---
url: /liquid-staking/overview.md
---
> For AI agents: the complete documentation index is available at /llms.txt, the full documentation bundle is available at /llms-full.txt.
# Staking Overview
This guide will introduce you to how staking with Rocket Pool works (how your ETH is put to work and your rewards are generated) and summarize the ways in which you can stake.
::: tip NOTE
If you're not interested in how staking works and just want to learn how to stake, [**click here to skip to that section.**](#how-to-stake-with-rocket-pool)
:::
## How Ethereum Staking Works
Before getting into Rocket Pool, let's talk about staking on Ethereum in general.
Since [the Merge](https://ethereum.org/en/upgrades/merge/) on September 15th, 2022, Ethereum now comprises two blockchains in parallel: the Execution layer (formerly ETH1), which contains all of Ethereum's transaction data, and the Consensus layer (also known as the [Beacon Chain](https://ethereum.org/en/roadmap/beacon-chain/), formerly ETH2) which consists of a network of **validators** that collectively determine the validity of each transaction and each block broadcast to the network.
**Staking** is the process of creating and maintaining one (or more) of these validators on the Beacon Chain to help the network maintain the consistency and security of the Ethereum blockchain.
Validators do this by listening for transactions and new block proposals, and **attesting** that the proposed block contains legal, valid transactions by doing some number crunching and verification behind the scenes.
Occasionally, they get to propose new blocks themselves.
To ensure that the network is resilient against malicious validators that lie about the current state of the chain, each validator is required to lock exactly 32 ETH up as a "stake" in the networks.
Performing their duties correctly and agreeing with the majority of the other validators will earn them rewards; performing incorrectly and attacking the chain will cost them some of their locked 32 ETH balance.
The amount taken depends on the severity of the attack and the number of validators that participated in it.
Validators in Ethereum are assigned attestations and block proposals **on a schedule**.
This is very different from the old Proof of Work (PoW) system, where everyone is constantly trying to race each other and come up with the next block before everyone else.
This means that unlike PoW where a miner isn't guaranteed to earn a block reward unless they find the next block, Proof of Stake validators are guaranteed to have slow, steady income as long as they perform their duties.
Initially, validator rewards simply accrued on the Beacon Chain against each validator and were inaccessible by their operator. As of the "Shapella" hard fork, validator rewards are routinely ["skimmed"](/node-staking/skimming.md) to the Execution Layer address defined by the validator's withdrawal credentials.
Additionally, now that the Execution and Consensus layers have merged, validators are _also_ awarded with **priority fees** for transactions included in blocks they propose.
These priority fees are paid **directly on the Execution layer** according the "Fee Recipient" set by the block proposer.
If the validator is participating in [a MEV network](https://ethereum.org/en/developers/docs/mev/) to propose a block built by someone else, that builder will provide a supplemental tip to the validator known as a **MEV reward**.
This is _also_ available directly on the Execution layer and is provided at the same time as priority fees.
## How Rocket Pool Works
Unlike solo stakers, who are required to put 32 ETH up for deposit to create a new validator, Rocket Pool nodes only need to deposit 4 ETH per validator (called "bonded ETH").
This will be coupled with 28 ETH from the staking pool (called "borrowed ETH", which comes from liquid staker deposits in exchange for rETH) to create a new megapool validator.
To the Beacon chain, a megapool validator looks exactly the same as a normal validator.
It has the same responsibilities, same rules it must follow, same rewards, and so on.
The only difference is in how the megapool validator was created on the execution layer, and how withdrawals work when the node operator decides to voluntarily exit the megapool validator.
All of the creation, withdrawing, and rewards delegation is handled by Rocket Pool's **smart contracts** on the Ethereum chain.
This makes it completely decentralized.
## The rETH Token
As a Rocket Pool staker, your role is to deposit ETH into the deposit pool which will enable a node operator to create a new Beacon Chain validator.
You can stake as little as **0.01 ETH**.
In doing so, you will be given a token called **rETH**. rETH represents both **how much** ETH you deposited, and **when** you deposited it.
The ratio includes rewards that Rocket Pool node operators earn from:
- The Beacon Chain itself
- Priority fees from block proposals
- MEV rewards from block proposals
More specifically, the value of rETH is determined by the following ratio:
```
rETH:ETH ratio = (total rETH supply) / (total ETH staked + total rETH contract balance + total rETH share of priority fees + total rETH share of MEV rewards)
```
Since the Beacon Chain rewards, priority fees, and MEV rewards will constantly accumulate, this means that **rETH's value effectively always increases relative to ETH**.
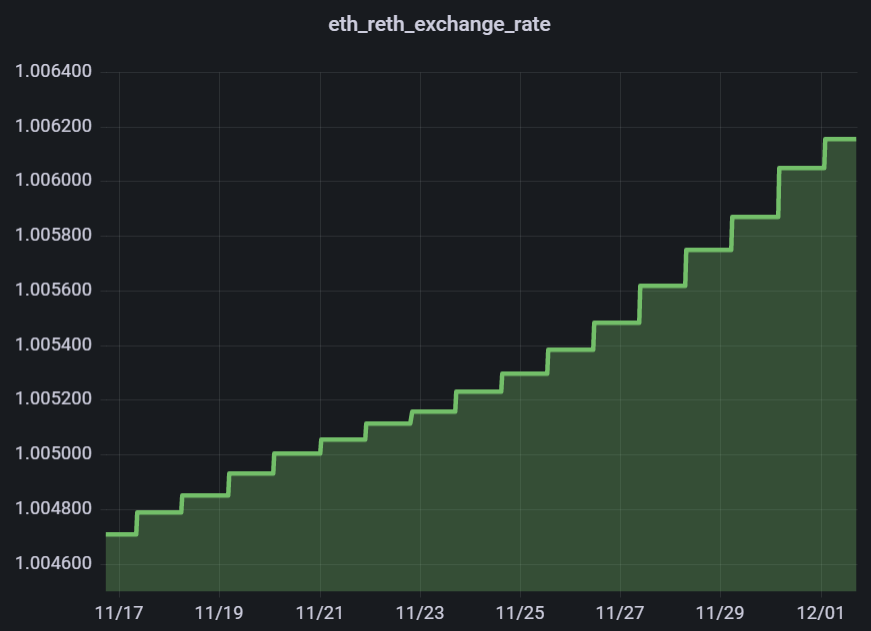
The rETH/ETH exchange rate is updated approximately every 24 hours based on the Beacon Chain rewards earned by Rocket Pool node operators.
To illustrate this point, here is a chart of rETH's value (relative to ETH) over time - as expected, it demonstrates slow but steady growth:
Let's do a simple example as a demonstration.
Say you stake at the very beginning when 1 ETH = 1 rETH.
You deposit 10 ETH and receive 10 rETH back.
After a few years, the balances on the Beacon Chain grow due to validator rewards.
Say 128 ETH had been staked with Rocket Pool and the sum of all validator balances on the Beacon Chain was 160 ETH.
Then 1 ETH would be worth (128/160) = 0.8 rETH; conversely, 1 rETH would be worth (160/128) = 1.25 ETH.
At this point, you could trade your 10 rETH back to Rocket Pool's smart contracts and receive 12.5 ETH in return.
This means **as long as you are holding rETH**, you are staking with Rocket Pool!
**You do not need to get it from Rocket Pool directly.**
For example, you can purchase rETH on an exchange; as every rETH token is exactly the same, you will **automatically receive the benefits of staking just by holding the token!**
::: warning NOTE
Trading rETH back for ETH directly with Rocket Pool is only possible when the staking pool has enough ETH in it to handle your trade.
ETH in this pool comes from two sources:
1. ETH that other stakers have deposited, which hasn't been used by a node operator to create a new validator yet
2. ETH that was returned by a node operator after they exited one of their validators and received their rewards from the Beacon Chain
It's possible that if node operators have put all of the staking pool to work on the Beacon chain, then the liquidity pool won't have enough balance to cover your unstaking.
In this scenario, you may find other ways to trade your rETH back to ETH (such as a decentralized exchange like [Uniswap](https://app.uniswap.org/#/swap)) - though they will likely come with a small premium.
:::
As an alternative to holding onto and eventually returning your rETH to the Rocket Pool, you are also free to **use it in DeFi applications**.
You can trade it, lend it, use it as collateral... as rETH is a standard ERC20 token, you can use it in any way you could use any other token.
## Tax Implications
Each country has its own tax laws, and it would be impossible to document them all here.\
In some countries, depositing ETH for rETH may be considered **a taxable event**.
However, because rETH inherently accumulates value while the actual amount of the token you hold remains constant, simply holding it usually **does not generate any taxable events**.
This may make rETH **a preferable staking token for long-term holding** if your country separates short-term and long-term capital gains taxes.
Tax laws related to cryptocurrencies are in their infancy; each user should do their own research and consider speaking with a tax professional.
Below are some helpful sites that offer tax assistance to users related to Ethereum.
**This is not an official endorsement - users are advised to do their own research regarding tax implications and strategies**:
- [https://koinly.io/](https://koinly.io/)
- [https://cryptotaxcalculator.io/](https://cryptotaxcalculator.io/)
- [https://rotki.com/](https://rotki.com/)
## How to Stake with Rocket Pool
As described above, as long as you are holding the rETH token, you are a **Rocket Pool Staker**.
We will summarize several common ways to acquire it here.
::: warning NOTE
All of the methods described here rely on the usage of an Ethereum wallet such as [MetaMask](https://metamask.io/).
If you have never used an Ethereum wallet before, we strongly encourage you to learn more about them and practice using them before staking with Rocket Pool.
The sections below include some steps that are demonstrated with MetaMask as an example; they should translate to your wallet of choice easily enough for you to follow along.
:::
### Via Rocket Pool Directly
With this method, you will use a web3 wallet (such as MetaMask) and interact with Rocket Pool's website to swap ETH for rETH and vice-versa.
This method is **guaranteed** to provide you with the exact amount of rETH that your ETH is worth, since it's coming directly from Rocket Pool's smart contracts, but it can be somewhat expensive if the network's gas prices are high and you're staking a relatively small amount of ETH.
::: tip NOTE
If you are practicing staking on the Hoodi Testnet, the direct method above is the only option currently supported.
:::
[Click here to learn how to stake via Rocket Pool directly.](/liquid-staking/via-rp.md)
### Via a Decentralized Exchange on Ethereum (Layer 1)
With this method, you will access a decentralized exchange such as [Balancer](https://docs.balancer.fi/) or [Uniswap](https://docs.uniswap.org/protocol/introduction) and purchase rETH using your token of choice, just like you would do any other token swap.
Rocket Pool has officially created a [Balancer composable stable pool](https://docs.balancer.fi/products/balancer-pools/composable-stable-pools).
Composable stable pools are ideal for tokens like rETH, because **they honor the true exchange rate reported by the Oracle DAO** - this means exchanging with it will have **much lower slippage** and **lower fees** than a conventional decentralized exchange, so you get a much better deal when buying or selling rETH.
Because of this, and because it has a **smaller transaction fee** than swapping directly via Rocket Pool's website, we **strongly recommended** using Balancer if you want to stake via this route.
If Balancer doesn't work for you, there is also an ETH-rETH liquidity pool on Uniswap.
Note that this is a conventional pool, so **you will be affected by slippage and higher fees** if you use it, but the gas fee will still be lower than staking directly via Rocket Pool's website.
[Click here to learn how to swap ETH for rETH via a decentralized exchange on Layer 1.](/liquid-staking/via-l1.md)
### Via a Decentralized Exchange on a Layer 2 Network
With this method, you will start by bridging your existing ETH (or other tokens of choice) onto an Ethereum Layer 2 network such as [Optimism](https://www.optimism.io/) or [Arbitrum](https://arbitrum.io/) and then use a decentralized exchange on the network to purchase rETH. If you already have tokens on a Layer 2 network, this method is compelling because **the transaction fees are \~10x smaller than on the Ethereum mainnet**. However, if you have not used a Layer 2 network before, it does require a few additional steps to get set up.
[Click here to learn how to swap ETH for rETH via a decentralized exchange on a Layer 2 network.](/liquid-staking/via-l2.md)
### Video Demonstration
Community member **Kevster** has put together a helpful video that demonstrates each of these options step-by-step:
For a more detailed writeup, select which method you would like to use from the links above and follow the guide for that section.
---
url: /node-staking/responsibilities.md
---
> For AI agents: the complete documentation index is available at /llms.txt, the full documentation bundle is available at /llms-full.txt.
# A Node Operator's Responsibilities
## How Ethereum Staking Works
As a reminder, staking in Proof of Stake is done via **validators**.
A validator is essentially a single Beacon Chain address to which 32 ETH was deposited on the Execution layer.
Validators are responsible for maintaining the consistency and security of the Beacon Chain.
They do this by listening for transactions and new block proposals and **attesting** that the proposed block contains legal, valid transactions by doing some number crunching and verification behind the scenes.
Occasionally, they get to propose new blocks themselves.
Validators are assigned attestations and block proposals **on a randomized schedule**.
This is very different from the old Proof of Work system, where everyone was constantly trying to race each other and come up with the next block before everyone else.
This means that unlike Proof of Work where miners weren't guaranteed to earn a block reward unless they found the next block, Proof of Stake validators _are_ guaranteed to have slow, steady income as long as they perform their duties.
If a validator is offline and misses an attestation or a block proposal, it will be **slightly penalized**.
The penalties are quite small though; as a rule of thumb, if a validator is offline for X hours, it will make all of its lost ETH back after the same X hours of being back online.
### Rewards
Validators earn consensus layer rewards from Attestation, Block Proposals, Sync Committees (rare), and Slashing Rewards (vanishingly rare). They also earn execution layer rewards from Priority Fees and MEV.
As of 5/2026, overall APR is \~2.84%, with 2.63% being consensus layer APR, and 0.22% being execution layer APR. One place to find this info is the [rated explorer](https://explorer.rated.network/network?network=mainnet\&timeWindow=30d\&rewardsMetric=average\&geoDistType=all\&hostDistType=all\&soloProDist=stake).
### Penalties
Validators are penalized for small amounts of ETH if they are offline and fail to perform their assigned duties.
This is called **leaking**.
If a validator violates one of the core rules of the Beacon chain and appears to be attacking the network, it may get **slashed**.
Slashing is a forceful exit of your validator without your permission, accompanied by a relatively large fine that removes some of your validator's ETH balance.
Realistically, the only condition that can cause a slashing is if you run your validator's keys on two nodes at the same time (such as a failover / redundancy setup, where your backup node accidentally turns on while your main node is still running).
Don't let this happen, and **you won't get slashed**.
Slashing _cannot occur_ from being offline for maintenance.
Below is a table that shows the penalties that can happen to a validator:
| Type | Layer | Amount |
| --------------------- | --------- | --------------------------------------------------------------------------------- |
| Missed Attestation | Consensus | -0.000011 ETH\* per attestation (-9/10 the value of a normal attestation reward) |
| Missed Proposal | Consensus | 0 |
| Missed Sync Committee | Consensus | -0.00047 ETH\* per epoch (-0.1 ETH total if offline for the whole sync committee) |
| Slashing | Consensus | At least 1/32 of your balance, up to your entire balance in extreme circumstances |
\*_Varies based on the total number of validators in the network.
Approximated for 435,000 active validators._
::: tip TIP
As a rule of thumb, if you're offline for X hours (and you aren't in a sync committee), then you'll make all of your leaked ETH back after X hours once you're back online and attesting.
:::
## How Rocket Pool Nodes Work
Unlike solo stakers, who are required to put 32 ETH up for deposit to create a new validator, Rocket Pool nodes only need to deposit 4 ETH per validator (called "bonded ETH").
This will be coupled with 28 ETH from the staking pool (called "borrowed ETH", which comes from liquid staker deposits in exchange for rETH) to create a new megapool validator.
To the Beacon chain, a megapool validator looks exactly the same as a normal validator.
It has the same responsibilities, same rules it must follow, same rewards, and so on.
The only difference is in how the megapool validator was created on the execution layer, and how withdrawals work when the node operator decides to voluntarily exit the megapool validator.
All of the creation, withdrawing, and rewards delegation is handled by Rocket Pool's **smart contracts** on the Ethereum chain.
This makes it completely decentralized.
A Rocket Pool **Node** is a single computer with an Ethereum wallet that was registered with Rocket Pool's smart contracts.
The node can then create as many megapool validators as it can afford, all running happily on the same machine together.
**A single Rocket Pool node can run many, many megapool validators.**
Each megapool validator has a negligible impact on overall system performance; some people have been able to run hundreds of them on a single node.
A megapool validator's upfront cost is 4 ETH. In addition, a node operator may optionally stake RPL to their node to qualify for additional rewards and to gain voting power within the protocol DAO.
## Rocket Pool Node Operators
**Node operators** are the heart and soul of Rocket Pool.
They are the individuals that run Rocket Pool nodes.
### Responsibilities
They put ETH from the staking pool to work by running megapool validators with it, which earn staking rewards for the Rocket Pool protocol (and thus, increase rETH's value).
Their job is straightforward, but crucially important: _run validators with the highest quality possible, and maximize staking rewards_.
Node operators are responsible for:
- Setting up a computer (either physical or virtual)
- Configuring it correctly, including their home network if applicable
- Installing Rocket Pool on it and setting up validators to perform validation
- Securing it, both from outside and inside threats
- Maintaining it for the life of their validators
It's a big responsibility, and not a simple set-it-and-forget-it kind of job; you need to care for your node for as long as it's staking.
With great responsibility, however, comes great rewards.
### Rewards
Here are the major benefits of running a Rocket Pool node:
- You earn your portion of each validator's ETH rewards, plus commission.
- You run a validator with only 4 ETH of your own capital, with the remaining 28 ETH sourced from liquid stakers.
- Each megapool validator earns 5% commission on rewards generated from the 28 protocol ETH. This comes to 35% more than solo staking (`(4 bonded + 28 borrowed * 0.05) / 4 = 1.35`).
- By joining the [Smoothing Pool](/node-staking/fee-distrib-sp.md#the-smoothing-pool), you share execution layer rewards (priority fees and MEV) with other participants, providing more consistent returns instead of relying on the luck of block proposals.
- Staking RPL earns you additional rewards.
- RPL stakers earn a [share of protocol commission](/node-staking/megapools/staking-and-claiming-rewards.md#how-voter-share-is-distributed-to-megapool-rpl-stakers) (paid in ETH) proportional to their staked RPL.
- You also earn issuance rewards (paid in RPL) on the RPL you stake.
- At the end of a period (every 28 days), there's a snapshot of your RPL.
- You can earn max yield on RPL **up to 15%** of the value of your total borrowed ETH.
- You will earn yield on RPL beyond 15%, at a decreasing level.
- You will get vote power based on the square root of your staked RPL, up to 150% of your bonded ETH.
### Limitations
There are some limitations that come along with the rewards above:
- If your node performs poorly and you actually end up losing ETH by the time you decide to exit your megapool validator, all of the lost ETH is coming out of your share.
- For example: if you exit with a balance of 31 ETH, then your megapool validator lost 1 ETH from its initial 32 ETH deposit. You will receive 3 ETH, and 28 ETH will be returned to the staking pool.
- Your staked RPL will be less liquid:
- There's no limit on how much megapool staked RPL you can unstake, but you must wait 28 days after initiating unstaking before withdrawal. This prevents users from gaming the rewards system by staking RPL just in time for the 28-day rewards period, then withdrawing it immediately after the period.
### You've got this
If you're fairly new to using the command line or computer maintenance, this can seem like a scary challenge.
Luckily, one of Rocket Pool's most core principles is _decentralization_ - the fact that anyone, anywhere, can run a node if they have the determination and knowledge.
While we can't help with determination, we _can_ help with knowledge.
This section is packed with guides, walkthroughs, and information that will help you understand how to run a great Rocket Pool node.
---
url: /index.md
---
> For AI agents: the complete documentation index is available at /llms.txt, the full documentation bundle is available at /llms-full.txt.
# Rocket Pool
Guides & Documentation
> Decentralised Ethereum Liquid Staking Protocol
[Get Started →](/protocol/) | [Contribute](https://github.com/rocket-pool/docs.rocketpool.net)
## Features
- [**Overview**](/protocol/): Learn all about what Rocket Pool is, how it works, and how to use it with an easy-to-read series of articles.
- [**Liquid Staking**](/liquid-staking/overview): Follow our detailed walkthroughs to practice using Rocket Pool on the Hoodi test network, from staking ETH to earning rewards.
- [**Run a node**](/node-staking/responsibilities): Get started running a node with our detailed walkthroughs. Learn how to secure, maintain, monitor and upgrade your node.
---
url: /legacy/atlas/lebs.md
---
> For AI agents: the complete documentation index is available at /llms.txt, the full documentation bundle is available at /llms-full.txt.
# 8-ETH Bonded Minipools
When Rocket Pool was first launched, it supported two types of minipools:
1. A **16-ETH bond**, where the node operator provided 16 ETH and the remaning 16 ETH would come from the staking pool to create a complete (32 ETH) validator.
2. A **32-ETH temporary bond**, where the node operator would provide all 32 ETH so they could skip the initialization process and start validating on the Beacon Chain right away, then be given a refund of 16 ETH once the deposit pool had enough ETH to cover it. At this point it would turn into a normal 16-ETH bonded minipool.
The latter was removed by a community vote several months into the protocol's life due to it no longer being necessary and resulting in long refund delays.
The former represented the protocol's lowest bond amount because it guaranteed that if a node operator used Rocket Pool to attack the Ethereum protocol and had their _entire bond_ slashed, they would stand to lose just as much as the rETH stakers and would not come out ahead.
Since Rocket Pool's launch, the community has done [significant research](https://dao.rocketpool.net/t/leb8-discussion-thread/899) on the security provided by this bond and found that it was very conservative.
For all intents and purposes, a slashing of 16 ETH was deemed unrealistic and a 16-ETH bond effectively provided the same security benefits as a bond of only 8 ETH (plus the supplemental RPL requirement).
Thus, backed by this research, the Atlas upgrade introduces a new type of minipool to the list: the **8-ETH bond**, colloquially referred to by the Rocket Pool community as a "LEB8" (Lower ETH Bond - 8 ETH).
To create an 8-ETH minipool, the node operator only needs to provide **8 of their own ETH** (plus enough RPL to cover the collateral requirement - more on this in [RPL Collateral](#rpl-collateral)).
It will then pull **24 ETH** from the deposit pool in order to complete the validator and get to work on the Beacon Chain.
This **opens the door to new prospective node operators** that want to run a node but don't quite have 16 ETH.
Further, it lets larger node operators **put more pool staker ETH to work** on the Beacon Chain earning rewards.
As this works without meaningfully compromising security, everybody wins!
In this guide, we'll cover three topics:
- How 8-ETH bonded minipools actually work, and the reward numbers behind them
- How to create a new 8-ETH minipool
- How to migrate an _existing_ 16-ETH minipool down to an 8-ETH minipool without exiting
Read on to learn more about each topic.
## How 8-ETH Bonded Minipools Work
Mechanically, 8-ETH bonded minipools behave **identically** to every other minipool in the protocol.
They still "own" a validator on the Beacon Chain (they represent that validator's withdrawal credentials), they still come with a commission (though the commission with Atlas **will be fixed at 14%** for all new minipools), and they provide all the same functionality that a 16-ETH bonded minipool does.
The difference lies entirely in the numbers.
### Rewards
From a profitability perspective (looking _purely_ at ETH rewards and ignoring RPL), 8-ETH bonded minipools with a 14% commission provide _more rewards_ to the node operator than even _16-ETH bonded minipools at 20% commission_ (which, as of Redstone, is the highest possible reward configuration).
At the same time, they also provide more rewards to the _rETH holders_ as well due to the fact that the node operators are more efficiently putting the capital of the rETH holders to work.
Let's walk through a simple example to illustrate.
Say we are a node operator with 16 ETH available to stake (plus the required RPL bond).
Say we've earned 1 ETH of rewards on the Beacon Chain per validator.
Here's how the math works out for a single 16-ETH minipool with a 20% commission, versus two 8-ETH minipools at 14% commission:
```
1x 16 ETH Minipool @ 20%:
Rewards: 1 ETH
Node Share = (16/32) + (16/32 * 0.2)
= 0.5 + (0.5 * 0.2)
= 0.5 + 0.1
= 0.6 ETH
rETH Share = 1 - 0.6
= 0.4 ETH
2x 8 ETH Minipools @ 14%:
Rewards: 2 ETH
Node Share = ((8/32) + (24/32 * 0.14)) * 2
= (0.25 + (0.75 * 0.14)) * 2
= (0.25 + 0.105) * 2
= 0.71 ETH
rETH Share = 2 - 0.71
= 1.29 ETH
```
In other words, a node operator will earn **18% more ETH** via two 8-ETH minipools than they would with a single 16-ETH minipool at 20% commission.
### RPL Collateral
In order to create an 8-ETH minipool, node operators still need to stake enough RPL to cover the minimum collateral requirements for their node (accounting for all of its minipools of all bond sizes).
These rules have been clarified with Atlas:
- The **minimum RPL** per minipool is **10% of the _borrowed_ amount**
- The **maximum RPL** per minipool is **150% of the _bonded_ amount**
For a 16-ETH minipool, this remains unchanged; the minimum is 1.6 ETH worth of RPL, and the maximum is 24 ETH worth of RPL.
For an 8-ETH minipool, this becomes a **minimum of 2.4 ETH worth of RPL** (10% of the borrowed amount, which is 24 ETH) and a **maximum of 12 ETH worth of RPL** (150% of the bonded amount).
These numbers were selected by the Rocket Pool community [as part of a governance vote](https://vote.rocketpool.net/#/proposal/0x7426469ae1f7c6de482ab4c2929c3e29054991601c95f24f4f4056d424f9f671).
## Creating a New 8-ETH Minipool
The process to create a new minipool with an 8-ETH bond is identical to the process for creating a 16-ETH minipool.
Simply run the following command:
```shell
rocketpool node deposit
```
When prompted for your bond amount, select `8 ETH`:
```
Your eth2 client is on the correct network.
NOTE: by creating a new minipool, your node will automatically claim and distribute any balance you have in your fee distributor contract. If you don't want to claim your balance at this time, you should not create a new minipool.
Would you like to continue? [y/n]
y
Please choose an amount of ETH to deposit:
1: 8 ETH
2: 16 ETH
1
Your minipool will use the current fixed commission rate of 14.00%.
You currently have 8.00 ETH in your credit balance.
This deposit will use 8.000000 ETH from your credit balance and will not require any ETH from your node.
...
```
::: tip NOTE
This example also shows usage of the [**new Deposit Credit System**](/node-staking/credit.md).
Since the node operator has 8 ETH in credit, creating this 8-ETH minipool is free!
:::
That's all there is to it!
The rest of the process is the same as [the usual minipool creation instructions](/node-staking/create-validator.md).
---
url: /legacy/atlas/whats-new.md
---
> For AI agents: the complete documentation index is available at /llms.txt, the full documentation bundle is available at /llms-full.txt.
# The Atlas Update
::: tip NOTE
Atlas was deployed on `18 April 2023, 00:00 UTC`. Please visit [here](/legacy/houston/whats-new.md) to read about Houston, the latest protocol upgrade.
:::
This page describes the major changes that Rocket Pool's next major update, titled **Atlas**, brings to the protocol including updates to both the Smart Node stack and to the Rocket Pool protocol in general.
Please read through this page thoroughly to understand all of the differences between the previous version of Rocket Pool (Redstone) and Atlas.
## New Protocol Features
Atlas brings about some exciting new features that are based on both community feedback and changes to the Ethereum protocol itself.
Below is a brief list of these changes - click on any of them to learn more about it.
### Shapella and Withdrawals
The Ethereum protocol is preparing to undergo its next major upgrade: **Shanghai** on the Execution layer, and **Capella** on the Consensus layer - since these are now interconnected, both will occur at the same time.
Ethereum users have affectionately come to call the combined upgrade [**"Shapella"**](https://blog.ethereum.org/2023/02/21/sepolia-shapella-announcement) accordingly.
Shapella introduces **withdrawals** to the Beacon Chain, meaning node operators are now able to access the ETH that is currently locked on the Beacon Chain.
This comes in two flavors:
- Partial withdrawals (**skimming**), where your rewards (your excess Beacon Chain balance over 32 ETH) are sent to your minipool on the Execution Layer. This is done _automatically by the protocol itself_ every so often (about once every four or five days on Mainnet).
- **Full withdrawals**, where you exit your validator from the Beacon Chain and its entire balance is sent to your minipool on the Execution Layer. This is done _automatically by the protocol itself_ once your validator has been exited from the chain long enough.
Atlas introduces a new delegate contract for minipools that allows node operators to **distribute** the minipool's ETH balance, splitting it evenly between the node operator and the rETH holders (plus commission, of course) at any time.
This gives node operators **immediate access** to their Beacon Chain rewards!
It also puts the rETH holders's share back into the deposit pool, so it can be used to unstake rETH for ETH at the protocol's exchange rate (or to create new minipools).
### 8-ETH Bonded Minipools
One of the most anticipated changes made in Atlas is the introduction of the ability to only provide 8 ETH to make a minipool instead of 16 ETH.
Minipools with only 8 ETH bonded by their owning node operator are matched with **24 ETH** from the staking pool (provided by rETH holders) in order to make a validator.
This significantly reduces the capital requirement for running your own validator _and_ results in greater returns for both the node operator and the rETH stakers!
In fact, running two 8-ETH minipool instead of one 16-ETH minipool will provide **over 18% more rewards** - even if the 16-ETH minipool has a commission rate of 20%.
Creating an 8 ETH minipool requires that you stake a **minimum of 2.4 ETH worth of RPL** and a **maximum of 12 ETH worth of RPL**.
These represent 10% of the amount you're _borrowing_ from the protocol, and 150% of the amount you're _bonding_ (staking) yourself.
New minipools can be created with either 8 ETH or 16 ETH.
16 ETH minipools are unchanged from how they work today, and are available for users that want to minimize their exposure to the RPL token.
To learn how to make new minipools using an 8 ETH bond, please visit the [minipool creation guide](/node-staking/create-validator.md).
Also, once Atlas has been applied, node operators can **migrate existing 16-ETH minipools directly into 8-ETH minipool without needing to exit**.
This will give them 8 ETH back in [deposit credit](/node-staking/credit.md), which can be used to create a **new 8-ETH minipool for free**!
To learn more about 8-ETH bond minipools, please visit the [bond reduction guide](/node-staking/leb-migration.md).
### Solo Validator Conversion
Part of the Shapella upgrade involves the ability for solo validators to [change their validators' withdrawal credentials](https://notes.ethereum.org/@launchpad/withdrawals-faq) from the original (now unused) BLS-based withdrawal key to an address on the Execution layer.
This address will be the recipient for all of that validator's rewards and its full ETH balance once it exits the Beacon Chain.
Regular Rocket Pool node operators don't need to worry about any of this, as the protocol automatically set this up for your minipools when you created them.
_However_, as part of this new requirement for solo validators, Atlas brings an exciting opportunity: the ability to **create a special minipool** that will become the withdrawal address for your **existing solo validator**.
In other words, this will allow you to **directly convert a solo validator into a Rocket Pool minipool without needing to exit it!**
This means you will get all the benefits of Rocket Pool minipools, including:
- The ability to convert your one validator (with a 32 ETH bond) into **four minipools** (each with an 8 ETH bond), effectively **quadrupling** your presence on the Beacon Chain
- Commission on the portion of those minipools provided by rETH stakers
- Access to Rocket Pool's [Smoothing Pool](/node-staking/fee-distrib-sp.md#the-smoothing-pool) to pool and evenly distribute rewards from block proposals and MEV
To learn more about converting a solo validator into a minipool, please visit the [Converting a Solo Validator into a Minipool](/node-staking/solo-staker-migration.md) guide.
## New Smart Node Features
In addition to core changes to the Rocket Pool protocol, Atlas also brings some exciting upgrades to the Smart Node stack itself which are present in v1.9.0.
### Automatic Rewards Distributions
If you're already an active Rocket Pool node operator, you may be familiar with the `rocketpool_node` process that handles certain automated processes.
For example, it ensures you have the correct fee recipient and automatically runs the second `stake` transaction for you after `prelaunch` minipools pass the 12-hour scrub check.
Starting with Atlas, the `node` has a new duty: **automatic distribution of minipool rewards!**
This is due to the way [the Shapella upgrade works](/node-staking/skimming.md), by skimming your rewards from the Beacon Chain into your minipool every few days.
Whenever one of your minipools reaches a balance larger than a user-specified threshold (default of 1 ETH), the node will automatically run `distribute-balance` on it.
This will send your portion of the rewards to your withdrawal address, and the pool staker's portion back to the deposit pool.
Changing the threshold can be done in the `Smartnode and TX Fees` section of the `service config` TUI, under the `Auto-Distribute Threshold` setting.
### Unified Grafana Dashboard
By popular demand, we have created a new [**Grafana dashboard**](https://grafana.com/grafana/dashboards/24900-rocket-pool-dashboard-v1-4-0/) to help node operators track and assess the status, progress, and overall health of their nodes:
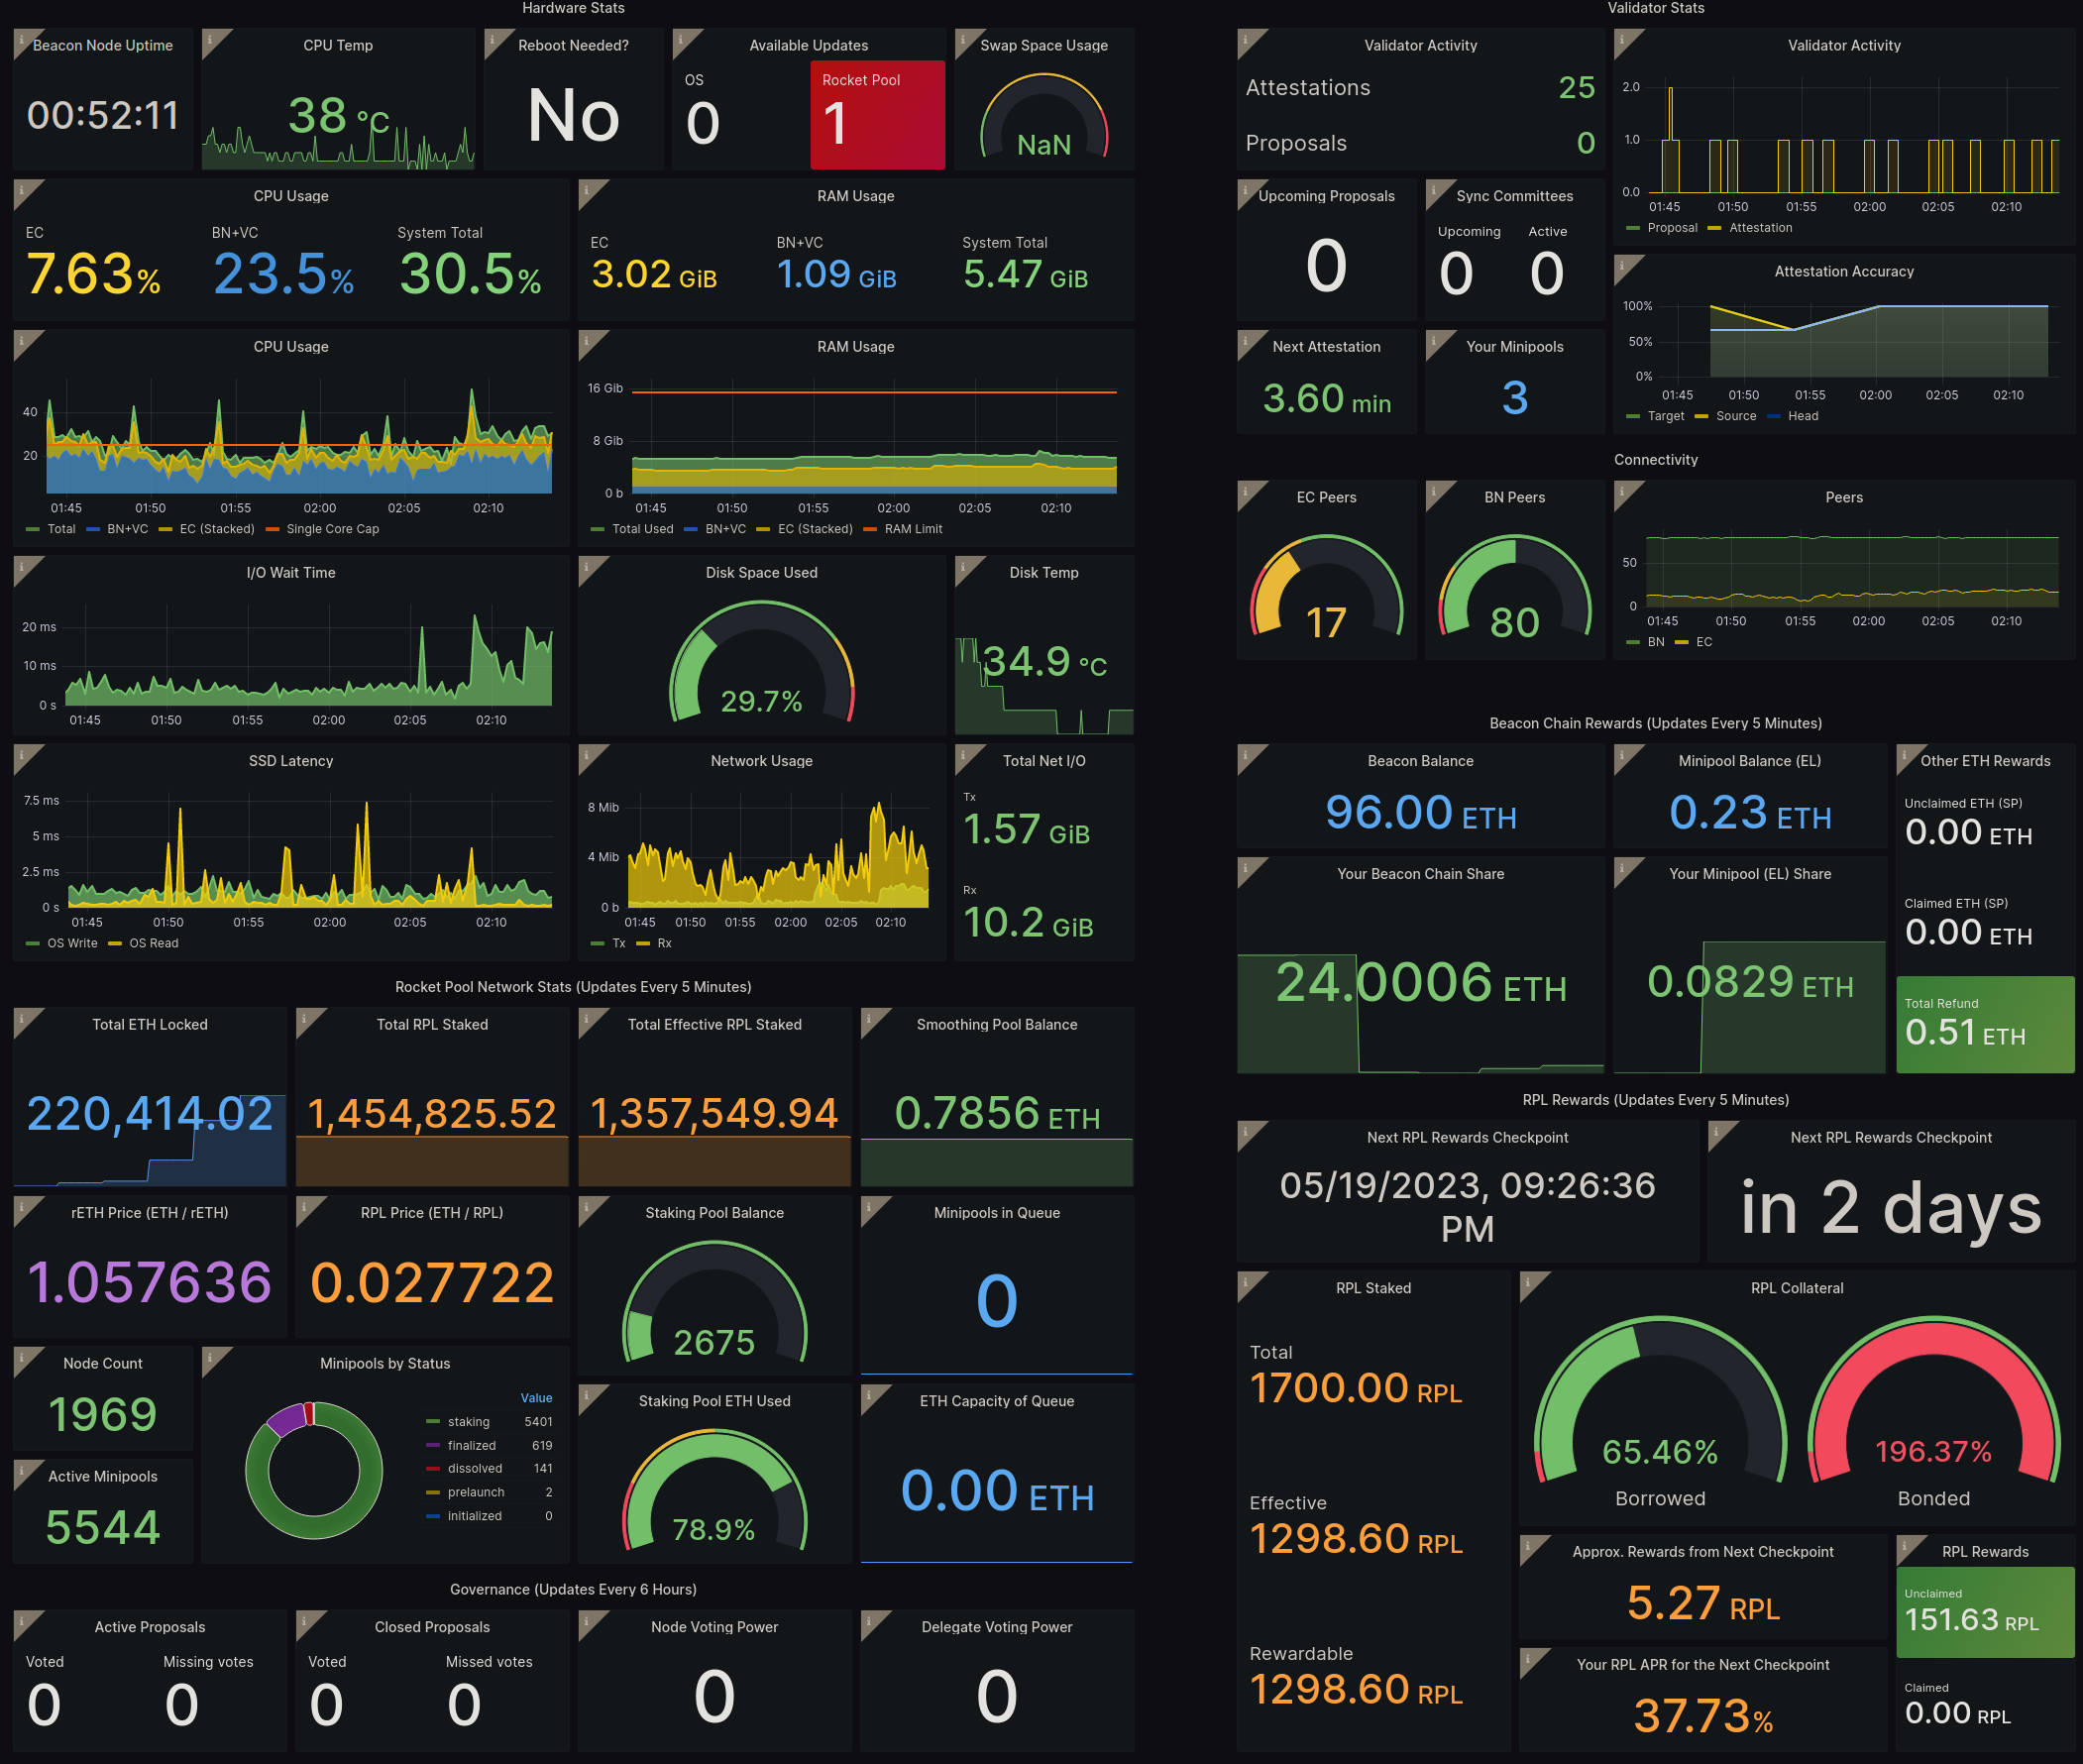
It comes with the following highly requested features:
- Support for all Execution and Consensus clients in a single dashboard - no more changing dashboards based on which clients you're using!
- Execution client stats, including CPU and RAM usage, and peer count
- Attestation accuracy tracking which follows how "correct" your attestations were for the previous epoch, so you know how far off from optimal rewards you're getting
- Tracking of the Smoothing Pool's balance
- Tracking of claimed and unclaimed rewards, now including ETH from the Smoothing Pool
- Stats about Rocket Pool's Snapshot-based governance votes
- Room for tracking a second SSD's used space and temperature if you have one for your OS and a different one for your chain data
- And more!
You can import the new dashboard from the official Grafana service using ID `21863` by following our [Grafana guide](/node-staking/grafana.md).
This new dashboard was a labor of love that involved extensive help from community member **0xFornax** - thank you for all of your hard work!
### Nimbus Changes
Smart Node v1.9.0 introduces **split mode support** for Nimbus!
Instead of running the Beacon Node and Validator Client inside a single process / container, the Smart Node will now run them in separate containers like the other clients. This has the following benefits:
- Nimbus now supports **fallback clients** (a secondary Execution client and Beacon Node that Nimbus's Validator Client can connect to when your primary clients are down for maintenance, such as resyncing).
- Nimbus is now supported in **Externally-Managed (Hybrid) Mode**, so you can couple the Validator Client that the Smart Node manages to an external Beacon Node that you maintain on your own.
- The Beacon Node no longer needs to be restarted after the addition of new minipools, meaning you don't lose attestations while it reconnects to its peers.
### Lodestar Support
[Lodestar](https://chainsafe.github.io/lodestar/) is now supported as an option for your Consensus Client of choice!
This is the newest addition to be officially accepted onto [Ethereum's Launchpad](https://launchpad.ethereum.org/en/lodestar), and it's ready for validation.
Lodestar supports many of the great features you've come to love from the other clients, including Doppelganger Detection, MEV-Boost, externally-managed clients (Hybrid Mode), and more!
### New Network Snapshot System
On a slightly more technical note, v1.9.0 introduces a brand new system for quickly capturing a snapshot of the state of **everything about your node** on both the Execution and the Consensus layers.
Under the hood, this system leverages [MakerDAO's multicall contract](https://github.com/makerdao/multicall) and Will O'Beirne's [Ethereum Balance Checker contract](https://github.com/wbobeirne/eth-balance-checker) to batch thousands of individual Execution client queries up into a single request.
This makes the `node` process much less taxing on the Execution client for node operators with a large number of validators, and should significantly reduce its CPU load which will improve attestations and overall rewards.
This new system hasn't made its way into the CLI itself yet, so any commands you run there (such as `rocketpool minipool status`) will still use the old single-query setup.
Over time we'll introduce it into the CLI too, which will make all of its commands lightning fast (_except for waiting for transactions to be validated, that still takes a while_).
---
url: /legacy/houston/getting-started.md
---
> For AI agents: the complete documentation index is available at /llms.txt, the full documentation bundle is available at /llms-full.txt.
# Houston Quick-Start
Whether you're a seasoned Node Operator, rETH holder or curious onlooker, this page will help you get started with exploring the new features included in Houston.
##
### Initializing Voting Power
First and foremost, the most important step if you are **Node Operator** is to [initialize voting](/legacy/houston/participate.md#initializing-voting) to unlock your voting power. Nodes who've initialized voting are included when the network's total voting power is calculated.
At the genesis of Houston, pDAO voting is disabled until a sufficient number of nodes have initialized voting. This is to prevent rogue proposals from passing while total voting power and quorum is low. After enough nodes have initialized voting, a switch will be flipped and pDAO will have the helm.
To initialize voting power, use this command in the smartnode:
```shell
rocketpool pdao initialize-voting
```
You only need to do this once. Initializing voting will ensure that your node's voting power is included in future on-chain proposals and allow you to vote on them.
### Setting your Snapshot Signalling Address
Secondly, you'll want to set your snapshot signalling address. This allows node operators to participate in Snapshot votes in their browser or mobile device without having to expose their node keys to a hot wallet.
Setting this up involves a handful of steps, so you'll want to follow this guide:
[Setting your Snapshot Signalling Address](/legacy/houston/participate.md#setting-your-snapshot-signalling-address).
### Delegating on-chain Voting Power
If you want to delegate on-chain voting power to a community member of your choosing, click [here](/legacy/houston/participate.md#delegating-voting-power) to learn how.
##
# Guides
[Full Houston Overview](/legacy/houston/whats-new.md) presents the fully on-chain Protocol DAO and introduces new features such as staking ETH on behalf of a node, setting an RPL withdrawal address, and time based balance and RPL submissions. Houston smart contract audits can be found here as well.
[The Protocol DAO](/legacy/houston/pdao.md) discusses who and how the pDAO governs Rocket Pool. This page will fill you in on how pDAO duties such as treasury spends can be executed on-chain, along with the role of the all new Security Council. It'll also walk you through the lifecycle of a pDAO proposal and explain some of the measures taken to prevent spam and gun down malicious proposals.
[Participating in Proposals](/legacy/houston/participate.md) includes a detailed step-by-step guide on how Node Operators can participate in pDAO proposals. If you're keen on raising an on-chain proposal, voting or delegating voting power, this is the guide for you.
[Stake Eth on Behalf of a Node](/legacy/houston/stake-eth-on-behalf.md) goes over the steps for staking ETH on behalf of a node. It's a new feature introduced in Houston to facilitate single depositor scenarios. We'll walk through how to do this on a testnet if you want to try it out before staking real ETH on mainnet.
[RPL Withdrawal Address](/legacy/houston/rpl-withdrawal-address.md) shows you how to set an RPL withdrawal address for your node. This is useful if you want to enable a separate entity to supply the RPL insurance collateral for a node.
---
url: /legacy/houston/nonsmartnode-setup.md
---
> For AI agents: the complete documentation index is available at /llms.txt, the full documentation bundle is available at /llms-full.txt.
# Voting setup for non-smartnode users
Some users (eg, Allnodes users) don't use the smartnode and may need to set up voting using direct contract interaction.
This guide contains both a minimal and a complete setup guide for such users.
::: tip
Your node address should be loaded onto a hardware wallet for this.
:::
## Minimal setup guide
This allows your delegate to vote for you on-chain and offchain. You'll be able to override your delegate on-chain, but not off-chain.
- Use etherscan to initialize vote power ("Connect to Web3" with node address) with a delegate [https://etherscan.io/address/0xA9d27E1952f742d659143a544d3e535fFf3Eebe1#writeContract#F2](https://etherscan.io/address/0xA9d27E1952f742d659143a544d3e535fFf3Eebe1#writeContract#F2)
- You can find delegates at [https://delegates.rocketpool.net/](https://delegates.rocketpool.net/)
## Full setup guide
Use etherscan to initialize vote power ("Connect to Web3" with node address)
- \[recommended for most] Initialize voting with a different node as the delegate [https://etherscan.io/address/0xA9d27E1952f742d659143a544d3e535fFf3Eebe1#writeContract#F2](https://etherscan.io/address/0xA9d27E1952f742d659143a544d3e535fFf3Eebe1#writeContract#F2)
- You can find delegates at [https://delegates.rocketpool.net/](https://delegates.rocketpool.net/)
- Remember you will always be able to override your delegates
- Initialize voting with your own node as the delegate [https://etherscan.io/address/0xA9d27E1952f742d659143a544d3e535fFf3Eebe1#writeContract#F1](https://etherscan.io/address/0xA9d27E1952f742d659143a544d3e535fFf3Eebe1#writeContract#F1)
- Here you'll be responsible for voting every time
- I would mostly suggest this option for folks that wish to be delegates since they _do_ need to vote every time.
- If your node was registered after Houston:
- You will already have your vote power initialized with your own node as the delegate
- You can set a new delegate with [https://etherscan.io/address/0xA9d27E1952f742d659143a544d3e535fFf3Eebe1#writeContract#F3](https://etherscan.io/address/0xA9d27E1952f742d659143a544d3e535fFf3Eebe1#writeContract#F3)
Set snapshot signalling address:
- Go to [https://node.rocketpool.net/signalling-address](https://node.rocketpool.net/signalling-address) and connect your node address
- Put in your desired snapshot signalling address and sign the message to get the r, s, and v arguments you'll need
- Note: your snapshot signalling address MUST NOT be your node address
- In a new tab, go to [https://etherscan.io/address/0xc1062617d10Ae99E09D941b60746182A87eAB38F#writeContract#F2](https://etherscan.io/address/0xc1062617d10Ae99E09D941b60746182A87eAB38F#writeContract#F2)
- "Connect to Web3" with node address
- Fill in the arguments with your signalling address and the r, s, v parameters given in the previous step
---
url: /legacy/houston/participate.md
---
> For AI agents: the complete documentation index is available at /llms.txt, the full documentation bundle is available at /llms-full.txt.
# Participating in on-chain pDAO Proposals
Any node with a non-zero voting power may raise or participate in a pDAO proposal at any time. Proposals can be one of
the following types:
- Changing pDAO settings
- One-time treasury spends
- Repeat treasury spends (management committees)
- Security council membership
For greater detail and rationale, refer to [proposal types](https://rpips.rocketpool.net/RPIPs/RPIP-33#proposal-types).
It's important to understand that a pDAO proposal is an on-chain entity that exists to execute changes at the protocol
level.
## Governance Process
A proposal should be forecasted by the governance process before it ends up on-chain.
Changes to the Rocket Pool protocol and proposed, voted, and executed using a strict, yet transparent governance
process. The process begins with an informal discussion of an idea within the Discord community. This idea then
progresses to formal discussions in
the [#governance](https://discordapp.com/channels/405159462932971535/774497904559783947) channel on Discord and
the [DAO Forum](https://dao.rocketpool.net/), where it undergoes thorough research, modeling, and scrutiny in
preparation for a [Rocket Pool Improvement Proposal (RPIP)](https://rpips.rocketpool.net/). Following this, a draft RPIP
is prepared and reviewed by designated RPIP reviewers to ensure its quality and readiness for presentation to the DAO.
The draft proposal is then presented to the DAO on the forum for further review, feedback, and incorporation of any
necessary changes. Once the proposal has been refined based on community input, a poll is raised on the DAO forum to
gauge readiness for finalizing the RPIP text. If the poll passes, indicating community approval, the RPIP is marked
final and ready for a Protocol DAO vote, which is conducted via Snapshot to determine whether the proposal should be
implemented.
From here, the Oracle DAO will raise an on-chain proposal. There is a window in which the Protocol DAO, Oracle DAO and
community can review the proposal. If consensus is reached, the proposal is executed and changes are applied to the
protocol.
A handy dandy visual representation of this process can be found on
the [Rocket Pool website](https://rocketpool.net/governance/process).
## Prerequisite
Please read the [lifecycle of a proposal](/legacy/houston/pdao.md#lifecycle-of-a-pdao-proposal) before proceeding. It'll explain
the differences between all the voting periods and the actions that can be taken during each period.
The rest of this page will walk you through the steps required for participating in on-chain pDAO proposals.
## Initializing Voting
If you are a node operator who registered before the Houston upgrade, you need to initialize voting to unlock voting
power. Keep in mind that having at least one minipool is a requirement for having voting power.
```shell
rocketpool pdao initialize-voting
```
This command will raise the prompt below. Please read it carefully:
```
Thanks for initializing your voting power!
You have two options:
1. Vote directly (delegate vote power to yourself)
This will allow you to vote on proposals directly,
allowing you to personally shape the direction of the protocol.
2. Delegate your vote
This will delegate your vote power to someone you trust,
giving them the power to vote on your behalf. You will have the option to override.
You can see a list of existing public delegates at https://delegates.rocketpool.net,
however, you can delegate to any node address.
Learn more about how this all works via: /en/legacy/houston/participate#participating-in-on-chain-pdao-proposals
Please type `direct` or `delegate` to continue:
```
- If you respond with `direct`, voting power will be initialized to your node and you'll be able to vote directly on
Protocol DAO proposals.
- If you respond with `delegate`, you'll have the opportunity to save a bit of gas by initializing voting
and [setting a delegate](/legacy/houston/participate.md#delegating-voting-power) within the same transaction.
You only need to do this once. It configures the initial snapshot information for a node. After you initialize voting,
every action taken will update your node's snapshot information. Once your voting power is initialized, you can check
how much you have using the following smartnode command:
```shell
rocketpool pdao status
```
:::tip NOTE
Whenever a new proposal is created, a voting tree representing a snapshot of the network's voting power and delegate info
is created in conjunction with the new proposal. This means your node's voting power won't be included in a proposal if
it was raised before you initialized voting. `rocketpool pdao status` will display your node's voting power at the
latest block, which may or may not be representative of your voting power on a particular proposal.
:::
## Auto Initialize Vote Power
Smart Node version `1.13.8` introduces a new feature **Auto Initialize Vote Power**, which is designed to automatically
initialize voting power on nodes who have not yet done so. Automatically initialized voting power is self-delegated.
This feature can be configured in the Smart Node settings by running `rocketpool service config` and navigating to the \*
\*Smart Node and TX Fees\*\* section.
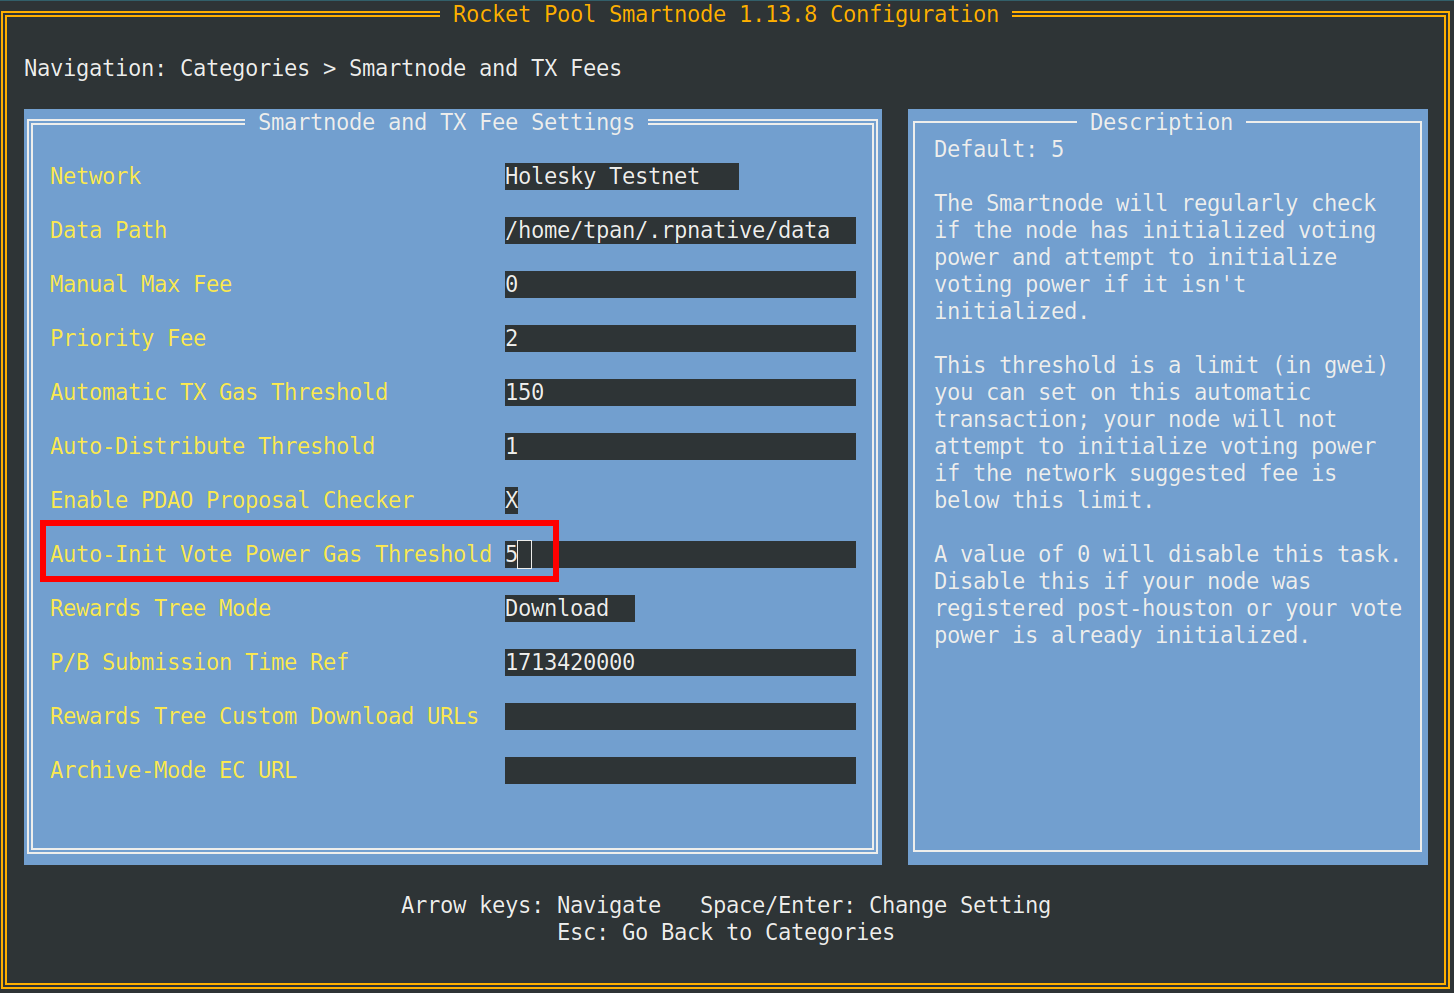
The **Auto-Init Vote Power Gas Threshold** is a limit (in gwei) on this automatic transaction. You can opt out of this
task by setting the threshold to 0. Feel free to opt out if your node was registered after the Houston upgrade or if
voting power is already enabled.
## Setting your Snapshot Signalling Address
Setting your Snapshot signalling address will allow you to participate in Snapshot votes on a browser or mobile device
without having to expose node keys to a hot wallet.
There are a few things to prepare:
- Your node's address
- An address you want to use for snapshot voting (signalling address)
You'll be signing a message saying that your node's address can delegate to the new address. This message states your
intent to use your wallet address as a Snapshot signalling address.
Select which network you're using from one of the tabs below.
**Hoodi Testnet**
If you're trying this out on Hoodi testnet, you can sign on this page:
[https://testnet.node.rocketpool.net/signalling-address](https://testnet.node.rocketpool.net/signalling-address)
**Mainnet**
If you're ready to configure this on mainnet, go here instead:
[https://node.rocketpool.net/signalling-address](https://node.rocketpool.net/signalling-address)
:::danger WARNING
Do not load your node's private key onto a hot wallet. Please choose another account to be your signalling address.
After setting the signalling address, you can use it to vote on Snapshot with your node's voting power.
:::
Start by **connecting the address you want to use as a signalling address** to the website using MetaMask,
WalletConnect, or any of the other methods the website supports. You will then be presented with this dialog to look up
your node address.
Next, you'll enter your node address then click the orange "Find" button. This will check if the address is a registered
node and then bring you to the next step.
:::tip TIP
**Make sure you have the correct node address before doing this!** if you need to confirm your node's address, you can
quickly retrieve it via the CLI using the `rocketpool node status` command.
:::
Once you've signed in and confirmed your node address, you'll see your **Snapshot signalling address**. It should be the
same as the account you've signed into the site with. Double check that this is correct before proceeding. Once you're
confident that you're signed into the desired account, click the orange "Sign Message" button. You'll see a prompt in
your wallet extension app to sign the following message:
```
`snapshot signalling address` may delegate to me for Rocket Pool governance
```
Signing won't cost you any gas but setting will. After you sign, the frontend will give you a command to paste into the
smartnode. Go ahead and paste it into your smartnode's CLI and follow the prompted steps. The command should look
something like this:
```shell
rocketpool pdao set-signalling-address
`snapshot signalling address`
`EIP712 signature`
```
If you see this message in your CLI, you're all set!
```
The node's signalling address was successfully set to `snapshot signalling address`
```
:::tip TIP
Don't worry if you accidentally close the site or lose track of the command. You can simply repeat the steps and **sign
again using the same node address and signalling address**. The frontend uses `signer.Signmessage()` from the ethers
library, which means your signature is deterministic given the same input.
Click [here](https://docs.ethers.org/v6/api/providers/#cid_865) to learn more.
:::
Clearing your signalling address is pretty easy, just use this command in the CLI:
```shell
rocketpool pdao clear-signalling-address
```
## Allowing RPL Locking
You may ignore this step if you are only interested in voting on a proposal. Allowing RPL locking is only required for
those who wish to propose or challenge a proposal.
RPL locking is required for proposing and challenging. By default, locking RPL for any purpose, will be disabled. Node
operator's will opt-in to performing governance activities by enabling the locking of RPL from their node or primary
withdrawal address. You can do so using this command in the Smart Node:
```shell
rocketpool node allow-rpl-locking
```
This will prompt you to allow the locking of RPL when creating or challenging governance proposals. Conversely you can
use the following command to opt-out of RPL locking:
```shell
rocketpool node deny-rpl-locking
```
::: tip NOTE
Locked RPL acts the same way as regular staked RPL for the purposes of rewards, voting, and collateral requirements.
Locked RPL is not counted towards thresholds for withdrawing RPL.
:::
## Delegating Voting Power
A node operator can elect to delegate their voting power to another node operator. The only requirement is that your
delegate is a registered node.
To delegate on-chain voting power to another node, use the following command:
```shell
rocketpool pdao set-voting-delegate `address`
```
::: tip NOTE
If you've delegated your voting power to another node operator, you can reset this by setting the delegate address to
your own node's address.
:::
- During phase 1 of a proposal: **Voters** and **Delegates** may cast their vote on a proposal.
- During phase 2 of a proposal: **Node Operators** who have delegated their vote get the opportunity to overturn their
Delegate's vote, if they disagree.
If you are a node operator with delegated voting power, you must vote during voting phase 1 for the delegated voting
power to count towards the proposal. Your vote in phase 1 will be worth your **local voting power + delegated voting
power**. Your vote in phase 2 is worth your **local voting power** only.
## Creating a Proposal
In order to be eligible to propose, a node must meet a few requirements:
- Included in snapshotting (either by [initializing voting](/legacy/houston/participate.md#initializing-voting) or by
registering post Houston)
- Must have at least one minipool
- Has non-zero voting power
- Has allowed [RPL locking](/legacy/houston/participate.md#allowing-rpl-locking)
- Has an RPL stake (minus any already locked RPL) greater than the proposal bond
Proposals exist to change parameters and execute code at the protocol level! There should be discussion and consensus
through the [governance](/legacy/houston/participate.md#governance-process) process before a proposal is created on chain.
Use the command `rocketpool pdao propose` to bring up a menu of options
```
COMMANDS:
rewards-percentages, rp Propose updating the RPL rewards allocation percentages for node operators, the Oracle DAO, and the Protocol DAO
one-time-spend, ots Propose a one-time spend of the Protocol DAO's treasury
recurring-spend, rs Propose a recurring spend of the Protocol DAO's treasury
recurring-spend-update, rsu Propose an update to an existing recurring spend plan
security-council, sc Modify the security council
setting, s Make a Protocol DAO setting proposal
```
Each of these commands will prompt you with a list of inputs to create your desired proposal. In this guide, we'll
invite a node to the security council to serve as an example. To raise a proposal to invite a node to the security
council, you would use the command:
```shell
rocketpool pdao propose security-council invite
```
Keep in mind that this step will have some slight variation depending on the type of proposal. This particular command:
`rocketpool pdao propose security-council invite` will prompt you to enter an ID followed by a member address.
```
Please enter an ID for the member you'd like to invite: (no spaces)
test-member
Please enter the member's address:
0xBdbcb42DD8E39323a395B2B72d2c8E7039f1F145
... gas estimations ...
Are you sure you want to propose inviting test-member (0xBdbcb42DD8E39323a395B2B72d2c8E7039f1F145) to the security council? [y/n]
```
After this is included in a block, a pDAO proposal will be created! The proposal will enter
the [vote delay period](/legacy/houston/pdao.md#vote-delay-period) upon creation.
## Viewing the State of a Proposal
Every proposal is assigned a `proposalID`. In this case, our proposal to invite `0xBdbc...` to the security council is
represented with `ID 71`. There are a few ways to view the state of the proposal. One method will display a list of
every pdao proposal along with their state (pending, succeeded, executed, etc). The second method displays in-depth
details about a specific proposal.
**Viewing a List of Proposals**
To list all proposals, use the following command:
```shell
rocketpool pdao proposals list
```
This will display a list of all proposals and their state
```
1 Pending proposal(s):
71: invite test-member (0xBdbcb42DD8E39323a395B2B72d2c8E7039f1F145) to the security council - Proposed by:
0x681B8BBf08708e64694005c7Dc307b381b4D1A7D
Succeeded proposal(s):
Executed proposal(s):
Destroyed proposal(s):
Quorum not Met proposal(s):
Defeated proposal(s):
Expired proposal(s):
```
Here we can see that our proposal `invite test-member` has an ID of 71 and is in the pending state. In this state,
[challengers](/legacy/houston/pdao.md#challenge-process) can dispute the validity of the
merkle pollard (used to calculate voting power) supplied by the proposer. When `proposal.vote.delay.time` ends,
the proposal will transition into active voting phases. Feel free to review [lifecycle of a
proposal](/legacy/houston/pdao.md#lifecycle-of-a-pdao-proposal) for a refresher.
**Viewing Proposal Details**
Now that you have the proposal ID, you can view the status of your proposal using this command:
```shell
rocketpool pdao proposals details `proposal-id`
```
This is where you can view all the information in regards to a specific proposal. For example, the execution
payload, what phase the proposal is in, and vote direction.
```
Proposal ID: 71
Message: invite test-member (0xBdbcb42DD8E39323a395B2B72d2c8E7039f1F145) to the security council
Payload: proposalSecurityInvite(test-member,0xBdbcb42DD8E39323a395B2B72d2c8E7039f1F145)
Payload (bytes):
f944c19f0000000000000000000000000000000000000000000000000000000000000040000000000000000000000000bdbcb42dd8e39323a395b2b72d2c8e7039f1f145000000000000000000000000000000000000000000000000000000000000000b746573742d6d656d626572000000000000000000000000000000000000000000
Proposed by: 0x681B8BBf08708e64694005c7Dc307b381b4D1A7D
Created at: 12 Mar 24 06:15 UTC
State: Pending
Voting start: 12 Mar 24 06:20 UTC
Challenge window: 30m0s
Voting power required: 90943818825
Voting power for: 0
Voting power against: 0
Voting power abstained: 0
Voting power against: 0
Node has voted: no
```
NOTE
The state of this sample proposal is `Pending`. This indicates that the proposal can be challenged, before
moving onto `Active (Phase 1)`. No voting can take place during the `Pending` state.
## Voting on a Proposal
During a voting period, **Node Operators** and **Delegates** can cast a vote with one of four options:
```
1. Abstain: The voter's voting power is contributed to quorum but is neither for nor against the proposal.
2. For: The voter votes in favor of the proposal being executed.
3. Against: The voter votes against the proposal being executed.
4. Veto: The voter votes against the proposal as well as indicating they deem the proposal as spam or malicious.
```
Their voting power will be applied to the option of their choosing. Voting power is a function of "effective RPL stake."
A more detailed reading can be found in
the [rocketpool-research repo](https://github.com/rocket-pool/rocketpool-research/blob/master/Protocol%20DAO/kane/pDAO%20Replacement/pDAO.md#overview-of-on-chain-voting).
::: tip NOTE
If you are a node operator with delegated voting power, you must vote during voting phase 1 for the delegated voting
power to count towards the proposal. Your vote in phase 1 will be worth your local voting power + delegated voting
power. Your vote in phase 2 is worth your local voting power only. Please keep in mind that a node may vote once and
only once on a proposal, so choose carefully.
:::
Use this command to cast a vote:
```shell
rocketpool pdao proposals vote
```
You'll be prompted to select a proposal to vote on if there is at least one proposal in an active voting phase.
The menu should display all of the proposals your node is eligible to vote on:
```
1: proposal 71 (message: 'invite test-member', payload: proposalSecurityInvite(test-member,0xBdbcb42DD8E39323a395B2B72d2c8E7039f1F145), phase 1 end: 14 Mar 24 05:40 UTC, vp required: 0.00, for: 0.00, against: 0.00, abstained: 0.00, veto: 0.00, proposed by: 0x681B8BBf08708e64694005c7Dc307b381b4D1A7D)
2: proposal 72 (message: 'replace langers-not-his-eoa (0xaC1396c21Eaf6630113516C69d63b7CB59B98b3E) on the security council with tpan (0x6E9E4Cc0A8172349E049128574E1fb85B8D3CE9E)', payload: proposalSecurityReplace(0xaC1396c21Eaf6630113516C69d63b7CB59B98b3E,tpan,0x6E9E4Cc0A8172349E049128574E1fb85B8D3CE9E), phase 1 end: 14 Mar 24 05:40 UTC, vp required: 0.00, for: 0.00, against: 0.00, abstained: 0.00, veto: 0.00, proposed by: 0xe2fC31d61E28BB16c0857D4682AB3616FA7A793d)
3: proposal 73 (message: 'set proposal.vote.delay.time', payload: proposalSettingUint(rocketDAOProtocolSettingsProposals,proposal.vote.delay.time,60), phase 1 end: 14 Mar 24 05:41 UTC, vp required: 0.00, for: 0.00, against: 0.00, abstained: 0.00, veto: 0.00, proposed by: 0x681B8BBf08708e64694005c7Dc307b381b4D1A7D)
```
After selecting an option, you'll be asked how you want to cast your vote.
```
How would you like to vote on the proposal?
1: Abstain
2: In Favor
3: Against
4: Veto
```
Selecting an option will then display your voting power, and then prompt you to send the transaction:
```
Your current voting power: 20123617964
+============== Suggested Gas Prices ==============+
| Avg Wait Time | Max Fee | Total Gas Cost |
| 15 Seconds | 76 gwei | 0.0176 to 0.0265 ETH |
| 1 Minute | 56 gwei | 0.0127 to 0.0190 ETH |
| 3 Minutes | 56 gwei | 0.0127 to 0.0190 ETH |
| >10 Minutes | 56 gwei | 0.0127 to 0.0190 ETH |
+==================================================+
These prices include a maximum priority fee of 2.00 gwei.
Please enter your max fee (including the priority fee) or leave blank for the default of 56 gwei:
```
You've successfully voted on the proposal once the transaction is included in the block! At this point, you may use
`rocketpool pdao proposal details ` to view the state of the proposal. A proposal needs to reach
`proposal.quorum` **voting power required** and a majority **voting power for** for it to be successful.
```
Voting power required: 140970562215
Voting power for: 197980809837
Voting power against: 0
Voting power abstained: 0
Voting power against: 0
Node has voted: In Favor
```
For the example above to pass, the voting power needs to exceed a quorum of `140970562215` voting power. There is
`197980809837` voting power in favor and no votes against or abstained. The proposal is poised for success and ready
for
execution by the end of `proposal.vote.phase2.time`.
## Executing a Successful Proposal
Congrats! Your proposal has passed! Now all that's left to do is to execute the proposal. Keep in mind that anybody
can
be the executor to a proposal. To execute a successful proposal, type in the command:
```shell
rocketpool pdao execute
```
Selecting an option will prompt you to send a transaction. Once this transaction is included in a block, the change
will
be applied to the Rocket Pool protocol!
```
Please select a proposal to execute:
1: All available proposals
2: proposal 71 (invite test-member (0xBdbcb42DD8E39323a395B2B72d2c8E7039f1F145) to the security council)',
proposalSecurityInvite(test-member,0xBdbcb42DD8E39323a395B2B72d2c8E7039f1F145)
```
## Claiming Bonds and Rewards
Proposers or Challengers may claim their bonds upon conclusion of a proposal. Depending on the outcome of a proposal,
a
Proposer or Challenger may or may not be able to claim their `proposal.bond` and `proposal.challenge.bond`.
Here are some rules that dictate the conditions in which bonds can be claimed:
- If a proposal is defeated, the proposer forfeits their bond which is divided proportionally amongst the challengers
who contributed to the proposal's defeat. All other challengers receive their bond back only.
- Contributing to the defeat of a proposal means a challenger submitted an index which was later proven to be
incorrect
by the proposers inability to reply to a challenge. It is possible that there are multiple incorrect indices but only
those that resulted in the defeat of the proposal share the reward. All other challengers receive their bond back
only.
- If a challenger challenges a node, the proposer responds, and the proposal does not get defeated. The proposer can
claim the challenge bonds from the invalid challenges.
- If a proposal is defeated, the proposer forfeits their bond which is divided proportionally amongst the challengers
who contributed to the proposal's defeat.
Use this command to claim bonds:
```shell
rocketpool pdao claim-bonds
```
This will display every proposal you're eligible to claim bonds from. You can either claim bonds from a specified
proposal, or you can claim bonds and rewards from all eligible proposals.
```
Please select a proposal to unlock bonds / claim rewards from:
1: All available proposals
2: Proposal 42 (proposer: true, unlockable: 21.00 RPL, rewards: 0.00 RPL)
3: Proposal 43 (proposer: true, unlockable: 21.00 RPL, rewards: 0.00 RPL)
4: Proposal 44 (proposer: true, unlockable: 21.00 RPL, rewards: 0.00 RPL)
5: Proposal 46 (proposer: true, unlockable: 21.00 RPL, rewards: 0.00 RPL)
6: Proposal 47 (proposer: true, unlockable: 21.00 RPL, rewards: 0.00 RPL)
7: Proposal 48 (proposer: true, unlockable: 21.00 RPL, rewards: 0.00 RPL)
8: Proposal 49 (proposer: true, unlockable: 21.00 RPL, rewards: 0.00 RPL)
```
Once you've selected an option, you'll be prompted with the network's current gas costs recommendations; confirm your
gas price selection and follow the rest of the prompts.
```
+============== Suggested Gas Prices ==============+
| Avg Wait Time | Max Fee | Total Gas Cost |
| 15 Seconds | 26 gwei | 0.1591 to 0.2387 ETH |
| 1 Minute | 21 gwei | 0.1261 to 0.1891 ETH |
| 3 Minutes | 21 gwei | 0.1261 to 0.1891 ETH |
| >10 Minutes | 21 gwei | 0.1261 to 0.1891 ETH |
+==================================================+
These prices include a maximum priority fee of 2.00 gwei.
Please enter your max fee (including the priority fee) or leave blank for the default of 21 gwei:
Using a max fee of 21.00 gwei and a priority fee of 2.00 gwei.
Are you sure you want to claim bonds and rewards from 7 proposals? [y/n]
```
Note that if you select the first option to claim all available proposals, they will each execute individually and not
as one transaction.
## Creating a Recurring Treasury Spend
You'll need to prepare a few inputs to create a recurring treasury spend:
- A contract name
- The recipient's address
- Amount of RPL to send per period
- The start time for the recurring payment (as a UNIX timestamp)
- The length of each payment period in hours / minutes / seconds (e.g., 168h0m0s)
- Number of payment periods
::: tip INFO
The recipient will need to keep note of the contract name in order to claim payments. Don't worry though, as this
information is stored and can be retrieved using the command `rocketpool pdao proposals details `
:::
To raise a proposal to set up a recurring treasury spend, use the following smartnode command and follow the prompts:
```shell
rocketpool pdao propose recurring-spend
```
Here's what it looks like all together:
```
Please enter a contract name for this recurring payment:
test-recurring-spend
Please enter a recipient address for this recurring payment:
0x681B8BBf08708e64694005c7Dc307b381b4D1A7D
Please enter an amount of RPL to send to 0x681B8BBf08708e64694005c7Dc307b381b4D1A7D per period:
1
Your value will be multiplied by 10^18 to be used in the contracts, which results in:
[1000000000000000000]
Please make sure this is what you want and does not have any floating-point errors.
Is this result correct? [y/n]
y
Please enter the time that the recurring payment will start (as a UNIX timestamp):
1717935233
The provided timestamp corresponds to 2024-06-09 12:13:53 +0000 UTC - is this correct? [y/n]
y
Please enter the length of each payment period in hours / minutes / seconds (e.g., 168h0m0s):
720h
Please enter the total number of payment periods:
24
```
Once you've entered all the required inputs, a proposal to create a recurring payment will be raised. When the pDAO
passes and executes this proposal, the recipient is allocated `1 RPL` starting at `2024-06-09 12:13:53 +0000 UTC`
every
`720 hours` for a total of `24 payments`.
## Claiming a Recurring Treasury Spend
Claiming recurring payments should be pretty simple! Navigate to our frontend
tool [here](https://node.rocketpool.net/claim-recurring-payments) to do so. If you're trying this out on
Hoodi
testnet, use [this](https://testnet.node.rocketpool.net/stake-rpl-on-behalf-of-node) link instead.
Once you're on the site, click the **connect wallet** button. Please read through and accept the Terms of Service &
Privacy Policy, this will enable different ways to connect, then click connect **metamask**.
MetaMask will prompt you to select an account to connect to the website. After you've signed in, you'll need to enter
the **contract name**. Doing so will display all the relevant details. Make sure you double check the recipient's
address. Anybody can call the claim function, but each payment contract will have a designated recipient to disperse
RPL
towards.
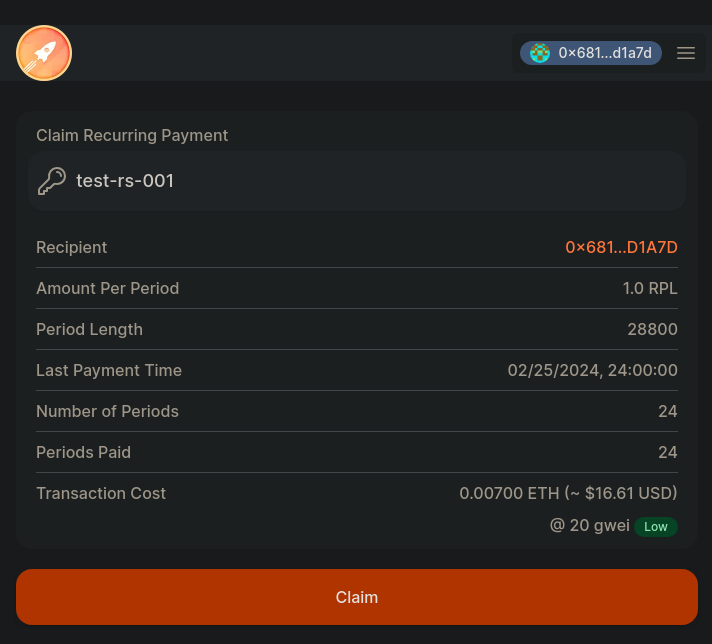
You can claim your payments at any time, you'll just get the total unclaimed RPL up until the most recent period.
Alternatively you can wait until all periods have passed to collect all at once and save on gas.
Just hit the big orange claim button when you're ready and review the transaction in metamask (or your preferred
wallet). Once that's done, you're all set!
---
url: /legacy/houston/pdao.md
---
> For AI agents: the complete documentation index is available at /llms.txt, the full documentation bundle is available at /llms-full.txt.
# The Protocol DAO (pDAO)
The Rocket Pool Protocol DAO (pDAO) is responsible for shaping the direction of the protocol and is run by RPL governance. Its members and their voting power are made up of node operators, big and small, all of which are directly participating in the protocol. It serves the Rocket Pool community at large, including rETH holders, Node Operators, and RPL holders. The pDAO prioritizes the safety of the Rocket Pool protocol and the health of the Ethereum Network. For an explicit definition of who and what the pDAO is, feel free to take a look at the [pDAO charter](https://rpips.rocketpool.net/RPIPs/RPIP-23).
## New pDAO features in Houston
### On-chain execution of pDAO responsibilities
The Houston Upgrade introduces an on-chain replacement for the pDAO governance system's execution process. It uses an optimistic fraud-proof system that allows any node operator to raise proposals and vote on proposals to adjust "pDAO protocol parameters" and spend treasury funds. To see a comprehensive list of pDAO controllable parameters, click [here](https://rpips.rocketpool.net/RPIPs/RPIP-33#parameter-table).
Pre-Houston, the core team was responsible for executing pDAO duties at the behest of the community governance process. For example, the team carries out the monthly IMC and GMC payments as per the governance voted payment schedules. The plan was for this power to reside with the team temporarily until a new power structure is set up to take over these responsibilities. Houston removes this dependency on the team, making the protocol more decentralized and trustless.
### Security Council
The Houston upgrade also includes a new security council to help react quickly in the event of any potential issues with the protocol. These members can be elected by the pDAO and have the ability to propose and execute changes without delay. The pDAO has the power to elect and remove members from the security council. It's a serious role and the pDAO should develop strong entry requirements and processes for flushing stale members. The pDAO guardian will be the security council's sole member at the start of Houston.
### Recurring Treasury Spends
RPL has a 5% inflation rate. 22% of this inflation is directed towards the pDAO as defined in [RPIP-25](https://rpips.rocketpool.net/RPIPs/RPIP-25). The pDAO can use these funds for a variety of purposes. For example, incentives such as liquidity provider (LP) bonuses, grants and bounties for 3rd party improvements and projects, and funding the development of the Rocket Pool protocol. The Houston upgrade also introduces a new feature that enables recurring treasury payments made to a specified beneficiary each rewards period.
## Protocol DAO (pDAO) proposals
Any node with a non-zero voting power may raise or participate in a pDAO proposal at any time. Proposals can be one of the following types:
- Changing pDAO settings
- One-time treasury spends
- Repeat treasury spends (management committees)
- Security council membership
For greater detail and rationale, refer to [proposal types](https://rpips.rocketpool.net/RPIPs/RPIP-33#proposal-types). It's important to understand that a pDAO proposal is an on-chain entity that exists to execute changes at the protocol level.
## Lifecycle of a pDAO proposal
A proposal should be forecasted by the [governance process](/legacy/houston/participate.md#governance-process) before it ends up on-chain. It consists of 4 Periods, all of which are pDAO [controllable parameters](https://rpips.rocketpool.net/RPIPs/RPIP-33#parameter-table):
- Vote Delay Period: `proposal.vote.delay.time`
- Vote Phase 1: `proposal.vote.phase1.time`
- Vote Phase 2: `proposal.vote.phase2.time`
- Execution: `proposal.execute.time `
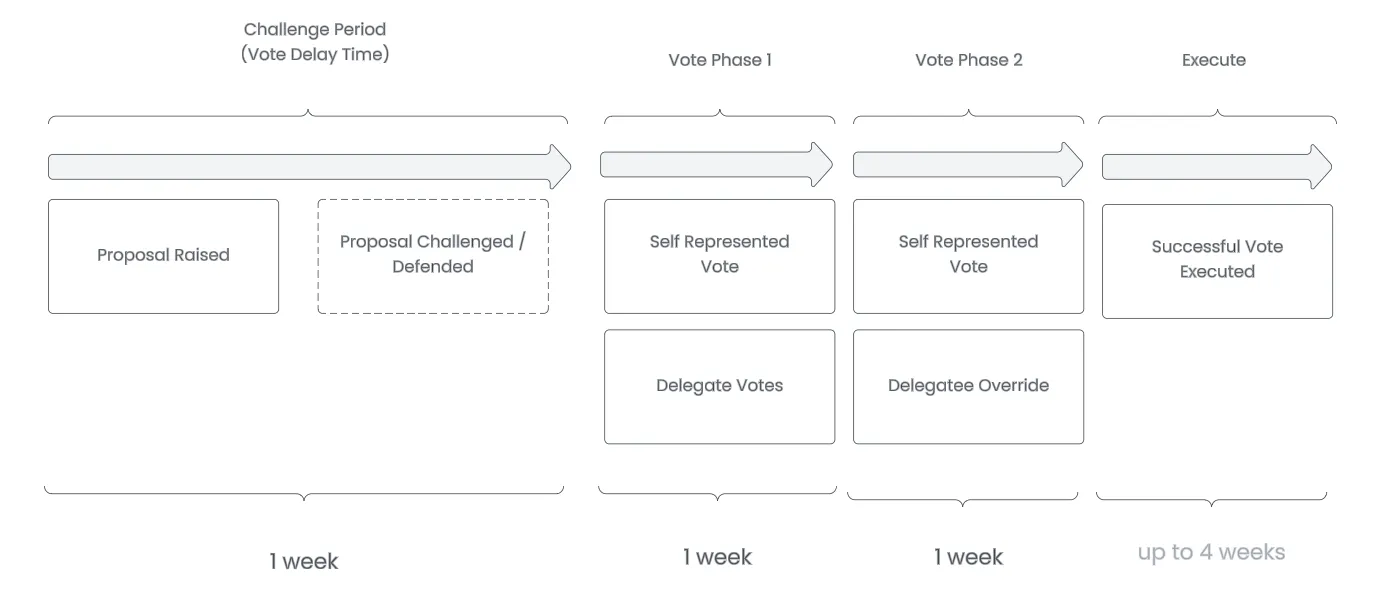
### Vote Delay Period
In order to decide the outcome of a proposal, the protocol must know the quorum required. A proposer calculates this value off-chain and submits it alongside their proposal. The value is optimistically accepted, but in the case of fraud, verifiers can perform a challenge/response process to prove the value is incorrect. Invalid proposals are then discarded.
A few reasons why proposers and challengers are required to lock RPL.
- `proposal.bond` incentivizes valid proposals and disincentivizes spam.
- `proposal.challenge.bond` incentivizes the takedown of invalid/malicious proposals.
Challengers supply an index into the Merkle-sum tree that they are alleging is incorrect. Any node operator can participate in challenging fraudulent proposals (and earn a reward in doing so). Feel free to read about the [pDAO Challenge Process](/legacy/houston/pdao.md#challenge-process) if you're interested in opting in. A proposal not defeated in a challenge by the end of the vote delay period will enter voting stages.
::: tip NOTE
When `proposal.vote.delay.time` expires, the proposal is no longer able to be challenged or defeated.
:::
### Vote Period 1
During a voting period, Node Operators and Delegates can cast a vote with one of four options:
```
1. Abstain: The voter's voting power is contributed to quorum but is neither for nor against the proposal.
2. For: The voter votes in favor of the proposal being executed.
3. Against: The voter votes against the proposal being executed.
4. Veto: The voter votes against the proposal as well as indicating they deem the proposal as spam or malicious.
```
Their voting power will be included in the option of their choosing.
This can be done using the command:
```shell
rocketpool pdao proposals vote
```
If the veto quorum (as defined by the `proposal.veto.quorum` parameter) is met, the proposal is immediately defeated and the proposer loses their bond. This is to dissuade spam, low quality proposals, or proposals that have not gone through off-chain processes first. The smartnode command `rocketpool pdao proposals finalize` is used to finalize a vetoed proposal by burning the proposer's locked RPL bond.
The duration of period 1 is determined by the `proposal.vote.phase1.time` parameter. The proposal will transition to phase 2 regardless of whether `proposal.quorum` is reached or not.
### Vote Period 2
Delegates can vote during vote period 2, but only their vote is only worth their **local voting power**. Voters who didn't vote in period 1 will still be able to cast a vote during period 2. Node operators who disagree with their delegate's choice will have the opportunity to overturn their delegate's vote.
The process of overturning a vote is pretty simple, just call `rocketpool pdao proposals vote` during vote period 2 and follow the prompts. The delegate's voting power will be overturned by the delegatee's voting power.
The result of a proposal is concluded when vote period 2 is over. In order for a result to be determined (and executed), `proposal.quorum` total voting power must be reached by the end of `proposal.vote.phase2.time`. If quorum is met and consensus is reached, the proposal will pass the voting periods and be marked as successful.
::: tip NOTE
No further actions can be taken in the event that `proposal.quorum` is not met. A proposal is considered concluded and final if quorum is not met.
:::
### Execution
Once both voting periods have passed and the proposal is successful, the proposal can be executed and the change (defined by the payload) is applied to the Rocket Pool protocol. To execute a proposal, use the command:
```shell
rocketpool pdao proposals execute
```
You will be prompted to select a proposal to execute, the proposal will be applied to the protocol after this step!
After the proposal has passed the voting periods, the proposer may [claim](/legacy/houston/participate.md#claiming-bonds-and-rewards) their locked RPL bond, unless the proposal was defeated by a challenge or vetoed.
::: tip NOTE
There is a window `proposal.execute.time` where a proposal can be executed. A proposal will expire if this timer reaches its end.
:::
And that's it! Keep in mind that all of the variables mentioned above are pDAO controllable parameters. Click [here](https://rpips.rocketpool.net/RPIPs/RPIP-33#parameter-table) for a comprehensive list of every parameter the pDAO has authority to change using on-chain proposals.
## Challenge Process
The complete network voting power tree is stored off-chain due to gas limits. When a user submits a new proposal, they are responsible for constructing the network voting tree at target block number. This tree is generated off-chain but verifiable via Merkle roots that are submitted on-chain. The protocol relies on **verifiers** to check the details submitted by the proposer.
Any node can participate in tracking and verifying the correctness of proposals. To opt into this responsibility, use the command `rocketpool service config`, navigate to the **Smart Node and TX Fee Settings** menu, and check the box `Enable PDAO Proposal Checker`.
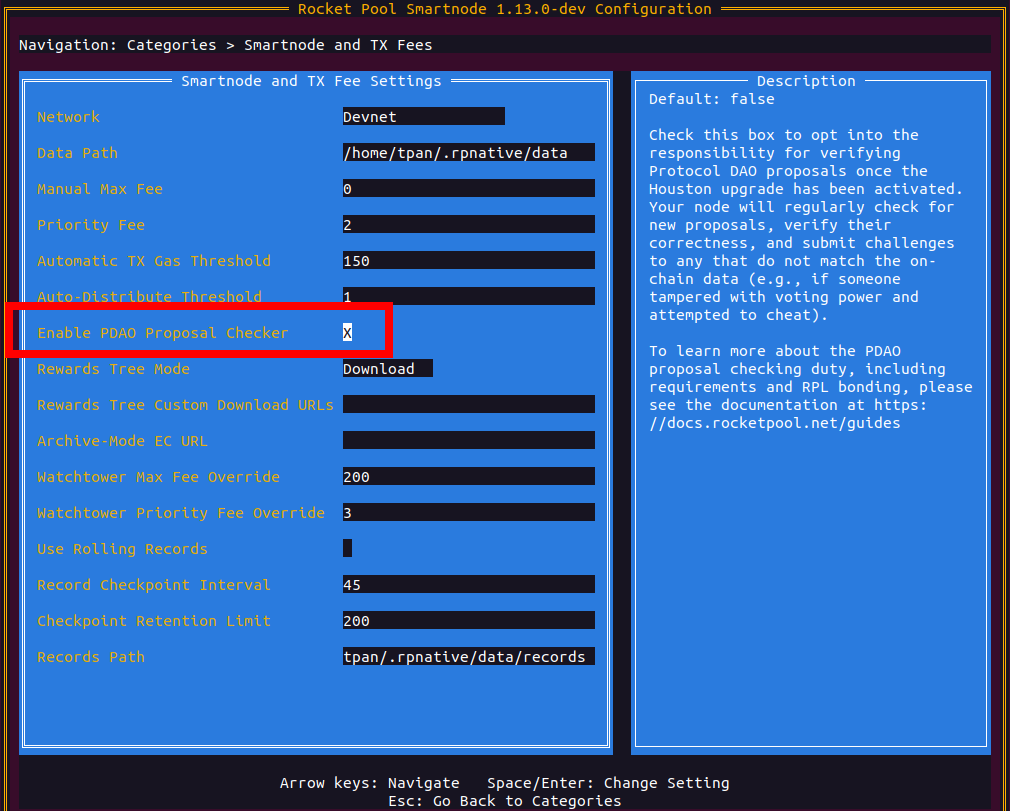
When this setting is enabled, the node will check for new proposals, verify their correctness, and submit challenges to invalid proposals. The only prerequisite is that [RPL Locking](/legacy/houston/participate.md#allowing-rpl-locking) is enabled.
This check runs every 5 minutes in conjunction with a few other node related duties. We'll run through an example of what challenging a fraudulent proposal looks like. We can use the smartnode command `rocketpool service logs node` to monitor the progress:
```
rocketpool_node | 2024/04/05 02:19:16 Checking for Protocol DAO proposal challenges to defend...
rocketpool_node | 2024/04/05 02:19:26 Checking for Protocol DAO proposals to challenge...
rocketpool_node | 2024/04/05 02:19:26 [Network Tree] Couldn't load network tree for block 1283202 from disk, so it must be regenerated.
rocketpool_node | 2024/04/05 02:19:26 [PDAO Proposals] Network tree for block 1283202 didn't exist, creating one.
rocketpool_node | 2024/04/05 02:19:26 [Voting Info Snapshot] Couldn't load network tree for block 1283202 from disk, so it must be regenerated.
rocketpool_node | 2024/04/05 02:19:26 [PDAO Proposals] Voting info snapshot for block 1283202 didn't exist, creating one.
rocketpool_node | 2024/04/05 02:19:26 Proposal 177 does not match the local tree artifacts and must be challenged.
rocketpool_node | 2024/04/05 02:19:26 [Voting Info Snapshot] Loaded file [vi-1283202.json.zst].
rocketpool_node | 2024/04/05 02:19:26 [Network Tree] Loaded file [network-tree-1283202.json.zst].
rocketpool_node | 2024/04/05 02:19:26 Submitting challenge against proposal 177, index 5...
rocketpool_node | 2024/04/05 02:19:26 This transaction will use a max fee of 16.067134 Gwei, for a total of up to 0.003252 - 0.004878 ETH.
rocketpool_node | 2024/04/05 02:19:26 Transaction has been submitted with hash 0x327e59e398bf2141a0d9273947d1da5c255606c45afaca428ab092186300eac2.
rocketpool_node | 2024/04/05 02:19:26 You may follow its progress by visiting:
rocketpool_node | 2024/04/05 02:19:26 https://holesky.etherscan.io/tx/0x327e59e398bf2141a0d9273947d1da5c255606c45afaca428ab092186300eac2
```
We can see that our node has caught a fraudulent proposal and started the process of challenging it. Block `1283202` is the block in which proposal 177 was raised, which means voting power for this proposal will be calculated at block `1283202`. If you're interested in seeing what these **Voting Info Snapshots** look like, you can locate them in this directory: `~/.rocketpool/data/voting`
Because the proposer was caught submitting incorrect voting info, our node makes a contract call `Function: createChallenge` on proposal 177 at index 5 and waits for the proposer to respond to the challenge.
```
rocketpool3_node | 2024/04/05 02:56:51 Checking for Protocol DAO proposal challenges to defend...
rocketpool3_node | 2024/04/05 02:57:01 Checking for Protocol DAO proposals to challenge...
rocketpool3_node | 2024/04/05 02:57:01 [Network Tree] Loaded file [network-tree-1283202.json.zst].
rocketpool3_node | 2024/04/05 02:57:01 Proposal 177 does not match the local tree artifacts and must be challenged.
rocketpool3_node | 2024/04/05 02:57:01 [Voting Info Snapshot] Loaded file [vi-1283202.json.zst].
rocketpool3_node | 2024/04/05 02:57:01 [Network Tree] Loaded file [network-tree-1283202.json.zst].
rocketpool3_node | 2024/04/05 02:57:01 Proposal 177 has been defeated with node index 20, submitting defeat...
rocketpool3_node | 2024/04/05 02:57:01 This transaction will use a max fee of 19.078965 Gwei, for a total of up to 0.002061 - 0.003091 ETH.
rocketpool3_node | 2024/04/05 02:57:01 Transaction has been submitted with hash 0x8cc01dff37205dc98e53f4e9fae7f3c802ecc1c69a01f53e734115a73401287e.
rocketpool3_node | 2024/04/05 02:57:01 You may follow its progress by visiting:
rocketpool3_node | 2024/04/05 02:57:01 https://holesky.etherscan.io/tx/0x8cc01dff37205dc98e53f4e9fae7f3c802ecc1c69a01f53e734115a73401287e
rocketpool3_node |
rocketpool3_node | 2024/04/05 02:57:01 Waiting for the transaction to be validated...
rocketpool3_node | 2024/04/05 02:57:13 Successfully defeated proposal.
```
Since the proposer's voting info is incorrect, it won't be able to respond to the challenge in time (determined by `proposal.challenge.period`). The proposal is considered defeated at this point. When the proposal is defeated, our node automatically makes the contract call `defeatProposal` on proposal 177 at index 5 to end the proposal.
::: tip NOTE
Challengers who participate in defeating the proposal are paid a proportional amount of the proposer's bond if they submit an index proven to be incorrect. All other challengers receive their bond back only.
:::
Now that the proposal is defeated, our node (the challenger) can [claim](/legacy/houston/participate.md#claiming-bonds-and-rewards) their original RPL bond as well as the proposer's RPL bond as a reward for defeating a fraudulent proposal.
If you're curious to dig into the details of the pDAO proposal and challenge system, take a look at the [technical specifications](https://github.com/rocket-pool/rocketpool-research/blob/houston/Protocol%20DAO/pdao-prop-challenge-spec.md#draft-protocol-dao-proposal-challenge-system-specification). Feel free to skip to this section on the [challenge process](https://github.com/rocket-pool/rocketpool-research/blob/houston/Protocol%20DAO/pdao-prop-challenge-spec.md#challenge-process) if you're interested in studying an example that goes into low level details.
---
url: /legacy/houston/rpl-withdrawal-address.md
---
> For AI agents: the complete documentation index is available at /llms.txt, the full documentation bundle is available at /llms-full.txt.
# Setting your RPL Withdrawal Address
It's important to understand the difference between your [primary withdrawal address](/node-staking/prepare-node.md#setting-your-primary-withdrawal-address) and your RPL withdrawal address. By default, your RPL withdrawal address is unset and your Primary withdrawal address is where all of your RPL checkpoint rewards, your staked RPL, and Beacon Chain ETH will be sent to.
You can set a [separate withdrawal address for your RPL](https://rpips.rocketpool.net/RPIPs/RPIP-31) if you wish. Your RPL withdrawal address if set will be able to trigger and claim RPL from inflation rewards and will have no effect on ETH consensus rewards or anything related to ETH. In this case, your Primary withdrawal address will no longer have any authority over RPL related actions.
This creates some interesting opportunities where RPL can be supplied by an entity to a node operator that does not wish to have exposure to RPL. That entity can then claim RPL rewards for putting up the required insurance collateral for the node. In other words, this allows different actors to supply each collateral type.
::: warning NOTE
Upon setting up your node for the first time, your RPL withdrawal address defaults to being unset.
If you choose to set an RPL withdrawal address, **it is vitally important to set this to a different address controlled by a cold wallet.**
A cold wallet could be a hardware wallet (such as a [Ledger](https://www.ledger.com/), [Trezor](https://trezor.io/), or [Grid+](https://gridplus.io/)), or a Smart Contract wallet (such as [Safe](https://app.safe.global/welcome)).
We **strongly recommend** that you DO NOT use a hot wallet such as MetaMask as your RPL withdrawal address.
This way, if your node wallet is compromised, the attacker doesn't get access to your staked RPL by forcing you to exit because all of those funds will be sent to your separate cold wallet (which they hopefully do not have).
RPL withdrawal addresses are set at a node operator level.
If you create multiple minipools, they will all refer to the same RPL withdrawal address so you only need to perform this setup once.
[See here](https://ethereum.org/en/security/#wallet-security) for some basics on wallet security from the Ethereum Foundation.
:::
There are two different ways to do this.
Please read both options below to determine which one applies to you.
**Method 1**
_Use this method if your new RPL withdrawal address can be used to sign transactions via MetaMask or WalletConnect._\*
NOTE
This method will require you to **submit a transaction** from your new RPL withdrawal address, so **you must have a small amount of ETH in that address already.**
NOTE
For users of **Ledger** hardware wallets, note that Ledger Live does not yet support MetaMask or WalletConnect natively.
You will need to use MetaMask and connect it to your Ledger instead.
Follow [the official Ledger instructions](https://www.ledger.com/academy/security/the-safest-way-to-use-metamask) to do this.
To work with the Rocket Pool website, you will need to have your Ledger connected, unlocked, and the ETH app open.
You will also need to **enable "blind signing"** for the current session; you can find this within the Settings portion of the ETH app on the device.
Bind signing will automatically be disabled after you close the session.
If you are using Hoodi Testnet and want to use your Ledger as your RPL withdrawal address, **you must create a new Ethereum wallet on your Ledger** first to ensure you don't connect your live address to the test network, which tends to cause confusion.
Make sure to select the **Hoodi Testnet** in the network selection dropdown when connecting your Ledger to MetaMask.
Note that Ledger Live will not show your balance on the test network, but other applications which support the test network (such as MetaMask and Etherscan) will be able to display it.
1. Run `rocketpool node set-rpl-withdrawal-address 'your cold wallet address or ENS name'`. Your new RPL withdrawal address will be marked as "pending". Until you confirm it, **your old RPL withdrawal address will still be used**.
2. To confirm it, you must send a special transaction **from your new RPL withdrawal address** to the minipool contract to verify that you own the RPL withdrawal address.
3. The easiest way to do this is to navigate to the Rocket Pool RPL withdrawal address site (for the [Hoodi Testnet](https://testnet.node.rocketpool.net/rpl-withdrawal-address) or for [Mainnet](https://node.rocketpool.net/rpl-withdrawal-address)).
4. If you haven't already connected Metamask or WalletConnect to the Rocket Pool website, do this now. Click the **select wallet** button in the center of the screen, and choose MetaMask or WalletConnect based on which wallet you would like to use. You will then be prompted asking you to confirm the connection. For example, using MetaMask:
Click **Next**, then click **Confirm** to enable the Rocket Pool website to use your wallet. 3. Select **RPL Withdrawal Address** from the top menu (or the hamburger menu on the left side if you're on a mobile device). 4. You will see this prompt:
4. Type your **node wallet address** here and click on the orange **Find** button to continue.
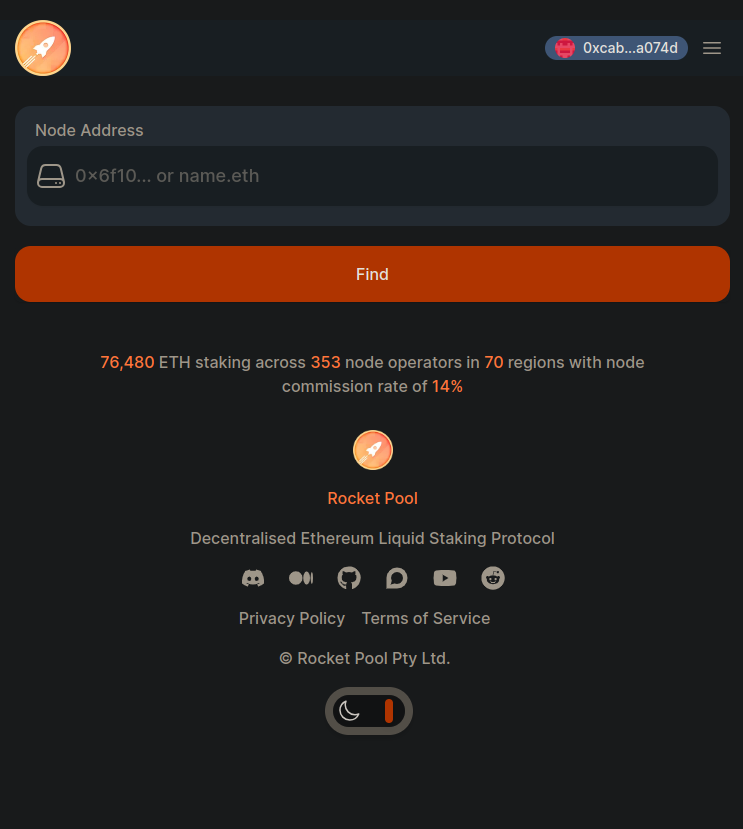1. You will be prompted to confirm a pending RPL withdrawal address. This should be the same address you used while running this command previously: `rocketpool node set-rpl-withdrawal-address` Select **Confirm Pending** when you're ready.
2. Now, there should be a new confirmation dialog in your wallet. Again, using MetaMask as an example, click the MetaMask icon to open it and you should see something like this:
Click **Confirm** to send the transaction to the network. This will take some time until it gets included in a block, but once it does, you will see a confirmation dialog:
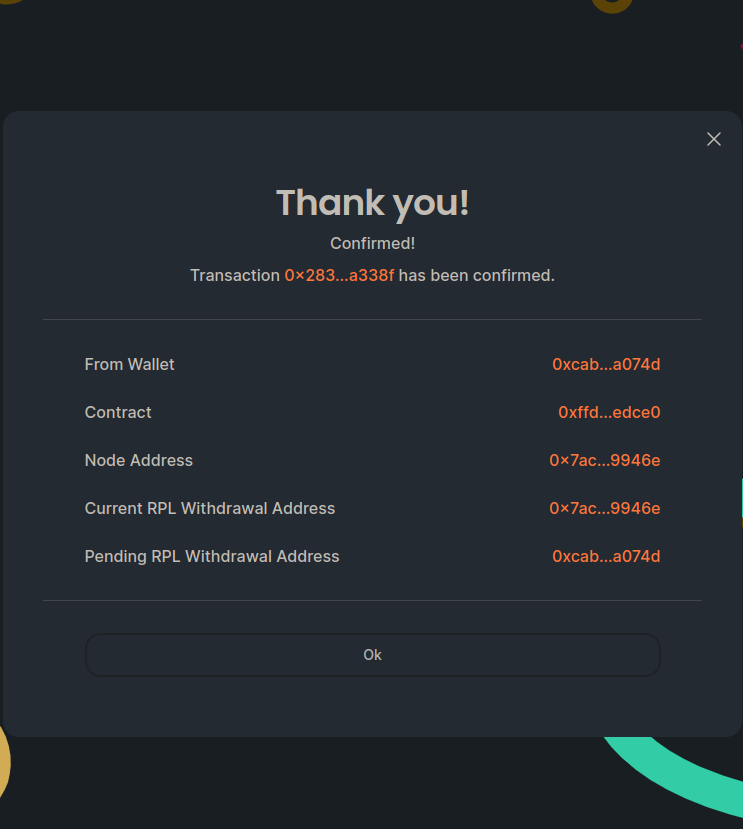5. Your new RPL withdrawal address will now be confirmed and activated. You can view this with `rocketpool node status`.
**Method 2**
**Use this method only if your RPL withdrawal address _cannot_ be used to sign transactions via MetaMask or WalletConnect.**
In this method, you will run:
```shell
rocketpool node set-rpl-withdrawal-address --force `your cold wallet address`
```
You will be offered the chance to send a test transaction before confirming this, to ensure that you have the right address.
If you confirm this command when it prompts you, your new RPL withdrawal address will be set immediately.
By doing this, you bypass the safety measure associated with Method 1, which requires you to prove that you own the new address.
If you make a typo here, there is no way to undo it and **your minipool's rewards will be lost forever**.
We **strongly** encourage you to use the test transaction mechanism before confirming this, and if possible, use Method 1 instead.
Once this is done, you will **no longer be able to change your RPL withdrawal address using the `set-rpl-withdrawal-address` command**.
To change it, you will need to send a signed transaction from your **active** RPL withdrawal address (the one you just switched to).
The Rocket Pool website has a function to help you do this.
If you'd like to unset your RPL withdrawal address, the process is pretty simple. First thing, you'll want to navigate back to the RPL Withdrawl Address page on the Rocket Pool website.
**Hoodi Testnet**
[https://testnet.node.rocketpool.net/rpl-withdrawal-address](https://testnet.node.rocketpool.net/rpl-withdrawal-address)
**Mainnet**
[https://node.rocketpool.net/rpl-withdrawal-address](https://node.rocketpool.net/rpl-withdrawal-address)
If you're signed in with the node's RPL withdrawal address, you should be able to click the **unset** button on the right here:
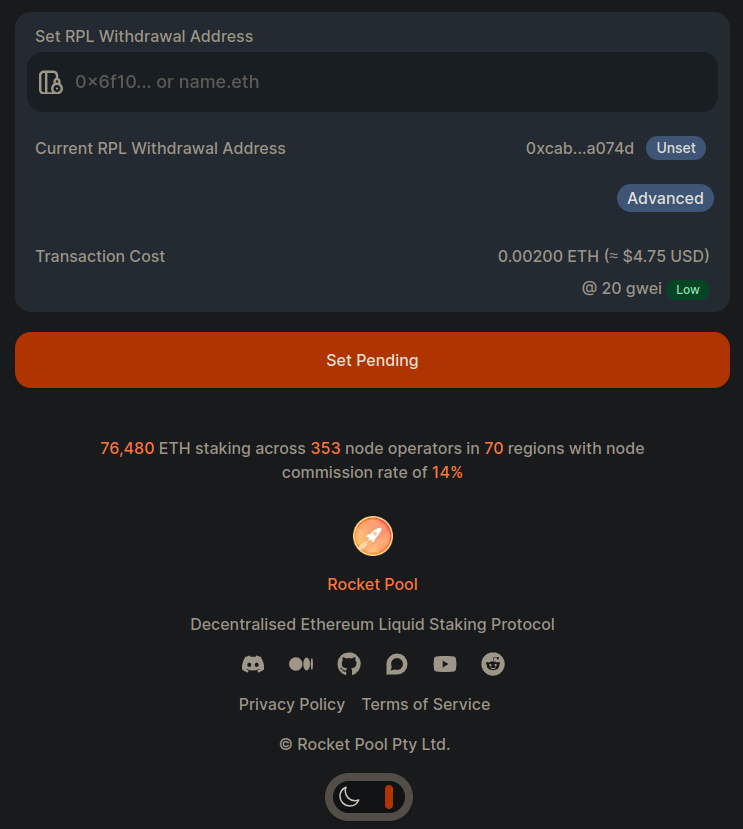
Clicking **unset** will take you to a page where you can confirm the details. If you're happy with what you see, click the orange **unset** button to send the transaction to the network.
That's all there is to setting your RPL withdrawal address! We hope you found the process quick and easy.
Feel free to swing by [our Discord server](https://discord.gg/G46XgK264a) to let us know what you thought of it and keep tabs on the project as it evolves.
---
url: /legacy/houston/stake-eth-on-behalf.md
---
> For AI agents: the complete documentation index is available at /llms.txt, the full documentation bundle is available at /llms-full.txt.
# Stake ETH on behalf of node
RPIP-32 allows an account to [stake ETH on behalf](https://rpips.rocketpool.net/RPIPs/RPIP-32) of a Rocket Pool node that is registered in the protocol. This supports a variety of situations where the node operator is not directly providing the ETH:
- Enhanced security for node operators, as they can stake directly from their hardware wallet, eliminating the need to transfer funds to the node beforehand.
- Staking as a Service providers where custody of funds are managed by a trusted custodian.
- Protocol integrations where custody of funds are managed by smart contracts.
- DAOs or organizations where custody of funds are managed by a treasury.
While the primary aim of this feature is to facilitate single depositor scenarios, it’s worth noting that multiple independent depositors can also leverage this capability by creating smart contracts layered on top. Rocket Pool also introduced the ability to [stake RPL on behalf](/node-staking/create-validator.md#whitelisting-an-address-to-stake-on-behalf) of a node back in our previous Atlas release.
### Prerequisite
Make sure that you've properly configured the [primary withdrawal address](/node-staking/prepare-node.md#setting-your-primary-withdrawal-address) of the node you intend on funding. Follow the link above for a guide on how withdrawal addresses act post houston.
::: tip NOTE
Don't skip this step! All ETH bond/rewards will be withdrawn to the primary withdrawal address. In other words, the address that supplies ETH for a node should be used as the primary withdrawal address! Please make sure that the node's primary withdrawal address is set to a wallet you have custody over.
:::
The process is slightly different for the Hoodi Testnet and Mainnet, so choose the network you are interested in from the tabs below.
**Preparing on the Hoodi Testnet**
WARNING
When practicing staking on the test network, you **do not need to provide any of your real ETH** during this process.
You will be given **fake test ETH** to use instead.
**Do not attempt to move your real ETH on mainnet to the testnet or you will lose it permanently!**
Start by installing [MetaMask](https://metamask.io/) if you haven't already.
Follow the instructions on their site to install the extension, create an account, and sign in.
Next, open the MetaMask panel using its icon in your browser toolbar.
You will need to add the Hoodi Testnet to MetaMask.
Click on the top left dropdown & click the "Add Network" button.
You will see a list of networks, Hoodi is not in this list so click the "Add a network manually" button.
Fill in the following details:
```
Network Name: Hoodi
New RPC Url: https://rpc.hoodi.ethpandaops.io
Chain ID: 560048
Currency Symbol: ETH
Block Explorer Url: https://hoodi.etherscan.io
```
Then click Save. You should now see the Hoodi network in the top left dropdown.
Click on the **network dropdown** in the top left of the Metamask extension & select **Hoodi Test Network**:
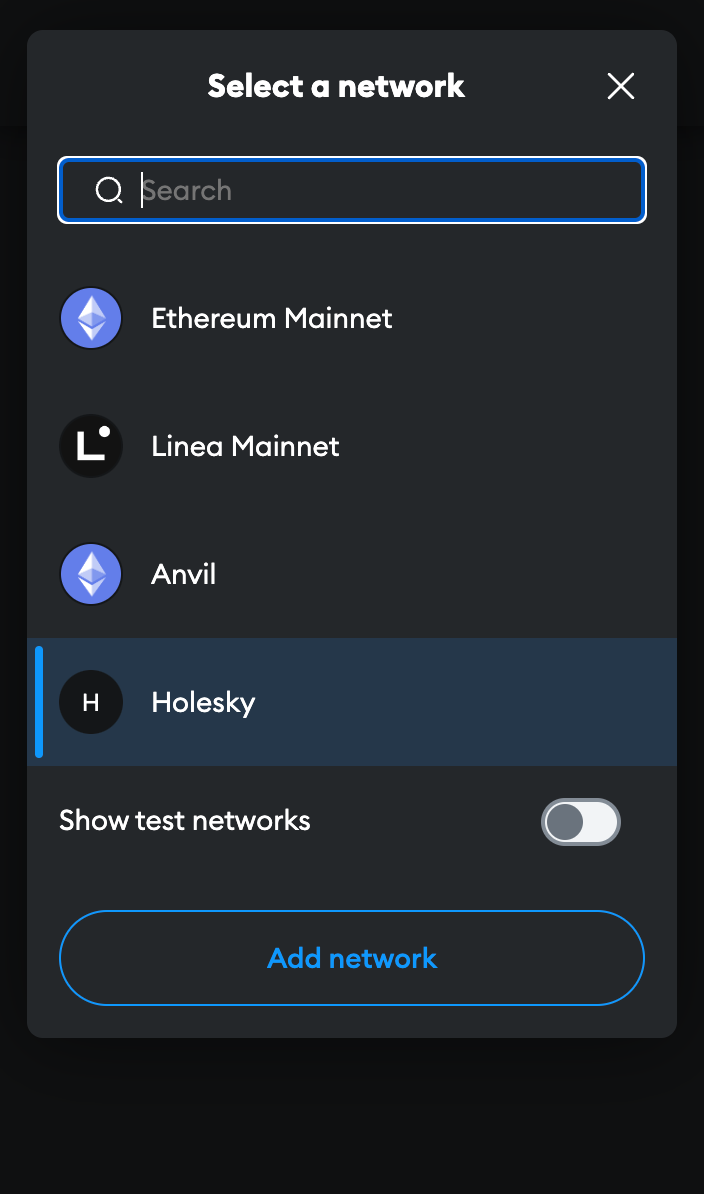Now that you have a wallet address in MetaMask, you need to fill it with some test ETH.
Head over to the [Practicing with the Test Network](/node-staking/testnet/overview.md#getting-test-eth-on-hoodi) page for a quick guide on how to use a testnet faucet to get some test ETH on Hoodi.
Once you have some Hoodi ETH to test with, head to [https://testnet.node.rocketpool.net/deposit-eth-on-behalf-of-node](https://testnet.node.rocketpool.net/deposit-eth-on-behalf-of-node).
If you see a notice about a web3 browser being required, or the current network ID being unsupported, make sure you’ve completed the previous steps correctly before continuing.
**Preparing on the Ethereum Mainnet**
Start by installing [MetaMask](https://metamask.io/) if you haven't already.
Follow the instructions on their site to install the extension, create an account, and sign in.
Next, open the MetaMask panel using its icon in your browser toolbar.
Click on the **network dropdown** in the toolbar at the top and ensure that **Ethereum Mainnet** is selected:
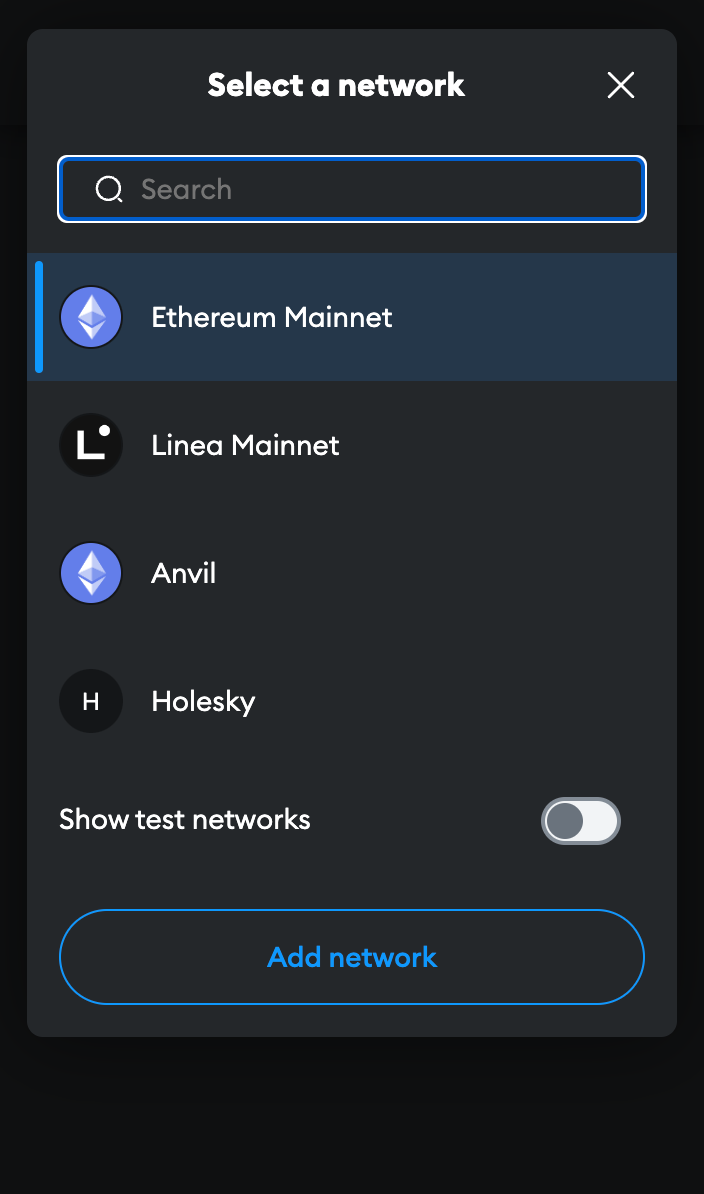Now that you have a wallet address in MetaMask, you need to transfer some ETH into it.
You will need to supply this from an existing wallet or buy ETH on an exchange.
Once you have some ETH to stake, head to [https://node.rocketpool.net/deposit-eth-on-behalf-of-node](https://node.rocketpool.net/deposit-eth-on-behalf-of-node).
If you see a notice about a web3 browser being required, or the current network ID being unsupported, make sure you’ve completed the previous steps correctly before continuing.
Once you're at the site, click on the **connect wallet** button. Please read through and accept the Terms of Service & Privacy Policy, this will enable different ways to connect, then click **connect metamask**.
MetaMask will prompt you to select an account to connect to the website.
Choose one, confirm a few permissions. You'll see an overview of your balances by clicking the wallet icon located at the top right of the window.
From here, you'll want to enter the address of the node you'd like to deposit ETH on behalf of. The page should look like this:
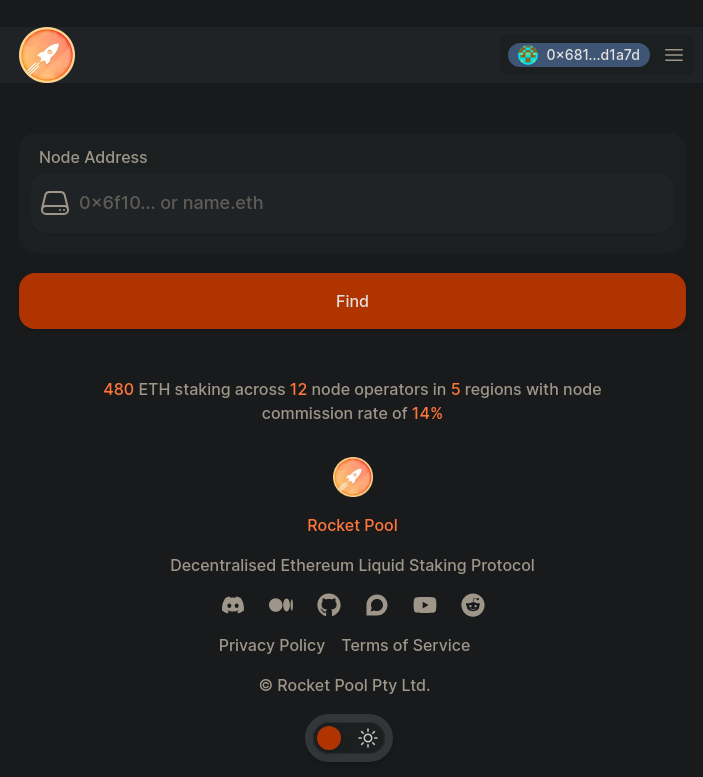
Go ahead and paste your desired address into this box and click find. In this example, we'll use `0xd3e317806456102d19db283b4c2201f0ef41a296`
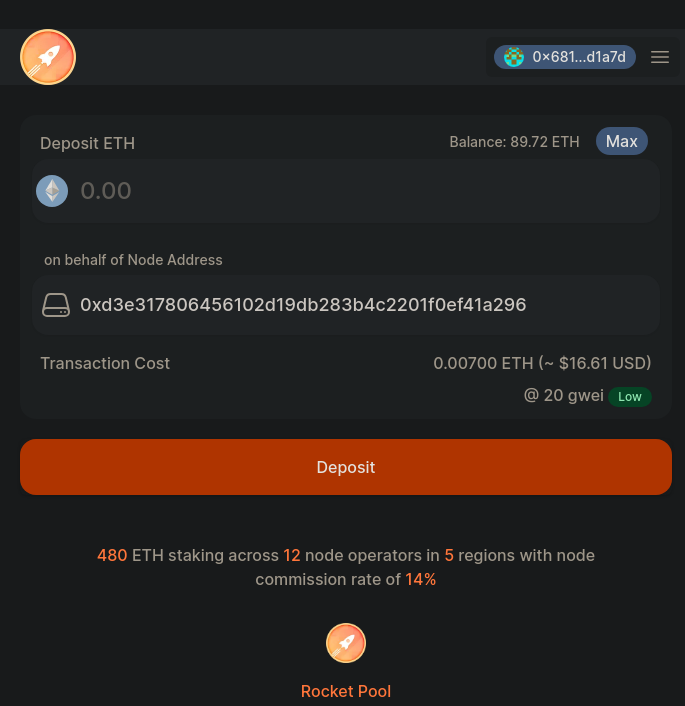
In the first box, enter the amount of ETH you would like to deposit on behalf of the node. The second box indicates which address you'll be depositing ETH on behalf of. Please ensure that you've entered the correct address and deposit. Once you're satisfied, click Deposit and MetaMask will pop up with a window asking you to confirm your transaction.
Once you confirm it, the transaction will begin.
When it's been included in a block and added to the chain, your delegate will be able to use the command `rocketpool node status` in smartnode to see the new balance. This balance can also be viewed through the Rocket Pool staking site.
```
The node has 0.000000 ETH in its credit balance and 8.000000 ETH staked on its behalf. 8.000000 can be used to make new minipools.
```
::: warning NOTE
If a node operator deposits your ETH into a minipool, you won't be able to exit their minipool without access to their withdrawal credentials, so keep this in mind! You can use the Rocket Pool staking site to withdraw ETH staked on behalf of a node if it isn't being used in a minipool.
:::
That's it!
You're now staking with Rocket Pool.
# Unstake ETH on behalf of node
**Preparing on the Hoodi Testnet**
When you're ready to withdraw ETH you've staked on behalf of a node, head over to [https://testnet.node.rocketpool.net/withdraw-eth](https://testnet.node.rocketpool.net/withdraw-eth). After
signing in as the node's [primary withdrawal address](/node-staking/prepare-node.md#setting-your-primary-withdrawal-address), you should be greeted with a familiar menu. You'll be prompted to
enter the node address you want to withdraw from:
**Preparing on the Ethereum Mainnet**
When you're ready to withdraw ETH you've staked on behalf of a node, head over to [https://node.rocketpool.net/withdraw-eth](https://node.rocketpool.net/withdraw-eth). After signing in as the
node's [primary withdrawal address](/node-staking/prepare-node.md#setting-your-primary-withdrawal-address), you should be greeted with a familiar menu. You'll be prompted to enter the node
address you want to withdraw from:

After entering an address, clicking "Find" will take you to the next menu where you can withdraw ETH you've staked on behalf of that node.
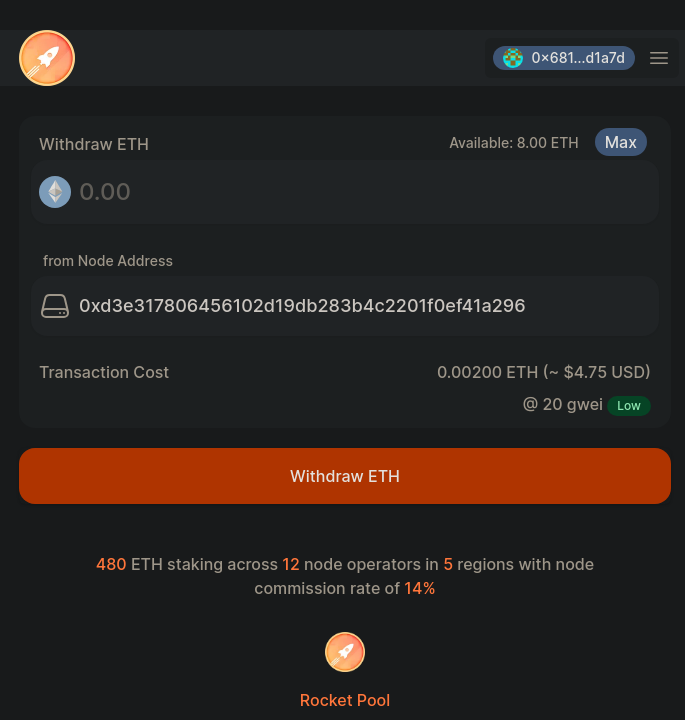
You'll be able to see how much ETH is available for withdrawal in the top right. After you input your desired quantity and confirm the node address, click the orange **Withdraw ETH** button to send the transaction to the network.
Once the transaction is confirmed, you'll see the proper balances in your account!
That's all there is to staking ETH on behalf of a node! We hope you found the process quick and easy.
Feel free to swing by [our Discord server](https://discord.gg/G46XgK264a) to let us know what you thought of it and keep tabs on the project as it evolves.
---
url: /legacy/houston/whats-new.md
---
> For AI agents: the complete documentation index is available at /llms.txt, the full documentation bundle is available at /llms-full.txt.
# The Houston Upgrade
The Houston upgrade is largely aimed at introducing a fully on-chain DAO to govern the protocol, known as the Protocol DAO or pDAO. It is a DAO like no other and it does not require snapshot voting or any other 3rd party tools to function, it is truly on-chain and one of a kind, more on that below.
This upgrade will also be introducing some other very exciting features that will allow new integrations and platforms to be built on the protocol. Some of these include the ability to stake ETH on behalf of node (not just from the node itself) and a new RPL withdrawal address feature, that allows one party to supply the ETH for staking and another party to provide the RPL without giving custody to the node operator"
## Protocol DAO
The Rocket Pool Protocol DAO (pDAO) is responsible for shaping the direction of the protocol and is run by RPL governance. Its members and their voting power are made up of node operators, big and small, all of which are directly participating in the protocol.
Typically DAO governance in the wider crypto space is done by token weight voting. Basically, the more tokens you hold for a protocol/project, the bigger your voting power. You also don’t need to be actively participating in the protocol, simply holding the tokens is enough.
This style of governance we wanted to avoid. If you want to help direct and guide the future of Rocket Pool, you need to be actively involved, not just storing tokens in a cold wallet. From the biggest Venture Capitalist funds to your ordinary guy running a single minipool, you will need to be actively participating in the protocol to help govern it.
Currently the protocol DAO has control over a variety of on-chain settings that are used in the protocol. New Rocket Pool Improvement Proposals (RPIP) can be made and voted on by these Node Operators within Rocket Pool. You can see the [**current RPIP registry here**](https://rpips.rocketpool.net/). If you’re a devil for the details, the current RPIP for the on-chain protocol DAO talked about now can be found here.
### What can the pDAO do?
The pDAO has control over many settings of the protocol, it can spend treasury funds and in our Houston upgrade, it comes with a new security council to help react quickly in the event of any potential issues with the protocol. Lets talk about each of those a little more below.
**Protocol Parameters:** These control certain facets of the protocol such as the setting that controls the minimum ETH amount that can be deposited for rETH (currently 0.01 ETH) or even controlling the maximum size of the deposit pool, this is how much max ETH that can be deposited into the protocol while waiting to be assigned to node operators for staking. You can find a full table of [these settings here](https://rpips.rocketpool.net/RPIPs/RPIP-33#parameter-table).
**Treasury Funds:** RPL has a 5% inflation rate and a portion of that is allocated to the pDAO treasury. The pDAO have the ability to spend this treasury on a variety of protocol oriented endeavors, from funding development of the protocol directly, grants management for funding 3rd party improvements and projects that make use of Rocket Pool and more. Our Houston upgrade adds a new ability where these payments from the treasury can be done not just in a lump sum manner, but in a progressive manner to help track goals in relation to ongoing funding.
**Security Council:** As the Houston upgrade moves the pDAO to a fully on-chain system, a new safety measure was introduced in the form of the [security council](https://rpips.rocketpool.net/RPIPs/RPIP-33#security-council). These members can be elected by the pDAO and they have the ability to pause the protocol quickly in the event any potential issues occur. Quorum must be met among members for any security response to be executed. The pDAO also has the power to remove members or disband the security council entirely if they need to.
### Proposals and Voting
For any governance system to function, there needs to be proposals and voting. At the moment, snapshot voting is used for these settings and proposal changes, then some manual intervention is needed to execute the changes. With the introduction of the [Houston upgrade and RPIP-33](https://rpips.rocketpool.net/RPIPs/RPIP-33), this is moved to a new optimistic fraud-proof system that allows any node operator to raise, vote on or challenge proposals, directly on-chain without the need for any 3rd party tools.
**Proposing:** Any node with a non-zero voting power may raise a proposal at any time. When doing so they must lock a proposal bond in the form of RPL for the entire proposal process.
**Challenging:** If a node that created a proposal has been found to have done so with incorrect data required, they can be challenged and the challenger must provide a bond for the challenge. The node that makes the challenge can be rewarded with the proposers bond made when creating the proposal if successful, however if they have made an invalid challenge, the proposer can collect their challenge bond.
**Voting**: If a proposal passes the period where it can be challenged, it enters the voting periods. Node operators can then choose to vote in one of the following flavors:
1. Abstain: The voter’s voting power is contributed to quorum but is neither for nor against the proposal.
2. For: The voter votes in favor of the proposal being executed.
3. Against: The voter votes against the proposal being executed.
4. Veto: The voter votes against the proposal as well as indicating they deem the proposal as spam or malicious. If the veto quorum is met, the proposal is immediately defeated and the proposer loses their bond. This is to dissuade spam, low quality proposals, or proposals that have not gone through off-chain processes first such as signaling by snapshot voting.
There are **two voting periods**
- Vote Period 1: For voters or delegates voting on behalf of others.
- Vote Period 2: For voters who delegated their power and want to overturn their delegate's decision.
Once both voting periods have passed and the proposal is successful, the proposal can be executed and the change is applied to the Rocket Pool protocol.
After the proposal has passed the voting periods, the proposer may unlock their RPL bond, unless the proposal was defeated by a challenge or vetoed.
## Stake ETH on Behalf of a node
[RPIP-32](https://rpips.rocketpool.net/RPIPs/RPIP-32) allows an account to [stake ETH on behalf](/legacy/houston/stake-eth-on-behalf.md) of a Rocket Pool node that is registered in the protocol. This supports a variety of situations where the node operator is not directly providing the ETH:
- Enhanced security for node operators, as they can stake directly from their hardware wallet, eliminating the need to transfer funds to the node beforehand.
- Staking as a Service providers where custody of funds are managed by a trusted custodian.
- Protocol integrations where custody of funds are managed by smart contracts.
- DAOs or organizations where custody of funds are managed by a treasury.
While the primary aim of this feature is to facilitate single depositor scenarios, it’s worth noting that multiple independent depositors can also leverage this capability by creating smart contracts layered on top. Rocket Pool also introduced the ability to stake RPL on behalf of back in our previous Atlas release.
## RPL Withdrawal Address
Rocket Pool currently allows node operators to specify a withdrawal address for their ETH and RPL. This could be an external hardware wallet or something similarly secure.
With [RPIP-31](https://rpips.rocketpool.net/RPIPs/RPIP-31), you can set a withdrawal address for your ETH and [a new one for your RPL](/legacy/houston/rpl-withdrawal-address.md) if you wish. The RPL withdrawal address if set will be able to trigger and claim RPL from inflation rewards and will have no effect on ETH consensus rewards or anything related to ETH.
This creates some interesting opportunities where RPL can be supplied by an entity to a node operator that does not wish to have exposure to RPL. That entity can then claim RPL rewards for putting up the required insurance collateral for the node.
## Time-based Balance and RPL Price Submissions
Rocket Pool nodes need to have at least 10% collateral in RPL staked to be eligible for rewards, with their "effective stake" calculated based on the ETH:RPL ratio, which is reported by the Oracle DAO at the end of each rewards interval. Previously, this "top up window" (the time between the final RPL report and the end of the interval) had some uncertainty and fluctuated from interval to interval because it was being specified by number of blocks. This was valid pre-merge but didn't factor variability and randomness in the way blocks are added.
To address this, the intervals for price and balance reporting will now be based on seconds rather than blocks. This change ensures predictability and has parity with the way rewards intervals are calculated today. If the interval is set to `86400` seconds (number of seconds in 24 hours), prices and balances are reported at the same time every day.
The protocol now has a fixed and controllable "top up window," removing guesswork and providing users with a consistent 24-hour window for topping up after the final price update. Feel free to read more about this change in [RPIP-35](https://rpips.rocketpool.net/RPIPs/RPIP-35).
## Audits
In preparation for the Houston Upgrade, Rocket Pool engaged with three of the most esteemed auditing teams in the Ethereum ecosystem.
- [Consensys Diligence](https://consensys.io/diligence/audits/2023/12/rocket-pool-houston/) (Late November to Mid December 2023)
- [Sigma Prime](https://rocketpool.net/files/audits/sigma-prime-audit-houston.pdf) x2 (Late November 2023, then a second round March 2024)
- [Chainsafe](https://rocketpool.net/files/audits/chainsafe-audit-houston.pdf) (Mid January to April 2024)
For a full history of audits plus details on the Immunefi bug bounty program, visit here:
[https://rocketpool.net/protocol/security](https://rocketpool.net/protocol/security)
---
url: /legacy/redstone/docker-migration.md
---
> For AI agents: the complete documentation index is available at /llms.txt, the full documentation bundle is available at /llms-full.txt.
# \[Docker Mode] Guide to the Redstone Update and the Merge
This guide will cover everything you need to know in order to prepare your node for the Redstone Update and The Merge if you are using **Docker Mode**.
## Things to Do Before Upgrading to v1.5.0
Before upgrading to v1.5.0 and higher of the Smart Node, please go through the following checklist to make sure you're prepared:
### Switch to a Full Execution Client
The Merge requires you to run your own Execution client, so you won't be able to use remote providers like Infura or Pocket anymore.
v1.5.0 won't have them anymore, and won't let you start the stack until you select a full Execution client.
Because of this change, you should switch to a full client while you're still on v1.4, let it sync to completion, and then upgrade to v1.5.
Docker Mode makes switching clients very easy.
[This guide](/node-staking/change-clients.md#changing-execution-clients) provides a walkthrough of the process.
## Upgrading to v1.5.0
Upgrading the Smart Node stack to v1.5.0 is no different than any other upgrade.
Simply follow [the normal directions here](/node-staking/updates.md#updating-the-smart-node-stack).
## Things the Smart Node Handles Automatically
In Docker mode, the Smart Node will take care of most of the changes needed to support Redstone and The Merge automatically once you update to v1.5.0.
Here's a brief list of what it will do for you without any manual intervention:
### The Engine API
The Merge changes the way your Execution client talks to your Consensus client.
Instead of using the old HTTP or Websocket based RPC system, The Merge requires a new system exposed by your Execution client called the Engine API.
This is a special connection that lets the Consensus client replace the old Proof-of-Work mining system with Proof-of-Stake; it's the heart of The Merge.
It's also **authenticated** with a secret token, so only your Consensus client can connect to your Execution client - nothing else can.
The Smart Node will handle the set up of the authentication token and the Engine API on both your Execution and Consensus clients automatically.
### Your Fee Recipient
The **fee recipient** is the address on the Execution layer chain that will receive all of the priority fees for blocks you propose.
It is a setting provided to your Validator client when it first starts.
The Smart Node will handle setting it up to the correct address when you upgrade to v1.5, and will constantly check to make sure you're using the correct one so you don't get [penalized accidentally](https://github.com/rocket-pool/rocketpool-research/blob/master/Penalties/penalty-system).
If you opted into the [Smoothing Pool](/legacy/redstone/whats-new.md#smoothing-pool), it will make that your fee recipient.
If you didn't, it will make your [fee distributor contract](/legacy/redstone/whats-new.md#fee-recipients-and-your-distributor) the fee recipient.
### MEV-Boost
[MEV-boost](https://boost.flashbots.net/) is the system Flashbots provides to give MEV rewards to Proof-of-Stake validators after The Merge.
Rocket Pool has MEV-Boost built into the Smart Node and automatically configures your node to use it, so your proposals get the maximum amount of rewards.
## Things You Should Do After Upgrading
While the Smart Node handles most of the changes for you, there are a few additional things you should do manually:
### Ensure a Successful Upgrade
The first thing to do is ensure that your node is working correctly.
Consider taking the following steps:
- Check the logs for errors with `rocketpool service logs eth1`, `rocketpool service logs eth2`, `rocketpool service logs validator`, and `rocketpool service logs node`.
- Confirm with a Block Explorer (such as your Grafana dashboard and [https://beaconcha.in](https://beaconcha.in)) that you are still attesting properly
- Remember that if you have Doppelganger protection enabled, you will miss a few attestations after the restart. This is normal!
### Set Up a Fallback Node
Because The Merge is not compatible with remote providers like Infura and Pocket, you'll lose the ability to use them as fallback Execution clients when your primary goes offline.
The Smart Node still has the ability to provide a fallback Execution client (and now a fallback Consensus client as well), but you will now need to use Execution and Consensus clients that you control.
For more information on setting up a fallback node, see the [Fallback node guide](/node-staking/fallback.md).
### Initialize your Fee Distributor
If you aren't planning to opt into the [Smoothing Pool](/legacy/redstone/whats-new.md#smoothing-pool) and claim all of your priority fees and MEV rewards to your [fee distributor contract](/legacy/redstone/whats-new.md#fee-recipients-and-your-distributor), you will eventually have to initialize it (create the contract instance on the chain) in order to claim rewards from it to your withdrawal address.
This is a fairly cheap operation and only needs to be done once.
::: tip TIP
Initializing your fee distributor can be done at **any time**.
You can let rewards accumulate in its address long before you initialize it, and your balance will remain after initialization.
We recommend you do so when gas prices are low to minimize the overhead cost.
Note that it **must be initialized in order to claim your rewards.**
:::
### Opt Into the Smoothing Pool
If you plan on taking advantage of the [Smoothing Pool](/legacy/redstone/whats-new.md#smoothing-pool) right away, you should opt in before the end of the first Redstone rewards period to maximize your "eligibility" amount.
Opting in can be done via running the following command:
```
rocketpool node join-smoothing-pool
```
### Claim Rewards
The Redstone upgrade replaces the expensive, problematic old rewards system with a [brand new one](/legacy/redstone/whats-new.md#new-rewards-system) that's much cheaper, supports automatic restaking of RPL (both partial and full amounts), and - most importantly - **lets you claim your rewards whenever you want**.
Because there is no longer a time limit on claiming rewards, and because it's cheaper to claim many rewards intervals at once, the automatic rewards claiming feature of the Smart Node **has been removed**.
You will now be able to claim rewards via the following command:
```
rocketpool node claim-rewards
```
This will show you all of the rewards you've accumulated across all of the rewards intervals starting with the Redstone upgrade.
## Reverting to v1.4.3
If, for any reason, something isn't to your liking and you want to revert to the previous Smart Node release, you can do so easily.
The Smart Node automatically backs up your settings from the previous version when you upgrade it, so simply get the previous version (here we're demonstrating **v1.4.3**) and replace the settings with the backup:
1. Stop the service:
```shell
rocketpool service stop
```
1. Download the v1.4.3 CLI:
**Linux x64**
`shell wget https://github.com/rocket-pool/smartnode/releases/download/v1.4.3/rocketpool-cli-linux-amd64 -O ~/bin/rocketpool `
**Linux arm64**
`shell wget https://github.com/rocket-pool/smartnode/releases/download/v1.4.3/rocketpool-cli-linux-arm64 -O ~/bin/rocketpool `
**Mac x64**
`shell curl -L https://github.com/rocket-pool/smartnode/releases/download/v1.4.3/rocketpool-cli-darwin-amd64 > /usr/local/bin/rocketpool `
**Mac arm64**
`shell curl -L https://github.com/rocket-pool/smartnode/releases/download/v1.4.3/rocketpool-cli-darwin-arm64 > /usr/local/bin/rocketpool `
1. Install the v1.4.3 package:
```shell
rocketpool service install -d
```
1. Replace your old configuration with the v1.4.3 backup configuration:
```shell
cp ~/.rocketpool/user-settings-backup.yml ~/.rocketpool/user-settings.yml
```
1. Verify all of your old settings are now being used:
```shell
rocketpool service config
```
1. If it looks good, start the Smart Node stack:
```shell
rocketpool service start
```
All set! You're now back on the old version and should begin attesting shortly after starting the service.
::: danger WARNING
v1.4.3 is **deprecated** and will no longer be usable after the Redstone update is deployed.
If you do need to revert to it, please make plans to upgrade back to v1.5.0 before the contracts are updated!
:::
---
url: /legacy/redstone/hybrid-migration.md
---
> For AI agents: the complete documentation index is available at /llms.txt, the full documentation bundle is available at /llms-full.txt.
# \[Hybrid Mode] Guide to the Redstone Update and the Merge
This guide will cover everything you need to know in order to prepare your node for the Redstone Update and The Merge if you are using **Hybrid Mode**.
## Things to Do Before Upgrading to v1.5.0
Before upgrading to v1.5.0 and higher of the Smart Node, please go through the following checklist to make sure you're prepared:
### Switch to a Full Execution Client
The Merge requires you to run your own Execution client, so you won't be able to use remote providers like Infura or Pocket anymore.
Because of this change, if you're currently using a light Execution client, you should switch to a full client while you're still on v1.4, let it sync to completion, and then upgrade to v1.5.
### Ensure the EC and CC are Both Externally Managed
Previous versions of the Smart Node stack allowed you to have one client locally managed, and the other externally managed.
For example, you could have an Execution client that the Smart Node manages and connect it to a Consensus client that you manage externally.
Starting with v1.5, this configuration is no longer supported.
You'll have to switch to either a locally managed Execution and Consensus client (also known as [Docker Mode](/legacy/redstone/docker-migration.md)), or set up both an Execution and a Consensus client that you manage on your own.
::: tip TIP
If you are interested in letting the Smart Node maintain its own Execution and Consensus client but want to keep control over your own Validator client (e.g., if you have your own solo staking validator keys attached to it), you may want to consider [Reverse Hybrid Mode](/node-staking/advanced-config.md#allowing-external-validator-clients-to-connect-to-the-smart-node) which does exactly this!
:::
### Set Up the Engine API
The Merge changes the way your Execution client talks to your Consensus client.
Instead of using the old HTTP or Websocket based RPC system, The Merge requires a new system exposed by your Execution client called the Engine API.
This is a special connection that lets the Consensus client replace the old Proof-of-Work mining system with Proof-of-Stake; it's the heart of The Merge.
It's also **authenticated** with a secret token, so only your Consensus client can connect to your Execution client - nothing else can.
As you manage your own Execution and Consensus clients, you'll need to set up the Engine API manually.
How to do it depends entirely on which clients you're running.
CoinCashew has [a great and concise guide](https://www.coincashew.com/coins/overview-eth/ethereum-merge-upgrade-checklist-for-home-stakers-and-validators) on how to set up the Engine API on your Execution and Consensus clients.
Give that a look, and test the new configuration out by making sure it still attests properly before upgrading.
As always, Rocket Pool will manage its own Validator client so you don't need to worry about manually modifying it.
## Upgrading to v1.5.0
Upgrading the Smart Node stack to v1.5.0 is no different than any other upgrade.
Simply follow [the normal directions here](/node-staking/updates.md#updating-the-smart-node-stack).
## Things the Smart Node Handles Automatically
In Hybrid mode, the Smart Node will take care of some of the changes needed to support Redstone automatically once you update to v1.5.0, but you will need to handle others manually in Hybrid Mode.
Here's a brief list of what it will do for you without any manual intervention:
### Your Fee Recipient
The **fee recipient** is the address on the Execution layer (eth1) chain that will receive all of the priority fees for blocks you propose.
It is a setting provided to your Validator client when it first starts.
The Smart Node will handle setting it up to the correct address on the Validator client it manages when you upgrade to v1.5, and will constantly check to make sure you're using the correct one so you don't get [penalized accidentally](https://github.com/rocket-pool/rocketpool-research/blob/master/Penalties/penalty-system).
If you opted into the [Smoothing Pool](/legacy/redstone/whats-new.md#smoothing-pool), it will make that your fee recipient.
If you didn't, it will make your [fee distributor contract](/legacy/redstone/whats-new.md#fee-recipients-and-your-distributor) the fee recipient.
## Things You Should Do After Upgrading
While the Smart Node handles most of the changes for you, there are a few additional things you should do manually:
### Ensure a Successful Upgrade
The first thing to do is ensure that your node is working correctly.
Consider taking the following steps:
- Check the logs for errors with `rocketpool service logs validator` and `rocketpool service logs node`.
- Confirm with a Block Explorer (such as your Grafana dashboard and [https://beaconcha.in](https://beaconcha.in)) that you are still attesting properly
- Remember that if you have Doppelganger protection enabled, you will miss a few attestations after the restart. This is normal!
### Set Up MEV-Boost
[MEV-boost](https://boost.flashbots.net/) is the system Flashbots provides to give MEV rewards to Proof-of-Stake validators after The Merge.
**Rocket Pool requires all nodes to use it to maximize their returns and thus keep the protocol competitive with other staking services.**
You will need to make some adjustments to your Beacon Node / Consensus client to connect it to MEV-boost.
MEV-boost is currently not available on Hoodi or Mainnet, so you do not need to set it up at this time.
Of course, you will not be penalized for not using it during this transition period.
Once it becomes available, we will announce a date at which it must be installed and connected to your node.
Flashbots will provide instructions you can follow at that time, and we will link to them here.
::: danger NOTE
Once we make the announcement that MEV-boost must be enabled by all node operators, you must ensure you have it properly installed and configured with your Beacon Node!
Not doing so will result in your minipool being [penalized](https://github.com/rocket-pool/rocketpool-research/blob/master/Penalties/penalty-system).
:::
### Set Up a Fallback Node
Because The Merge is not compatible with remote providers like Infura and Pocket, you'll lose the ability to use them as fallback Execution clients when your primary goes offline.
The Smart Node still has the ability to provide a fallback Execution client (and now a fallback Consensus client as well), but you will now need to use Execution and Consensus clients that you control.
For more information on setting up a fallback node, see the [Fallback node guide](/node-staking/fallback.md).
### Initialize your Fee Distributor
If you aren't planning to opt into the [Smoothing Pool](/legacy/redstone/whats-new.md#smoothing-pool) and claim all of your priority fees and MEV rewards to your [fee distributor contract](/legacy/redstone/whats-new.md#fee-recipients-and-your-distributor), you will eventually have to initialize it (create the contract instance on the chain) in order to claim rewards from it to your withdrawal address.
This is a fairly cheap operation and only needs to be done once.
::: tip TIP
Initializing your fee distributor can be done at **any time**.
You can let rewards accumulate in its address long before you initialize it, and your balance will remain after initialization.
We recommend you do so when gas prices are low to minimize the overhead cost.
Note that it **must be initialized in order to claim your rewards.**
:::
### Opt Into the Smoothing Pool
If you plan on taking advantage of the [Smoothing Pool](/legacy/redstone/whats-new.md#smoothing-pool) right away, you should opt in before the end of the first Redstone rewards period to maximize your "eligibility" amount.
Opting in can be done via running the following command:
```shell
rocketpool node join-smoothing-pool
```
### Claim Rewards
The Redstone upgrade replaces the expensive, problematic old rewards system with a [brand new one](/legacy/redstone/whats-new.md#new-rewards-system) that's much cheaper, supports automatic restaking of RPL (both partial and full amounts), and - most importantly - **lets you claim your rewards whenever you want**.
Because there is no longer a time limit on claiming rewards, and because it's cheaper to claim many rewards intervals at once, the automatic rewards claiming feature of the Smart Node **has been removed**.
You will now be able to claim rewards via the following command:
```shell
rocketpool node claim-rewards
```
This will show you all of the rewards you've accumulated across all of the rewards intervals starting with the Redstone upgrade.
## Reverting to v1.4.3
If, for any reason, something isn't to your liking and you want to revert to the previous Smart Node release, you can do so easily.
The Smart Node automatically backs up your settings from the previous version when you upgrade it, so simply get the previous version (here we're demonstrating **v1.4.3**) and replace the settings with the backup:
1. Stop the service:
```shell
rocketpool service stop
```
1. Download the v1.4.3 CLI:
**Linux x64**
`shell wget https://github.com/rocket-pool/smartnode/releases/download/v1.4.3/rocketpool-cli-linux-amd64 -O ~/bin/rocketpool `
**Linux arm64**
`shell wget https://github.com/rocket-pool/smartnode/releases/download/v1.4.3/rocketpool-cli-linux-arm64 -O ~/bin/rocketpool `
**Mac x64**
`shell curl -L https://github.com/rocket-pool/smartnode/releases/download/v1.4.3/rocketpool-cli-darwin-amd64 > /usr/local/bin/rocketpool `
**Mac arm64**
`shell curl -L https://github.com/rocket-pool/smartnode/releases/download/v1.4.3/rocketpool-cli-darwin-arm64 > /usr/local/bin/rocketpool `
1. Install the v1.4.3 package:
```shell
rocketpool service install -d
```
1. Replace your old configuration with the v1.4.3 backup configuration:
```shell
cp ~/.rocketpool/user-settings-backup.yml ~/.rocketpool/user-settings.yml
```
1. Verify all of your old settings are now being used:
```shell
rocketpool service config
```
1. If it looks good, start the Smart Node stack:
```shell
rocketpool service start
```
All set! You're now back on the old version and should begin attesting shortly after starting the service.
::: danger WARNING
v1.4.3 is **deprecated** and will no longer be usable after the Redstone update is deployed.
If you do need to revert to it, please make plans to upgrade back to v1.5.0 before the contracts are updated!
:::
---
url: /legacy/redstone/native-migration.md
---
> For AI agents: the complete documentation index is available at /llms.txt, the full documentation bundle is available at /llms-full.txt.
# \[Native Mode] Guide to the Redstone Update and the Merge
This guide will cover everything you need to know in order to prepare your node for the Redstone Update and The Merge if you are using **Native Mode**.
## Things to Do Before Upgrading to v1.5.0
Before upgrading to v1.5.0 and higher of the Smart Node, please go through the following checklist to make sure you're prepared:
### Switch to a Full Execution Client
The Merge requires you to run your own Execution client, so you won't be able to use remote providers like Infura or Pocket anymore.
Because of this change, if you're currently using a light Execution client, you should switch to a full client while you're still on v1.4, let it sync to completion, and then upgrade to v1.5.
### Set Up the Engine API
The Merge changes the way your Execution client talks to your Consensus client.
Instead of using the old HTTP or Websocket based RPC system, The Merge requires a new system exposed by your Execution client called the Engine API.
This is a special connection that lets the Consensus client replace the old Proof-of-Work mining system with Proof-of-Stake; it's the heart of The Merge.
It's also **authenticated** with a secret token, so only your Consensus client can connect to your Execution client - nothing else can.
As you manage your own Execution and Consensus clients, you'll need to set up the Engine API manually.
How to do it depends entirely on which clients you're running.
CoinCashew has [a great and concise guide](https://www.coincashew.com/coins/overview-eth/ethereum-merge-upgrade-checklist-for-home-stakers-and-validators) on how to set up the Engine API on your Execution and Consensus clients.
Give that a look, and test the new configuration out by making sure it still attests properly before upgrading.
We'll show you how to set up your Validator client so that it uses the correct fee recipient required by the Smart Node software automatically below.
## Upgrading to v1.5.0
Upgrading the Smart Node stack to v1.5.0 is no different than any other upgrade.
Simply follow [the normal directions here](/node-staking/updates.md#updating-the-smart-node-stack).
## Things You Should Do After Upgrading
In Native mode, there are several things you will need to do manually after upgrading:
### Ensure a Successful Upgrade
The first thing to do is ensure that your node is working correctly.
Consider taking the following steps:
- Check your log scripts for the Execution client, the Consensus client, the Validator client, and the Smart Node daemon (the `rp-node` service) to ensure they're all functioning normally without errors.
- Confirm with a Block Explorer (such as your Grafana dashboard and [https://beaconcha.in](https://beaconcha.in)) that you are still attesting properly
- Remember that if you have Doppelganger protection enabled, you will miss a few attestations after the restart. This is normal!
### Set up the Fee Recipient in your Validator Client
One of the **critical** details to set up prior to the Merge is the **fee recipient** specified by your validator client.
As described in the [overview article](/legacy/redstone/whats-new.md#fee-recipients-and-your-distributor), this can be one of two values:
- If you **are opted into** the Smoothing Pool, this must be the address of the **Smoothing Pool contract**. You can get the address from [the official contracts page](/protocol/contracts-integrations.md).
- If you are **not** in the Smoothing Pool, this must be the address of your node's **fee distributor contract**. You can get the address by running `rocketpool node status`, under the `Fee Distributor and Smoothing Pool` section.
In Native mode, you have the choice of letting the Smart Node manage this for you if you use the Smart Node daemon service, `rp-node`, or managing it yourself if you do not use the daemon.
#### Automatic Management via the Daemon
The Smart Node daemon will automatically determine the appropriate fee recipient for your node and manage it in case it changes (such as opting into and out of the Smoothing Pool).
This is the **safest** option, because the Smart Node will always ensure it's set to a value that **prevents [penalization](https://github.com/rocket-pool/rocketpool-research/blob/master/Penalties/penalty-system)**.
The way it does this is by maintaining a file with the correct fee recipient in it, and regularly refreshing it to ensure its correctness.
When it needs to be updated, it modifies the file and restarts your Validator client automatically so it loads the new recipient - similarly to how it restarts your Validator client after staking a new minipool.
Select your client below to learn how to set it up:
**Lighthouse**
Modify your Validator Client service by adding the following line _before_ the `ExecStart` line:
```
EnvironmentFile=`data dir`/validators/rp-fee-recipient-env.txt
```
For example:
```
EnvironmentFile=/srv/rocketpool/data/validators/rp-fee-recipient-env.txt
```
Next, add the following command line argument _to the end_ of your `ExecStart` line:
```
--suggested-fee-recipient ${FEE_RECIPIENT}
```
Your VC will now use the file managed by the Smart Node daemon, and will automatically be restarted whenever the fee recipient changes.
**Nimbus**
Modify your Validator Client service by adding the following line _before_ the `ExecStart` line:
```
EnvironmentFile=`data dir`/validators/rp-fee-recipient-env.txt
```
For example:
```
EnvironmentFile=/srv/rocketpool/data/validators/rp-fee-recipient-env.txt
```
Next, add the following command line argument _to the end_ of your `ExecStart` line:
```
--suggested-fee-recipient=${FEE_RECIPIENT}
```
Your VC will now use the file managed by the Smart Node daemon, and will automatically be restarted whenever the fee recipient changes.
**Prysm**
Modify your Validator Client service by adding the following line _before_ the `ExecStart` line:
```
EnvironmentFile=`data dir`/validators/rp-fee-recipient-env.txt
```
For example:
```
EnvironmentFile=/srv/rocketpool/data/validators/rp-fee-recipient-env.txt
```
Next, add the following command line argument _to the end_ of your `ExecStart` line:
```
--suggested-fee-recipient ${FEE_RECIPIENT}
```
Your VC will now use the file managed by the Smart Node daemon, and will automatically be restarted whenever the fee recipient changes.
**Teku**
Modify your Validator Client service by adding the following line _before_ the `ExecStart` line:
```
EnvironmentFile=`data dir`/validators/rp-fee-recipient-env.txt
```
For example:
```
EnvironmentFile=/srv/rocketpool/data/validators/rp-fee-recipient-env.txt
```
Next, add the following command line argument _to the end_ of your `ExecStart` line:
```
--validators-proposer-default-fee-recipient=${FEE_RECIPIENT}
```
Your VC will now use the file managed by the Smart Node daemon, and will automatically be restarted whenever the fee recipient changes.
#### Manual Fee Recipient Management
::: danger WARNING
By doing this, you assume full responsibility for ensuring your fee recipient is always set to the correct address.
Please read the [penalty specification](https://github.com/rocket-pool/rocketpool-research/blob/master/Penalties/penalty-system) to understand what it must be set to given your configuration, and when you can safely change it from one value to another.
Failure to do so could result in your minipools being penalized!
:::
**Prior to Redstone being deployed**, you can simply use the rETH address for the network you're on (which can be found in [the official contracts page](/protocol/contracts-integrations.md)).
The rETH address is always safe no matter what.
**Once Redstone has been deployed**, you can see the exact address that you should set your fee recipient to via `rocketpool node status`. For example, if you are opted into the Smoothing Pool, it will show the Smoothing Pool's address and note that you must use it as your fee recipient:

If you are _not_ opted into the Smoothing Pool, it will show your fee distributor address and note that you must use it as your fee recipient:

Select your Consensus client below to learn how to configure it.
**Lighthouse**
Add the following command line argument to your Validator Client's service definition file:
```
--suggested-fee-recipient `address`
```
Where `address` is:
- The [rETH address](/protocol/contracts-integrations/index.md#token-contracts) **before** the Redstone update is deployed (e.g., `0xae78736Cd615f374D3085123A210448E74Fc6393` on Mainnet)
- Your node's **fee distributor** after Redstone is deployed, which you can retrieve with `rocketpool node status` once the contract upgrade occurs
- The [Smoothing Pool address](/protocol/contracts-integrations/index.md#key-protocol-contracts) if you opt into the Smoothing Pool
As a reminder, `rocketpool node status` will show you the correct fee recipient to use at any time.
**Please read the [penalty specification](https://github.com/rocket-pool/rocketpool-research/blob/master/Penalties/penalty-system) carefully to understand the conditions and expectations around the fee recipient.**
**Nimbus**
Add the following command line argument to Nimbus's service definition file:
```
--suggested-fee-recipient=`address`
```
Where `address` is:
- The [rETH address](/protocol/contracts-integrations/index.md#token-contracts) **before** the Redstone update is deployed (e.g., `0xae78736Cd615f374D3085123A210448E74Fc6393` on Mainnet)
- Your node's **fee distributor** after Redstone is deployed, which you can retrieve with `rocketpool node status` once the contract upgrade occurs
- The [Smoothing Pool address](/protocol/contracts-integrations/index.md#key-protocol-contracts) if you opt into the Smoothing Pool
As a reminder, `rocketpool node status` will show you the correct fee recipient to use at any time.
**Please read the [penalty specification](https://github.com/rocket-pool/rocketpool-research/blob/master/Penalties/penalty-system) carefully to understand the conditions and expectations around the fee recipient.**
**Prysm**
Add the following command line argument to your Validator Client's service definition file:
```
--suggested-fee-recipient `address`
```
Where `address` is:
- The [rETH address](/protocol/contracts-integrations/index.md#token-contracts) **before** the Redstone update is deployed (e.g., `0xae78736Cd615f374D3085123A210448E74Fc6393` on Mainnet)
- Your node's **fee distributor** after Redstone is deployed, which you can retrieve with `rocketpool node status` once the contract upgrade occurs
- The [Smoothing Pool address](/protocol/contracts-integrations/index.md#key-protocol-contracts) if you opt into the Smoothing Pool
As a reminder, `rocketpool node status` will show you the correct fee recipient to use at any time.
**Please read the [penalty specification](https://github.com/rocket-pool/rocketpool-research/blob/master/Penalties/penalty-system) carefully to understand the conditions and expectations around the fee recipient.**
**Teku**
Add the following command line argument to your Validator Client's service definition file:
```
--validators-proposer-default-fee-recipient=`address`
```
Where `address` is:
- The [rETH address](/protocol/contracts-integrations/index.md#token-contracts) **before** the Redstone update is deployed (e.g., `0xae78736Cd615f374D3085123A210448E74Fc6393` on Mainnet)
- Your node's **fee distributor** after Redstone is deployed, which you can retrieve with `rocketpool node status` once the contract upgrade occurs
- The [Smoothing Pool address](/protocol/contracts-integrations/index.md#key-protocol-contracts) if you opt into the Smoothing Pool
As a reminder, `rocketpool node status` will show you the correct fee recipient to use at any time.
**Please read the [penalty specification](https://github.com/rocket-pool/rocketpool-research/blob/master/Penalties/penalty-system) carefully to understand the conditions and expectations around the fee recipient.**
### Set Up MEV-Boost
[MEV-boost](https://boost.flashbots.net/) is the system Flashbots provides to give MEV rewards to Proof-of-Stake validators after The Merge.
**Rocket Pool requires all nodes to use it to maximize their returns and thus keep the protocol competitive with other staking services.**
You will need to make some adjustments to your Beacon Node / Consensus client to connect it to MEV-boost.
MEV-boost is currently not available on Hoodi or Mainnet, so you do not need to set it up at this time.
Of course, you will not be penalized for not using it during this transition period.
Once it becomes available, we will announce a date at which it must be installed and connected to your node.
Flashbots will provide instructions you can follow at that time, and we will link to them here.
::: danger NOTE
Once we make the announcement that MEV-boost must be enabled by all node operators, you must ensure you have it properly installed and configured with your Beacon Node!
Not doing so will result in your minipool being [penalized](https://github.com/rocket-pool/rocketpool-research/blob/master/Penalties/penalty-system).
:::
### Set Up a Fallback Node
Because The Merge is not compatible with remote providers like Infura and Pocket, you'll lose the ability to use them as fallback Execution clients when your primary goes offline.
The Smart Node still has the ability to provide a fallback Execution client (and now a fallback Consensus client as well), but you will now need to use Execution and Consensus clients that you control.
For more information on setting up a fallback node, see the [Fallback node guide](/node-staking/fallback.md).
### Initialize your Fee Distributor
If you aren't planning to opt into the [Smoothing Pool](/legacy/redstone/whats-new.md#smoothing-pool) and claim all of your priority fees and MEV rewards to your [fee distributor contract](/legacy/redstone/whats-new.md#fee-recipients-and-your-distributor), you will eventually have to initialize it (create the contract instance on the chain) in order to claim rewards from it to your withdrawal address.
This is a fairly cheap operation and only needs to be done once.
::: tip TIP
Initializing your fee distributor can be done at **any time**.
You can let rewards accumulate in its address long before you initialize it, and your balance will remain after initialization.
We recommend you do so when gas prices are low to minimize the overhead cost.
Note that it **must be initialized in order to claim your rewards.**
:::
### Opt Into the Smoothing Pool
If you plan on taking advantage of the [Smoothing Pool](/legacy/redstone/whats-new.md#smoothing-pool) right away, you should opt in before the end of the first Redstone rewards period to maximize your "eligibility" amount.
Opting in can be done via running the following command:
```shell
rocketpool node join-smoothing-pool
```
### Claim Rewards
The Redstone upgrade replaces the expensive, problematic old rewards system with a [brand new one](/legacy/redstone/whats-new.md#new-rewards-system) that's much cheaper, supports automatic restaking of RPL (both partial and full amounts), and - most importantly - **lets you claim your rewards whenever you want**.
Because there is no longer a time limit on claiming rewards, and because it's cheaper to claim many rewards intervals at once, the automatic rewards claiming feature of the Smart Node **has been removed**.
You will now be able to claim rewards via the following command:
```shell
rocketpool node claim-rewards
```
This will show you all of the rewards you've accumulated across all of the rewards intervals starting with the Redstone upgrade.
---
url: /legacy/redstone/whats-new.md
---
> For AI agents: the complete documentation index is available at /llms.txt, the full documentation bundle is available at /llms-full.txt.
# The Rocket Pool Redstone Update
Rocket Pool's next major update, titled **Redstone**, has been released for beta testing on the Ropsten and Holesky test networks.
This page describes the major changes that Redstone brings, including updates to both the Smart Node stack and to the Rocket Pool protocol in general.
Please read through this page thoroughly to understand all of the differences between the previous version of Rocket Pool and Redstone.
::: tip ATTENTION
For detailed information on how to prepare your node for the upgrade and what to do after the upgrade, please look at the following guides:
- [Guide for Docker Mode](/legacy/redstone/docker-migration.md)
- [Guide for Hybrid Mode](/legacy/redstone/hybrid-migration.md)
- [Guide for Native Mode](/legacy/redstone/native-migration.md)
:::
## Client Changes and The Merge
Ropsten (and shortly, Holesky) have successfully undergone **The Merge of the Execution and Consensus Layers**.
It no longer uses Proof-of-Work; instead, validators on Ropsten are now responsible for creating and proposing blocks on both chains.
While this comes with some exciting financial benefits (which will be discussed later), it also comes with some important changes to the way validators operate.
Below is a brief summary of the changes to client behavior as part of The Merge:
- Your Execution client now uses three API ports:
- One for HTTP access to its API (**default 8545**)
- One for Websocket access to its API (**default 8546**)
- One for the new **Engine API** used by Consensus clients after The Merge (**default 8551**)
- Execution clients now require a Consensus client to function, and Consensus clients now require an Execution client to function.
- **Neither one can operate in isolation any longer.**
- One Execution client must be linked to one, and only one, Consensus client (and vice versa).
- You will not be able to link multiple Execution clients to a single Consensus client, or multiple Consensus clients to a single Execution client.
- Because of this, **fallback execution clients are no longer available** for Rocket Pool node operators.
- **Full execution clients** are required.
- Remote providers (like Infura and Pocket) can no longer be used by any validators, Rocket Pool or otherwise.
## Fee Recipients and Your Distributor
As validators are now responsible for creating blocks, that means they receive the **priority fees** (also known as **tips**) attached to each transaction.
These fees are paid in ETH, and they are provided directly to you every time one of your minipool validators proposes a block.
Unlike the ETH locked on the Beacon Chain, **you don't have to wait for withdrawals to access your priority fees**!
They are simply awarded to you as part of the block proposal process.
In order to know where to send the fees to, your Validator Client requires an extra parameter known as the `fee recipient`.
This is the address on the Execution Layer (ETH1) that all of the priority fees earned by your node during block proposals will be sent to.
Rocket Pool is designed to fairly distribute these rewards, the same way it fairly distributes your Beacon chain rewards: half of any priority fees your minipool validators earn will go to you (plus the average commission of all of your minipools), and the other half will go to the pool stakers (minus your average commission).
To that end, the Smart Node will automatically set your Validator Client's `fee recipient` to a special address known as your node's **fee distributor**.
Your fee distributor is a unique contract on the Execution Layer that's **specific to your node**.
It will hold all of the priority fees you've earned over time, and it contains the logic required to fairly split and distribute them.
This distribution process is controlled by you (the node operator), and can be done whenever you please.
It does not have a time limit.
The address for your node's fee distributor is **deterministically based on your node address**.
That means it is known ahead of time, before the fee distributor is even created.
**The Smart Node will use this address as your fee recipient.**
::: tip NOTE
By default, your fee recipient will be set to the **rETH address** when you install Smart Node v1.5.0 (if the Redstone contract updates haven't been deployed yet).
The Smart Node will automatically update this to your node's fee distributor address once the Redstone update has been deployed.
One exception to this rule is if you are opted into the **Smoothing Pool** - see the section at the end of this page for more information on it.
:::
New Rocket Pool nodes will automatically initialize their node's distributor contract upon registration.
Existing nodes will need to do this process manually.
This only needs to be run once.
One interesting ramification of this is that your distributor's address may start accruing a balance **before** you've initialized your node distributor contract.
This is okay, because your distributor will gain access to all of this existing balance as soon as you initialize it.
You can view your fee distributor's balance as part of:
```shell
rocketpool node status
```
The output will look like this:
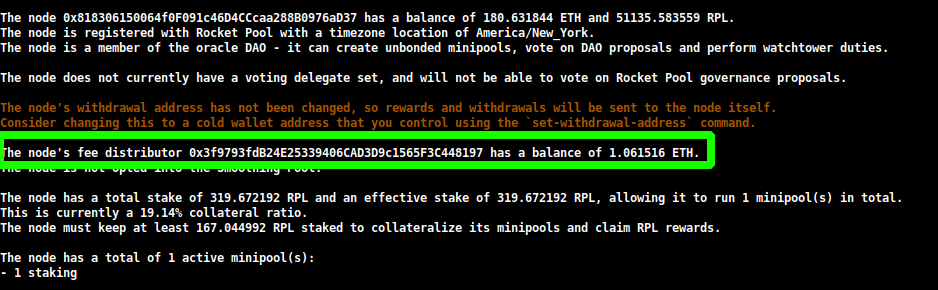
To initialize your node's distributor, simply run this new command:
```shell
rocketpool node initialize-fee-distributor
```
::: warning NOTE
After the Redstone update, you must call this function before you can create any new minipools with `rocketpool node deposit`.
:::
When your distributor has been initialized, you can claim and distribute its entire balance using the following command:
```shell
rocketpool node distribute-fees
```
This will send your share of the rewards to your **withdrawal address**.
## Rocket Pool Protocol Changes
In addition to the Execution and Consensus client changes and the new priority fees, the Rocket Pool protocol itself has undergone some important changes you should be aware of.
### New Rewards System
One of the most significant changes introduced with the Redstone update is the **new rewards system**.
This is a complete overhaul of the way node operators receive their RPL rewards (and ETH from the Smoothing Pool - discussed later).
The _old_ rewards system had the following drawbacks:
- Claiming cost approximately 400k gas, which is quite expensive.
- Node operators had to claim the rewards at each interval (every 28 days), or would forfeit them. This meant the gas costs could become prohibitively expensive for node operators with small amounts of RPL.
- Rewards were determined at the time of the _claim_, not at the time of the checkpoint. If a user staked a significant amount of RPL between the checkpoint and your claim, your rewards could be diluted and you'd receive less RPL than you were expecting.
The _new_ claims system solves all of these problems.
At every interval, the Oracle DAO will collectively create a **true snapshot** of the state of the node operators in the Rocket Pool network, including all of their effective stake amounts.
This information is compiled into a [Merkle Tree](https://en.wikipedia.org/wiki/Merkle_tree) - an extremely efficient way to make all of the details available to smart contracts.
The Merkle Tree is built into a JSON file and hosted on GitHub, and the root of the Merkle Tree is submitted to the contracts.
This new system has the following features:
- You can now **let rewards accumulate** for as long as you want. No more time limit on when you need to claim.
- You can claim **multiple intervals** all at once.
- Your first claim transaction uses about 85k gas. Each subsequent claim transaction costs about 55k gas.
- If you're claiming multiple intervals at once, each supplemental interval costs **6k gas** so it's most cost-effective to claim as many of them at once as possible.
- Your RPL rewards **no longer get diluted** - your RPL rewards are fixed at the time of the snapshot, and you are always eligible for that amount.
- You can **restake some (or all) of your RPL rewards** as part of the claiming transaction, which further trims down gas requirements compared to today.
- Currently, **all of your claims must be on Mainnet** but we have the infrastructure in place to build the ability to claim on Layer 2 networks at a later date.
When your node detects a new rewards checkpoint, it will automatically download the JSON file for that interval.
You can then review your rewards using the following command:
```shell
rocketpool node claim-rewards
```
As intervals go by and you accumulate rewards, the output will look like this:
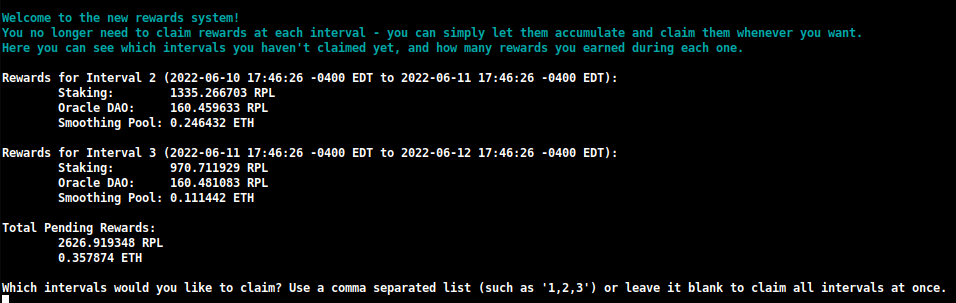
Here you can quickly see how many rewards you've earned at each interval, and can decide which ones you want to claim.
Note that **Ropsten's interval time is set to 1 day to facilitate testing.**
You can also specify an amount you want to restake during this claim:

This will let you compound your RPL rewards in one transaction, using substantially less gas than you currently need to use today.
::: tip NOTE
If you prefer to build the rewards checkpoint manually instead of downloading the one created by the Oracle DAO, you can change this setting from `Download` to `Generate` in the TUI:
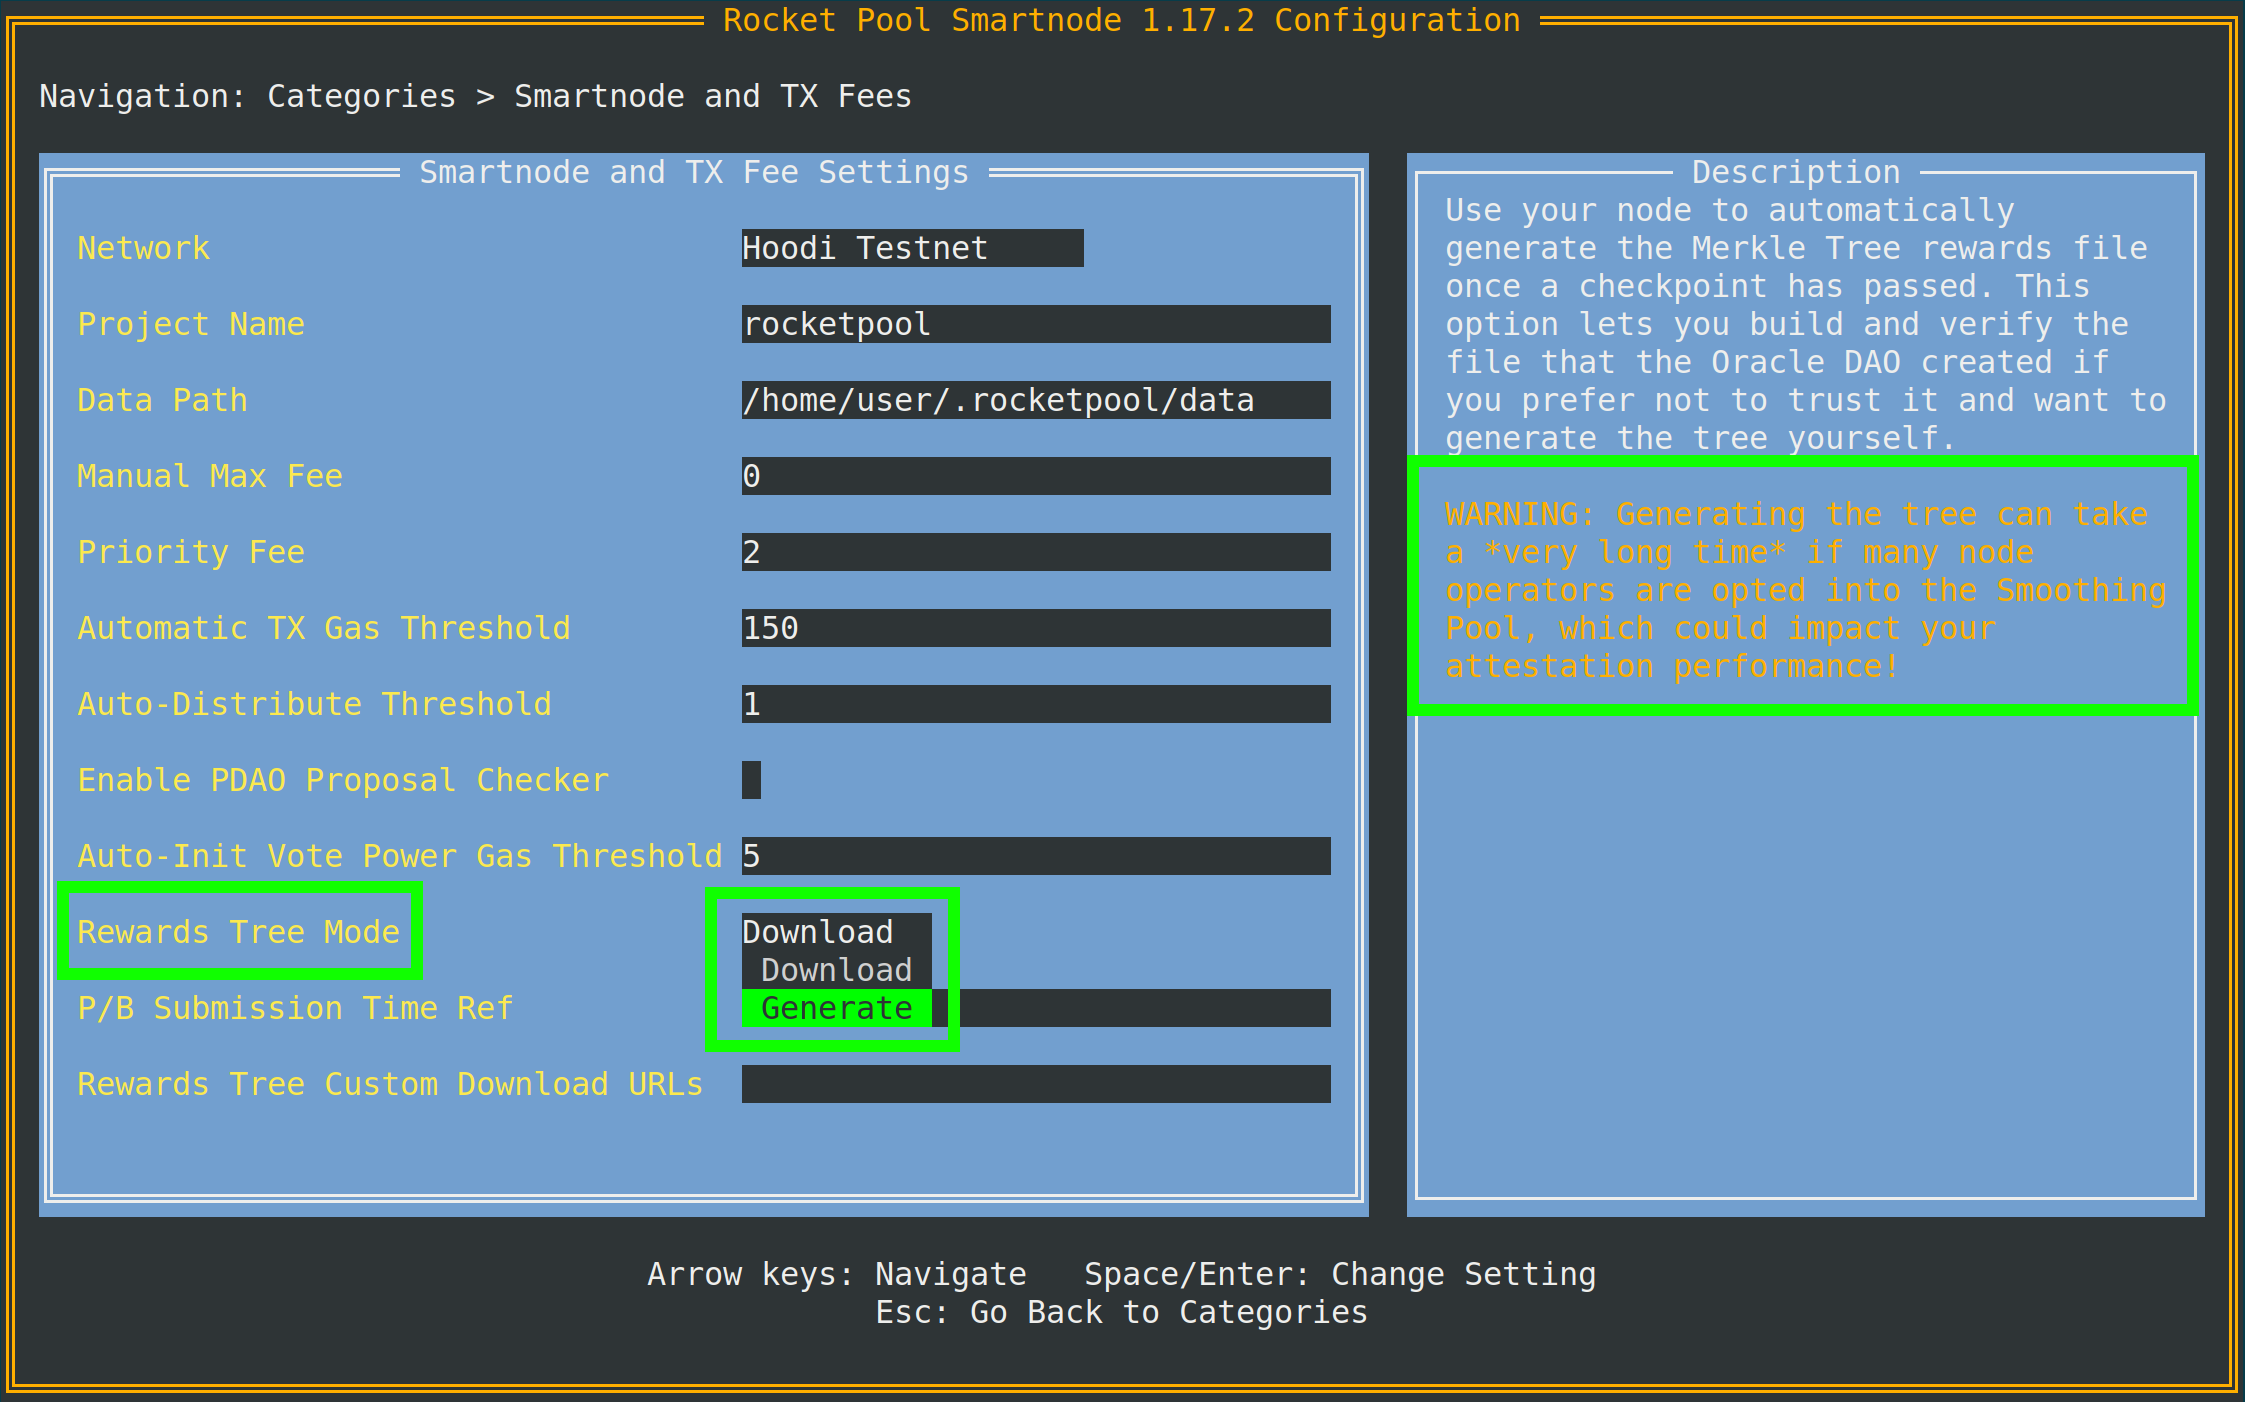
As the tip implies, you will need access to an archive node to do this.
If your local Execution client is not an archive node, you can specify a separate one (such as Infura or Alchemy) in the `Archive-Mode EC URL` box below it.
This URL will only be used when generating Merkle trees; it will not be used for validation duties.
:::
::: danger WARNING
If you are below 10% RPL collateral _at the time of the snapshot_, you will not be eligible for rewards for that snapshot.
Unlike the current system, where you can simply "top off" before you claim in order to become eligible again, this will be locked in that snapshot forever and **you will never receive rewards for that period**.
You **must** be above 10% collateral at the time of a snapshot in order to receive rewards for that period.
:::
### Smoothing Pool
One final exciting new feature of the Redstone update is the **Smoothing Pool**.
The Smoothing Pool is **an opt-in feature** that will collectively pool the priority fees of every member opted into it.
During a rewards checkpoint, the total ETH balance of the pool is divided into a pool staker portion and a node operator portion.
All of the rewards in the node operator portion are **distributed fairly to every member of the pool**.
In essence, the Smoothing Pool is a way to effectively eliminate the randomness associated with block proposals on the Beacon Chain.
If you've ever had a streak of bad luck and gone months without a proposal, you may find the Smoothing Pool quite exciting.
::: tip NOTE
The Smoothing Pool rewards are built into the Merkle Tree used for RPL rewards, so you claim them at the same time you claim RPL using `rocketpool node claim-rewards`.
:::
To help clarify the details, the Smoothing Pool uses the following rules:
- Opting into the Smoothing Pool is done on a **node level**. If you opt in, all of your minipools are opted in.
- The node operator's total share is determined by the average commission of every minipool in every node opted into the Smoothing Pool.
- Anyone can opt in at any time. They must wait a full rewards interval (1 day on Ropsten, 28 days on Mainnet) before opting out to prevent gaming the system.
- Once opted out, you must wait another full interval to opt back in.
- The Smoothing Pool calculates the "share" of each minipool (portion of the pool's ETH for the interval) owned by each node opted in.
- The share is a function of your minipool's performance during the interval (calculated by looking at how many attestations you sent on the Beacon Chain, and how many you missed), and your minipool's commission rate.
- Your node's total share is the sum of your minipool shares.
- Your node's total share is scaled by the amount of time you were opted in.
- If you were opted in for the full interval, you receive your full share.
- If you were opted in for 30% of an interval, you receive 30% of your full share.
To opt into the Smoothing Pool, run the following command:
```shell
rocketpool node join-smoothing-pool
```
This will record you as opted-in in the Rocket Pool contracts and automatically change your Validator Client's `fee recipient` from your node's distributor contract to the Smoothing Pool contract.
To leave the pool, run this command:
```shell
rocketpool node leave-smoothing-pool
```
### The Penalty System
To ensure that node operators don't "cheat" by manually modifying the fee recipient used in their Validator Client, Rocket Pool employs a penalty system.
The Oracle DAO constantly monitors each block produced by Rocket Pool node operators.
Any block that has a fee recipient other than one of the following addresses is considered to be **invalid**:
- The rETH address
- The Smoothing Pool address
- The node's fee distributor contract (if opted out of the Smoothing Pool)
A minipool that proposed a block with an **invalid** fee recipient will be issued **a strike**.
On the third strike, the minipool will begin receiving **infractions** - each infraction will dock **10% of its total Beacon Chain balance, including ETH earnings** and send them to the rETH pool stakers upon withdrawing funds from the minipool.
Infractions are at a **minipool** level, not a **node** level.
The Smart Node software is designed to ensure honest users will never get penalized, even if it must take the Validator Client offline to do so.
If this happens, you will stop attesting and will see error messages in your log files about why the Smart Node can't correctly set your fee recipient.
## Guides for Pre- and Post-Upgrade
For detailed information on how to prepare your node for the upgrade and what to do after the upgrade, please look at the following guides:
- [Guide for Docker Mode](/legacy/redstone/docker-migration.md)
- [Guide for Hybrid Mode](/legacy/redstone/hybrid-migration.md)
- [Guide for Native Mode](/legacy/redstone/native-migration.md)
---
url: /legacy/upgrading.md
---
> For AI agents: the complete documentation index is available at /llms.txt, the full documentation bundle is available at /llms-full.txt.
# Migrating the Smart Node from Previous Beta Tests
If you've been a Rocket Pool node operator during our previous beta tests on Medalla or Pyrmont, thank you for helping us improve the protocol and welcome back!
This brief guide will walk you through the process of purging your own beta build and setting up the newest build for either the Hoodi testnet, or for real staking on mainnet.
**Hoodi Network**
NOTE
You will need to create a new node wallet to interact with the Hoodi test network.
Re-using a wallet from a previous beta build may result in failures while creating new validators!
There are three major steps towards upgrading from a beta build to the Hoodi test network.
First, migrate any hoodi ETH you have to a separate wallet.
You can then migrate it back to the new node wallet you create after you reinstall Rocket Pool, so you don't need to rely as much on a faucet for hoodi ETH.
The easiest way to do this is via Metamask - see the [rETH staking guide](/liquid-staking/overview.md) for a walkthrough of how to set up a new wallet.
You can do this using the following command:
```shell
rocketpool node send XXX eth 0xabcd1234...
```
where `XXX` is the amount of hoodi ETH to send, and `0xabcd1234...` is the address of the new wallet you created.
**Note that you'll need to leave a little bit of ETH behind to pay for the gas used in the transaction!**
Next, remove all the old Docker images and chain data with the following command:
```shell
rocketpool service terminate
```
Once this is done, remove the old Rocket Pool data and settings folder.
**This will delete your old wallet and your old validators, so make sure you no longer need to save them for anything!**
```shell
sudo rm -rf ~/.rocketpool
```
Once this is done, your old beta setup will be cleaned.
You can follow the [Rocket Pool installation guide](/node-staking/eth-clients.md) for a walkthrough on installing and configuring Rocket Pool for the Hoodi testnet.
**Mainnet Network**
_Coming soon!_
---
url: /legacy/v1.3-update.md
---
> For AI agents: the complete documentation index is available at /llms.txt, the full documentation bundle is available at /llms-full.txt.
# Upgrading to Smart Node v1.3.x
Version 1.3.0 of the Smart Node stack brings some important changes that users should be aware of.
They are designed to significantly improve your node operator experience and address many of the features that our users have requested since Rocket Pool's launch.
In this guide, we'll walk you through the process of migrating from an older version of the Smart Node from an older version to v1.3.x and beyond.
## Configuration File Changes
v1.3.0 introduces some significant changes in the way the Smart Node's configuration is managed.
If you've manually modified the Smart Node configuration before, you should be aware of the following changes:
- The `config.yml` file has been removed. All of its information is now baked directly into the Smart Node stack, so users can no longer accidentally modify the file in a way that prevented the Smart Node from working properly.
- All of the user-configurable parameters that were previously part of it are now settings in the new `service config` Terminal UI.
- The `settings.yml` file has been replaced with a new file called `user-settings.yml`. This contains all of your settings for every user-configurable portion of the Smart Node.
- This file is **not meant to be modified directly**. Modification should be done through the new `service config` Terminal UI instead.
- The `chains` folder has been removed. The scripts for launching the Execution Client (ETH1), the Beacon Node, and the Validator Client now reside in the `scripts` folder.
- The `docker-compose` YAML files have been removed. Each container now gets its own file in the `templates` folder. Upon `rocketpool service start`, these templates are filled out with your settings and put into the `runtime` folder automatically.
- Modifying the templates or runtime files is not recommended. Instead, fill in your container customizations using the **override** files for each container in the `override` folder. These files will overwrite the Docker files in `runtime`, so you are free to customize them as you see fit.
- The files in `override` **will persist upon Smart Node upgrades and reinstallation** so you only need to create them once.
- If you are interested in modifying the `docker-compose` files via this override mechanic, please see [this section](/node-staking/advanced-config.md#customizing-the-docker-compose-definition-files)
## Installing the New Version
Installing the new version should feel very familiar.
Start by stopping the services and downloading the new CLI as usual:
**Docker or Hybrid Mode**
Stop the Rocket Pool services:
```
rocketpool service stop
```
Download the new Smart Node CLI for your system (choose from the tabs below):
**Linux x64**
For `x64` systems (most normal machines):
```shell
wget https://github.com/rocket-pool/smartnode-install/releases/latest/download/rocketpool-cli-linux-amd64 -O ~/bin/rocketpool
```
**Linux arm64**
For `arm64` systems:
```shell
wget https://github.com/rocket-pool/smartnode-install/releases/latest/download/rocketpool-cli-linux-arm64 -O ~/bin/rocketpool
```
**macOS x64**
For `x64` systems (most Macs):
```shell
curl -L https://github.com/rocket-pool/smartnode-install/releases/latest/download/rocketpool-cli-darwin-amd64 > /usr/local/bin/rocketpool
```
**macOS arm64**
For `arm64` systems, such as the Mac mini with M1:
```shell
curl -L https://github.com/rocket-pool/smartnode-install/releases/latest/download/rocketpool-cli-darwin-arm64 > /usr/local/bin/rocketpool
```
Now run the install command:
```
rocketpool service install -d
```
The `-d` flag tells it to ignore system dependencies like Docker, since you already have them.
NOTE
As of v1.3.0, you **no longer have to specify which network you want to install for!**
The new Smart Node will know which network you're already using, and it will let you change your network dynamically using the new Terminal UI.
**Native Mode**
NOTE
This will only update the Smart Node stack itself - it **will not** update your Execution and Consensus clients.
You will have to do this manually (see [the manual update guide](/node-staking/updates.md#manually-updating-the-execution-or-consensus-client) to learn how to do it).
Stop the Rocket Pool services:
```shell
sudo systemctl stop rp-node rp-watchtower
```
Download the new Smart Node CLI and daemon binaries:
**Linux x64**
For `x64` systems (most normal machines):
```shell
sudo wget https://github.com/rocket-pool/smartnode-install/releases/latest/download/rocketpool-cli-linux-amd64 -O /usr/local/bin/rocketpool
sudo wget https://github.com/rocket-pool/smartnode-install/releases/latest/download/rocketpool-daemon-linux-amd64 -O /usr/local/bin/rocketpoold
```
**Linux arm64**
For `arm64` systems:
```shell
sudo wget https://github.com/rocket-pool/smartnode-install/releases/latest/download/rocketpool-cli-linux-arm64 -O /usr/local/bin/rocketpool
sudo wget https://github.com/rocket-pool/smartnode-install/releases/latest/download/rocketpool-daemon-linux-arm64 -O /usr/local/bin/rocketpoold
```
**macOS x64**
For `x64` systems (most Macs):
```shell
curl -L https://github.com/rocket-pool/smartnode-install/releases/latest/download/rocketpool-cli-darwin-amd64 > /usr/local/bin/rocketpool
curl -L https://github.com/rocket-pool/smartnode-install/releases/latest/download/rocketpool-daemon-darwin-amd64 > /usr/local/bin/rocketpoold
```
**macOS arm64**
For `arm64` systems, such as the Mac mini with M1:
```shell
curl -L https://github.com/rocket-pool/smartnode-install/releases/latest/download/rocketpool-cli-darwin-arm64 > /usr/local/bin/rocketpool
curl -L https://github.com/rocket-pool/smartnode-install/releases/latest/download/rocketpool-daemon-darwin-arm64 > /usr/local/bin/rocketpoold
```
NOTE
As of v1.3.0, `config.yml` has been removed.
**You no longer need to download the installer package and extract it.**
Next, create a backup folder called `old_config_backup` in your Smart Node directory and move your old configuration files into it (`config.yml` and `settings.yml`).
The Smart Node will use these to migrate your settings to the new system.
For example, if you followed the Native setup guide and your Smart Node directory is `/srv/rocketpool`:
```shell
cd /srv/rocketpool
mkdir old_config_backup
mv config.yml old_config_backup
mv settings.yml old_config_backup
```
Now, modify the service definition files for `rp-node`:
```shell
sudo nano /etc/systemd/system/rp-node.service
```
Replace the `ExecStart` line with the following:
```
ExecStart=/home/ubuntu20/bin/rocketpoold --settings /srv/rocketpool/user-settings.yml node
```
Note that the `--config` flag has been removed, and `--settings` now points to `user-settings.yml`.
**Don't worry that this file doesn't exist yet; it will be generated automatically in the next step.**
NOTE
If you are an Oracle DAO member, you _must_ repeat the above process for the `rp-watchtower` service as well.
Finally, reload the service definitions:
```shell
sudo systemctl daemon-reload
```
After the installation, all of your old configuration files will be moved to a folder named `old_config_backup` in your Smart Node directory (by default `~/.rocketpool/old_config_backup`).
You can find them there if you ever need to refer to them for any reason.
**If you are looking for instructions on reverting to v1.2.4 from this backup, please scroll to the [Reverting to Your Previous Configuration](#reverting-to-your-previous-configuration) section at the end of this page.**
## Configuring the Smart Node with the Terminal UI
Now that you have the new CLI and package installed, all of your previous settings have been preserved and migrated to the new system.
In the next step, you should run `rocketpool service config`.
This will look quite different compared to previous versions of this function; v1.3.0 introduces the **Terminal UI**: a terminal-based dynamic user interface for configuring your Smart Node.
You must run it before starting the Docker containers after the migration process to view the configuration, verify that all of your changes were migrated successfully, and update any other settings that you desire.
When you first run it, you will be prompted with this greeting screen (if you were using **Docker or Hybrid mode**):
:::tip NOTE
**Native Mode users** will see this screen with slightly different wording, which states the Smart Node is operating in Native mode.
:::
The TUI will begin with **the Wizard**, which allows you to quickly and easily change the most important parameters of the Smart Node (such as client mode and selection).
**All of your previous settings should already be highlighted as you traverse through each page of the wizard so you don't have to remember what your previous configuration was off the top of your head.**
:::warning NOTE
**For a detailed walkthrough of this Wizard, please visit the following pages:**
- For **Docker Mode**, please visit [the new Docker configuration guide](/node-staking/config-docker.md).
- **Hybrid Mode** users: Hybrid Mode is now a **first-class feature** of the Smart Node and configuring it is _much_ easier than it used to be. Please visit [the new Docker configuration guide](/node-staking/config-docker.md) and follow it. When you are prompted to choose an Execution client mode and Consensus client mode, choose **Externally Managed** for them accordingly.
- For **Native Mode**, please visit [the new Native configuration guide](/node-staking/config-native.md).
:::
Navigate through this wizard and confirm that all of your settings are correct.
Once you are done, you will have the option of **reviewing all of the settings before saving** if you desire.
This includes settings that the Wizard didn't cover, such as the **RPL claim gas threshold** or your **max number of Geth peers** as examples.
The **main settings screen**, which you should also look at to confirm your previous settings, will look like this (for Docker and Hybrid mode users):
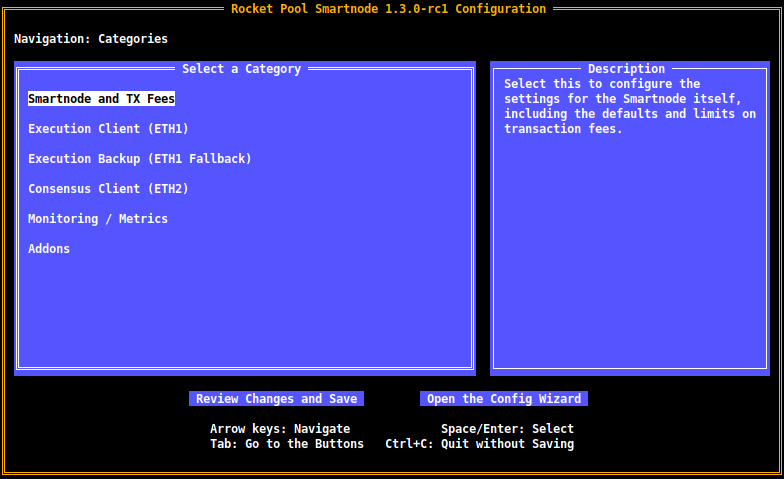
:::tip NOTE
**Native Mode users** will see a slightly different screen that is unique to Native mode and only presents the settings that are relevant for it.
:::
Feel free to explore this new UI and adjust any settings you see fit.
Use the `Arrow Keys` to navigate, and press `Enter` to enter a category or confirm any changes to a setting that you make.
Press `Esc` when you're finished editing a category to return to this home screen.
When you're ready to save your changes and start the Smart Node stack, simply press `Tab` to move down to the buttons at the bottom of the screen, select `Review Changes and Save` (by making it green via the arrow keys).
Press `Enter` to be brought to the **Review Page**, where you can see everything you've changed since the last time you ran `rocketpool service config`.
Confirm all of your change are present, and then press `Enter` again to save them.
The screen will show you which containers need to be restarted for the changes to apply, though since you're migrating, you've already turned the containers off and they will all be restarted anyway.
## Starting the Smart Node Stack
Once you've saved your configuration, the terminal will ask if you want to restart the containers automatically (unless you're using Native mode).
If you do not / cannot allow them to start automatically, you can start them up manually with the following commands:
**Docker or Hybrid Mode**
`shell rocketpool service start `
**Native Mode**
`shell sudo systemctl start rp-node rp-watchtower `
Once they're up, you can verify that everything is working as intended.
Use the `rocketpool service version` command to check that you have the correct version of the Smart Node and client containers:
```
$ rocketpool service version
Your Smartnode is currently using the Hoodi Test Network.
Rocket Pool client version: 1.3.0-rc1
Rocket Pool service version: 1.3.0-rc1
Selected Eth 1.0 client: Geth (Locally managed)
Image: ethereum/client-go:v1.10.16
Selected Eth 2.0 client: Nimbus (Locally managed)
Image: statusim/nimbus-eth2:multiarch-v22.3.0
```
Use the `rocketpool service logs eth1` and `rocketpool service logs eth2` commands to watch the logs for your Execution client (formerly ETH1 client) and your Consensus client (formerly ETH2 client).
Look out for any errors and [please visit our Discord server for help](https://discord.com/invite/rocketpool) if you encounter them.
## Reverting to your Previous Configuration
If, for any reason, you need to revert back to v1.2.4 of the Smart Node stack, don't worry!
All of your old configuration files have been preserved in a backup directory and can easily be retrieved to restore your previous setup.
Select which mode you use from the tabs below and follow the instructions.
**Docker or Hybrid Mode**
Start by replacing the CLI with the v1.2.4 CLI for your system:
**Linux x64**
For `x64` systems (most normal machines):
```shell
wget https://github.com/rocket-pool/smartnode-install/releases/download/v1.2.4/rocketpool-cli-linux-amd64 -O ~/bin/rocketpool
```
**Linux arm64**
For `arm64` systems:
```shell
wget https://github.com/rocket-pool/smartnode-install/releases/download/v1.2.4/rocketpool-cli-linux-arm64 -O ~/bin/rocketpool
```
**macOS x64**
For `x64` systems (most Macs):
```shell
curl -L https://github.com/rocket-pool/smartnode-install/releases/download/v1.2.4/rocketpool-cli-darwin-amd64 > /usr/local/bin/rocketpool
```
**macOS arm64**
For `arm64` systems, such as the Mac mini with M1:
```shell
curl -L https://github.com/rocket-pool/smartnode-install/releases/download/v1.2.4/rocketpool-cli-darwin-arm64 > /usr/local/bin/rocketpool
```
Next, copy all of your old configuration files from the `old_config_backup` folder back into the Smart Node's folder:
```shell
cd ~/.rocketpool
cp -r old_config_backup/*
```
Now, all you need to do is restart the Docker containers:
```shell
rocketpool service start
```
Done! Your old configuration is back.
**Native Mode**
Stop the Rocket Pool services:
**Linux x64**
For `x64` systems (most normal machines):
```shell
sudo wget https://github.com/rocket-pool/smartnode-install/releases/download/v1.2.4/rocketpool-cli-linux-amd64 -O /usr/local/bin/rocketpool
sudo wget https://github.com/rocket-pool/smartnode-install/releases/download/v1.2.4/rocketpool-daemon-linux-amd64 -O /usr/local/bin/rocketpoold
```
**Linux arm64**
For `arm64` systems:
```shell
sudo wget https://github.com/rocket-pool/smartnode-install/releases/download/v1.2.4/rocketpool-cli-linux-arm64 -O /usr/local/bin/rocketpool
sudo wget https://github.com/rocket-pool/smartnode-install/releases/download/v1.2.4rocketpool-daemon-linux-arm64 -O /usr/local/bin/rocketpoold
```
**macOS x64**
For `x64` systems (most Macs):
```shell
curl -L https://github.com/rocket-pool/smartnode-install/releases/download/v1.2.4/rocketpool-cli-darwin-amd64 > /usr/local/bin/rocketpool
curl -L https://github.com/rocket-pool/smartnode-install/releases/download/v1.2.4/rocketpool-daemon-darwin-amd64 > /usr/local/bin/rocketpoold
```
**macOS arm64**
For `arm64` systems, such as the Mac mini with M1:
```shell
curl -L https://github.com/rocket-pool/smartnode-install/releases/download/v1.2.4/rocketpool-cli-darwin-arm64 > /usr/local/bin/rocketpool
curl -L https://github.com/rocket-pool/smartnode-install/releases/download/v1.2.4/rocketpool-daemon-darwin-arm64 > /usr/local/bin/rocketpoold
```
Copy the previous settings files back into your Smart Node directory:
```shell
cd /srv/rocketpool
cp old_config_backup *
```
Now, revert the service definition files for `rp-node`:
```shell
sudo nano /etc/systemd/system/rp-node.service
```
Replace the `ExecStart` line with the following:
```
ExecStart=/usr/local/bin/rocketpoold --config /srv/rocketpool/config.yml --settings /srv/rocketpool/settings.yml node
```
NOTE
If you are an Oracle DAO member, you _must_ repeat the above process for the `rp-watchtower` service as well.
Finally, reload the service definitions and restart the services:
```shell
sudo systemctl daemon-reload
sudo systemctl start rp-node rp-watchtower
```
Done! Your old configuration is back.
---
url: /liquid-staking/via-l1.md
---
> For AI agents: the complete documentation index is available at /llms.txt, the full documentation bundle is available at /llms-full.txt.
# Staking via a Decentralized Exchange on the Ethereum Network (Layer 1)
As a reminder, you do not have to swap ETH for rETH directly via Rocket Pool in order to enjoy the benefits of decentralized staking.
All you need to do is hold rETH as it inherently grows in value - how you get it doesn't matter!
rETH is available for trade on several decentralized exchanges, such as [Balancer](https://docs.balancer.fi/) and [Uniswap](https://docs.uniswap.org/protocol/introduction).
The **Balancer** pool is a special kind of pool known as a [metastable pool](https://docs.balancer.fi/concepts/pools/composable-stable.html).
Metastable pools are ideal for tokens like rETH, because **they honor the true exchange rate reported by the Oracle DAO**.
This means exchanging with this pool will have **much lower slippage** and **lower fees** than a conventional decentralized exchange, so you get a much better deal when buying or selling rETH.
Other decentralized exchanges don't have this property, so you may find that their exchange rate is slightly lower.
Regardless of which pool you use, they all **tend to have lower gas fees** than staking via the official Rocket Pool website.
This makes them a great choice for users that want to stake a small amount of ETH, though it's always a good idea to compare the rate you would receive on an exchange with the exchange rate according to Rocket Pool.
In the following examples, we will show how to swap ETH for rETH using both Balancer and Uniswap.
::: warning NOTE
Currently this method is only available on Mainnet.
If you want to practice on the Hoodi Testnet, you must [swap with Rocket Pool directly](/liquid-staking/via-rp.md).
**The rest of this guide will assume you are on Mainnet.**
:::
This process can be completed with any web3-compatible wallet.
For demonstration purposes, we're going to use [MetaMask](https://metamask.io/) as it is one of the more popular wallet choices.
**You should be able to follow along using similar steps with a different wallet if you choose - just find the comparable function in your wallet for each step.**
## Setting up MetaMask
Start by installing [MetaMask](https://metamask.io/) if you haven't already.
Follow the instructions on their site to install the extension, create an account, and sign in.
Next, open the MetaMask panel using its icon in your browser toolbar.
Click on the **network dropdown** in the toolbar at the top and ensure that **Ethereum Mainnet** is selected:

Finally, add the rETH token to MetaMask so you can see your balance and access it for trading.
Click the **Assets** tab, then click **Add Token**:
Ensure that **Custom Token** is selected in this dialog.
In the **Token Contract Address** box, put the following value:
```
0xae78736Cd615f374D3085123A210448E74Fc6393
```
The **Token Symbol** should automatically be populated with `rETH`, and the **Decimals of Precision** should automatically be populated with `18`.
Accept the rest of the prompts, and then you will see the rETH token appear in your list.
Now that you have a wallet address in MetaMask, you need to transfer some ETH into it.
**You will need to supply this from an existing wallet or buy ETH on an exchange.**
## Swapping for rETH via Balancer
Now that your wallet is set up and funded, head to this URL which will open Balancer and automatically show swapping ETH for rETH:
[https://app.balancer.fi/#/trade/ether/0xae78736Cd615f374D3085123A210448E74Fc6393](https://app.balancer.fi/#/trade/ether/0xae78736Cd615f374D3085123A210448E74Fc6393)
The page will look like this initially:
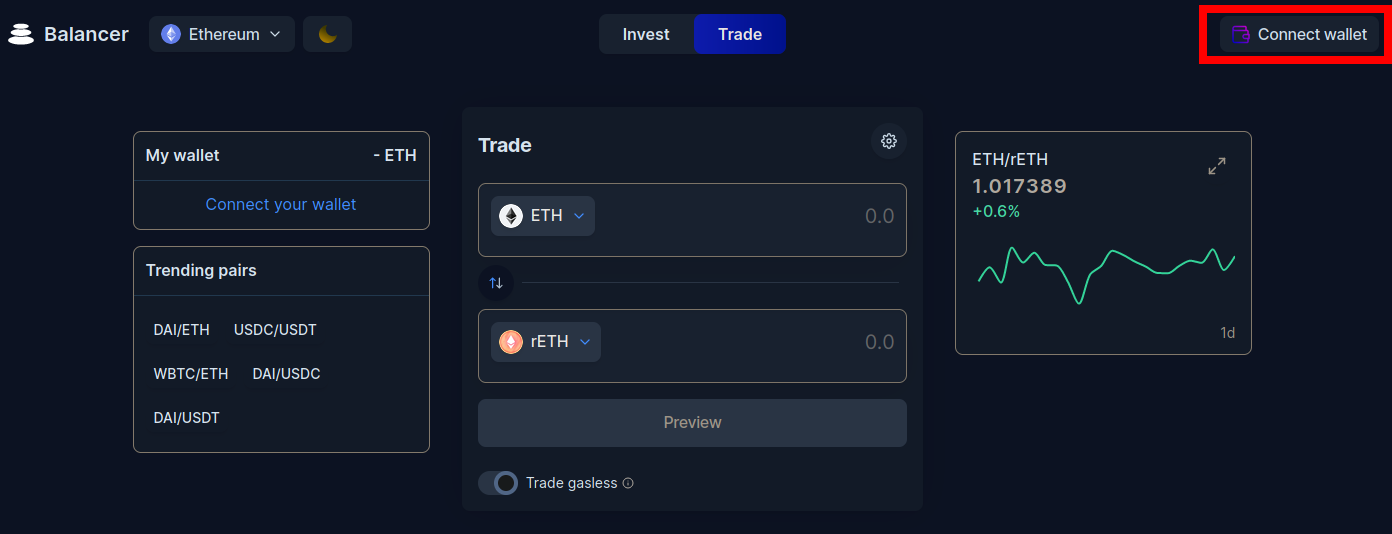
Click on the `Connect wallet` button in the top-right corner.
You will be prompted with a screen that asks you which wallet provider you want to use.
For this example, select **MetaMask**.
::: tip NOTE
If you're not using MetaMask, one of the other providers such as WalletConnect will likely be compatible with your wallet.
:::
Upon clicking that button, MetaMask will pop up with a prompt asking you to select which accounts you want to use.
Assuming you only have one, your account should already be selected.
Click **Next**.
It will then ask if you would like to give Balancer access to view the addresses of your accounts:
Click **Connect** and after a brief pause window, your wallet will be connected to Balancer.
You should now see its ETH balance in the top left side of the screen.
Now, enter the amount of ETH you want to swap and Balancer's UI will show you the amount of rETH you will receive in return:
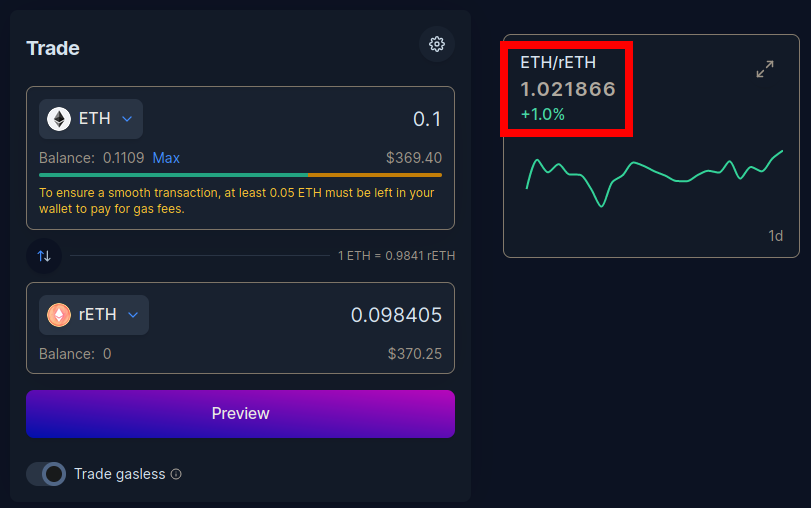
::: warning NOTE
Notice that the amount of rETH you receive will be **less than** the amount of ETH you put in.
This is normal, because **rETH is worth more than ETH** and continuously appreciates over time.
You can see this in the exchange rate highlighted at the right of the screenshot.
:::
Click **Preview** to see the details of the trade, including the minimum amount you could receive due to slippage.
If you're satisfied, click **Confirm trade**.
This will send the request to MetaMask, where you can review the total transaction cost before confirming it:
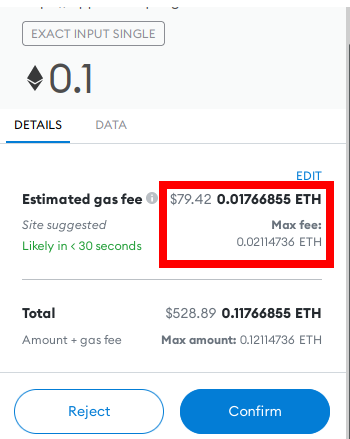
::: warning NOTE
Pay **close attention** to the estimated gas fee here, highlighted in red.
If it's a significant amount of your overall transaction (here it's over 17%), then it will take a **very long time** before you break even on staking rewards.
If this is the case, you should either wait for the network's average gas price to drop, or [consider using a Layer 2 solution instead](/liquid-staking/via-l2.md).
:::
If you are happy with the gas fees relative to the total amount of rETH you'll be receiving, click **Confirm** to submit the transaction.
After a short period, you should see a notification from MetaMask that it completed successfully, and you will now see the rETH token in your wallet.
That's it! You're now staking with Rocket Pool. All you need to do is hold onto your rETH, and you'll automatically gain your staking rewards as the value of the rETH token increases.
## Swapping for rETH via Uniswap
While we recommend you stake through Balancer because it has lower fees and a more accurate ETH-rETH rate, you can also swap for rETH via Uniswap if the need arises.
Head to this URL which will open Uniswap and automatically show swapping ETH for rETH:
[https://app.uniswap.org/#/swap?inputCurrency=eth\&outputCurrency=0xae78736cd615f374d3085123a210448e74fc6393](https://app.uniswap.org/#/swap?inputCurrency=eth\&outputCurrency=0xae78736cd615f374d3085123a210448e74fc6393)
::: warning NOTE
You may initially be prompted with a warning that looks like this:
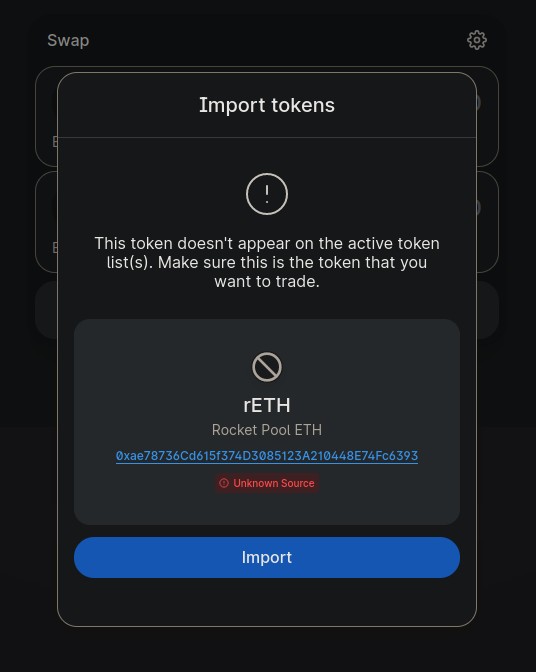
This is just a temporary warning until Uniswap adds rETH to its canonical token list.
As long as the token address is `0xae78736cd615f374d3085123a210448e74fc6393`, you can add it safely.
:::
The page will look like this initially:
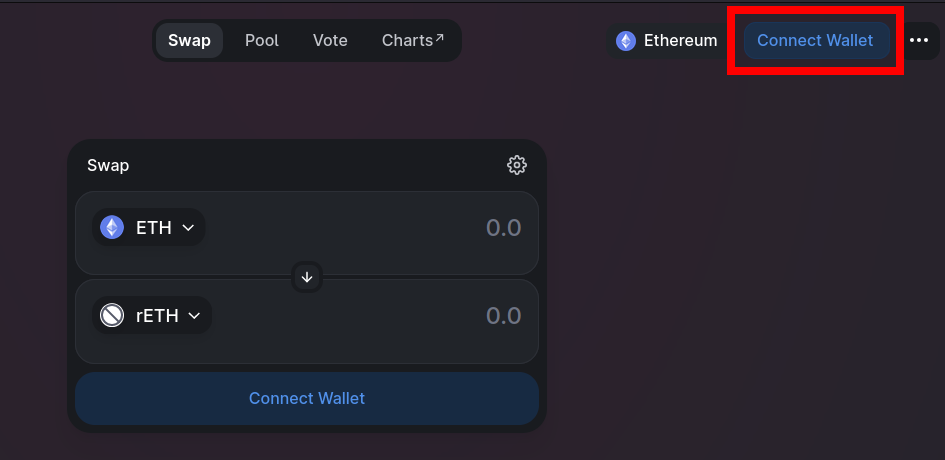
Click on one of the `Connect Wallet` buttons such as the highlighted one in the top-right corner.
You will be prompted with a screen that asks you which wallet provider you want to use.
For this example, select **MetaMask**.
::: tip NOTE
If you're not using MetaMask, one of the other providers such as WalletConnect will likely be compatible with your wallet.
:::
Upon clicking that button, MetaMask will pop up with a prompt asking you to select which accounts you want to use.
Assuming you only have one, your account should already be selected.
Click **Next**.
It will then ask if you would like to give Uniswap access to view the addresses of your accounts:
Click **Connect** and after a brief pause window, your wallet will be connected to Uniswap.
You should now see its ETH balance in the top right corner of the screen.
Now, enter the amount of ETH you want to swap and Uniswap's UI will show you the amount of rETH you will receive in return:
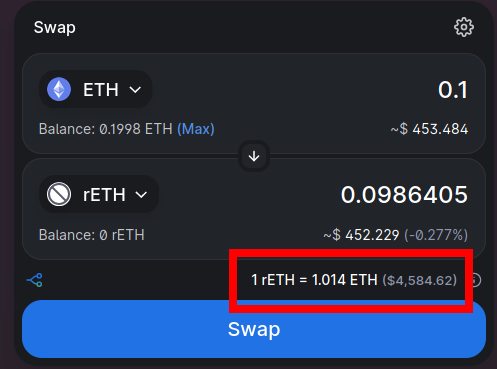
::: warning NOTE
Notice that the amount of rETH you receive will be **less than** the amount of ETH you put in.
This is normal, because **rETH is worth more than ETH** and continuously appreciates over time.
You can see this in the exchange rate highlighted at the bottom of the screenshot.
:::
Click **Swap** to see the details of the trade, including the minimum amount you could receive due to slippage.
If you're satisfied, click **Confirm Swap**.
This will send the request to MetaMask, where you can review the total transaction cost before confirming it:

::: warning NOTE
Pay **close attention** to the estimated gas fee here, highlighted in red.
If it's a significant amount of your overall transaction (here it's over 17%), then it will take a **very long time** before you break even on staking rewards.
If this is the case, you should either wait for the network's average gas price to drop, or [consider using a Layer 2 solution instead](/liquid-staking/via-l2.md).
:::
If you are happy with the gas fees relative to the total amount of rETH you'll be receiving, click **Confirm** to submit the transaction.
After a short period, you should see a notification from MetaMask that it completed successfully, and you will now see the rETH token in your wallet.
That's it! You're now staking with Rocket Pool. All you need to do is hold onto your rETH, and you'll automatically gain your staking rewards as the value of the rETH token increases.
---
url: /liquid-staking/via-l2.md
---
> For AI agents: the complete documentation index is available at /llms.txt, the full documentation bundle is available at /llms-full.txt.
# Staking via a Decentralized Exchange on Layer 2
As a reminder, you do not have to swap ETH for rETH directly via Rocket Pool in order to enjoy the benefits of decentralized staking.
All you need to do is hold rETH as it inherently grows in value - how you get it doesn't matter!
That being said, one of the main concerns (especially in recent times) is the cost of gas associated with staking or swapping ETH for rETH.
To help reduce this, the Ethereum network has started adopting the use of [rollups](https://www.youtube.com/watch?v=7pWxCklcNsU) - also known as **Layer 2**.
Layer 2 comprises several separate networks that live underneath Ethereum, executing lots of transactions like Ethereum normally would, but rolling all of them up into one single "mega" transaction and posting _that_ to the main Ethereum chain instead.
Ideally, this means you'd get all of the security benefits associated with Ethereum's decentralized nature, but enjoy **much lower gas fees** for your transactions since execution and storage costs on Layer 2s can be much lower and only a portion of your transactions must be stored on Layer 1 where state is much more expensive.
Rocket Pool currently supports two Layer 2 networks: [Optimism](https://www.optimism.io/) and [Arbitrum](https://arbitrum.io/).
Both of them have running versions of [Uniswap](https://docs.uniswap.org/protocol/introduction), the most widely-used decentralized exchange protocol.
With Uniswap, you can quickly and easily exchange ETH for rETH.
The advantage of using this approach is that **gas fees will be substantially lower** than with other methods.
If this is important to you because you want to stake a small amount of ETH, then using a Layer 2 network is likely going to be your option of choice.
The disadvantage is that you might not get the best deal on rETH.
Uniswap requires a small fee that's given to its liquidity providers, and large transactions will require large liquidity pools in order to get good deals without too much price impact.
Layer 2 networks tend to have lower rETH liquidity than the main Ethereum network.
Therefore, we recommend you compare the total rETH you would get on a Layer 2 network with what you'd get via the other methods to determine if it makes sense for you to pursue this path.
You can view the current ETH and rETH balances of the [Optimism pool](https://info.uniswap.org/#/optimism/pools/0xaefc1edaede6adadcdf3bb344577d45a80b19582) and the [Arbitrum pool](https://info.uniswap.org/#/arbitrum/pools/0xaac7de2b91293ba1791503d9127d2bdf2159db65) to determine if they have enough rETH to cover your swap.
In the following example, we will demonstrate how to interact with Layer 2 networks and use Uniswap to swap ETH for rETH.
::: warning NOTE
Currently this method is only available on Mainnet.
If you want to practice on the Hoodi Testnet, you must [swap with Rocket Pool directly](/liquid-staking/via-rp.md).
**The rest of this guide will assume you are on Mainnet.**
:::
This process can be completed with any web3-compatible wallet.
For demonstration purposes, we're going to use [MetaMask](https://metamask.io/) as it is one of the more popular wallet choices.
**You should be able to follow along using similar steps with a different wallet if you choose - just find the comparable function in your wallet for each step.**
## Setting up MetaMask on Mainnet
Start by installing [MetaMask](https://metamask.io/) if you haven't already.
Follow the instructions on their site to install the extension, create an account, and sign in.
Next, open the MetaMask panel using its icon in your browser toolbar.
Click on the **network dropdown** in the toolbar at the top and ensure that **Ethereum Mainnet** is selected:

The address directly below that is your **Ethereum wallet address**.
Before going any further, you will need to supply this wallet with ETH.
If you don't already have ETH in the account from prior usage, you can do this by transferring ETH from an existing account to this wallet address.
## Transferring ETH from Layer 1 to Layer 2 via Hop
There are several ways to bridge ETH from the Ethereum Mainnet to a Layer 2 network.
In this demonstration, we're going to use the [Hop](https://docs.hop.exchange/faq) protocol - a simple and reliable way to move ETH (and a few other coins) from Layer 1 to several Layer 2 networks, or between Layer 2 networks.
Navigate to the Hop exchange website here:
[https://app.hop.exchange/send?token=ETH](https://app.hop.exchange/send?token=ETH)
The home screen should look like this:
Start by clicking on the **Connect a Wallet** button in the top right corner.
You will be prompted with a screen that asks you which wallet provider you want to use.
For this example, select **MetaMask**.
::: tip NOTE
If you're not using MetaMask, one of the other providers such as WalletConnect will likely be compatible with your wallet.
:::
Upon clicking that button, MetaMask will pop up with a prompt asking you to select which accounts you want to use.
Assuming you only have one, your account should already be selected.
Click **Next**.
It will then ask if you would like to give Hop access to view the addresses of your accounts:
Click **Connect** and after a brief pause, your wallet will be connected to Hop.
You should now see its ETH balance in the top right corner of the screen.
Now, you can use the two dropdowns in the **From** and **To (estimated)** boxes to select your networks, and enter the amount of ETH you want to send in the **From** box.
For example, this is what it would look like to send 0.1 ETH from Layer 1 to Arbitrum:
::: warning NOTE
As a reminder, Uniswap (and thus Rocket Pool staking) is currently **only supported on Optimism and Arbitrum**.
You must select one of those networks.
:::
When you're ready, click the **Send** button.
Metamask will pop up with a confirmation dialog that shows you the gas fee associated with the transaction:
If you are comfortable with those gas fees, click **Confirm** to begin the transaction.
After a few moments, MetaMask will pop up with a successful transaction confirmation message, and your ETH will now be available on your Layer 2 network of choice!
## Connecting to Uniswap on Layer 2
Now that your wallet is set up and funded, head to this URL which will open Uniswap and automatically show swapping ETH for rETH:
[https://app.uniswap.org/#/swap?inputCurrency=eth](https://app.uniswap.org/#/swap?inputCurrency=eth)
The page will look like this initially:

Click on one of the `Connect Wallet` buttons such as the highlighted one in the top-right corner.
You will be prompted with a screen that asks you which wallet provider you want to use.
For this example, select **MetaMask**.
::: tip NOTE
If you're not using MetaMask, one of the other providers such as WalletConnect will likely be compatible with your wallet.
:::
Upon clicking that button, MetaMask will pop up with another prompt asking you to select which accounts you want to use, just like it did with Hop.
Leave your account selected, click **Next**, and then click **Connect** as you did with Hop before.
After a brief pause, your wallet will be connected to Uniswap.
You should now see its ETH balance in the top right corner of the screen.
The first thing to do is change your network from the Ethereum mainnet to the Layer 2 you just swapped to.
Click on the network dropdown at the top right of the screen (highlighted in red here):

Once you do, MetaMask will prompt you to confirm that you want to add a custom network:
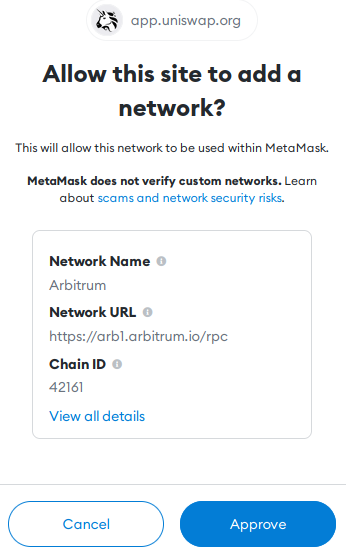
Click **Approve** and then click **Switch Network**.
This will change MetaMask to use the new Layer 2 network instead of Ethereum's mainnet for transactions.
::: warning NOTE
Before you do any transactions with MetaMask, _always_ verify which network it's currently using by opening MetaMask and looking at the network dropdown on the top!
It's easy to accidentally switch to a different network and forget!
:::
## Adding rETH to MetaMask
The next step is to add the rETH token to MetaMask so you can see your balance and access it for trading.
Click the **Assets** tab, then click **Add Token**:

Ensure that **Custom Token** is selected in this dialog, and select the appropriate tab for the Layer 2 network you chose below:
**Optimism**
In the **Token Contract Address** box, put the following value:
```shell
0x9bcef72be871e61ed4fbbc7630889bee758eb81d
```
The **Token Symbol** should automatically be populated with `rETH`, and the **Decimals of Precision** should automatically be populated with `18`.
Accept the rest of the prompts, and then you will see the rETH token appear in your list.
**Arbitrum**
In the **Token Contract Address** box, put the following value:
```shell
0xec70dcb4a1efa46b8f2d97c310c9c4790ba5ffa8
```
The **Token Symbol** should automatically be populated with `rETH`, and the **Decimals of Precision** should automatically be populated with `18`.
Accept the rest of the prompts, and then you will see the rETH token appear in your list.
## Swapping ETH for rETH with Uniswap
The final step of the process is to do the swap!
Click on the **Select a token** dropdown and enter the address for rETH that you just added to MetaMask (you can also just type rETH, but **make sure it is the correct token and not an impostor or scam token** by verifying its address first).
::: warning NOTE
You may initially be prompted with a warning that looks like this:

This is just a temporary warning until Uniswap adds rETH to its canonical token list on the Layer you're using.
As long as the token address is `0x9bcef72be871e61ed4fbbc7630889bee758eb81d` on Optimism or `0xec70dcb4a1efa46b8f2d97c310c9c4790ba5ffa8` on Arbitrum, you can add it safely.
:::
Next, enter the amount of ETH you want to swap and Uniswap's UI will show you the amount of rETH you will receive in return:
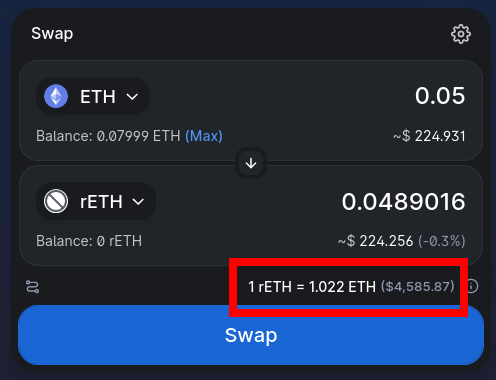
::: warning NOTE
Notice that the amount of rETH you receive will be **less than** the amount of ETH you put in.
This is normal, because **rETH is worth more than ETH** and continuously appreciates over time.
You can see this in the exchange rate highlighted at the bottom of the screenshot.
:::
Now click **Swap** to see the details of the trade, including the minimum amount you could receive due to slippage.
If you're satisfied, click **Confirm Swap**.
This will send the request to MetaMask, where you can review the total transaction cost before confirming it:
::: tip NOTE
Pay **close attention** to the estimated gas fee here.
You will likely notice that it is **approximately 10x cheaper** in terms of gas fees to do this swap on a Layer 2 network than it is on the Ethereum Mainnet!
:::
If you are happy with the gas fees relative to the total amount of rETH you'll be receiving, click **Confirm** to submit the transaction.
After a short period, you should see a notification from MetaMask that it completed successfully, and you will now see the rETH token in your wallet.
That's it! You're now staking with Rocket Pool. All you need to do is hold onto your rETH, and you'll automatically gain your staking rewards as the value of the rETH token increases.
---
url: /liquid-staking/via-rp.md
---
> For AI agents: the complete documentation index is available at /llms.txt, the full documentation bundle is available at /llms-full.txt.
# Staking Directly via Rocket Pool
## Overview
Rocket Pool's staking interface now offers two distinct routes for converting between ETH and rETH:
1. **Protocol Route** - Direct interaction with Rocket Pool smart contracts
2. **CoW Swap Route** - Decentralized exchange aggregator with MEV protection (Mainnet only)
The interface automatically recommends the best route based on current market conditions and liquidity availability.
## Routing Options Explained
### Protocol Route
**How it works:** Direct interaction with Rocket Pool's deposit pool and smart contracts on-chain.
**Advantages:**
- Instant execution
- Predictable exchange rate based on current rETH/ETH ratio
- No intermediary tokens required (direct ETH ↔ rETH conversion)
- Lower complexity
- Always get exactly as much rETH as your ETH is worth (minus a 0.05% deposit fee)
- No slippage, no liquidity issues, no sandwiching or front-running
**Limitations:**
- Subject to deposit pool limits when staking
- Subject to liquidity availability when unstaking
- Requires gas fees for transaction
- Gas fees might be expensive for small amounts
### CoW Swap Route (Mainnet Only)
::: danger WARNING
The CoW Swap route is not part of the Rocket Pool protocol. Quotes & solvers are determined by **third party** systems that are outside the control or visibility of the Rocket Pool protocol. Users should note that using CoW Swap may expose them to additional risks such as slippage, price impact, solvers that route funds incorrectly, etc. For fine grain control
we highly recommend that you use CoW Swap directly.
:::
**How it works:** Uses CoW Protocol's batch auction system to find the best price across multiple DEXs.
**Advantages:**
- MEV (Maximum Extractable Value) protection against sandwich attacks
- Gasless execution - you only sign the order
- Often provides better rates through DEX aggregation
- Always available regardless of protocol deposit pool limits
- No gas fees for the swap itself
**Limitations:**
- Requires WETH wrapping/unwrapping steps (handled automatically)
- Orders may take 2-5 minutes to execute
- Orders can expire if not matched within the time limit
- Requires one-time token approvals
## Key Concepts
### WETH (Wrapped ETH)
When using CoW Swap, the interface automatically handles WETH conversions:
- WETH is an ERC-20 token representing ETH in a standardized format
- 1 WETH always equals 1 ETH
- The interface wraps ETH to WETH before trading and unwraps after
- You only pay gas for the initial wrap (one-time)
### Slippage Tolerance
For CoW Swap orders:
- Default: 0.5%
- Adjustable based on your preference
- Higher slippage = more likely to execute
- Lower slippage = better price protection
### Order Expiry
CoW Swap orders have a time limit:
- Default: 30 minutes
- Adjustable from 5 minutes to 24 hours
- Orders automatically cancel if not executed
### Better Rate Indicator
The interface shows which route offers better value:
- Green badge with "X% better" indicates the optimal route
- Automatically pre-selects the best option
- Updates in real-time as market conditions change
### Protocol Liquidity
When unstaking rETH:
- Protocol route requires available ETH in the deposit pool
- Shows "Insufficient liquidity" when pool is empty
- Automatically routes through CoW Swap when protocol liquidity is unavailable
## Getting Started
**Preparing on the Hoodi Testnet**
WARNING
When practicing staking on the test network, you **do not need to provide any of your real ETH** during this process.
You will be given **fake test ETH** to use instead.
**Do not attempt to move your real ETH on mainnet to the testnet or you will lose it permanently!**
Start by installing [MetaMask](https://metamask.io/) if you haven't already.
Follow the instructions on their site to install the extension, create an account, and sign in.
Next, open the MetaMask panel using its icon in your browser toolbar.
You will need to add the Hoodi Testnet to MetaMask.
Click on the top left dropdown & click the "Add Network" button.
You will see a list of networks, Hoodi is not in this list so click the "Add a network manually" button.
Fill in the following details:
```
Network Name: Hoodi
New RPC Url: https://rpc.hoodi.ethpandaops.io
Chain ID: 560048
Currency Symbol: ETH
Block Explorer Url: https://hoodi.etherscan.io
```
Then click Save. You should now see the Hoodi network in the top left dropdown.
Click on the **network dropdown** in the top left of the Metamask extension & select **Hoodi Test Network**.
Finally, add the rETH token to MetaMask so you can see your balance and access it for trading.
Click the **Assets** tab, then click **Add Token**:
Ensure that **Custom Token** is selected in this dialog.
In the **Token Contract Address** box, put the following value:
```
0x7322c24752f79c05ffd1e2a6fcb97020c1c264f1
```
The **Token Symbol** should automatically be populated with `rETH`, and the **Decimals of Precision** should automatically be populated with `18`.
Accept the rest of the prompts, and then you will see the rETH token appear in your list.
Now that you have a wallet address in MetaMask, you need to fill it with some test ETH.
Head over to the [Practicing with the Test Network](/node-staking/testnet/overview.md#getting-test-eth-on-hoodi) page for a quick guide on how to use a testnet faucet to get some test ETH on Hoodi.
Once you have some Hoodi ETH to test with, head to [https://testnet.rocketpool.net/](https://testnet.rocketpool.net/).
**Note:** Testnet only supports Protocol routing. CoW Swap is available on mainnet only.
**Preparing on Ethereum Mainnet**
Start by installing [MetaMask](https://metamask.io/) if you haven't already.
Follow the instructions on their site to install the extension, create an account, and sign in.
Next, open the MetaMask panel using its icon in your browser toolbar.
Click on the **network dropdown** in the toolbar at the top and ensure that **Ethereum Mainnet** is selected:
Finally, add the rETH token to MetaMask so you can see your balance and access it for trading.
Click the **Assets** tab, then click **Add Token**:
Ensure that **Custom Token** is selected in this dialog.
In the **Token Contract Address** box, put the following value:
```
0xae78736Cd615f374D3085123A210448E74Fc6393
```
The **Token Symbol** should automatically be populated with `rETH`, and the **Decimals of Precision** should automatically be populated with `18`.
Accept the rest of the prompts, and then you will see the rETH token appear in your list.
Now that you have a wallet address in MetaMask, you need to transfer some ETH into it.
You will need to supply this from an existing wallet or buy ETH on an exchange.
Once you have some ETH to stake, head to [https://stake.rocketpool.net/](https://stake.rocketpool.net/).
## Staking ETH for rETH
Once you're at the staking site, click on the **connect wallet** button. Please read through and accept the Terms of Service & Privacy Policy, this will enable different ways to connect, then click **connect metamask**.
MetaMask will prompt you to select an account to connect to the website. Choose one, confirm a few permissions, and you'll see your balances update in the UI.
### Step 1: Enter Amount
Enter the amount of ETH you want to stake in the **Stake ETH** input field.
\[Image placeholder: Input field with amount being entered]
### Step 2: Review Routing Options
The interface will display two routing options (mainnet only):
- **Protocol Card**: Shows if deposit pool is available or full
- **CoW Swap Card**: Shows estimated output and rate comparison
The better option will be highlighted with a green "X% better" badge and automatically selected.
\[Image placeholder: Routing cards showing comparison]
### Step 3: Configure Settings (CoW Swap Only)
If using CoW Swap, you can optionally:
- Adjust slippage tolerance (default 0.5%)
- Set order expiry time (default 30 minutes)
### Step 4: Execute Transaction
**Via Protocol**
Click **Stake via Protocol** button.
MetaMask will prompt you to:
1. **Approve the transaction** with gas fees shown
2. **Confirm the transaction**
::: danger IMPORTANT
Check the total gas cost before approving - if it's very expensive relative to your stake amount, consider using CoW Swap instead!
:::
Once confirmed, the transaction will be mined and you'll receive your rETH immediately.
**Via CoW Swap**
Click **Stake via CoW Swap** button.
The process involves several automated steps:
1. **WETH Wrapping** (if needed)
- Approve ETH to WETH conversion
- One-time gas fee required
2. **WETH Approval** (first time only)
- Approve CoW Protocol to use your WETH
- One-time gas fee required
3. **Sign Order**
- Review order details
- Sign with MetaMask (gasless)
- No gas fees
4. **Order Execution**
- Monitor progress in modal
- Typical wait: 2-5 minutes
- Can close modal and continue browsing
5. **Completion**
- rETH automatically appears in wallet
- View on Etherscan if needed
::: tip NOTE
It's **completely normal** to receive less rETH than the ETH you put in. rETH and ETH have a **dynamic exchange rate**: as the Rocket Pool network earns rewards, 1 rETH becomes worth more than 1 ETH.
:::
## Unstaking rETH for ETH
When you're ready to unstake and trade your rETH back for ETH, head back to the staking website and click on the **swap direction button** to switch to unstaking mode:
### Step 1: Enter Amount
Enter the amount of rETH you want to unstake in the **Unstake rETH** field.
### Step 2: Check Routing Availability
The interface will show:
- **Protocol liquidity** available in the deposit pool
- **Protocol card** status (available or "Insufficient liquidity")
- **CoW Swap card** with estimated ETH output
### Step 3: Execute Unstaking
**Via Protocol**
If protocol liquidity is available:
1. Click **Unstake via Protocol**
2. Confirm transaction in MetaMask
3. Pay gas fees
4. Receive ETH immediately
::: warning NOTE
Protocol unstaking is only possible when the deposit pool has enough ETH. If you see "Insufficient liquidity", use CoW Swap instead.
:::
**Via CoW Swap**
CoW Swap is always available for unstaking:
1. **rETH Approval** (first time only)
- Approve rETH for CoW Protocol
- One-time gas fee
2. **Sign Order**
- Review details
- Sign order (gasless)
3. **Order Execution**
- Monitor in modal
- 2-5 minute wait
4. **WETH Unwrapping** (automatic)
- Receives WETH from swap
- Automatically unwraps to ETH
- ETH appears in wallet
## Troubleshooting
### Common Issues
#### Order Expired (CoW Swap)
Your order didn't execute within the time limit.
**Solutions:**
- Increase order expiry time (up to 24 hours)
- Adjust slippage tolerance higher
- Try again with current market prices
- Use Protocol route if available
#### Insufficient Balance
Not enough ETH/rETH for the transaction.
**Solutions:**
- Check wallet balance
- Account for gas fees (Protocol route)
- Reduce stake/unstake amount
#### Pool Full (Protocol Staking)
Deposit pool has reached its limit.
**Solution:**
- Use CoW Swap route (automatically selected)
- Wait for node operators to pull ETH from pool
- Check back later for availability
#### Insufficient Liquidity (Protocol Unstaking)
Not enough ETH in deposit pool for unstaking.
**Solution:**
- Use CoW Swap route (automatically selected)
- Always available regardless of pool state
### Manual WETH Conversion
If you have WETH that wasn't automatically unwrapped:
1. Visit [swap.cow.fi](https://swap.cow.fi)
2. Connect your wallet
3. Swap WETH → ETH (1:1 ratio, gasless)
Or use Etherscan:
1. Go to WETH contract: `0xC02aaA39b223FE8D0A0e5C4F27eAD9083C756Cc2`
2. Connect wallet to "Write Contract"
3. Use `withdraw` function
4. Enter amount in Wei
5. Execute transaction
## Best Practices
### For Optimal Rates
- Let the interface auto-select the best route
- Check during low network activity for better protocol availability
- For large amounts, CoW Swap often provides better rates
- Adjust slippage carefully to balance execution likelihood vs price
### For Security
- Verify you're on the correct website: [https://stake.rocketpool.net](https://stake.rocketpool.net)
- Start with small test amounts
- Review all transaction details before confirming
- Keep some ETH for gas fees
- Only approve trusted contracts
### For Gas Optimization
- Compare gas costs between routes
- Batch transactions when possible
- Use CoW Swap for small amounts to avoid high gas fees
- Monitor gas prices at [etherscan.io/gastracker](https://etherscan.io/gastracker)
## Tax Implications
::: warning IMPORTANT
This section provides general educational information only. Tax laws vary significantly by jurisdiction and individual circumstances. **Always consult with a qualified tax professional** for advice specific to your situation.
:::
### Understanding rETH and Taxes
When staking with Rocket Pool, it's crucial to understand potential tax implications:
#### The Staking Transaction (ETH → rETH)
**Potential Tax Events:**
- **Token Swap**: Converting ETH to rETH may be considered a taxable event in many jurisdictions
- **Capital Gains/Losses**: If your ETH has appreciated since acquisition, you may owe capital gains tax
- **Cost Basis**: The value of rETH received becomes your new cost basis for future transactions
**Example Scenario:**
```
Bought 1 ETH at $1,000
Stake when ETH is worth $2,000
Potential taxable gain: $1,000
Your rETH cost basis: $2,000
```
#### Holding rETH (Earning Rewards)
**How rETH Appreciates:**
- rETH increases in value relative to ETH automatically
- No new tokens are received - the token itself appreciates
- This appreciation represents your staking rewards
**Tax Treatment Varies:**
- **Some jurisdictions**: Tax on appreciation only when realized (upon sale/swap)
- **Other jurisdictions**: May tax unrealized gains annually
- **Income vs. Capital Gains**: Classification affects tax rates
#### The Unstaking Transaction (rETH → ETH)
**Tax Considerations:**
- Converting rETH back to ETH is typically a taxable event
- Calculate gain/loss based on:
- **Cost basis**: Value when you acquired rETH
- **Disposal value**: Value when converting back to ETH
- The difference is your capital gain or loss
### Routing Method Tax Implications
#### Protocol Route
- Single taxable event per transaction
- Clear timestamp and value for tax records
- On-chain transaction provides permanent record
#### CoW Swap Route
- WETH wrapping/unwrapping typically not taxable (1:1 conversion)
- Main swap (ETH/WETH ↔ rETH) is the taxable event
- Order execution provides clear tax documentation
### Record Keeping Best Practices
**Essential Records to Maintain:**
1. **For Each Stake:**
- Date and time of transaction
- Amount of ETH staked
- Amount of rETH received
- ETH price at time of staking
- Transaction hash
- Gas fees paid
1. **While Holding:**
- Periodic snapshots of rETH/ETH exchange rate
- Your rETH balance over time
- Market values on key dates (year-end, etc.)
1. **For Each Unstake:**
- Date and time of transaction
- Amount of rETH unstaked
- Amount of ETH received
- ETH price at time of unstaking
- Transaction hash
- Gas fees paid
**Tools for Tracking:**
- Export transactions from Etherscan
- Use portfolio tracking apps that support rETH
- Maintain a spreadsheet with all transactions
- Consider using crypto tax software
### Tax Optimization Strategies
**Timing Considerations:**
- **Tax-Loss Harvesting**: Unstake during market downturns if you have losses to offset gains
- **Long-term vs. Short-term**: Many jurisdictions favor long-term holdings (typically >1 year)
- **Year-end Planning**: Consider timing of transactions around tax year boundaries
**Cost Basis Methods:**
- **FIFO (First In, First Out)**: Default in many jurisdictions
- **LIFO (Last In, First Out)**: May be available in some regions
- **Specific Identification**: Track specific rETH portions if allowed
### Common Tax Scenarios
#### Scenario 1: Regular Staking
```
Action: Stake 10 ETH for 9.5 rETH
Tax Event: Disposal of ETH, acquisition of rETH
Report: Capital gain/loss on ETH disposal
Track: 9.5 rETH with new cost basis
```
#### Scenario 2: Partial Unstaking
```
Action: Unstake 5 rETH for 5.3 ETH
Tax Event: Disposal of rETH, acquisition of ETH
Report: Capital gain/loss on rETH disposal
Track: Remaining rETH balance and cost basis
```
#### Scenario 3: DeFi Integration
```
Action: Use rETH in DeFi protocols
Tax Event: Each protocol interaction may be taxable
Report: Track all movements and value changes
Track: Yields, swaps, and liquidity provisions
```
### Jurisdiction-Specific Considerations
**United States:**
- IRS treats crypto-to-crypto swaps as taxable
- Staking rewards may be taxable when received or when sold (evolving guidance)
- Form 8949 and Schedule D for reporting
**European Union:**
- Tax treatment varies by member state
- Some countries tax upon realization, others annually
- Consider local crypto tax regulations
**United Kingdom:**
- HMRC treats staking rewards as income or capital gains depending on circumstances
- Detailed record keeping required
- Consider "bed and breakfasting" rules
**Other Jurisdictions:**
- Research your local tax authority's crypto guidance
- Many countries are still developing frameworks
- Professional advice strongly recommended
### Using Tax Software
**Popular Crypto Tax Tools:**
- Most support rETH tracking
- Can import from Etherscan
- Calculate gains/losses automatically
- Generate tax reports for your jurisdiction
**Integration Tips:**
1. Import all wallet addresses
2. Verify rETH/ETH transactions are correctly classified
3. Ensure exchange rates are accurate
4. Review calculated gains/losses
5. Export reports for tax filing
### Red Flags to Avoid
**Common Mistakes:**
- Not tracking cost basis
- Forgetting to report staking transactions
- Ignoring small transactions
- Missing DeFi interactions
- Incorrect exchange rate data
**Audit Preparation:**
- Keep all transaction records
- Document your calculation methods
- Save exchange rate sources
- Maintain wallet ownership proof
- Store records for required retention period
## FAQs
**Q: Which route should I choose?**
A: The interface automatically recommends the best route with a green "better rate" badge. Generally, use the recommended option.
**Q: Why does CoW Swap sometimes offer better rates?**
A: CoW Swap aggregates liquidity from multiple DEXs and uses batch auctions to find optimal prices, often beating the fixed protocol rate.
**Q: Is CoW Swap really gasless?**
A: Order creation and signing are gasless. You only pay gas for initial WETH wrapping and token approvals (one-time setup).
**Q: How long do CoW Swap orders take?**
A: Typically 2-5 minutes, but can vary based on market conditions.
**Q: What happens if my CoW Swap order expires?**
A: Nothing is lost. Your tokens remain in your wallet. You can place a new order with adjusted parameters.
**Q: Why is the Protocol route sometimes unavailable?**
A: **For staking:** Deposit pool is full. **For unstaking:** Insufficient ETH liquidity. These are temporary states that change as users interact with the protocol.
**Q: Are staking transactions taxable?**
A: In most jurisdictions, yes. Converting ETH to rETH and back are typically taxable events. Consult a tax professional for your specific situation.
**Q: How do I track my rETH cost basis?**
A: Record the value of ETH when you stake it - this becomes your rETH cost basis. Use transaction hashes, timestamps, and prices for accurate records.
**Q: Is moving between Protocol and CoW Swap routes different for taxes?**
A: The tax treatment is typically the same - both involve exchanging ETH for rETH. The route chosen doesn't usually affect tax obligations, though record keeping may differ slightly.
## Additional Resources
- [Rocket Pool Documentation](https://docs.rocketpool.net)
- [CoW Swap Documentation](https://docs.cow.fi)
- [Rocket Pool Discord](https://discord.gg/rocketpool)
- [Etherscan Gas Tracker](https://etherscan.io/gastracker)
## Contract Addresses
### Mainnet
- **rETH Token:** `0xae78736Cd615f374D3085123A210448E74Fc6393`
- **WETH Token:** `0xC02aaA39b223FE8D0A0e5C4F27eAD9083C756Cc2`
- **Rocket Storage:** `0x1d8f8f00cfa6758d7bE78336684788Fb0ee0Fa46`
- **CoW Protocol VaultRelayer:** `0xC92E8bdf79f0507f65a392b0ab4667716BFE0110`
### Hoodi Testnet
- **rETH Token:** `0x7322c24752f79c05ffd1e2a6fcb97020c1c264f1`
- Check [Rocket Pool Documentation](https://docs.rocketpool.net) for other Hoodi testnet addresses.
***
That's all there is to staking with Rocket Pool! We hope you find the new routing options helpful in getting the best value for your stake.
Feel free to swing by [our Discord server](https://discord.gg/rocketpool) to let us know what you thought of it and keep tabs on the project as it evolves.
---
url: /node-staking/addons/addons.md
---
> For AI agents: the complete documentation index is available at /llms.txt, the full documentation bundle is available at /llms-full.txt.
# How to Write Add-ons for Rocket Pool Smart Node
## Introduction
Rocket Pool Smart Node add-ons are extensions that provide additional features to the Smart Node stack. They can be implemented as Docker containers that integrate with the Ethereum clients or the Smart Node service. Add-ons can be enabled and configured through the Smart Node's terminal user interface (TUI) via the `rocketpool service config` command.
Add-on development can be based on two existing examples:
- **Graffiti Wall Writer**: Enables node operators to contribute to community drawings on the Beaconcha.in graffiti wall by dynamically setting block proposal graffiti. It uses a decentralized drawing tool to determine which pixels to "paint" with each proposal.
- **Rescue Node**: Provides a fallback beacon node service using credentials from the Rocket Rescue Node project. This helps prevent missed attestations during node maintenance, syncing, or outages by routing requests to a shared remote beacon node.
Add-ons are part of the Smart Node source code and must be contributed via pull request to the repository. They implement a standardized interface for configuration and integration.
## Prerequisites
- Familiarity with Go programming, as add-ons are written in Go.
- Understanding of Docker, as add-ons can run as containers.
- Knowledge of the Rocket Pool Smart Node architecture, including its Docker compose setup and configuration system.
- Access to the Smart Node repository for local development and testing.
## Steps to Create an Add-on
To create a new add-on, you will need to add code in specific locations within the Smart Node repository. The process involves implementing the add-on logic, configuring its UI, registering it, and handling integration with the Docker stack.
### 1. Implement the Add-on Logic
Create a new subdirectory in `addons/` named after your add-on (use snake_case, e.g., `my_addon`).
In this directory, create a Go file (e.g., `my_addon.go`) that defines the add-on struct and implements the `SmartnodeAddon` interface from `github.com/rocket-pool/smartnode/shared/types/addons`.
```
type MyAddon struct {
cfg *MyAddonConfig `yaml:"config,omitempty"`
}
func NewMyAddon() addons.SmartnodeAddon {
return &MyAddon{
cfg: NewConfig(),
}
}
```
Key methods to implement:
- `GetName()`: Returns the display name of the add-on.
- `GetDescription()`: Returns a brief description.
- `GetConfig()`: Returns the configuration object with parameters (e.g., enabled flag, API keys, URLs).
- `GetEnabledParameter()`: Returns the parameter controlling whether the add-on is enabled.
- Methods for starting/stopping the add-on, generating Docker compose sections, or interacting with other services.
If the add-on runs a Docker container:
- Define the Docker image (e.g., a custom image or external one).
- Specify volumes, ports, or environment variables needed.
For example, the Graffiti Wall Writer add-on runs a container that periodically updates the validator client's graffiti file based on a JSON configuration for the image to draw.
The Rescue Node add-on configures the validator client to use a remote fallback beacon node via a proxy, requiring username and password parameters.
### 2. Create the Configuration UI
Add a file in `rocketpool-cli/service/config/` named `addon-myaddon.go`.
This file defines the TUI page for configuring the add-on using the `tview` library.
Key elements:
- Define a struct `AddonMyAddonPage` with fields for the layout, master config, and form items.
- Constructor `NewAddonMyAddonPage` that initializes the page and calls `createContent()`.
- `createContent()`: Sets up the form with checkboxes (e.g., enabled) and input fields for other parameters.
- Event handlers like `handleEnableChanged()` to show/hide parameters based on the enabled state.
Example snippet:
```go
package config
import (
"fmt"
"github.com/rivo/tview"
"github.com/rocket-pool/smartnode/shared/services/config"
"github.com/rocket-pool/smartnode/shared/types/addons"
cfgtypes "github.com/rocket-pool/smartnode/shared/types/config"
)
// The page wrapper for the add-on config
type AddonMyAddonPage struct {
addonsPage *AddonsPage
page *page
layout *standardLayout
masterConfig *config.RocketPoolConfig
addon addons.SmartnodeAddon
enabledBox *parameterizedFormItem
otherParams []*parameterizedFormItem
}
// Creates a new page for the add-on settings
func NewAddonMyAddonPage(addonsPage *AddonsPage, addon addons.SmartnodeAddon) *AddonMyAddonPage {
configPage := &AddonMyAddonPage{
addonsPage: addonsPage,
masterConfig: addonsPage.home.md.Config,
addon: addon,
}
configPage.createContent()
// ... (additional code for page setup)
}
// Creates the content for the settings page
func (configPage *AddonMyAddonPage) createContent() {
// Setup layout and form items
// ...
}
```
### 3. Register the Add-on
Update `addons/constructors.go` to include a constructor for your add-on.
This file contains functions to instantiate all add-ons.
Example:
```
func NewMyAddon() addons.SmartnodeAddon {
return my_addon.NewMyAddon()
}
```
Then add it to the list of available addons within the`NewRocketPoolConfig` in `shared/services/config/rocket-pool-config.go`.
```
// Addons
cfg.GraffitiWallWriter = addons.NewGraffitiWallWriter()
cfg.RescueNode = addons.NewRescueNode()
cfg.MyAddon = addons.MyAddon()
```
### 4. Integrate with Docker Compose
Add-ons often require modifications to the Docker compose files.
- Add templates in the `shared/services/rocketpool/assets/install/templates/addons` directory for your add-on's compose section (e.g., `my_addon.tmpl`).
- The add-on code generates the compose YAML when enabled, including services, volumes, and dependencies.
The `composeAddons` function inside the `services/rocketpool/client` folder is responsible for provisioning Docker Compose containers based on the Rocket Pool configuration, setting up runtime, template and override assets for the add-on.
For installation:
- Update the installer script (`install.sh`) if the add-on needs files copied (e.g., default config files).
### 5. Optional Integrations
- **Node Status Command**: If the add-on has status info (e.g., credential expiration for Rescue Node), update `rocketpool-cli/node/status.go` to display it.
- **Metrics or Logs**: Integrate with Prometheus/Grafana if applicable.
- **External Dependencies**: If using an external repo (e.g., Rescue Node proxy), ensure it's documented.
### 6. Testing and Submission
- Build and test locally: Use the Makefile to build the Smart Node, install, and enable your add-on.
- Verify in the TUI, check Docker containers, and test functionality.
- Submit a pull request to [https://github.com/rocket-pool/smartnode](https://github.com/rocket-pool/smartnode) with your changes.
## Example: Graffiti Wall Writer
- **Purpose**: Draws community images on the Beaconcha.in graffiti wall using block proposals.
- **Implementation**: Runs a Docker container that fetches wall state and updates the validator's graffiti file.
- **Config**: Enabled flag and parameter for image JSON URL (default: Rocket Pool logo).
- **Integration**: The container mounts the validator's data directory to write the graffiti file. Enabled via TUI; contributes to decentralized drawing.
## Example: Rescue Node
- **Purpose**: Fallback beacon node to avoid penalties during downtime.
- **Implementation**: Configures the validator client to use a remote proxy with authentication.
- **Config**: Enabled flag, username, and password from Rescue Node website.
- **Integration**: Modifies validator config to point to the rescue proxy. Shows credential status in `rocketpool node status`.
For more details, review the source code in the repository or contribute to improve add-on development docs.
---
url: /node-staking/advanced-cli.md
---
> For AI agents: the complete documentation index is available at /llms.txt, the full documentation bundle is available at /llms-full.txt.
# \[NYI] Advanced CLI Usage
As a node operator, the command-line interface (CLI) is the tool that you will use to interface with nearly every aspect of Rocket Pool.
In this section, we'll go through a detailed walkthrough of how to use it.
## Wallet Control
---
url: /node-staking/advanced-config.md
---
> For AI agents: the complete documentation index is available at /llms.txt, the full documentation bundle is available at /llms-full.txt.
# Advanced Smart Node Configuration for Docker Mode
In this section, we will cover a few techniques that expand the Smart Node's customization and functionality.
## Allowing External Validator Clients to Connect to the Smart Node
Because the Smart Node manages the Execution client and Beacon Node, it handles much of their configuration (including updates) automatically.
One common request from users is for the ability to attach an externally-managed Validator client to the Smart Node's Execution and Consensus clients.
Essentially, this acts as a sort of **"Reverse Hybrid" mode**; instead of the Smart Node managing its own Validator client and connecting to an external Execution and Consensus client, it manages all three things and an external Validator client can use its own clients instead.
Enabling this is trivial using the [Settings Manager](/node-staking/config-docker.md#configuring-via-the-settings-manager).
### Execution Client
To enable access to the Execution client, go to the **Execution Client (ETH1)** category and check the **Expose RPC Ports** box:
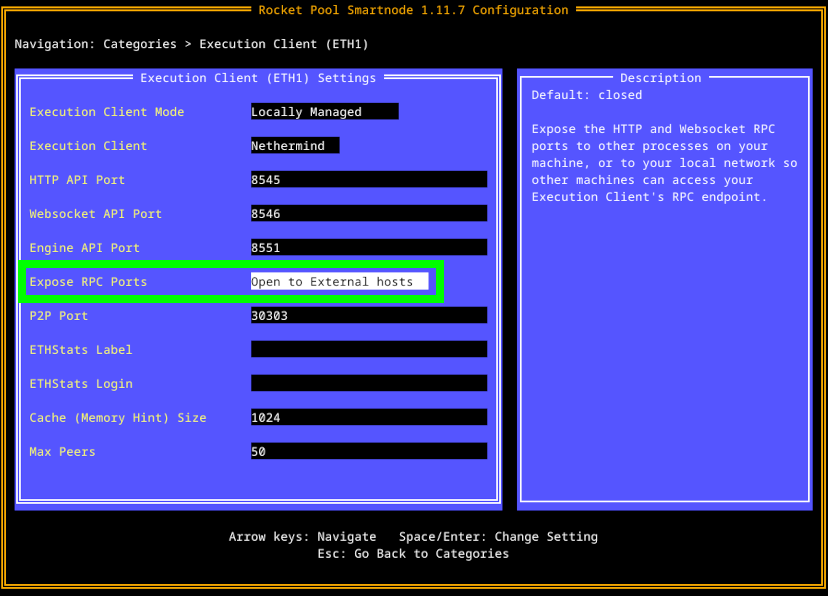
This will open the RPC ports (default 8545 for HTTP and 8546 for Websockets) on your node, so other machines on your local network can connect to them.
For example, if your node's local IP address were `192.168.1.45`, then by enabling this option you could use `http://192.168.1.45:8545` as the Execution client URL for your other services.
### Beacon Node (Consensus Client)
To enable access to the Consensus client's Beacon Node, go to the **Consensus Client (ETH2)** category and check the **Expose API Port** box:
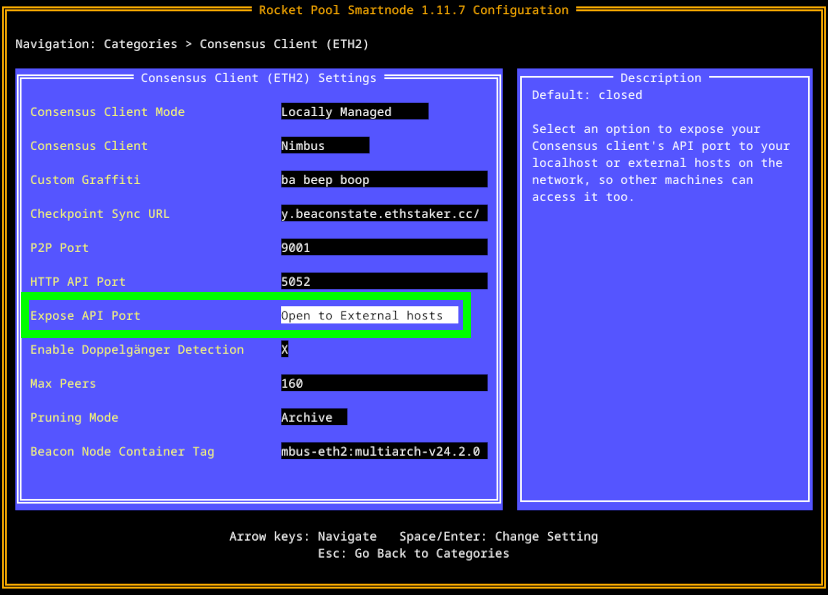
This will open the HTTP API port (default 5052) on your node, so other machines on your local network can connect to it.
::: warning Note: Ports opened via iptables, not ufw
When you expose RPC and API endpoints in using the Rocketpool configurator, ports are opened via `iptables` and therefore will not show up as a `ufw` firewall rule. To see which ports are open you can use `sudo lsof -i -P -n | grep LISTEN` or similar command.
:::
For example, if your node's local IP address were `192.168.1.45`, then by enabling this option you could use `http://192.168.1.45:5052` as the Beacon Node URL for your other services.
::: warning NOTE FOR PRYSM USERS
**Prysm** has a second box called `Expose RPC Port` that must be checked if you want to attach an externally-managed Prysm Validator Client to your Beacon Node.
This is because Prysm's Validator Client cannot currently connect to a Beacon Node via the standard Beacon HTTP API.
In the future, this will be fixed and there will only be one checkbox like the other clients.
:::
### MEV-Boost
To enable access to MEV-Boost, go to the **MEV-Boost** category and check the **Expose API Port** box:
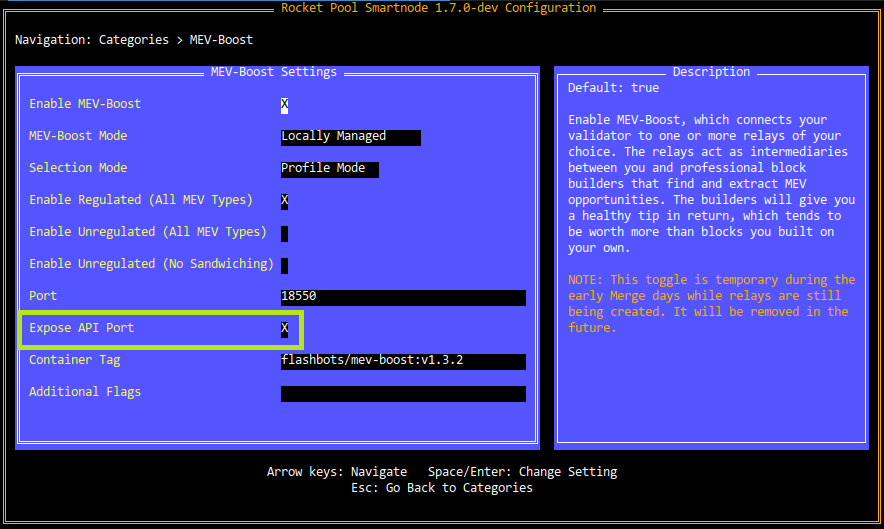
This will open the HTTP API port (default 18550) on your node, so other machines on your local network can connect to it.
For example, if your node's local IP address were `192.168.1.45`, then by enabling this option you could use `http://192.168.1.45:18550` as the MEV-Boost URL for your other services.
## Customizing the Docker-Compose Definition Files
While the Settings Manager contains many options you can use to customize your node, it doesn't wrap all of the features that `docker-compose` provides.
Some users require supplemental customizations to the Smart Node's `docker-compose` files.
Because the `docker-compose` files are regenerated (into the `runtime` directory) from their templates (in the `templates` directory) each time `rocketpool service start` is called, modifying the runtime files is not advised.
Instead, we leverage `docker-compose`'s [inherent override functionality](https://docs.docker.com/compose/extends/#adding-and-overriding-configuration) to let you make any modifications you need to which will be preserved upon restarts.
Furthermore, this system _also_ **preserves your modifications after an upgrade to or reinstallation of the Smart Node stack**.
To do this, simply open the file for the container of your choice in the `override` folder, and add your customizations to it there.
Anything you put in these files will **override** whatever the corresponding settings are in the `docker-compose` files from the `runtime` folder.
For example, say you wanted to [add AWS credentials to Grafana for CloudWatch support](https://grafana.com/docs/grafana/latest/administration/configure-docker/#configure-aws-credentials-for-cloudwatch-support).
You could do it by modifying `override/grafana.yml` like so:
```yaml
# Enter your own customizations for the Grafana container here. These changes will persist after upgrades, so you only need to do them once.
#
# See https://docs.docker.com/compose/extends/#adding-and-overriding-configuration
# for more information on overriding specific parameters of docker-compose files.
version: "3.7"
services:
grafana:
x-rp-comment: Add your customizations below this line
environment:
- GF_AWS_PROFILES=default
- GF_AWS_default_ACCESS_KEY_ID=YOUR_ACCESS_KEY
- GF_AWS_default_SECRET_ACCESS_KEY=YOUR_SECRET_KEY
- GF_AWS_default_REGION=us-east-1
```
This will merge the four environment variables listed here to the existing array of environment variables in the Grafana container.
Alternatively, if you wanted to save eth1 client data to a non-default path on your filesystem, you would modify `override/eth1.yml` to contain volume parameters like:
```yaml
# Enter your own customizations for the eth1 container here. These changes will persist after upgrades, so you only need to do them once.
#
# See https://docs.docker.com/compose/extends/#adding-and-overriding-configuration
# for more information on overriding specific parameters of docker-compose files.
version: "3.7"
services:
eth1:
x-rp-comment: Add your customizations below this line
volumes:
eth1clientdata:
driver: local
driver_opts:
type: none
o: bind
device: "/data/eth/eth1"
```
This will merge the parameters into the `eth1clientdata` volume specification, causing `/data/eth/eth1` to be the location of the eth1 client data rather than the default (`/var/lib/docker/volumes/rocketpool_eth1clientdata` if using default Docker configuration).
For more information on how `docker-compose` overrides work, please visit [https://docs.docker.com/compose/extends/#adding-and-overriding-configuration](https://docs.docker.com/compose/extends/#adding-and-overriding-configuration).
## Custom and override networks
Smart Node loads official network definitions from YAML instead of hard-coding them.
- Official networks ship in `networks-default.yml`. On every `rocketpool service install`, Smart Node overwrites `~/.rocketpool/networks-default.yml` with the packaged file, so do not edit that file for lasting changes.
- To add a network or override an official one without rebuilding, create `~/.rocketpool/networks-extra.yml` using the same schema (`version` plus a `networks` list). Same-name entries replace the official ones; new names are appended and appear in `rocketpool service config`.
- Extra networks may omit Rocket Pool contract addresses. Use that when you only need your execution and consensus clients to sync a chain that has no Rocket Pool deployment.
::: tip NOTE
After you change `networks-extra.yml`, run `rocketpool service config`, select the network you want, save, and restart the affected containers so the new definition is picked up.
:::
Example — append a sync-only chain with no Rocket Pool contracts:
```yaml
version: 1
networks:
- name: plataberget
label: Platåberget
description: |
Platåberget is the public Glamsterdam / Gloas testnet (ethpandaops glamsterdam-devnet-8).
It launched 13 August 2026 (chain ID 7091047534) with the Gloas fork at epoch 1536.
There are no Rocket Pool contracts on this network; use it to run execution and consensus clients.
chainID: 7091047534
txWatchUrl: https://dora.plataberget.ethpandaops.io
beaconExplorerUrl: https://dora.plataberget.ethpandaops.io
beaconNetwork: plataberget
commitBoostChainName: plataberget
clientTagSet: test
customChainConfigDir: plataberget
supportsMevBoost: false
allowNonBlsWithdrawalCredentials: false
isProduction: false
nethermindPruneThresholdMb: 51200
```
::: warning NOTE
If you pick a network with no Rocket Pool storage address, Smart Node node/protocol commands that need Rocket Pool contracts will not work on that network. Client syncing can still proceed.
:::
## Docker image pins
Smart Node pins official client and Smart Node images by digest so a retagged image cannot be pulled.
- Defaults live in `~/.rocketpool/mainnet.env` as `repo:tag@sha256:…`. `rocketpool service install` always overwrites this file (and `testnet.env` / `devnet.env`).
- To pin a different image for one network only, put that key in the matching `{network}.env` file. Keys you omit inherit the mainnet pin.
- TUI tag fields still override the pins. They win over both env files until you restore the default.
## Node Daemon HTTP API
The node daemon serves an HTTP API (default port **8280**) used by the local `rocketpool` CLI and by custom tooling.
Configure it in `rocketpool service config` under the **API** category. Native mode uses the same category.
| Setting | Purpose |
| ------------------- | -------------------------------------------------------------------------------------------------------------------------------------------------------------------------------------- |
| **API Port** | Listen port. Default `8280`. |
| **Expose API Port** | **Closed** — not published; the host CLI cannot reach the API in Docker. **Open to Localhost** (default) — `127.0.0.1:8280`. **Open to External hosts** — published on all interfaces. |
Changing these settings requires a node container restart. The Settings Manager flags that for you.
::: warning Do not expose the API without TLS
The API can export your wallet, send funds, and change node settings.
Do not publish it to the public internet without TLS. Put it behind a reverse proxy, or keep it on a trusted LAN.
:::
If you run multiple nodes on the same machine, each instance needs its own API port and its own api-tokens.json file.
### API authentication
Starting with Smart Node v1.22.0, API routes require a bearer token. Clients send:
```
Authorization: Bearer
```
Query-string tokens are ignored. The `rocketpool` CLI on this machine loads the write token from the data directory and sends it automatically.
If the CLI returns `unauthorized`, point `-c` at the same config directory the daemon is using, or copy that install's `data/api-tokens.json`.
| Setting | Purpose |
| ------------------------- | ------------------------------------------------------------------------------------------------------------------------------------------------------------------------------------------------------------------------------------------------------------------------------------------------------------------------------------------------------- |
| **API Token** | Write-scoped secret. Format is `rpsn_` followed by 64 hex characters. Treat it like a password. Clearing the field and saving regenerates it. It is stored in `api-tokens.json`, not in `user-settings.yml`. |
| **API Token Comment** | Non-secret label stored with the token. Default `rocketpool CLI`. |
| **Unauthenticated Reads** | Server policy, not a per-token privilege. Default is **Require a token for read routes**: every route except `/healthz` needs a valid bearer token. Choosing **Allow unauthenticated reads** lets status, balances, and `can-*` estimates run without a token. Wallet operations, transactions, and other write routes still need a write-scoped token. |
| **API Rate Limit** | Maximum requests per second. `0` disables the limit (this is the default). Burst equals one second of quota. Over the limit, the API returns HTTP 429 with `Retry-After: 1`. |
`/healthz` never requires a token.
Tokens live in `/api-tokens.json` (host default `~/.rocketpool/data/api-tokens.json`). The Docker daemon sees the same file at `/.rocketpool/data/api-tokens.json` on the data-directory bind mount. The file is mode `0600`.
Each record has a scope:
- `write` — all routes.
- `read` — read routes only. Write routes return HTTP 403 `forbidden`.
Add extra tokens by appending records to `api-tokens.json`, then restart the node:
```json
{
"tokens": [
{
"token": "rpsn_…",
"comment": "rocketpool CLI",
"scope": "write"
},
{
"token": "rpsn_…",
"comment": "monitoring",
"scope": "read"
}
]
}
```
Copy the token from the **API Token** field or from `api-tokens.json`. Do not put it in logs or screenshots.
### Calling the API
Read-only query (GET). A token is required unless unauthenticated reads are enabled:
```shell
curl -s -H "Authorization: Bearer $RP_API_TOKEN" \
http://127.0.0.1:8280/api/node/sync | jq
```
```json
{
"status": "success",
"error": "",
"ecStatus": {
"primaryEcStatus": {
"isWorking": true,
"isSynced": true,
"syncProgress": 1,
"networkId": 560048
}
},
"bcStatus": {
"primaryEcStatus": {
"isWorking": true,
"isSynced": true,
"syncProgress": 1
}
}
}
```
Transaction (POST). Always requires a write-scoped token:
```shell
curl -s -X POST \
-H "Authorization: Bearer $RP_API_TOKEN" \
-d "timezoneLocation=America/Los_Angeles" \
http://127.0.0.1:8280/api/node/set-timezone | jq
```
```json
{
"status": "success",
"error": "",
"txHash": "0x0bab800962146f3e41c701601be6d636f9bec261ef6cabe667bc560ed19dfffb"
}
```
| Status | Body | When |
| ------ | --------------------------------------------------------------------------- | -------------------------------- |
| 401 | `{"status":"error","error":"unauthorized"}` plus `WWW-Authenticate: Bearer` | Missing or invalid token |
| 403 | `{"status":"error","error":"forbidden"}` | Read token used on a write route |
| 429 | `{"status":"error","error":"too many requests"}` plus `Retry-After: 1` | Rate limit exceeded |
## (Experimental) Enabling Dual-Stack (IPv4 + IPv6) networking
This option is for users running Docker mode configurations with locally managed clients.
Starting with Smart node v1.20.2, Rocket Pool supports dual-stack (IPv4 + IPv6) networking for your Ethereum clients.
When enabled, your consensus client can connect to both IPv4 and IPv6 peers, potentially improving peer discovery.
If you use the Besu (v1.22.0 and newer) or Reth (v1.24.4 and newer) execution client, it connects to IPv6 peers too.
This feature is also useful if your network is behind a CGNAT and struggles to peer using IPv4.
::: tip TIP
The following site gives a rundown on the status of Ethereum IPv6 Support.
[ipv6eth.info](https://ipv6eth.info/)
:::
::: warning EXPERIMENTAL FEATURE
IPv6 support is currently experimental. While it has been tested with all supported consensus clients, you may encounter issues depending on your network configuration.
If you experience problems, you can disable IPv6 and restart your clients to return to IPv4-only mode. If you encounter any issues with IPv6 support,
please report them in the **#support** channel on the [Rocket Pool Discord](https://discord.gg/rocketpool).
:::
When you enable IPv6 support:
- Your Docker network will be configured for dual-stack (IPv4 + IPv6)
- Your consensus client will listen on both IPv4 and IPv6 addresses
- If you use Besu or Reth, your execution client will listen on both IPv4 and IPv6 addresses on its usual P2P port (default `30303`)
- Your node will be able to discover and connect to IPv6 peers in addition to IPv4 peers
- Your node will advertise its IPv6 address in its ENR (Ethereum Node Record), making it discoverable by other IPv6 nodes (depends on your consensus client; see the table below)
- Changing the setting (on or off) recreates the Docker network, so all Rocket Pool containers are stopped, removed and recreated. The Smart Node asks you to confirm first. Your chain data and wallet/validator keys are not affected, but your clients will be offline briefly while they restart.
### Client-Specific Behavior
Different consensus clients handle IPv6 with varying levels of support:
| Client | IPv6 Listening | IPv6 Broadcasting (ENR) | Peering Behavior | Notes |
| -------------- | -------------- | ----------------------- | ---------------- | ------------------------------------------------------------------------------------------------------------ |
| **Teku** | Full | Full | Prioritizes IPv6 | Prefers IPv6 connections when available. Uses separate IPv6 ports (default: 9090, and 8002 for QUIC). |
| **Lighthouse** | Full | Full | No preference | Connects to whichever address (IPv4 or IPv6) responds first. Typically sees \~1-2% IPv6 peers. |
| **Lodestar** | Full | Full | Prioritizes IPv4 | Listens and broadcasts on both IPv4 and IPv6, but only peers via IPv6 if the other node has IPv4 disabled. |
| **Nimbus** | Full | IPv4 only\* | Primarily IPv4 | Can accept inbound IPv6 connections, but broadcasts only IPv4 in ENR. |
| **Prysm** | IPv4 only\* | IPv4 only\* | Primarily IPv4 | Listens and broadcasts on IPv4 only, so IPv6 peers can't reach it. Can still connect out to some IPv6 peers. |
\* By default, uses IPv4. On IPv6-only hosts, uses IPv6 instead.
### Prerequisites
Before enabling IPv6, ensure that:
1. Your ISP/host provides IPv6 connectivity - Test this with [ipv6test.google.com/](https://ipv6test.google.com/)
or by running this command in your CLI: `curl -6 https://icanhazip.com`. If the command returns an IPv6 address in this format: `xxxx:xxxx:xxxx:xxxx:xxxx:xxxx:xxxx:xxxx`, you are good to go.
2. Your firewall allows IPv6 traffic on the consensus client P2P ports. The defaults are `9001` (TCP and UDP) and `8001` (UDP, for QUIC). Teku requires additional dedicated
ports for IPv6. The default Teku IPv6 ports are `9090` (TCP and UDP) and `8002` (UDP, for QUIC). If you use Besu or Reth, also allow IPv6 traffic on the execution client P2P port (default `30303`).
3. You're using locally managed clients in Docker mode (not externally managed clients)
### How to Enable IPv6
To enable IPv6, go to the Smart Node and TX Fees category
and check the **Enable IPv6** box then save and restart the Smart Node stack.
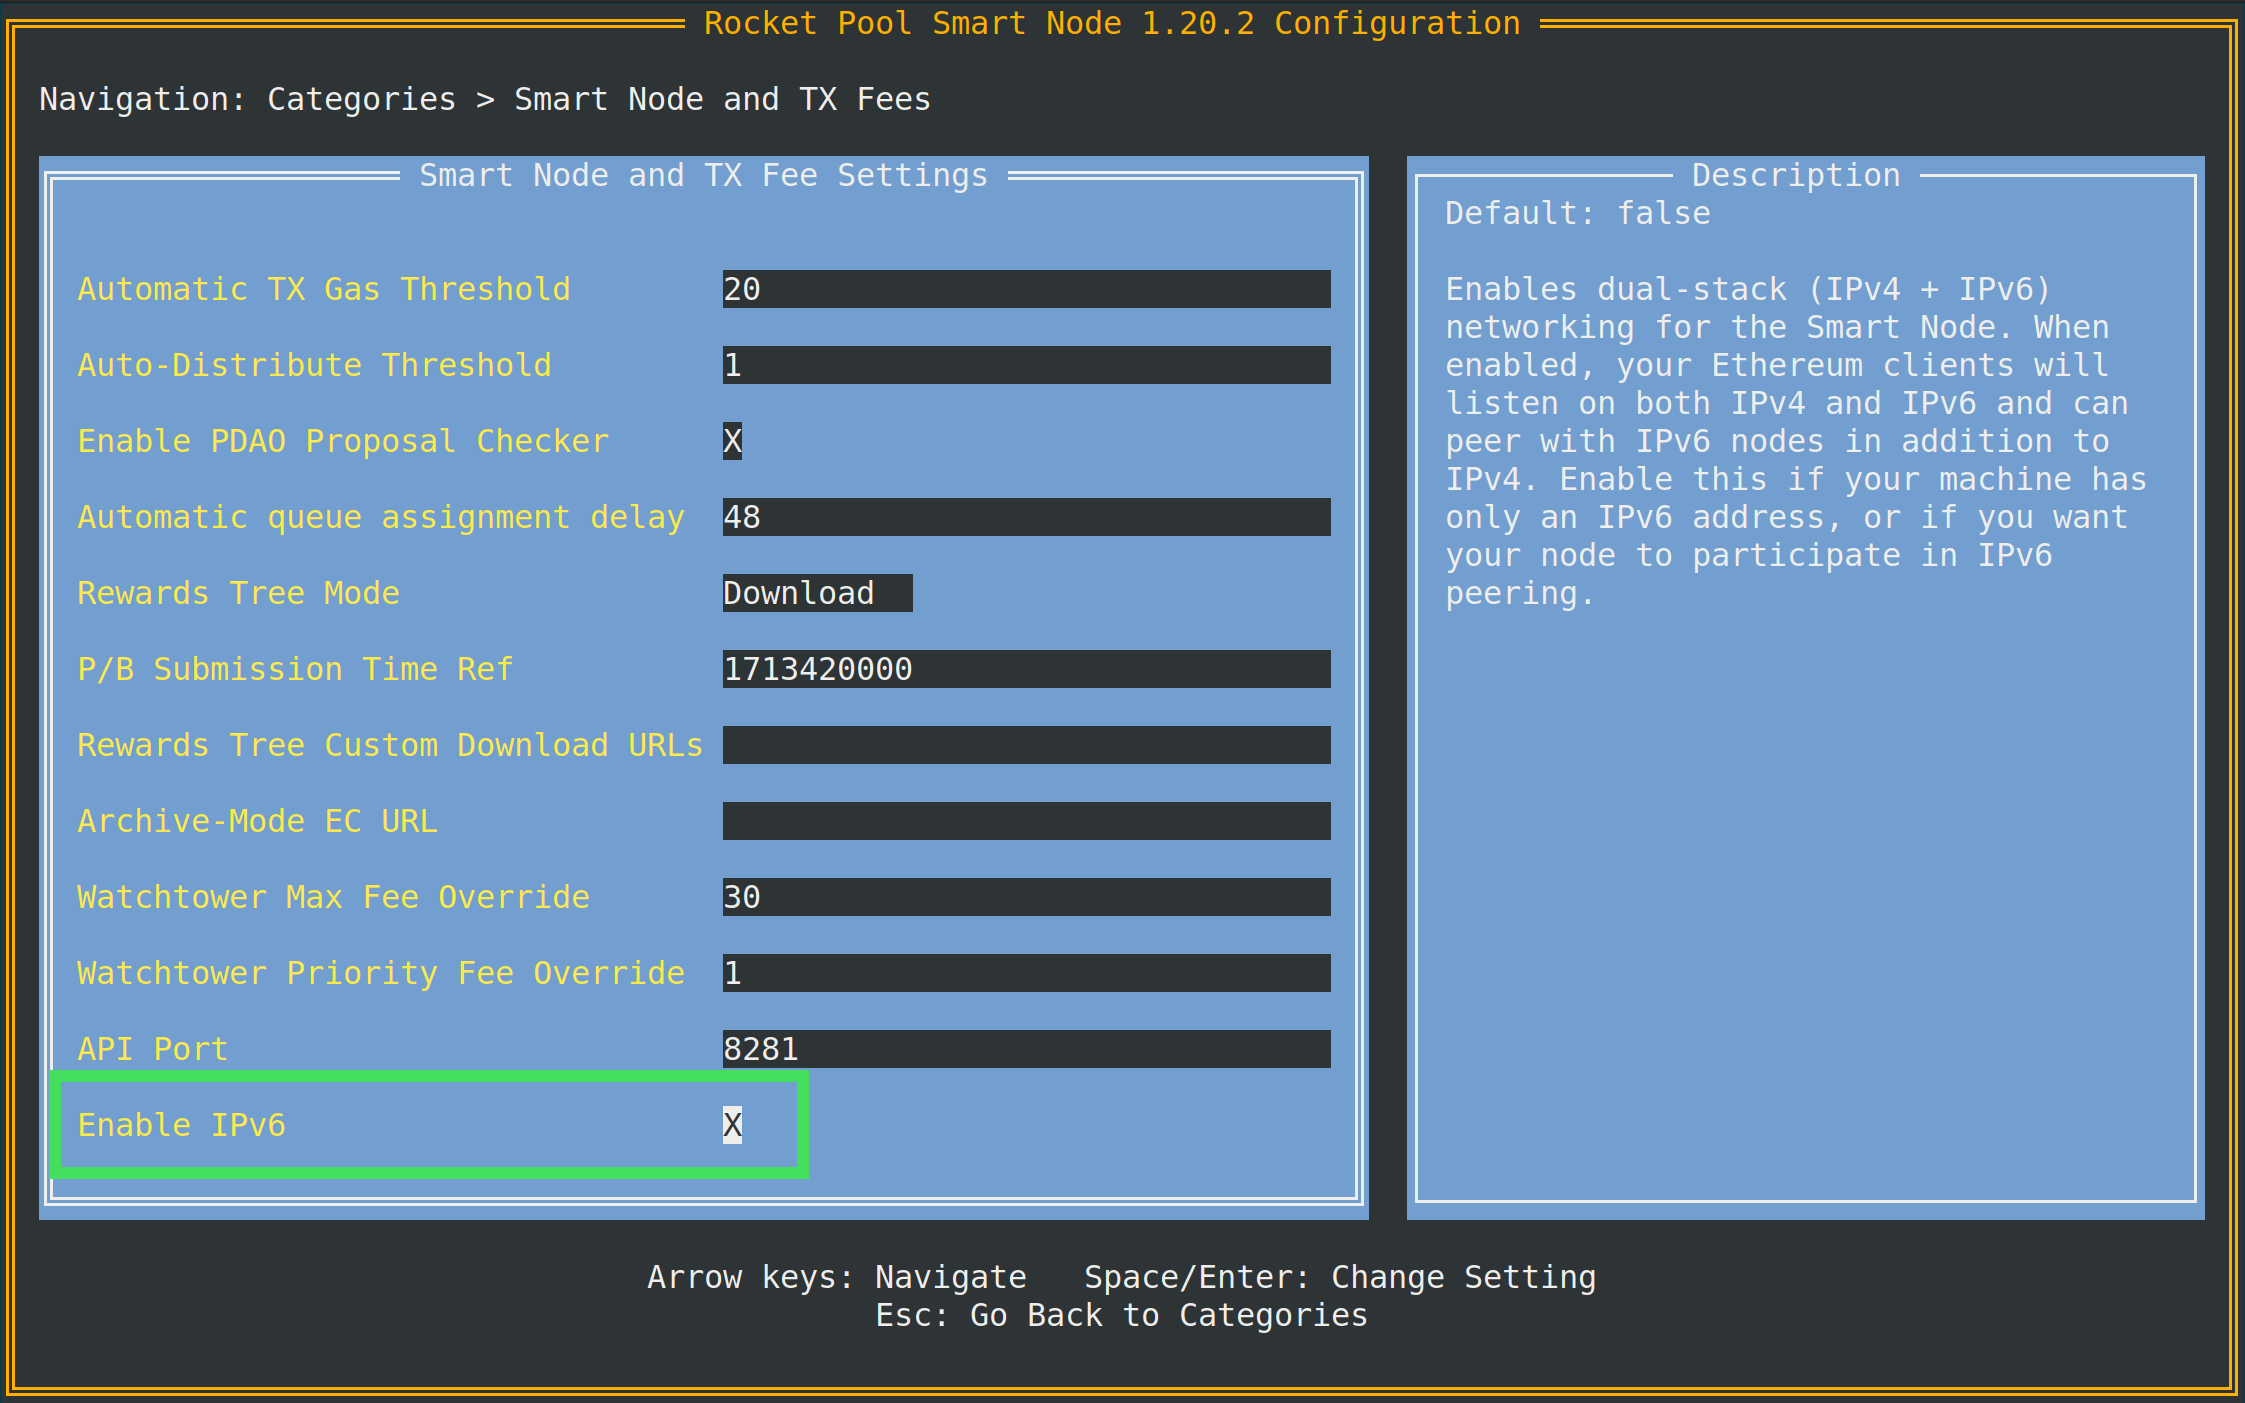
::: warning NOTE
If you enable IPv6 but don't have a public IPv6 address, the Smart node will display a warning during startup:
```
Warning: IPv6 is enabled but no public IPv6 address was detected.
Your node will not be reachable by IPv6 peers.
```
Your node will continue to work normally using IPv4.
:::
### Verifying that IPv6 is Working
After enabling IPv6 and restarting your services, you can verify it's working correctly:
1. Check Docker Network Configuration
```shell
docker inspect rocketpool_net | grep -i ipv6
```
You should see `"EnableIPv6": true` and each container should have an `IPv6Address`.
2. Verify Port Binding
```shell
sudo nsenter -t $(docker inspect -f '{{.State.Pid}}' rocketpool_eth2) -n ss -tlnp | grep 9001
```
This checks the port inside your consensus client's container. You should see `*:9001` or `[::]:9001`. If you see an IPv4 address instead (such as `172.18.0.x:9001`), your consensus client isn't listening on IPv6 (expected for Prysm, see the table above).
3. Confirm Your Public IPv6 Address
```shell
curl -6 https://icanhazip.com
```
Should return your public IPv6 address (e.g., `xxx:xxx:xxxx:...`).
4. Check Consensus Client Logs
View your consensus client logs to confirm IPv6 listening:
```shell
docker logs rocketpool_eth2 2>&1 | grep -iE "listen|ipv6|::" | head -20
```
**What to look for:**
- **Lighthouse** - `Listening on /ip6/` or `listen_addr: /ip6/`
- **Lodestar** - `Multiaddrs` showing both `/ip4/` and `/ip6/` addresses
- **Teku** - `p2p-interface` showing both `0.0.0.0` and `::`
- **Nimbus** - `Listening to incoming network requests` (does not explicitly mention IPv6)
- **Prysm** - `Beacon chain gRPC server listening` (does not explicitly mention IPv6)
5. Check for IPv6 Peers
Check your beacon node's peer list via the API:
```shell
curl -s http://localhost:5052/eth/v1/node/peers | grep -o '/ip6/[^"]*' | head -10
```
This will show up to 10 IPv6 peer addresses if any are connected. Depending on which consensus client you are using, it may take
a while for any IPv6 peers to connect. In our testing, we found that Teku was the only client to immediately connect to IPv6 peers.
---
url: /node-staking/backups.md
---
> For AI agents: the complete documentation index is available at /llms.txt, the full documentation bundle is available at /llms-full.txt.
# Backing Up Your Node
::: tip NOTE
This is currently written for **Docker Mode** installations.
Some locations may vary for Hybrid or Native users.
:::
In general, if you created your node wallet and minipools via the Smart Node, the only thing you truly need on hand to recover your node from a complete failure is the **mnemonic for your node wallet**
Everything else can be recovered from that quite easily.
If you have minipools that have externally-generated validator keys (e.g. you migrated from **Allnodes** to your own self-hosted node), you will need the private keystore files for your validators as well since they cannot be recovered from the node wallet.
That being said, once the Merge takes place, you will no longer be able to use a light Execution client (e.g. Pocket or Infura) as a fallback if you ever need to resync the Execution layer chain.
Furthermore, you will be required to have an active and healthy Execution client to attest correctly.
Having a fast, reliable way to recover from an Execution client failure (such as a corrupt database, SSD malfunction, or compromised / stolen hardware) will be critical, as it can take hours or even days to sync from scratch.
In this guide, we'll show you how to back up some of these things to help improve your node's resilience and minimize unnecessary downtime.
::: warning NOTE
This guide assumes you have installed the Smart Node to the default directory (`~/.rocketpool`).
If you specified a different installation directory, substitute it accordingly in the instructions below.
:::
## Items That Can Be Backed Up
### Smart Node Configuration
The Smart Node's configuration is stored in `~/.rocketpool/user-settings.yml`.
You can save this and replace it to restore all of your Smart Node settings (i.e., the things you specified in `rocketpool service config`).
### Execution Client / ETH1 Client Chain Data
The Execution client's chain data is likely the most important thing to back up.
As mentioned, it can take several days to re-sync your EC chain data.
After The Merge, this means hours to days of downtime and lost profits!
The chain data is stored within the `rocketpool_eth1clientdata` Docker volume, which by default is located at `/var/lib/docker/volumes/rocketpool_eth1clientdata`.
Note this folder is typically not accessible by unprivileged user accounts; you will need to elevate to the `root` user to see it.
::: tip NOTE
If you changed Docker's storage location during the initial Smart Node installation (such as people that run Docker on a second SSD), you will find the volume in `//docker/volumes/rocketpool_eth1clientdata`
If you don't recall which installation path you use, you can check `/etc/docker/daemon.json` for its location.
If the file doesn't exist, you use the default location.
:::
For detailed instructions on how to efficiently back up your Execution chain data, please see the [Backing up your Execution Chain Data](#backing-up-your-execution-chain-data) section below.
### Monitoring & Metrics Data
This data is stored within the `rocketpool_grafana-storage` Docker volume, which by default is located at `/var/lib/docker/volumes/rocketpool_grafana-storage` (or `//docker/volumes/rocketpool_prometheus-data` if you customized your Docker storage location).
## Items That Should **Not** Be Backed Up
### Private Keys and Passwords
Your node wallet's private key and the password file used to encrypt it are stored in `~/.rocketpool/data/wallet` and `~/.rocketpool/data/password` respectively.
These files don't generally need to be backed up, as they can be recovered from your mnemonic using `rocketpool wallet recover`.
If, for some reason, you _do_ decide to back up these files, you will need to be **extremely careful** about how you store them.
Anyone who gains access to these files will gain access to your node wallet, its validators, and any funds you have stored on it for things like gas.
We **strongly recommend** you do not back up these files and just use your wallet mnemonic to recover them if necessary.
### Consensus Client Chain Data
Unlike the Execution layer data, the Consensus layer data is not nearly as important to your node thanks to [Checkpoint Sync](/node-staking/config-docker.md#beacon-chain-checkpoint-syncing).
Consensus clients can easily use this technique to immediately resync to the head of the Beacon chain and resume validation duties.
## Backing up your Execution Chain Data
The Smart Node comes with the ability to back up your Execution chain data via the `rocketpool service export-eth1-data` command.
Under the hood, this utilizes `rsync`, a powerful backup/copy tool within Linux.
`rsync` compares the files in the source directory (your Docker volume) and the target directory (your backup location).
If a source file doesn't exist in the target directory, it will be copied entirely.
However, if it _does_ exist, `rsync` will only copy the _changes_ between the two files.
This means the first backup will take a good amount of time as it must copy all of the data initially.
Subsequent backups will only copy the changes between your previous backup and now, making the process much faster.
As part of a backup strategy, you may want to plan to run `export-eth1-data` on a regular basis.
To ensure the integrity of the chain data, running this command will **safely shut down the Execution client before backing up its data**.
If you elect to schedule it every week, your Execution client will only be down for a few minutes while it updates the backup.
This is certainly better than the days it would take to resync the data from scratch.
To trigger a backup, start by **mounting the storage medium you want to export the data to**.
For example, this could be an external hard drive.
::: tip HINT
If you don't know how to mount external devices on Linux, it's easy!
Plug the device into your node, and follow [a guide like this](https://www.addictivetips.com/ubuntu-linux-tips/mount-external-hard-drives-in-linux/) to learn how to mount it.
:::
Once you have it mounted, note its mount path.
For this example, let's assume that we want to store the chain data in a folder called `/mnt/external-drive` which the external device is mounted to.
Replace this with your actual mount path wherever you see it below.
Now, run the following command:
```shell
rocketpool service export-eth1-data /mnt/external-drive
```
This will check that your target folder is reachable and has enough free space to store the chain data.
The output will look like this:
```
This will export your execution client's chain data to an external directory, such as a portable hard drive.
If your execution client is running, it will be shut down.
Once the export is complete, your execution client will restart automatically.
You have a fallback execution client configured (http://:8545).
Rocket Pool (and your consensus client) will use that while the main client is offline.
Chain data size: 87 GiB
Target dir free space: 287 GiB
Your target directory has enough space to store the chain data.
NOTE: Once started, this process *will not stop* until the export is complete - even if you exit the command with Ctrl+C.
Please do not exit until it finishes so you can watch its progress.
Are you sure you want to export your execution layer chain data? [y/n]
```
As you can see, the chain data will be under 100 GB (for the Hoodi testnet; the Ethereum mainnet will be an order of magnitude larger) and the external folder has 287 GiB free so exporting can continue.
When you're ready, enter `y` here and press `Enter`.
This will stop your Execution client and begin copying its chain data to your target folder.
You will see the progress of each individual file go past the screen as it runs.
::: warning NOTE
It's important that you _do not_ exit the terminal while this is running.
If you do, the copy will continue to run in the background but you won't be able to follow its progress!
:::
Once it's finished, it will automatically restart your Execution client container.
**Note that your existing chain data is not deleted from your node after the export is complete!**
### Restoring Your Execution Chain Data
If you ever need to restore your backed up chain data, simply run the following command.
```shell
rocketpool service import-eth1-data /mnt/external-drive
```
::: danger WARNING
This will automatically delete any existing Execution client data in your `rocketpool_eth1clientdata` volume!
:::
Once it's done, your Execution client will be ready to go.
---
url: /node-staking/change-clients.md
---
> For AI agents: the complete documentation index is available at /llms.txt, the full documentation bundle is available at /llms-full.txt.
# Changing Execution or Consensus Clients
Under normal circumstances, you will likely just select an Execution and Consensus client when you first create your Rocket Pool node and will let them happily run for the life of your Node.
However, there are a few situations where you may want to change your client selection.
Here are a few examples:
- Your client gains a [supermajority](https://clientdiversity.org/) share on the Execution or Beacon chains, and you want to change for the overall health of the network
- A bug causes your client to stop functioning correctly, and you need to get back online quickly to resume validation duties
- You want to try a new feature that a different client offers
- A different client is better suited to your node's hardware (e.g. some clients are better on ARM systems than others)
Luckily, the Smart Node stack makes changing clients extremely easy.
All it takes is a few changes in the Configuration TUI, and some optional extra commands to back up your existing client data before changing clients.
## Changing Execution Clients
Prior to changing your Execution client, it's worth noting the following points:
- Chain data **is not shared** between clients. Your new client will need to resync the Mainnet chain data, which can take some time (though each client supports snap sync, which the Smart Node uses to speed up resyncing).
- By default, the Smart Node will leave your old client's chain data on your drive in case you want to revert back to your old Execution client and pick up where you left off. You may want to **export it to a different location** and delete it to free up space prior to changing clients, since Execution clients can use hundreds of gigabytes. We have steps below on how to do this.
- While your new client is resyncing, most of the Smart Node CLI functions will be offline since they rely on the Execution client. **You should have a fallback Execution client available before doing this to mitigate the downtime on your Smart Node.**
### (Optional) Export your Execution Client's Database
The first step in the process is an optional one: if you like, you can export your existing chain data for your current Execution client.
This will let you free up valuable disk space on your node for your new Execution client, and you can keep the old chain data around in case you want to revert back to the old client and pick up where you left off.
Please refer to the [Backing Up Your Node](/node-staking/backups.md#backing-up-your-execution-chain-data) guide for details.
### Change your Selected Execution Client
To change your selected client, run `rocketpool service config` to enter the configuration UI.
Navigate to the `Execution Client (ETH1)` section, and select the `Execution Client` dropdown:
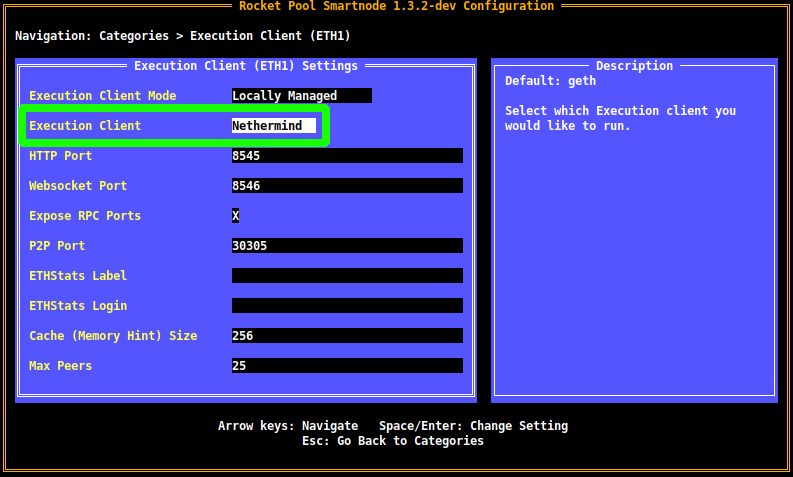
Open the dropdown with `Enter`, use the arrow keys to navigate to your client of choice, and press `Enter` again to confirm the selection.
Note that each client has its own unique options, so you may see some additional settings appear in this screen after you select a different client.
Feel free to explore through them to see how they affect things.
When you're happy with your choice, press `Esc` to return to the main menu, then `Tab` to highlight the `Review Changes and Save` button.
You will be presented with the review screen, which will show your client selection change:
Press `Enter` to accept the changes, and you're done!
Your new Execution client will begin syncing immediately.
As usual, you can follow it with `rocketpool service logs eth1`.
**We recommend you do this to verify there are no errors, and that it works properly.**
::: danger NOTE
Now that the Execution and Consensus layers have merged, taking down your Execution client will _also_ take down your Consensus client until your Execution client has finished resyncing.
This means your node will **stop attesting and proposing blocks, and it will leak ETH instead of earning it!**
To avoid this and continue validating while your Execution client resyncs, **please set up a [fallback node](/node-staking/fallback.md)**.
:::
### (Recommended) Remove your Old Chain Data
This is not a required step, but we **strongly recommend** you remove the chain data from your old client now that you've switched to a new one so you can free up disk space for it.
To do this, simply run the following command:
```shell
rocketpool service resync-eth1
```
This will delete all of your Execution client data and start it over.
::: tip TIP
Since you just selected a new Execution client, it won't be affected by this - essentially, all it will do is delete your old chain data.
You should do this as soon as possible after switching clients to prevent unnecessary loss of progress on your new client.
:::
## Changing Consensus Clients
Changing Consensus clients is even easier than Execution clients, thanks to [Checkpoint Sync](/node-staking/config-docker.md#beacon-chain-checkpoint-syncing).
This feature lets you immediately sync a new Consensus client with the network, so there's no need to preserve your old chain data.
Start by using the `rocketpool service config` UI and navigating to the `Consensus Client (ETH2)` section.
Next, select the `Consensus Client` dropdown:
Open the dropdown with `Enter`, use the arrow keys to navigate to your client of choice, and press `Enter` again to confirm the selection.
Note that each client has its own unique options, so you may see some additional settings appear in this screen after you select a different client.
Feel free to explore through them to see how they affect things.
Next, verify that you're using a Checkpoint Sync provider:
If you don't have a Checkpoint Sync provider configured, [you can easily use instructions from here to do it for free](/node-staking/config-docker.md#beacon-chain-checkpoint-syncing)!
When you're happy with your choice, press `Esc` to return to the main menu, then `Tab` to highlight the `Review Changes and Save` button.
You will be presented with the review screen, which will show your client selection change:
Press `Enter` to accept the changes, and you're done!
Your new Consensus client will begin syncing immediately.
As usual, you can follow it with `rocketpool service logs eth2`.
**We recommend you do this to verify there are no errors, and that it works properly.**
---
url: /node-staking/cli-intro.md
---
> For AI agents: the complete documentation index is available at /llms.txt, the full documentation bundle is available at /llms-full.txt.
# Intro to the Command Line Interface
As a node operator, the CLI is your primary tool for interacting with Rocket Pool.
You will use it to create new megapool validators, check on the status of everything, claim periodic RPL rewards, exit and withdraw from your minipools when you're ready, and a host of other activities.
Once you've finished syncing the Execution and Beacon chains, all of the commands will be available for you to use.
In this section, we'll go over a brief tour of some of the more common ones and some other tricks that the CLI can do.
## Learning About the Commands
To list all of the available commands, type:
```shell
rocketpool help
```
The output will look like this:
```
______ _ _ ______ _
| ___ \ | | | | | ___ \ | |
| |_/ /___ ___| | _____| |_ | |_/ /__ ___ | |
| // _ \ / __| |/ / _ \ __| | __/ _ \ / _ \| |
| |\ \ (_) | (__| < __/ |_ | | | (_) | (_) | |
\_| \_\___/ \___|_|\_\___|\__| \_| \___/ \___/|_|
Authored by the Rocket Pool Core Team
A special thanks to the Rocket Pool community for all their contributions.
NAME:
rocketpool - Rocket Pool CLI
USAGE:
rocketpoolcli [global options] command [command options] [arguments...]
VERSION:
1.24.2
COMMANDS:
auction, a Manage Rocket Pool RPL auctions
claims, l View and claim all available rewards and credits across the node
minipool, m Manage the node's minipools
megapool, g Manage the node's megapool
network, e Manage Rocket Pool network parameters
node, n Manage the node
odao, o Manage the Rocket Pool oracle DAO
pdao, p Manage the Rocket Pool Protocol DAO
queue, q Manage the Rocket Pool deposit queue
security, c Manage the Rocket Pool security council
service, s Manage Rocket Pool service
wallet, w Manage the node wallet
update Update the cli binary
help, h Shows a list of commands or help for one command
GLOBAL OPTIONS:
--allow-root, -r Allow rocketpool to be run as the root user
--config-path path, -c path Rocket Pool config asset path (default: "~/.rocketpool")
--daemon-path path, -d path Interact with a Rocket Pool service daemon at a path on the host OS, running outside of docker
--maxFee value, -f value The max fee (including the priority fee) you want a transaction to cost, in gwei (default: 0)
--maxPrioFee value, -i value The max priority fee you want a transaction to use, in gwei (default: 0)
--gasLimit value, -l value [DEPRECATED] Desired gas limit (default: 0)
--nonce value Use this flag to explicitly specify the nonce that this transaction should use, so it can override an existing 'stuck' transaction
--debug Enable debug printing of API commands
--secure-session, -s Some commands may print sensitive information to your terminal. Use this flag when nobody can see your screen to allow sensitive data to be printed without prompting
--help, -h show help
--version, -v print the version
COPYRIGHT:
(c) 2026 Rocket Pool Pty Ltd
```
The `pdao` group is for Protocol DAO voting and proposals. Voting is done with `rocketpool pdao proposals vote`. To change **several** Protocol DAO settings in a single proposal, write them to a JSON file using the `--to-json` flag on the setting propose commands, then submit with:
```shell
rocketpool pdao propose submit-batch
```
Governance walkthrough: [Participating in on-chain pDAO Proposals](/pdao/participate.md).
## Service Commands
The service group involves managing the various services the smart node manages for you.
Here is what the `rocketpool service help` output will show:
```
NAME:
rocketpool service - Manage Rocket Pool service
USAGE:
rocketpool service [global options] command [command options] [arguments...]
VERSION:
1.24.2
COMMANDS:
install, i Install the Rocket Pool service
config, c Configure the Rocket Pool service
status, u View the Rocket Pool service status
start, s Start the Rocket Pool service
pause, p Pause the Rocket Pool service
stop, o Pause the Rocket Pool service (alias of 'rocketpool service pause')
reset-docker, rd Cleanup Docker resources, including stopped containers, unused images and networks. Stops and restarts Smart Node.
prune-docker, pd Cleanup unused Docker resources, including stopped containers, unused images, networks and volumes. Does not restart smartnode, so the running containers and the images and networks they reference will not be pruned.
logs, l View the Rocket Pool service logs
compose View the Rocket Pool service docker compose config
version, v View the Rocket Pool service version information
prune-eth1, n Shuts down the main ETH1 client and prunes its database, freeing up disk space, then restarts it when it's done.
migrate-geth Shuts down Geth and migrates its database from Pebble v1 to Pebble v2, then restarts it when it's done.
install-update-tracker, d Install the update tracker that provides the available system update count to the metrics dashboard
get-config-yaml Generate YAML that shows the current configuration schema, including all of the parameters and their descriptions
resync-eth1 Deletes the main ETH1 client's chain data and resyncs it from scratch. Only use this as a last resort!
resync-eth2 Deletes the ETH2 client's chain data and resyncs it from scratch. Only use this as a last resort!
terminate, t Deletes all of the Rocket Pool Docker containers and volumes, including your ETH1 and ETH2 chain data and your Prometheus database (if metrics are enabled). Also removes your entire `.rocketpool` configuration folder, including your wallet, password, and validator keys. Only use this if you are cleaning up the Smart Node and want to start over!
GLOBAL OPTIONS:
--compose-file value, -f value Optional compose files to override the standard Rocket Pool docker compose YAML files; this flag may be defined multiple times
--help, -h show help
```
### `status`
This command shows you the current running status of each of the Docker containers managed by Rocket Pool.
For example, the default Docker install's output looks like this:
```
Your Smart Node is currently using the Hoodi Testnet network.
NAME IMAGE COMMAND SERVICE CREATED STATUS PORTS
rocketpool_eth1 ghcr.io/paradigmxyz/reth:v2.8.1@sha256:… "sh /setup/start-ec.…" eth1 2 days ago Up 2 days 0.0.0.0:30303->30303/tcp, [::]:30303->30303/tcp, 0.0.0.0:30303->30303/udp, [::]:30303->30303/udp
rocketpool_eth2 consensys/teku:26.10.2@sha256:… "sh /setup/start-bn.…" eth2 2 days ago Up 2 days 0.0.0.0:8001->8001/udp, [::]:8001->8001/udp, 0.0.0.0:9001->9001/tcp, [::]:9001->9001/tcp, 0.0.0.0:9001->9001/udp, [::]:9001->9001/udp
rocketpool_exporter prom/node-exporter:v1.12.1@sha256:… "/bin/node_exporter …" node-exporter 2 days ago Up 2 days
rocketpool_grafana grafana/grafana:13.2.4@sha256:… "/run.sh" grafana 2 days ago Up 2 days 3000/tcp, 0.0.0.0:3100->3100/tcp, [::]:3100->3100/tcp
rocketpool_node rocketpool/smartnode:v1.25.1@sha256:… "/go/bin/rocketpool …" node 2 days ago Up 2 days 127.0.0.1:8280->8280/tcp
rocketpool_prometheus prom/prometheus:v3.15.1@sha256:… "/bin/prometheus --w…" prometheus 2 days ago Up 2 days 9090/tcp
rocketpool_validator consensys/teku:26.10.2@sha256:… "sh /setup/start-vc.…" validator 2 days ago Up 2 days 5051/tcp, 8008/tcp, 9000/tcp, 9000-9001/udp
rocketpool_watchtower rocketpool/smartnode:v1.25.1@sha256:… "/go/bin/rocketpool …" watchtower 2 days ago Up 2 days
Volume sizes:
rocketpool_alertmanager-data 0B
rocketpool_eth1clientdata 156.6GB
rocketpool_eth2clientdata 429.3GB
rocketpool_grafana-storage 3.279MB
rocketpool_prometheus-data 2.133GB
```
You can use it to quickly check if any of the Docker containers are having trouble, or to make sure that a `start` or `stop` command worked correctly.
Starting with Smart Node v1.25.1, the command also lists how much disk space each Smart Node Docker volume uses, below the container table.
For example, `rocketpool_eth1clientdata` holds your Execution client's chain data and `rocketpool_eth2clientdata` holds your Consensus client's.
This is a quick way to see what is filling up your disk.
Measuring the volumes can take a while on a node with a large database, so the list may show up a little later than the table.
### `start` and `stop`
These two commands you are already familiar with.
They simply start all of the Rocket Pool containers, or stop them.
::: tip
The `pause` command does the same thing as `stop`.
It's just left over as a legacy command from earlier versions of Rocket Pool.
:::
### `logs`
This command is another one you should have already seen.
You can use it to look at the output logs of each Docker container.
This can be useful for troubleshooting or getting a more detailed status report from them.
If you simply do `rocketpool service logs` without any other arguments, it will aggregate all of the logs together and show them to you at once.
If you want to focus on one container's output, you can add an argument to the end to specify the container.
Valid values are `eth1`, `eth2`, `validator`, `api`, `node`, `watchtower`, `prometheus`, `grafana`, and `node-exporter`.
By default, it shows the last 100 lines and keeps following new output until you press `Ctrl+C`.
To look at a specific time window instead, add `--since`, `--until`, or both.
Both accept a timestamp (such as `2026-10-20T10:00:00Z`) or a relative time (such as `30m` for 30 minutes ago):
```shell
# Everything from the last 30 minutes, then keep following
rocketpool service logs --since 30m eth2
# A 5-minute window that started 3 hours ago, using relative times
rocketpool service logs --since 3h --until 2h55m node
# The same kind of window, using timestamps
rocketpool service logs --since 2026-10-20T10:00:00Z --until 2026-10-20T10:05:00Z node
```
With either flag, you get every line in the window rather than only the last 100. With `--until`, the command prints the logs and exits instead of following them.
Logs only go back to when the container was last created, which happens on every Smart Node update, and the oldest lines are removed once the logs grow large. A window further back than that shows nothing.
These flags require Smart Node v1.25.1 or newer.
### `config`
This command runs through the configuration interview again.
You can use it if you want to change your selection of Execution or Consensus client, or change some of the parameters that you initially specified when you selected them (such as your validator's graffiti message, the max number of peers to connect to, and so on).
You can call this command at any time, but the changes won't take effect until you call `rocketpool service stop` and `rocketpool service start`.
### `migrate-geth`
Geth operators who still have a Pebble v1 database can migrate it in place with:
```shell
rocketpool service migrate-geth
```
This **shuts Geth down**, migrates the database from Pebble v1 to Pebble v2, then restarts it. Plan for Execution-client downtime (a [fallback node](/node-staking/fallback.md) keeps you attesting). Confirm with `y`, or pass `--yes` to skip the prompt.
### `terminate`
This command will shut down the Docker containers, then delete them, delete the Rocket Pool virtual network, and delete the ETH1 and ETH2 chain data volumes and your Prometheus metrics database.
It then deletes your entire Smart Node configuration folder (`~/.rocketpool` by default).
Use it only when you want to remove the Smart Node completely and start over.
::: warning
This is irreversible. It removes your chain data, which means you'll need to sync ETH1 and ETH2 again.
It **also deletes your node wallet, password, and validator keys**, along with your configured settings.
Before running it, make sure you have your node's recovery mnemonic written down and have verified it (for example with `rocketpool wallet test-recovery`), or you will lose access to your node wallet and validator keys.
:::
## Update Command
To replace the CLI binary (and optionally stop, upgrade, and restart the stack), run:
```shell
rocketpool update
```
This is the usual way to update a Docker or Hybrid node. The walkthrough lives on [Checking for Updates](/node-staking/updates.md).
## Node Commands
The `node` group involves operations on your Rocket Pool node.
We'll cover these more in-depth in the next section where we create a megapool validator, but it may be helpful to see them all at a glance.
Here is what the `rocketpool node help` output will show:
```
NAME:
rocketpool node - Manage the node
USAGE:
rocketpool node command [command options] [arguments...]
COMMANDS:
status, s Get the node's status
sync, y Get the sync progress of the eth1 and eth2 clients
register, r Register the node with Rocket Pool
rewards, e Get the time and your expected RPL rewards of the next checkpoint
set-primary-withdrawal-address, w Set the node's primary withdrawal address, which will receive all ETH rewards (and RPL if the RPL withdrawal address is not set)
confirm-primary-withdrawal-address, f Confirm the node's pending primary withdrawal address if it has been set back to the node's address itself
set-rpl-withdrawal-address, srwa Set the node's RPL withdrawal address, which will receive all RPL rewards and staked RPL withdrawals
confirm-rpl-withdrawal-address, crwa Confirm the node's pending rpl withdrawal address if it has been set back to the node's address itself
allow-rpl-locking, arl Allow the node to lock RPL when creating governance proposals/challenges
deny-rpl-locking, drl Do not allow the node to lock RPL when creating governance proposals/challenges
set-timezone, t Set the node's timezone location
swap-rpl, p Swap old RPL for new RPL
stake-rpl, k Stake RPL against the node
add-address-to-stake-rpl-whitelist, asw Adds an address to your node's RPL staking whitelist, so it can stake RPL on behalf of your node.
remove-address-from-stake-rpl-whitelist, rsw Removes an address from your node's RPL staking whitelist, so it can no longer stake RPL on behalf of your node.
claim-rewards, c Claim available RPL and ETH rewards for any checkpoint you haven't claimed yet
withdraw-rpl, i Withdraw RPL staked against the node
withdraw-eth, h Withdraw ETH staked on behalf of the node
withdraw-credit, wc (Saturn) Withdraw ETH credit from the node as rETH
send, n Send ETH or tokens from the node account to an address. ENS names supported. Use 'all' as the amount to send the entire balance. can be 'rpl', 'eth', 'fsrpl' (for the old RPL v1 token), 'reth', or the address of an arbitrary token you want to send (including the 0x prefix).
initialize-fee-distributor, z Create the fee distributor contract for your node, so you can withdraw priority fees and MEV rewards after the merge
distribute-fees, b Distribute the priority fee and MEV rewards from your fee distributor to your withdrawal address and the rETH contract (based on your node's average commission)
join-smoothing-pool, js Opt your node into the Smoothing Pool
leave-smoothing-pool, ls Leave the Smoothing Pool
sign-message, sm Sign an arbitrary message with the node's private key
send-message Send a zero-ETH transaction to the target address (or ENS) with the provided hex-encoded message as the data payload
claim-unclaimed-rewards, cur Sends any unclaimed rewards to the node's withdrawal address
provision-express-tickets, pet Provision the node's express tickets
OPTIONS:
--help, -h show help
```
Below is a summary of some of the commands you'll tend to need during typical node operation.
### `status`
This command will give you a high-level view of your entire node at a glance.
It includes how much ETH and RPL you have staked, how many minipools you have and their statuses, your RPL collateral ratio, and more.
This is an example of what `rocketpool node status` shows once you have your node registered and some minipools set up:
```
=== Account and Balances ===
The node 0x4d19DE4A5a1B1B36EBaB3D5c32C01061fbDE328d has a balance of 49.402553 ETH and 0.000000 RPL.
The node has 0.000000 ETH in its credit balance and 0.000000 ETH staked on its behalf. 0.000000 can be used to make new validators.
The node is registered with Rocket Pool with a timezone location of America/Los_Angeles.
=== Megapool ===
The node has a megapool deployed at 0xCf3576c5A6e5a25AC00C9adb6751924BAe1680B1.
The megapool has 9 validators.
The node has 0 express queue ticket(s).
=== Penalty Status ===
The node does not have any penalties for cheating with an invalid fee recipient.
=== Signalling on RocketDash ===
The node does not currently have an offchain signalling address set.
To learn more about offchain signalling, please visit https://docs.rocketpool.net/pdao/participate#setting-your-snapshot-signalling-address.
Rocket Pool has no RocketDash governance proposals being voted on.
=== Onchain Voting ===
The node doesn't have a delegate, which means it can vote directly on onchain proposals. You can have another node represent you by running `rocketpool p svd `.
The node is NOT allowed to lock RPL to create governance proposals/challenges.
=== Primary Withdrawal Address ===
The node's primary withdrawal address has not been changed, so ETH rewards and minipool withdrawals will be sent to the node itself.
Consider changing this to a cold wallet address that you control using the `set-withdrawal-address` command.
=== RPL Withdrawal Address ===
The node's RPL withdrawal address has not been set. All RPL rewards will be sent to the primary withdrawal address.
=== Fee Distributor and Smoothing Pool ===
The node's fee distributor 0x84c1f488CDecb2E335c40901E3Fe58925f4cC9A7 has a balance of 0.004897 ETH.
NOTE: You are in Native Mode; you MUST ensure that your Validator Client is using this address as its fee recipient!
The node is not opted into the Smoothing Pool.
To learn more about the Smoothing Pool, please visit https://docs.rocketpool.net/upgrades/redstone/whats-new#smoothing-pool.
=== RPL Stake ===
NOTE: The following figures take *any pending bond reductions* into account.
The node has a total stake of 20000.000000 RPL.
This is currently 3.74% of its borrowed ETH and 30.06% of its bonded ETH.
The node has 0.000000 megapool staked RPL.
The node has 20000.000000 legacy staked RPL.
The node has a total stake (legacy minipool RPL plus megapool RPL) of 20000.000000 RPL.
You have 0.000000 RPL staked on your megapool and can request to unstake up to 0.000000 RPL
=== Minipools ===
The node has a total of 3 active minipool(s):
- 3 staking
```
### `sync`
This command will show you the current sync status of your Execution and Consensus clients.
You'll probably use it a lot when you first set the node up, then never need it again (unless you change or reset your clients).
The output of `rocketpool node sync` will look like this:
```
Your Smartnode is currently using the Hoodi Test Network.
Your eth1 client hasn't synced enough to determine if your eth1 and eth2 clients are on the same network.
To run this safety check, try again later when eth1 has made more sync progress.
Your primary execution client is still syncing (67.12%).
You do not have a fallback execution client enabled.
Your primary consensus client is still syncing (99.94%).
You do not have a fallback consensus client enabled.
```
Note that **Prysm** currently doesn't provide its completion percent - you'll need to look in the `eth2` logs if you use it.
### `stake-rpl`
This command is what you'll use when you want to stake more RPL on your node.
RPL staked on your megapool earns a share of the protocol's ETH revenue and gives your node voting power; see [Staking RPL and Claiming Rewards](/node-staking/megapools/staking-and-claiming-rewards.md) for details.
Unlike the other commands so far, this one is actually _interactive_ because it will trigger a transaction - it isn't simply informational.
It will first ask you how much RPL you'd like to stake, with some pre-defined options for convenience or the ability to specify a custom amount:
```
NOTE: By staking RPL, you become a member of the Rocket Pool pDAO. Stay informed on governance proposals by joining the Rocket Pool Discord.
Please choose an amount of RPL to stake:
1: 5% of borrowed ETH (733.993926 RPL) for one validator?
2: 10% of borrowed ETH (1467.987852 RPL) for one validator?
3: 15% of borrowed ETH (2201.981778 RPL) for one validator?
4: Your entire RPL balance (20000.000000 RPL)?
5: A custom amount
```
Once you select an option, you will be shown some information about the suggested gas price and estimated amount to be used, along with a confirmation dialog. If it's your first time staking RPL on the node, you'll need to give the staking contract approval to interact with your RPL:
```
Before staking RPL, you must first give the staking contract approval to interact with your RPL.
This only needs to be done once for your node.
+============== Suggested Gas Prices ==============+
| Avg Wait Time | Max Fee | Total Gas Cost |
| 15 Seconds | 4 gwei | 0.0001 to 0.0001 ETH |
| 1 Minute | 4 gwei | 0.0001 to 0.0001 ETH |
| 3 Minutes | 4 gwei | 0.0001 to 0.0001 ETH |
| >10 Minutes | 4 gwei | 0.0001 to 0.0001 ETH |
+==================================================+
These prices include a maximum priority fee of 2.00 gwei.
Please enter your max fee (including the priority fee) or leave blank for the default of 4 gwei:
Using a max fee of 4.00 gwei and a priority fee of 2.00 gwei.
Do you want to let the staking contract interact with your RPL? [y/n]
y
Approving RPL for staking...
Transaction has been submitted with hash .
You may follow its progress by visiting:
https://hoodi.etherscan.io/tx/
Waiting for the transaction to be included in a block... you may wait here for it, or press CTRL+C to exit and return to the terminal.
Successfully approved staking access to RPL.
RPL Stake Gas Info:
+============== Suggested Gas Prices ==============+
| Avg Wait Time | Max Fee | Total Gas Cost |
| 15 Seconds | 4 gwei | 0.0005 to 0.0007 ETH |
| 1 Minute | 4 gwei | 0.0005 to 0.0007 ETH |
| 3 Minutes | 4 gwei | 0.0005 to 0.0007 ETH |
| >10 Minutes | 4 gwei | 0.0005 to 0.0007 ETH |
+==================================================+
These prices include a maximum priority fee of 2.00 gwei.
Please enter your max fee (including the priority fee) or leave blank for the default of 4 gwei:
Using a max fee of 4.00 gwei and a priority fee of 2.00 gwei.
Are you sure you want to stake 733.993925 RPL? You may request to unstake your staked RPL at any time. The unstaked RPL will be withdrawable after an unstaking period of 672h0m0s. [y/n]
```
If you confirm, you will be shown the transaction hash and given a link to [Etherscan](https://etherscan.io) so you can follow its progress:
```
Staking RPL...
Transaction has been submitted with hash .
You may follow its progress by visiting:
https://hoodi.etherscan.io/tx/
Waiting for the transaction to be included in a block... you may wait here for it, or press CTRL+C to exit and return to the terminal.
Successfully staked 733.993925 RPL.
```
Most operations only require one transaction, so the CLI will wait until it has been included in a block and then exit. However, stake-rpl is one of the few commands that requires two transactions, so this dialog will appear twice.
### `claim-rewards`
When your node detects a new rewards checkpoint, it will automatically download the rewards tree file with the information for that interval (if you're using the default of Download Mode - see below for information on generating your own trees instead of downloading them).
You can then review your rewards using the following command:
```
rocketpool node claim-rewards
```
As intervals go by and you accumulate rewards, the output will look like this:

Here you can quickly see how many rewards you've earned at each interval, and can decide which ones you want to claim.
You can also specify an amount you want to restake during this claim:

This will let you compound your RPL rewards in one transaction, using substantially less gas than you currently needed to use with the legacy claim system.
::: tip NOTE
If you prefer to build the rewards checkpoint manually instead of downloading the one created by the Oracle DAO, you can change this setting from `Download` to `Generate` in the TUI:

As the tip implies, you will need access to an Execution client archive node to do this.
If your local Execution client is not an archive node, you can specify a separate one (such as Infura or Alchemy) in the `Archive-Mode EC URL` further down in the same menu.
This URL will only be used when generating Merkle trees; it will not be used for validation duties.
:::
### `join-smoothing-pool`
```shell
rocketpool node join-smoothing-pool
```
This will record you as opted-in in the Rocket Pool contracts and automatically change your Validator Client's `fee recipient` from your node's distributor contract to the Smoothing Pool contract.
Note that once you opt in, there is a **28 day cooldown** (one full rewards interval length) until you can opt out.
### `leave-smoothing-pool`
```shell
rocketpool node leave-smoothing-pool
```
This will opt you out of the Smoothing Pool if you're currently opted in, and have waited at least 28 days after opting in.
Once **the next epoch after the current epoch** is finalized, it will automatically change your node's `fee recipient` from the Smoothing Pool back to your node's distributor contract.
This is to ensure you don't get penalized for front-running the exit process when you see that you have a proposal coming up.
### `distribute-fees`
Once you've earned rewards on your fee distributor, you can claim and distribute its entire balance using the following command:
```shell
rocketpool node distribute-fees
```
This will send your share of the rewards to your **withdrawal address**.
### `send`
This command lets you send ETH, RPL, or other Rocket Pool-related tokens from the node wallet to a different address.
This might be useful if you want to move your funds on the wallet elsewhere.
The syntax for using the `send` command is like this:
```shell
rocketpool node send
```
The arguments are as follows:
- `` is the amount of the token to send.
- `` is the token to send - this can be `eth`, `rpl`, `fsrpl` (the old legacy RPL token), or `reth`.
- `` is the Ethereum address (or ENS name) to send the tokens to.
For example:
```shell
rocketpool node send 1 eth
```
would send 1 ETH to my friend.
## Megapool Commands
The `megapool` group is where you can access all the commands used to manage your megapool and megapool validators.
Here's what `rocketpool megapool help` will show:
```
NAME:
rocketpool megapool - Manage the node's megapool
USAGE:
rocketpool megapool [global options] command [command options] [arguments...]
VERSION:
1.24.2
COMMANDS:
deposit, d Make a deposit and create a new validator on the megapool. Optionally specify count to make multiple deposits.
status, s Get the node's megapool status
validators, v Get a list of the megapool's validators
repay-debt, r Repay megapool debt
reduce-bond, e Reduce the megapool bond
claim, c Claim any megapool rewards that were distributed but not yet claimed
stake, k Stake a megapool validator
exit-queue, x Exit the megapool queue
dissolve-validator, i Dissolve a megapool validator
exit-validator, t Request to exit a megapool validator
notify-validator-exit, n Notify that a validator exit is in progress
notify-final-balance, f Notify that a validator exit has completed and the final balance has been withdrawn
distribute, b Distribute any accrued execution layer rewards sent to this megapool
GLOBAL OPTIONS:
--help, -h show help
```
Below is a summary of the commands that you'll typically use during normal operation:
### `deposit`
This command lets you create new validators on your megapool. We'll go more into it later. Feel free to jump ahead to [Creating a Megapool Validator](/node-staking/megapools/create-megapool-validator.md) if you'd like a preview.
### `status`
This command gives you some information on the state of your megapool and the validators managed by your megapool. You'll be able to see your megapool's address, number of express queue tickets, your megapool's delegate address, ETH balance on the execution and consensus layer, and lots of other useful information. Here's an example of the `rocketpool megapool status` output:
```
=== Megapool ===
The node has a megapool deployed at 0xCf3576c5A6e5a25AC00C9adb6751924BAe1680B1
The node has 0 express ticket(s).
The megapool has 9 validators.
=== Megapool Delegate ===
The megapool is using the latest delegate.
The megapool's effective delegate address is 0x138602A95956995280f1146aA9477d6B4E481B3c
The megapool has automatic delegate upgrades disabled. You can toggle this setting using 'rocketpool megapool set-use-latest-delegate'.
=== Megapool Balance ===
The megapool has 4.000000 node bonded ETH.
The megapool has 28.000000 RP ETH for a total of 32.000000 bonded ETH.
Megapool balance (EL): 32.051883 ETH
The megapool has 1 validators exiting. You'll be able to see claimable rewards once the exit process is completed.
Beacon balance (CL): 0.000000 ETH
Your portion: 0.000000 ETH
Current network commission: 5.000000%
```
### `validators`
The `rocketpool megapool validators` command will show you the status of each and every validator managed by your node's megapool. You'll be able to see information such as the validator pubkeys, beacon chain state, and queue position of prestaking validators:
```
There are 8 validator(s) on the express queue.
There are 2 validator(s) on the standard queue.
The express queue rate is 2.
1 Staking validator(s):
Megapool Validator ID: 1
Validator pubkey:
Validator active: no
Validator index:
Beacon status: pending_queued
Express Ticket Used: no
1 Initialized validator(s):
--------------------
Megapool Validator ID: 2
Expected pubkey:
Validator active: no
Validator Queue Position: 10
Express Ticket Used: no
1 Exiting validator(s):
--------------------
Megapool Validator ID: 0
Validator pubkey:
Validator active: no
Validator index:
Beacon status: withdrawal_done
Express Ticket Used: yes
```
### `exit-validator`
This command allows you to select a validator to voluntarily exit on the Beacon Chain. Use this when you want to close a validator and withdraw its final ETH balance. Note that this cannot be undone - once you trigger an exit, the validator will shut down permanently.
## Minipool Commands
The `minipool` group involves commands that affect your minipools.
As with the `node` group, we'll cover these more in-depth in the next section but it may be helpful to see them all now.
Here is what the `rocketpool minipool help` output will show:
```
NAME:
rocketpool minipool - Manage the node's minipools
USAGE:
rocketpool minipool command [command options] [arguments...]
COMMANDS:
status, s Get a list of the node's minipools
stake, t Stake a minipool after the scrub check, moving it from prelaunch to staking.
set-withdrawal-creds, swc Convert the withdrawal credentials for a migrated solo validator from the old 0x00 value to the minipool address. Required to complete the migration process.
import-key, ik Import the externally-derived key for a minipool that was previously a solo validator, so the Smart Node's VC manages it instead of your externally-managed VC.
refund, r Refund ETH belonging to the node from minipools
distribute-balance, d Distribute a minipool's ETH balance between your withdrawal address and the rETH holders.
exit, e Exit staking minipools from the beacon chain
close, c Withdraw any remaining balance from a minipool and close it
delegate-upgrade, u Upgrade a minipool's delegate contract to the latest version
rescue-dissolved, rd Manually deposit ETH into the Beacon deposit contract for a dissolved minipool, activating it on the Beacon Chain so it can be exited.
OPTIONS:
--help, -h show help
```
::: warning NOTE
The `set-withdrawal-creds` and `import-key` commands only apply to minipools that were created from solo validator migrations before Saturn 1.
[Solo validator migration](/node-staking/solo-staker-migration.md) is no longer possible, and the corresponding `create-vacant-minipool` and `promote` commands have been removed from the CLI.
:::
Below is a summary of the commands that you'll typically use.
### `status`
This command simply provides a summary of each of your minipools.
This includes its current status, the eth1 address of the minipool, the commission on it (called the `node fee`), the public key of the corresponding ETH2 validator, and some other things:
```
$ rocketpool minipool status
1 Staking minipool(s):
--------------------
Address:
Penalties: 0
Status updated: 2025-07-15, 08:31 +0000 UTC
Node fee: 5.000000%
Node deposit: 8.000000 ETH
RP ETH assigned: 2025-07-14, 20:26 +0000 UTC
RP deposit: 24.000000 ETH
Minipool Balance (EL): 0.064202 ETH
Your portion: 0.018458 ETH
Available refund: 0.000000 ETH
Total EL rewards: 0.018458 ETH
Validator pubkey:
Validator index:
Validator active: yes
Beacon balance (CL): 32.000347 ETH
Your portion: 8.000099 ETH
Use latest delegate: no
Delegate address: 0x56903694d881282D33ed0643EAe14263880Dd47F
Rollback delegate:
Effective delegate: 0x56903694d881282D33ed0643EAe14263880Dd47F
```
### `refund`
This command lets you pull 16 ETH back from a minipool if you deposited 32 ETH to create one, once Rocket Pool was able to contribute 16 ETH from the rETH staking pool.
### `exit`
This command submits a voluntary exit for your validator on the Beacon Chain.
Use this when you want to close a validator and withdraw its final ETH balance.
Note that **this cannot be undone** - once you trigger an exit, the validator will shut down permanently.
## Useful Flags
There are some useful global flags that you can add to some of the above commands, which you may want to take advantage of.
### Setting a Custom Max Fee or Priority Fee (Gas Price)
Starting with [the London ETH1 hardfork](https://coinquora.com/ethereum-london-hard-fork-all-you-need-to-know/) in July of 2021, Ethereum transactions no longer use a single gas price for their transactions.
Instead, modern Ethereum transactions use two values:
- The **max fee**, which describes the absolute maximum gas price you're willing to accept on a transaction
- The **max priority fee**, which describes the maximum amount you're willing to "tip" the miner for including your transaction in a block
::: tip TIP
The way these two values work can be a bit convoluted, so here are some simple examples.
Let's say the current network fee, called the **base fee**, is at 50 gwei.
You submit a transaction with an **80 gwei** max fee, and a priority fee of **2 gwei**.
Because the network's base fee is lower than your max fee, this transaction could get picked up in the current block.
It would cost you **50 gwei** for the base fee and **2 gwei** for the priority fee; even though you set your max fee to 80, **it would only cost you 52 gwei total**.
As another example, say you have that same transaction, but now the network's base fee is **100 gwei**.
Since 100 gwei is larger than your 80 gwei max fee, your transaction **will not** be included in this block.
Instead, it will simply sit in the transaction pool until the base fee is low enough to include it.
Now, let's say the current base fee is **50 gwei** again, and your transaction has a max fee of **80** gwei and a priority fee of **4 gwei**.
It would execute with a total cost of **54 gwei**.
The 4 gwei priority fee would ensure that it was included in front of all of the transactions with a lower priority fee.
If you **really** want the transaction to go through at all costs, you can set the priority fee to be the same as the max fee.
This emulates the legacy gas behavior, so your transaction will use all of the gas you give it - regardless of whether or not the network's base fee is lower than your max fee or not.
:::
By default, Rocket Pool will use an oracle to look at the current transaction pool and suggest a reasonable max fee for any transactions you trigger.
It uses [EtherChain](https://etherchain.org/tools/gasnow) for its primary suggestion oracle, and [Etherscan](https://etherscan.io/gastracker) as a backup.
If you prefer, you can set a custom max fee (in gwei) you'd be willing to pay with the `-f` flag.
You can also set a custom priority fee with the `-i` flag.
To do this, add them after `rocketpool` and before the other command information.
For example, calling `node set-timezone` with this flag would provide the following output:
```
$ rocketpool -f 10 node set-timezone
Would you like to detect your timezone automatically? [y/n]
n
Please enter a timezone to register with in the format 'Country/City':
Australia/Brisbane
You have chosen to register with the timezone 'Australia/Brisbane', is this correct? [y/n]
y
Using the requested max fee of 10.00 gwei (including a max priority fee of 2.00 gwei).
Total cost: 0.0005 to 0.0007 ETH
Are you sure you want to set your timezone? [y/n]
```
This shows that regardless of what max fee the network recommends, it will use your custom max fee of 10 gwei (and priority fee if you specify it) instead when submitting this transaction.
::: warning NOTE
If you set a manual max fee, we strongly encourage you to use a third-party gas price oracle such as [EtherChain](https://etherchain.org/tools/gasnow) to determine if that fee is high enough for the current network conditions before submitting the transaction.
:::
### Canceling / Overwriting a Stuck Transaction
Sometimes, you might run into a scenario where you sent a transaction to the network but you used a gas price that is far too low for the network conditions, and it will take a prohibitively long time to execute.
Since all of your subsequent transactions will wait until that one goes through, that transaction essentially blocks all of the operations on your Rocket Pool node.
To deal with this situation, we've added a global flag that lets you "cancel" such a transaction by replacing it with something else.
Every Ethereum wallet, including your node wallet, sends transactions sequentially.
Each transaction you send has a number called a `nonce` that identifies where it lives in that sequence.
The very first transaction you send will have a `nonce` of 0, the next one you send will have a `nonce` of 1, and so on.
This overwriting technique involves sending a _new_ transaction that uses the same `nonce` as your existing _stuck_ transaction, but will ideally include a higher gas price than the stuck one.
This means that the new one will be mined first.
As soon as it's mined into a block, the old one will be discarded from the network as though it was never sent in the first place.
To use this flag, you first need to find the `nonce` of your stuck transaction:
1. Go to an ETH1 block explorer like [https://etherscan.io](https://etherscan.io).
2. Navigate to the address of your wallet, and look at the list of transactions.
3. Go through them, starting with the most recent, until you find the furthest one down the list that has the `Pending` state.
4. Mark the `nonce` of that transaction. That's what you'll need.
Once you have it, simply call any transaction with the CLI using the `--nonce -i 2.2` flags after `rocketpool` and before the rest of the command.
::: warning NOTE
You **must** include the `-i` (priority fee) flag in order to overwrite a previous transaction.
This number must be at least 10% higher than whatever priority fee your old transaction used.
The Smart Node uses a priority fee of 2 gwei by default, so a value of `2.2` is usually sufficient for an override.
If your old transaction used a custom fee (say, 10 gwei), you will need to set it at least 10% higher in the overriding transaction (so in this example, 11 gwei).
:::
As an example, say I submitted a transaction with a `nonce` of 10 and a max fee of 20 gwei, but the current network fee is 100 gwei so my transaction is stuck.
To fix it, I will submit a transaction where I send a small amount of ETH from myself back to myself with a higher max fee (say, 150 gwei) and a higher priority fee.
I'll burn a little gas doing it, but it will unstick the broken transaction:
```
$ rocketpool --nonce 10 -f 150 -i 2.2 node send 0.0001 eth
Using the requested max fee of 150.00 gwei (including a max priority fee of 2.20 gwei).
Total cost: 0.0032 to 0.0032 ETH
Are you sure you want to send 0.000100 eth to ? This action cannot be undone! [y/n]
```
The Smart Node stack will automatically check to make sure that the `nonce` you have provided is valid (it refers to a pending transaction) before sending it and wasting your gas accidentally.
If not, it will return an error message.
Otherwise, it will go through and provide you with the transaction details so you can monitor it to confirm that it did, in fact, overwrite your old stuck transaction.
That's it for the common CLI commands.
In the next section, we'll walk through how to create a megapool validator and start validating on the Beacon Chain.
---
url: /node-staking/commit-boost.md
---
> For AI agents: the complete documentation index is available at /llms.txt, the full documentation bundle is available at /llms-full.txt.
# Commit-Boost
Commit-Boost is an open-source and community-driven validator sidecar that serves as an alternative to MEV-Boost for handling Proposer-Builder Separation (PBS).
In addition to block building, Commit-Boost also supports proposer commitments protocols, such as preconfirmations and inclusion lists.
The Smart Node currently runs only Commit-Boost's PBS (block building) module, so these extra protocols aren't available through the Smart Node yet.
If you're new to MEV and PBS, we recommend reading the [MEV, MEV-Boost & MEV Rewards](/node-staking/mev.md) page first for background information.
## What is Commit-Boost?
Commit-Boost is a drop-in alternative for MEV-Boost with additional capabilities. The main purpose is to standardize communication between Ethereum validators
and third-party protocols.
- Uses the same Builder API as MEV-Boost (default port 18550), so your Beacon Node talks to it the same way it talks to MEV-Boost.
- Connects to MEV relays and handles block building, just like MEV-Boost.
- Supports a modular plugin system for upcoming commitment protocols.
- For developers, it provides a single API to interact with validators.
Commit-Boost is [open source](https://github.com/Commit-Boost/commit-boost-client) and was [audited](https://github.com/Commit-Boost/commit-boost-client/blob/main/audit/Sigma_Prime_Commit_Boost_Client_Security_Assessment_Report_v2_0.pdf) by Sigma Prime in Dec 2024.
## Commit-Boost vs MEV-Boost
Both Commit-Boost and MEV-Boost handle PBS using the builder marketplace and MEV relay infrastructure. Here's how they differ:
| Feature | MEV-Boost | Commit-Boost |
| ------------------------------ | --------- | ---------------------------------------------------------------------------------- |
| **Purpose** | PBS only | PBS + extensible and modular platform |
| **Maintainer** | Flashbots | Community / Commit-Boost team |
| **Future protocols** | Static | Plugin system for third-party protocols (not available through the Smart Node yet) |
| **Available relays (mainnet)** | 8 relays | 5 relays (OFAC-filtering only) |
From the Smart Node's perspective, both connect to your Beacon Node identically. Commit-Boost is forward-looking as Ethereum adds new proposer commitment features like preconfirmations.
:::tip NOTE
You cannot run both MEV-Boost and Commit-Boost simultaneously. The Smart Node enforces this when saving your config within the TUI.
:::
## Available Relays
Here are the relays available in Commit-Boost:
| Name | Regulation | Networks | MEV Types |
| ------------------------------------------------------------------------------------------------------------ | ------------------------------ | -------------- | --------- |
| [Flashbots](https://boost.flashbots.net/) | Complies with OFAC Sanctions\* | Mainnet, Hoodi | All types |
| [bloXroute Regulated](https://docs.bloxroute.com/eth/block-builders-and-validators/mev-relay-for-validators) | Complies with OFAC Sanctions\* | Mainnet, Hoodi | All types |
| [Titan Regional](https://docs.titanrelay.xyz/) | Complies with OFAC Sanctions\* | Mainnet only | All types |
| [Ultra Sound Filtered](https://relay-filtered.ultrasound.money/) | Complies with OFAC Sanctions\* | Mainnet only | All types |
| BTCS OFAC+ | Complies with OFAC Sanctions\* | Mainnet only | All types |
| [AESTUS](https://aestus.live/) | Unregulated | Hoodi only | All types |
| [Titan Global](https://docs.titanrelay.xyz/) | Unregulated | Hoodi only | All types |
:::warning NOTE
\*Relays that comply with OFAC sanctions follow the blacklist of addresses that the United States Office of Foreign Assets Control (OFAC) maintains.
We **strongly encourage** you to read more about OFAC sanctions, network censorship, and make a carefully-informed decision about which relays you are comfortable using.
More information can be found in the [MEV page](/node-staking/mev.md#block-builders-and-relays).
:::
:::warning IMPORTANT
On mainnet, Commit-Boost supports **fewer relays** than MEV-Boost in the Smart Node. Specifically, Commit-Boost on mainnet does **not** include:
- Ultra Sound (non-filtering)
- Aestus
- Titan Global (non-filtering)
All relays available in Commit-Boost on mainnet are regulated/filtered versions that comply with OFAC sanctions. If you need access to unregulated relays, you should continue using MEV-Boost instead of Commit-Boost.
:::
## Rewards and APY
Commit-Boost provides similar rewards to MEV-Boost.
Since Commit-Boost only supports regulated relays on mainnet, you may see slightly different MEV rewards compared to MEV-Boost if you were previously using unregulated relays.
In the future, proposer commitment protocols such as preconfirmations and inclusion lists could add additional yield on top of standard MEV rewards.
## Configuring Commit-Boost in the Smart Node
To learn how to configure Commit-Boost, select your mode below:
**Docker Mode**
Configuring Commit-Boost is easy with the Smart Node's configuration TUI.
Start by running `rocketpool service config` and select the `ePBS` category:
Then select `Commit-Boost`:
Check the box labeled `Enable Commit-Boost` to enable it.
:::tip NOTE
If MEV-Boost is currently enabled, you'll need to disable it before saving and exiting the TUI. The Smart Node will not allow both to be enabled simultaneously.
:::
Once enabled, you'll see several configuration options:
**Commit-Boost Mode**
- **Locally Managed** (recommended): The Smart Node runs and manages the Commit-Boost container for you.
- **Externally Managed**: Use a Commit-Boost instance that you manage yourself. Enter its address in the **External URL** field (e.g., `http://192.168.1.10:18550`). None of the settings below apply in this mode.
:::warning NOTE
If you run your own Commit-Boost instance, you **must** only register with the trusted relays listed above. Using untrusted relays may result in penalties from the Oracle DAO.
:::
**If using Locally Managed mode:**
**Relay Selection Mode**
- **Use All Relays**: Automatically enables all relays available for your current network (mainnet or testnet). This is the simplest option.
- **Manual Mode**: Shows individual checkboxes for each available relay, letting you pick exactly which relays to use.
**Custom Relays**: Add custom relay URLs (comma-separated) if you want to use relays not in the default list. Only add relays from the trusted list above; using untrusted relays may result in penalties from the Oracle DAO.
**Port**: Default `18550` (same as MEV-Boost). You typically don't need to change this.
**Expose API Port**:
- **Closed** (recommended): API is only accessible within the Docker network
- **Open to Localhost**: API is accessible on localhost
- **Open to External hosts**: API is accessible from external machines. Only select this if you need external access _and_ you've followed the proper steps to secure your node from unwanted traffic: [Securing Your Node](/node-staking/securing-your-node.md)
**Container Tag**: The Docker image tag for Commit-Boost. The Smart Node sets the default and updates it with each release. You can change it manually if a new version is released before the Smart Node is updated.
Once you've configured Commit-Boost and selected your relays, save and exit. The Smart Node will restart the relevant containers and automatically configure your Beacon Node and Validator Client to use Commit-Boost.
See below for instructions on verifying it's working correctly.
**Hybrid Mode**
Configuring Commit-Boost is easy with the Smart Node's configuration TUI.
Start by running `rocketpool service config` and select the `ePBS` category:
Then select `Commit-Boost`:
Check the box labeled `Enable Commit-Boost` to enable it.
:::tip NOTE
If MEV-Boost is currently enabled, you'll need to disable it before saving and exiting the TUI. The Smart Node will not allow both to be enabled simultaneously.
:::
Once enabled, you'll see several configuration options:
**Commit-Boost Mode**
This determines whether the Smart Node manages Commit-Boost for you, or if you're running your own instance:
- **Locally Managed** (recommended): The Smart Node runs and manages the Commit-Boost container for you. Some users prefer to let Rocket Pool manage its own instance of Commit-Boost and connect their externally-managed Beacon Nodes to it.
- **Externally Managed**: Use this if your externally-managed Beacon Node already connects to its own Commit-Boost (or MEV-Boost) instance. There is no URL to enter: the Smart Node only enables the builder flags on its Validator Client, and you must enable the builder endpoint in your Beacon Node's own configuration. If you don't, you may not be able to publish blocks and will miss significant rewards.
:::warning NOTE
If you run your own Commit-Boost instance, you **must** only register with the trusted relays listed above. Using untrusted relays may result in penalties from the Oracle DAO.
:::
**If using Locally Managed mode** (recommended for most users):
**Relay Selection Mode**
- **Use All Relays**: Automatically enables all relays available for your current network (mainnet or testnet). This is the simplest option.
- **Manual Mode**: Shows individual checkboxes for each available relay, letting you pick exactly which relays to use.
**Custom Relays**: Add custom relay URLs (comma-separated) if you want to use relays not in the default list. Only add relays from the trusted list above; using untrusted relays may result in penalties from the Oracle DAO.
**Port**: Default `18550` (same as MEV-Boost). You typically don't need to change this.
**Expose API Port**: This setting **should be changed from the default** so that your externally-managed Beacon Node can communicate with the Commit-Boost instance Rocket Pool will manage.
- **Closed** (default): API is only accessible within the Docker network
- **Open to Localhost**: API is accessible on localhost. Select this if your externally-managed BN is running on the same machine.
- **Open to External hosts**: API is accessible from external machines. Only select this if your externally-managed BN is running on a different machine _and_ you've followed the proper steps to secure your node from unwanted traffic: [Securing Your Node](/node-staking/securing-your-node.md)
**Container Tag**: The Docker image tag for Commit-Boost. The Smart Node sets the default and updates it with each release. You can change it manually if a new version is released before the Smart Node is updated.
**If using Externally Managed mode**:
There are no other settings to fill in. Relay selection, port, and the other options don't apply since you're managing Commit-Boost (and your Beacon Node's connection to it) yourself.
Once you've configured Commit-Boost and selected your relays, save and exit the TUI.
**Configuring your Beacon Node (Locally Managed mode)**: You'll need to manually configure your externally-managed Beacon Node to connect to the Smart Node's Commit-Boost instance. Set your Beacon Node's builder endpoint to `http://localhost:18550` (or use the appropriate IP if your BN runs on a different machine). Refer to your Beacon Client's documentation for the specific flag to enable the builder endpoint.
The Smart Node will automatically configure your Validator Client with the necessary builder flags when you enable Commit-Boost.
:::tip NOTE
You **may need to permit this in your UFW configuration** if you have the firewall enabled.
:::
See below for instructions on verifying it's working correctly.
**Native Mode**
Native Mode users who want to use Commit-Boost must set it up manually outside the Smart Node:
Refer to the [official Commit-Boost documentation](https://commit-boost.github.io/commit-boost-client/) for installation and configuration instructions.
:::warning NOTE
If you run your own Commit-Boost instance, you **must** only register with the trusted relays listed above. Using untrusted relays may result in penalties from the Oracle DAO.
:::
## Checking Logs and Verifying Operation
After enabling Commit-Boost, you can verify it's running correctly by checking the logs:
```bash
rocketpool service logs commit-boost
```
You should see log output similar to this, showing successful validator registrations with the relays:
```
rocketpool_commit-boost | 2026-05-21T03:06:11.039761Z INFO : new request ua="nim-presto/0.0.3 (amd64/linux)" num_registrations=7 method=/eth/v1/builder/validators req_id=dcbb5e96-709b-4e0f-b336-cca37eb81d6b
rocketpool_commit-boost | 2026-05-21T03:06:11.587846Z INFO : register validator successful method=/eth/v1/builder/validators req_id=dcbb5e96-709b-4e0f-b336-cca37eb81d6b
rocketpool_commit-boost | 2026-05-21T03:06:11.587862Z INFO : Responded with 200 OK in 548 ms method=/eth/v1/builder/validators req_id=dcbb5e96-709b-4e0f-b336-cca37eb81d6b
rocketpool_commit-boost | 2026-05-21T03:12:35.037766Z INFO : new request ua="nim-presto/0.0.3 (amd64/linux)" num_registrations=7 method=/eth/v1/builder/validators req_id=b47edad9-be4d-4a7f-b0d0-6c7ef4808629
rocketpool_commit-boost | 2026-05-21T03:12:35.642706Z INFO : register validator successful method=/eth/v1/builder/validators req_id=b47edad9-be4d-4a7f-b0d0-6c7ef4808629
rocketpool_commit-boost | 2026-05-21T03:12:35.642721Z INFO : Responded with 200 OK in 604 ms method=/eth/v1/builder/validators req_id=b47edad9-be4d-4a7f-b0d0-6c7ef4808629
```
Key things to look for in the logs:
- `new request` entries showing your Validator Client connecting to Commit-Boost
- `register validator successful` confirming your validators are registered with the relays
- `200 OK` responses indicating successful communication
You can also verify Commit-Boost is running with:
```bash
rocketpool service version
```
Near the end of the output, you should see:
```
MEV-Boost client: Disabled
Commit-Boost client: Enabled (Local Mode)
Image: ghcr.io/commit-boost/commit-boost:
```
If you use an externally-managed instance, it shows `Enabled (External Mode)` instead.
## Switching from MEV-Boost to Commit-Boost
Switching from MEV-Boost to Commit-Boost is straightforward:
1. Run `rocketpool service config`
2. Select the **ePBS** category, then **MEV-Boost**, and uncheck `Enable MEV-Boost`
3. Go back to the **ePBS** category, select **Commit-Boost**, and check `Enable Commit-Boost`
4. Configure your relay preferences
5. Save and exit
The Smart Node will handle the rest. Your Beacon Node will be updated automatically to use Commit-Boost instead of MEV-Boost.
:::tip NOTE
Switching restarts your Beacon Node, so your validators may miss an attestation or two while it comes back up. Avoid switching right before a scheduled proposal.
:::
## Additional Resources
- [Official Commit-Boost Documentation](https://commit-boost.github.io/commit-boost-client/)
- [Commit-Boost GitHub Repository](https://github.com/Commit-Boost/commit-boost-client)
- [Understanding MEV and PBS](/node-staking/mev.md)
---
url: /node-staking/config-docker.md
---
> For AI agents: the complete documentation index is available at /llms.txt, the full documentation bundle is available at /llms-full.txt.
# Configuring the Smart Node Stack (Docker / Hybrid Mode)
Running complete Execution layer and Consensus layer clients can be daunting; there are several options to choose from and each of them has a plethora of different settings.
Luckily, the Smart Node is designed to hide all of that complexity so it's quick and easy to configure, while still giving you the freedom to customize everything if you so desire.
In this section, we'll go over the various methods for configuring the Smart Node if you're using the **Docker-based setup** or a **Hybrid setup** where you connect to externally managed Execution or Consensus clients (e.g., clients you manage outside of the Smart Node for solo staking).
::: warning NOTE
If you're using Native mode without Docker, please visit the [Native configuration guide](/node-staking/config-native.md) instead.
:::
There are three ways to configure it:
- Via the [Wizard UI](#configuring-via-the-wizard) - this is the easiest way. It only asks you a few basic questions and uses well-tested defaults for the test. This will be what you are presented with when you run `rocketpool service config` for the first time.
- Via the [Settings Manager UI](#configuring-via-the-settings-manager) - this gives you access to all of the Smart Node's settings so you can customize everything as much as you want.
- Headlessly via the [Command Line](#configuring-via-the-command-line) - this is an option for people who run the Smart Node in a headless (non-interactive) environment and need to configure it automatically.
Choose which mode you'd like to learn more about from the list above, or simply scroll through each option below.
## Configuring via the Wizard
To start the configuration process, run the following command:
```shell
rocketpool service config
```
This will launch a terminal-based UI that will allow you to quickly and easily configure your node, as well as provide optional fine-grained control over every setting for advanced customization.
::: tip NOTE
If you've already configured the Smart Node, you will instead be greeted with the [Settings Manager](#configuring-via-the-settings-manager).
You can choose to re-open the Wizard from there if you prefer it, and all of your existing settings will be pre-selected for you.
:::
When you run the config UI for the first time (or if you choose to run the Wizard again later), you will be presented with a screen that looks like this:
::: tip TIP
To use the Wizard, **press the `Arrow Keys` (up/down/left/right) to navigate between things such as buttons (choices) or text boxes**.
You can also use `Tab` and `Shift+Tab` if you prefer - it will do the same thing.
For buttons, **the one that's currently selected will be highlighted in green**.
The ones in black are not selected.
In the screenshot above, `Next` is currently selected and `Quit` is not.
**Press `Enter` or `Space` to select a button**, analogous to clicking on it with the mouse.
**Press `Escape` to go back to the previous dialog** if you changed your mind about something.
This will come in handy as you progress through the various Wizard pages.
**Hold `Ctrl` and press `C` at any time to exit the Wizard without saving anything**.
For example, on the screen above, you could press the `left` and `right` arrow keys to move between the `Next` and `Quit` buttons.
Pressing `Enter` while `Next` is selected will proceed to the next screen.
Pressing `Enter` while `Quit` is selected will quit the Wizard without saving.
:::
When you're ready to begin, press `Next`.
### Choosing a Network
In the next screen, you will be asked to choose which network you want to use:
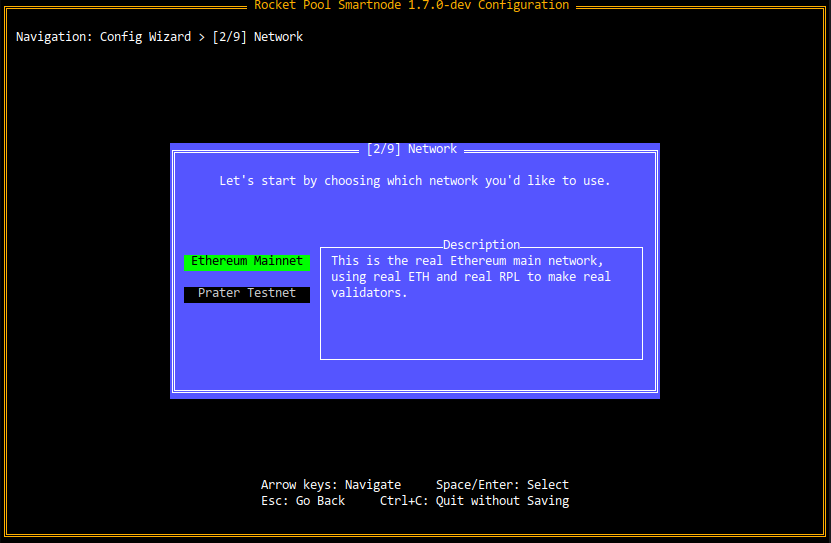
You can highlight the different choices with the `Up` and `Down` arrow keys (or `Tab` and `Shift+Tab`).
When you change choices, the **Description** box on the right will show you a brief description of each option.
This is true for all choice-based pages in the Wizard, not just the network selection, so you will see this style of page frequently.
If you want to practice running a Rocket Pool node on the Hoodi test network with fake ETH and RPL you can get for free, select **Hoodi Testnet**.
If you're ready to create a real Rocket Pool node on Mainnet to earn real rewards, select **Mainnet**.
::: tip NOTE
Official networks (Mainnet, Hoodi Testnet, and Devnet) come from `networks-default.yml`. You can add or override networks in `~/.rocketpool/networks-extra.yml` without rebuilding Smart Node. See [Custom and override networks](/node-staking/advanced-config.md#custom-and-override-networks) for details.
:::
### Client Mode
You will be presented with two options for client mode:
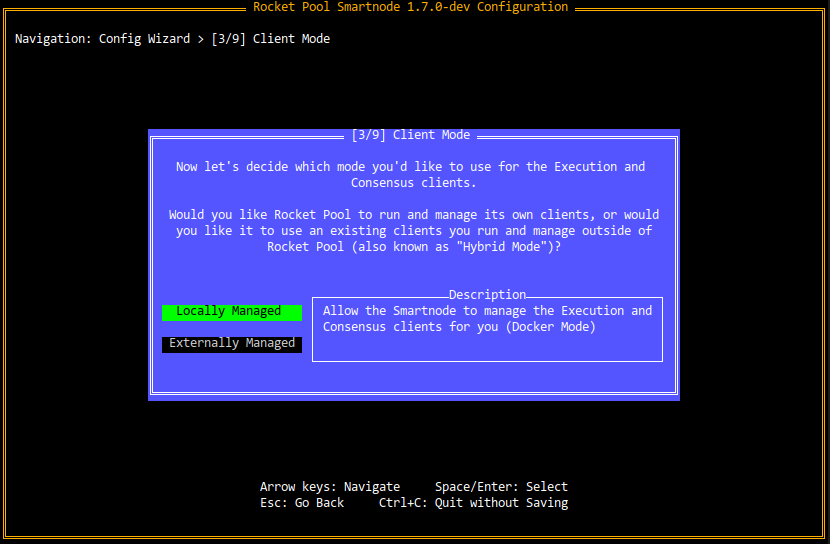
**Locally Managed** (also known as **"Docker Mode"**) is the default choice.
Use it if you don't already have a client pair and you want the Smart Node to manage one for you.
By choosing this, the Smart Node will create, configure and manage an Execution & Consensus Client pair as Docker containers.
Don't worry, you'll get to choose _which_ client you want to run next.
**Externally Managed** (also known as **"Hybrid Mode"**) is a convenient choice for users that already have an Execution & Consensus client pair running elsewhere that they manage manually.
By choosing this, the Smart Node will simply connect to your existing clients and will not run one of its own.
For example, users can use this to plug into the clients that they currently use for solo staking; that way, they don't need to have two separate copies of the clients.
:::warning NOTE
Since the Execution-Consensus Layer Merge, you _cannot_ mix and match these modes (e.g., you cannot have a local Execution client but an externally-managed Consensus client).
You must either choose all locally-managed or all externally-managed.
:::
### Execution Client Setup
Choose which mode you'd like to use for managing your Execution client and follow the steps in the corresponding tab below:
**Locally Managed**
If you want the Smart Node to manage an Execution client for you, the next screen will ask you to pick a client:
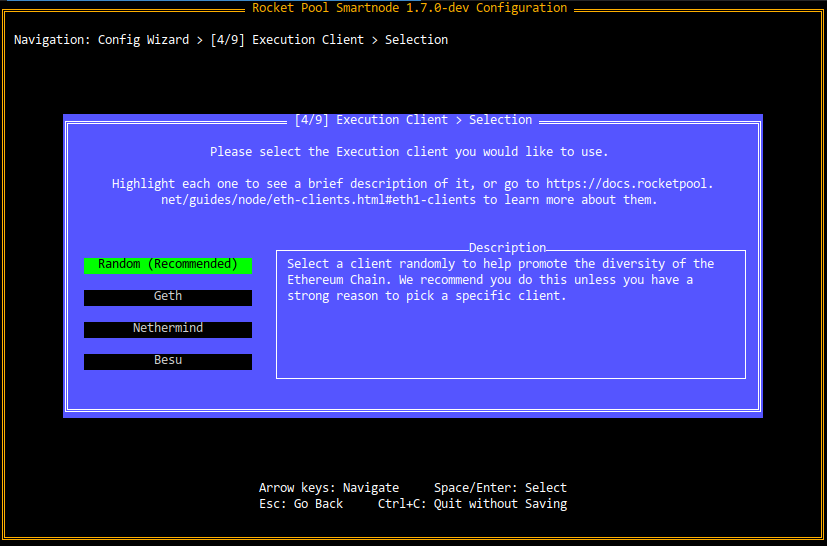Please refer to the [Choosing your ETH clients](/node-staking/eth-clients.md#execution-clients) section for a description of each option.
Once you've made your choice, click on the appropriate tab below to learn how to configure it:
If you choose **Geth**, **Besu**, **Nethermind**, **Reth**, or **Erigon**, the Wizard will handle all of the configuration for you.
You can manually adjust some of its parameters at the end of this process, but the defaults that it uses are completely appropriate for node operation.
You can proceed to the next section.
If you choose **Erigon**, also forward its **Torrent Port** (default **42069**, TCP and UDP) as well as P2P port **30303**, so snapshot sync and peering work. The Wizard still uses sensible defaults for everything else.
NOTE
**Open up the P2P port in your router's port forwarding setup**. Configure it to forward **port 30303** on both TCP and UDP to your machine's local IP address.
This way, other Execution clients can discover it and communicate with it from the outside. This will help your Execution client sync quickly and improve performance (and thus rewards).
Each router has a different way of doing this, so **you'll need to check out your router's manual on how to set up port forwarding**.
NOTE
Because the Smart Node will run in its own Docker container, it will use Docker's internal network.
You won't be able to use hostnames like `localhost` or `127.0.0.1` here; if your Execution client is running on the same machine as the Smart Node, you will need to provide the machine's LAN IP address instead.
And with that, your Execution client is all set!
**External**
For an externally managed Execution client, the next screen will prompt you for the URLs of its HTTP-based RPC (web3) API and its Websocket-based RPC API:
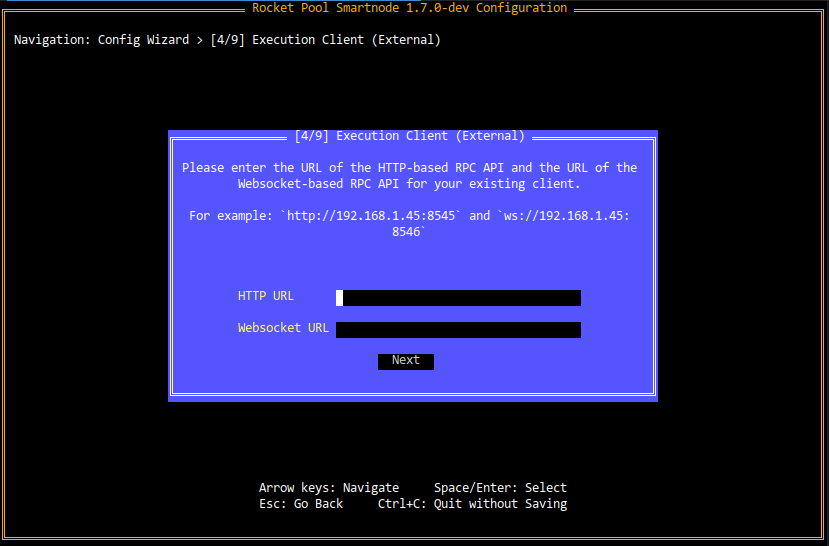The Smart Node will use the HTTP URL to communicate with it and perform blockchain activities, such as querying the chain's state and submitting transactions.
**If you don't already have your client's API port enabled and accessible from your Smart Node machine, you will need to set it up now.**
Instructions on this vary from client to client; consult your client's documentation to learn how to set up the HTTP RPC endpoint.
The Websocket URL is only relevant if you need it for your own usage; the Smart Node does not use it.
You can leave it blank if you do not need it.
NOTE
Because the Smart Node will run in its own Docker container, it will use Docker's internal network.
You won't be able to use hostnames like `localhost` or `127.0.0.1` here; if your fallback Execution client is running on the same machine as the Smart Node, you will need to provide the machine's LAN IP address instead.
When you're happy with your fallback Execution client choices, proceed to the next step.
### Consensus Client Setup
Now that you have an Execution client ready, the next task is to set up the Consensus client.
The "mode" (local or external) will be inherited from the choice you used for your Execution client earlier.
Choose which mode you selected earlier from the tabs below:
**Locally Managed**
If you want the Smart Node to manage a Consensus client for you, the next screen will ask you to pick a client:
**The preferred choice** for the overall health and diversity of the network is the **Random (Recommended)** choice, which will randomly choose among one of the four supported Consensus clients for you.
If you would prefer to choose an explicit client, please refer to the [Choosing your ETH clients](/node-staking/eth-clients.md#consensus-clients) section for a description of each option so you can make an educated decision.
NOTE
There are two conditions that will prompt you with warnings based on client selection:
- The selected client is currently [a supermajority client](https://clientdiversity.org/), meaning that an unhealthy majority of validators on the Beacon Chain use it which threatens the stability of the network
- The selected client is **too resource-heavy** for the hardware you're currently using
If either of those cases is true for your chosen client, you will be warned and asked to choose a different client.
You have the option of continuing to use the one you selected, but you must be aware of the risks in doing so.
Once you've made your choice or have been assigned a random client, click on the appropriate tab below to learn how to configure it:
**Lighthouse**
The first option in Lighthouse's configuration will ask about your validator's **graffiti** message:
This is an optional custom message you can attach to any blocks you propose on the Beacon Chain.
The message will be preserved forever, so think of it like a fun little way to leave your mark!
**Note the maximum length of the graffiti is 16 characters.**
If you'd like to see some examples of what validators are using for Graffiti today, [take a look here](https://beaconcha.in/blocks).
Next up is an option to enable or disable **Checkpoint Sync**:
Lighthouse has the ability to instantly sync to the latest block on the Beacon Chain network by connecting to an existing Beacon Node that you trust.
This is preferred over conventional syncing because it doesn't require any time (whereas conventional syncing can take days) and comes with some security benefits.
Take a look at [their documentation on checkpoint syncing](https://lighthouse-book.sigmaprime.io/checkpoint-sync.html) for more information if you are curious.
You can enter the URL of any Beacon Node that provides access to its REST API here.
See [the section below on Checkpoint Syncing](#beacon-chain-checkpoint-syncing) if you'd like to use it.
The final question will ask if you want to enable Doppelgänger Protection:
Lighthouse supports a feature called [Doppelgänger Detection](https://lighthouse-book.sigmaprime.io/validator-doppelganger.html).
In a nutshell, this feature will **intentionally** miss a few attestations after Lighthouse's Validator Client restarts; while doing this, it will listen to see if attestations are still being sent to the network using your validator keys.
Ideally, there would not be any attestations (which means no other machine is running with your validator keys attached).
After its short waiting period, Lighthouse would start validating normally.
_However_, if there _is_ another machine running with your validator keys attached, then Lighthouse will immediately shut down and issue an error message in its log files.
The reason for this is that if it were to start attesting as well, then you would start **double attesting** which is a **slashable offense**.
When slashed, your validator would be forcibly exited from the Beacon chain and you would be penalized a significant amount of ETH.
Most of the time, doppelgänger detection will result in nothing but a few missed attestations after a client restart.
In situations where you are moving your validator to a new machine or you are changing to a new Beacon client, however, **doppelgänger detection can prevent you from being slashed by double attesting accidentally**.
Think of it as cheap insurance for your minipools; you'll miss a trivial bit of profit every time you restart, but you can be fairly confident that you won't accidentally run your keys in two places and get slashed for it.
Lighthouse also establishes P2P connections over the [QUIC protocol](https://en.wikipedia.org/wiki/QUIC), which the Smart Node always enables. It uses the **P2P QUIC Port** in the ETH2 settings (default 8001, UDP), so forward that port to your node in your router's port forwarding setup. Make sure to avoid collisions with ports already in use by your node (or fallback/testnet nodes). Also make sure the same port is open if you're using a firewall on your node (check `ufw status`).
To check if the QUIC configuration is working you should see a 2-digit number after `libp2p_quic_peers` when running `docker run --network rocketpool_net curlimages/curl http://eth2:9100/metrics | grep libp2p_peers_multi`.
**Nimbus**
The first option in Nimbus's configuration will ask about your validator's **graffiti** message:
This is an optional custom message you can attach to any blocks you propose on the Beacon Chain.
The message will be preserved forever, so think of it like a fun little way to leave your mark!
**Note the maximum length of the graffiti is 16 characters.**
If you'd like to see some examples of what validators are using for Graffiti today, [take a look here](https://beaconcha.in/blocks).
Next up is an option to enable or disable **Checkpoint Sync**:
Nimbus has the ability to instantly sync to the latest block on the Beacon Chain network by connecting to an existing Beacon Node that you trust.
This is preferred over conventional syncing because it doesn't require any time (whereas conventional syncing can take days) and comes with some security benefits.
Take a look at [their documentation on checkpoint syncing](https://nimbus.guide/trusted-node-sync.html) for more information if you are curious.
You can enter the URL of any Beacon Node that provides access to its REST API here.
See [the section below on Checkpoint Syncing](#beacon-chain-checkpoint-syncing) if you'd like to use it.
The final question will ask if you want to enable Doppelgänger Protection:
Nimbus supports a feature called [Doppelgänger Protection](https://nimbus.guide/faq.html#why-does-my-validator-miss-two-epochs-of-attestations-after-restarting).
In a nutshell, this feature will **intentionally** miss a few attestations after Nimbus restarts; while doing this, it will listen to see if attestations are still being sent to the network using your validator keys.
Ideally, there would not be any attestations (which means no other machine is running with your validator keys attached).
After its short waiting period, Nimbus would start validating normally.
_However_, if there _is_ another machine running with your validator keys attached, then Nimbus will immediately shut down and issue an error message in its log files.
The reason for this is that if it were to start attesting as well, then you would start **double attesting** which is a **slashable offense**.
When slashed, your validator would be forcibly exited from the Beacon chain and you would be penalized a significant amount of ETH.
Most of the time, doppelgänger detection will result in nothing but a few missed attestations after a client restart.
In situations where you are moving your validator to a new machine or you are changing to a new Beacon client, however, **doppelgänger detection can prevent you from being slashed by double attesting accidentally**.
Think of it as cheap insurance for your minipools; you'll miss a trivial bit of profit every time you restart, but you can be fairly confident that you won't accidentally run your keys in two places and get slashed for it.
Nimbus supports P2P gossip over the [QUIC protocol](https://en.wikipedia.org/wiki/QUIC), which the Smart Node always enables. It uses the **P2P QUIC Port** under Nimbus settings (default **8001**, UDP), so forward that port to your node in your router's port-forwarding setup, and open it in the host firewall if you use one (`ufw status`). Avoid collisions with other nodes on the same machine (or fallback / testnet nodes).
**Prysm**
The first option in Prysm's configuration will ask about your validator's **graffiti** message:
This is an optional custom message you can attach to any blocks you propose on the Beacon Chain.
The message will be preserved forever, so think of it like a fun little way to leave your mark!
**Note the maximum length of the graffiti is 16 characters.**
If you'd like to see some examples of what validators are using for Graffiti today, [take a look here](https://beaconcha.in/blocks).
Next up is an option to enable or disable **Checkpoint Sync**:
Prysm has the ability to instantly sync to the latest block on the Beacon Chain network by connecting to an existing Beacon Node that you trust.
This is preferred over conventional syncing because it doesn't require any time (whereas conventional syncing can take days) and comes with some security benefits.
Take a look at [their documentation on checkpoint syncing](https://docs.prylabs.network/docs/prysm-usage/checkpoint-sync) for more information if you are curious.
You can enter the URL of any Beacon Node that provides access to its REST API here.
See [the section below on Checkpoint Syncing](#beacon-chain-checkpoint-syncing) if you'd like to use it.
The final question will ask if you want to enable Doppelgänger Protection:
Prysm supports a feature called Doppelgänger Protection.
In a nutshell, this feature will **intentionally** miss a few attestations after Prysm's Validator Client restarts; while doing this, it will listen to see if attestations are still being sent to the network using your validator keys.
Ideally, there would not be any attestations (which means no other machine is running with your validator keys attached).
After its short waiting period, Prysm would start validating normally.
_However_, if there _is_ another machine running with your validator keys attached, then Prysm will immediately shut down and issue an error message in its log files.
The reason for this is that if it were to start attesting as well, then you would start **double attesting** which is a **slashable offense**.
When slashed, your validator would be forcibly exited from the Beacon chain and you would be penalized a significant amount of ETH.
Most of the time, doppelgänger detection will result in nothing but a few missed attestations after a client restart.
In situations where you are moving your validator to a new machine or you are changing to a new Beacon client, however, **doppelgänger detection can prevent you from being slashed by double attesting accidentally**.
Think of it as cheap insurance for your minipools; you'll miss a trivial bit of profit every time you restart, but you can be fairly confident that you won't accidentally run your keys in two places and get slashed for it.
**Teku**
The first option in Teku's configuration will ask about your validator's **graffiti** message:
This is an optional custom message you can attach to any blocks you propose on the Beacon Chain.
The message will be preserved forever, so think of it like a fun little way to leave your mark!
**Note the maximum length of the graffiti is 16 characters.**
If you'd like to see some examples of what validators are using for Graffiti today, [take a look here](https://beaconcha.in/blocks).
The final question is an option to enable or disable **Checkpoint Sync**:
Teku has the ability to instantly sync to the latest block on the Beacon Chain network by connecting to an existing Beacon Node that you trust.
This is preferred over conventional syncing because it doesn't require any time (whereas conventional syncing can take days) and comes with some security benefits.
Take a look at [their documentation on checkpoint syncing](https://docs.teku.consensys.net/en/latest/HowTo/Get-Started/Checkpoint-Start/) for more information if you are curious.
You can enter the URL of any Beacon Node that provides access to its REST API here.
See [the section below on Checkpoint Syncing](#beacon-chain-checkpoint-syncing) if you'd like to use it.
**Lodestar**
The first option in Lodestar's configuration will ask about your validator's **graffiti** message:
This is an optional custom message you can attach to any blocks you propose on the Beacon Chain.
The message will be preserved forever, so think of it like a fun little way to leave your mark!
**Note the maximum length of the graffiti is 16 characters.**
If you'd like to see some examples of what validators are using for Graffiti today, [take a look here](https://beaconcha.in/blocks).
Next up is an option to enable or disable **Checkpoint Sync**:
Lodestar has the ability to instantly sync to the latest block on the Beacon Chain network by connecting to an existing Beacon Node that you trust.
This is preferred over conventional syncing because it doesn't require any time (whereas conventional syncing can take days) and comes with some security benefits.
Take a look at [their documentation on checkpoint syncing](https://chainsafe.github.io/lodestar/run/beacon-management/starting-a-node#checkpoint-sync) for more information if you are curious.
You can enter the URL of any Beacon Node that provides access to its REST API here.
See [the section below on Checkpoint Syncing](#beacon-chain-checkpoint-syncing) if you'd like to use it.
The final question will ask if you want to enable Doppelgänger Protection:
Lodestar supports a feature called Doppelgänger Detection.
In a nutshell, this feature will **intentionally** miss a few attestations after Lodestar's Validator Client restarts; while doing this, it will listen to see if attestations are still being sent to the network using your validator keys.
Ideally, there would not be any attestations (which means no other machine is running with your validator keys attached).
After its short waiting period, Lodestar would start validating normally.
_However_, if there _is_ another machine running with your validator keys attached, then Lodestar will immediately shut down and issue an error message in its log files.
The reason for this is that if it were to start attesting as well, then you would start **double attesting** which is a **slashable offense**.
When slashed, your validator would be forcibly exited from the Beacon chain and you would be penalized a significant amount of ETH.
Most of the time, doppelgänger detection will result in nothing but a few missed attestations after a client restart.
In situations where you are moving your validator to a new machine or you are changing to a new Beacon client, however, **doppelgänger detection can prevent you from being slashed by double attesting accidentally**.
Think of it as cheap insurance for your minipools; you'll miss a trivial bit of profit every time you restart, but you can be fairly confident that you won't accidentally run your keys in two places and get slashed for it.
NOTE
**Open up the P2P port in your router's port forwarding setup**. Configure it to forward **port 9001** on both TCP and UDP, and **port 8001** on UDP (used for P2P over QUIC), to your machine's local IP address.
This way, other Consensus clients can discover it and communicate with it from the outside. This will help your Consensus client sync quickly and improve performance (and thus rewards).
Each router has a different way of doing this, so **you'll need to check out your router's manual on how to set up port forwarding**
**Externally Managed**
Because each Consensus client has slightly different behavior, the Smart Node needs to know which one you're using externally so it can adapt its own behavior accordingly.
Start by choosing which client you have from the list in the next screen:
NOTE
At this time, **Nimbus** is not compatible with External mode because it cannot run as a standalone Validator Container (VC) yet.
When the client supports this feature, it will be added to the list here.
Select your client from the tabs below to learn how to finish configuring it.
**Lighthouse**
Start by specifying the URL for your Lighthouse Beacon Node's API:
The Smart Node will use the HTTP URL to communicate with it and perform blockchain activities, such as querying the chain's state and submitting messages.
**If you don't already have the API port enabled and accessible from your Smart Node machine, you will need to set it up now.**
See [Lighthouse's documentation](https://lighthouse-book.sigmaprime.io/api-bn.html) for instructions on how to do this.
NOTE
Because the Smart Node will run in its own Docker container, it will use Docker's internal network.
You won't be able to use hostnames like `localhost` or `127.0.0.1` here; if your client is running on the same machine as the Smart Node, you will need to provide the machine's LAN IP address instead.
Next, it will ask about your validator's **graffiti** message:
This is an optional custom message you can attach to any blocks you propose on the Beacon Chain.
The message will be preserved forever, so think of it like a fun little way to leave your mark!
**Note the maximum length of the graffiti is 16 characters.**
If you'd like to see some examples of what validators are using for Graffiti today, [take a look here](https://beaconcha.in/blocks).
The final question will ask if you want to enable Doppelgänger Protection:
Lighthouse supports a feature called [Doppelgänger Detection](https://lighthouse-book.sigmaprime.io/validator-doppelganger.html).
In a nutshell, this feature will **intentionally** miss a few attestations after Lighthouse's Validator Client restarts; while doing this, it will listen to see if attestations are still being sent to the network using your validator keys.
Ideally, there would not be any attestations (which means no other machine is running with your validator keys attached).
After its short waiting period, Lighthouse would start validating normally.
_However_, if there _is_ another machine running with your validator keys attached, then Lighthouse will immediately shut down and issue an error message in its log files.
The reason for this is that if it were to start attesting as well, then you would start **double attesting** which is a **slashable offense**.
When slashed, your validator would be forcibly exited from the Beacon chain and you would be penalized a significant amount of ETH.
Most of the time, doppelgänger detection will result in nothing but a few missed attestations after a client restart.
In situations where you are moving your validator to a new machine or you are changing to a new Beacon client, however, **doppelgänger detection can prevent you from being slashed by double attesting accidentally**.
Think of it as cheap insurance for your minipools; you'll miss a trivial bit of profit every time you restart, but you can be fairly confident that you won't accidentally run your keys in two places and get slashed for it.
**Prysm**
Start by specifying the URL for your Prysm Beacon Node's API and the URL for its JSON-RPC API:
The Smart Node will use the HTTP URL to communicate with it and perform blockchain activities, such as querying the chain's state and submitting messages.
It will prepare its Prysm Validator Client with the JSON-RPC URL so it can communicate with your Beacon Node, as _Prysm's Validator Client currently cannot work over the HTTP API._
**If you don't already have the API ports enabled and accessible from your Smart Node machine, you will need to set them up now.**
See [Prysm's documentation](https://docs.prylabs.network/docs/prysm-usage/parameters) for instructions on how to do this.
**You will need the `grpc-gateway` _and_ the `rpc-host` enabled.**
NOTE
Because the Smart Node will run in its own Docker container, it will use Docker's internal network.
You won't be able to use hostnames like `localhost` or `127.0.0.1` here; if your client is running on the same machine as the Smart Node, you will need to provide the machine's LAN IP address instead.
Next, it will ask about your validator's **graffiti** message:
This is an optional custom message you can attach to any blocks you propose on the Beacon Chain.
The message will be preserved forever, so think of it like a fun little way to leave your mark!
**Note the maximum length of the graffiti is 16 characters.**
If you'd like to see some examples of what validators are using for Graffiti today, [take a look here](https://beaconcha.in/blocks).
The final question will ask if you want to enable Doppelgänger Protection:
Prysm supports a feature called Doppelgänger Protection.
In a nutshell, this feature will **intentionally** miss a few attestations after Prysm's Validator Client restarts; while doing this, it will listen to see if attestations are still being sent to the network using your validator keys.
Ideally, there would not be any attestations (which means no other machine is running with your validator keys attached).
After its short waiting period, Prysm would start validating normally.
_However_, if there _is_ another machine running with your validator keys attached, then Prysm will immediately shut down and issue an error message in its log files.
The reason for this is that if it were to start attesting as well, then you would start **double attesting** which is a **slashable offense**.
When slashed, your validator would be forcibly exited from the Beacon chain and you would be penalized a significant amount of ETH.
Most of the time, doppelgänger detection will result in nothing but a few missed attestations after a client restart.
In situations where you are moving your validator to a new machine or you are changing to a new Beacon client, however, **doppelgänger detection can prevent you from being slashed by double attesting accidentally**.
Think of it as cheap insurance for your minipools; you'll miss a trivial bit of profit every time you restart, but you can be fairly confident that you won't accidentally run your keys in two places and get slashed for it.
**Teku**
Start by specifying the URL for your Teku Beacon Node's API:
The Smart Node will use the HTTP URL to communicate with it and perform blockchain activities, such as querying the chain's state and submitting messages.
**If you don't already have the API port enabled and accessible from your Smart Node machine, you will need to set it up now.**
See [Teku's documentation](https://docs.teku.consensys.net/en/latest/Reference/CLI/CLI-Syntax/#rest-api-enabled) for instructions on how to do this.
NOTE
Because the Smart Node will run in its own Docker container, it will use Docker's internal network.
You won't be able to use hostnames like `localhost` or `127.0.0.1` here; if your client is running on the same machine as the Smart Node, you will need to provide the machine's LAN IP address instead.
Next, it will ask about your validator's **graffiti** message:
This is an optional custom message you can attach to any blocks you propose on the Beacon Chain.
The message will be preserved forever, so think of it like a fun little way to leave your mark!
**Note the maximum length of the graffiti is 16 characters.**
If you'd like to see some examples of what validators are using for Graffiti today, [take a look here](https://beaconcha.in/blocks).
#### Beacon Chain Checkpoint Syncing
**Checkpoint syncing** is a very useful technique that some Beacon Chain clients support.
It allows your Beacon client to instantly sync the entire Beacon chain without having to start from the beginning and catch up on every block.
This means instead of taking **days**, your Beacon client can be ready in a matter of **minutes**.
All it needs is access to an existing Beacon client that you trust.
You can use any Beacon node that provides access to its HTTP API.
Currently, many node operators are using the checkpoint-sync-endpoints - a service that allows Rocket Pool node operators to checkpoint sync easily.
Both the Hoodi Testnet and Mainnet are supported.
A list of checkpoint sync urls can be found via the following link:
- [Checkpoint Sync Urls](https://eth-clients.github.io/checkpoint-sync-endpoints/)
Choose a relevant checkpoint sync url and paste in the terminal during `rocketpool service config` when it prompts you for a Checkpoint Sync Provider.
After that, your Beacon node will automatically connect to the checkpoint sync node when it first starts up and instantly pull down the latest state of the chain!
::: warning NOTE
Checkpoint Sync will only occur if you _don't have any Beacon Chain data yet_.
In other words, if you start syncing normally and decide to checkpoint sync later, you will have to remove your chain data first in order for checkpoint sync to work.
This can easily be done with the following command:
```shell
rocketpool service resync-eth2
```
:::
### Fallback Node
Starting with 1.5.0 of the Smart Node stack, you can provide a "fallback" Execution client and Consensus client pair that can take over for your primary clients if they ever go offline (such as because you use Geth and need to prune it).
In this situation, your primary node machine will still be responsible for attesting and proposing blocks with your minipools' validator keys, but it will connect to an external machine to interact with the Execution layer and Beacon chains.
[To learn more about fall back nodes, see this section](/node-staking/fallback.md) and return here when you're done.
### Metrics Configuration
Rocket Pool comes with the ability to display a detailed dashboard showing metrics about your node's hardware health, system updates, your validator performance, your rewards, information about the overall Rocket Pool network, and more:
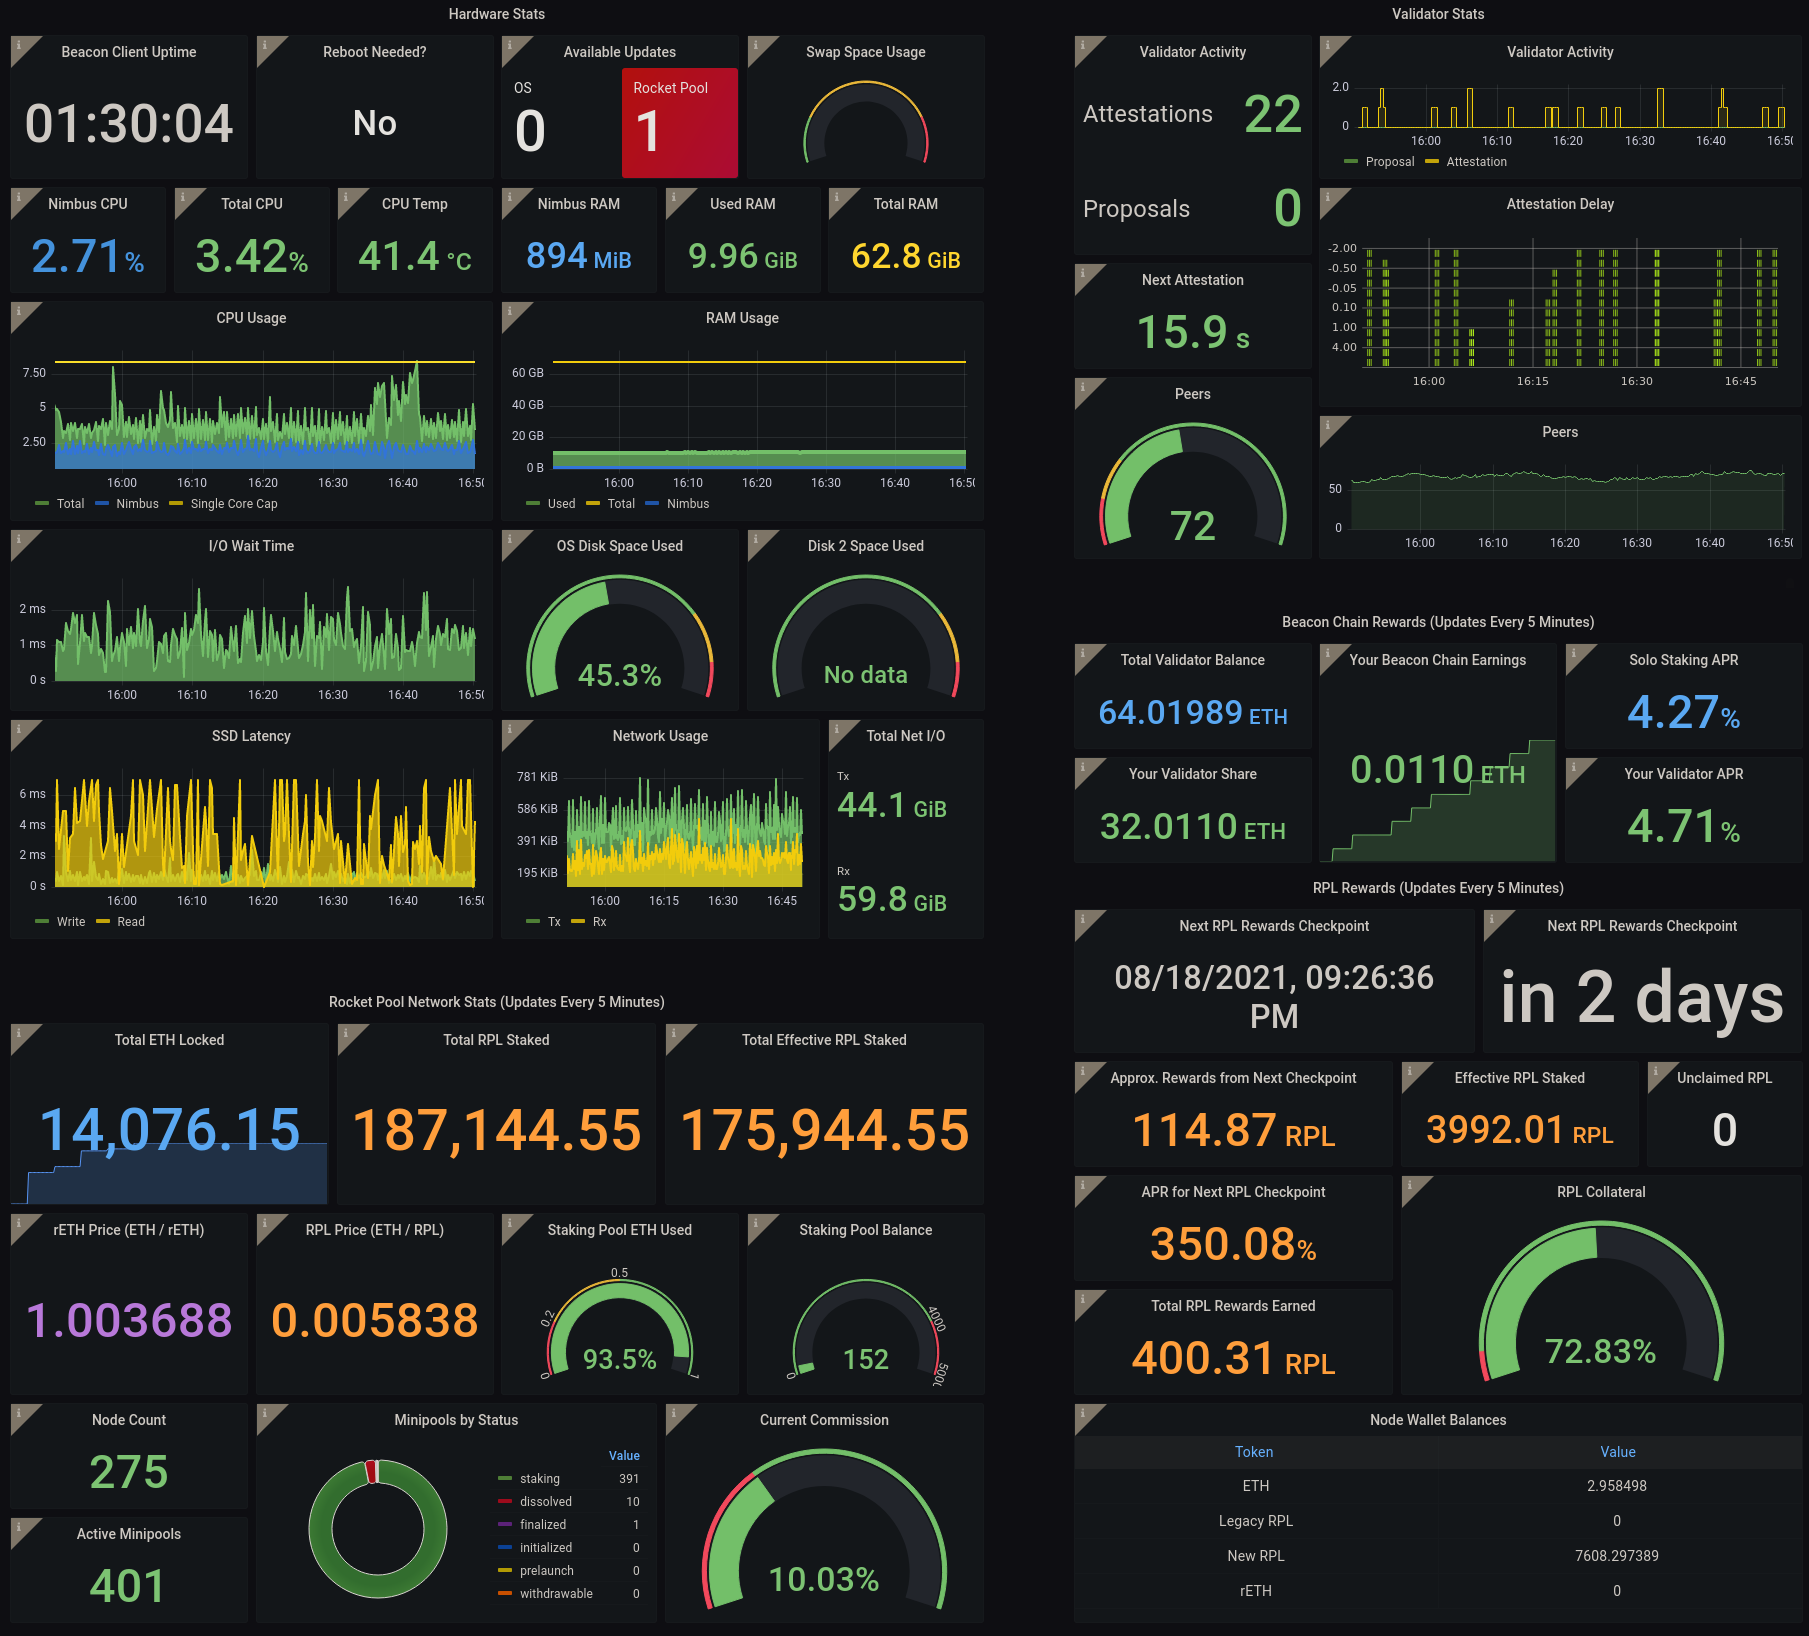
The next question in the Wizard will ask you if you want to enable this:
If you choose to enable it, you will learn more about setting it up and how to use it in the [Setting up the Grafana Dashboard](/node-staking/grafana.md) section later in the process.
::: warning NOTE
All of the data collected by this system **stays on your machine**.
Rocket Pool does not collect any of the telemetry or send it to a separate service.
It's purely there for you to use so you can monitor your own node!
:::
### MEV Configuration
Since the Merge of the Execution and Consensus layers in September 2022, Ethereum validators now have the ability to earn priority fees and participate in Maximal Extractable Value (or MEV for short).
Starting with Smart Node v1.7.0, MEV is now _opt-out_ so its configuration is presented as part of the initial setup, as you see in the next screen:
[Please read our MEV guide to learn more about MEV, its configuration, and what to do in this section of the wizard.](/node-staking/mev.md)
Return here when you're finished.
### Completion
After this question, you've finished setting up the Smart Node!
You will see the following dialog:
If you're happy with your setup and are ready to start the Smart Node, click `Save and Exit` here and go to the [Securing your Node](/node-staking/securing-your-node.md) section next.
If you would like to review all of the settings and customize many additional settings that weren't included in the Wizard, click `Review All Settings` and go to the [next section](#configuring-via-the-settings-manager).
## Configuring via the Settings Manager
If you've already run `rocketpool service config`, instead of being greeted by the Wizard, you will see the **Settings Manager** screen:
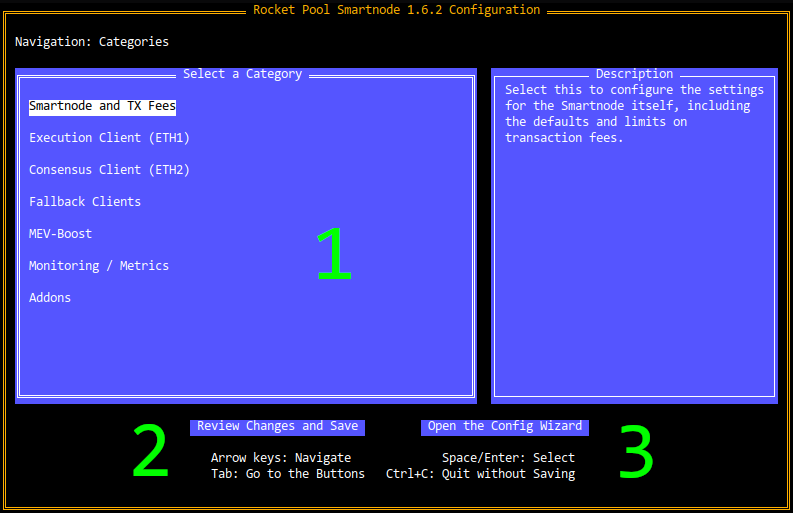
There are three main features of this screen:
1. The **Category List**, which lets you drill down into the settings for each category of the Smart Node stack
2. The **Review Changes and Save** button, which you can use when you're ready to see what settings you've changed and save the updated configuration
3. The **Open the Config Wizard** button, which will bring you to the [Setup Wizard](#configuring-via-the-wizard) if you prefer that interface instead
::: tip TIP
To use the Settings Manager, **press the `Arrow Keys` (up/down/left/right) to navigate between options in the home page**.
Press `Tab` to go **between the category list (1) and the buttons (2 and 3)** at the bottom of the screen.
The button that's currently selected will be **highlighted in green**.
**Press `Enter` or `Space` to select a button**, analogous to clicking on it with the mouse.
**Hold `Ctrl` and press `C` at any time to exit the Settings Manager without saving anything**.
:::
As you scroll through the categories list, each option will have a helpful description appear in the **Description Box** to the right of the screen.
Feel free to explore them; nothing you do will be saved until you go through the Review dialog via the **Review Changes and Save** button, and you can press **Ctrl+C** at any time to exit without saving, so you won't accidentally mess something up by playing with the settings here.
### Configuring the Settings
From the home screen, select any one of the categories with the `Enter` key to view the settings for that category.
For example, here is the screen for the **Smart Node and TX Fees** category:
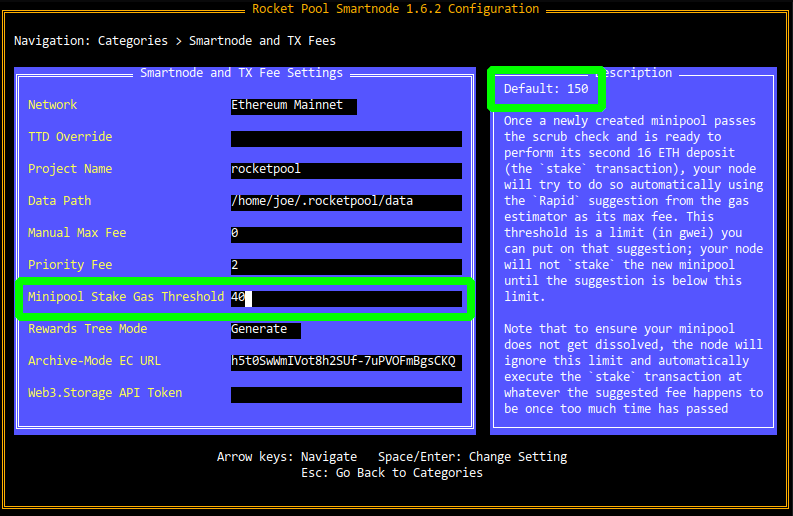
Use the `Arrow Keys` to move up and down between the settings.
The currently selected one will have a white square at the end of it (if it's a text box or a check box), or will be highlighted in white (if it's a drop down).
Press `Escape` to go back to the home screen of the Settings Manager when you're done.
As you scroll through the settings, each one will show a brief description of what it does in the **Description Box** on the right.
It will also show the **default value** there in case you want to revert it to its stock setting.
In this example, the **RPL Claim Gas Threshold** setting is currently selected (highlighted with a green box on the left-hand side of the screen).
It has been changed to `40`, but you can see that it has a default of `150` in the top-right corner (the top of the **Description Box**).
::: tip TIP
As a reminder, nothing will be saved to disk until you go through the Review dialog via the **Review Changes and Save** button.
You are encouraged to explore all of the settings to learn about them and see what your Smart Node can do!
:::
### The Setting Types and How to Use Them
The settings manager uses the following setting types and UI elements:
#### Text Boxes
Text boxes are used to enter arbitrary strings of text or numbers.
They look like this:
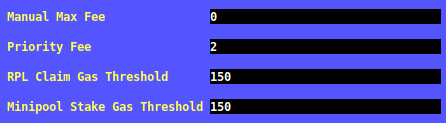
Enter your desired values into them, then **press `Enter` or use the `Arrow Keys` to navigate to a different setting in order to preserve your changes.**
If you don't, the Settings Manager will assume you're still updating that setting and won't mark it as changed yet.
#### Drop Downs
Drop downs are used to select an option from a list of choices.
They look like this (when they're open):
The **green** item is the one that is currently selected.
Use the `Arrow Keys` to change options - as you do, the **Description Box** on the right will update to tell you more about the currently selected option.
When you're happy with your choice, press `Enter` to choose the selected option and the drop down will close, revealing the option that is currently selected:
#### Check Boxes
Check boxes are used for simple Yes/No questions.
They look like this:

When they are checked, they will have an `X` in the middle as you see above.
When they are _unchecked_, they will simply be blank like this:

To change the setting, simply select it and press `Enter`.
### Saving Changes
When you're happy with your changes and you'd like to review them before saving, press the **Review Changes and Save** button on the home screen.
As a reminder, to get to it, press the `Tab` key.
You will be presented with a view that looks like this:
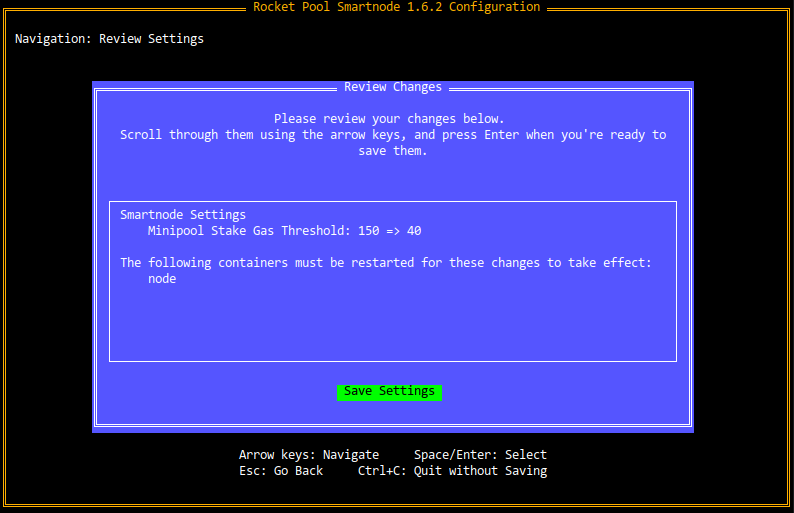
The **Review Box** here will present all of the settings you've changed, showing the old values and the new ones.
For example, the first line here shows that the **RPL Claim Gas Threshold** used to be `150`, and it's been changed to `40`.
It will also show you which containers are affected by the settings you've modified and will offer to restart them for you after you've saved your changes.
::: tip NOTE
At this point, your changes **still haven't been saved yet**.
If you want to go back and modify something, press `Escape` to return to the home screen.
:::
When you are satisfied with the changes, press `Enter` to save the new configuration to disk.
You will then exit the Terminal UI and be presented with something like this message:
```
Your changes have been saved!
The following containers must be restarted for the changes to take effect:
rocketpool_watchtower
rocketpool_validator
rocketpool_eth2
rocketpool_node
Would you like to restart them automatically now? [y/n]
```
Press `y` and `Enter` if you want to automatically apply your new configuration changes and restart the affected containers.
Press `n` and `Enter` if you have other things you want to do before restarting them, and will do it manually later.
In either case, your configuration is done!
::: tip NOTE
You may see an error message like the one below:
```
2022/08/13 13:49:41 Error piping stdout: read |0: file already closed
```
This is not actually an error, it's simply a cosmetic glitch.
You can safely ignore it.
:::
::: tip NOTE
If you are running Mac OS, you may see an issue complaining about node_exporter.
You will need to run these commands to fix.
```shell
rocketpool service stop
nano ~/.rocketpool/override/exporter.yml
```
Replace the entire contents of the file with:
```
# Enter your own customizations for the node exporter container here. These changes will persist after upgrades, so you only need to do them once.
#
# See https://docs.docker.com/compose/extends/#adding-and-overriding-configuration
# for more information on overriding specific parameters of docker-compose files.
version: "3.7"
services:
node-exporter:
x-rp-comment: Add your customizations below this line
volumes: ["/proc:/host/proc:ro","/sys:/host/sys:ro"]
```
then finally `rocketpool service start`.
:::
## Configuring via the Command Line
If you use the Smart Node in a headless environment where you can't interact with the Terminal UI, you can configure your node via the command line instead.
The `rocketpool service config` command accepts, as arguments, every setting that can normally be configured via the Terminal UI.
Run the following command to see a list of them (note that it's quite long):
```shell
rocketpool service config --help
```
The output will look like this:
```
NAME:
rocketpool service config - Configure the Rocket Pool service
USAGE:
rocketpool service config
OPTIONS:
--executionClientMode value Choose which mode to use for your Execution client - locally managed (Docker Mode), or externally managed (Hybrid Mode).
Type: choice
Options: local, external
(default: "local")
--executionClient value Select which Execution client you would like to run.
Type: choice
Options: geth, infura, pocket
(default: "geth")
--useFallbackExecutionClient Enable this if you would like to specify a fallback Execution client, which will temporarily be used by the Smartnode and your Consensus client if your primary Execution client ever goes offline.
Type: bool
...
```
Each option will have its name, its type, its default value, and (if it's a choice parameter) its options.
Using this text, you can find the option(s) you want to set and specify them via the appropriate arguments.
::: tip NOTE
This command builds on top of your existing configuration, so if you have some settings already saved and just want to modify others, you don't need to repeat them.
It will only update settings that you include as arguments to this command.
:::
## Next Steps
Once you've configured your node just the way you want it, you're ready to secure your operating system to protect your node.
Move on to the [Securing your Node](/node-staking/securing-your-node.md) section next.
---
url: /node-staking/config-native.md
---
> For AI agents: the complete documentation index is available at /llms.txt, the full documentation bundle is available at /llms-full.txt.
# Configuring the Smart Node Stack (Native Mode)
In this section, we'll go over the various methods for configuring the Smart Node if you're using the **Native setup** that doesn't use Docker at all.
::: warning NOTE
If you're using a Docker-based setup, please visit the [Docker configuration guide](/node-staking/config-docker.md) instead.
:::
There are three ways to configure it:
- Via the [Wizard UI](#configuring-via-the-wizard) - this is the easiest way. It only asks you a few basic question and uses well-tested defaults for the test. This will be what you are presented with when you run `rocketpool service config` for the first time.
- Via the [Settings Manager UI](#configuring-via-the-settings-manager) - this gives you access to all of the Smart Node's settings so you can customize everything as much as you want.
- Headlessly via the [Command Line](#configuring-via-the-command-line) - this is an option for people who run the Smart Node in a headless (non-interactive) environment and need to configure it automatically.
Choose which mode you'd like to learn more about from the list above, or simply scroll through each option below.
## Configuring via the Wizard
To configure the Smart Node, run the configuration command:
```shell
rp service config
```
This will launch a terminal-based UI that will allow you to quickly and easily configure your node, as well as provide optional fine-grained control over the settings that are relevant to Native mode.
::: tip NOTE
If you've already configured the Smart Node, you will instead be greeted with the [Settings Manager](#configuring-via-the-settings-manager).
You can choose to re-open the Wizard from there if you prefer it, and all of your existing settings will be pre-selected for you.
:::
When you run the config UI for the first time (or if you choose to run the Wizard again later), you will be presented with a screen that looks like this:
::: tip TIP
To use the Wizard, **press the `Arrow Keys` (up/down/left/right) to navigate between things such as buttons (choices) or text boxes**.
You can also use `Tab` and `Shift+Tab` if you prefer - it will do the same thing.
For buttons, **the one that's currently selected will be highlighted in green**.
The ones in black are not selected.
In the screenshot above, `Next` is currently selected and `Quit` is not.
**Press `Enter` or `Space` to select a button**, analogous to clicking on it with the mouse.
**Press `Escape` to go back to the previous dialog** if you changed your mind about something.
This will come in handy as you progress through the various Wizard pages.
**Hold `Ctrl` and press `C` at any time to exit the Wizard without saving anything**.
For example, on the screen above, you could press the `left` and `right` arrow keys to move between the `Next` and `Quit` buttons.
Pressing `Enter` while `Next` is selected will proceed to the next screen.
Pressing `Enter` while `Quit` is selected will quit the Wizard without saving.
:::
When you're ready to begin, press `Next`.
### Choosing a Network
In the next screen, you will be asked to choose which network you want to use:
You can highlight the different choices with the `Up` and `Down` arrow keys (or `Tab` and `Shift+Tab`).
When you change choices, the **Description** box on the right will show you a brief description of each option.
This is true for all choice-based pages in the Wizard, not just the network selection, so you will see this style of page frequently.
If you want to practice running a Rocket Pool node on the Hoodi test network with fake ETH and RPL you can get for free, select **Hoodi Testnet**.
If you're ready to create a real Rocket Pool node on Mainnet to earn real rewards, select **Mainnet**.
::: tip NOTE
Official networks (Mainnet, Hoodi Testnet, and Devnet) come from `networks-default.yml`. You can add or override networks in `~/.rocketpool/networks-extra.yml` without rebuilding Smart Node. See [Custom and override networks](/node-staking/advanced-config.md#custom-and-override-networks) for details.
:::
### Execution Client Setup
The next screen will prompt you for the URL of your Execution client's HTTP-based RPC API:
Enter `http://127.0.0.1:8545` here if you plan to run an Execution client on the same machine as the Smart Node (in the rest of this guide, we will assume this is what you plan to do).
However, if you already have an Execution client set up elsewhere, use its URL here instead.
Note that you can always change this by running `rp service config` again later.
### Consensus Client Setup
Next, you'll be asked which Consensus client you are using (or plan to use).
Because each Consensus client has slightly different behavior, the Smart Node needs to know which one you're using so it can adapt its own behavior accordingly.
Choose your client from the list in the following screen:
Next, you will see a screen prompting you for your client's API URL:
Enter `http://127.0.0.1:5052` here if you plan to run the Beacon Node of your Consensus client on the same machine as the Smart Node (in the rest of this guide, we will assume this is what you plan to do).
However, if you already have a Beacon Node set up elsewhere, use its URL here instead.
### Other Settings
The next screen will have a few other miscellaneous settings:
Leave these as the default options unless you have decided to use a directory other than `/srv/rocketpool` for your Smart Node installation.
### Fallback Clients
Starting with 1.5.0 of the Smart Node stack, you can provide a "fallback" Execution client and Consensus client pair that can take over for your primary clients if they ever go offline (such as because you use Geth and need to prune it).
In this situation, your primary node machine will still be responsible for attesting and proposing blocks with your minipools' validator keys, but it will connect to an external machine to interact with the Execution layer and Beacon chains.
[To learn more about fall back nodes, see this section](/node-staking/fallback.md) and return here when you're done.
### Metrics
Rocket Pool has the ability to integrate with Prometheus and Grafana to produce convenient web-based dashboards that let you observe your node's health at a glance:

The final question in the Wizard will ask you if you want to enable this:
If you choose to enable it, you will learn more about setting it up and how to use it in the [Setting up the Grafana Dashboard](/node-staking/grafana.md) section later in the process.
::: warning NOTE
All of the data collected by this system **stays on your machine**.
Rocket Pool does not collect any of the telemetry or send it to a separate service.
It's purely there for you to use so you can monitor your own node!
:::
### MEV Configuration
Since the Merge of the Execution and Consensus layers in September 2022, Ethereum validators now have the ability to earn priority fees and participate in Maximal Extractable Value (or MEV for short).
Starting with Smart Node v1.7.0, MEV is now _opt-out_ so a notification about configuring it is presented as part of the initial setup, as you see in the next screen:
[Please read our MEV guide to learn more about MEV, its configuration, and what to do in this section of the wizard.](/node-staking/mev.md)
Return here when you're finished.
### Completion
After this question, you've finished setting up the Smart Node configuration.
You will see the following dialog:
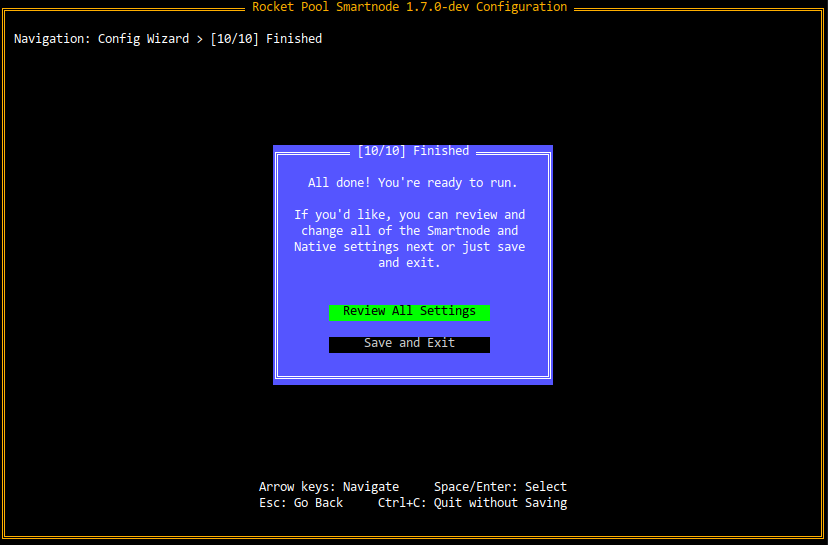
If you're happy with your setup and are ready to start the Smart Node, click `Save and Exit` here.
If you haven't finished installing Rocket Pool yet, return to the Native setup guide now.
Otherwise, the next step is to restart your daemon services with:
```shell
sudo systemctl restart rp-node rp-watchtower
```
If you would like to review all of the settings and customize many additional settings that weren't included in the Wizard, click `Review All Settings` and go to the [next section](#configuring-via-the-settings-manager).
## Configuring via the Settings Manager
If you've already run `rp service config`, instead of being greeted by the Wizard, you will see the **Settings Manager** screen:
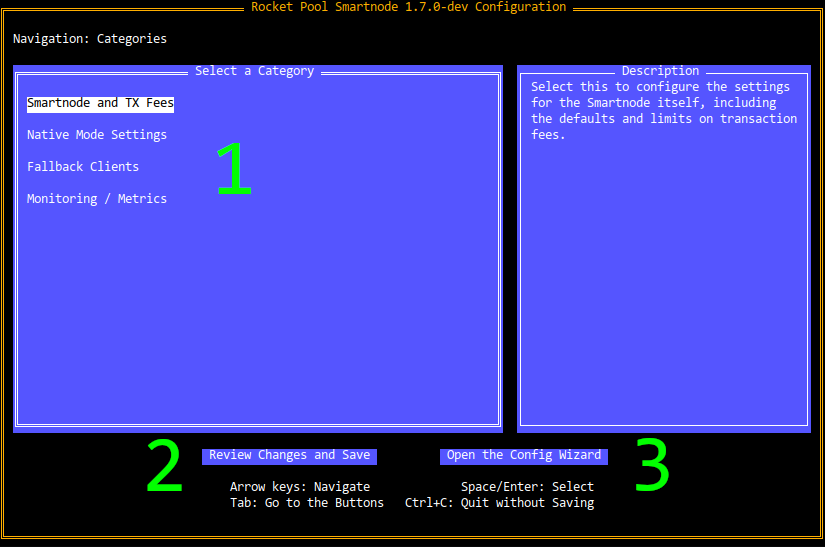
There are three main features of this screen:
1. The **Category List**, which lets you drill down into the settings for each category of the Smart Node stack that is relevant to Native mode
2. The **Review Changes and Save** button, which you can use when you're ready to see what settings you've changed and save the updated configuration
3. The **Open the Config Wizard** button, which will bring you to the [Setup Wizard](#configuring-via-the-wizard) if you prefer that interface instead
::: tip TIP
To use the Settings Manager, **press the `Arrow Keys` (up/down/left/right) to navigate between options in the home page**.
Press `Tab` to go **between the category list (1) and the buttons (2 and 3)** at the bottom of the screen.
The button that's currently selected will be **highlighted in green**.
**Press `Enter` or `Space` to select a button**, analogous to clicking on it with the mouse.
**Hold `Ctrl` and press `C` at any time to exit the Settings Manager without saving anything**.
:::
As you scroll through the categories list, each option will have a helpful description appear in the **Description Box** to the right of the screen.
Feel free to explore them; nothing you do will be saved until you go through the Review dialog via the **Review Changes and Save** button, and you can press **Ctrl+C** at any time to exit without saving, so you won't accidentally mess something up by playing with the settings here.
### Configuring the Settings
From the home screen, select any one of the categories with the `Enter` key to view the settings for that category.
For example, here is the screen for the **Smart Node and TX Fees** category:
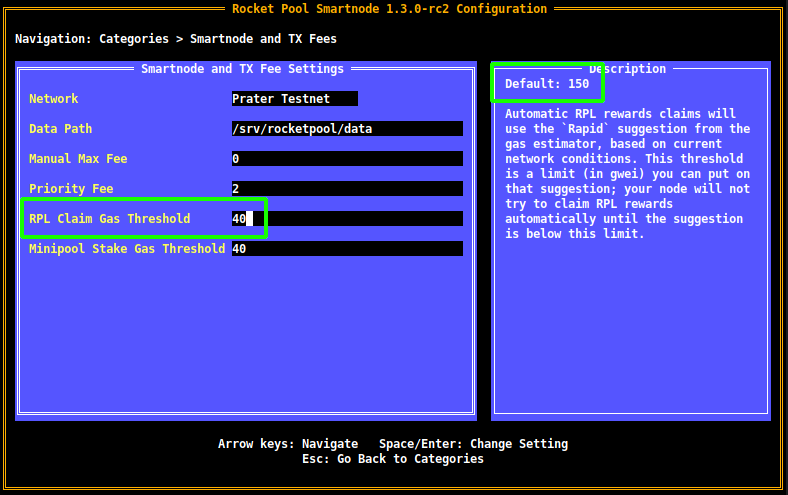
Use the `Arrow Keys` to move up and down between the settings.
The currently selected one will have a white square at the end of it (if it's a text box or a check box), or will be highlighted in white (if it's a drop down).
Press `Escape` to go back to the home screen of the Settings Manager when you're done.
As you scroll through the settings, each one will show a brief description of what it does in the **Description Box** on the right.
It will also show the **default value** there in case you want to revert it to its stock setting.
In this example, the **RPL Claim Gas Threshold** setting is currently selected (highlighted with a green box on the left-hand side of the screen).
It has been changed to `40`, but you can see that it has a default of `150` in the top-right corner (the top of the **Description Box**).
::: tip TIP
As a reminder, nothing will be saved to disk until you go through the Review dialog via the **Review Changes and Save** button.
You are encouraged to explore all of the settings to learn about them.
:::
### The Setting Types and How to Use Them
The settings manager uses the following setting types and UI elements:
#### Text Boxes
Text boxes are used to enter arbitrary strings of text or numbers.
They look like this:

Enter your desired values into them, then **press `Enter` or use the `Arrow Keys` to navigate to a different setting in order to preserve your changes.**
If you don't, the Settings Manager will assume you're still updating that setting and won't mark it as changed yet.
#### Drop Downs
Drop downs are used to select an option from a list of choices.
They look like this (when they're open):

The **green** item is the one that is currently selected.
Use the `Arrow Keys` to change options - as you do, the **Description Box** on the right will update to tell you more about the currently selected option.
When you're happy with your choice, press `Enter` to choose the selected option and the drop down will close, revealing the option that is currently selected:

#### Check Boxes
Check boxes are used for simple Yes/No questions.
They look like this:

When they are checked, they will have an `X` in the middle as you see above.
When they are _unchecked_, they will simply be blank like this:

To change the setting, simply select it and press `Enter`.
### Saving Changes
When you're happy with your changes and you'd like to review them before saving, press the **Review Changes and Save** button on the home screen.
As a reminder, to get to it, press the `Tab` key.
You will be presented with a view that looks like this:
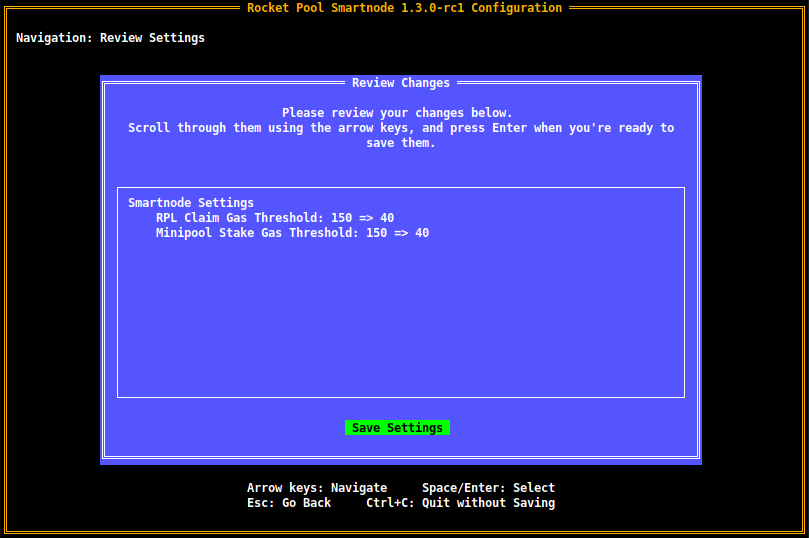
The **Review Box** here will present all of the settings you've changed, showing the old values and the new ones.
For example, the first line here shows that the **RPL Claim Gas Threshold** used to be `150`, and it's been changed to `40`.
::: tip NOTE
At this point, your changes **still haven't been saved yet**.
If you want to go back and modify something, press `Escape` to return to the home screen.
:::
When you are satisfied with the changes, press `Enter` to save the new configuration to disk.
You will then exit the Terminal UI and be presented with this message:
```
Your changes have been saved!
Please restart your daemon service for them to take effect.
```
If you haven't finished installing Rocket Pool yet, return to the Native setup guide now.
Otherwise, now you can restart your daemon services with:
```shell
sudo systemctl restart rp-node rp-watchtower
```
## Configuring via the Command Line
If you use the Smart Node in a headless environment where you can't interact with the Terminal UI, you can configure your node via the command line instead.
The `rocketpool service config` command accepts, as arguments, every setting that can normally be configured via the Terminal UI.
Run the following command to see a list of them (note that it's quite long):
```
rocketpool service config --help
```
The output will look like this:
```
NAME:
rocketpool service config - Configure the Rocket Pool service
USAGE:
rocketpool service config
OPTIONS:
--executionClientMode value Choose which mode to use for your Execution client - locally managed (Docker Mode), or externally managed (Hybrid Mode).
Type: choice
Options: local, external
(default: "local")
--executionClient value Select which Execution client you would like to run.
Type: choice
Options: geth, infura, pocket
(default: "geth")
--useFallbackExecutionClient Enable this if you would like to specify a fallback Execution client, which will temporarily be used by the Smartnode and your Consensus client if your primary Execution client ever goes offline.
Type: bool
...
```
Each option will have its name, its type, its default value, and (if it's a choice parameter) its options.
Using this text, you can find the option(s) you want to set and specify them via the appropriate arguments.
::: tip NOTE
This command builds on top of your existing configuration, so if you have some settings already saved and just want to modify others, you don't need to repeat them.
It will only update settings that you include as arguments to this command.
:::
If you haven't finished installing Rocket Pool yet, return to the Native setup guide now.
Otherwise, the next step is to restart your daemon services with:
```shell
sudo systemctl restart rp-node rp-watchtower
```
---
url: /node-staking/config/overview.md
---
> For AI agents: the complete documentation index is available at /llms.txt, the full documentation bundle is available at /llms-full.txt.
# Overview
In this section, you'll learn how to configure the Smart Node stack and customize all of the settings to your liking.
You will have to configure it prior to running the stack for the first time, but you can always come back once it's running and reconfigure it again whenever you like.
## Prerequisites
Before configuring your Smart Node, please make sure you:
- Have a node machine (or virtual machine) with the Operating System installed and configured
- Have the machine secured (via the [Securing your Node](/node-staking/securing-your-node.md) guide)
- Have the Smart Node installed on it
## Guides
[Configuring the Smart Node Stack (Docker / Hybrid Mode)](/node-staking/config-docker.md) is the guide to use if you want to run with Docker Mode or Hybrid Mode.
[Configuring the Smart Node Stack (Native Mode)](/node-staking/config-native.md) is the guide to use if you want to run with Native Mode.
[Advanced Smart Node Configuration for Docker Mode](/node-staking/advanced-config.md) is a supplement to the Docker guide that shows some extra capabilities and features you might be interested in (such as "Reverse Hybrid" Mode or customizing the Docker container flags).
---
url: /node-staking/create-validator.md
---
> For AI agents: the complete documentation index is available at /llms.txt, the full documentation bundle is available at /llms-full.txt.
::: danger WARNING
Minipool deposits are currently disabled in preparation for Saturn 1.
:::
# Creating a New Minipool (Validator)
As a reminder, a `minipool` in Rocket Pool terms refers to a unique smart contract instance on the Execution Layer that your node manages.
The minipool handles a portion of your ETH, known as the **bond amount**, and a portion of ETH from the rETH staking pool, known as the **borrowed amount**.
It merges them together to form 32 ETH in total, which is then sent to the Beacon Chain deposit contract to create a new validator.
Thus, in order to create a validator using Rocket Pool, you need to **create a minipool**.
::: danger WARNING
Minipool creation is governed by two queues.
The first is the Rocket Pool deposit queue, which is managed by the Rocket Pool protocol & determines when your minipool will receive its borrowed ETH. There needs to be ETH available in the deposit pool to match your 8 ETH with 24 ETH in the deposit pool & create the minipool.
The second is the Beacon Chain queue, which is managed by the Ethereum Beacon Chain & determines when your validator will become active.
Please be aware that the time it takes for your minipool to become active can vary greatly depending on your position in each queue & the current state of the network.
:::
::: tip NOTE
The Beacon Chain validator queue activation (and exit) times can vary greatly depending on the current state of the network.
This is outside Rocket Pool's control and is a function of the Beacon Chain itself.
The following tool provides a good estimate of how long you can expect to wait:
[https://www.validatorqueue.com/](https://www.validatorqueue.com/)
Please review this tool to get an idea of how long you can expect to wait for your validator to become active.
:::
### Staking RPL via the Website
The easiest and safest way to stake RPL for your node is to use the protocol's **Stake-on-Behalf** feature, which was
reintroduced with the Atlas upgrade. This way, you can stake RPL for your node while the RPL is still in the wallet
you used to acquire it. In other words, you **don't need to send RPL to your node's hot wallet** in order to stake it.
#### Whitelisting an address to stake on behalf
In order to stake on behalf of your node an address must be whitelisted. Your withdrawal address is always whitelisted,
and you may skip this step if your RPL is held by your withdrawal address. You only need to whitelist an address once
in order to stake from it. You can do this via the following Smart Node command:
```shell
rocketpool node add-address-to-stake-rpl-whitelist address-or-ens
```
Where `address-or-ens` is the address or ENS name that resolves to your desired address. You will be asked to
confirm the whitelist addition and after the transaction is confirmed, you can then navigate to the relevant page below.
#### Staking RPL on behalf of
Select which network you're using from the tabs below to be taken to it:
**Mainnet**
[https://node.rocketpool.net/stake-rpl-on-behalf-of-node](https://node.rocketpool.net/stake-rpl-on-behalf-of-node)
**Hoodi Testnet**
[https://testnet.node.rocketpool.net/stake-rpl-on-behalf-of-node](https://testnet.node.rocketpool.net/stake-rpl-on-behalf-of-node)
Start by connecting your wallet to the website using MetaMask, WalletConnect, or any of the other methods the website supports.
You will then be presented with this dialog to look up your node address.
Enter your node address & click "Lookup".
**Make sure you have the correct node address before doing this!**
If you need to confirm your node's address, you can quickly retrieve it via the CLI using the `rocketpool node status` command.
This will check that the address is a registered node & that the node has whitelisted the connected wallet. Withdrawal addresses are whitelisted by default, however if you wish to allow other addresses you will need to whitelist them via the following command on your node.
```shell
rocketpool node add-address-to-stake-rpl-whitelist address-or-ens
```
This is a two-step process.
First, enter the amount of RPL you want to stake and click `Approve` - this will **approve** the staking contract to access that much RPL in your wallet, but **no more than that amount**.
::: tip TIP
You can approve more than the amount you intend to stake if you trust the Rocket Pool staking contract, and don't want to perform this extra Approve transaction each time you want to stake more RPL.
:::
Once the RPL is approved, you will be able to stake on behalf of a node.
Enter the amount of RPL you want to stake in the `Stake RPL` box, and enter your node's address in the `on behalf of Node Address` box.
When you've entered that information, press the `Stake` button and approve the transaction.
It will be sent to the Ethereum network, and once included in a block, you're all set!
If you run `rocketpool node status`, you should see your staked RPL appear under the `=== RPL Stake ===` section.
#### Removing an address from the stake whitelist
If you ever want to remove an address from your stake-on-behalf whitelist, you may do so with the following Smart Node command:
```shell
rocketpool node remove-address-from-stake-rpl-whitelist address-or-ens
```
Where `address-or-ens` is the address or and ENS name resolving to the address you want to remove from the whitelist.
### Staking via the Node CLI
If you cannot (or do not want to) use the website to stake your RPL, you can also stake it via the node's CLI directly.
First, transfer your RPL from the wallet you acquired it with to your node's address.
::: danger WARNING
**Please do this carefully and ensure you are sending the RPL to your node's address - transfers on Ethereum cannot be undone!**
**Sending RPL to the wrong address will result in the loss of your RPL.**
Use the `rocketpool node status` command to verify your node's address if you aren't sure what it is.
:::
Run the following command:
```
rocketpool node stake-rpl
```
Here is the output:
```
Please choose an amount of RPL to stake:
1: Your entire RPL balance (1440.000000 RPL)?
2: A custom amount
```
Select how much you'd like to stake, then confirm the operation.
The first time you run this command, it will involve two transactions - one to **approve** the Rocket Pool staking contract to access your RPL, and one to **stake** your RPL with it.
Subsequent runs will only require the **stake** transaction, since the token has already been approved.
Once both transactions finish, you can check your staked RPL amount with `rocketpool node status`.
The following portion of the output is what you want to verify:
```
The node has a total stake of 300.000000 RPL.
This is currently 29.76% of its borrowed ETH and 89.29% of its bonded ETH.
It can earn max apy on up to 151.209677 RPL (15% of borrowed ETH), and still earn at lower APY with more RPL.
```
This will show you how many minipools you can make of each bond size based on your RPL collateral.
## (Optional) Finding a Custom Vanity Address for your Minipool
By default, when you create a new minipool, Rocket Pool will generate a random unique address for it.
However, the Smart Node provides the ability to search for a custom **vanity address** for the minipool.
A vanity address is one where you personally pick the characters that the address starts with.
This is a purely cosmetic exercise and will not have any practical impact on your minipool's operation.
As Ethereum addresses are in hexadecimal, any of the following characters are legal:
```
0 1 2 3 4 5 6 7 8 9 a b c d e f
```
As a few examples, you could make your minipool's address start with a bunch of zeros (`0x000000...`), `0x600d` (hex for "good") or `0xa77e57ed` (hex for "attested", a fitting prefix for a minipool).
To find such a vanity address, you will need to **search for it**.
This searching process involves picking a number, applying it as a "salt" to the hashing algorithm, and comparing the results against what you're looking for.
The results are effectively random (though any given salt always produces the same result), so the only way to find an address with the prefix you want is to try lots and lots of them until you find a salt that works.
If you would like a custom vanity address to use for your minipool when you create it, you can use the following command to search for one:
```
rocketpool minipool find-vanity-address
```
This will prompt you for the prefix you want to search for, and ask which type of deposit you will be doing (a 16 ETH or a 32 ETH deposit - see below for more info on these types).
Once you enter that information, it will begin trying lots and lots of salts until it finds one that produces your desired prefix!
Here is a complete example of the process:
```
$ rocketpool minipool find-vanity-address
Please specify the address prefix you would like to search for (must start with 0x):
0xa77e57
Running with 12 threads.
Found on thread 3: salt 0x5cd7fb = 0xA77E57c892C9e98B0B81289e4AfdA62fb59c5DDD
Finished in 1.91145873s
```
In this case, we searched for `0xa77e57` as the prefix and found the salt `0x5cd7fb` which could generate it.
In the next step, when we create a minipool, we can specify this salt as an optional argument to create the new minipool at the address associated with the salt (`0xA77E57c892C9e98B0B81289e4AfdA62fb59c5DDD` as shown above).
In general, each additional character you search for will multiply the search time by about 16.
Because of this, **we recommend you only look for prefixes of 7 or 8 characters max unless you have a very powerful machine with many CPU cores**.
Otherwise, it might take prohibitively long to find a salt that produces the prefix you want.
For example, an AMD 5600x with 6 cores (12 threads) at 4.8 GHz can search about 3.2 million salts per second.
On average, it will take a few seconds to find a 6-character prefix, a few minutes to find a 7-character prefix, and a few hours to find an 8-character prefix.
::: tip NOTE
The salt that gets generated is specific to the following variables:
- The network you're using (either the Hoodi Testnet or Mainnet)
- The node address
- The bond amount
- The salt
If you change any of those variables, the minipool address for a given salt will change as well.
:::
For more advanced usage (such as searching for a different node address or changing how many CPU cores are used for searching), take a look at the help text with `rocketpool minipool find-vanity-address --help`.
## Depositing ETH and Creating a Minipool
::: tip TIP
If the market value of rETH is higher than its ETH backing (i.e., rETH is at a premium on the market), there is an opportunity to arbitrage the difference when creating a minipool.
The value of the arbitrage is equal to the amount of protocol ETH in the minipool times the premium (minus a small amount of gas).
E.g., if making a minipool when there's a 2.5% premium: `16 ETH * .025 = 0.4 ETH`.
In other words, you could receive 0.4 ETH back during these conditions just for creating a minipool!
If you're interested in taking advantage of this opportunity, consider using the community-developed [rocketarb](https://github.com/xrchz/rocketarb#readme) tool to capture the profit of the MEV rETH arbitrage opportunity that launching your minipool creates.
To learn more about rocketarb, feel free to inquire about it on the [RP discord server](https://discord.gg/rocketpool).
:::
After everything you've done so far, you are finally ready to deposit your ETH, create a new minipool, and create a Beacon Chain validator.
This is done with the following command:
```shell
rocketpool node deposit
```
::: danger WARNING
While the CLI does automate a lot of the next steps for you, we **strongly
** recommend monitoring your node & transactions to ensure a successful transition from `prelaunch`
to `staking`
.
Failed transactions (due to adjusted gas settings or insufficient ETH) could make your minipool transition to the `dissolved` state, which you want to avoid.
[Learn more about how to confirm a successful stake](/node-staking/create-validator.md#confirming-a-successful-stake)
:::
::: tip NOTE
If you want to use a salt for a vanity address that you found using the process above, run the following command instead:
```shell
rocketpool node deposit --salt
```
:::
You will first see a note that depositing a new minipool will **automatically distribute** any balance in your node's [fee distributor](/node-staking/fee-distrib-sp.md) contract (used to capture MEV rewards if you're not opted into the [Smoothing Pool](/node-staking/fee-distrib-sp.md#the-smoothing-pool)):
```
Your eth2 client is on the correct network.
NOTE: by creating a new minipool, your node will automatically claim and distribute any balance you have in your fee distributor contract. If you don't want to claim your balance at this time, you should not create a new minipool.
Would you like to continue? [y/n]
```
If you already have minipools and a balance in your fee distributor, you may decide not to create another minipool if distributing this balance causes a taxable event in your jurisdiction.
After that you'll be notified of your commission rate for the new minipool, and a note on whether or not your node's [credit balance](/node-staking/credit.md) can be used to cover the cost of the minipool bond for you:
```
Your minipool will use the current fixed commission rate of 5.00%.
If you participate in the smoothing pool, your minipool will receive at least a 5% commission boost, and up to a 9% commission boost based on RPL stake.
You currently have 8.00 ETH in your credit balance.
This deposit will use 8.000000 ETH from your credit balance and will not require any ETH from your node.
```
You will next be prompted with the network's current gas costs recommendations; confirm your gas price selection and follow the rest of the prompts.
```
Your consensus client is synced, you may safely create a minipool.
+============== Suggested Gas Prices ==============+
| Avg Wait Time | Max Fee | Total Gas Cost |
| 15 Seconds | 15 gwei | 0.0244 to 0.0366 ETH |
| 1 Minute | 10 gwei | 0.0157 to 0.0235 ETH |
| 3 Minutes | 7 gwei | 0.0100 to 0.0150 ETH |
| >10 Minutes | 6 gwei | 0.0080 to 0.0120 ETH |
+==================================================+
These prices include a maximum priority fee of 2.00 gwei.
Please enter your max fee (including the priority fee) or leave blank for the default of 10 gwei:
Using a max fee of 10.00 gwei and a priority fee of 2.00 gwei.
You are about to deposit 8.000000 ETH to create a minipool with a minimum possible commission rate of 14.000000%.
ARE YOU SURE YOU WANT TO DO THIS? Exiting this minipool and retrieving your capital cannot be done until:
- Your minipool has been *active* on the Beacon Chain for 256 epochs (approx. 27 hours)
- The Shapella upgrade of the Ethereum network has been deployed
- The Atlas upgrade of the Rocket Pool protocol has been deployed
- Your minipool has been upgraded to use the Atlas delegate
[y/n]
y
Creating minipool...
Transaction has been submitted with hash .
You may follow its progress by visiting:
Waiting for the transaction to be included in a block... you may wait here for it, or press CTRL+C to exit and return to the terminal.
The node deposit of 8.000000 ETH was made successfully!
Your new minipool's address is:
The validator pubkey is:
Your minipool is now in Initialized status.
Once the remaining ETH has been assigned to your minipool from the staking pool, it will move to Prelaunch status.
After that, it will move to Staking status once 1h0m0s have passed.
You can watch its progress using `rocketpool service logs node`.
```
Note that creating a minipool **is an expensive transaction**!
Pay close attention to the total cost and ensure that you accept it.
If you accept, your minipool creation will be triggered.
Once the transaction completes, you will be given the address of your new minipool contract on the Execution Layer and its corresponding validator public key on the Beacon Chain.
You can visit these with any block explorers if you'd like.
## Confirming a Successful Stake
Upon creation, your minipool will be put into the `initialized` state.
It will remain here until it's your turn in the Rocket Pool queue to be given 24 ETH from the staking pool so you can stake your new validator on the Beacon Chain.
Once this happens, your minipool will move into the `prelaunch` state for a certain period of time (currently 12 hours).
Your 8 ETH deposit will be transferred to be Beacon Chain, and the Oracle DAO [will verify that it is all correct](https://github.com/rocket-pool/rocketpool-research/blob/master/Reports/withdrawal-creds-exploit.md).
During this time, you can observe the validator by looking up its validator pubkey with a Beacon Chain explorer such as [https://beaconcha.in](https://beaconcha.in) (or [https://hoodi.beaconcha.in](https://hoodi.beaconcha.in) for the Hoodi Testnet).
You can check on the new minipool's status with the `rocketpool minipool status` command.
For example, when it has moved into `prelaunch`, you will likely see something like this:
```
1 Prelaunch minipool(s):
--------------------
Address:
Penalties: 0
Status updated: 2024-10-31, 04:51 +0000 UTC
Node fee: 5.000000%
Node deposit: 8.000000 ETH
RP ETH assigned: 2024-10-31, 04:51 +0000 UTC
RP deposit: 24.000000 ETH
Minipool Balance (EL): 31.000000 ETH
Your portion: 7.000000 ETH
Available refund: 0.000000 ETH
Total EL rewards: 7.000000 ETH
Validator pubkey:
Validator index: 0
Validator seen: no
Use latest delegate: no
Delegate address:
Rollback delegate:
Effective delegate:
0 finalized minipool(s):
```
After this prelaunch period, your minipool will enter `staking` status and send the additional ETH from the staking pool to the deposit contract.
This will be done by the `rocketpool_node` Docker container (or the `rp-node` service if you used the Native setup) - if, for some reason, you are taking abnormally long to enter `staking` status, looking at the logs for this container / service will likely tell you what's wrong.
You can check these logs with the `rocketpool service logs node` command (or `/srv/rocketpool/node_log.sh` on Native mode setups).
Running `rocketpool minipool status` will then show something like this:
```
$ rocketpool minipool status
1 Staking minipool(s):
--------------------
Address:
Penalties: 0
RP ETH assigned: 2024-10-31, 05:53 +0000 UTC
Node fee: 5.000000%
Node deposit: 8.000000 ETH
RP ETH assigned: 2024-10-31, 04:51 +0000 UTC
RP deposit: 24.000000 ETH
Minipool Balance (EL): 0.000000 ETH
Your portion: 0.000000 ETH
Available refund: 0.000000 ETH
Total EL rewards: 0.000000 ETH
Validator pubkey:
Validator index:
Validator active: yes
Validator balance: 32.018460 ETH
Expected rewards: 16.010614 ETH
Use latest delegate: no
Delegate address:
Rollback delegate:
Effective delegate:
0 finalized minipool(s):
```
::: warning NOTE
The transaction to migrate from `prelaunch` to `staking` is submitted automatically by your node and is subject to the gas settings in `rocketpool service config`.
If the gas settings prevent the node from submitting the transaction, or there is insufficient ETH in the node wallet to pay for the transaction, the minipool will become `dissolved` two weeks after it entered `prelaunch`.
If this happens, retrieving the balance is a costly and lengthy process, so make sure to monitor your minipool closely until it reaches `staking` status!
:::
Once the Beacon Chain accepts both of the deposits (one from you and one from the staking pool), your validator will enter the Beacon Chain queue where it will wait for its turn to become activated and start staking.
At this point, you're done!
Congratulations!
You have officially created a validator with Rocket Pool!
Have a look at the next sections in Monitoring and Maintenance to learn how to watch your validator's performance and health over time.
## Creating Multiple Minipools
Conveniently, your Rocket Pool node is capable of hosting as many minipools as you want.
You **do not** need to create a new node for each minipool.
If you would like to make a second (or third, or fourth...) minipool for your node, all you need to do is run `rocketpool node deposit` again.
Also, you won't be able to reuse an old vanity address salt - you'll need to search for another unique one for each of your minipools.
## Next Steps
Now that you have a minipool up and running, the next steps will walk you through how to monitor the health of your node, check for and apply updates, and maintain it throughout its life.
**Please read through the `Monitoring and Maintenance` section next to learn more about these topics.**
---
url: /node-staking/credit.md
---
> For AI agents: the complete documentation index is available at /llms.txt, the full documentation bundle is available at /llms-full.txt.
::: danger WARNING
Minipool deposits are currently disabled in preparation for Saturn 1.
:::
# The Deposit Credit System
The deposit credit system is a mechanism to track ETH that was previously bonded by node operators but is no longer required and make it available for use again.
The source of this credit comes from two places:
- [Migrating an existing 16-ETH bonded minipool down to an 8-ETH bonded minipool](/node-staking/leb-migration.md) (which adds 8 ETH to the node operator's credit balance)
- [Migrating an existing solo validator](/node-staking/solo-staker-migration.md) into a minipool (which adds either 16 or 24 ETH to the node operator's credit balance, depending on which type of minipool they create during migration)
Every node operator begins with a credit balance of **0 ETH**.
Either of these two actions will increase that balance accordingly.
This ETH is _not_ made liquid and returned to the node operator; instead, it can be used to **create additional minipools** without requiring any ETH from the node operator.
The credit system is **transparent** to the node operator; it will automatically be used (with notifications in the Smart Node CLI explaining that it will be used) during either `rocketpool node deposit` or `rocketpool node create-vacant-minipool` operations if possible.
If it _cannot_ be used, the Smart Node will alert the user that it cannot be used and will require a normal ETH bond during either operation.
See the [Credit Availability](#credit-availability) section below for more details.
## An Example
Say you have a credit balance of 0 ETH, and a single minipool with a 16-ETH bond.
You can then [migrate that minipool to an 8-ETH bond](/node-staking/leb-migration.md).
This will result in **8 ETH** that is no longer bonded.
That 8 ETH will be placed into your **credit balance**.
Now, say you want to create a _second_ 8-ETH minipool.
You run `rocketpool node deposit` as usual, and select 8-ETH as the bond amount.
This normally requires you to provide 8 of your own ETH for the minipool.
However, because you have a credit balance of 8 ETH, Rocket Pool will **automatically use that instead**:
```
Please choose an amount of ETH to deposit:
1: 8 ETH
2: 16 ETH
1
Your minipool will use the current fixed commission rate of 14.00%.
You currently have 8.00 ETH in your credit balance.
This deposit will use 8.000000 ETH from your credit balance and will not require any ETH from your node.
Your consensus client is synced, you may safely create a minipool.
```
The second set of lines here is the relevant one: they tell you that you have enough ETH in your credit balance to cover this deposit _and that it is available for use_, so it will use the balance automatically and won't require any supplemental ETH from your node wallet.
See [the availability section below](#credit-availability) for details on credit balance availability.
## Viewing your Current Credit Balance
To view your current credit balance, simply run the following command:
```shell
rocketpool node status
```
This produces a comprehensive list of details about your node, including its credit balance right at the top:
```
Your Smartnode is currently using the Zhejiang Test Network.
=== Account and Balances ===
The node 0x9BA1401Eb7D779eC51f910B066e9C4351cD28911 has a balance of 347.796908 ETH and 16799.835547 RPL.
The node has 8.000000 ETH in its credit balance, which can be used to make new minipools.
...
```
## Credit Availability
In some situations, your node might have a credit balance available but cannot currently use it to deploy additional minipools.
The ETH for your credit balance is taken from the **deposit pool**.
Thus, if you want to use 8 ETH in credit to create a new 8-ETH minipool, it will end up taking **all 32 ETH for that minipool** from the deposit pool and require none from you.
Because of this, if the deposit pool does not have enough ETH in it to cover the pre-deposit value (currently set to 1 ETH), **the balance will not be available**.
In this situation, the Smart Node will alert you during a `rocketpool node deposit` operation that it **cannot** use your credit balance, and must instead use ETH from your node wallet to complete the bond.
Doing so will **not** consume your credit balance; it will be left as-is and available for use later once the deposit pool has enough balance to cover it.
---
url: /node-staking/docker.md
---
> For AI agents: the complete documentation index is available at /llms.txt, the full documentation bundle is available at /llms-full.txt.
# Creating a Standard Rocket Pool Node with Docker
In this section, we will walk through the process of installing the Rocket Pool Smart Node stack using the standard [Docker](https://www.docker.com/resources/what-container)-based setup.
This will install and configure everything you need to run a complete node, including:
- The Rocket Pool **Smart Node** software
- An **Execution** (formerly ETH1) client of your choice, or a connection to an existing client you already manage
- A **Consensus** (formerly ETH2) client of your choice, or a connection to an existing client you already manage
- A **Validator** client that will handle your Beacon Chain validation duties
- (Optionally) a **monitoring stack** for capturing performance and health metrics
All you need to do is tell it what you want to run!
::: tip NOTE
The below instructions require you to use your system's **terminal** to enter and execute commands.
If you are connected to the node machine via SSH, you are already doing this.
If you are on the node machine and using a Desktop UI, you will need to open a terminal window to execute the following commands.
Refer to your OS's instructions to learn how to do this if you are unfamiliar.
:::
## Process Overview
At a high level, here's what is involved in installing Rocket Pool:
1. Download the Rocket Pool command-line interface (CLI)
2. Use the CLI to install the Smart Node stack
3. Configure the Smart Node stack with an easy-to-use UI in the terminal
4. Done!
## Before You Start
::: warning
If using Ubuntu, it is recommended that before installing Rocket Pool you double check that docker was not installed alongside the operating system.
The Ubuntu installer gets docker from the snap package manager, which will conflict with the version of docker installed by Smart Node.
Run `snap list`, and make sure `docker` was not installed.
For example, this is the output on a machine where docker is not installed:
```
Name Version Rev Tracking Publisher Notes
core20 20230308 1852 latest/stable canonical✓ base
lxd 5.0.2-838e1b2 24322 5.0/stable/… canonical✓ -
snapd 2.59.1 18933 latest/stable canonical✓ snapd
```
And here is the output if it was installed:
```
Name Version Rev Tracking Publisher Notes
core20 20230308 1852 latest/stable canonical✓ base
docker 20.10.17 2746 latest/stable canonical✓ -
lxd 5.0.2-838e1b2 24322 5.0/stable/… canonical✓ -
snapd 2.59.1 18933 latest/stable canonical✓ snapd
```
If you see it in the `snap list` output, be sure to remove it with:
```shell
sudo systemctl stop snap.docker.dockerd.service
sudo snap remove --purge docker
```
After which, it is recommended that you reboot the machine (`sudo systemctl reboot`)
:::
## Downloading the Rocket Pool CLI
The instructions for downloading the CLI vary based on your Operating System.
::: warning NOTE
You must perform the following instructions **on the machine you will use for your Rocket Pool node.**
If you are not using a keyboard and monitor directly connected to your node machine, you will need to access it remotely (e.g. via SSH) and run these commands on it through that remote connection.
:::
**Linux**
On Linux, start by creating a new folder that will hold the CLI application:
```shell
mkdir -p ~/bin
```
Next, download the CLI.
This depends on what architecture your system uses.
TIP
If you do not know your CPU architecture, you can run the following command to find it:
```shell
uname -m
```
The output of this command will print your architecture.
**Note that `x86_64` is the same as `x64` and `amd64`.**
**Note that `aarch64` is the same as `arm64`.**
For `x64` systems (most normal computers):
```shell
wget https://github.com/rocket-pool/smartnode/releases/latest/download/rocketpool-cli-linux-amd64 -O ~/bin/rocketpool
```
For `arm64` systems:
```shell
wget https://github.com/rocket-pool/smartnode/releases/latest/download/rocketpool-cli-linux-arm64 -O ~/bin/rocketpool
```
Mark it as executable, so it has permissions to run:
```shell
chmod +x ~/bin/rocketpool
```
Next, **log out and log back in** (or close SSH and reconnect), or simply restart.
This is because the path that you saved the CLI to (`~/bin`) may not be in your system's `PATH` variable (the list of places your system searches for executables) yet.
Logging out and back in will put it there.
Now, test running it with the `--version` flag.
You should see output like this:
```shell
rocketpool --version
```
```shell
rocketpool version 1.24.2
```
TIP
If you see an error message like this,
```shell
-bash: /home/user/rocketpool: cannot execute binary file: Exec format error
```
it means that you downloaded the wrong version above.
Please check if your system is **x64** or **arm64** using the command in the tip above, and download the appropriate version.
If your system is neither of those, then you will not be able to run Rocket Pool.
**MacOS**
On macOS, download the CLI for your machine with the following command.
TIP
If you do not know your CPU architecture, you can run the following command to find it:
```shell
uname -m
```
The output of this command will print your architecture.
**Note that `x86_64` is the same as `x64` and `amd64`.**
**Note that `aarch64` is the same as `arm64`.**
For `x64` systems (most Macs):
```shell
curl -L https://github.com/rocket-pool/smartnode/releases/latest/download/rocketpool-cli-darwin-amd64 > /usr/local/bin/rocketpool
```
For `arm64` systems, such as the Mac mini with M1:
```shell
curl -L https://github.com/rocket-pool/smartnode/releases/latest/download/rocketpool-cli-darwin-arm64 > /opt/homebrew/bin/rocketpool
```
For `x64` systems (most Macs):
Mark it as executable, so it has permissions to run:
```shell
chmod +x /usr/local/bin/rocketpool
```
For `arm64` systems, such as the Mac mini with M1:
Mark it as executable, so it has permissions to run:
```shell
chmod +x /opt/homebrew/bin/rocketpool
```
Now, test running it with the `--version` flag.
You should see output like this:
```shell
rocketpool --version
```
```
rocketpool version 1.24.2
```
TIP
If you see an error message like this,
```shell
/usr/local/bin/rocketpool: Exec format error
```
it means that you downloaded the wrong version above.
Please check if your system is x64 or arm64 using the command in the tip above, and download the appropriate version.
If your system is neither of those, then you will not be able to run Rocket Pool.
## Installing the Smart Node Stack
Now that you have the CLI installed, you can deploy the Smart Node stack.
This will prepare your system with Docker, [docker-compose](https://docs.docker.com/compose/), and load the Smart Node files so they're ready to go.
It won't actually run anything yet; that comes later.
To deploy the Smart Node stack, you will need to run the following command on your node machine (either by logging in locally, or connecting remotely such as through SSH):
```shell
rocketpool service install
```
This will grab the latest version of the Smart Node stack and set it up.
You should see output like this (_above some release notes for the latest version which will be printed at the end_):
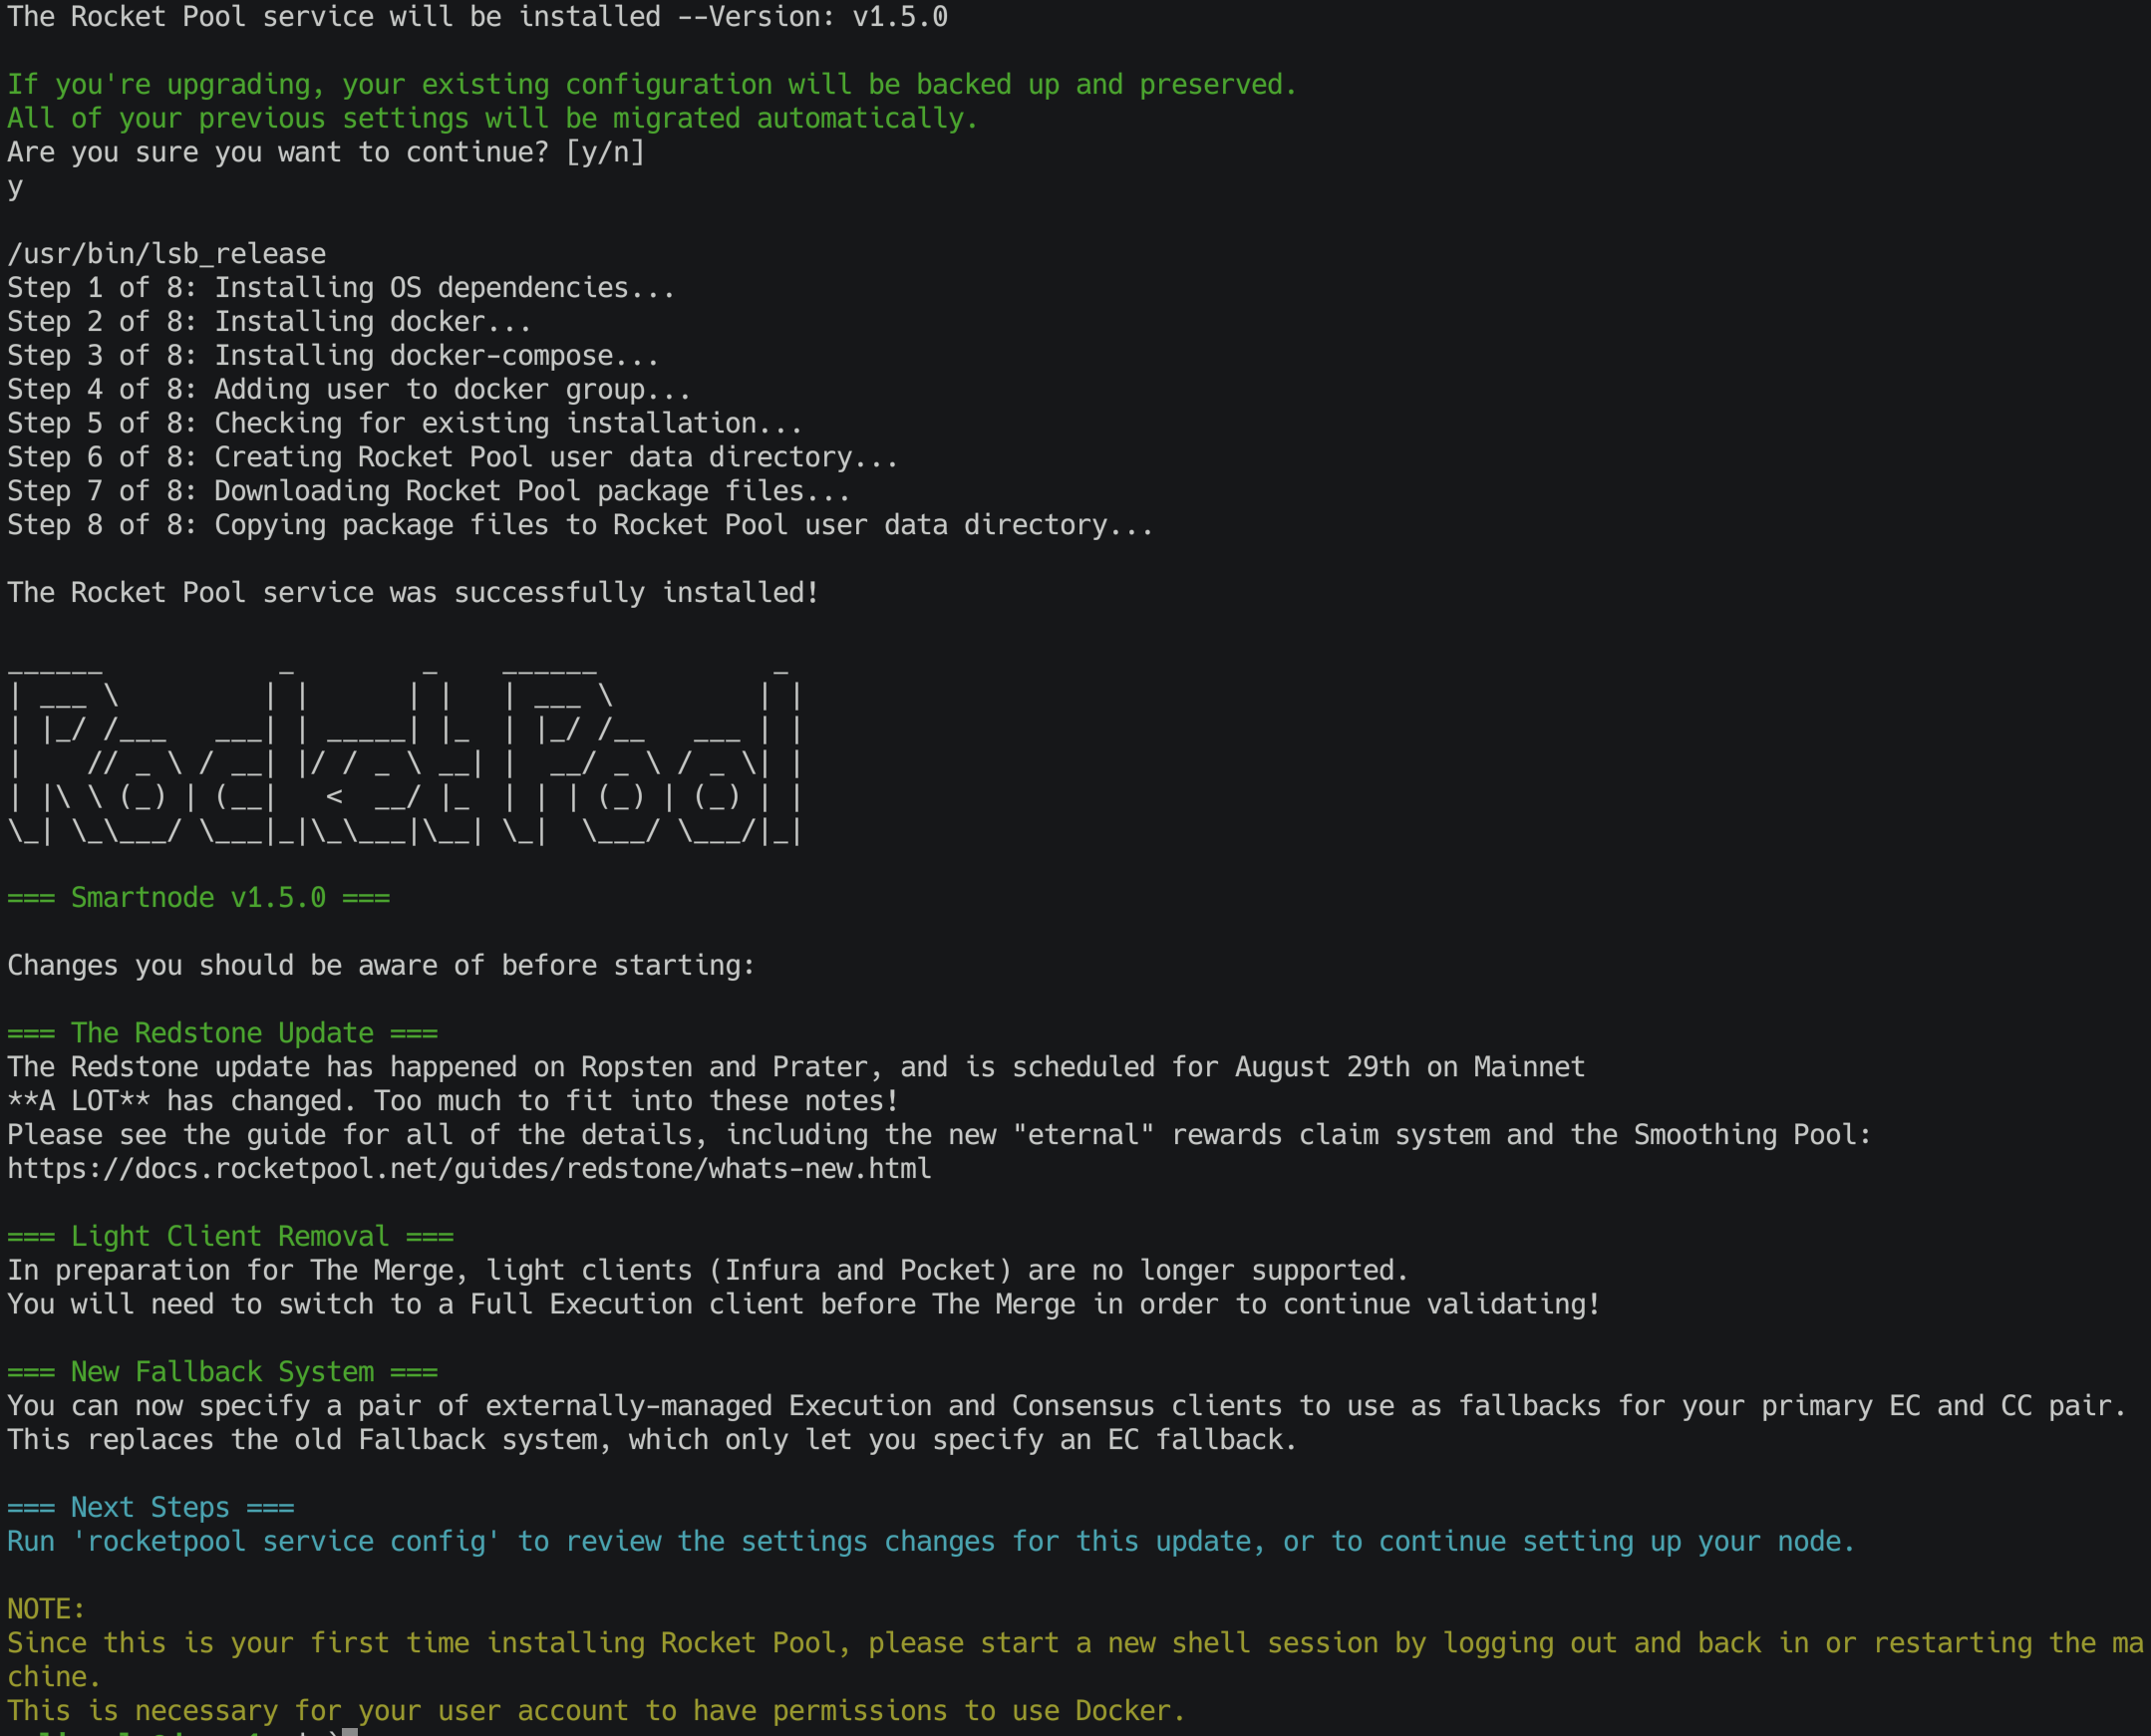
If there aren't any error messages, then the installation was successful.
By default, it will be put into the `~/.rocketpool` directory inside of your user account's home folder.
::: warning NOTE
Note that the Smart Node installer cannot install `docker` and `docker-compose` on all platforms automatically.
If you receive an error message like this during the installation:
```
Automatic dependency installation for the Mint operating system is not supported.
Please install docker and docker-compose manually, then try again with the '-d' flag to skip OS dependency installation.
Be sure to add yourself to the docker group with 'sudo usermod -aG docker $USER' after installing docker.
Log out and back in, or restart your system after you run this command.
```
Then you simply have to install those two things manually.
Docker provides common [install instructions here](https://docs.docker.com/engine/install/).
Docker-compose provides common [install instructions here](https://docs.docker.com/compose/install/).
Once both are installed, make sure you give your user account permission to use Docker:
```shell
sudo usermod -aG docker $USER
```
Finally, re-run the installer with the `-d` flag to skip Docker installation:
```shell
rocketpool service install -d
```
:::
After this, **log out and back in or restart your SSH session** for the settings to take effect.
Once this is finished, the Smart Node stack will be ready to run.
## Configuring Docker's Storage Location
By default, Docker will store all of its container data on your operating system's drive.
In some cases, this is not what you want.
::: tip NOTE
If you are fine with this default behavior, skip down to the next section.
:::
To do this, create a new file called `/etc/docker/daemon.json` as the root user:
```shell
sudo nano /etc/docker/daemon.json
```
This will be empty at first, which is fine. Add this as the contents:
```json
{
"data-root": "/docker"
}
```
where `` is the directory that your other drive is mounted to.
Press `Ctrl+O, Enter` to save the file, and `Ctrl+X, Enter` to exit the editor.
Next, make the folder:
```shell
sudo mkdir -p /docker
```
Now, restart the docker daemon so it picks up on the changes:
```shell
sudo systemctl restart docker
```
After that, Docker will store its data on your desired disk.
## Configuring the Smart Node Stack
The next step in the installation process is to do an initial configuration of your node.
Move on to the [Configuring Rocketpool](/node-staking/config/overview.md) section for a walkthrough of this process.
---
url: /node-staking/eth-clients.md
---
> For AI agents: the complete documentation index is available at /llms.txt, the full documentation bundle is available at /llms-full.txt.
# Choosing your ETH Clients
Rocket Pool's Smart Node installer can transform your machine into a full Ethereum node, as it requires both Execution and Consensus clients in order to operate properly.
The terms ETH1/ETH2 have been deprecated.
The chains will be referred to as the **Execution Layer (ETH1)** and the **Beacon Chain or Consensus Layer (ETH2)** in the rest of these guides.
If you already have Execution and Consensus clients up and running on a separate machine (for example, if you're already solo-staking), then skip this section and move onto the [Configuring a Hybrid Rocket Pool Node with External Clients](/node-staking/install-modes.md#the-hybrid-configuration-with-external-clients) section.
Otherwise, read on to learn more about your choices for Execution and Consensus clients.
::: warning NOTE
As of August 2025, the distribution of clients on the Beacon Chain looks roughly like this:
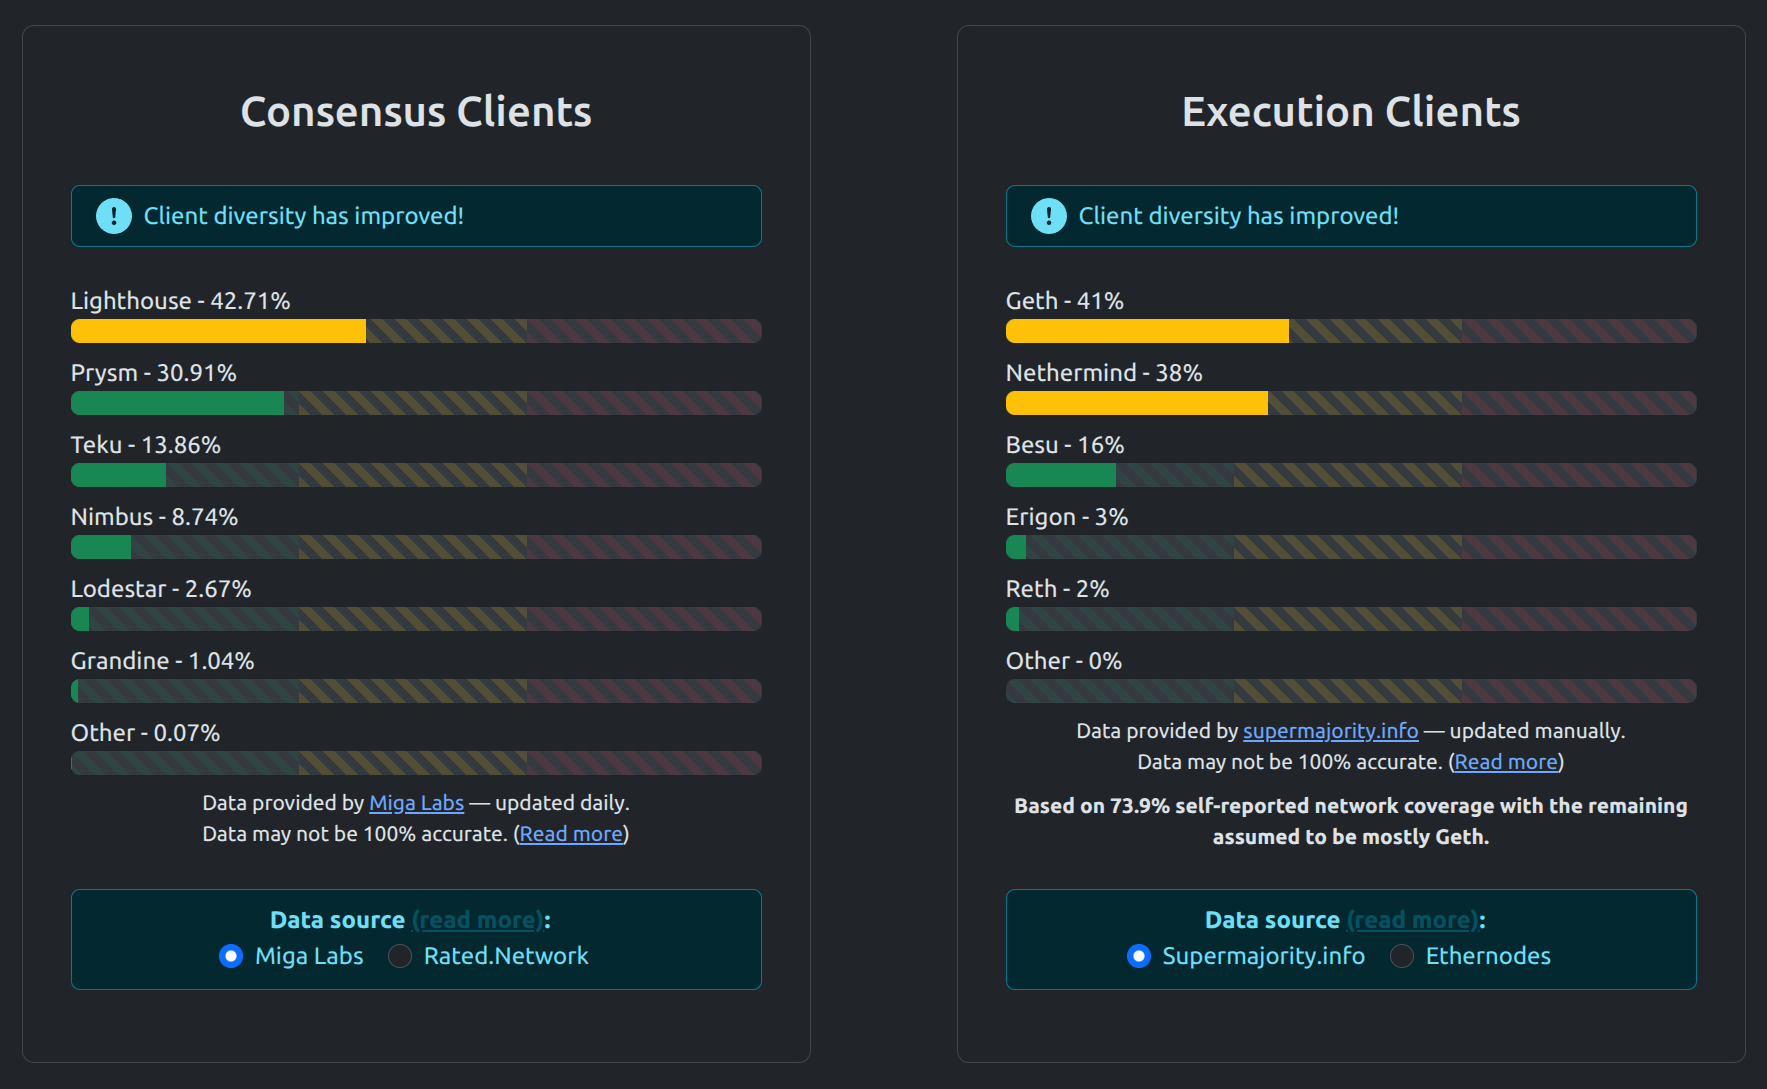
_Data obtained from [https://clientdiversity.org](https://clientdiversity.org)_
Obtaining data on which consensus client a validator is running is a relatively difficult problem because clients are not easily identified. The [data methodology](https://clientdiversity.org/methodology/) page
on [https://clientdiversity.org](https://clientdiversity.org) goes into how data from different sources are obtained. Feel free to check out
[https://ethernodes.org/](https://ethernodes.org/) as an additional source of data.
The overwhelming majority of node operators are currently using Geth as an Execution Client and either Lighthouse or Prysm as a Consensus Client.
In the interest of supporting the health of the Execution Layer (formerly ETH1) and the Beacon Chain (formerly ETH2), we currently recommend that you consider using different clients.
Here are some relevant articles about why an even client diversity is crucial to the health of the network if you would like to learn more:
[https://clientdiversity.org/#why](https://clientdiversity.org/#why)
[https://blog.ethereum.org/2020/08/21/validated-why-client-diversity-matters/](https://blog.ethereum.org/2020/08/21/validated-why-client-diversity-matters/)
[https://our.status.im/the-importance-of-client-diversity/](https://our.status.im/the-importance-of-client-diversity/)
[https://medium.com/prysmatic-labs/eth2-mainnet-incident-retrospective-f0338814340c](https://medium.com/prysmatic-labs/eth2-mainnet-incident-retrospective-f0338814340c)
[https://dankradfeist.de/ethereum/2022/03/24/run-the-majority-client-at-your-own-peril.html](https://dankradfeist.de/ethereum/2022/03/24/run-the-majority-client-at-your-own-peril.html)
[https://eth2book.info/bellatrix/part2/incentives/diversity](https://eth2book.info/bellatrix/part2/incentives/diversity/)
:::
For users that would like to get up and running quickly, the Smart Node installer provides a `Random Client` option which may be the best choice.
For users that have a specific client they'd like to use in mind, we provide the ability to easily choose one during Rocket Pool's installation.
The options below help to describe each client so you can make an informed decision if you'd like to specify which one you want.
## Execution Clients
Rocket Pool supports five Execution clients: **Geth**, **Besu**, **Nethermind**, **Reth**, and **Erigon**.
Running an Execution client involves storing a copy of the Execution layer blockchain on your machine.
It interacts via peer-to-peer communications with other EC nodes to record and verify new blocks and transactions.
A full Execution client is **required** to run a validator now that the Execution and Consensus layers have merged.
### Geth
[Geth](https://geth.ethereum.org/) (formally named `Go Ethereum`) is one of the three original implementations (along with C++ and Python) of the Ethereum protocol.
It is written in Go, fully open source and licensed under the GNU LGPL v3.
Geth is the oldest and most widely-used Execution Client around the world.
It has a reputation for being very stable and reliable.
It is multithreaded, meaning it can take advantage of your entire CPU.
Its minimum RAM requirement is 8 GB, but 16 GB is recommended.
This makes it viable for low-power systems and high-power systems alike.
::: warning NOTE
Geth requires **offline pruning** of its database periodically: its database will grow over time and gradually consume all of your free disk space unless you prune it when your disk runs low on free space.
The frequency you need to prune will depend on your SSD's size.
For more information on pruning Geth, view the [Pruning the Execution Client](/node-staking/pruning.md) page.
:::
### Besu
Hyperledger [Besu](https://besu.hyperledger.org/en/stable/) is an open-source Ethereum client developed under the Apache 2.0 license and written in [Java](https://en.wikipedia.org/wiki/Java_%28programming_language%29).
Besu's most exciting features is its use of [Bonsai Tries](https://consensys.net/blog/news/bonsai-tries-a-big-update-for-small-state-storage-in-hyperledger-besu/) for state storage. In addition to their better performance characteristics, Bonsai Tries give Besu two interesting advantages over the other clients:
1. Besu does _not_ need to be pruned at all; it is effectively maintenance-free in that respect
2. Besu is able to revisit any past block in the blockchain, though it does this by rewinding each block so reaching blocks from long ago may take some time.
Besu currently recommends at least **16 GB of RAM**, though it is possible to run successfully with 8 GB.
### Nethermind
[Nethermind](https://nethermind.io/nethermind-client/) is written in [.NET Core](https://en.wikipedia.org/wiki/.NET).
It boasts the fastest sync speed of the Execution clients and has a rich set of configuration options.
It is designed with node operators in mind and has many features that they will find helpful.
Like Geth, Nethermind requires periodic pruning of its database.
Unlike Geth, however, Nethermind's database can [be pruned while it stays online](https://medium.com/nethermind-eth/netherminds-full-pruning-is-here-cutting-the-gordian-knot-5e3450f02de9).
This means you do not need to turn your client off and rely on a fallback in order to prune.
However, Nethermind's online pruning process is quite resource intensive so users running low-power nodes may see some performance degradation during the process.
Nethermind requires **at least 16GB of RAM**, though more is preferable.
::: tip NOTE
Nethermind requires periodic pruning of its database periodically: its database will grow over time and gradually consume all of your free disk space unless you prune it when your disk runs low on free space.
The frequency you need to prune will depend on your SSD's size.
Unlike Geth, however, Nethermind **remains online** while it is pruning.
This makes it a compelling choice for nodes because they won't have any down time during pruning.
For more information on pruning Nethermind, view the [Pruning the Execution Client](/node-staking/pruning.md) page.
:::
### Reth
[Reth](https://reth.rs/) is an Execution layer client written in [Rust](https://www.rust-lang.org/) and uses the [Erigon staged-sync](https://erigon.substack.com/p/erigon-stage-sync-and-control-flows) architecture.
Reth is designed from the ground up with efficiency, performance, and modularity in mind. It's licenced under the Apache/MIT permissive license and built
with small, well-abstracted, well-tested, and benchmarked packages. This makes for a great open source developer experience and allows Reth's components to be used in other projects.
As the newest client in the ecosystem, Reth is rapidly evolving and gaining adoption. While RAM and CPU requirements are flexible, the most important
requirement is by far the disk. We suggest using a good [TLC disk](https://gist.github.com/yorickdowne/f3a3e79a573bf35767cd002cc977b038).
Reth requires **at least 8 GB of RAM** for a full node or **16 GB of RAM** for an archive node.
### Erigon
[Erigon](https://erigon.tech/) is an Execution client written in [Go](https://go.dev/). It uses a staged-sync architecture and can pull snapshots over BitTorrent on first start, which makes initial sync comparatively fast if the torrent port is reachable.
In the Settings Manager, Erigon exposes a **Torrent Port** (default `42069`, TCP and UDP) in addition to the usual P2P port (`30303`). Forward both if you want snapshot sync and peering to work well from outside your LAN.
Erigon supports **Rolling History Expiry** (drop bodies and receipts older than about one year). It does **not** support pre-merge-only History Expiry; if you pick that mode, it keeps remaining block history with full-mode state pruning. If you run it as a **full node**, it keeps receipts.
Like the other clients, RAM needs are flexible and disk quality matters. Open the torrent and P2P ports in your router (and host firewall) the same way you would for Geth's `30303`.
### Client Comparison Table
| Client | Type | RAM Usage |
| ---------- | ---- | --------- |
| Geth | Full | \~8 GB |
| Besu | Full | \~10 GB |
| Nethermind | Full | \~7-15 GB |
| Reth | Full | \~14 GB |
| Erigon | Full | \~10 GB |
_RAM usage data sourced from [eth-docker](https://ethdocker.com/Usage/ResourceUsage/). Actual usage may vary based on configuration and network conditions._
## Consensus Clients
Rocket Pool's installer is proud to support five currently available Consensus clients: **Lighthouse**, **Lodestar**, **Nimbus**, **Prysm**, and **Teku**.
Each of these is a **full client**, meaning you will contribute to the decentralization of the Consensus network regardless of which client you choose.
All five clients are quite low-risk, low-maintenance, and will generate practically identical total rewards from validation.
They differ slightly in terms of resource requirements and features, but you cannot go wrong with any of them.
By default, the Rocket Pool installer will offer to select a random consensus client for you.
This will help contribute to the overall **diversity of the network**.
This is important from a security perspective: if one client is used by a majority of nodes and suffers from a severe bug or attack, it might cause all of those nodes to fail and thus threaten the entire Beacon Chain's stability.
### Lighthouse
[Lighthouse](https://lighthouse.sigmaprime.io/) is an open-source Ethereum 2.0 maintained by [Sigma Prime](https://sigmaprime.io/).
It implements the [Ethereum 2.0 specification](https://github.com/ethereum/consensus-specs) as defined by the Ethereum Foundation Research team.
Lighthouse is a cutting-edge distributed systems project implementing technologies at the forefront of blockchain research; including proof-of-stake consensus, parallel transaction execution and state separation (sharding).
Lighthouse has no official affiliation with the Ethereum Foundation and will continue to follow its guidance as long it is remains in the best interest of the Ethereum protocol and community surrounding it.
Lighthouse is implemented in [Rust](https://www.rust-lang.org/) and will maintain a focus on security and efficiency.
### Lodestar
[Lodestar](https://lodestar.chainsafe.io/) is the fifth open-source Ethereum consensus client maintained by [ChainSafe Systems](https://chainsafe.io/). Our flagship product is our production-capable beacon chain and validator client for Ethereum consensus. Our software and tooling is uniquely situated as the go-to for researchers and developers for rapid prototyping and browser usage. Millions of developers around the world are familiar with Typescript, and Lodestar's high-quality codebases are excellent introductions to the Ethereum world.
Lodestar has also been a leader in light client research, standardization, and implementation of Ethereum light clients. We strive to work with other client implementers, researchers and developers to demonstrate the importance of having browsers utilize trustless data directly from the blockchain.
Lodestar's niche is in its implementation language, [Typescript](https://www.typescriptlang.org/).
### Nimbus
[Nimbus](https://nimbus.team/) is a client implementation for both Ethereum 2.0 and Ethereum 1.0 that strives to be as lightweight as possible in terms of resources used.
This allows it to perform well on embedded systems and resource-restricted devices. If you're planning to run an Execution and Consensus client pair with 16GB total RAM on your node, nimbus is recommended.
However, resource-restricted hardware is not the only thing Nimbus is good for.
Its low resource consumption makes it easy to run Nimbus together with other workloads on your server (this is especially valuable for stakers looking to lower the cost of their server instances).
Nimbus is written in [Nim](https://nim-lang.org/) and maintained by the [Status.im team](https://status.im/about/).
### Prysm
The [Prysm](https://docs.prylabs.network/docs/getting-started/#what-is-prysm) project is a full-featured implementation for the Ethereum 2.0 network written entirely in the [Go programming language](https://golang.org/).
Created by [Prysmatic Labs](https://prysmaticlabs.com/), Prysm implements the official [Ethereum 2.0 specification](https://github.com/ethereum/consensus-specs), which is the product of an ongoing collective research and development effort by various teams across the Ethereum ecosystem including the [Ethereum Foundation](https://ethereum.org/).
### Teku
[Teku](https://docs.teku.consensys.net/en/stable/) (formerly known as Artemis) is a [Java](https://en.wikipedia.org/wiki/Java_%28programming_language%29)-based Ethereum consensus client designed & built to meet institutional needs and security requirements.
PegaSys is an arm of [ConsenSys](https://consensys.net/) dedicated to building enterprise-ready clients and tools for interacting with the core Ethereum platform.
Teku is Apache 2.0 licensed and written in Java, a language notable for its maturity & ubiquity.
### Client Comparison Table
| Client | RAM Usage | Sync Time |
| ---------- | --------- | ---------------------------- |
| Lighthouse | \~14 GB | Instant with checkpoint sync |
| Lodestar | \~12 GB | Instant with checkpoint sync |
| Nimbus | \~5 GB | Instant with checkpoint sync |
| Prysm | \~9 GB | Instant with checkpoint sync |
| Teku | \~10 GB | Instant with checkpoint sync |
_RAM usage data sourced from [eth-docker](https://ethdocker.com/Usage/ResourceUsage/). Actual usage may vary based on configuration and network conditions._
---
url: /node-staking/fallback.md
---
> For AI agents: the complete documentation index is available at /llms.txt, the full documentation bundle is available at /llms-full.txt.
# Specifying a Fallback Node
Starting with **1.5.0** of the Smart Node stack, you can provide a "fallback" Execution client and Consensus client pair that can take over for your primary clients if they ever go offline (such as because [you use Geth and need to prune it](/node-staking/pruning.md)).
In this situation, your primary node machine will still be responsible for attesting and proposing blocks with your megapool's validator keys, but it will connect to an external machine to interact with the Execution layer and Beacon chains.
Essentially, it allows you to _temporarily_ use another pair of clients for things like querying the chains, sending transactions, and receiving blocks to attest to.
This pair can be externally managed (like Hybrid mode), or it can be another Rocket Pool node (another Docker mode machine that has the API ports exposed, which we'll cover below).
Once your node's primary clients are back online, the Smart Node and your Validator client will switch back to them automatically.
::: warning NOTE
A fallback node is **not** the same as a "backup" node.
Fallback nodes have an Execution and Consensus client pair synced to the chain and running, but they **do not** have your node's wallet or its validator keys loaded.
If your main node ever goes offline, **your fallback will not start validating for you.**
:::
## Supported Clients
As of v1.9.0, all our supported validator clients have added Fallback support with only a few limitations:
| Name | Supports Fallback | Valid Fallback Clients |
| ---------- | ----------------- | ------------------------------------------------------------------------------ |
| Lighthouse | Yes | Any (doppelganger protection off) Lighthouse (doppelganger protection on) |
| Nimbus | Yes | Any |
| Prysm | Yes | Prysm |
| Teku | Yes | Any |
| Lodestar | Yes | Any |
## Setting up a New Node (Docker Mode)
You can use a 2nd machine that you own locally, a remote node hosted on a VPS, or a cloud-based node as a fallback node.
This example shows you how to create a 2nd Smart Node on a different machine using Docker mode, which can serve as a fallback node.
::: tip TIP
If you already have a 2nd node ready and have its RPC ports exposed, feel free to skip this section.
:::
1. Follow the steps in the guide on setting up a node ([local](/node-staking/local/hardware.md) or [remote](/node-staking/vps/providers.md)).
2. Once the machine is ready, [install the Smart Node stack](/node-staking/docker.md).
3. Run `rocketpool service config` to specify which clients you'd like to use.
1. When you get to the end of the wizard and it asks if you'd like to review your settings, select **Yes**.
2. Enter the `Execution Client` settings.
3. Check the `Expose RPC Ports` box:
4. Go back and enter the `Consensus Client` settings. 5. Check the `Expose API Port` box (and, if you're using **Prysm**, the `Expose RPC Port` box as well):
6. Save the settings and start the Smart Node.
4. Skip to the [Securing your Node](/node-staking/securing-your-node.md) guide to set up SSH and the proper security posture on it.
1. If you have `ufw` installed, you will need to add rules to allow incoming traffic to the API ports (`8545`, `8546`, and `5052` by default; also `5053` if you're using **Prysm**).
5. That's it! You can stop here.
::: danger NOTE
**Do not** create a wallet with `rocketpool wallet init` or recover your old wallet.
Leave this node without a wallet and without validator keys.
Its only job is to have a synced Execution client and Consensus client.
:::
## Connecting your Main Node to the Fallback Node
Once you have a fallback node prepared, you can connect it to your main node.
1. Enter the `rocketpool service config` TUI and enter the `Fallback Clients` settings.
2. Check the `Use Fallback Clients` box.
3. Enter the RPC URL for your Execution client in the `Execution Client URL` box. For example, if your fallback node's IP address is `192.168.1.45` and you have its Execution client on the default port of `8545`, you would enter `http://192.168.1.45:8545` here.
4. Do the same for the RPC URL of your fallback Consensus client. Following the same example, if you have it on the default port of `5052`, you would enter `http://192.168.1.45:5052` here.
5. Optionally check **Prefer Fallback Clients** (default off). If enabled, the Smart Node will send API, node, and watchtower requests to your fallback Execution and Consensus clients first, and only use the primary pair if the fallback is unavailable. This keeps Smart Node load off the primary clients so they can focus on validator duties. Your Validator Client is not affected and still uses the primary pair first.
The final page should look like this:
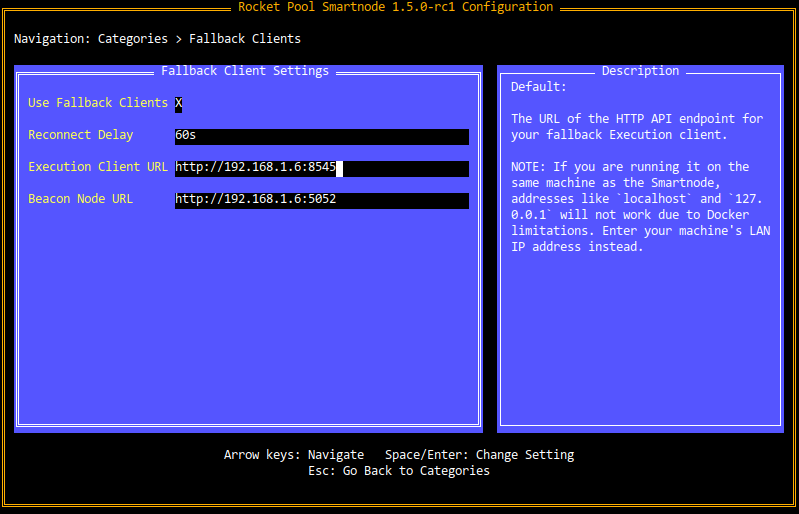
::: tip NOTE
**Native mode** users can follow the same steps, though the TUI will look slightly different from the above screenshot.
Note that this will only provide the **Smart Node itself** (the daemon service) with fallback support; **you will have to update your Validator client service's arguments manually to give it access to the fallback clients.**
:::
Press `enter` on the final box to ensure that it's confirmed, then save the settings and apply the changes.
Once they've been applied, you can confirm the availability of your fallback node using the `rocketpool node sync` command:
```
Your Smartnode is currently using the Ethereum Mainnet.
Your eth2 client is on the correct network.
Your primary execution client is fully synced.
Your fallback execution client is fully synced.
Your primary consensus client is fully synced.
Your fallback consensus client is fully synced.
```
If it shows that both the fallback Execution and Consensus client are synced, then you're all set!
## Testing the Fallback Clients
If you'd like to be absolutely sure that your configuration is going to work by testing the fallback clients, simply stop the Execution and Consensus clients on your main node:
```shell
docker stop rocketpool_eth1 rocketpool_eth2
```
Then run any command that queries the chain, such as `rocketpool network stats`.
You will see a warning message at the top indicating that one (or both) of your primary clients are offline, and that it's reverting to the fallback clients:
```
NOTE: primary clients are not ready, using fallback clients...
Primary EC status: unavailable (Sync progress check failed with [Post "http://eth1:8545": dial tcp: lookup eth1 on 127.0.0.11:53: no such host])
Primary CC status: unavailable (Sync progress check failed with [Could not get node sync status: Get "http://eth2:5052/eth/v1/node/syncing": dial tcp: lookup eth2 on 127.0.0.11:53: no such host])
========== General Stats ==========
Total Value Locked: 1196.926316 ETH
Deposit Pool Balance: 23.586761 ETH
Minipool Queue Demand: 0.000000 ETH
Deposit Pool ETH Used: 6.809609%
============== Nodes ==============
Current Commission Rate: 5.000000%
Node Count: 16
Active Minipools: 36
Initialized: 0
Prelaunch: 0
Staking: 36
Withdrawable: 0
Dissolved: 0
Finalized Minipools: 30
=========== Megapools ============
Megapool contracts deployed: 10
Total megapool validators: 86
Staking: 51
In Prestake: 6
In Queue: 10
Exited: 14
Locked: 1
Exiting: 2
Dissolved: 2
========== Smoothing Pool =========
Contract Address: 0xE8D1136ac49DBe6ac8f299130253004DC63841a1
Nodes Opted in: 3
Pending Balance: 0.000000
============== Tokens =============
rETH Price (ETH / rETH): 1.185477 ETH
RPL Price (ETH / RPL): 0.000639 ETH
Total RPL staked: 33406.127068 RPL
Total Megapool RPL staked: 11406.127068 RPL
Total Legacy RPL staked: 22000.000000 RPL
```
Finally, start your primary clients again:
```shell
docker start rocketpool_eth1 rocketpool_eth2
```
And you're done!
Your fallback setup is working.
## Next Steps
Whether or not you've opted into creating and/or running a fallback node for your setup, the next step is to learn about **priority fees**.
Click on the next section of the guide when you're ready to proceed.
---
url: /node-staking/faq.md
---
> For AI agents: the complete documentation index is available at /llms.txt, the full documentation bundle is available at /llms-full.txt.
# FAQ (WIP)
### What are the benefits of running minipools with Rocket Pool compared to a 32 ETH solo validator?
By running a single solo validator, you would receive 100% rewards on your 32 ETH.
By running two 16 ETH minipools, you would receive 100% rewards on your 32 ETH **plus** 14% of the rewards on 32 ETH provided by the Rocket Pool protocol.
By running four 8 ETH minipools, you would receive 100% rewards on your 32 ETH **plus** 14% of the rewards on 96 ETH provided by the Rocket Pool protocol.
You would also have the option to use Rocket Pool's [Smoothing Pool](/node-staking/fee-distrib-sp.md#the-smoothing-pool) feature.
### How do I know how much my rETH is worth? Does it rebase?
The rETH token will not rebase.
The number of tokens on your wallet will remain constant but they appreciate in value over time.
### I have a technical issue running my node, how do I get help?
You can start by checking the [Rocket Pool Support](https://rocketpool.support) page.
If that doesn't help, you can ask your question on the Rocket Pool **#support** channel in [the Discord server](https://discord.gg/rocketpool).
### How can I get test ETH to experiment with creating and running a minipool? I can't post messages on the faucet channel.
See [Getting test ETH on Hoodi](/node-staking/testnet/overview.md#getting-test-eth-on-hoodi).
### How do I recover my node if my machine breaks?
Short answer: your mnemonic is all that you need to fully recover your node.
Always make sure to keep it safe.
To recover your node on a new machine, start by making sure **your previous machine is not going to be online again** with the keys available, as two nodes running with the same keys **will get you slashed**.
Follow the [steps](/node-staking/install-modes.md) to install the Smart Node on a new machine.
Then, recover your node wallet and validator keys by running the command `rocketpool wallet recover` and insert your 24-word mnemonic.
### Why aren't my clients syncing? I have a low amount of peers.
Clients need to have a healthy number of peers to be able to properly sync.
You can start by running the test [here](https://www.yougetsignal.com/tools/open-ports/), checking if ports 30303 and 9001 are opened. Your Consensus client also uses UDP port 8001 for QUIC, so forward that one too (this tool only tests TCP).
If they're closed, you'll need to setup port forwarding on your router.
Also, make sure your node has a static local IP address so the port forwarding does not break due to your node getting a new address.
### My consensus client is taking too long to sync. What should I do?
Consensus clients can take a long time to sync if you didn't start the sync process using [Checkpoint Sync](/node-staking/config-docker.md#beacon-chain-checkpoint-syncing).
Even if you're running it for a long time, it's usually faster to configure the checkpoint sync URL, clear the current sync data with `rocketpool service resync-eth2` and start over.
Your client should be synced in less than a minute.
### I've already rebooted. Why does Grafana say I still need to reboot?
The reboot information is cached and only updates every few hours.
Running `sudo apt update` will force an update.
### I changed my Execution Layer and/or my Beacon Chain or Consensus Layer. How do I clean out the old data?
If you change clients, Rocketpool does not delete the old volumes. This data could be wasting significant disk space and you may want to remove it. To do so, you need to find the volumes. If you are using the default Rocketpool settings, the docker volumes are stored at `/var/lib/docker/volumes/`. The execution layer is in `rocketpool_eth1clientdata/_data/*` and the consensus layer is in `rocketpool_eth2clientdata/_data/*`.
To access these directories, you may need to sudo as root using `sudo -i`. Then you can delete a directory by calling `rm -rf `. For example, if you wanted to delete all the geth data, you would call `rm -rf /var/lib/docker/volumes/rocketpool_eth1clientdata/_data/geth/`.
To exit as root, type `exit`.
---
url: /node-staking/fee-distrib-sp.md
---
> For AI agents: the complete documentation index is available at /llms.txt, the full documentation bundle is available at /llms-full.txt.
# Fee Distributors and the Smoothing Pool
Node operators receive **priority fees** (**tips**) from the transactions they include in any blocks that they propose to the Ethereum chain.
These fees come from and stay on the Execution layer.
Unlike most validation rewards which are generated on the Consensus layer and automatically withdrawn periodically, these fees are _immediately liquid_.
In general, priority fees provide almost as much ETH to you as Beacon Chain rewards do, so they are a very nice benefit of the Merge.
::: tip NOTE
As a quick reminder here's a breakdown of the different types of rewards and which layer they're provided on:
- Consensus Layer: attestations, block proposals, sync committees, slashing reports
- Execution Layer: priority fees and MEV (discussed in the next section) from block proposals
:::
## Fee Recipients
When you propose a block on the Ethereum chain, the protocol needs to know where to send the tips from each transaction included in your block.
It can't send them to your validator's address, because that's on the Consensus layer - not the Execution layer.
It can't send them to your minipool address, because it has to work for solo stakers too and solo stakers don't have an address on the Execution layer attached to their validators the way Rocket Pool does.
Instead, the way it works is fairly straightforward: when Rocket Pool starts up your Validator Client, it passes in an argument called the **fee recipient**.
The fee recipient is simply an address on the Execution layer where you want the tips to go.
Your node's `fee recipient` can be one of the following special contracts:
- Your node's own personal **Fee Distributor**
- Your node's megapool contract
- The **Smoothing Pool** (opt-in)
The Smart Node will automatically set the correct fee recipient based on your configuration:
| Smoothing Pool Status | Has Megapool Validators | Has Minipools | Fee Recipient |
| --------------------- | ----------------------- | ------------- | ----------------------------------------------------------------------------------------------------------------------------------------------------------------------------------------------------------------- |
| Opted In | No | Yes | Smoothing Pool address |
| Opted In | Yes | No | Smoothing Pool address |
| Opted In | Yes | Yes | Smoothing Pool address (all validators) |
| Opted Out | No | Yes | Fee Distributor contract address |
| Opted Out | Yes | No | Megapool contract address |
| Opted Out | Yes | Yes | Megapool validators → Megapool address Minipool validators → Fee Distributor address (Set per validator via [keymanager API](https://ethereum.github.io/keymanager-APIs/#/Fee%20Recipient/setFeeRecipient)) |
Rocket Pool is designed to fairly distribute these rewards between you and the rETH pool stakers, the same way it fairly distributes your Beacon chain rewards: your portion of any priority fees your minipool validators earn will go to you (plus the average commission of all of your minipools), and the remaining portion will go to the pool stakers (minus your average commission).
The exact portion depends on the number of 8 ETH-bonded, 16 ETH-bonded minipools, and 4 ETH-bonded megapool validators you have.
In brief, the **Fee Distributor** is a unique contract attached to your node that collects and fairly splits your priority fees between you and the rETH stakers.
It's like your own personal vault for priority fees.
Anyone (including you) can distribute its balance at any time to ensure that the rewards are always available to rETH stakers.
The **Smoothing Pool** is a special opt-in contract that allows all participating node operators to aggregate and pool their priority fees together, and distributes them evenly among the participants during each Rocket Pool rewards interval (currently every 28 days) and the rETH pool stakers.
This is a very compelling feature for node operators that don't want to worry about the luck factor involved in getting block proposals with high priority fees, and would rather have a nice, regular, consistent set of monthly earnings.
We'll cover both of these below so you understand the difference and whether or not you want to join the Smoothing Pool.
::: tip NOTE
Minipools created after 2024-10-28 used to earn bonus commission (up to 14% in total) through the Smoothing Pool. As defined in [RPIP-62](https://rpips.rocketpool.net/RPIPs/RPIP-62), the bonus ended four rewards intervals after Saturn 1 (the last one was paid in June 2026). These minipools now earn their 5% contract commission, whether or not you are in the Smoothing Pool.
:::
## Your Fee Distributor
Your Fee Distributor is a unique contract on the Execution Layer that's **specific to your node**.
It will hold all of the priority fees you've earned over time, and it contains the logic required to fairly split and distribute them to the rETH pool stakers and your withdrawal address.
This distribution process **can be called by anyone** (including rETH stakers), and can be done **at any time**.
If someone other than you distributes it, your share is held as [unclaimed rewards](#claiming-unclaimed-rewards) until you claim it.
It does not have a time limit before rewards expire.
The address for your node's Fee Distributor is **deterministically based on your node address**.
That means it is known ahead of time, before the Fee Distributor is even created.
New Rocket Pool nodes will automatically create (initialize) their node's Fee Distributor contract upon registration.
This only needs to be run once.
One interesting ramification of this is that your Distributor's address may start accruing a balance **before** you've initialized your Fee Distributor contract.
This is okay, because your Distributor will gain access to all of this existing balance as soon as you initialize it.
### Viewing its Address and Balance
You can view your fee distributor's address and balance as part of:
```shell
rocketpool node status
```
The output will look like this:

### Claiming fees from your Fee Distributor
You can claim and distribute the entire balance of your fee distributor using the following command:
```shell
rocketpool node distribute-fees
```
This will send your share of the rewards to your **withdrawal address**.
::: warning NOTE ON TAXABLE EVENTS
Anyone can distribute your fee distributor (to prevent you from holding rETH rewards hostage).
Rocket Pool also distributes it automatically whenever one of your minipools is closed, so that the fees you had accumulated are split using your node's average commission before it changes.
You may have a taxable event whenever your fee distributor is distributed.
Please keep these conditions in mind when deciding whether or not to use the Smoothing Pool (discussed below).
:::
### Claiming Unclaimed Rewards
Your share goes straight to your withdrawal address only when the fee distributor is distributed by your node address or your withdrawal address, for example with `rocketpool node distribute-fees`.
Since the Saturn 1 upgrade, when anyone else distributes it (including Rocket Pool itself when you close a minipool), your share is set aside as **unclaimed rewards** instead.
Unclaimed rewards do not expire, and only your node address or withdrawal address can claim them.
To check for unclaimed rewards and claim them, run:
```shell
rocketpool node claim-unclaimed-rewards
```
If you have any, it will show the amount before asking you to confirm the claim:
```
The node's withdrawal address is 0x4ACb4E5E5A9a5EfB1f4D3eE2f6E5A13bB0E8f0a7
You have 0.012345 ETH in unclaimed rewards.
Your node 0xE8325F5f4486c2FF2AC7B522Fbc9eB249d46C936 has rewards that were distributed to its unclaimed rewards balance instead of its withdrawal address. This happens whenever your fee distributor is distributed by anyone other than your node or withdrawal address.
Claiming will send them to your current withdrawal address.
```
The rewards are sent to your **current** withdrawal address.
### The Penalty System
To ensure that node operators don't "cheat" by manually modifying the fee recipient used in their Validator Client, Rocket Pool employs a penalty system.
The Oracle DAO are able to penalise node operators that do not follow the protocol rules.
If a node is _opted out_ of the Smoothing Pool, the following addresses are considered valid fee recipients:
- The rETH address
- The Smoothing Pool address
- The node's fee distributor contract
- The node's megapool contract
If a node is _opted in_ to the Smoothing Pool, the following address is considered a valid fee recipient:
- The Smoothing Pool address
A fee recipient other than one of the valid addresses above is considered to be **invalid**.
The Smart Node software automatically sets the correct fee recipient based on your configuration (whether you're opted into the Smoothing Pool, and whether you have megapool validators, minipools, or both). For nodes with both megapool validators and minipools while opted out, the fee recipient is set per validator using the keymanager API. The full list of conditions are summarized [here](/node-staking/fee-distrib-sp.md#fee-recipients).
The Smart Node software is designed to ensure honest users will never get penalized, even if it must take the Validator Client offline to do so.
If this happens, you will stop attesting and will see error messages in your log files about why the Smart Node can't correctly set your fee recipient.
## The Smoothing Pool
The **Smoothing Pool** is a unique opt-in feature of the Rocket Pool network that is available to our node operators.
Essentially, it becomes the fee recipient for every node operator that opts into it and collectively accumulates the priority fees from blocks proposed by those node operators into one large pool. During a Rocket Pool rewards checkpoint (the same ones used to distribute RPL rewards), the total ETH balance of the pool is distributed fairly to the pool stakers and the node operators that opted into it.
In essence, the Smoothing Pool is a way to effectively eliminate the randomness associated with being selected for block proposals.
If you've ever had a streak of bad luck and gone months without a proposal, or if your block proposals only have low priority fees, you may find the Smoothing Pool quite exciting.
To make the math easy to understand, community member Ken Smith has put together a [massive analysis](https://raw.githubusercontent.com/htimsk/SPanalysis/main/report/Analysis%20of%20the%20Smoothing%20Pool.pdf) comparing the profitability of the Smoothing Pool and the Fee Distributor, which is summarized nicely with this chart:
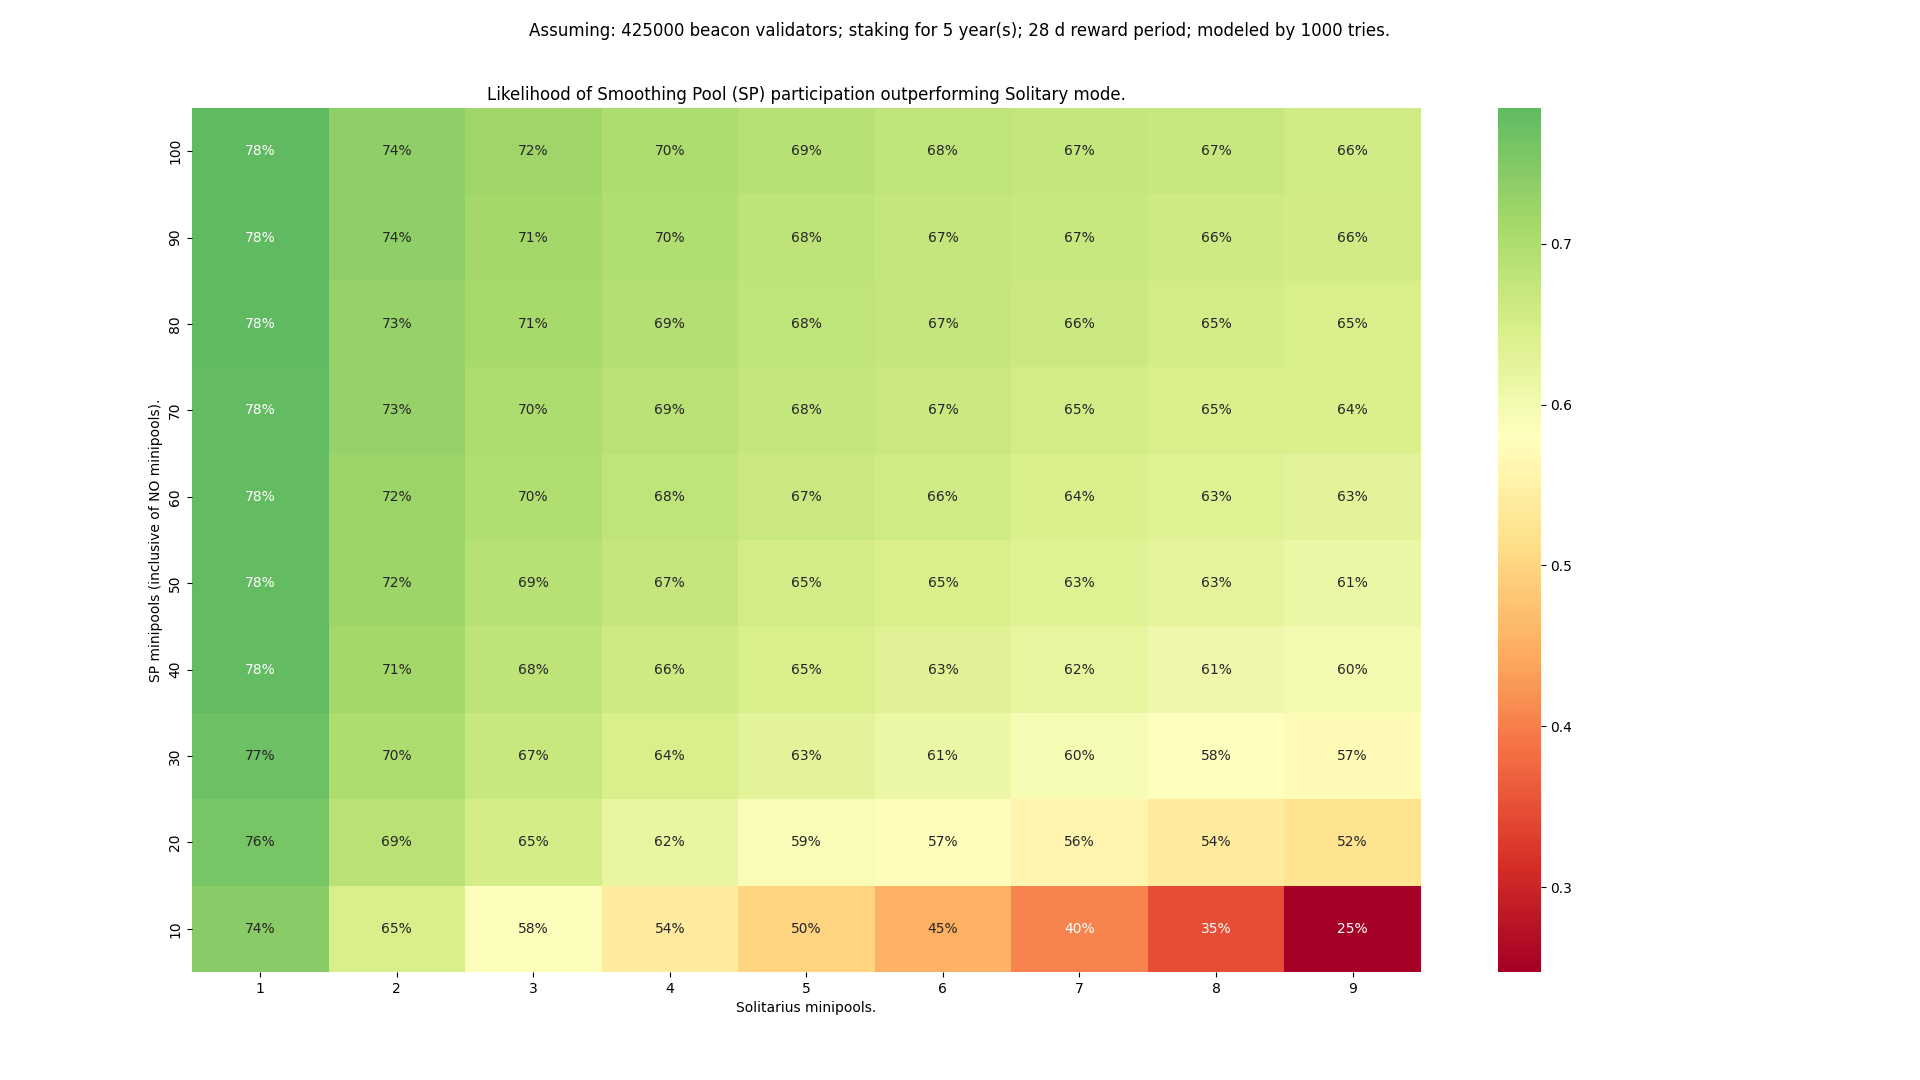
In short, as long as the Smoothing Pool has more minipools than you do, it's more likely that you'll come out ahead by joining it.
### The Rules
The Smoothing Pool uses the following rules:
- During a Rocket Pool rewards checkpoint when the Smoothing Pool's balance is distributed between node operators (factoring in their commission), RPL staking node operators, rETH stakers, and potentially the Rocket Pool DAO. The exact percentages are determined by Rocket Pool [Protocol Dao (pDAO) governance](/pdao/overview.md)
- Opting into the Smoothing Pool is done on a **node level**. If you opt in, all of your minipools and megapool validators are opted in.
- Anyone can opt in at any time. They must wait a full rewards interval (3 days on Hoodi, 28 days on Mainnet) before opting out to prevent gaming the system (e.g. leaving the SP right after being selected to propose a block).
- Once opted out, they must wait another full interval to opt back in.
- The Smoothing Pool calculates the "share" of each validator (portion of the pool's ETH for the interval) owned by each node opted in.
- The share is a function of your validator's performance during the interval (calculated by looking at how many attestations you sent on the Beacon Chain, and how many you missed), and your commission rate.
- Your node's total share is the sum of your validator shares.
- Your node's total share is scaled by the amount of time you were opted in.
- If you were opted in for the full interval, you receive your full share.
- If you were opted in for 30% of an interval, you receive 30% of your full share.
If you are interested in the complete technical details of Smoothing Pool rewards calculation, please review the [full specification here](https://github.com/rocket-pool/rocketpool-research/blob/master/Merkle%20Rewards%20System/rewards-calculation-spec.md#smoothing-pool-rewards).
### Joining and Leaving the Smoothing Pool
To opt into the Smoothing Pool, run the following command:
```shell
rocketpool node join-smoothing-pool
```
This will record you as opted-in in the Rocket Pool contracts and automatically change your Validator Client's `fee recipient` from your node's distributor contract to the Smoothing Pool contract.
To leave the pool, run this command:
```shell
rocketpool node leave-smoothing-pool
```
This will record you as opted-out in the Rocket Pool contracts, and once a small delay has passed, will automatically change your Validator Client's `fee recipient` from the Smoothing Pool contract back to your node's Fee Distributor contract.
### Claiming Rewards from the Smoothing Pool
Rewards from the Smoothing Pool are bundled together with RPL at the end of each rewards interval using the Redstone rewards system.
Claiming them is as simple as running:
```shell
rocketpool node claim-rewards
```
If opted into the Smoothing Pool, you will notice that the amount of ETH you receive for each interval is more than zero:
```
Welcome to the new rewards system!
You no longer need to claim rewards at each interval - you can simply let them accumulate and claim them whenever you want.
Here you can see which intervals you haven't claimed yet, and how many rewards you earned during each one.
Rewards for Interval 0 (2022-08-04 01:35:39 -0400 EDT to 2022-09-01 01:35:39 -0400 EDT):
Staking: 50.820133 RPL
Smoothing Pool: 0.000000 ETH
Rewards for Interval 1 (2022-09-01 01:35:39 -0400 EDT to 2022-09-29 01:35:39 -0400 EDT):
Staking: 40.668885 RPL
Smoothing Pool: 0.096200 ETH
Total Pending Rewards:
91.489018 RPL
0.096200 ETH
Which intervals would you like to claim? Use a comma separated list (such as '1,2,3') or leave it blank to claim all intervals at once.
```
Note that the Smoothing Pool rewards in Interval 1 here indicate that the node was opted in during that interval and received rewards accordingly.
We'll cover more about claiming RPL and Smoothing Pool rewards later in the guide, in the [Claiming Rewards](/node-staking/rewards.md) section.
## Next Steps
Once you've decided on whether or not you want to join the Smoothing Pool, take a look at the next section on MEV and MEV rewards.
---
url: /node-staking/grafana.md
---
> For AI agents: the complete documentation index is available at /llms.txt, the full documentation bundle is available at /llms-full.txt.
# Setting up the Grafana Dashboard
Now that you have your node up and running, you'll probably want to have a convenient way to monitor everything about it at a glance to make sure it's functioning correctly (and what kind of earnings it's generating for you).
There are many tools out there that do this job.
One of the most popular is called [Grafana](https://grafana.com/) - an easy-to-use, general-purpose dashboard system that you can access with a browser.
Rocket Pool comes out-of-the-box with support for Grafana and its dependencies; it even comes with a pre-built dashboard for each of the Consensus clients.
For example, here is a snapshot of what the dashboard looks like on the Hoodi test network:

The standard dashboard includes the following information all in a convenient format:
- **Top left:** some important statistics about your machine's health and performance, and any pending system updates
- **Top right:** the activity and performance of your validators on the Beacon Chain, along with some Execution and Consensus client stats
- **Bottom left:** details about the entire Rocket Pool network, for reference
- **Bottom right:** details about your staking rewards, both ETH and RPL
In this guide, we'll show you how to enable Rocket Pool's metrics system so you can use this dashboard - or even build your own!
## Overview of the Rocket Pool Metrics Stack
If you choose to enable metrics during the Smart Node configuration process, your node will add the following processes:
- [Prometheus](https://prometheus.io/) - a data collection, storage, and reporting system that captures all of the metrics you see above (any many more) and stores them, so they can be looked at over time
- The Prometheus [Node Exporter](https://github.com/prometheus/node_exporter) - a service that collects information about your machine's health (such as CPU usage, RAM usage, free disk space and swap space, etc.) and reports it to Prometheus
- Grafana, the tool that exposes Prometheus's data through a convenient website hosted on your node
- An optional custom set of scripts that will report any available Operating System updates to Prometheus, so you know if your system needs to be patched
The default configuration will create Docker containers with all of these services that live alongside the rest of the Smart Node's Docker containers.
It will open up a port on your node machine for Grafana, so you can access its dashboard from any machine on your local network with a browser.
## Enabling the Metrics Server
**Docker**
Enabling metrics in Docker mode is the easiest of all.
Start by running the Smart Node configuration command again:
```shell
rocketpool service config
```
Go to the `Monitoring / Metrics` section and check the `Enable Metrics` checkbox.
For those who prefer to fine-tune their port settings, you may do so here.
Note that all of these ports are restricted to Docker's internal network with the exception of the Grafana port - that will be opened on your machine (so you can access it via a browser from other machines, such as your desktop or phone) so you may want to change that if the default port conflicts with something you already have.
Save and exit, and smartnode will start the Prometheus, Node Exporter, and Grafana Docker containers for you.
It will also modify your Consensus and Validator clients so they expose their own metrics to Prometheus.
The Operating System and Rocket Pool update tracker is **not installed by default** for maximum flexibility, but the process is simple.
If you would like to install it so your dashboard shows you how many updates are available for your system, you can do it with this command:
```shell
rocketpool service install-update-tracker
```
Under the hood, this will install a service that hooks into your Operating System's package manager, periodically checks for updates, and sends that information to Prometheus.
This service is different for every Operating System, but it has been confirmed to work on the following:
- Ubuntu 20.04+
- Debian 9 and 10
- CentOS 7 and 8
- Fedora 34
NOTE
Enabling the service automatically is incompatible with SELinux.
If your system has SELinux enabled by default (as is the case with CentOS and Fedora), the installation command will get you _most of the way there_ but will also give you instructions on how to finish the process manually at the end.
During this check, it will also compare your installed Rocket Pool Smart Node version with the latest release, and inform you if there's a new release available.
If you enabled the update tracker, then the last step is to restart the Node Exporter with the following command:
```shell
docker restart rocketpool_exporter
```
After that, you should be all set.
**Hybrid**
Hybrid Mode works similar to Docker Mode; the only difference is that you must manually add the proper command-line flags for enabling metrics to your Execution and Consensus Client service definition.
First, we will update your Execution Client.
Open the `systemd` unit file you created when you installed your Execution Client and make sure it has the correct flags, based on which client you are running:
**Geth**
```
--metrics --metrics.addr 0.0.0.0 --metrics.port 9105
```
**Nethermind**
```
--Metrics.Enabled true --Metrics.ExposePort 9105
```
**Besu**
```
--metrics-enabled --metrics-host=0.0.0.0 --metrics-port=9105
```
Next, we will update your Consensus Client.
Open the `systemd` unit file you created when you installed your Consensus Client and make sure it has the correct flags, based on which client you are running:
**Lighthouse**
```
--metrics --metrics-address 0.0.0.0 --metrics-port 9100 --validator-monitor-auto
```
**Lodestar**
```
--metrics --metrics.address 0.0.0.0 --metrics.port 9100
```
**Nimbus**
```
--metrics --metrics-address=0.0.0.0 --metrics-port=9100
```
**Prysm**
```
--monitoring-host 0.0.0.0 --monitoring-port 9100
```
If you see the flag `--disable-monitoring`, remove it.
**Teku**
```
--metrics-enabled=true --metrics-interface=0.0.0.0 --metrics-port=9100 --metrics-host-allowlist=*
```
If you already have these flags set and are using different ports for your solo validator monitoring, leave them as-is and make note of which ports you're using.
Now, scroll up and follow the directions in the `Docker` tab of this section to finish the process - keeping in mind that you must replace the ports listed there with any custom ports you use when you run `rocketpool service config`.
**Native**
Native installation of Grafana and Prometheus is recommended for advanced users only. It requires Linux administration skills like `systemd`, file permissions, users and network management.
First, make sure your Execution Client and Consensus Client have metrics enabled. Refer to 'Hybrid' tab for details.
Next, check prebuilt prometheus and node_exporter packages on [the official download page](https://prometheus.io/download/).
Choose packages with proper architecture for your platform (amd64 or arm64).
Most recent LTS (Long Time Support) version of Prometheus is recommended.
For example to download prometheus v2.45.3 LTS and node_exporter v1.7.0 for Linux amd64 with `wget` do:
```shell
wget https://github.com/prometheus/prometheus/releases/download/v2.45.3/prometheus-2.45.3.linux-amd64.tar.gz
wget https://github.com/prometheus/node_exporter/releases/download/v1.7.0/node_exporter-1.7.0.linux-amd64.tar.gz
wget https://github.com/prometheus/alertmanager/releases/download/v0.26.0/alertmanager-0.26.0.linux-amd64.tar.gz
```
Extract prometheus and node_exporter executables from downloaded archives.
```shell
sudo tar -zxvf prometheus-2.45.3.linux-amd64.tar.gz -C /usr/local/bin --wildcards '*/prometheus' --strip-components=1
sudo tar -zxvf node_exporter-1.7.0.linux-amd64.tar.gz -C /usr/local/bin --wildcards '*/node_exporter' --strip-components=1
sudo tar -zxvf alertmanager-0.26.0.linux-amd64.tar.gz -C /usr/local/bin --wildcards '*/alertmanager' --strip-components=1
```
Create directories for prometheus & alertmanager configs.
```shell
sudo mkdir /etc/prometheus
sudo mkdir /etc/alertmanager
sudo mkdir /var/lib/prometheus
sudo mkdir /var/lib/alertmanager
```
Create file `/etc/prometheus/prometheus.yml` with following content:
```yaml
global:
scrape_interval: 15s # Set the scrape interval to every 15 seconds. Default is every 1 minute.
scrape_timeout: 12s # Timeout must be shorter than the interval
evaluation_interval: 15s # Evaluate rules every 15 seconds. The default is every 1 minute.
scrape_configs:
- job_name: "prometheus"
static_configs:
- targets: ["localhost:9091"]
- job_name: "node"
static_configs:
- targets: ["localhost:9103"]
# - targets: ['localhost:9103', 'node_hostname:9103']
- job_name: "eth1"
static_configs:
- targets: ["localhost:9105"]
# Uncomment the line below if you are using geth as Execution Client
#metrics_path: /debug/metrics/prometheus
- job_name: "eth2"
static_configs:
- targets: ["localhost:9100"]
- job_name: "validator"
static_configs:
- targets: ["validator:9101"]
- job_name: "rocketpool"
scrape_interval: 5m
scrape_timeout: 5m
static_configs:
- targets: ["node:9102"]
- job_name: "watchtower"
scrape_interval: 5m
scrape_timeout: 5m
static_configs:
- targets: ["watchtower:9104"]
alerting:
alertmanagers:
- static_configs:
- targets: ["localhost:9093"]
```
NOTE
Change the port numbers for the Execution Client and Consensus Client if required.
You may be running your node on a different host than the host running prometheus change. In that case
install node_exporter on your rocketpool node host and update `targets` of the `node` job to include all machines you want to monitor.
Also adjust `metrics_path` if your Execution Client is geth - it exposes non-standard endpoint for metrics.
Create the `/etc/alertmanager/alertmanager.yml` with the following content.
Replace both `webhook_url` values with your own [Discord webhook URL](https://support.discord.com/hc/en-us/articles/228383668-Intro-to-Webhooks):
```yaml
global:
# ResolveTimeout is the default value used by alertmanager if the alert does
# not include EndsAt, after this time passes it can declare the alert as resolved if it has not been updated.
# This has no impact on alerts from Prometheus, as they always include EndsAt.
# default = 5m
resolve_timeout: 5m
route:
# The labels by which incoming alerts are grouped together.
group_by: ["alertname"]
# How long to initially wait to send a notification for a group
# of alerts. Allows to wait for an inhibiting alert to arrive or collect
# more initial alerts for the same group.
group_wait: 30s
# How long to wait before sending a notification about new alerts that
# are added to a group of alerts for which an initial notification has
# already been sent. (Usually ~5m or more.)
group_interval: 5m
# How long to wait before sending a notification again if it has already been sent successfully for an alert.
repeat_interval: 4h
routes:
# severity=info: Don't send the follow-up resolved notification.
- match:
severity: info
continue: false
# The notification destination
receiver: "node_operator_no_resolved"
# all other alerts get sent notifications for the initial firing _and_ resolved notifications.
- receiver: "node_operator_default"
#match: We want this to match all alerts (severity=info is first though so it will stop)
# The notification destination
receiver: "node_operator_default"
receivers:
- name: "node_operator_default"
discord_configs:
- webhook_url: "https://discord.com/api/webhooks/YOUR_WEBHOOK_ID/YOUR_WEBHOOK_TOKEN"
- name: "node_operator_no_resolved"
discord_configs:
- webhook_url: "https://discord.com/api/webhooks/YOUR_WEBHOOK_ID/YOUR_WEBHOOK_TOKEN"
send_resolved: false
inhibit_rules:
# Inhibit rules mute a new alert (target) that matches an existing alert (source).
- source_match:
# if the existing alert (source) is severity=critical
severity: "critical"
target_match:
# and the new alert (target) is severity=warning
severity: "warning"
# and the alertname, job, and instance labels have the same value
equal: ["alertname", "job", "instance"]
```
Create system user for prometheus and alertmanager.
```shell
sudo useradd -r -s /sbin/nologin prometheus
sudo useradd -r -s /sbin/nologin alertmanager
```
Change prometheus/alertmanager files ownership and permissions.
```shell
sudo chown prometheus:prometheus /usr/local/bin/prometheus
sudo chown alertmanager:alertmanager /usr/local/bin/alertmanager
sudo chown prometheus:prometheus /usr/local/bin/node_exporter
sudo chown -R prometheus:prometheus /etc/prometheus
sudo chown -R alertmanager:alertmanager /etc/alertmanager
sudo chown -R prometheus:prometheus /var/lib/prometheus
sudo chown -R alertmanager:alertmanager /var/lib/alertmanager
sudo chmod u+sx,g+sx,o-wx /usr/local/bin/prometheus
sudo chmod u+sx,g+sx,o-wx /usr/local/bin/alertmanager
sudo chmod u+sx,g+sx,o-wx /usr/local/bin/node_exporter
```
Create file `/lib/systemd/system/node-exporter.service` for node_exporter service configuration.
```
[Unit]
Description=Node metrics exporter for Prometheus
Documentation=https://prometheus.io/docs/introduction/overview
Wants=network-online.target
After=network-online.target
[Service]
User=prometheus
Group=prometheus
Type=simple
Restart=on-failure
WorkingDirectory=/var/lib/prometheus
RuntimeDirectory=node-exporter
RuntimeDirectoryMode=0750
ExecStart=/usr/local/bin/node_exporter --web.listen-address=:9103
[Install]
WantedBy=multi-user.target
```
NOTE
If you want to change the port on which node_exporter is running, modify command at `ExecStart` parameter. Default port is 9100.
Create file `/lib/systemd/system/prometheus.service` for prometheus service configuration.
```
[Unit]
Description=Prometheus instance
Documentation=https://prometheus.io/docs/introduction/overview
Wants=network-online.target
After=network-online.target
[Service]
User=prometheus
Group=prometheus
Type=simple
Restart=on-failure
WorkingDirectory=/var/lib/prometheus
RuntimeDirectory=prometheus
RuntimeDirectoryMode=0750
ExecStart=/usr/local/bin/prometheus --config.file /etc/prometheus/prometheus.yml --web.listen-address=:9091
[Install]
WantedBy=multi-user.target
```
NOTE
If you want to change the port on which prometheus is running, modify command at `ExecStart` parameter. Default port is 9090.
Create file `/lib/systemd/system/alertmanager.service` for the alertmanager service configuration.
```
[Unit]
Description=Alertmanager instance
Documentation=https://prometheus.io/docs/alerting/latest/alertmanager/
Wants=network-online.target
After=network-online.target
[Service]
User=alertmanager
Group=alertmanager
Type=simple
Restart=on-failure
WorkingDirectory=/var/lib/alertmanager
RuntimeDirectory=alertmanager
RuntimeDirectoryMode=0750
ExecStart=/usr/local/bin/alertmanager --config.file /etc/alertmanager/alertmanager.yml --web.listen-address=:9093
[Install]
WantedBy=multi-user.target
```
NOTE
If you want to change the port on which alertmanager is running, modify command at `ExecStart` parameter. Default port is 9093.
Let `systemd` know about new services.
```shell
sudo systemctl daemon-reload
```
Enable and start node-exporter service.
```shell
sudo systemctl enable node-exporter
sudo systemctl start node-exporter
```
Check the service status to make sure it's running.
```shell
sudo systemctl status node-exporter
```
Enable and start prometheus service.
```shell
sudo systemctl enable prometheus
sudo systemctl start prometheus
```
Enable and start alertmanager service.
```shell
sudo systemctl enable alertmanager
sudo systemctl start alertmanager
```
Check the service status to make sure it's running.
```shell
sudo systemctl status prometheus
sudo systemctl status alertmanager
```
Setup package repository for Grafana.
```shell
sudo apt-get update
sudo apt-get install -y apt-transport-https software-properties-common
sudo mkdir -p /etc/apt/keyrings/
wget -q -O - https://apt.grafana.com/gpg.key | gpg --dearmor | sudo tee /etc/apt/keyrings/grafana.gpg > /dev/null
echo "deb [signed-by=/etc/apt/keyrings/grafana.gpg] https://apt.grafana.com stable main" | sudo tee -a /etc/apt/sources.list.d/grafana.list
```
Install Grafana.
```shell
sudo apt-get update
sudo apt-get install grafana
```
Verify settings in `/etc/grafana/grafana.ini`. Change the `http_port` to 3100 to be in line with the other sections provided in this document.
Configure datasource to visualise metrics from Prometheus in Grafana. Create file `/etc/grafana/provisioning/datasources/prometheus.yml`.
```yaml
apiVersion: 1
deleteDatasources:
- name: Prometheus
orgId: 1
datasources:
- name: Prometheus
type: prometheus
access: proxy
orgId: 1
url: http://localhost:9091
basicAuth: false
isDefault: true
version: 1
editable: true
```
NOTE
Edit `url` if you have changed Prometheus listening port.
Enable and start service for Grafana.
```shell
sudo systemctl daemon-reload
sudo systemctl enable grafana-server
sudo systemctl start grafana-server
```
Check if Grafana is up and running.
```shell
sudo systemctl status grafana-server
```
This is pretty much it.
## Configure firewall to allow connections for monitoring
::: warning NOTE
If you have UFW enabled as referenced in the [Securing your Node](/node-staking/securing-your-node.md) section, you will need to open a few ports in order to allow local connections between the Prometheus and your Execution/Consensus Clients. Follow the steps below.
:::
**Docker**
Run the following, and replace the ports as needed:
```shell
RP_NET=$(docker inspect rocketpool_net | grep -Po "(?<=\"Subnet\": \")[0-9./]+")
sudo ufw allow from $RP_NET to any port 9105 comment "Allow Prometheus access to Execution Client"
sudo ufw allow from $RP_NET to any port 9100 comment "Allow Prometheus access to Consensus Client"
sudo ufw allow from $RP_NET to any port 9103 comment "Allow Prometheus access to Exporter"
```
**Native**
If your RocketPool node and Prometheus resides on different hosts you need to configure firewall on your node host to allow incoming traffic
from Prometheus host IP to the node monitoring ports.
You also need to configure UFW on the Prometheus machine to allow for outgoing traffic from the Prometheus host to the RocketPool node host.
Having node host IP `192.168.1.5` and Prometheus host IP `192.168.1.6` the UFW rules for the node will be:
```shell
sudo ufw allow from 192.168.1.6 to any port 9100:9105 proto tcp comment 'Allow Prometheus host to scrape metrics of this host'
```
And for Prometheus host:
```shell
sudo ufw allow out from any to 192.168.1.5 port 9100:9105 proto tcp comment 'Allow this host to scrape node metrics'
```
Assuming your Grafana listening port is 3100, continue reading to find out how to expose Grafana in your network.
You can then open the firewall to allow external devices access to your Grafana dashboard.
**Network**
Use this if you want to access Grafana from any machine inside your local network, but deny access everywhere else.
This will be the most common use case.
Please check whether your local network uses the `192.168.1.xxx` structure first.
You may have to change the command below to match your local network's configuration if it uses a different address structure (e.g. `192.168.99.xxx`).
```shell
# This assumes your local IP structure is 192.168.1.xxx
sudo ufw allow from 192.168.1.0/24 proto tcp to any port 3100 comment 'Allow grafana from local network'
```
**Subnet**
Use this if your Rocket Pool node is not connected to the same subnet as the device from which you are viewing Grafana. This may happen when your node is connected directly to your ISP's modem and the device you use to view Grafana is connected to a secondary router.
Please check whether your local network uses the `192.168.1.xxx` structure first.
You may have to change the command below to match your local network's configuration if it uses a different address structure (e.g. `192.168.99.xxx`).
```shell
# To allow any devices in the broader subnet
# for example allowing 192.168.2.20 to access
# grafana on 192.168.1.20
sudo ufw allow from 192.168.1.0/16 proto tcp to any port 3100 comment 'Allow grafana from local subnets'
```
**Anywhere**
This will let you access Grafana from anywhere.
If you want to access it from outside your local network, you will still need to forward the Grafana port (default 3100) in your router settings.
```shell
# Allow any IP to connect to Grafana
sudo ufw allow 3100/tcp comment 'Allow grafana from anywhere'
```
## Setting up Grafana
Now that the metrics server is ready, you can access it with any browser on your local network.
Refer to the tabs below for your Smart Node installation mode.
Navigate to the following URL, substituting the variables with your setup as necessary:
```
http://:
```
For example, if you node's IP was `192.168.1.5` and you used the default Grafana port of `3100`, then you would go to this URL in your browser:
```
http://192.168.1.5:3100
```
You will see a login screen like this:
The default Grafana information is:
```
Username: admin
Password: admin
```
You will then be prompted to change the default password for the `admin` account.
Pick something strong and don't forget it!
::: tip Tip
If you lose the admin password, you can reset it using the following command on your node:
**Docker and Hybrid Mode**
```shell
docker exec -it rocketpool_grafana grafana-cli admin reset-admin-password admin
```
**Native**
```shell
sudo grafana-cli admin reset-admin-password admin
```
You will be able to log into Grafana using the default `admin` credentials once again, and then you will be prompted to change the password for the `admin` account.
:::
Thanks to community member **tedsteen**'s work, Grafana will automatically connect to your Prometheus instance so it has access to the metrics that it collects.
All you need to do is grab the dashboard!
## Importing the Rocket Pool Dashboard
Now that you have Grafana attached to Prometheus, you can import the standard dashboard (or build your own using the metrics that it provides, if you are familiar with that process).
Start by going to the **Create** menu (the plus icon on the right-side bar) and click on **Import**:
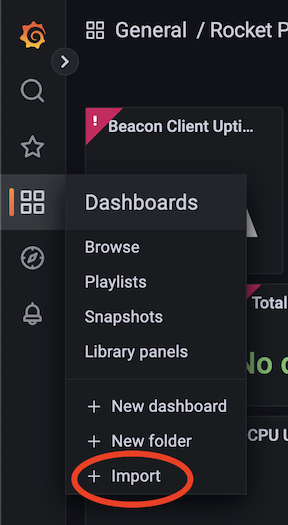
When prompted for the dashboard ID in the **Import via grafana.com** box, enter `24900` or use the full URL ([https://grafana.com/grafana/dashboards/24900-rocket-pool-dashboard-v1-4-0/](https://grafana.com/grafana/dashboards/24900-rocket-pool-dashboard-v1-4-0/)) and press the **Load** button.
You will be prompted with some information about the dashboard here, such as its name and where you'd like to store it (the default **General** folder is fine unless you use a lot of dashboards and want to organize them).
Under the **Prometheus** drop-down at the bottom, you should only have a single option labeled **Prometheus (default)**.
Select this option.
Your screen should look like this:
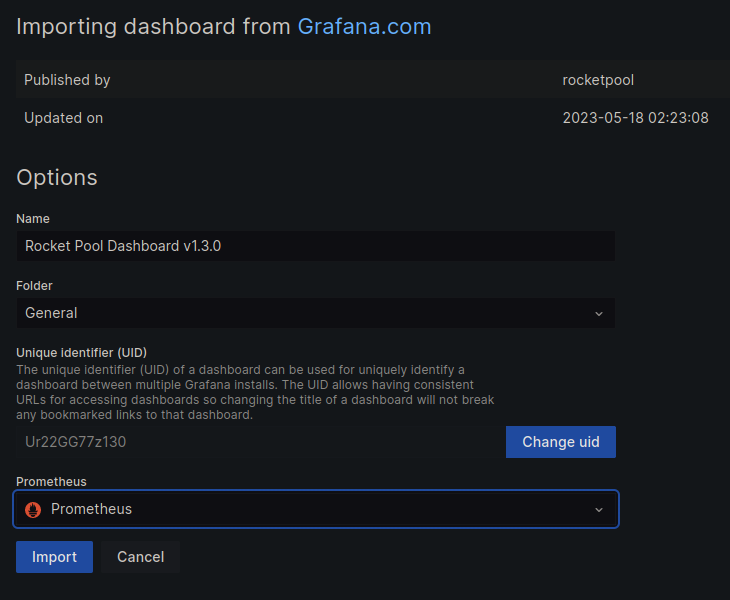
If yours matches, click the **Import** button and you will be immediately taken to your new dashboard.
::: tip NOTE
Smart Node v1.23.0 ships **Rocket Pool Dashboard v1.4.2** with its metrics stack. That revision adds node-scoped minipool and megapool validator counts by status and drops network-wide megapool status panels that depended on removed supply-collector metrics. If your Grafana already imported an older dashboard, re-import (or load the JSON provisioned with Smart Node) so those panels match the metrics your node exports.
:::
At first glance, you should see lots of information about your node and your validators.
Each box comes with a handy tooltip on the top left corner (the `i` icon) that you can hover over to learn more about it.
For example, here is the tooltip for the **Your Validator Share** box:
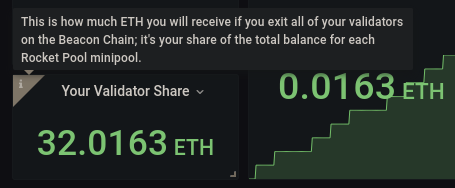
However, we aren't done setting things up yet - there is still a little more configuration to do.
::: warning NOTE
Some of the boxes (notably the APR ones) have been temporarily disabled due to the way Shapella provides skimmed rewards.
They will be enabled again in a future version of the Smart Node that can track historical rewards properly.
:::
## Tailoring the Hardware Monitor to your System
Now that the dashboard is up, you might notice that a few boxes are empty such as **SSD Latency** and **Network Usage**.
We have to tailor the dashboard to your specific hardware so it knows how to capture these things.
### CPU Temp
To update your CPU temperature gauge, click the title of the **CPU Temp** box and select **Edit** from the drop down.
Your screen will now look something like this:
This is Grafana's edit mode, where you can change what is displayed and how it looks.
We're interested in the query box highlighted in red, to the right of the **Metrics browser** button.
By default, that box has this in it:
```
node_hwmon_temp_celsius{job="node", chip="", sensor=""}
```
There are two fields in this text that are currently blank: `chip` and `sensor`.
These are unique to each machine, so you'll have to fill them in based on what your machine provides.
To do this, follow these steps:
1. Remove the `, sensor=""` portion so it ends with `chip=""}`. For clarity, the whole thing should now be `node_hwmon_temp_celsius{job="node", chip=""}`.
2. Put your cursor in-between the quote marks of `chip=""` and press `Ctrl+Spacebar`. This will bring up an auto-complete box with the available options, which looks like this:
3. Select the option that corresponds to your system's CPU.
4. Once that's selected, add `, sensor=""` back into the string. Place your cursor in-between the quote marks of `sensor=""` and press `Ctrl+Spacebar` to get another auto-complete menu. Select the sensor you want to monitor.
::: tip Tip
If you don't know which `chip` or `sensor` is correct, you'll have to try all of them until you find the one that looks right. To help with this, install the `lm-sensors` package (for example, `sudo apt install lm-sensors` on Debian / Ubuntu) and run the `sensors -u` command to provide what sensors your computer has. You can try to correlate a chip ID from Grafana's list with what you see here based on their names and IDs.
For example, this is one of the outputs of our `sensors -u` command:
```
k10temp-pci-00c3
Tctl:
temp1_input: 33.500
Tdie:
temp2_input: 33.500
```
In our case, the corresponding chip in Grafana is `pci0000:00_0000:00:18_3` and the corresponding sensor is `temp1`.
:::
Once you're happy with your selections, click the blue **Apply** button in the top right corner of the screen to save the settings.
::: warning NOTE
Not all system expose CPU temperature info - notably virtual machines or cloud-based systems.
If yours doesn't have anything in the auto-complete field for `chip`, this is probably the case and you won't be able to monitor your CPU temperature.
:::
### SSD Latency
The **SSD Latency** chart tracks how long it takes for read/write operations to take.
This is helpful in gauging how fast your SSD is, so you know if it becomes a bottleneck if your validator suffers from poor performance.
To update the SSD you want to track in the chart, click on the **SSD Latency** title and select **Edit**.
This chart has four query fields (four textboxes) with eight `device=""` portions in total.
You'll need to update the first four of these portions with the device you want to track.
Simply place your cursor in-between the quote marks and press `Ctrl+Spacebar` to get Grafana's auto-complete list, and select the correct option from there for each of the `device=""` portions.
**You want to start from the leftmost empty setting first, or the auto-complete list may not appear.**
::: tip Tip
If you don't know which device to track, run the following command:
```
lsblk
```
This will output a tree showing your device and partition list, for example:
```
NAME MAJ:MIN RM SIZE RO TYPE MOUNTPOINT
...
loop25 7:25 0 132K 1 loop /snap/gtk2-common-themes/9
loop26 7:26 0 65,1M 1 loop /snap/gtk-common-themes/1515
nvme0n1 259:0 0 238,5G 0 disk
├─nvme0n1p1 259:1 0 512M 0 part /boot/efi
├─nvme0n1p2 259:2 0 150,1G 0 part /
├─nvme0n1p3 259:3 0 87,4G 0 part
└─nvme0n1p4 259:4 0 527M 0 part
```
If you didn't change Docker's default location to a different drive during your Smart Node installation, then the disk you want to track will be the one that your Operating System is installed on.
Look in the `MOUNTPOINT` column for an entry simply labeled `/`, then follow that back up to its parent device (the one with `disk` in the `TYPE` column).
Typically this will be `sda` for SATA drives or `nvme0n1` for NVMe drives.
If you _did_ change Docker's default location to a different drive, or if you're running a hybrid / native setup, you should be able to use the same technique of "following the mount point" to determine which device your chain data resides on.
:::
Optionally, you can also track latency of a second disk on your system.
This is aimed at people that keep their Operating System and chain data on separate drives.
To set this up, simply follow the instructions above for the last two query fields, substituting `device=""` portion values with those of the disk you want to track.
Once you're happy with your selections, click the blue **Apply** button in the top right corner of the screen to save the settings.
### Network Usage
This chart tracks how much data you're sending and receiving over a particular network connection.
As you might expect, the dashboard needs to know which network you want it to track.
To change it, click on the **Network Usage** title and select **Edit**.
This chart has two query fields with two `device=""` portions in total.
You'll need to update these with the network you want to track.
Place your cursor in-between the quote marks and press `Ctrl+Spacebar` to get Grafana's auto-complete list, and select the correct option from there for each of the `device=""` portions.
::: tip Tip
If you don't know which device to track, run the following command:
```shell
sudo route
```
The output will look something like this:
```
Kernel IP routing table
Destination Gateway Genmask Flags Metric Ref Use Iface
default 192.168.1.1 0.0.0.0 UG 100 0 0 eth0
192.168.1.0 0.0.0.0 255.255.255.0 U 0 0 0 eth0
192.168.1.1 0.0.0.0 255.255.255.255 UH 100 0 0 eth0
```
Look at the `Destination` column for the row with the value if `default`.
Follow that row all the way to the `Iface` column.
The device listed there is the one you want to use - in this example, `eth0`.
:::
Once you're happy with your selections, click the blue **Apply** button in the top right corner of the screen to save the settings.
### Total Net I/O
This tracks the total amount of data you've sent and received.
You might find it useful to watch if, for example, your ISP limits you to a certain amount of data per month.
The setup is identical to the **Network Usage** box above, so simply follow those instructions for this box too.
### Disk Space Used
This keeps tabs on how full your Operating System disk is getting, so you know when it's time to clean up (and if your chain data lives on the same drive, time to [prune Geth or Nethermind](/node-staking/pruning.md)).
The steps are the same as the **SSD Latency** box above, so simply follow those instructions for this box too.
As a reminder, you want the drive that houses the partition which has `/` in the `MOUNTPOINT` column for this one because that will be your Operating System drive.
Fill this into the first query field.
Optionally, you can also track the free space of a second disk on your system.
This is aimed at people that keep their Operating System and chain data on separate drives.
Set this up by following the same process, but instead of looking at which partition has `/` in the `MOUNTPOINT` column, you want to look for the one that has whatever your second drive's mount point is.
Update the second query field with the disk associated with that partition.
### Disk Temp
This tracks the current temperature of your Operating System disk. The steps are the same as the **CPU Temp** box above, so simply follow those instructions for this box too, substituting CPU chip and sensor values with those of your Operating System disk. Fill these values into the first query field.
Optionally, you can also track the current temperature of a second disk on your system. Set this up by following the same process, substituting the chip and sensor values with those of your second drive. Fill these values into the second query field.
## Customizing the Dashboard
While the standard dashboard tries to do a good job capturing everything you'd want to see at a glance, it's quite easy to customize a Grafana dashboard however you want.
You can add new graphs, change the way graphs look, move things around, and much more!
Take a look at [Grafana's Tutorials](https://grafana.com/tutorials/) page to learn how to play with it and set it up to your liking.
## Customizing the Metrics Stack
The tools used in the Rocket Pool Metrics Stack offer a wide array of configuration options beyond what is included in the default Rocket Pool installation. This section includes configuration examples for different use cases.
In general, [Grafana configuration options](https://grafana.com/docs/grafana/latest/administration/configuration/) should be passed through using environment variables in `override/grafana.yml`. Any config option can be converted to an environment variable using the following syntax:
```
GF__
```
### Grafana SMTP Settings for Sending Emails
To send emails from Grafana, e.g. for alerts or to invite other users, SMTP settings need to be configured in the Rocket Pool Metrics Stack.
See the [Grafana SMTP configuration](https://grafana.com/docs/grafana/latest/administration/configuration/#smtp) page for reference.
**Docker and Hybrid Mode**
Open `~/.rocketpool/override/grafana.yml` in a text editor.
Add an `environment` section below the `x-rp-comment: Add your customizations below this line` line, replacing the values below with those for your SMTP provider.
```yaml
version: "3.7"
services:
grafana:
x-rp-comment: Add your customizations below this line
environment:
## SMTP settings start, replace values with those of your SMTP provider
- GF_SMTP_ENABLED=true
- GF_SMTP_HOST=mail.example.com:`port` # Gmail users should use smtp.gmail.com:587
- GF_SMTP_USER=admin@example.com
- GF_SMTP_PASSWORD=password
- GF_SMTP_FROM_ADDRESS=admin@example.com
- GF_SMTP_FROM_NAME="Rocketpool Grafana Admin"
## SMTP server settings end
```
**Native**
Open `/etc/grafana/grafana.ini` in a text editor. Look for `[smtp]` section and update it, replacing the values below with those for your SMTP provider.
```
[smtp]
enabled = true
host = mail.example.com:`port` # Gmail users should use smtp.gmail.com:587
user = admin@example.com
# If the password contains # or ; you have to wrap it with triple quotes. Ex """#password;"""
password = """passw0rd"""
from_address = admin@example.com
from_name = "Rocketpool Grafana Admin"
```
::: tip Tip
If using Gmail and [2-Step Verification](https://support.google.com/accounts/answer/185839) is enabled, create an [App Password](https://support.google.com/mail/answer/185833?hl=en) for this service.
:::
After making these modifications, **run the following to apply the changes**:
**Docker and Hybrid Mode**
```shell
docker stop rocketpool_grafana
rocketpool service start
```
**Native**
```shell
sudo systemctl restart grafana-server
```
To test the SMTP settings, go to the **Alerting** menu and click **Contact points**.
Click **New contact point** and select **Email** as the Contact point type.
Enter an email address in the **Addresses** section and click **Test**.
Check to see that the test email was received.
Click **Save contact point\*** when finished.
---
url: /node-staking/install-modes.md
---
> For AI agents: the complete documentation index is available at /llms.txt, the full documentation bundle is available at /llms-full.txt.
# Selecting a Rocket Pool Mode
Rocket Pool's Smart Node stack is quite flexible; there are several different ways to run it.
It can stand up an entire full node from scratch, it can integrate with existing Execution or Consensus client deployments, and it can even run natively as a set of system services.
In this section, we will cover the typical ways of configuring and using the Smart Node stack.
## The Default Docker-Based Configuration
The default mode, and the most common way to run a Smart Node, is to have it create an entire full node instance on your local machine that Rocket Pool manages.
To accomplish this, the Smart Node uses [Docker containers](https://www.docker.com/resources/what-container).
In essence, a Docker container is a small sandbox that comes pre-configured with a program, all of its dependencies, and all of the configuration needed to run correctly.
When it's no longer needed, it can simply be thrown away.
It's a nice little self-contained bundle that lets things work without making a mess of your actual filesystem or other programs.
This mode is what the Smart Node Installer will deploy for you.
It uses the following Docker containers:
- `rocketpool_node` - This is a background process that will periodically check for and claim RPL rewards after a reward checkpoint (if you have auto-claim enabled, more on this later), and is responsible for actually staking new validators when you create a minipool.
- `rocketpool_watchtower` - This is used by Oracle Nodes to perform oracle-related duties. For regular node operators, this will simply stay idle.
- `rocketpool_eth1` - This will be your Execution client.
- `rocketpool_eth2` - This will be your Consensus beacon node client.
- `rocketpool_validator` - This will be your Validator client, which is responsible for your validator duties (such as attesting to blocks or proposing new blocks).
In most situations, this is a good option to choose when creating a new node from scratch.
It's the fastest, most hands-off procedure.
It will also handle updates to the Execution and Consensus clients with every new Smart Node release, so you don't have to worry about them (though you can manually upgrade them at any time if you desire).
::: warning NOTE
Currently, some of the Docker containers need to run as the `root` user to function correctly.
While Docker containers are generally quite good at preventing a user from escaping into your main Operating System, you may not be comfortable with this requirement for security reasons.
In this case, we suggest you use the Native configuration mode listed below.
:::
If you would like to use this mode, proceed to the [Configuring a Standard Rocket Pool Node with Docker](/node-staking/docker.md) section.
## The Hybrid Configuration with External Clients
The hybrid configuration is well-suited for users that are interested in running a Rocket Pool node, but already have their own Execution and/or Consensus clients running for other purposes (for example, because they're already solo-staking).
In this mode, Rocket Pool will deploy Docker containers for its own processes and for a Validator client it manages, but will ignore the Execution client and Beacon Node containers for whichever external clients you already run and maintain.
**As Rocket Pool will be creating and maintaining new validator keys for each of your node's minipools, it is important that it runs its own Validator client.**
When using this configuration, the Smart Node will use the following Docker containers (which were described above):
- `rocketpool_node`
- `rocketpool_watchtower`
- `rocketpool_validator`
The `rocketpool_eth1` and `rocketpool_eth2` containers will either be included or excluded, depending on which clients you already have running externally.
If you would like to use this mode, proceed to the [Configuring a Standard Rocket Pool Node with Docker](/node-staking/docker.md) section.
When prompted to choose a management mode for your Execution and/or Consensus clients, choose the **Externally Managed** option which is described in detail within that section.
## The Native Configuration without Docker
This configuration bypasses Docker entirely.
Instead of running the Smart Node stack via Docker, each process will be installed as a local system service (e.g. via `systemd`).
This includes the `node`, `watchtower`, `eth1`, `eth2`, and `validator` processes.
This configuration offers the most flexibility because it allows you to fine-tune Rocket Pool's parameters (such as its security posture, where the Execution and Consensus clients live, where the chain data lives, where your keys live, and so on).
It is also the most difficult to set up and maintain.
In this mode, the Smart Node Installer is no longer relevant.
You are responsible for manually instantiating, maintaining, and upgrading the Smart Node infrastructure, the ETH clients, and the validator clients.
::: danger WARNING
While we provide some example documentation on how to do this, we suggest that this mode should only be used by **experienced system administrators**.
:::
If you would like to use this mode, proceed to the [Configuring a Native Rocket Pool Node without Docker](/node-staking/native.md) section.
---
url: /node-staking/installing/overview.md
---
> For AI agents: the complete documentation index is available at /llms.txt, the full documentation bundle is available at /llms-full.txt.
# Overview
In this section, you'll learn how to install the Rocket Pool Smart Node stack onto your node machine.
There are several different flavors of installation; you'll learn which one is right for you and walk through the installation process for it.
## Prerequisites
Before diving into this section, please make sure you've:
- Picked a node machine (local hardware or virtual server)
- Set up the Operating System on it
- Configured a remote control system such as [SSH](/node-staking/ssh.md)
- Secured it by following the [Securing your Node](/node-staking/securing-your-node.md) guide
## Guides
[Choosing your ETH Clients](/node-staking/eth-clients.md) presents the various options for Ethereum clients - both on the Execution Layer (formerly ETH1) and the Consensus Layer (formerly ETH2).
You'll need one of each in order to run your node, and this section will help you choose which ones you'd like to run.
[Selecting a Rocket Pool Mode](/node-staking/install-modes.md) will show you the different modes the Rocket Pool Smart Node can be installed with and will help you pick the mode that's best for you.
[Creating a Standard Rocket Pool Node with Docker](/node-staking/docker.md) will walk you through the installation process for **Docker Mode** and **Hybrid Mode**.
[Creating a Native Rocket Pool Node without Docker](/node-staking/native.md) will walk you through the installation process for **Native Mode**.
---
url: /node-staking/leb-migration.md
---
> For AI agents: the complete documentation index is available at /llms.txt, the full documentation bundle is available at /llms-full.txt.
::: danger WARNING
Minipool deposits are currently disabled in preparation for Saturn 1.
:::
# Migrating a 16-ETH Minipool to 8-ETH
Node operators have the ability to **directly migrate** their existing 16-ETH minipools into 8-ETH minipools.
Doing so will add 8 ETH to their [deposit credit balances](/node-staking/credit.md) which can be used to **create additional minipools without requiring any ETH from the node operators**.
In effect, this process allows a node operator to **convert one 16-ETH minipool into two 8-ETH minipools for free** (_though it will still require ETH for gas and require enough RPL collateral to handle both minipools_).
Migrating an existing 16-ETH minipool to an 8-ETH one is formally known as **bond reduction**.
It is a two-step process and involves validation by the Oracle DAO.
We'll walk you through the whole process in the sections below.
### Bond Reduction Rules
A bond reduction involves the following steps:
1. Starting the bond reduction, done by the node operator.
2. A waiting period (the "bond reduction scrub check"), allowing the Oracle DAO time to verify the bond reduction is legal and cancel any bond reductions that violate the rules.
3. Completing the bond reduction, done by the node operator.
To perform a successful bond reduction without being scrubbed, the minipool must follow these rules:
1. The minipool must be upgraded to the [Atlas delegate](/node-staking/minipools/delegates.md); the old Redstone delegate cannot be used.
2. The minipool's validator on the Beacon Chain must be **pending or actively staking**. It cannot be slashed, exiting / exited, or withdrawable / withdrawn.
3. The minipool's validator balance on the Beacon Chain must be **at least 31.99 ETH** (32 ETH with a small buffer for poorly-timed complications resulting in missed attestations after a rewards skim).
The minipool must obey these conditions for the **entire duration** of the scrub check, during which time the Oracle DAO will be watching it to ensure compliance with the conditions above.
If, at any time during the scrub check, a minipool is found to be in violation of these conditions, the bond reduction will be **scrubbed**.
The minipool itself will not be affected; it will still happily live on as a 16 ETH minipool, validating and acting as though the whole bond-reduction process never happened.
However, **it will no longer be eligible for bond reductions**.
Once a minipool's bond reduction is scrubbed, it can never be attempted again.
::: warning NOTE
Upon a successful bond reduction, the minipool's bond amount will be reduced from 16 ETH to 8 ETH and **the minipool's commission will be reset to whatever the current network value is**.
If you reduce a 16-ETH minipool with a 20% commission, **you will not keep that 20% commission**.
It will be reduced to the network value (**currently set to a flat 14%**).
Note that as demonstrated by the [example math](/node-staking/create-validator.md) section, an 8-ETH minipool at 14% is _still more profitable_ than a 16-ETH minipool at 20% so holding onto a high commission rate is not a compelling reason to retain a 16 ETH bond.
:::
### Step 1: Beginning Bond Reduction
To begin the bond reduction process, enter the following command:
```shell
rocketpool minipool begin-bond-reduction
```
This will start by providing a brief blurb on the process (though, if you have read through this guide, it should all be familiar to you already).
Once you acknowledge that you understand the process, it will show you which minipools currently have a bond that can be reduced, along with their current bond and commission:
```
Please select a minipool to begin the ETH bond reduction for:
1: All available minipools
2: 0x7E5703fdA638CD86c316B9EbAF76927fF695ADC5 (Current bond: 16 ETH, commission: 15.00%)
3: 0x7E5704aD2a63eb90880426Dcd4a3811246dF3cB0 (Current bond: 16 ETH, commission: 15.00%)
4: 0x7E5705c149D11efc951fFc20349D7A96bc6b819C (Current bond: 16 ETH, commission: 15.00%)
5: 0x7E570625cE8F586c90ACa7fe8792EeAA79751778 (Current bond: 16 ETH, commission: 15.00%)
```
Once you've selected one or more minipools to reduce, the Smart Node will check if those minipools are eligible for bond reduction.
To be eligible, these conditions must be satisfied:
- The minipool has been upgraded to use the [Atlas minipool delegate contract](/node-staking/minipools/delegates.md).
- The minipool's validator must have a Beacon Chain balance of at least 32 ETH.
- The minipool's validator must be pending or active.
- You have enough RPL staked to support the minimum RPL collateral level that would be required _after_ the bond reduction.
If not, it will print a warning error explaining what needs to be done first; for example:
```
Please select a minipool to begin the ETH bond reduction for:
1: All available minipools
2: 0x7E5703fdA638CD86c316B9EbAF76927fF695ADC5 (Current bond: 16 ETH, commission: 15.00%)
3: 0x7E5704aD2a63eb90880426Dcd4a3811246dF3cB0 (Current bond: 16 ETH, commission: 15.00%)
4: 0x7E5705c149D11efc951fFc20349D7A96bc6b819C (Current bond: 16 ETH, commission: 15.00%)
5: 0x7E570625cE8F586c90ACa7fe8792EeAA79751778 (Current bond: 16 ETH, commission: 15.00%)
2
Cannot reduce bond for minipool 0x7E5703fdA638CD86c316B9EbAF76927fF695ADC5:
The minipool version is too low. It must be upgraded first using `rocketpool minipool delegate-upgrade`.
You do not have enough RPL staked to support this bond reduction; it would bring you below the minimum RPL staking requirement. You will have to stake more RPL first.
```
This shows that the selected minipool requires a delegate upgrade and the node needs more RPL staked in order to reduce that minipool's bond.
When you have satisfied the preconditions, selecting a minipool in this command will simply prompt you to choose your gas price for the transaction and confirmation of the action.
Upon accepting the confirmation, the minipool's bond reduction will begin.
### Monitoring the Scrub Check Timer
Once you've started a bond reduction, you can view how long until it's able to be completed in your `node` daemon logs:
**Docker and Hybrid Mode**
For **Docker Mode** and **Hybrid Mode** users, this can be done with the following command:
```shell
rocketpool service logs node
```
**Native Mode**
Consult the script you use to review your node daemon's system logs.
You will see a new entry noting how much time is left until the scrub check for your bond reduction is complete:
```
rocketpool_node | 2023/02/25 09:04:21 Checking for minipool bonds to reduce...
rocketpool_node | 2023/02/25 09:04:21 Minipool 0x7E5703fdA638CD86c316B9EbAF76927fF695ADC5 has 12m0s left until it can have its bond reduced.
```
Once this timer reaches zero and no longer appears in these logs, you can complete the bond reduction.
### Step 2: Completing Bond Reduction
When the scrub timer has successfully ended, there are two ways to complete your minipool's bond reduction:
1. Let the `node` daemon handle it for you; it does this during the routine check it performs every five minutes (the same one that prints the time-remaining line in the log above). If it notices you have an eligible bond reduction, **it will complete the reduction automatically** - just as it does with staking pending minipools and checking your fee recipient. You will see output in the `node` log showing when it has detected, and completed, a bond reduction.
2. Complete the bond reduction manually using the following command:
```shell
rocketpool minipool reduce-bond
```
The command is simple; follow the prompts to complete the process once your minipool is eligible for bond reduction.
During the bond reduction, Rocket Pool **distributes your minipool's existing balance** using the minipool's pre-bond-reduction bond and commission to ensure both you and the rETH stakers get your fair share of the existing balance, and the bond reduction doesn't change the rewards either party _would_ have gotten on that balance.
### The Results of a Reduced Bond
You can verify the successful bond reduction using `rocketpool minipool status`.
**Before** the bond reduction, for the example minipool we've been following, that command would produce the following output:
```
Address: 0x7E5703fdA638CD86c316B9EbAF76927fF695ADC5
...
Node fee: 15.000000%
Node deposit: 16.000000 ETH
RP ETH assigned: 2023-02-08, 06:13 +0000 UTC
RP deposit: 16.000000 ETH
Minipool Balance (EL): 0.150713 ETH
Your portion: 0.086660 ETH
Available refund: 0.000000 ETH
Total EL rewards: 0.086660 ETH
...
Beacon balance (CL): 32.000152 ETH
Your portion: 16.000087 ETH
...
```
**After** the bond reduction, the command would return this output:
```
Address: 0x7E5703fdA638CD86c316B9EbAF76927fF695ADC5
...
Node fee: 14.000000%
Node deposit: 8.000000 ETH
RP ETH assigned: 2023-02-08, 06:13 +0000 UTC
RP deposit: 24.000000 ETH
Minipool Balance (EL): 0.086769 ETH
Your portion: 0.000000 ETH
Available refund: 0.086769 ETH
Total EL rewards: 0.086769 ETH
...
Beacon balance (CL): 32.000037 ETH
Your portion: 8.000013 ETH
...
```
Note how things have changed:
- `Node fee` (commission) went from 15% to 14%
- `Node deposit` (your bond) went from 16 ETH to 8 ETH
- `RP deposit` (the amount you borrowed) went from 16 ETH to 24 ETH
- `Minipool Balance (EL)` went from 0.150713 ETH to 0.086769 ETH
- `Your portion (EL)` went from 0.086660 ETH to 0 ETH
- `Available refund` went from 0 ETH to 0.086769 ETH
- `Your portion (CL)` went from 16.000087 ETH to 8.000013 ETH
The changes to `Node fee`, `Node deposit`, `RP deposit`, and `Your portion (CL)` indicate that the bond was successfully reduced.
The changes to `Minipool Balance (EL)`, `Your portion (EL)`, and `Available refund` indicate the results of the **minipool balance distribution** that occurred as part of the bond reduction process.
To clarify how to interpret these results:
- If you look at [the transaction](https://zhejiang.beaconcha.in/tx/0xf02f6b1a4ea68f356909e6f1974dc3c24d301ba115b97f3013c3c829ba2ca57c), you will also see that it sent 0.06413383 ETH from the minipool to the staking pool.
- In the "before" example, the staking pool's share is the minipool's balance minus the node operator's portion, or `0.150713 - 0.086660 = 0.064053` which is the amount transferred to the staking pool during the bond reduction (plus a small amount from a rewards skim that occurred during the scrub check).
- The _node operator's_ share, on the other hand, doesn't get sent to the node operator's withdrawal address. It is instead bookmarked as an **available refund**, which is why the refund amount increased from 0 ETH to what was previously the "your portion" amount of the minipool's balance on the EL.
- You can claim this refund at any time using the following command:
```shell
rocketpool minipool refund
```
There is one more important result of the bond reduction, which can be observed using `rocketpool node status`:
```
Your Smartnode is currently using the Zhejiang Test Network.
=== Account and Balances ===
The node 0x9BA1401Eb7D779eC51f910B066e9C4351cD28911 has a balance of 347.796908 ETH and 16799.835547 RPL.
The node has 8.000000 ETH in its credit balance, which can be used to make new minipools.
```
The bond reduction process has **increased the node's** [deposit credit balance](/node-staking/credit.md) by 8 ETH.
This credit can be used to [make another 8-ETH minipool](/node-staking/create-validator.md#depositing-eth-and-creating-a-minipool) for free (no ETH required from the node wallet, except for gas)!
---
url: /node-staking/local/hardware.md
---
> For AI agents: the complete documentation index is available at /llms.txt, the full documentation bundle is available at /llms-full.txt.
# Selecting Staking Hardware
There are no official specifications for running a Rocket Pool node.
This page offers some guidelines and examples that you can use to select staking hardware.
The minimum hardware requirements of your node will depend on the Consensus and Execution clients that you choose.
If, for example, you intend to run your node on a low powered device, you may be limited to using `Geth` as your Execution client and `Nimbus` as your Consensus client.
If you're using a more powerful NUC with 32+ GB of RAM, all client combinations are open to you.
The guidelines below assume you want a **comfortable** level of hardware, meaning you have excess capacity.
If you keep these guidelines in mind, your node will have plenty of resources to run any of the Rocket Pool supported client combinations.
This will allow you to choose a `random` client pair, which is very important for client diversity on the Ethereum network.
::: tip NOTE
Ethereum staking is very forgiving.
If your house is flooded and your staking device is fried, there is no big penalty for taking a week to get back up and running (unless you happen to be in a sync committee, which is a very rare event).
Component failure might happen at some point, but don't stress about it.
Downtime does not get you slashed unless you are offline during a major outage of the entire Ethereum network.
:::
## Hardware Requirements
Ethereum validators are not very computationally expensive, which is to say that once your Execution and Consensus clients are running, any additional validator will use **a very small amount of additional resources**.
This grows up to 64 validators, at which point the resources required for adding a 65th validator and beyond are negligible.
In our experience, most setups, including mini-PCs and NUCs, are capable of running an effectively unlimited number of validators.
### CPU Requirements
**Guideline: any modern CPU with at least 4 threads.**
Running a Rocket Pool node is not very computationally intensive.
The biggest impact of the CPU is how fast your node can initially sync the state of the blockchain when you first create it (or if you ever change clients later).
After the initial sync, the CPU is not used as heavily.
CPU naming can be deceptive; an Intel Core i5 from 2010 is usually **less powerful** than a core i3 from 2022.
Many community members use Intel NUC devices because of their small form factor, but an old i5 NUC may be a worse choice than a new i3.
For this reason, we recommend using a "modern" CPU that is, at most, a few years old.
More specifically, **for x64-based CPUs**, we recommend a CPU that supports the [BMI2](https://en.wikipedia.org/wiki/X86_Bit_manipulation_instruction_set#BMI2_\(Bit_Manipulation_Instruction_Set_2\)) extension - check the manufacturer's specs for your CPU to see if it is supported.
Not all modern CPUs support this; for example, Celeron CPUs tend not to include it.
ARM-based CPUs (such as the Mac M1 or M2, or the Rock 5B) do not apply to the BMI2 extension above.
::: tip NOTE
If you are interested in using a NUC, you can tell how modern the NUC is by its model number.
They are formatted as `NUC` + `generation number` + `model` + `CPU type` + `suffix`.
For example, a `NUC11PAHi50Z` unit is a 11th generation i5 unit.
You can see a list of NUCs [here](https://www.intel.com/content/www/us/en/products/details/nuc/kits/products.html) on the Intel website.
Other mini-PCs, such as the Asus PN50 or PN51, do not follow this convention but information about which CPU is used by them should be included in their product pages.
:::
The amount of cores on a CPU is less relevant than its **number of threads**.
We recommend a **minimum of 4 threads** for Rocket Pool node operation.
A 2 core CPU with 4 threads will work without issue.
It is rare to find a CPU with only 2 threads.
### RAM Requirements
**Guideline: at least 16 GB of RAM, 32 GB preferred, DDR4 preferred**
Rocket Pool nodes can operate with as little as 16 GB of RAM.
We generally recommend having slightly more to offer some headroom and full support for RAM-heavy clients such as Teku.
An added benefit of more RAM is that you can provide a larger cache size to Execution client, which tends to slow the rate of your disk space usage.
### SSD Requirements
**Guideline: a 2+ TB SSD that has TLC or better, with a DRAM cache. NVMe preferred.**
This element is more important than most people expect.
The Execution client relies heavily on IOPS, or "operations per second"; we recommend 15k Read IOPS, and 5k Write IOPS
In practice, this means that:
- HDD (spinning platter) drives will not work
- SATA or external USB 3.0+ SSDs _can_ work
- NVMe SSD drives are preferred
If you already have an SSD you want to use and want to be sure it has sufficient performance for node operation.
_\* If you are unsure if your disk meets these performance requirements, `fio` is a good way to test them.
See [here](https://arstech.net/how-to-measure-disk-performance-iops-with-fio-in-linux/) for Linux instructions,
and [here](https://www.nivas.hr/blog/2017/09/19/measuring-disk-io-performance-macos/) for MacOS instructions._
:::tip NOTE
SSD selection can be a complex choice!
The method SSDs use to store data on their flash chips has a noticeable impact on speed and longevity.
When shopping for an SSD you might notice labels like `QLC`, `TLC` or `SLC`.
These stand for the amount of data contained within a single cell of the flash chip: `Q` for "quad" means 4, `T` for "triple" means 3, `M` for "multi" means 2, and `S` for "single" means 1.
We recommend **TLC, MLC, or SLC** drives.
We **do not recommend QLC drives** due to their slower performance and lower total reliability.
SSDs come with or without DRAM, which is a hardware element that makes accessing data on the SSD more efficient.
Those with DRAM are faster but those without DRAM are cheaper.
However, DRAM is quite important for providing smooth node operation.
We recommend a drive with a **DRAM** cache.
We **do not recommend DRAM-less drives**.
:::
The final consideration is drive size.
As of 4/2026, the `geth` execution client database size requires about 1.2TB of space after it finishes its initial sync (or after you just finished pruning it).
This will grow steadily over time, and while pruning can regain some of that space, the freshly pruned state _does_ grow over time.
You will have peace of mind with a larger drive. The size of this database can be reduced if you [decide to not to store history before the merge](/node-staking/maintenance/history-expiry.md).
### Common Accessories
Many node operators improve their setups beyond the minimum requirements.
Some common additions include:
- SSD heatsinks to extend the drive lifespan
- Uninterruptable power supplies (UPS) in case of power outages
- A fallback node to have a backup in case something fails
These are all convenient to have, but not required to run a Rocket Pool node.
## Example Setups
In this section, we'll showcase a few of the varied builds that Rocket Pool's community has created for themselves.
They are examples of what people are using, not recommendations for how you should run your setup.
Note that many are somewhat outdated and, eg, use SSDs that are now too small.
### Xer0's Server
Discord user **Xer0** is among the many stakers that opted to go with a conventional PC form factor for their staking machine.
They wanted to build a rig that would last for years and years to come with minimal maintenance and upgrading required, while still offering complete customization of every component.
To that end, Xer0 devised and built a full ATX server - much like a traditional desktop PC, but targeted exclusively at staking on Ethereum.
Their setup includes a six-core Xeon Bronze 3204 (1.9 GHz), 8 DDR4 slots, and an M.2 slot... though since this is essentially a home server build, the exact components are completely up to the end user.
Xer0's setup:
- Motherboard: [Supermicro X11SPI-TF](https://www.newegg.com/supermicro-mbd-x11spi-tf-o-intel-xeon-scalable-processors-single-socket-p-supported-cpu-tdp-suppor/p/1B4-005W-00153) ($440)
- CPU: [Xeon Bronze 3204](https://www.amazon.com/Intel-BX806954216-Bronze-1-9GHz-FC-LGA14B/dp/B07RTBMWVJ) ($248)
- RAM: [NEMIX 2x32GB DDR4 ECC 2933MHz](https://www.amazon.com/2x32GB-DDR4-2933-PC4-23400-Registered-Memory/dp/B07V1YG2VV) ($359)
- SSD: [Sabrent 2TB Rocket M.2 2280 SSD](https://www.newegg.com/sabrent-rocket-2tb/p/14R-00X6-00007) ($250)
- Case: [SilverStone HTPC ATX GD07B](https://www.amazon.com/dp/B007X8TQW0) ($172)
- PSU: [EVGA SuperNova 650 G3, 80+ Gold](https://www.newegg.com/evga-supernova-g3-series-220-g3-0650-y1-650w/p/N82E16817438094) ($111)
- Cooler: [Noctua NH-D9 DX-3647 4U](https://www.amazon.com/Noctua-NH-D9-DX-3647-4U-Premium/dp/B07DPQJH5J) ($100)
- **Total: $1680**
Here are Xer0's comments on why they chose this setup:
_Obviously there is no need to build a monstrosity for simply staking on the Ethereum network, but I do have a few reasons why I built something like this._
1. _Now I believe that 1 or more validators in the future will be worth much more than what we are seeing right now, so I wanted to buy something that will be able to support the network for at least the next 10-20 years without a hiccup._
2. _By creating a machine that has at this many cores I've also given myself a lot more headroom to the point of I could run an L2 aggregator on top of this without any problems (regarding hardware) and anything else that I'd want to run on a server._ :)
3. _I like building computers, and so I built it…_
4. _With a server build, It gives me a lot more flexibility with hardware and features that most computers don't have natively._
5. _A bit of future proof (just in-case)_ :wink:
### Darcius's Shelf Rig
Rocket Pool's founder David Rugendyke (known on Discord as **darcius**) spent a long time perfecting his node.
After some debate, he built a Mini-ITX that's small and portable, but still packs an enormous amount of processing power.
His rig includes an 8-core Ryzen 7 5800x (3.8 GHz), two DDR4 slots, and two M.2 slots for NVMe SSDs.
It is truly one of the most high-performance rigs of the Rocket Pool nodes, but with good reason: darcius runs a special type of Rocket Pool node called an Oracle Node, which relays information from the Beacon chain back to the Execution chain about all of the Rocket Pool validators.
With thousands of Rocket Pool minipools active to watch, that job takes a lot of horsepower... but his shelf rig is easily up to the task.
Darcius's setup:
- Motherboard: [MSI MPG B550I Mini-ITX AMD](https://www.newegg.com/msi-mpg-b550i-gaming-edge-wifi/p/N82E16813144323) ($200)
- CPU: [AMD Ryzen 7 5800x](https://www.newegg.com/amd-ryzen-7-5800x/p/N82E16819113665) ($490)
- RAM: [Corsair Vengeance RGB Pro 2x16GB DDR4 3600MHz](https://www.newegg.com/p/0RN-00P8-000A5) ($390)
- SSD: [Samsung 970 EVO Plus 2TB M.2 2280 NVMe SSD](https://www.newegg.com/samsung-970-evo-plus-2tb/p/N82E16820147744) ($315)
- Case: [SilverStone SST-SG13B Mini-ITX](https://www.amazon.com/SilverStone-Technology-Mini-ITX-Computer-SST-SG13WB-USA/dp/B07MNC3JCB) ($52)
- PSU: [SilverStone Strider Platinum 550W](https://www.newegg.com/silverstone-strider-platinum-series-ps-st55f-pt-550w/p/N82E16817256154) ($140)
- **Total: $1587**
### Yorick's microATX Build
Veteran hardware enthusiast **YorickDowne** has a lot of experience building and maintaining servers.
Using that knowledge, he has settled on a flexible microATX setup.
His machine is considerably smaller than a typical PC, but still manages to fit in server-grade technology that maximizes resilience and uptime - key metrics when running a Rocket Pool node.
He has recommendations for both Intel and AMD setups, which you can find [on his website](https://eth-docker.net/docs/Usage/Hardware).
The Intel version uses a quad core i3-9100F (3.6 GHz) or a Xeon CPU, and the AMD version suggests any Ryzen CPU that supports ECC memory.
For both configurations, he suggests 16 GB of ECC RAM, and a 1 TB NVMe SSD.
Yorick's Setup:
- Motherboard: [SuperMicro X11SCL-F-O](https://www.newegg.com/supermicro-mbd-x11scl-f-o-8th-generation-intel-core-i3-pentium-celeron-processor-intel-xeon-pro/p/N82E16813183671) ($200)
- CPU: [Intel i3-9100F](https://www.newegg.com/intel-core-i3-9th-gen-core-i3-9100f/p/N82E16819118072) ($150)
- RAM: [Samsung 1x16GB DDR4 ECC UDIMM 2400MHz](https://www.newegg.com/samsung-16gb-288-pin-ddr4-sdram/p/1WK-002G-00080) ($100)
- SSD: [Samsung 970 EVO Plus 1TB M.2 2280 NVMe SSD](https://www.newegg.com/samsung-970-evo-plus-1tb/p/N82E16820147743?Item=N82E16820147743) ($165)
- Case: [SilverStone Micro ATX HTPC Case ML04B-USA](https://www.amazon.com/Silverstone-Technology-Aluminum-Center-ML04B-USA/dp/B07PD8CL7P/) ($110)
- PSU: Any (example: [Seasonic PRIME Fanless PX-500 Platinum 500W](https://www.newegg.com/seasonic-prime-fanless-px-500-500w/p/N82E16817151234)) ($161)
- Case fans: Any
- **Total: About $886**
Here are Yorick's comments on why he chose this setup:
- _It is at the same or lower cost as some NUCs_
- _It has ECC RAM, which means that if memory fails - which it does now and then - I will know, because the system will tell me. I do not have to run memtest87 for 4-5 days to figure out whether my problem with instability is even memory-related. I protect my time fiercely so I can spend it bloviating on Discord instead of troubleshooting hardware_
- _It has IPMI, which is remote management via Ethernet/browser of the entire machine, including UEFI and power-cycle. I should be allowed to go on an extended vacation and still have full remote access._
- _If I want redundant storage so eventual SSD failure is a non-event, I can do that_
- _It allows for great flexibility in build choices. I can choose however much RAM and compute I want; I can choose to run a NAS with virtualization tech like TrueNAS Scale and run the node on there alongside some other home-servery stuff._
### Drez's Laptop
Sometimes, shelling out for new hardware just doesn't make sense.
In Discord user **Drez**'s case, running a Rocket Pool node is one of those times.
Drez happened to have a spare laptop lying around, and they turned it into a node with ease.
Their machine comes with a quad core i7-4710HQ (2.5 GHz), two DDR3 slots, and a 2.5" SATA slot.
Being a laptop, it also comes with its own battery (which offsets the need for a UPS).
They added some additional upgrades over time, giving the laptop even more power for extra peace of mind.
Drez's setup:
- Laptop: [MSI GE70 2PE Apache Pro](https://www.msi.com/Laptop/GE70-2PE-Apache-Pro/Specification) ($1800)
- RAM: 2x8GB DDR3 1333Mhz (Included)
- SSD: [Samsung 860 EVO 1TB 2.5" SATA](https://www.amazon.com/Samsung-Inch-Internal-MZ-76E1T0B-AM/dp/B078DPCY3T) ($110)
- **Total: $1910**
Here are Drez's comments on why they chose this setup:
_Main reason i am gonna stake on this laptop is because i already had spare one and dont need to spend extra money on a new server.
I like its mobility, compactness, built-in screen for easy monitoring.
In case of overheating i bought a laptop cooling pad and spare CPU cooler just in case, i also recommend to change thermal compound paste especially if you're gonna run on an older machine_
## NUCs (Next Unit of Computing) and Mini-PCs
Running a Rocket Pool node doesn't necessarily require a complete build-it-yourself desktop.
In fact, one of the most popular setups among stakers is the illustrious NUC.
A NUC (Next Unit of Computing) is essentially a small, self-contained computer that is designed around very low power usage and maximum efficiency.
NUCs are great for most stakers that only run a few validators because of their low maintenance, low monthly running costs, and ease of setup.
Unlike PCs, NUCs come preassembled in a case; all you need to do is add some RAM, add an SSD, and you're up and running!
Below are a few examples of NUC setups that some Rocket Pool veterans use and recommend.
::: tip NOTE
**Ethernet Adaptor Compatibility**
If you're planning to buy an Intel® NUC 11th or 12th Generation you can encounter connectivity issues with the ethernet adaptor, specifically if the adaptor is identified as **I225-LM** (Check intel especifications before buying).
If you already have one, there are steps you can take to address this concern.
The I225-LM adaptor has been associated with certain compatibility challenges that may lead to **system freezes** and unexpected kernel behavior, particularly when using Linux kernels.
To determine if your NUC employs the problematic I225-LM ethernet adaptor, you can use the following command in the terminal:
```shell
sudo lshw -class network | grep 225
```
If the output confirms the presence of the I225-LM adaptor, you might experience the mentioned issues. However, there are _remedies_ you can apply to mitigate these problems:
**USB-C to Ethernet Adaptor**: A viable solution involves acquiring a USB-C to Ethernet adaptor and connecting your internet cable through this external adaptor. While this approach requires additional hardware and configuration, it has proven effective in resolving the compatibility conflicts. This allows you to utilize the latest available Linux kernels without encountering the freezing or kernel-related anomalies associated with the I225-LM adaptor.**This is the recommended solution (for now) if you already have one NUC with the I225-LM** _Keep in mind that opting for an adaptor may introduce a trade-off in terms of potential latency or reduced internet velocity. To mitigate this impact, it's advisable to select an adaptor with at least 1GB/s portability, thereby helping maintain optimal data transfer rates._
**Driver and Software Updates**: Consider updating your drivers, firmware, and BIOS by referring to the official Intel® support page for your NUC model [here](https://www.intel.com/content/www/us/en/search.html?ws=text#sort=relevancy\&f:@tabfilter=\[Downloads). This might include using the latest available support driver from Intel's website or applying BIOS updates that address compatibility concerns.
**Intel's Patch (Windows)**: Intel has released a patch to address a similar issue on Windows systems. While the patch itself **may not directly apply to Linux environments**, it highlights the recognition of the problem by Intel and their efforts to provide solutions. You can find more details about the patch in this [link](https://www.intel.com/content/www/us/en/download/705968/patch-for-a-modern-standby-lan-issue-on-intel-nuc-11th-12th-generation-products.html?wapkw=nuc11tnhi3).
Keep in mind that technology evolves, and solutions might change over time. Always stay updated with the latest resources provided by Intel for your specific NUC model on their official Downloads [page](https://www.intel.com/content/www/us/en/search.html?ws=text#sort=relevancy\&f:@tabfilter=\[Downloads]).
By following these steps, you can address the compatibility challenges associated with the I225-LM ethernet adaptor on Intel® NUC 11th and 12th Generation Products, ensuring a smoother and more reliable experience with your server deployment. _While a subset of NUC users with this adaptor have reported experiencing no issues, it's important to note that the **majority of users**, particularly after a kernel upgrade, have encountered problems. Notably, the 5.15.+ kernels have proven to be the most stable option for those using the I225-LM adaptor. If the idea of using a USB-C adaptor isn't appealing and you're willing to take the risk of potential random freezes, it's advisable to **remain on a kernel version that has demonstrated greater stability**._
:::
### Ken's NUC8i5BEK
The NUC8i5BEK is one of Intel's own NUCs with an 8th-generation processor.
Released in 2018, this model comes with a quad-core i5-8259U CPU (2.30 GHz), two DDR4 slots, an M.2 slot for SSDs, and USB 3.1 ports.
It normally draws about 20 watts, but Discord user **Ken** has been able to optimize it down to 9 watts during normal validation.
It is more than capable of handling any Execution and any Consensus client, making it an excellent choice for a lightweight, efficient node machine.
Ken's Setup:
- Base: [Intel NUC8i5BEK](https://www.amazon.com/Intel-NUC-Mainstream-Kit-NUC8i5BEK/dp/B07GX67SBM) ($349)
- RAM: [Dell Memory Upgrade - 1x16GB DDR4 SODIMM 3200MHz](https://www.dell.com/en-us/shop/dell-memory-upgrade-16gb-1rx8-ddr4-sodimm-3200mhz/apd/ab371022/memory) ($112)
- SSD: [ADATA XPG S7 Series 2TB M.2 2280 NVMe SSD](https://www.amazon.com/XPG-S7-Gen3x4-Solid-State/dp/B08BDZQJP5) ($230)
- Fanless Case (optional): [AKASA Turing Fanless case](https://www.amazon.com/Akasa-Compact-fanless-Generation-NUC45-M1B/dp/B07RTBF1SY) ($134)
- **Total: $691 to $825**
Here are Ken's comments on why he chose this setup:
- _Small size and footprint, the power supply is a brick on the power cord (like a laptop), single-board computer, x86 architecture, low purchase price point, low power consumption (\~10W), 3-year warranty, and an active manufacture product line (Intel)._
- _8th generations are plenty fast and at a lower price point than the latest generation chips._
- _I upgraded to a fan-less (passively cooled) case, so the NUC is absolutely silent (0 dB) as I’m leaving it my home office (a stock NUC is near silent already)._
- _Plus no mechanical wear on the fan bearings._
- _Resale or re-purpose value if I decide to retire this hardware platform as my RP node - NUC’s make a great workstation computer._
### GreyWizard's NUC10i7FNH
The NUC10i7FNH is another one of Intel's own NUCs.
This one sports a 10th-generation processor, and was released in 2019.
It comes with a six core i7-10710U CPU (1.10 GHz, boosts to 4.7 GHz), two DDR4 slots, an M.2 slot and a 2.5" slot for SSDs, and USB 3.1 ports.
It draws about 20 watts of power.
It is an incredibly powerful machine, given its power consumption and size.
Discord user **GreyWizard** uses this NUC for his node - the extra power gives him peace of mind knowing that no matter what the future of the Ethereum 2.0 chain holds, his machine will be able to handle it.
GreyWizard's Setup:
- Base: [Intel BXNUC10I7FNH1](https://www.newegg.com/intel-bxnuc10i7fnh1/p/N82E16856102227) ($445)
- RAM: 2x [Samsung M471A4G43MB1 32GB DDR4 SODIMM 2666 MHz](https://www.newegg.com/samsung-32gb-260-pin-ddr4-so-dimm/p/0RM-002H-00156) ($154 ea.)
- SSD: [Samsung 970 EVO Plus 2TB M.2 2280 NVMe SSD](https://www.newegg.com/samsung-970-evo-plus-2tb/p/N82E16820147744) ($315)
- **Total: $1068**
Here are GreyWizard's comments on why he chose this setup:
_I went with the i7 NUC mostly because it felt like the best combination of outstanding performance relative to overall size and overhead.
I also looked at other options like building a Micro ATX-sized machine.
After pricing one with the specs I was looking for, this Intel NUC ended up being about the same price, and the form factor is really tough to beat.
I like having the extra headroom for performance/peace of mind, and I acknowledge that this is almost certainly way overkill.
I consider staking as a serious investment and I don't want to worry if my hardware will be sufficient._
_Tips for other people considering this as an option..._
- _The NUC does run pretty warm, similar temps to a laptop. If you worry about CPU temp and you want something powerful, then you should look at small desktop setups like Micro ATX._
- _You will want to make sure there is plenty of room around your NUC for airflow. Plan to clean the area regularly to prevent dust buildup._
- _Make sure to check compatibility for your RAM cards. The different NUCs support varying degrees of total RAM, RAM speeds, etc._
- _If you go with the NUC, I'd suggest you give yourself room to grow when selecting RAM... For example, spend a bit extra and get a single 32gb RAM card rather than 2x16 so you can expand later if you want (assuming your NUC will support 64gb in this example)_
- _Feel free to reach out to me on Discord if you would like to discuss._
### ArtDemocrat's NUC10i5FNHN Build Process Video
To complement Greywizard's setup descriptions and tips, ArtDemocrat created this build process video as an additional help resource to set up a NUC10 (in this case a NUC10i5FNHN, but the build process should be similar for a NUC10i7FNH):
ArtDemocrat's Setup:
- Base: [Intel NUC NUC10i5FNHN (Barebone)](https://www.jacob.de/produkte/intel-nuc-nuc10i5fnhn-bxnuc10i5fnhn-artnr-7103179.html) ($300)
- RAM: 1x [Crucial 32GB DDR4-3200 SODIMM](https://www.amazon.de/dp/B07ZLC7VNH) ($65)
- SSD: [Samsung 970 EVO Plus 2TB M.2 2280 NVMe SSD](https://www.amazon.de/dp/B07MLJD32L) ($107)
### Actioncj17's PN50
The ASUS PN50 is a mini-PC, which shares a lot in common with Intel's NUC family.
It has a very small form factor but has all the components and features of a full PC.
It comes with your choice of AMD CPU so you can balance between performance and cost (up to an 8-core Ryzen R7-4700U at 2.0 GHz), two DDR4 slots, an M.2 slot and a 2.5" slot for SSDs, and USB 3.1 ports.
It also comes with a 90 watt power supply, though in practice it doesn't require that much power while acting as a Rocket Pool node.
Discord user **actioncj17** has tried several different setups, but prefers the PN50 over everything... though they happily admit that it's overkill for running a Rocket Pool node.
Actioncj17's Setup:
- Base: [ASUS PN50 4700u](https://www.newegg.com/asus-pn50-bbr066md/p/N82E16856110206) ($583)
- RAM: [HyperX Impact 2x16GB DDR4 SODIMM 3200MHz](https://www.newegg.com/hyperx-32gb-260-pin-ddr4-so-dimm/p/N82E16820104836) ($220)
- SSD: [Samsung 970 EVO Plus 2TB M.2 2280 NVMe SSD](https://www.newegg.com/samsung-970-evo-plus-2tb/p/N82E16820147744) ($315)
- **Total: $1118**
Here are actioncj17's comments on why they chose this setup:
_My answer to why I chose the Asus PN50 is quite simple.
I wanted to see how badass AMD's Ryzen 7 4700U was.
Let’s just say I’m not disappointed.
I actually started with the Intel NUC10FNK.
I put 32gb of ram and 1tb 970 evo plus nvme m.2 in the nuc and it blazes.
I have no complaints with the nuc and it works fine but I get more out of my PN50.
I’d say both setups are overkill for staking on Rocketpool but a little future proofing doesn’t hurt.
They both have small footprints and the nuc is actually much quieter since it is fanless.
All in all the PN50 is a better bang for your buck if you can get your hands on one._
### Moralcompass's Mini-PC
Discord user **moralcompass** went a similar route to actioncj17 by selecting a mini-PC, but their preference is for an Intel CPU.
They use a mini PC that sports a quad core i5 8250U (1.6 GHz, boost up to 3.4 GHz), one DDR4 slot, an M.2 slot and a 2.5" slot for SSDs, and USB 3.0 ports.
Moralcompass claims that it only pulls about 10 watts from the wall, which demonstrates that mini PCs like this are very efficient.
The interesting thing about this choice is that it is completely passively cooled - no fans to be found!
While there are many variations of fanless mini PCs, moralcompass found one that worked for them and has stuck with it.
Moralcompass's Setup:
- Base: [Partaker Fanless Mini PC - i5 8250U](https://www.aliexpress.com/item/1005001867740130.html?spm=a2g0s.9042311.0.0.66e94c4d0ORiVh) ($387)
- RAM: [Crucial 1x32GB DDR4 SODIMM 2666MHz](https://www.newegg.com/crucial-32gb-260-pin-ddr4-so-dimm/p/N82E16820156239) ($153)
- SSD: [Silicon Power 1TB M.2 2280 NVMe SSD](https://www.amazon.com/Silicon-Power-Gen3x4-000MB-SU001TBP34A80M28AB/dp/B07L6GF81L) ($115)
- **Total: $655**
Here are moralcompass's comments on why they chose this setup:
- _No moving parts, no noise._
- _Dual intel NIC (in case I decide to repurpose this as my router one day)_
- _NVME + SATA slots (prefer NVME for speed and options with higher TBW endurance. SATA gives option of HDD or SSD. I avoided M.SATA interfaces because these SSDs seem to be turning legacy)_
- _USB and serial ports available for graceful shutdown signal from UPS_
---
url: /node-staking/local/overview.md
---
> For AI agents: the complete documentation index is available at /llms.txt, the full documentation bundle is available at /llms-full.txt.
# Overview
This section is aimed at helping you understand the process of preparing a local machine for use as a Rocket Pool node at home.
## Guides
[Selecting Staking Hardware](/node-staking/local/hardware.md) shows a wide variety of viable hardware configurations for node operation, hopefully helping you find inspiration when picking what to get for yourself.
[Preparing a PC, Mini-PC, or NUC](/node-staking/local/prepare-pc.md) walks you through the basic steps of installing and configuring the base Operating System on your machine to prepare it for life as a node.
[Preparing a Mac](/node-staking/local/prepare-mac.md) is the same, but for macOS systems.
[Intro to Secure Shell (SSH)](/node-staking/ssh.md) shows you how to use **SSH**, a popular remote-access tool for working with your node machine remotely and securely from a different machine (such as a laptop or desktop) so you don't have to interact with the node directly via a monitor and keyboard connected to it.
---
url: /node-staking/local/prepare-mac.md
---
> For AI agents: the complete documentation index is available at /llms.txt, the full documentation bundle is available at /llms-full.txt.
# Preparing a Mac
Before installing Rocket Pool, there are a few checks you should do to make sure your system is compatible and will work correctly.
::: danger
We strongly encourage you to create a dedicated machine for running a Rocket Pool node.
Running a node on a general-use machine, such as your daily work desktop, presents extra security risks that may compromise your wallet and result in the theft of your coins.
**For maximum safety, please build a new machine that is dedicated exclusively to running a node.**
:::
## System Requirements
Below is a brief description of the software and hardware requirements that a Rocket Pool node requires.
This guide assumes that you already have your machine physically built, and the operating system installed.
### Supported Operating Systems
Rocket Pool recommends you use the latest version of macOS for your hardware.
### macOS Support
You will need to install the following pre-requisites:
We highly recommend using [Homebrew](https://brew.sh) as your package manager for Mac. It allows you to install packages easily using the `brew` command.
You can install it via
```shell
/bin/bash -c "$(curl -fsSL https://raw.githubusercontent.com/Homebrew/install/HEAD/install.sh)"
```
It should install some pre-requisites for you, such as XCode Command Line Tools. If it doesn't, you can install them manually using
```shell
xcode-select --install
```
Once installed, ensure everything is working correctly by using
```shell
brew doctor
```
Once everything is installed & working, Homebrew will allow you to install packages using the `brew` command.
For example, to install `wget` using Homebrew execute the following command in the Terminal:
```shell
brew install wget
```
Now that we have Homebrew installed, we can install our Docker client, [Orbstack](https://orbstack.dev).
```shell
brew install --cask orbstack
```
Orbstack will be installed to your Applications folder. Launch it from there and it will initialise. If you are migrating from Docker Desktop, it should detect your existing Docker installation and migrate your images and containers.
You may need to adjust your Orbstack settings depending on your hardware.
If you have previously installed Docker Desktop, you will need to uninstall it first. Docker Desktop used to be the recommended Docker Client however in the last year a few new clients have been released that provide much better stability.
Please ensure your Firewall (System Settings -> Network -> Firewall) is turned on and Orbstack is added to the list of applications allowing incoming connections. (Orbstack should do this for you)
### Installing and Using SSH
SSH should already be installed with macOS.
### Pre-installation System Checks
Before installing Rocket Pool, please review the following checklist:
- Your system is fully built, powers on, and can boot into the operating system.
- You will not do any other activity on the system, such as browsing the Internet, checking email, or playing games.
- You have a macOS operating system installed.
- Your user account has root / administrator privileges.
- You have an SSD that meets the performance requirements.
- Your SSD is mounted on your file system.
- You have at least 1.5TB of space free for the initial Execution and Consensus syncing process.
- If your ISP caps your data, it is more than 2 TB per month.
If you have checked and confirmed all of these items, then you are ready to install Rocket Pool and begin running a node!
Move on to the [Choosing your ETH Clients](/node-staking/eth-clients.md) section.
---
url: /node-staking/local/prepare-pc.md
---
> For AI agents: the complete documentation index is available at /llms.txt, the full documentation bundle is available at /llms-full.txt.
# Preparing a PC, Mini-PC, or NUC
Before installing Rocket Pool, there are a few checks you should do to make sure your system is compatible and will work
correctly.
::: danger
We strongly encourage you to create a dedicated machine for running a Rocket Pool node.
Running a node on a general-use machine, such as your daily work desktop or a gaming rig, presents extra security risks
that may compromise your wallet and result in the theft of your coins.
**For maximum safety, please build a new machine that is dedicated exclusively to running a node.**
:::
## System Requirements
Below is a brief description of the software and hardware requirements that a Rocket Pool node requires.
This guide assumes that you already have your machine physically built, and the operating system installed.
### Supported Operating Systems
Rocket Pool's Smart Node client currently supports **Linux** and **macOS** systems.
At this time, **Windows** can be used to remotely manage a remote Linux or Mac machine, but the Smart Node itself cannot
currently run on a Windows system. However, Rocket Pool _can_ be run on a
Linux [virtual machine](https://en.wikipedia.org/wiki/System_virtual_machine) hosted by a Windows machine.
This setup is not recommended over simply installing Linux as the host operating system, but it does work if necessary.
Note that it will require extra resource overhead, and comes with its own set of security risks, so we do not advise
using this setup when staking real Ether on the main network.
Rocket Pool is natively compatible with **AMD64 (x64)** and **arm64 (aarch64)** CPU architectures.
For other architectures, you will need to compile the smartnode clients from source.
Note that the user must have **root / Administrator** access (or **sudo** privileges) to install the Smart Node.
#### Linux Support
There are many variants of the Linux OS (called distributions, or **distros** for short). While you can run Rocket Pool
from any modern distro, Rocket Pool's installer can automatically install the entire stack
on [Ubuntu](https://ubuntu.com/about), [Debian](https://www.debian.org/intro/why_debian), [CentOS](https://www.centos.org/about/),
and [Fedora](https://docs.fedoraproject.org/en-US/project/).
::: warning NOTE
If you plan to use Ubuntu, we strongly recommend using an **LTS** release such as 24.04.
These releases are actively maintained for longer periods of time, which helps with the security and stability of your
node.
:::
For installation on other distros, the Smart Node installer will not be able to automatically install some system
dependencies (such as `docker-compose`).
Some manual steps will be required during installation.
For `arm64` systems, the Smart Node installer only natively supports Debian and Debian-based distros such as Ubuntu.
For other distros, manual steps will be required during installation.
## Installing the Operating System
If you're using macOS, it's highly likely that you already have the Operating System installed and can skip this step.
If you're installing Linux from scratch, each of the distributions listed above come with helpful and detailed tutorials
for installing the Operating System from scratch.
As an example though, we will walk you through the process of installing and preparing **Debian Server**.
Debian is a good choice for node operation because it focuses on **maximum stability and reliability** - both of which
are highly desirable for node machines that must be running 24/7.
[Here is a good step-by-step guide](https://itslinuxfoss.com/debian-11-bullseye-guide/) with screenshots that shows you
how to install Debian on your node machine from scratch.
:::tip
We have a few helpful amendments to the guide linked above, which you may want to follow:
- When prompted to set up a **root password**, we recommend leaving it **blank**. This will disable the `root` account
and instead install the `sudo` package, allowing your user to perform root operations by re-entering its password to
elevate its permissions. This is analogous to the way Ubuntu Linux is set up, which may be more familiar to users.
- In the **Software selection** screen towards the end, you may not want to have a desktop GUI installed.
- Desktop GUIs are largely unnecessary for a node; they add extra overhead and most of the time will not be used since
you'll be remote controlling it via the terminal anyway, so we prefer to **uncheck GNOME and Debian desktop
environment** here.
- If you _do_ want a desktop UI on your node, we recommend you **uncheck GNOME and check XFCE** instead, as it's
lighter on system resources. We also recommend running no additional software on the node, such as browsers or
Discord, as they diminish security and consume system resources.
- Uncheck **web server**, but leave **SSH server** and **standard system utilities** checked.
- If you have created a flash drive from an iso, you may need to disable the CD-ROM repository in order to run `apt`.
You can find an explanation of how to do
this [here](https://www.linuxtechi.com/things-to-do-after-installing-debian-11/).
- Your system may be set up to sleep/hibernate by default. To disable these settings, you can run the following command:
`sudo systemctl mask sleep.target suspend.target hibernate.target hybrid-sleep.target`
:::
### Installing `sudo`
Rocket Pool's installer requires the `sudo` program to acquire all of its dependencies.
If you left the **root user password blank** in the previous step, you will already have this.
If not, please install it now by running the following commands:
```shell
apt update
```
```shell
apt install sudo
```
```shell
usermod -aG sudo $USER
```
Then restart the machine.
You should now be able to run commands via `sudo` such as `sudo apt update`.
### Using SSH
Once the server is installed and you're able to log in, you need to get its IP address.
An easy way to do this is with `ifconfig` which is built into the 'net-tools' package:
```shell
sudo apt update
```
```shell
sudo apt install net-tools
```
```shell
sudo ifconfig
```
You may see several entries here, but the one you want to look for is going to look something like this:
```
eth0: flags=4163 mtu 1500
inet 192.168.1.8 netmask 255.255.255.0 broadcast 192.168.1.255
inet6 fe80::96f2:bf29:e269:1097 prefixlen 64 scopeid 0x20
ether txqueuelen 1000 (Ethernet)
...
```
The flags should say `UP,BROADCAST,RUNNING,MULTICAST`.
The `inet` value (here `192.168.1.8`) is your machine's local IP address.
Next, install SSH:
```shell
sudo apt install openssh-server
```
:::tip NOTE
If you had the **SSH server** box checked during Debian's installation, you should already have this installed so this
command won't do anything.
:::
Once this is done, you can log into the machine's terminal remotely from your laptop or desktop using `ssh`.
If you aren't familiar with `ssh`, take a look at the [Intro to Secure Shell](/node-staking/ssh.md) guide.
:::warning NOTE
At this point, you should _strongly consider_ configuring your router to make your node's IP address **static**.
This means that your node will have the same IP address forever, so you can always SSH into it using that IP address.
Otherwise, it's possible that your node's IP could change at some point, and the above SSH command will no longer work.
You'll have to enter your router's configuration to find out what your node's new IP address is.
Each router is different, so you will need to consult your router's documentation to learn how to assign a static IP
address.
:::
## Setting up Swap Space
In most cases, if you choose your Execution and Consensus clients and your instance type carefully, you should not run
out of RAM.
Then again, it never hurts to add a little more.
What we're going to do now is add what's called **swap space**.
Essentially, it means we're going to use the SSD as "backup RAM" in case something goes horribly, horribly wrong and
your server runs out of regular RAM.
The SSD isn't nearly as fast as the regular RAM, so if it hits the swap space it will slow things down, but it won't
completely crash and break everything.
Think of this as extra insurance that you'll (most likely) never need.
### Creating a Swap File
The first step is to make a new file that will act as your swap space.
Decide how much you want to use - a reasonable start would be 8 GB, so you have 8 GB of normal RAM and 8 GB of "backup
RAM" for a total of 16 GB.
To be super safe, you can make it 24 GB so your system has 8 GB of normal RAM and 24 GB of "backup RAM" for a total of
32 GB, but this is probably overkill.
Luckily, since your SSD has 1 or 2 TB of space, allocating 8 to 24 GB for a swapfile is negligible.
For the sake of this walkthrough, let's pick a nice middleground - say, 16 GB of swap space for a total RAM of 24 GB.
Just substitute whatever number you want in as we go.
Enter this, which will create a new file called `/swapfile` and fill it with 16 GB of zeros.
To change the amount, just change the number in `count=16` to whatever you want. **Note that this is going to take a
long time, but that's ok.**
```shell
sudo dd if=/dev/zero of=/swapfile bs=1G count=16 status=progress
```
Next, set the permissions so only the root user can read or write to it (for security):
```shell
sudo chmod 600 /swapfile
```
Now, mark it as a swap file:
```shell
sudo mkswap /swapfile
```
Next, enable it:
```shell
sudo swapon /swapfile
```
Finally, add it to the mount table so it automatically loads when your server reboots:
```shell
sudo nano /etc/fstab
```
Add a new line at the end that looks like this:
```
/swapfile none swap sw 0 0
```
Press `Ctrl+O` and `Enter` to save, then `Ctrl+X` and `Enter` to exit.
To verify that it's active, run these commands:
```shell
sudo apt install htop
htop
```
Your output should look like this at the top:

If the second number in the last row labeled `Swp` (the one after the `/`) is non-zero, then you're all set.
For example, if it shows `0K / 16.0G` then your swap space was activated successfully.
If it shows `0K / 0K` then it did not work and you'll have to confirm that you entered the previous steps properly.
Press `q` or `F10` to quit out of `htop` and get back to the terminal.
### Configuring Swappiness and Cache Pressure
By default, Linux will eagerly use a lot of swap space to take some of the pressure off of the system's RAM.
We don't want that. We want it to use all of the RAM up to the very last second before relying on SWAP.
The next step is to change what's called the "swappiness" of the system, which is basically how eager it is to use the
swap space.
There is a lot of debate about what value to set this to, but we've found a value of 6 works well enough.
We also want to turn down the "cache pressure", which dictates how quickly the server will delete a cache of its
filesystem.
Since we're going to have a lot of spare RAM with our setup, we can make this "10" which will leave the cache in memory
for a while, reducing disk I/O.
To set these, run these commands:
```shell
sudo sysctl vm.swappiness=6
sudo sysctl vm.vfs_cache_pressure=10
```
Now, put them into the `sysctl.conf` file so they are reapplied after a reboot:
```shell
sudo nano /etc/sysctl.conf
```
Add these two lines to the end:
```shell
vm.swappiness=6
vm.vfs_cache_pressure=10
```
Then save and exit like you've done before (`Ctrl+O`, `Ctrl+X`).
### Pre-installation System Checks
Before installing Rocket Pool, please review the following checklist:
- Your system is fully built, powers on, and can boot into the operating system.
- You will not do any other activity on the system, such as browsing the Internet, checking email, or playing games.
- You have a Linux operating system installed.
- Your user account has root / administrator privileges.
- You have an SSD that meets the performance requirements.
- Your SSD is mounted on your file system.
- You have at least 1.5 TB of disk space free for the initial Execution and Consensus syncing process.
- If your ISP caps your data, it is more than 2 TB per month.
If you have checked and confirmed all of these items, then you are ready to install Rocket Pool and begin running a
node!
Move on to the [Choosing your ETH Clients](/node-staking/eth-clients.md) section.
---
url: /node-staking/local/prepare-pi.md
---
> For AI agents: the complete documentation index is available at /llms.txt, the full documentation bundle is available at /llms-full.txt.
# Preparing a Raspberry Pi
::: warning NOTE
This page has been left here for archival purposes. We no longer recommend running Rocket Pool on a Raspberry Pi due to the
increased hardware and performance requirements of running an Ethereum validator.
:::
This guide will walk you through how run a Rocket Pool node using a Raspberry Pi.
While this is not typically recommended in most staking guides, we recognize that it is attractive because it is a much more affordable option than standing up an entire PC.
To that end, we've worked hard to tweak and optimize a whole host of settings and have determined a configuration that seems to work well.
This setup will run **a full Execution node** and **a full Consensus node** on the Pi, making your system contribute to the health of the Ethereum network while simultaneously acting as a Rocket Pool node operator.
## Preliminary Setup
To run a Rocket Pool node on a Raspberry Pi, you'll need to first have a working Raspberry Pi.
If you already have one up and running - great! You can skip down to the [Mounting the SSD](#mounting-the-ssd) section.
Just make sure you have **a fan attached** before you go.
If you're starting from scratch, then read on.
### What You'll Need
These are the recommended components that you'll need to buy in order to run Rocket Pool on a Pi:
- A **Raspberry Pi 4 Model B**, the **8 GB model**
- Note: while you _can_ use a 4 GB with this setup, we strongly recommend you go with an 8 GB for peace of mind... it's really not much more expensive.
- A **USB-C power supply** for the Pi. You want one that provides **at least 3 amps**.
- A **MicroSD card**. It doesn't have to be big, 16 GB is plenty and they're pretty cheap now\... but it should be at least a **Class 10 (U1)**.
- A **MicroSD to USB** adapter for your PC. This is needed so you can install the Operating System onto the card before loading it into the Pi.
If your PC already has an SD port, then you don't need to pick up a new one.
- Some **heatsinks**. You're going to be running the Pi under heavy load 24/7, and it's going to get hot.
Heatsinks will help so it doesn't throttle itself. You ideally want a set of 3: one for the CPU, one for the RAM, and one for the USB controller.
[Here is a good example of a nice set](https://www.canakit.com/raspberry-pi-4-heat-sinks.html).
- A **case**. There are two ways to go here: with a fan, and fanless.
- With a fan:
- A 40mm **fan**. Same as the above, the goal is to keep things cool while running your Rocket Pool node.
- A **case with a fan mount** to tie it all together.
You could also get a case with integrated fans [like this one](https://www.amazon.com/Raspberry-Armor-Metal-Aluminium-Heatsink/dp/B07VWM4J4L) so you don't have to buy the fans separately.
- Without a fan:
- A **fanless case** that acts as one giant heatsink, like [this one](https://www.amazon.com/Akasa-RA08-M1B-Raspberry-case-Aluminium/dp/B081VYVNTX).
This is a nice option since it's silent, but your Pi **will** get quite hot - especially during the initial blockchain sync process.
Credit to Discord user Ken for pointing us in this direction!
- As a general rule, we recommend going **with a fan** because we're going to be overclocking the Pi significantly.
You can get a lot of this stuff bundled together for convenience - for example, [Canakit offers a kit](https://www.amazon.com/CanaKit-Raspberry-8GB-Starter-Kit/dp/B08956GVXN) with many components included.
However, you might be able to get it all cheaper if you get the parts separately (and if you have the equipment, you can [3D print your own Pi case](https://www.thingiverse.com/thing:3793664).)
Other components you'll need:
- A **USB 3.0+ Solid State Drive**. The general recommendation is for a **2 TB drive**.
- The [Samsung T5](https://www.amazon.com/Samsung-T5-Portable-SSD-MU-PA2T0B/dp/B073H4GPLQ) is an excellent example of one that is known to work well.
- :warning: Using a SATA SSD with a SATA-to-USB adapter is **not recommended** because of [problems like this](https://www.raspberrypi.org/forums/viewtopic.php?f=28\&t=245931).
If you go this route, we've included a performance test you can use to check if it will work or not in the [Testing the SSD's Performance](#testing-the-ssds-performance) section.
- An **ethernet cable** for internet access. It should be at least **Cat 5e** rated.
- Running a node over Wi-Fi is **not recommended**, but if you have no other option, you can do it instead of using an ethernet cable.
- A **UPS** to act as a power source if you ever lose electricity.
The Pi really doesn't draw much power, so even a small UPS will last for a while, but generally the bigger, the better. Go with as big of a UPS as you can afford.
Also, we recommend you **attach your modem, router, and other network equipment** to it as well - not much point keeping your Pi alive if your router dies.
Depending on your location, sales, your choice of SSD and UPS, and how many of these things you already have, you're probably going to end up spending **around $200 to $500 USD** for a complete setup.
### Making the Fan Run More Quietly
When you get the fan, by default you're probably going to be instructed to connect it to the 5v GPIO pin, as shown in the picture below.
The fan will have a connector with two holes; the black one should go to GND (pin 6), and the red one should go to +5v (pin 4).
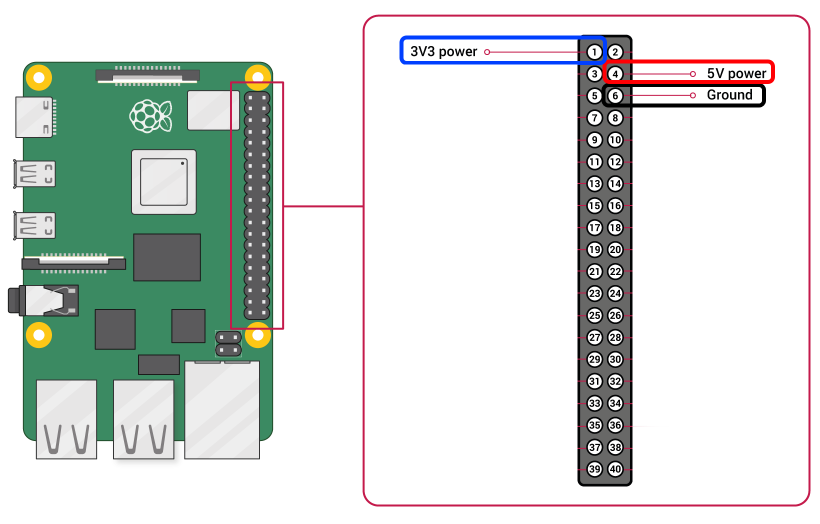
However, in our experience, this makes the fan run very loud and fast which isn't really necessary.
If you want to make it more quiet while still running cool, try connecting it to the 3.3v pin (Pin 1, the blue one) instead of the 5v pin.
This means that on your fan, the black point will go to GND (pin 6) still, but now the red point will go to +3.3v (pin 1).
If your fan has a connector where the two holes are side by side and you can't split them apart, you can put [some jumpers like this](https://www.amazon.com/GenBasic-Female-Solderless-Breadboard-Prototyping/dp/B077N7J6C4) in between it and the GPIO pins on the Pi.
### Installing the Operating System
There are a few varieties of Linux OS that support the Raspberry Pi.
For this guide, we're going to stick to **Ubuntu 20.04**.
Ubuntu is a tried-and-true OS that's used around the world, and 20.04 is (at the time of this writing) the latest of the Long Term Support (LTS) versions, which means it will keep getting security patches for a very long time.
If you'd rather stick with a different flavor of Linux like Raspbian, feel free to follow the existing installation guides for that - just keep in mind that this guide is built for Ubuntu, so not all of the instructions may match your OS.
The fine folks at Canonical have written up [a wonderful guide on how to install the Ubuntu Server image onto a Pi](https://ubuntu.com/tutorials/how-to-install-ubuntu-on-your-raspberry-pi#1-overview).
Follow **steps 1 through 4** of the guide above for the Server setup.
For the Operating System image, you want to select `Ubuntu Server 20.04.2 LTS (RPi 3/4/400) 64-bit server OS with long-term support for arm64 architectures`.
If you decide that you want a desktop UI (so you can use a mouse and have windows to drag around), you'll need to follow step 5 as well.
We suggest that you don't do this and just stick with the server image, because the desktop UI will add some additional overhead and processing work onto your Pi with relatively little benefit.
However, if you're determined to run a desktop, then we recommend choosing the Xubuntu option.
It's pretty lightweight on resources and very user friendly.
Once that's complete, you're ready to start preparing Ubuntu to run a Rocket Pool node.
You can use the local terminal on it, or you can SSH in from your desktop / laptop as the installation guide suggests.
The process will be the same either way, so do whatever's most convenient for you.
If you aren't familiar with `ssh`, take a look at the [Intro to Secure Shell](/node-staking/ssh.md) guide.
::: warning NOTE
At this point, you should _strongly consider_ configuring your router to make your Pi's IP address **static**.
This means that your Pi will have the same IP address forever, so you can always SSH into it using that IP address.
Otherwise, it's possible that your Pi's IP could change at some point, and the above SSH command will no longer work.
You'll have to enter your router's configuration to find out what your Pi's new IP address is.
Each router is different, so you will need to consult your router's documentation to learn how to assign a static IP address.
:::
## Mounting the SSD
As you may have gathered, after following the above installation instructions, the core OS will be running off of the microSD card.
That's not nearly large enough or fast enough to hold all of the Execution and Consensus blockchain data, which is where the SSD comes in.
To use it, we have to set it up with a file system and mount it to the Pi.
### Connecting the SSD to the USB 3.0 Ports
Start by plugging your SSD into one of the Pi's USB 3.0 ports. These are the **blue** ports, not the black ones:
The black ones are slow USB 2.0 ports; they're only good for accessories like mice and keyboards.
If you have your keyboard plugged into the blue ports, take it out and plug it into the black ones now.
### Formatting the SSD and Creating a New Partition
::: warning
This process is going to erase everything on your SSD.
If you already have a partition with stuff on it, SKIP THIS STEP because you're about to delete it all!
If you've never used this SSD before and it's totally empty, then follow this step.
:::
Run this command to find the location of your disk in the device table:
```shell
sudo lshw -C disk
*-disk
description: SCSI Disk
product: Portable SSD T5
vendor: Samsung
physical id: 0.0.0
bus info: scsi@0:0.0.0
logical name: /dev/sda
...
```
The important thing you need is the `logical name: /dev/sda` portion, or rather, the **`/dev/sda`** part of it.
We're going to call this the **device location** of your SSD.
For this guide, we'll just use `/dev/sda` as the device location - yours will probably be the same, but substitute it with whatever that command shows for the rest of the instructions.
Now that we know the device location, let's format it and make a new partition on it so we can actually use it.
Again, **these commands will delete whatever's already on the disk!**
Create a new partition table:
```shell
sudo parted -s /dev/sda mklabel gpt unit GB mkpart primary ext4 0 100%
```
Format the new partition with the `ext4` file system:
```shell
sudo mkfs -t ext4 /dev/sda1
```
Add a label to it (you don't have to do this, but it's fun):
```shell
sudo e2label /dev/sda1 "Rocket Drive"
```
Confirm that this worked by running the command below, which should show output like what you see here:
```shell
sudo blkid
...
/dev/sda1: LABEL="Rocket Drive" UUID="1ade40fd-1ea4-4c6e-99ea-ebb804d86266" TYPE="ext4" PARTLABEL="primary" PARTUUID="288bf76b-792c-4e6a-a049-cb6a4d23abc0"
```
If you see all of that, then you're good. Grab the `UUID="..."` output and put it somewhere temporarily, because you're going to need it in a minute.
### Optimizing the New Partition
Next, let's tune the new filesystem a little to optimize it for validator activity.
By default, ext4 will reserve 5% of its space for system processes.
Since we don't need that on the SSD because it just stores the Execution and Consensus chain data, we can disable it:
```shell
sudo tune2fs -m 0 /dev/sda1
```
### Mounting and Enabling Automount
In order to use the drive, you have to mount it to the file system.
Create a new mount point anywhere you like (we'll use `/mnt/rpdata` here as an example, feel free to use that):
```shell
sudo mkdir /mnt/rpdata
```
Now, mount the new SSD partition to that folder:
```shell
sudo mount /dev/sda1 /mnt/rpdata
```
After this, the folder `/mnt/rpdata` will point to the SSD, so anything you write to that folder will live on the SSD.
This is where we're going to store the chain data for Execution and Consensus.
Now, let's add it to the mounting table so it automatically mounts on startup.
Remember the `UUID` from the `blkid` command you used earlier?
This is where it will come in handy.
```shell
sudo nano /etc/fstab
```
This will open up an interactive file editor, which will look like this to start:
```
LABEL=writable / ext4 defaults 0 0
LABEL=system-boot /boot/firmware vfat defaults 0 1
```
Use the arrow keys to go down to the bottom line, and add this line to the end:
```
LABEL=writable / ext4 defaults 0 0
LABEL=system-boot /boot/firmware vfat defaults 0 1
UUID=1ade40fd-1ea4-4c6e-99ea-ebb804d86266 /mnt/rpdata ext4 defaults 0 0
```
Replace the value in `UUID=...` with the one from your disk, then press `Ctrl+O` and `Enter` to save, then `Ctrl+X` and `Enter` to exit.
Now the SSD will be automatically mounted when you reboot. Nice!
### Testing the SSD's Performance
Before going any further, you should test your SSD's read/write speed and how many I/O requests it can handle per second (IOPS).
If your SSD is too slow, then it won't work well for a Rocket Pool node and you're going to end up losing money over time.
To test it, we're going to use a program called `fio`. Install it like this:
```shell
sudo apt install fio
```
Next, move to your SSD's mount point:
```shell
cd /mnt/rpdata
```
Now, run this command to test the SSD performance:
```shell
sudo fio --randrepeat=1 --ioengine=libaio --direct=1 --gtod_reduce=1 --name=test --filename=test --bs=4k --iodepth=64 --size=4G --readwrite=randrw --rwmixread=75
```
The output should look like this:
```
test: (g=0): rw=randrw, bs=(R) 4096B-4096B, (W) 4096B-4096B, (T) 4096B-4096B, ioengine=libaio, iodepth=64
fio-3.16
Starting 1 process
test: Laying out IO file (1 file / 4096MiB)
Jobs: 1 (f=1): [m(1)][100.0%][r=63.9MiB/s,w=20.8MiB/s][r=16.4k,w=5329 IOPS][eta 00m:00s]
test: (groupid=0, jobs=1): err= 0: pid=205075: Mon Feb 15 04:06:35 2021
read: IOPS=15.7k, BW=61.5MiB/s (64.5MB/s)(3070MiB/49937msec)
bw ( KiB/s): min=53288, max=66784, per=99.94%, avg=62912.34, stdev=2254.36, samples=99
iops : min=13322, max=16696, avg=15728.08, stdev=563.59, samples=99
write: IOPS=5259, BW=20.5MiB/s (21.5MB/s)(1026MiB/49937msec); 0 zone resets
...
```
What you care about are the lines starting with `read:` and `write:` under the `test:` line.
- Your **read** should have IOPS of at least **15k** and bandwidth (BW) of at least **60 MiB/s**.
- Your **write** should have IOPS of at least **5000** and bandwidth of at least **20 MiB/s**.
Those are the specs from the Samsung T5 that we use, which work very well.
We have also tested a slower SSD with read IOPS of 5k and write IOPS of 1k, and it has a very hard time keeping up with the consensus layer.
If you use an SSD slower than the specs above, just be prepared that you might see a lot of missed attestations.
If yours meets or exceeds them, then you're all set and can move on.
::: tip NOTE
If your SSD doesn't meet the above specs but it should, you might be able to fix it with a firmware update.
For example, this has been experienced by the Rocket Pool community with the Samsung T7.
Two of them fresh out of the box only showed 3.5K read IOPS and 1.2K write IOPS.
After applying all available firmware updates, the performance was back up to the numbers shown in the above example.
Check with your manufacturer's support website for the latest firmware and make sure your drive is up to date - you may have to update the firmware multiple times until there are no more updates left.
:::
Last but not least, remove the test file you just made:
```shell
sudo rm /mnt/rpdata/test
```
## Setting up Swap Space
The Pi has 8 GB (or 4 GB if you went that route) of RAM.
For our configuration, that will be plenty.
Then again, it never hurts to add a little more.
What we're going to do now is add what's called **swap space**.
Essentially, it means we're going to use the SSD as "backup RAM" in case something goes horribly, horribly wrong and the Pi runs out of regular RAM.
The SSD isn't nearly as fast as the regular RAM, so if it hits the swap space it will slow things down, but it won't completely crash and break everything.
Think of this as extra insurance that you'll (most likely) never need.
### Creating a Swap File
The first step is to make a new file that will act as your swap space.
Decide how much you want to use - a reasonable start would be 8 GB, so you have 8 GB of normal RAM and 8 GB of "backup RAM" for a total of 16 GB.
To be super safe, you can make it 24 GB so your system has 8 GB of normal RAM and 24 GB of "backup RAM" for a total of 32 GB, but this is probably overkill.
Luckily, since your SSD has 1 or 2 TB of space, allocating 8 to 24 GB for a swapfile is negligible.
For the sake of this walkthrough, let's pick a nice middleground - say, 16 GB of swap space for a total RAM of 24 GB.
Just substitute whatever number you want in as we go.
Enter this, which will create a new file called `/mnt/rpdata/swapfile` and fill it with 16 GB of zeros.
To change the amount, just change the number in `count=16` to whatever you want. **Note that this is going to take a long time, but that's ok.**
```shell
sudo dd if=/dev/zero of=/mnt/rpdata/swapfile bs=1G count=16 status=progress
```
Next, set the permissions so only the root user can read or write to it (for security):
```shell
sudo chmod 600 /mnt/rpdata/swapfile
```
Now, mark it as a swap file:
```shell
sudo mkswap /mnt/rpdata/swapfile
```
Next, enable it:
```shell
sudo swapon /mnt/rpdata/swapfile
```
Finally, add it to the mount table so it automatically loads when your Pi reboots:
```shell
sudo nano /etc/fstab
```
Add a new line at the end so that the file looks like this:
```
LABEL=writable / ext4 defaults 0 0
LABEL=system-boot /boot/firmware vfat defaults 0 1
UUID=1ade40fd-1ea4-4c6e-99ea-ebb804d86266 /mnt/rpdata ext4 defaults 0 0
/mnt/rpdata/swapfile none swap sw 0 0
```
Press `Ctrl+O` and `Enter` to save, then `Ctrl+X` and `Enter` to exit.
To verify that it's active, run these commands:
```shell
sudo apt install htop
htop
```
Your output should look like this at the top:

If the second number in the last row labeled `Swp` (the one after the `/`) is non-zero, then you're all set.
For example, if it shows `0K / 16.0G` then your swap space was activated successfully.
If it shows `0K / 0K` then it did not work and you'll have to confirm that you entered the previous steps properly.
Press `q` or `F10` to quit out of `htop` and get back to the terminal.
### Configuring Swappiness and Cache Pressure
By default, Linux will eagerly use a lot of swap space to take some of the pressure off of the system's RAM.
We don't want that. We want it to use all of the RAM up to the very last second before relying on SWAP.
The next step is to change what's called the "swappiness" of the system, which is basically how eager it is to use the swap space.
There is a lot of debate about what value to set this to, but we've found a value of 6 works well enough.
We also want to turn down the "cache pressure", which dictates how quickly the Pi will delete a cache of its filesystem.
Since we're going to have a lot of spare RAM with our setup, we can make this "10" which will leave the cache in memory for a while, reducing disk I/O.
To set these, run these commands:
```shell
sudo sysctl vm.swappiness=6
sudo sysctl vm.vfs_cache_pressure=10
```
Now, put them into the `sysctl.conf` file so they are reapplied after a reboot:
```shell
sudo nano /etc/sysctl.conf
```
Add these two lines to the end:
```shell
vm.swappiness=6
vm.vfs_cache_pressure=10
```
Then save and exit like you've done before (`Ctrl+O`, `Ctrl+X`).
## Overclocking the Pi
By default, the 1.5 GHz processor that the Pi comes with is a pretty capable little device.
For the most part, you should be able to validate with it just fine.
However, we have noticed that on rare occasions, your validator client gets stuck working on some things and it just doesn't have enough horsepower to keep up with your validator's attestation duties.
When that happens, you'll see something like this on the [beaconcha.in explorer](https://beaconcha.in) (described in more detail in the [Monitoring your Node's Performance](/node-staking/performance.md) guide later on):

That inclusion distance of 8 means that it took a really long time to send that attestation, and you will be slightly penalized for being late.
Ideally, all of them should be 0.
Though rare, these do occur when running at stock settings.
There is a way to mitigate these, however: overclocking.
Overclocking is by far the easiest way to get some extra performance out of your Pi's CPU and prevent those nasty high inclusion distances.
Frankly, the default CPU clock of 1.5 GHz is really underpowered.
You can speed it up quite a bit via overclocking, and depending on how far you take it, you can do it quite safely too.
Overclocking the Pi is very simple - it just involves changing some numbers in a text file.
There are two numbers that matter: the first is the **core clock**, which directly determines how fast the ARM CPU runs.
The second is **overvoltage**, which determines the voltage that gets fed into the ARM CPU.
Higher speeds generally require higher voltage, but the Pi's CPU can handle quite a bit of extra voltage without any appreciable damage.
It might wear out a little faster, but we're still talking on the order of years and the Pi 5 will be out by then, so no real harm done!
Rather, the real concern with overvoltage is that **higher voltages lead to higher temperatures**.
This section will help you see how hot your Pi gets under a heavy load, so you don't push it too far.
::: warning
While overclocking at the levels we're going to do is pretty safe and reliable, you are at the mercy of what's called the "silicon lottery".
Every CPU is slightly different in microscopic ways, and some of them can simply overclock better than others.
If you overclock too far / too hard, then your system may become **unstable**.
Unstable Pis suffer from all kinds of consequences, from constant restarts to completely freezing.
**In the worst case, you could corrupt your microSD card and have to reinstall everything from scratch!**
**By following the guidance here, you have to accept the fact that you're running that risk.**
If that's not worth it for you, then skip the rest of this section.
:::
## Benchmarking the Stock Configuration
Before overclocking, your should profile what your Pi is capable of in its stock, off-the-shelf configuration.
There are three key things to look at:
1. **Performance** (how fast your Pi calculates things)
2. **Temperature** under load (how hot it gets)
3. **Stability** (how long it runs before crashing)
We're going to get stats on all three of them as we go.
### Performance
For measuring performance, you can use LINPACK.
We'll build it from source.
```shell
cd ~
sudo apt install gcc
wget http://www.netlib.org/benchmark/linpackc.new -O linpack.c
...
cc -O3 -o linpack linpack.c -lm
...
sudo mv linpack /usr/local/bin
rm linpack.c
```
Now run it like this:
```shell
linpack
Enter array size (q to quit) [200]:
```
Just press `enter` to leave it at the default of 200, and let it run.
When it's done, the output will look like this:
```
Memory required: 315K.
LINPACK benchmark, Double precision.
Machine precision: 15 digits.
Array size 200 X 200.
Average rolled and unrolled performance:
Reps Time(s) DGEFA DGESL OVERHEAD KFLOPS
----------------------------------------------------
512 0.70 85.64% 3.76% 10.60% 1120802.516
1024 1.40 85.70% 3.74% 10.56% 1120134.749
2048 2.81 85.71% 3.73% 10.56% 1120441.752
4096 5.62 85.69% 3.74% 10.57% 1120114.452
8192 11.23 85.67% 3.74% 10.59% 1120277.186
```
What you need to look at is the last row, in the `KFLOPS` column.
This number (1120277.186 in the above example) represents your computing performance.
It doesn't mean anything by itself, but it gives us a good baseline to compare the overclocked performance to.
Let's call this the **stock KFLOPS**.
### Temperature
Next, let's stress the Pi out and watch its temperature under heavy load.
First, install this package, which will provide a tool called `vcgencmd` that can print details about the Pi:
```shell
sudo apt install libraspberrypi-bin
```
Once this is installed, reboot the Pi (this is necessary for some new permission to get applied).
Next, install a program called **stressberry**.
This will be our benchmarking tool.
Install it like this:
```shell
sudo apt install stress python3-pip
pip3 install stressberry
source ~/.profile
```
::: tip NOTE
If stressberry throws an error about not being able to read temperature information or not being able to open the `vchiq` instance, you can fix it with the following command:
```shell
sudo usermod -aG video $USER
```
Then log out and back in, restart your SSH session, or restart the machine and try again.
:::
Next, run it like this:
```shell
stressberry-run -n "Stock" -d 300 -i 60 -c 4 stock.out
```
This will run a new stress test named "Stock" for 300 seconds (5 minutes) with 60 seconds of cooldown before and after the test, on all 4 cores of the Pi.
You can play with these timings if you want it to run longer or have more of a cooldown, but this works as a quick-and-dirty stress test for me.
The results will get saved to a file named `stock.out`.
During the main phase of the test, the output will look like this:
```
Current temperature: 41.3°C - Frequency: 1500MHz
Current temperature: 41.3°C - Frequency: 1500MHz
Current temperature: 41.8°C - Frequency: 1500MHz
Current temperature: 40.9°C - Frequency: 1500MHz
Current temperature: 41.8°C - Frequency: 1500MHz
```
This basically tells you how hot the Pi will get.
At 85°C, the Pi will actually start to throttle itself and bring the clock speed down so it doesn't overheat.
Luckily, because you added a heatsink and a fan, you shouldn't get anywhere close to this!
That being said, we generally try to keep the temperatures below 65°C for the sake of the system's overall health.
If you want to monitor the system temperature during normal validating operations, you can do this with `vcgencmd`:
```shell
vcgencmd measure_temp
temp=34.0'C
```
### Stability
Testing the stability of an overclock involves answering these three questions:
- Does the Pi turn on and get to a login promp / start the SSH server?
- Does it randomly freeze or restart during normal operations?
- Does it randomly freeze or restart during heavy load?
For an overclock to be truly stable, the answers must be **yes, no, and no**.
There are a few ways to test this, but the easiest at this point is to just run `stressberry` for a really long time.
How long is entirely up to you - the longer it goes, the more sure you can be that the system is stable.
Some people just run the 5 minute test above and call that good if it survives; others run it for a half hour; others run it for 8 hours or even more.
How long to run it is a personal decision you'll have to make based on your own risk tolerance.
To change the runtime, just modify the `-d` parameter with the number of seconds you want the test to run.
For example, if you decided a half-hour is the way to go, you could do `-d 1800`.
## Your First Overclock - 1800 MHz (Light)
The first overclock we're going to do is relatively "light" and reliable, but still provides a nice boost in compute power.
We're going to go from the stock 1500 MHz up to 1800 MHz - a 20% speedup!
Open this file:
```shell
sudo nano /boot/firmware/usercfg.txt
```
Add these two lines to the end:
```shell
arm_freq=1800
over_voltage=3
```
Then save the file and reboot.
These settings will increase the CPU clock by 20%, and it will also raise the CPU voltage from 0.88v to 0.93v (each `over_voltage` setting increases it by 0.025v).
This setting should be attainable by any Pi 4B, so your system should restart and provide a login prompt or SSH access in just a few moments.
If it doesn't, and your Pi stops responding or enters a boot loop, you'll have to reset it - read the next section for that.
### Resetting After an Unstable Overclock
If your Pi stops responding, or keeps restarting over and over, then you need to lower the overclock.
To do that, follow these steps:
1. Turn the Pi off.
2. Pull the microSD card out.
3. Plug the card into another Linux computer with a microSD adapter.
\*NOTE: This **has to be** another Linux computer. It won't work if you plug it into a Windows machine, because Windows can't read the `ext4` filesystem the SD card uses!\*\*
4. Mount the card on the other computer.
5. Open `/boot/firmware/usercfg.txt`.
6. Lower the `arm_freq` value, or increase the `over_voltage` value. _NOTE: **do not go any higher than over_voltage=6.** Higher values aren't supported by the Pi's warranty, and they run the risk of degrading the CPU faster than you might be comfortable with._
7. Unmount the SD card and remove it.
8. Plug the card back into the Pi and turn it on.
If the Pi works, then great! Continue below.
If not, repeat the whole process with even more conservative settings.
In the worst case you can just remove the `arm_freq` and `over_voltage` lines entirely to return it to stock settings.
### Testing 1800 MHz
Once you're logged in, run `linpack` again to test the new performance.
Here's an example from our test Pi:
```
linpack
Enter array size (q to quit) [200]:
...
Reps Time(s) DGEFA DGESL OVERHEAD KFLOPS
----------------------------------------------------
512 0.59 85.72% 3.75% 10.53% 1338253.832
1024 1.18 85.72% 3.75% 10.53% 1337667.003
2048 2.35 85.72% 3.75% 10.53% 1337682.272
4096 4.70 85.73% 3.75% 10.53% 1337902.437
8192 9.40 85.71% 3.76% 10.53% 1337302.722
16384 18.80 85.72% 3.75% 10.52% 1337238.504
```
Again, grab the `KFLOPS` column in the last row.
To compare it to the stock configuration, simply divide the two numbers:
`1337238.504 / 1120277.186 = 1.193668`
Alright! That's a 19.4% boost in performance, which is to be expected since we're running 20% faster.
Now let's check the temperatures with the new clock speed and voltage settings:
```shell
stressberry-run -n "1800_ov3" -d 300 -i 60 -c 4 1800_ov3.out
```
You should see output like this:
```
Current temperature: 47.2°C - Frequency: 1800MHz
Current temperature: 48.7°C - Frequency: 1800MHz
Current temperature: 47.7°C - Frequency: 1800MHz
Current temperature: 47.7°C - Frequency: 1800MHz
Current temperature: 47.7°C - Frequency: 1800MHz
```
Not bad, about 6° hotter than the stock settings but still well below the threshold where we'd personally stop.
You can run a longer stability test here if you're comfortable, or you can press on to take things even higher.
## Going to 2000 MHz (Medium)
The next milestone will be 2000 MHz. This represents a 33.3% boost in clock speed, which is pretty significant.
Most people consider this to be a great balance between performance and stability, so they stop the process here.
Our recommendation for this level is to start with these settings:
```shell
arm_freq=2000
over_voltage=5
```
This will boost the core voltage to 1.005v.
Try this out with the `linpack` and `stressberry` tests.
If it survives them, then you're all set. If it freezes or randomly restarts, then you should increase the voltage:
```shell
arm_freq=2000
over_voltage=6
```
That puts the core voltage at 1.03v, which is as high as you can go before voiding the warranty.
That usually works for most Pis.
If it doesn't, instead of increasing the voltage further, **you should lower your clock speed and try again.**
For reference, here are the numbers from our 2000 run:
```
linpack
Enter array size (q to quit) [200]:
...
Reps Time(s) DGEFA DGESL OVERHEAD KFLOPS
----------------------------------------------------
512 0.53 85.76% 3.73% 10.51% 1482043.543
1024 1.06 85.74% 3.73% 10.53% 1481743.724
2048 2.12 85.74% 3.72% 10.54% 1482835.055
4096 4.24 85.73% 3.74% 10.53% 1482189.202
8192 8.48 85.74% 3.73% 10.53% 1482560.117
16384 16.96 85.74% 3.73% 10.53% 1482441.146
```
That's a 32.3% speedup which is in-line with what we'd expect. Not bad!
Here are our temperatures:
```
Current temperature: 54.0°C - Frequency: 2000MHz
Current temperature: 54.5°C - Frequency: 2000MHz
Current temperature: 54.0°C - Frequency: 2000MHz
Current temperature: 54.5°C - Frequency: 2000MHz
Current temperature: 55.5°C - Frequency: 2000MHz
```
An increase of 7 more degrees, but still under our threshold of 65°C.
## Going to 2100 MHz (Heavy)
The next step represents a solid **40% speedup** over the stock configuration.
**NOTE: Not all Pi's are capable of doing this while staying at `over_voltage=6`.
Try it, and if it breaks, go back to 2000 MHz.**
The configuration will look like this:
```shell
arm_freq=2100
over_voltage=6
```
For reference, here are our results:
```
linpack
Enter array size (q to quit) [200]:
...
Reps Time(s) DGEFA DGESL OVERHEAD KFLOPS
----------------------------------------------------
512 0.50 85.68% 3.76% 10.56% 1560952.508
1024 1.01 85.68% 3.76% 10.56% 1554858.509
2048 2.01 85.70% 3.74% 10.56% 1561524.482
4096 4.03 85.72% 3.73% 10.55% 1560152.447
8192 8.06 85.72% 3.73% 10.54% 1561078.999
16384 16.11 85.73% 3.73% 10.54% 1561448.736
```
That's a 39.4% speedup!
Here are our temperatures:
```
Current temperature: 59.4°C - Frequency: 2100MHz
Current temperature: 58.9°C - Frequency: 2100MHz
Current temperature: 58.4°C - Frequency: 2100MHz
Current temperature: 59.4°C - Frequency: 2100MHz
Current temperature: 58.9°C - Frequency: 2100MHz
```
Just shy of 60°C, so there's plenty of room.
## Going to 2250 MHz (Extreme)
This is the setting we run our Pi's at, which has been stable for over a year at the time of writing.
Still, **users are cautioned in overclocking this high** - ensure you do thorough stability tests and have plenty of thermal headroom before attempting to make this your node's production configuration!
Our configuration is:
```shell
arm_freq=2250
over_voltage=10
```
Here are our results:
```
Reps Time(s) DGEFA DGESL OVERHEAD KFLOPS
----------------------------------------------------
1024 0.95 85.69% 3.85% 10.47% 1650081.294
2048 1.91 85.64% 3.91% 10.45% 1646779.068
4096 3.84 85.41% 4.15% 10.44% 1637706.598
8192 7.75 85.50% 4.03% 10.46% 1620589.096
16384 15.34 85.43% 4.13% 10.44% 1638067.854
```
That's 46% faster than the stock configuration!
OV10 is as the stock firmware will let the Pi go, and 2250 MHz is the fastest we could reliably run in production.
The temperatures in the stress test get this high:
```
Current temperature: 70.6°C - Frequency: 2251MHz
Current temperature: 71.1°C - Frequency: 2251MHz
Current temperature: 71.1°C - Frequency: 2251MHz
Current temperature: 71.1°C - Frequency: 2251MHz
Current temperature: 71.1°C - Frequency: 2251MHz
```
But during actual validation, they tend to stay below 60C which is acceptable for us.
## Next Steps
And with that, your Pi is up and running and ready to run Rocket Pool!
Move on to the [Choosing your ETH Clients](/node-staking/eth-clients.md) section.
---
url: /node-staking/maintenance/alerting.md
---
> For AI agents: the complete documentation index is available at /llms.txt, the full documentation bundle is available at /llms-full.txt.
# Monitoring your Smart Node Stack with Alert Notifications
The Smart Node alert notification functionality allows you to receive notifications about the health and important events of your Rocket Pool Smart Node.
## Alerting System Overview
The notification functionality utilizes [Alertmanager](https://prometheus.io/docs/alerting/latest/alertmanager/) to deliver alerts. Alerting requires that you have already followed the [Setting up the Grafana Dashboard](/node-staking/grafana.md) which walks through setting up the Smart Node stack's metrics tracker. The alerts are triggered when important metrics from your Smart Node exceed certain thresholds or when particular events occur like when your node's fee recipient is changed.
## Setting up Discord Notifications
Currently, notifications can be sent to Discord channels and Telegram chats. You can configure one or both destinations within the Rocket Pool Text User Interface (TUI) on the "Monitoring / Alerting" page.
### Adding a Discord Webhook URL:
1. Navigate to your desired Discord channel and open its settings.
2. Under "Integrations," locate and click on "Webhooks."
3. Click "Create Webhook."
4. Give your webhook a name and choose a channel to send the alerts to.
5. Copy the provided Webhook URL.
6. Within the Rocket Pool TUI, navigate to the "Monitoring / Alerting" page.
7. Paste the copied Webhook URL into the designated field and save the configuration.
## Setting up Telegram Notifications
You can configure Telegram notifications within the Rocket Pool Text User Interface (TUI) on the "Monitoring / Alerting" page. Telegram notifications are sent via the Telegram Bot API. Both a bot token and a numeric chat ID are required; filling only one does nothing.
### Adding a Telegram Bot Token and Chat ID:
1. Open [@BotFather](https://t.me/BotFather) in Telegram and create a new bot.
2. Copy the bot token BotFather provides (the token only — do not include a `bot` prefix).
3. Decide whether alerts should go to a private chat (DM) with you, a group, or a channel.
4. If you want alerts in a DM, send `/start` to your bot first. Then open `https://api.telegram.org/bot/getUpdates` in a browser (replace `` with the token from step 2) and look for the `"chat"` object:
```json
"chat": {
"id": 123456789,
"type": "private"
}
```
The `"id"` value is the chat ID you should set in the Telegram Chat ID field.
5. If you want alerts in a group or channel, add the bot as a member (the bot must be an admin for channels). Group and channel IDs are negative (typically starting with `-100`). After the bot can see the chat, use the same `getUpdates` URL to find the numeric chat ID. Usernames such as `@mychannel` will not work.
6. Within the Rocket Pool TUI, navigate to the "Monitoring / Alerting" page.
7. Paste the bot token and the numeric chat ID into the designated fields and save the configuration.
::: tip TIP
Is your favorite notification missing? The Rocket Pool team is actively looking for feedback from the community regarding additional notification destinations. Feel free to suggest new notification destinations at [https://github.com/rocket-pool/smartnode/issues](https://github.com/rocket-pool/smartnode/issues).
:::
## Disabling and Enabling Alerts
The Rocket Pool TUI provides a user-friendly interface for managing your alerts. You can access this functionality through the "Monitoring / Alerting" page. This interface allows you to View a list of all configured alerts and Enable or disable individual alerts based on your preference.
## Advanced Configuration
::: warning NOTE
This section is for advanced users who are experienced with Prometheus and modifying YAML files.
:::
For more advanced configuration of alerts you can add your own based on any metric that is available in the Prometheus container managed by the Smart Node Stack. Add your own yaml file containing [Prometheus Alerting Rules](https://prometheus.io/docs/prometheus/latest/configuration/alerting_rules/) into the `~/.rocketpool/alerting/rules/` directory and those rules and restart the Prometheus container with `docker stop rocketpool_prometheus` followed by `docker start rocketpool_prometheus`. Then run `docker logs rocketpool_prometheus` to confirm that Prometheus loaded your configuration file successfully (you want to see a line with _msg="Completed loading of configuration file" filename=/etc/prometheus/prometheus.yml_ and not _err="error loading config from "/etc/prometheus/prometheus.yml"..._)
---
url: /node-staking/maintenance/history-expiry.md
---
> For AI agents: the complete documentation index is available at /llms.txt, the full documentation bundle is available at /llms-full.txt.
# Execution Client History Expiry
Execution clients can drop old block bodies and receipts so the chain data stays a manageable size. The Smart Node **Pruning Mode** setting (Execution Client → Pruning Mode) controls this.
**Rolling History Expiry** is the default. Nethermind, Besu, Reth, and Erigon drop bodies and receipts older than about one year. Geth does not implement that mode yet and uses pre-Prague history expiry instead.
The other choices:
- **History Expiry** — drop _pre-merge_ bodies and receipts only (partial [EIP-4444](https://eips.ethereum.org/EIPS/eip-4444) expiry). Erigon does not support pre-merge-only expiry.
- **Full node** — keep the usual full-node data, including bodies and receipts. Erigon full-node mode keeps receipts.
- **Archive** — keep history and historical state (which requires much more disk).
Feel free to read this overview of partial history expiry: [https://blog.ethereum.org/2025/07/08/partial-history-exp](https://blog.ethereum.org/2025/07/08/partial-history-exp)
::: tip NOTE
New installs already use Rolling History Expiry. If you previously picked a different Pruning Mode, select **Rolling History Expiry** in the TUI and **resync** the Execution client for it to take effect.
- **Nethermind, Reth and Erigon** — resync after changing the mode (`rocketpool service resync-eth1`).
- **Geth** — prune with `rocketpool service prune-eth1` or resync; Geth still uses pre-Prague expiry rather than one-year rolling expiry.
- **Besu** — stays online.
:::
The following steps to remove pre-merge history are for Docker mode nodes only. If you are using an external client in Hybrid
mode or Native mode, please refer to the documentation provided by your Execution client.
Start by opening the Settings Manager:
```shell
rocketpool service config
```
To change the Execution Client pruning mode, go to the `Execution Client (ETH1)` menu and select the `History Expiry` setting in the dropdown menu for `Pruning Mode`
Pick **Rolling History Expiry** unless you have a reason to keep more history.
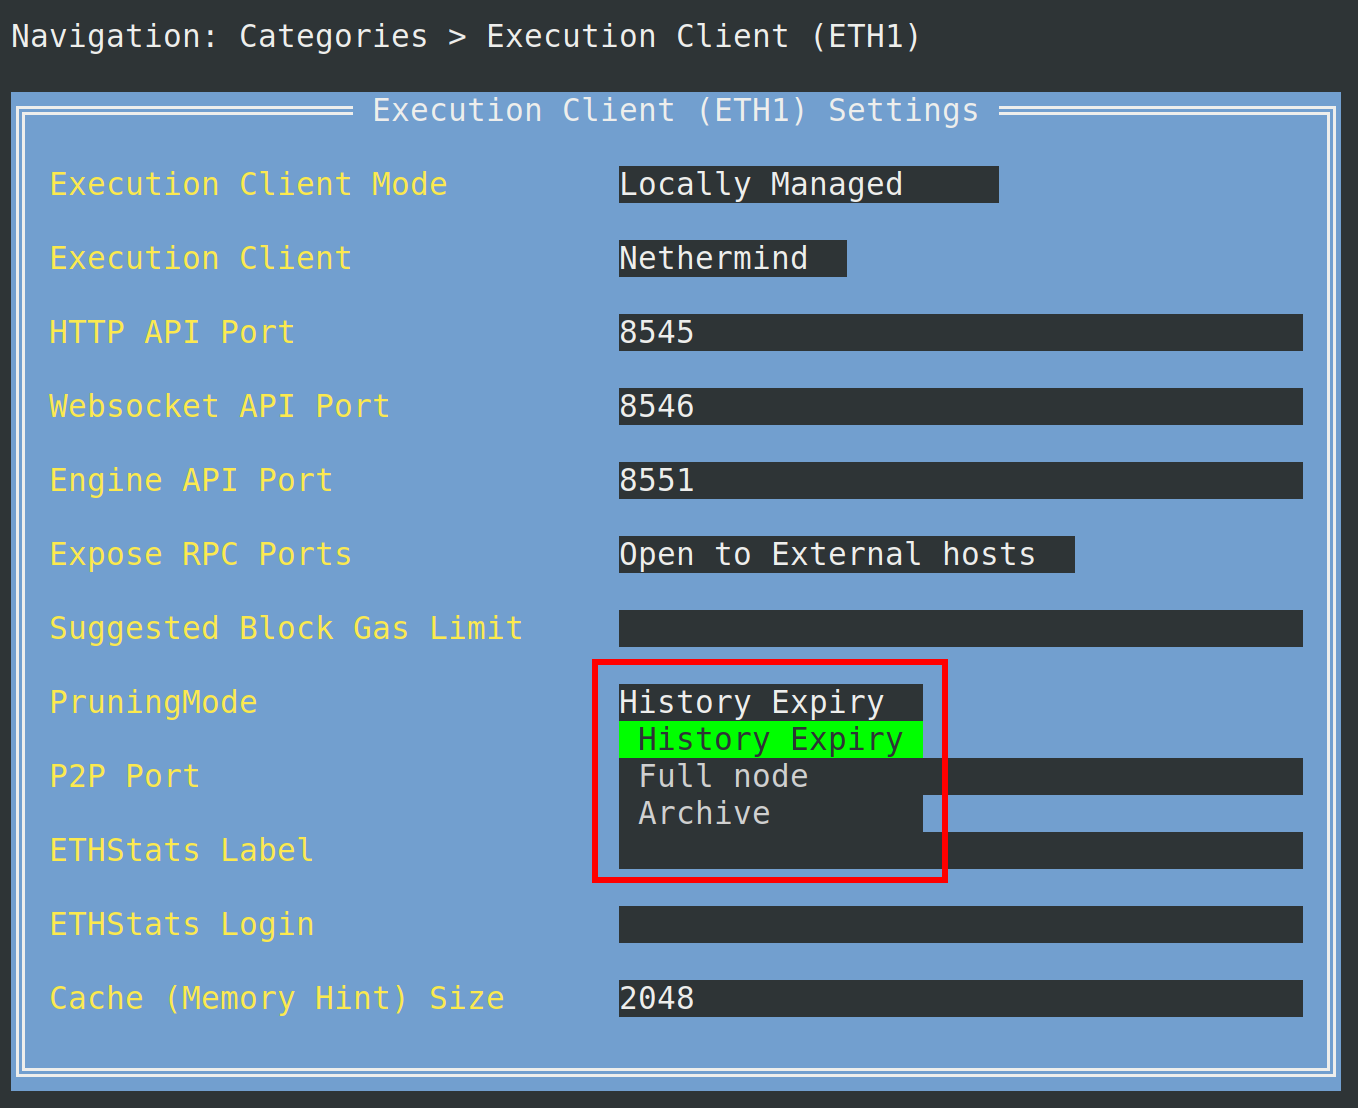
After you've made the selection, press `escape` to return to the main menu, then press `tab` to highlight the `Review Changes and Save` button. Press
the `enter` key to continue. You'll be presented with a menu to preview the changes to your Execution client settings.
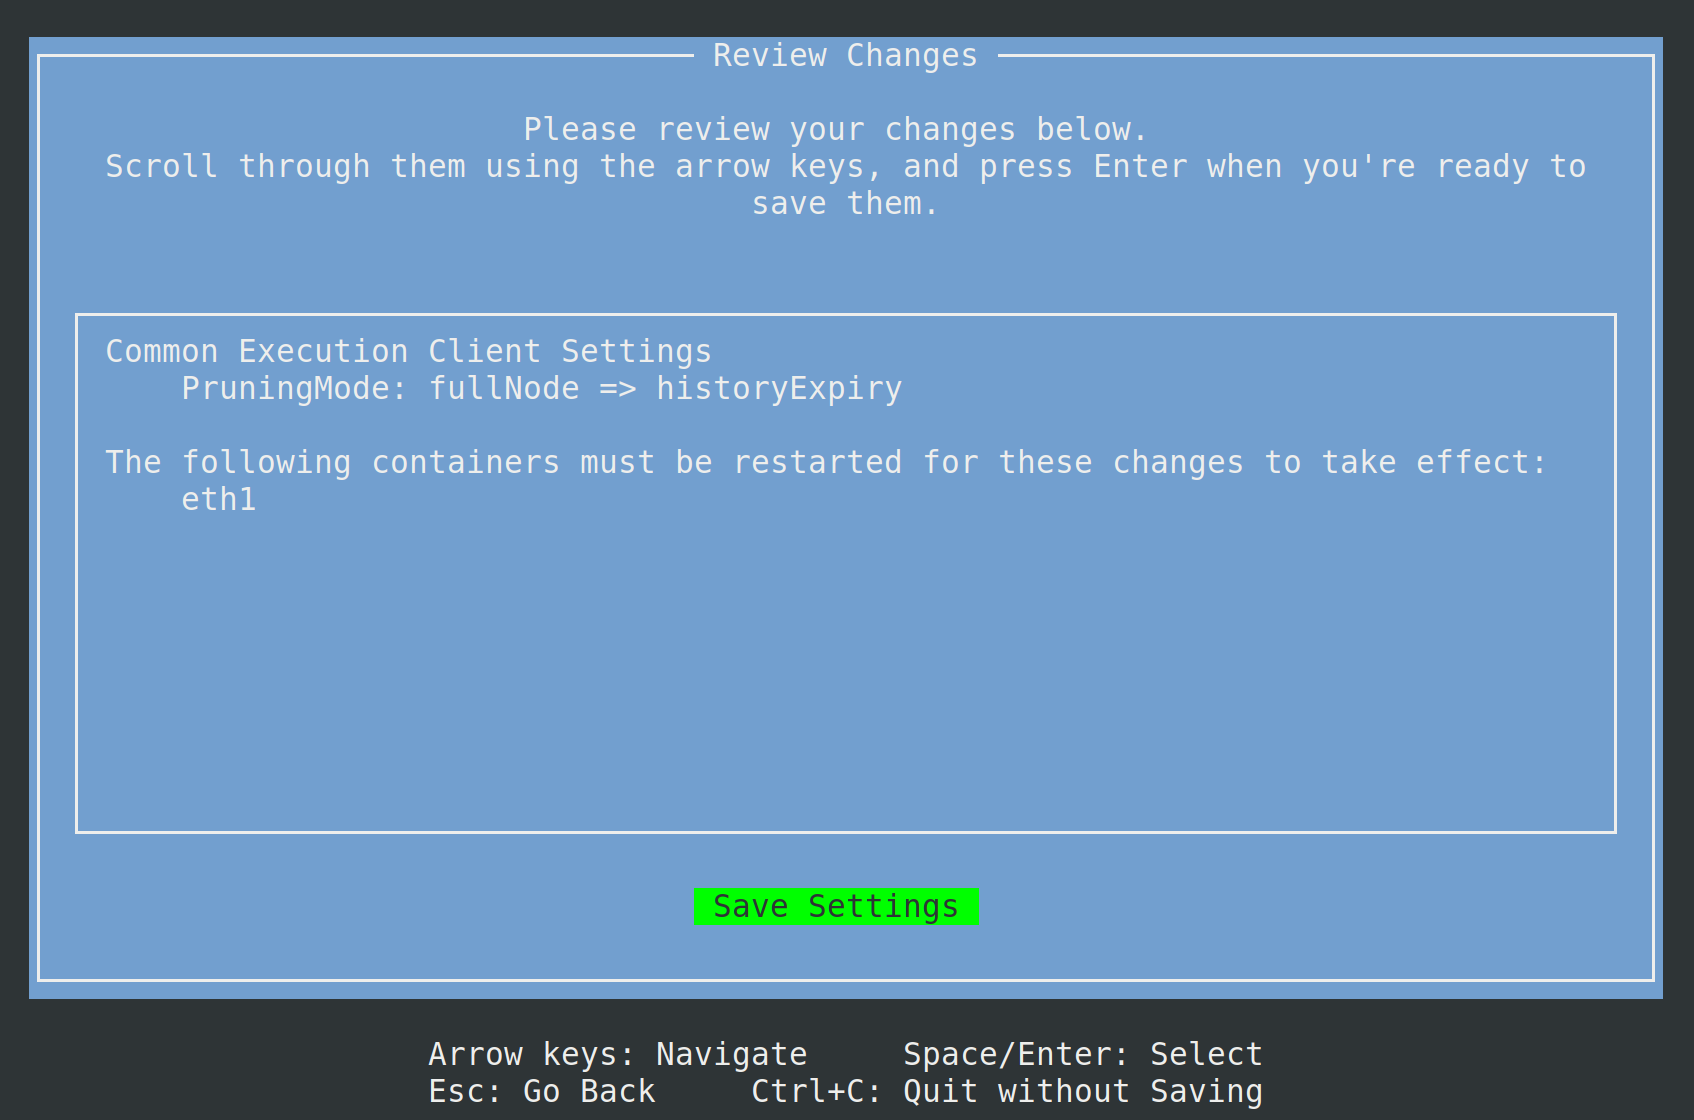
Press the `enter` key on `Save Settings` to save and exit the Settings Manager, then enter `y` to restart your `rocketpool_eth1` container.
```shell
Your changes have been saved!
The following containers must be restarted for the changes to take effect:
rocketpool_eth1
Would you like to restart them automatically now? [y/n]
```
From this point on, the steps differ depending on which Execution client you're using:
**Nethermind**
Nethermind nodes require a full resync to remove pre-merge history. You must resync your Execution client after saving
the `History Expiry` setting and restarting your `eth1` container.
::: warning WARNING
If you don't have a fallback node configured, your node will stop validating during a resync. A fallback node will
allow your primary node to continue attesting and proposing blocks during a prune or resync. Click [here](/node-staking/fallback.md)
to learn how to configure a fallback node.
:::
Use the following command to resync your Execution client:
```shell
rocketpool service resync-eth1
```
You're all set! The node will no longer store pre-merge data, substantially improving the feasibility of fitting a node on a 2 TB drive.
We recommend monitoring the progress using the following command.
```shell
rocketpool service logs eth1
```
**Geth**
Geth nodes require an offline prune to remove pre-merge history. You must prune your Execution client after saving
the `History Expiry` setting and restarting your `eth1` container. Alternatively you may choose to conduct a full resync to remove pre-merge history.
::: tip NOTE
We recommend pruning over conducting a full resync. If you wish to start over with a fresh Geth database or have an issue
with pruning, you can resync the Execution client using `rocketpool service resync-eth1`. Both choices should result in expired pre-merge history.
:::
::: warning WARNING
If you don't have a fallback node configured, your node will stop validating during a prune or resync. A fallback node will
allow your primary node to continue attesting and proposing blocks during a prune or resync. Click [here](/node-staking/fallback.md)
to learn how to configure a fallback node.
:::
Please run the following command to prune your Execution client:
```shell
rocketpool service prune-eth1
```
You can click [here](/node-staking/pruning.md#starting-a-prune) to learn more about pruning.
You're all set! The node will no longer store pre-merge data, substantially improving the feasibility of fitting a node on a 2 TB drive.
We recommend monitoring the progress using the following command.
```shell
rocketpool service logs eth1
```
**Besu**
You're all set! Besu nodes will perform an online prune while continuing to attest and propose blocks.
The node will no longer store pre-merge data, substantially improving the feasibility of fitting a node on a 2 TB drive.
We recommend monitoring the progress using the following command.
```shell
rocketpool service logs eth1
```
**Reth**
You're all set! Reth nodes will perform an online prune while continuing to attest and propose blocks.
On Mainnet with Rolling History Expiry selected, Reth downloads the official rolling-history snapshot on first start.
The node will no longer store pre-merge data, substantially improving the feasibility of fitting a node on a 2 TB drive.
We recommend monitoring the progress using the following command.
```shell
rocketpool service logs eth1
```
**Erigon**
Erigon nodes require a full resync to apply Rolling History Expiry. You must resync your Execution client after saving
the Pruning Mode setting and restarting your `eth1` container.
Use the following command to resync your Execution client:
```shell
rocketpool service resync-eth1
```
You're all set! The node will drop bodies and receipts older than about one year.
We recommend using the Rescue Node while resyncing and monitoring the progress using the following command.
```shell
rocketpool service logs eth1
```
---
url: /node-staking/maintenance/node-migration.md
---
> For AI agents: the complete documentation index is available at /llms.txt, the full documentation bundle is available at /llms-full.txt.
# Moving from One Node to Another
Sometimes, your node machine is no longer able to do its job and you need to move to another one.
This could happen if you're upgrading your node for example, or if you're moving from a cloud-based node to one locally hosted on dedicated hardware, or even if your node itself suffers a catastrophic hardware failure and you need to run your validators on a backup machine.
Regardless of the case, this guide will help you understand how to safely migrate your wallet and validator keys from one node to another without getting slashed.
## Slashing and The Slashing Database
The primary reason that we encourage you to exercise so much caution when moving your wallet from one machine to another, or recovering your wallet on another machine, is because of the risk of **slashing**.
Slashing occurs when one or more of your validator keys does something that violates the rules of the Beacon Chain and appears as though you're attempting to attack the network.
In response, the chain will forcibly exit your validator and enact a severe penalty - the size of the penalty depends on how many validators are also slashed within a two-week period of your own, but currently the minimum is **1 ETH** and there is no maximum.
Though there are several conditions that can be interpreted as "attacking the network", realistically the only one that happens accidentally is the **double attestation** (or **double proposal**).
This occurs when your validator submits two attestations (or two block proposals) for the same slot that have different votes (e.g., it votes on two different candidate blocks for a particular slot instead of picking one).
To combat this, your Validator Client hosts what's called a **Slashing Database**.
The Slashing Database is simply a record of your validator's votes (i.e., the slot of each vote and the hash of the block that vote was for), so it knows not to vote on something that it's already voted on.
### Avoiding Being Slashed
Every Validator Client maintains a Slashing Database to ensure your node never double attests or double proposes.
The problem, then, comes from situations where you begin validating **without** a slashing database and thus have no record of what your validators have previously voted on.
This can happen in several situations:
1. You just changed Consensus Clients, and the new client doesn't carry the Slashing Database over from the old one (which the Smart Node does not do during a client change).
2. You have your wallet loaded on one machine and are actively attesting with it, and then load your wallet onto a second machine _while the first machine is still actively attesting_.
3. You stop validating on one machine and load your wallet into a second machine, but you haven't waited long enough for the current epoch to be finalized so your second machine attests for slots that your validators have already attested to.
The standard way to avoid being slashed is to **wait for at least 15 minutes after your last successful attestation** before starting your Validator Client and attesting again, and **ensure that your validator keys are only present on one single machine**.
More specifically, the plan is to wait until your validator has intentionally missed an attestation, **and that miss has been finalized**.
Once finality is attained, your validator cannot vote for the finalized epoch any longer and it is safe to start attesting with it once more.
The 15-minute wait comes from a rule of thumb that when operating normally (e.g. with normal consensus), the Beacon Chain takes about 7 minutes to finalize an epoch.
Waiting for 15 minutes ensures that you've missed at least one epoch, and waited long enough for that epoch to be finalized, with a small buffer just for safety.
## Node Migration Checklist
With the above context in mind, here is a helpful checklist you can follow when migrating your node to ensure you won't be slashed.
This is designed for maximum safety, so while you may think some of the steps are unnecessary, we **strongly** encourage you to follow them all to completion.
1. **Prepare the new node** by following these guides, starting from the "Preparing a Node" section and ending once you have the Smart Node installed and are syncing an Execution and Consensus client.
- :warning: **DO NOT** initialize a new wallet or recover your old wallet on the node. Allow it to sync the clients _without a wallet present_.
2. **WAIT** until your clients are fully synced on the new node.
3. Confirm that you have recorded your mnemonic correctly by running `rocketpool wallet test-recovery` on your new machine. This will _simulate_ key recovery to confirm your node wallet and all of your minipools' validator keys can be recovered correctly, but will not _actually_ recover them and save them to disk so there is no risk of slashing.
1. If the Smart Node fails to recover your node wallet using the mnemonic you provided, then your mnemonic may be invalid. **STOP** going through this process; removing the keys from your old node means they could be **lost forever**.
2. In this situation we recommend exiting your validators and withdrawing your capital as soon as possible, so you can start over with a new node that you have the working mnemonic for.
4. **Stop validating** on your old node (for example, using `rocketpool service stop` to shut down the validator client).
5. **Delete your keys** from your old node (for example, using `rocketpool wallet purge`).
1. **VERIFY** the keys have been removed by looking if your node's `data` folder (default is `~/.rocketpool/data/validators/`) - each Consensus Client will have its own folder under that data folder with its own copy of the keys.
2. Please see the [Verifying Key Removal](#verifying-key-removal) section below for instructions on how to do this.
3. Ensure **all of them** have been deleted.
6. **Power off** your old node and disconnect it from the Internet, by removing the Ethernet cable or Wi-Fi module.
7. **Wipe the SSD** from your old node, using one of the following methods:
1. Use a bootable USB drive with a Linux installation (such as the popular [GParted](https://gparted.org/download.php)) and use it to erase the drive.
2. **Physically remove it** from your old node, attach it to another machine using a USB converter, and use a tool such as [GParted](https://installati.one/debian/11/gparted/) to erase the drive.
3. **Physically remove it** from your old node and hit it with a hammer to break it and ensure it will never be used again.
8. **WAIT** for at least 15 minutes before proceeding. Use a block explorer like [https://beaconcha.in](https://beaconcha.in) to look at your validator's attestation record. Wait until at least one attestation has been recorded as missing _and the corresponding epoch has been finalized_.
1. NOTE: if you have multiple minipools, you must ensure _all of them_ have missed at least one attestation that has been finalized.
9. **Recover your node wallet** on the new machine by following the instructions in [Importing / Recovering an Existing Wallet](/node-staking/recovering-rp.md).
10. **Restart your Validator Client** to ensure that your validator keys are loaded (e.g., with `docker restart rocketpool_validator`).
Your validator keys will now be loaded on your new node, and you can begin attesting safely with it.
## Verifying Key Removal
Validator keys are stored on your disk in the form of `json` files.
They are kept inside your node's `data` folder.
By default, you can find them here:
```shell
~/.rocketpool/data/validators/
```
::: warning NOTE
If you changed your `data` directory using the `service config` TUI (e.g., you are using an Aegis key and set that as your `data` folder, the above path should be changed to `/validators`.)
:::
Each client will have its own copy of the keys, since each client expects them in a different format or configuration.
To **find** the keys on disk, run the following command:
```shell
sudo find ~/.rocketpool/data/validators -type f -name "*.json"
```
For example, on a machine with two minipools, the output would look like this:
```shell
/home/joe/.rocketpool/data/validators/teku/keys/0x831862d79685079037dbba67acfa1faf13a5863b94c1c39126e9a52155d32b7733ba65a56ba172e0fcb2b7d77e8a125b.json
/home/joe/.rocketpool/data/validators/teku/keys/0x900189d6bf7b0635ce1d81046c0d882d52ccf05e3f4fb29e7b9db4c9fb72c6587256fd41a785f103e15a253f3d24a610.json
/home/joe/.rocketpool/data/validators/lighthouse/validators/0x831862d79685079037dbba67acfa1faf13a5863b94c1c39126e9a52155d32b7733ba65a56ba172e0fcb2b7d77e8a125b/voting-keystore.json
/home/joe/.rocketpool/data/validators/lighthouse/validators/0x900189d6bf7b0635ce1d81046c0d882d52ccf05e3f4fb29e7b9db4c9fb72c6587256fd41a785f103e15a253f3d24a610/voting-keystore.json
/home/joe/.rocketpool/data/validators/nimbus/validators/0x831862d79685079037dbba67acfa1faf13a5863b94c1c39126e9a52155d32b7733ba65a56ba172e0fcb2b7d77e8a125b/keystore.json
/home/joe/.rocketpool/data/validators/nimbus/validators/0x900189d6bf7b0635ce1d81046c0d882d52ccf05e3f4fb29e7b9db4c9fb72c6587256fd41a785f103e15a253f3d24a610/keystore.json
/home/joe/.rocketpool/data/validators/prysm-non-hd/direct/accounts/all-accounts.keystore.json
/home/joe/.rocketpool/data/validators/prysm-non-hd/direct/keymanageropts.json
/home/joe/.rocketpool/data/validators/lodestar/validators/0x831862d79685079037dbba67acfa1faf13a5863b94c1c39126e9a52155d32b7733ba65a56ba172e0fcb2b7d77e8a125b/voting-keystore.json
/home/joe/.rocketpool/data/validators/lodestar/validators/0x900189d6bf7b0635ce1d81046c0d882d52ccf05e3f4fb29e7b9db4c9fb72c6587256fd41a785f103e15a253f3d24a610/voting-keystore.json
```
This shows an example where the keys have **not** been deleted yet and are still on the filesystem.
If your keys **have** been deleted, you should not see _any_ of the hex strings (the large strings starting with `0x`) in any of the folders for any of the clients within the output of that command.
---
url: /node-staking/maintenance/overview.md
---
> For AI agents: the complete documentation index is available at /llms.txt, the full documentation bundle is available at /llms-full.txt.
# Overview
In this section, you'll learn about how to monitor the health of your node and your validators, track your earnings, and perform periodic maintenance such as updates.
## Prerequisites
Before configuring your Smart Node, please make sure you:
- Have set up a node machine (or virtual machine) and secured it (via the [Securing your Node](/node-staking/securing-your-node.md) guide)
- Have the Smart Node [installed](/node-staking/installing/overview.md) and [configured](/node-staking/config/overview.md) on it
- Have a node wallet loaded on your Smart Node
- Synced your Execution and Consensus clients
- Provisioned your node with [a withdrawal address](/node-staking/prepare-node.md#setting-your-primary-withdrawal-address), set up your [fallback clients](/node-staking/fallback.md) (optional), opted into the [Smoothing Pool](/node-staking/fee-distrib-sp.md#the-smoothing-pool) (optional), and configured [MEV](/node-staking/mev.md)
- Created at least one [minipool](/node-staking/create-validator.md)
## Guides
[Monitoring your Node's Performance](/node-staking/performance.md) provides some tools and tutorials for keeping tabs on your node's health (from a resource perspective, such as CPU and RAM consumption) and your validators' performance on the Beacon Chain.
It covers a lot of fundamental tools you'll use during your tenure as an Ethereum validator.
[Setting up the Grafana Dashboard](/node-staking/grafana.md) walks through setting up the Smart Node stack's metrics tracker and the Grafana dashboard - a one stop shop for monitoring everything about your node and validators, and a staple in each node operator's arsenal.
We _strongly_ recommend exploring the Grafana dashboard and regularly checking in on it.
[Smart Node Stack Alert Notifications](/node-staking/maintenance/alerting.md) walks through using the Smart Node alert notification functionality to receive notifications about the health and important events of your Rocket Pool Smart Node.
[Checking for Updates](/node-staking/updates.md) covers the crucial processes of regularly updating your node with new security patches, how to update the Smart Node after a new release, and how to manually update client versions if your clients of choice release a new version that the Smart Node's latest release doesn't include yet.
You should familiarize yourself with this entire section, as you may need to refer to it whenever an update is released.
[Backing Up Your Node](/node-staking/backups.md) is an optional guide that describes how to back up your node's configuration and its chain data in case of a hardware failure.
[Pruning the Execution Client](/node-staking/pruning.md) is **important** for anyone running an Execution client that gradually consumes all of your SSD's disk space and requires periodic pruning (such as Geth or Nethermind) to reclaim some of that space.
If you are running one of those clients, you should definitely familiarize yourself with the pruning process.
[Changing Execution or Consensus Clients](/node-staking/change-clients.md) is a useful guide; it goes through the process of changing your client choice(s) and what can be expected during the process.
This is another good guide to familiarize yourself with, just in case you ever have to switch clients for any reason down the line.
---
url: /node-staking/masquerade.md
---
> For AI agents: the complete documentation index is available at /llms.txt, the full documentation bundle is available at /llms-full.txt.
# Masquerading as Another Node Address
Starting with Smart Node version `v1.15.7`, users will be able to mock the behaviour of an arbitrary address. While masquerading as another address,
your node will continue the node and watchtower task loop using your node address and perform duties such as attesting using your validator keys. You will not be able
to submit transactions or sign messages as the masqueraded address. This feature is especially useful for support and debugging.
If you wish to interact with the Smart Node through the lens of another node address, please use the following command: `rocketpool wallet masquerade`
```
rp@user:~$ rocketpool wallet masquerade
Masquerading allows you to set your node address to any address you want. All commands will
act as though your node wallet is for that address. Since you don't have the private key for
that address, you can't submit transactions or sign messages though; commands will be read-only
until you end the masquerade with `rocketpool wallet end-masquerade`.
Please enter an address to masquerade as:
0xcaB549EdE082592D10FE6a238e7e8914aD3a074d
Are you sure you want to masquerade as 0xcaB549EdE082592D10FE6a238e7e8914aD3a074d? [y/n]
y
Your node is now masquerading as address 0xcaB549EdE082592D10FE6a238e7e8914aD3a074d.
```
When you are finished with masquerade mode, simply run `rocketpool wallet end-masquerade` and follow the prompts:
```
rp@user:~$ rocketpool wallet end-masquerade
The node wallet is 0xE8325F5f4486c2FF2AC7B522Fbc9eB249d46C936. You will no longer be masquerading as 0xcaB549EdE082592D10FE6a238e7e8914aD3a074d.
Are you sure you want to end masquerade mode? [y/n]
y
Successfully ended masquerade mode.
```
Additionally, you can check the status of your node wallet by running `rocketpool wallet status`:
```
rp@node:~$ rocketpool wallet status
Your Smart Node is currently using the Hoodi Test Network.
The node wallet is initialized, but you are currently masquerading as 0xcaB549EdE082592D10FE6a238e7e8914aD3a074d
Wallet Address: 0xE8325F5f4486c2FF2AC7B522Fbc9eB249d46C936
Due to this mismatch, the node cannot submit transactions. Use the command 'rocketpool wallet end-masquerade' to end masquerading and restore your wallet address.
```
---
url: /node-staking/megapools/create-megapool-validator.md
---
> For AI agents: the complete documentation index is available at /llms.txt, the full documentation bundle is available at /llms-full.txt.
# Creating a Megapool (Validator)
Welcome to Saturn 1! A Rocket Pool megapool is a smart contract instance on the execution layer.
Your node will manage a megapool that serves as an Ethereum withdrawal address for one or many validators.
Each validator is comprised of a portion of your ETH, known as the bond amount, and a portion of ETH from the rETH staking pool,
known as the borrowed amount. Your megapool is responsible for merging the bond amount and borrowed amount ETH to form 32 ETH total, which is
then sent to the Beacon Chain deposit contract to create a new validator.
Your megapool is automatically deployed at the time of your first validator deposit. Afterwards you'll be able to use the same megapool to manage as many validators as you wish! You won't need
to deploy a new megapool every time you create a new validator.
::: warning WARNING
Megapool validators need to clear the Beacon Chain queue twice.
1. Prestake (1 ETH). When ETH is assigned to your megapool validator from the deposit pool, only 1 ETH is sent
to the Beacon Chain. At this point, your validator enters the Beacon Chain queue.
2. Stake (31 ETH). After the validator is processed by the Beacon Chain, the Rocket Pool protocol will verify the
withdrawal credentials for the validator then stake the remaining 31 ETH on the Beacon Chain. At this point, the validator enters the Beacon
Chain queue a second and final time.
Previously with minipools, the [Oracle DAO (oDAO)](/odao/overview.md#the-rocket-pool-oracle-dao) was responsible for verifying the withdrawal credentials for every
minipool validator. This new system extends the queue time but removes a trust requirement enforced by the oDAO.
[validatorqueue.com](https://www.validatorqueue.com/) is a helpful tool for monitoring the length of the Beacon Chain queue. Please consider this factor
when migrating your minipool stake to a megapool.
:::
::: tip NOTE
Validator creation is governed by two queues.
1. The first is the Rocket Pool deposit queue. We'll go more into it in a different section, but essentially this queue is managed by the Rocket Pool protocol & determines when your validator will receive its borrowed ETH.
There needs to be ETH available in the deposit pool to match your 4 ETH with 28 ETH in the deposit pool & create the validator.
2. The second is the Beacon Chain queue, which is managed by the Ethereum Beacon Chain & determines when your validator will become active.
Please be aware that the time it takes for your validator to become active can vary greatly depending on your position in each queue & the current state of the network.
The Rocket Pool deposit queue features an express queue system to help existing node operators migrate their minipool validator ETH
to megapool validator ETH.
:::
::: tip Useful Links
[saturn-1.net/queue](https://saturn-1.net/queue) is a community supported dashboard created by Steely! This page can give you an idea of how long the Rocket Pool deposit queue is.
[validatorqueue.com](https://www.validatorqueue.com/) is a helpful site for checking the length of the Beacon Chain queue. This queue is contingent on the amount of ETH
entering and leaving the Beacon Chain. It's processed at a rate of `256 ETH per epoch`.
[rocketpool.net/node-staking/rpl-fee-switch](https://rocketpool.net/node-staking/rpl-fee-switch) models the impact of Saturn 1's fee switch on your staking rewards.
:::
## Rocket Pool Deposit Queue and Express Queue
There are two types of queues within Rocket Pool's deposit queue: express queue and standard queue.
The deposit queue features an express queue system to help existing node operators migrate their minipool validator ETH
to megapool validator ETH. It also creates more predictable deposit timelines for deposits using the express queue.
The express queue is processed at a 4:1 ratio which means 4 validators from the express queue get matched for every 1 validator matched from
the standard queue. In other words: 4 validators from the express queue are matched, then 1 from the standard queue, then 4 from the express queue and so on.
Existing node operators receive express queue tickets based on their bonded ETH in legacy minipools: one ticket for every 4 ETH bonded.
For example, a node operator with an 8 ETH legacy minipool gets 2 express queue tickets. This is enough tickets to fully migrate to two 4 ETH megapool validators using the express queue.
[RPIP-59: Deposit Mechanics](https://rpips.rocketpool.net/RPIPs/RPIP-59#deposit-queue) goes into the nitty gritty of how deposits are handled.
Your node will be refunded an express queue ticket if you choose to [dequeue your validator from the express queue](/node-staking/megapools/create-megapool-validator.md#exit-a-validator-from-the-rocket-pool-deposit-queue).
## Depositing ETH and Creating a Validator
If this is your node's first megapool validator, your node's megapool will also be automatically deployed at the same time. Please remember that your node's Megapool can
manage one or many validators, so megapool deployment only happens once per node!
Once you're ready to deposit your ETH into a megapool and create a Beacon Chain validator, you can do so using the following command:
```
rocketpool megapool deposit
```
::: danger WARNING
While the CLI does automate a lot of the next steps for you, we **strongly
** recommend monitoring your node & transactions to ensure a successful transition from `prelaunch`
to `staking`
.
Failed transactions (due to adjusted gas settings, insufficient ETH for gas, or the node being offline for 28 days after the initial deposit) could make your megapool validator transition to the `dissolved` state, which you want to avoid.
If a prelaunch validator fails to stake within 365 days, the validator will be dissolved. The 1 ETH (of a 4 ETH bond) sent to the Beacon Chain during the prelaunch process is **not recoverable**.
The node operator receives the remaining 3 ETH from their bond (minus a 0.05 ETH dissolve penalty applied as debt) as a refund in their megapool, for a net refund of 2.95 ETH.
This can be claimed using `rocketpool megapool claim` or `rocketpool claims claim-all`.
[Learn more about how to confirm a successful stake](/node-staking/megapools/create-megapool-validator.md#confirming-a-successful-stake)
:::
The first prompt will ask how many validators you'd like to create. You can create up to 35 in the same deposit, but we'll go with 1 validator
for the rest of our demonstration here. Type `1` then hit `enter` to begin creating 1 validator.
```
Your eth2 client is on the correct network.
How many validators would you like to create? (max: 35)
1
```
The second prompt will display a bit of information on how much ETH your node is currently bonded with, in addition
to the total bond requirement for the number of validators you've selected. The node in our demonstration has no
megapool validators, hence `0.00 ETH bonded`. The current bond requirement is `4 ETH`.
After you've read and understood the information shown, type `y` then hit `enter` to continue to the next prompt.
```
The node is currently bonded with 0.00 ETH.
The total bond requirement is 4.00 ETH.
NOTE: You are about to create 1 new megapool validator(s), requiring a total of: 4.00 ETH.
Would you like to continue? [y/n]
y
```
The next prompt will display the status of the [Rocket Pool deposit queue](/node-staking/megapools/create-megapool-validator.md#rocket-pool-deposit-queue-and-express-queue).
This shows how many validators are waiting ahead of you to be matched with ETH. The express queue is mainly for already existing node operators as new nodes won't have any express
queue tickets. `The express queue rate is 4` means 4 validators from the express queue are matched for every 1 validator in the standard queue.
```
There are 1 validator(s) on the express queue.
There are 12 validator(s) on the standard queue.
The express queue rate is 4 (4 express validators assigned per 1 standard).
A new express validator would be at queue position 3.
A new standard validator would be at queue position 14.
```
::: tip NOTE
If you are a returning node operator and have express queue tickets available for this deposit, you'll be prompted to use them at this point.
Enter `1` then hit `enter` to proceed with using one express queue ticket for this single megapool validator deposit.
```
How many express tickets would you like to use? (max: 7)
1
```
If you'd like to save your express queue ticket(s) and proceed in the standard queue, simply type `0` then hit `enter` to move on to the next prompt.
:::
If you have any [deposit credit](/node-staking/megapools/credit.md) to redeem on a validator, you'll be prompted to do so here. Otherwise, this step will prompt
you with the network's current gas price suggestions.
```
Your credit balance is 0.00 ETH. (Credit in addition to ETH staked on your behalf).
Your consensus client is synced, you may safely create a megapool validator.
+================ Suggested Gas Prices ================+
| Avg Wait Time | Max Fee | Total Gas Cost |
| 15 Seconds | 2.13120 gwei | 0.00160 to 0.00240 ETH |
| 1 Minute | 1.96787 gwei | 0.00148 to 0.00222 ETH |
| 3 Minutes | 1.00871 gwei | 0.00075 to 0.00113 ETH |
| >10 Minutes | 1.00871 gwei | 0.00075 to 0.00113 ETH |
+======================================================+
These prices include a maximum priority fee of 0.010 gwei.
Please enter your max fee (including the priority fee) or leave blank for the default of 1.96787 gwei:
```
After confirming your gas price, we'll make one last and final confirmation to create a megapool validator.
```
Using a max fee of 1.968 gwei and a priority fee of 0.010 gwei.
You are about to deposit 4.000000 ETH to create 1 new megapool validator(s).
ARE YOU SURE YOU WANT TO DO THIS?
[y/n]
y
Creating 1 megapool validator(s) ...
Transaction has been submitted with hash .
You may follow its progress by visiting:
https://hoodi.etherscan.io/tx/
Waiting for the transaction to be included in a block... you may wait here for it, or press CTRL+C to exit and return to the terminal.
The node deposit of 4.000000 ETH total was made successfully!
Validator pubkeys:
1.
The 1 new megapool validators have been created.
Once your validators progress through the queue, ETH will be assigned and a 1 ETH prestake submitted for each.
After the prestake, your node will automatically perform a stake transaction for each validator, to complete the progress.
To check the status of your validators use `rocketpool megapool validators`
To monitor the stake transactions use `rocketpool service logs node`
```
Once the transaction completes, you'll have a confirmation of your deposit
as an etherscan transaction hash along with the expected Beacon Chain pubkey once your megapool validator comes online. Feel free to use the command `rocketpool megapool status` to
check the status of your megapool, or `rocketpool megapool validators` check the status of your specific validator. Your validator will be in the
`initialized` state as it progresses through the Rocket Pool deposit queue. Please keep in mind that your megapool validator pubkey won't be registered on the Beacon Chain until it's been
processed by the Rocket Pool deposit queue and assigned ETH.
At this point, you've made it! Congrats on your megapool validator. You'll definitely want to check out the [Monitoring and Maintenance](/node-staking/maintenance/overview.md) section
of our guides to learn how to keep your node in the best shape possible. Also continue reading the next section on confirming a successful stake to ensure
that your `initialized` validator smoothly progresses to `staking` without incurring any penalties.
## Confirming a Successful Stake
::: danger WARNING
While the CLI does automate a lot of the next steps for you, we **strongly
** recommend monitoring your node & transactions to ensure a successful transition from `prelaunch`
to `staking`
.
Failed transactions (due to adjusted gas settings, insufficient ETH for gas, or the node being offline for 28 days after the initial deposit) could make your megapool validator transition to the `dissolved` state, which you want to avoid.
If a prelaunch validator fails to stake within 365 days, the validator will be dissolved. The 1 ETH (of a 4 ETH bond) sent to the Beacon Chain during the prelaunch process is **not recoverable**.
The node operator receives the remaining 3 ETH from their bond (minus a 0.05 ETH dissolve penalty applied as debt) as a refund in their megapool, for a net refund of 2.95 ETH.
This can be claimed using `rocketpool megapool claim` or `rocketpool claims claim-all`.
:::
Make sure your node stays online during this entire process! It will perform a handful of fully automatic steps to ensure that your validator smoothly advances
between the various stages explained below:
Your new megapool validator will be in the `initialized` state. It will be in this state until it progresses through the Rocket Pool deposit queue
and is assigned 28 ETH from the deposit pool. Use the `rocketpool megapool validators` command to check the status of your validator. It should look something like this:
```
1 Initialized validator(s):
--------------------
Megapool Validator ID: 7
Expected pubkey:
Validator active: no
Validator Queue Position: 14
Express Ticket Used: no
```
Once your validator is assigned ETH from the [Rocket Pool deposit queue](/node-staking/megapools/create-megapool-validator.md#rocket-pool-deposit-queue-and-express-queue), it will be moved into the `Prelaunch` state. At this point, 1 ETH from your megapool balance will be deposited
in the Beacon Chain. Your validator's pubkey will also be registered on the Beacon Chain, which means you can view the status of your `Prelaunch` validator on an explorer such as [https://beaconcha.in/](https://beaconcha.in/) (or [https://hoodi.beaconcha.in/](https://hoodi.beaconcha.in/) if you are using testnet).
You can observe your validator by searching the pubkey on [https://beaconcha.in/](https://beaconcha.in/) or visiting this link with the format: `https://beaconcha.in/validator/`
```
1 Prelaunch validator(s):
--------------------
Megapool Validator ID: 7
Validator pubkey:
Validator active: no
Express Ticket Used: no
```
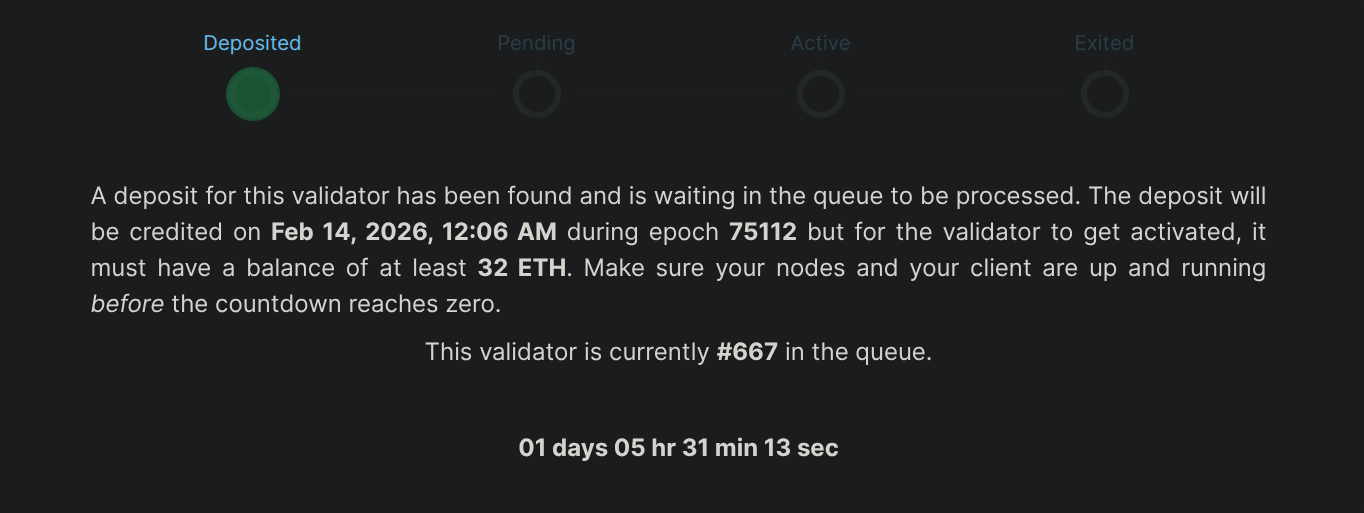
After your `Prelaunch` validator is processed by the Beacon Chain and the initial 1 ETH deposit is credited. Your node will automatically perform a `stake` transaction to complete the full 32 ETH
Beacon Chain deposit. The `stake` transaction will progress your `Prelaunch` validator into a `Staking` validator. At this point your `Staking` validator has:
- 32 ETH deposited into the Beacon Chain
- Assigned a validator index number
- Pending activation on the Beacon Chain
```
1 Staking validator(s):
Megapool Validator ID: 1
Validator pubkey:
Validator active: no
Validator index:
Beacon status: pending_queued
Express Ticket Used: no
```
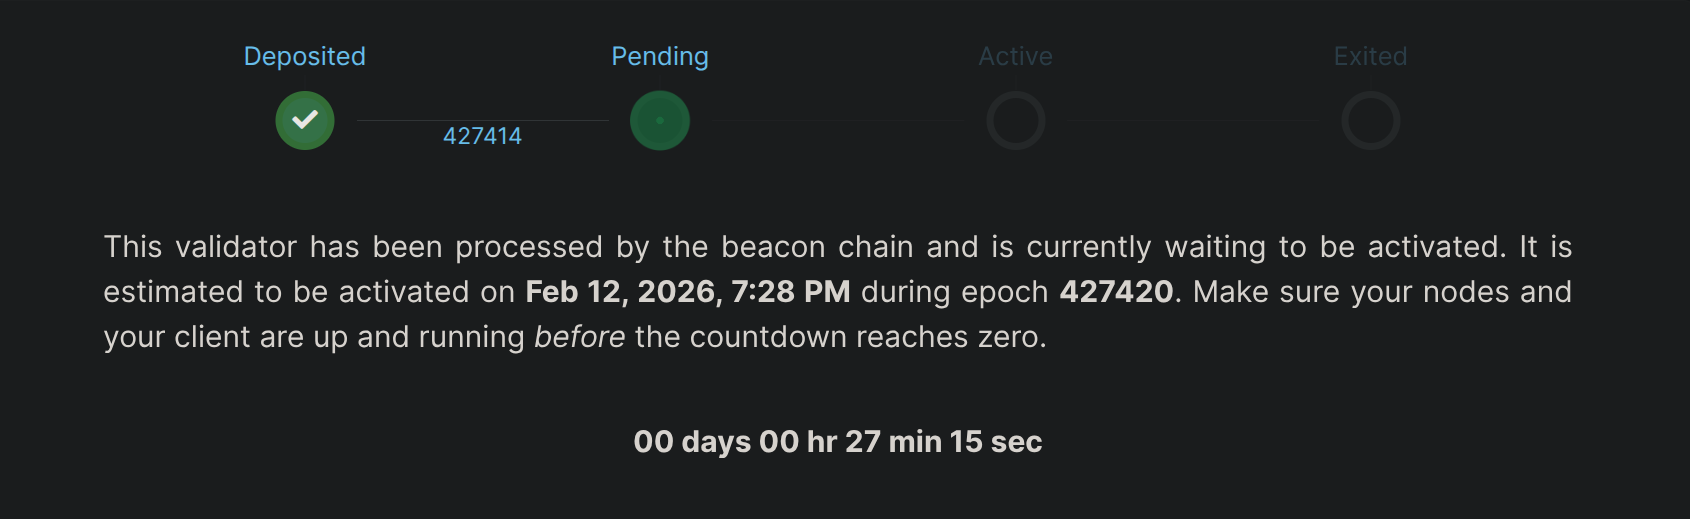
The current status of the Beacon Chain validator queue can be found here: [https://www.validatorqueue.com/](https://www.validatorqueue.com/). Once your `Staking` validator is activated on the Beacon Chain, you'll
see `Beacon status: active_ongoing` in the `rocketpool megapool validators` menu to confirm that it's been activated and ready to make attestations.
```
1 Staking validator(s):
--------------------
Megapool Validator ID: 0
Validator pubkey:
Validator active: yes
Validator index:
Beacon status: active_ongoing
Express Ticket Used: no
```
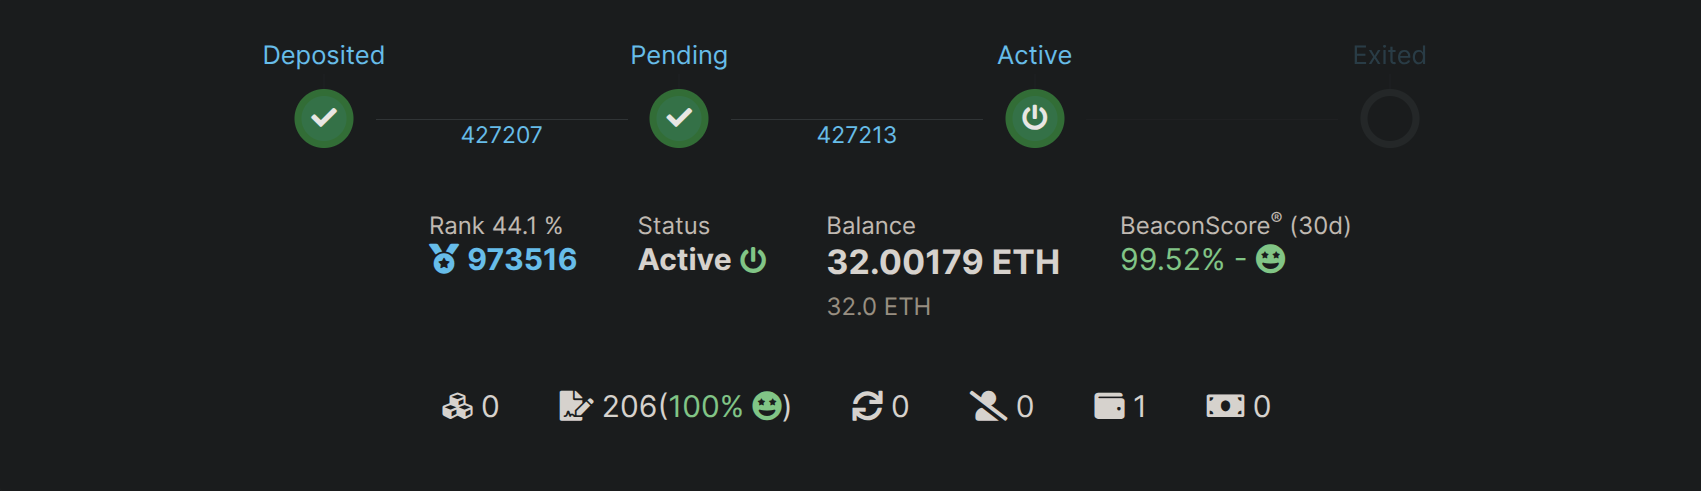
At this stage you are all set! Congrats! You have officially created a megapool validator with Rocket Pool! Have a look at the [Monitoring and Maintenance](/node-staking/maintenance/overview.md) guides
to learn how to monitor your node and keep it in tip top condition.
## Exit a validator from the Rocket Pool Deposit Queue
If you've had a validator waiting in queue (express OR standard) and wish to exit the queue, you may do so! Your 4 ETH deposit will be refunded
as credit redeemable for an equivalent amount in rETH. The steps are fairly simple:
First, check `rocketpool megapool validators` to determine which validator to dequeue. You want to make sure
that the validator you are dequeueing is in the `Initialized` state. Take note of its pubkey. After your validator has been assigned ETH, you won't be able to dequeue it.
```
1 Initialized validator(s):
--------------------
Megapool Validator ID: 6
Expected pubkey:
Validator active: no
Validator Queue Position: 14
Express Ticket Used: no
```
Use the following command to exit a validator from the queue, then proceed with the selection:
```
staker@node:~$ rocketpool megapool exit-queue
Please select a validator to exit the queue:
1: Pubkey:
```
Once you've made your selection and confirm that your validator has exited the Rocket Pool deposit queue, you can use the following command to redeem the credit as rETH:
```
staker@node:~$ rocketpool node withdraw-credit
You have 4.000000 ETH of credit that you can withdraw, receiving the equivalent amount in rETH. Would you like to withdraw the maximum amount of credit? [y/n]
```
And there you have it! If you would like to deposit another validator, this credit is also redeemable as a validator deposit in addition to being redeemable as rETH.
If you happen to have used an express queue ticket on your exited (dequeued) validator, your node will be refunded that express queue ticket.
## Creating Multiple Megapool Validators
Your node's megapool can manage as many validators as you'd like. If you'd like to create an additional validator (or create multiple validators in the same transaction to save on transaction fees),
you can do so using the `rocketpool megapool deposit` command. Given the current block gas limit, the maximum amount of validators you can create in one transaction is 35.
## Next Steps
Now that you have a megapool validator up and running, the next steps will walk you through how to monitor the health of your node, check for and apply updates, and maintain it throughout its life.
Please read through the [Monitoring and Maintenance](/node-staking/maintenance/overview.md) section next to learn more about these topics.
---
url: /node-staking/megapools/credit.md
---
> For AI agents: the complete documentation index is available at /llms.txt, the full documentation bundle is available at /llms-full.txt.
# The Deposit Credit System
The deposit credit system is a mechanism to track ETH that was previously bonded by node operators but is no longer required and make it available for use again.
The source of this credit comes from a few places:
- [Exiting a validator from the Rocket Pool deposit queue](/node-staking/megapools/create-megapool-validator.md#exit-a-validator-from-the-rocket-pool-deposit-queue). Dequeueing a validator will credit the node operator with the bonded amount (4 ETH)
- **Reducing your bond amount**. If your current bond exceeds the protocol's minimum requirement, you can reduce your excess bond and receive it as deposit credit. Note that the first two validators always require 4 ETH bonds each
(regardless of pDAO settings). Bond reduction primarily benefits node operators with 3+ validators when the pDAO lowers the `reduced_bond` parameter. Use `rocketpool megapool reduce-bond` to do perform a bond reduction.
The next two are only for node operators who made migrations pre-saturn. They are no longer possible:
- [Migrating an existing 16-ETH bonded minipool down to an 8-ETH bonded minipool](/node-staking/leb-migration.md) (which adds 8 ETH to the node operator's credit balance)
- [Migrating an existing solo validator](/node-staking/solo-staker-migration.md) into a minipool (which adds either 16 or 24 ETH to the node operator's credit balance, depending on which type of minipool they create during migration)
Every node operator begins with a credit balance of **0 ETH**.
This ETH is not made liquid and returned to the node operator; instead, it can be redeemed for an equivalent amount of rETH. Additionally, credit can be used to
**create additional megapool validators** without requiring any ETH from the node operator.
The credit system is **transparent** to the node operator; it will automatically be used (with notifications in the Smart Node CLI explaining that it will be used) during `rocketpool megapool deposit` operations if possible.
If it _cannot_ be used, the Smart Node will alert the user that it cannot be used and will require a normal ETH bond during either operation.
See the [Credit Availability](#credit-availability) section below for more details.
## Viewing your Current Credit Balance
To view your current credit balance, simply run the following command:
```shell
rocketpool node status
```
This produces a comprehensive list of details about your node, including its credit balance right at the top:
```
Your Smart Node is currently using the Hoodi Test Network.
=== Account and Balances ===
The node has a balance of 49.402553 ETH and 0.000000 RPL.
The node has 4.000000 ETH in its credit balance and 0.000000 ETH staked on its behalf. 2.909175 can be used to make new validators.
```
## Redeeming credit for rETH
To redeem credit for rETH, use the command `rocketpool node withdraw-credit`. The equivalent amount in rETH will be sent to your withdrawal (your node address if a withdrawal address is not set):
```
staker@node:~$ rocketpool node withdraw-credit
You have 4.000000 ETH of credit that you can withdraw, receiving the equivalent amount in rETH.
Would you like to withdraw the maximum amount of credit? [y/n]
```
## Credit Availability
The ETH for your credit balance is taken from the **deposit pool**.
In some situations, your node might have a credit balance available but the deposit pool won't have the ETH balance to fully bond your next megapool validator deposit.
If you want to use 4 ETH in credit to create a new 4 ETH megapool validator, it will require 4 ETH from the deposit pool and require none from you.
Because of this, if the deposit pool does not have enough ETH in it to cover the bond value (currently set to 4 ETH), your deposit will require ETH from your node wallet to create a validator.
The smartnode will be able to create a validator using ETH from the deposit pool alongside a portion of your credit. The smartnode will notify you during
the `rocketpool megapool deposit` operation if you have credit and must use ETH from your node wallet to create a validator.
In the following example the node operator has `4 ETH` in credit but the deposit pool only has `3.431627 ETH`, requiring `0.568373 ETH` from the node wallet to complete the deposit:
```
Your credit balance is 4.00 ETH. (Credit in addition to ETH staked on your behalf).
This deposit will use 3.431627 ETH from your credit balance plus ETH staked on your behalf and 0.568373 ETH from your node wallet.
```
---
url: /node-staking/megapools/exit-megapool-validator.md
---
> For AI agents: the complete documentation index is available at /llms.txt, the full documentation bundle is available at /llms-full.txt.
# Exiting a Megapool Validator
If you no longer want to run a megapool validator and want to access the full balance locked on the Beacon Chain, you will have to follow
a couple of steps. This page serves to walk you through the process of exiting a megapool validator.
1. Send a voluntary exit request to the Beacon Chain (manual)
2. Notify validator exit (automated by the smart node)
3. Notify final balance (automated by the smart node)
## Sending an Exit Request to the Beacon Chain
To send an exit request to the Beacon Chain, use the `rocketpool megapool exit-validator` command in the smart node. You will be presented with a list of validators that can be exited.
```
staker@node:~$ rocketpool megapool exit-validator
Please select a validator to EXIT:
1: ID: 1 - Index: 1269834 Pubkey: 0x9455594c2f02674922eb6dee40d096f3203dd1762aa7f1a988ab6c277a62418ec3abfb460b57f33f13a5922e9551d5cc
2: ID: 2 - Index: 1269835 Pubkey: 0xa188774e1adf42db768230541403347a8d2ebcd8386b7f5662bcf1004e17d8d53303889a7e527448cf29bff9bde34bb9
3: ID: 3 - Index: 1269851 Pubkey: 0xa3e211e95a542ffaf8467ba211a3d893b58c59204dab8c32df29f0cfda3f9ce485a3bc13a50e4c205f912613521ed203
4: ID: 7 - Index: 1274411 Pubkey: 0xb5369a5f8550daa07476378dc4864f08b74d4950e28c74844527b59b1e9dea9fd376ea3bd171ee8fba7de866cd4ea37e
5: ID: 8 - Index: 1275239 Pubkey: 0xa56660fa14f0cb7a7030ea0c68a075c7fd700d98ee3afb498030f2bafbadfbf29703bf8fe8ccc9e1f2332b96dcb51ee2
```
Once you've selected a validator, the smart node will follow up with an additional prompt. Confirm that you've selected the validator you intend on exiting, then
type `y`, then press `enter` to send a voluntary exit request to the Beacon Chain. This action does not require any gas. It sends a signed message from your node to the beacon chain to voluntarily
exit the validator.
```
NOTE:
You are about to exit a validator. This will tell each validator to stop all activities on the Beacon Chain.
Please continue to run your validators until each one you've exited has been processed by the exit queue.
You can watch their progress on the https://beaconcha.in explorer.
Your funds will be locked on the Beacon Chain until they've been withdrawn, which will happen automatically (this may take a few days).
Once your funds have been withdrawn, you can run `rocketpool megapool notify-validator-exit` to distribute them to your withdrawal address.
Are you sure you want to EXIT validator id 1? [y/n]
y
Successfully requested to exit validator id 1.
```
Your node sends a voluntary exit request to the Beacon Chain. At this point, your validator should be in the `active_exiting` Beacon Chain state. You can confirm this by running the
`rocketpool megapool validators` command and checking for the validator you just requested an exit for:
```
Megapool Validator ID: 1
Validator pubkey: 0x9455594c2f02674922eb6dee40d096f3203dd1762aa7f1a988ab6c277a62418ec3abfb460b57f33f13a5922e9551d5cc
Validator active: yes
Validator index: 1269834
Beacon status: active_exiting
Express Ticket Used: no
```
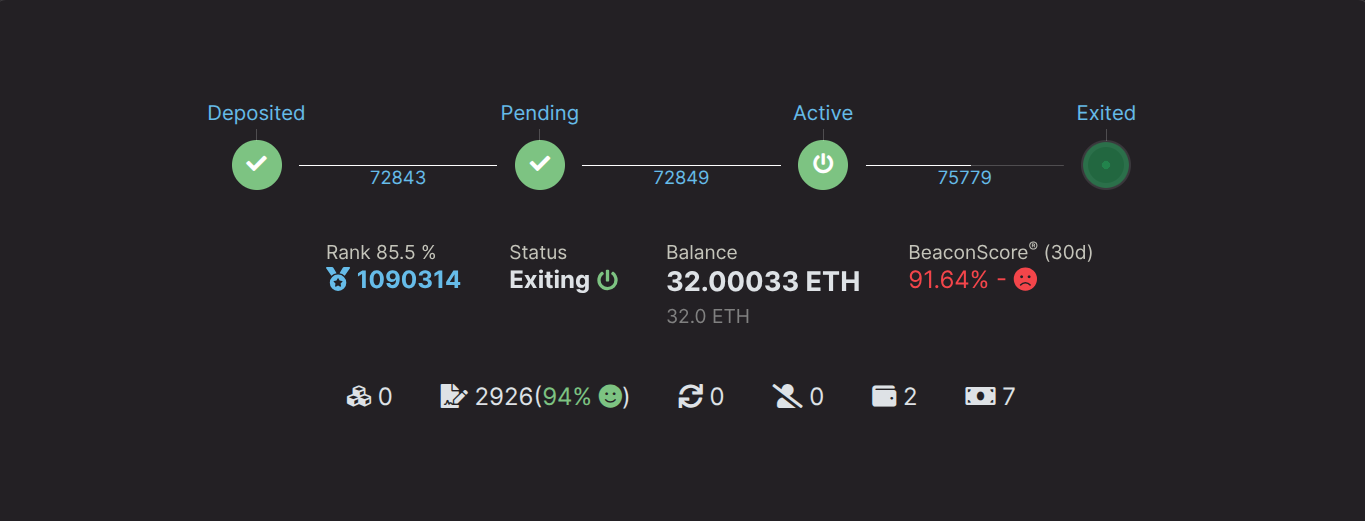
::: tip NOTE
Your validator will continue making attestations until it is processed by the Beacon Chain exit queue, so please keep your node online during this process! It might take a few days or longer.
This website is pretty handy for checking the current queue time: [https://www.validatorqueue.com/](https://www.validatorqueue.com/)
:::
## Notify Validator Exit
In the previous stage `active_exiting`, your node was making attestations while it was subject to the Beacon Chain exit queue. The time varies depending on
how much ETH is waiting to exit.
After your validator makes it to the end of this queue, it transitions into the `exited_unslashed` state. As soon as your exit request is processed, your smart node will automatically call `notify validator exit`, signalling
to the Rocket Pool protocol that your validator is in the `active_exiting` state and is nearly withdrawable.
::: warning WARNING
This step is fully automated by the Smart Node within the `rocketpool_node` task loop, so it's very important to keep your node online during the process.
The exit must be notified at least 112 epochs (about 12 hours) before your validator becomes withdrawable. If it is notified later, a `0.05 ETH` fine is added to your node's debt,
which is deducted from your share of the final balance. Please monitor the status of your node throughout the entire validator exit process.
:::
```
Megapool Validator ID: 1
Validator pubkey: 0x9455594c2f02674922eb6dee40d096f3203dd1762aa7f1a988ab6c277a62418ec3abfb460b57f33f13a5922e9551d5cc
Validator active: no
Validator index: 1269834
Beacon status: exited_unslashed
Express Ticket Used: no
```
The status on beaconcha.in should look like:
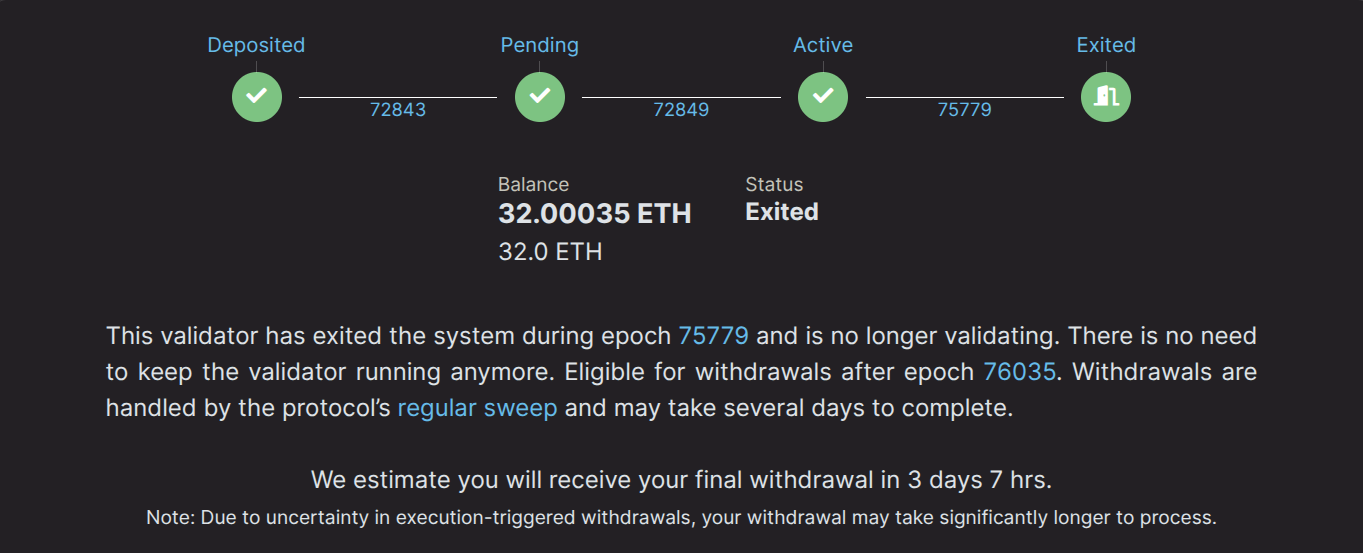
After 256 epochs on the Beacon Chain, the full 32 ETH along with other accumulated rewards will be sent to your node's megapool.
## Notify Final Balance
At this point, your validator is fully exited from the Beacon Chain and the final withdrawal is sent from the Beacon Chain to your megapool. Your smart node will automatically call `notify final balance`.
This call fully ends your megapool validator's duties and also distributes your portion of the balance to your node's ETH withdrawal address. If you've kept your node online and automatic duties such as `notify
validator exit` and `notify final balance` were performed, no further steps are required on your end.
## Notifying Manually
Most node operators can skip this section.
Your node checks for both notifications every few minutes and sends them on its own. If it was offline during the exit, it catches up as soon as it is back online and synced.
You only need to send them yourself if your node won't: when automatic transactions are disabled (the **Automatic TX Gas Threshold** in the **Smart Node and TX Fees** settings is `0`), or when the gas price stays above your threshold. In that case, run these in order:
```shell
rocketpool megapool notify-validator-exit
rocketpool megapool notify-final-balance
```
Each command lists the validators that are ready to be notified.
`notify-validator-exit` works as soon as the Beacon Chain has processed your exit request; send it at least 112 epochs (about 12 hours) before the validator becomes withdrawable to avoid the fine.
`notify-final-balance` works once the exit has been notified and the Beacon Chain has sent the validator's final withdrawal to your megapool.
Don't leave them unsent. Your megapool can't distribute rewards between the two notifications, and if the exit isn't notified in time, the Oracle DAO can pause your megapool's reward distribution until it is.
If you don't notify the final balance yourself, anyone else can do it for you once 7 days have passed since the final withdrawal (longer if the validator lost ETH). Your share then stays in your megapool instead of going to your withdrawal address, and you can claim it with `rocketpool megapool claim`.
---
url: /node-staking/megapools/migration.md
---
> For AI agents: the complete documentation index is available at /llms.txt, the full documentation bundle is available at /llms-full.txt.
# Migrating from Minipools to Megapool Validators
If you're a returning node operator looking to migrate their minipool stake to a megapool, this page will offer a step-by-step guide on
how to do so. Migration involves exiting your minipool, creating new megapool validators, unstaking legacy RPL, then restaking the RPL
on your megapool. The megapool validator bond is 4 ETH, which means you'll be able to create two megapool validators for every 8 ETH minipool validator you have.
9% of protocol ETH revenue is distributed proportionally to RPL stakers with megapool validators in the form of [voter share rewards](/node-staking/megapools/staking-and-claiming-rewards.md#how-voter-share-is-distributed-to-megapool-rpl-stakers).
This is in addition to the previously standard RPL inflation rewards.
There are a handful of separate steps:
1. Exiting your minipool. That means finializing your minipool and withdrawing its full balance from the Beacon Chain.
2. Creating a new megapool validator
3. \[Optional] Unstaking and withdrawing your legacy RPL
4. \[Optional] Restake the RPL on a megapool. Doing so will earn [voter share rewards](/node-staking/megapools/staking-and-claiming-rewards.md#how-voter-share-is-distributed-to-megapool-rpl-stakers) from ETH revenue in addition to RPL inflation rewards.
Before you commit to migrating your minipool stake to a megapool, you'll want to consider the status of the Rocket Pool deposit queue
and the Beacon Chain queue. Both of which are variable in wait time and independent of each other. The Rocket Pool deposit queue governs
the creation of new megapool validators and when they get matched with ETH from rETH stakers. Meanwhile, the Beacon Chain queue determines
how soon your minipool validator can exit. More importantly it also determines when your new megapool validator can begin participating in attestation duties.
::: tip Useful Links
[saturn-1.net/queue](https://saturn-1.net/queue) is a community supported dashboard created by Steely! This page can give you an idea of how long the Rocket Pool deposit queue is.
[validatorqueue.com](https://www.validatorqueue.com/) is a helpful site for checking the length of the Beacon Chain queue. This queue is contingent on the amount of ETH
entering and leaving the Beacon Chain. It's processed at a rate of `256 ETH per epoch`.
[rocketpool.net/node-staking/rpl-fee-switch](https://rocketpool.net/node-staking/rpl-fee-switch) models the impact of Saturn 1's fee switch on your staking rewards.
:::
::: warning WARNING
There are two things to consider with respect to earning rewards:
A. Your node won't earn RPL inflation rewards unless you have at least one active minipool or megapool validator.
B. Once your minipool has fully exited from the Beacon Chain, you won't be earning ETH rewards (commission or voter share) until your megapool validator is actively validating.
It needs to be processed by the Rocket Pool deposit queue _and_ the Beacon Chain deposit queue before it can begin its attestation duties.
You'll want to monitor the length of the queue to decide when to migrate.
:::
::: warning WARNING
Megapool validators need to clear the Beacon Chain queue twice.
1. Prestake (1 ETH). When ETH is assigned to your megapool validator from the deposit pool, only 1 ETH is sent
to the Beacon Chain. At this point, your validator enters the Beacon Chain queue.
2. Stake (31 ETH). After the validator is processed by the Beacon Chain, the Rocket Pool protocol will verify the
withdrawal credentials for the validator then stake the remaining 31 ETH on the Beacon Chain. At this point, the validator enters the Beacon
Chain queue a second and final time.
Previously with minipools, the [Oracle DAO (oDAO)](/odao/overview.md#the-rocket-pool-oracle-dao) was responsible for verifying the withdrawal credentials for every
minipool validator. This new system extends the queue time but removes a trust requirement enforced by the oDAO.
[validatorqueue.com](https://www.validatorqueue.com/) is a helpful tool for monitoring the length of the Beacon Chain queue. Please consider this factor
when migrating your minipool stake to a megapool.
:::
## Step 1: Exiting your Minipool
Exiting your minipool is the first step for migrating stake to a megapool. Follow the link below for a handy guide on how
to exit your minipool and withdraw funds from the Beacon Chain:
[https://docs.rocketpool.net/node-staking/withdraw](https://docs.rocketpool.net/node-staking/withdraw)
This process typically takes a few days depending on the Beacon Chain exit queue. Feel free to bookmark this page and revisit when it's complete.
Don't forget to finalize your minipool by [distributing full rewards](/node-staking/withdraw.md#distributing-full-rewards).
This will claim any rewards earned on the minipool and allow you to unstake your full balance of legacy RPL.
## Step 2: Creating a Megapool Validator
Once your minipool is closed and the ETH funds are fully accessible, you're ready to create a megapool validator!
The following page will walk you through all the steps for creating a new megapool validator:
[https://docs.rocketpool.net/node-staking/megapools/create-megapool-validator](https://docs.rocketpool.net/node-staking/megapools/create-megapool-validator)
As a returning node operator, you'll receive one express queue ticket per 4 ETH bonded in minipools. That's 2 tickets per 8 ETH minipool.
These tickets are available to you automatically.
The Rocket Pool deposit queue processes deposits at a rate of 4 express queue validators for each standard queue validator.
Please read [Rocket Pool Deposit Queue and Express Queue](/node-staking/megapools/create-megapool-validator.md#rocket-pool-deposit-queue-and-express-queue)
to learn more about how ETH is assigned to new megapool validators.
## Step 3: Unstaking and Withdrawing Legacy RPL
The minimum legacy RPL stake requirement is 15% of minipool borrowed ETH. If you wish to unstake your full balance of legacy RPL, you need to
close all of your minipools first (bringing borrowed ETH to 0).
When you're ready, you can use the following command to unstake and withdraw Legacy RPL:
```
rocketpool node withdraw-rpl
```
There is a 28-day unstaking period before you can withdraw your Legacy RPL.
Please follow this link for detailed instructions on how to unstake and withdraw legacy RPL.
[https://docs.rocketpool.net/node-staking/megapools/staking-and-claiming-rewards#unstaking-and-withdrawing-rpl](https://docs.rocketpool.net/node-staking/megapools/staking-and-claiming-rewards#unstaking-and-withdrawing-rpl)
## Step 4: Staking RPL on your megapool
Click on the following link for instructions on how to stake your RPL on a megapool:
[https://docs.rocketpool.net/node-staking/megapools/staking-and-claiming-rewards#staking](https://docs.rocketpool.net/node-staking/megapools/staking-and-claiming-rewards#staking)
This step is totally optional as RPL staking is not required to create a megapool validator. You won't want to miss out on this step if
you want to earn voter share rewards, RPL inflation
rewards (same as previous RPL inflation rewards), and have voting power in [Protocol Dao (pDAO) governance](/pdao/overview.md).
- The voter share (9% of protocol revenue) is distributed proportionally among all node operators based on their share of total megapool RPL staked.
For more detailed information on how voter share is distributed to RPL stakers with megapool validators, read this guide:
[How Voter Share is Distributed to Megapool RPL stakers](/node-staking/megapools/staking-and-claiming-rewards.md#how-voter-share-is-distributed-to-megapool-rpl-stakers)
And there you have it! As always, don't forget to brush up on the [Monitoring and Maintenance](/node-staking/maintenance/overview.md) guide if needed. This section covers
all the related topics to keeping your node in tip top shape, including software updates and how to monitor the health of your node.
---
url: /node-staking/megapools/overview.md
---
> For AI agents: the complete documentation index is available at /llms.txt, the full documentation bundle is available at /llms-full.txt.
# Overview
This section covers Rocket Pool megapools and creating megapool validators.
This is where you'll learn how to start validating the Ethereum network and earn rewards for it.
## Prerequisites
Before running Megapool Validators, please make sure you:
- Have set up a node machine (or virtual machine) and secured it (via the [Securing your Node](/node-staking/securing-your-node.md) guide)
- Have the Smart Node [installed](/node-staking/installing/overview.md) and [configured](/node-staking/config/overview.md) on it
- Have a node wallet loaded on your Smart Node
- Synced your Execution and Consensus clients
- Provisioned your node with [a withdrawal address](/node-staking/prepare-node.md#setting-your-primary-withdrawal-address), set up your [fallback clients](/node-staking/fallback.md) (optional), opted into the [Smoothing Pool](/node-staking/fee-distrib-sp.md#the-smoothing-pool) (optional), and configured [MEV](/node-staking/mev.md)
## Guides
[Creating a Megapool (Validator)](/node-staking/megapools/create-megapool-validator.md) explains the process of creating a new Rocket Pool megapool and corresponding validator on the Beacon Chain.
Whether you're making your very first megapool validator or already have some and would like to make another one, this guide will walk you through it step-by-step.
[Migrating from Minipools to Megapool Validators](/node-staking/megapools/migration.md) provides a step-by-step guide for returning node operators looking to migrate their minipool stake to megapools.
This guide covers exiting minipools, creating new megapool validators, unstaking legacy RPL, and restaking RPL to earn voter share and RPL inflation rewards.
[Stake ETH on behalf of node](/upgrades/houston/stake-eth-on-behalf.md#stake-eth-on-behalf-of-node) explains how you can use any independent address (a hardware wallet for example) to stake ETH on behalf of a node. Pretty useful if you want to create validator deposits
without your node having direct access to ETH.
[RPL Staking and Claiming Rewards](/node-staking/megapools/staking-and-claiming-rewards.md) covers how to stake RPL to your megapool, claim your ETH and RPL rewards, and understand Saturn 1's new revenue distribution system.
Whether you're migrating legacy RPL stake or starting fresh, this guide walks you through staking, unstaking, and earning your share of protocol revenue.
[The Deposit Credit System](/node-staking/megapools/credit.md) goes over all the different ways it's possible to accrue ETH credit and how it can be redeemed for rETH or used to create new validators.
[Exiting a Megapool Validator](/node-staking/megapools/exit-megapool-validator.md) walks you through the process of exiting a megapool validator using the Smart Node.
Once you're ready to wind down your megapool validator and access your funds from the Beacon Chain, this guide will show you how to so.
---
url: /node-staking/megapools/staking-and-claiming-rewards.md
---
> For AI agents: the complete documentation index is available at /llms.txt, the full documentation bundle is available at /llms-full.txt.
# RPL Staking and Claiming Rewards
In Saturn 1, RPL has fundamentally transformed into an ETH-accruing revenue share token. This guide covers how to stake RPL to your megapool,
migrate existing RPL stake from legacy minipools, claim your rewards, and withdraw your RPL when needed. This guide also goes over the mechanics of how
ETH protocol revenue is distributed to megapool RPL stakers via voter share rewards.
## What's Changed in Saturn 1
Moving forward, legacy RPL previously staked on minipools continue earning inflation rewards and contribute to voting power just like before.
In Saturn 1, staking RPL on your megapool provides several benefits:
1. **ETH Revenue Share**: Megapool staked RPL earns you a proportional share of protocol ETH revenue through the voter share mechanism
2. **RPL Inflation Rewards**: Continue to earn RPL inflation rewards (28-day reward periods)
3. **Voting Power**: Staked RPL grants voting power in Rocket Pool's [Protocol Dao (pDAO) governance](/pdao/overview.md)
Staking RPL on your megapool unlocks ETH rewards generated by protocol revenue. The voter share (9% of protocol revenue) is distributed proportionally among all
node operators based on their share of total megapool RPL staked.
## Universal Adjustable Revenue Split (UARS)
Saturn 1 introduces UARS, which distributes protocol ETH revenue from node operator commissions among four groups:
| Group | Default Share | Adjustable via pDAO |
| ------------------------------------------- | --------------- | ------------------- |
| **Base Commission** Share to node operators | 5% | Yes |
| **Voter Share** to megapool RPL stakers | 9% | Yes |
| **pDAO Treasury** | 0% | Yes |
| **rETH Holders** | 86% (remainder) | Automatic |
These parameters are adjustable via [pDAO governance](/pdao/overview.md), allowing the Rocket Pool protocol to adapt and be competitive as market conditions shift. By staking RPL
and running validators, you are eligible to participate in this process!
## How Voter Share is Distributed to Megapool RPL stakers
The voter share (9% of protocol revenue) is distributed proportionally among all node operators based on their share of total megapool RPL staked. Every 28 days, the oracle
DAO will take a snapshot of the total ETH accumulated in the voter share pool as well as a record of each node operator's share based on their balance of megapool staked RPL.
At the end of each 28 day reward period, you'll be able to claim your rewards using the smart node. Alternatively you can accumulate rewards over the span of many periods then
claim all at once.
Check out the [Viewing your ETH and RPL rewards](/node-staking/megapools/staking-and-claiming-rewards.md#viewing-your-nodes-eth-and-rpl-rewards) guide to learn about the different types
of rewards you can earn, and how to check the status of your rewards.
Once you're familiar with that, give [Claiming Rewards](/node-staking/megapools/staking-and-claiming-rewards.md#claiming-your-nodes-eth-and-rpl-rewards) a read to learn how to claim your rewards.
## Vote Power
For your RPL to be vote-eligible, it must meet these requirements:
- Staked to your node operator account (both legacy and megapool-attributed RPL are eligible)
- Capped at 150% of your total bonded ETH (across all minipools and megapools)
- Your node must have active validators (minipools or megapools) to contribute bonded ETH
These requirements together serve to ensure fairness by making it harder for large stakers to gain disproportionate influence over the voting process.
The 150% of total bonded ETH maximum vote-eligible RPL is calculated using your bonded ETH across all minipools and megapools as follows:
```
vote-eligible RPL = min(1.5*RPL value of megapool bonded_eth, megapool staked rpl)
```
You should be able to view your node's bonded ETH ratio in the `rocketpool node status` menu:
```
=== RPL Stake ===
NOTE: The following figures take *any pending bond reductions* into account.
The node has a total stake of 5400.964614 RPL.
This is currently 4.79% of its borrowed ETH and 14.38% of its bonded ETH.
The node has 4383.275814 megapool staked RPL.
The node has 1017.688800 legacy staked RPL.
The node has a total stake (legacy minipool RPL plus megapool RPL) of 5400.964614 RPL.
You have 4383.275814 RPL staked on your megapool and can request to unstake up to 4383.275814 RPL
```
::: tip IMPORTANT
The voting system treats all staked RPL equally when calculating your voting power.
However, vote-eligible RPL must be staked on a megapool to earn voter share ETH rewards. The voter share (9% of protocol ETH revenue) is only distributed to megapool stakers.
In other words, all vote-eligible RPL grants voting power while vote-eligible megapool RPL earns voter share rewards.
So in the example above the node's `total stake of 5400.964614 RPL` is vote-eligible as it falls within the 150% bonded ETH max. The node's `4383.275814 megapool staked RPL`
earns voter share rewards while the node's `1017.688800 legacy staked RPL` does not.
:::
## Migrating RPL from Legacy Minipools to Megapools
If you're an existing node operator with RPL staked to legacy minipools, you might consider migrating your legacy RPL stake to your megapool.
Legacy RPL staked on minipools do not earn voter share rewards. However, your legacy RPL stake will continue earning RPL inflation rewards and contribute to your
node's voting power in [pDAO governance](/pdao/overview.md).
To migrate your legacy RPL, you will first [Unstake and withdraw](/node-staking/megapools/staking-and-claiming-rewards.md#unstaking-and-withdrawing-rpl) your legacy RPL, then [stake](/node-staking/megapools/staking-and-claiming-rewards.md#staking) it again using the `rocketpool node stake-rpl` command. We'll go into how
to do so in the next section.
## Unstaking and Withdrawing RPL
Saturn 1 introduces a two-step withdrawal system for unstaking RPL. It's intended to reduce market volatility, especially in the case of a bank run. The two-step withdrawal
system also prevents the scenario of a node operator gaming the rewards system by having their RPL earn rewards in Defi then staking it in time for a rewards period.
1. The first step is to make a request to unstake RPL. You'll decide how much legacy RPL or megapool RPL you wish to unstake.
2. After a 28 day `unstaking period`, the `unstaking` RPL will be `unstaked`. At this point you may withdraw your `unstaked` RPL.
There's no limit on how much megapool staked RPL you can unstake, which means you can unstake and withdraw all of it any time.
Node operators with legacy RPL may withdraw down to 15% borrowed ETH collateral. This 15% minimum only considers borrowed ETH from legacy minipools, not megapools. The next few sections
will go over the two steps for unstaking and withdrawing RPL.
::: tip Note for Legacy RPL Stakers
If you want to lower your percentage of borrowed ETH collateral to withdraw more of your RPL, you might want to consider
[exiting your minipool(s)](/node-staking/withdraw.md#shut-down-a-minipool) to lower your borrowed ETH collateral amount.
:::
### Step 1: Request to Unstake RPL
::: warning WARNING
During the 28 day unstaking period:
- The RPL you've requested to unstake does not continue earning rewards.
- You can't cancel the unstaking process, but you may withdraw after the 28 day period then restake it.
- You may initiate a new withdrawal during the 28 day period, but all your unstaking RPL will refresh to 28 days in unstaking. It's recommended
to complete your initial withdrawal before making another one. Otherwise you'll need to wait the full length of the unstaking period again.
:::
To begin the process, use the `rocketpool node withdraw-rpl` command. You'll see the following prompt:
```
The RPL withdrawal process has changed in Saturn. It is now a 2-step process:
1. Request to unstake a certain RPL amount;
2. Wait for the unstaking period to end (currently 28 days), and then withdraw the RPL.
Your node has 1017.688800 RPL on its legacy stake (previously associated to minipools) and 4383.275814 RPL staked on its megapool.
Your node currently has 0.000000 RPL locked on pDAO proposals.
Your node's RPL withdrawal address is 0x89e860C8Feb86D9f54Ad4D7D6bcBe019EB1D6C24.
You have 0.000000 RPL unstaked and ready to be withdrawn to your RPL withdrawal address.
Please select one of the three options below.
1: withdraw unstaked RPL
2: request to unstake RPL
3: request to unstake legacy RPL
```
- If you're unstaking megapool RPL, select the second option `request to unstake RPL` by typing `2`, then pressing `enter` on your keyboard.
- If you're in the process of migrating legacy RPL, select the third option `request to unstake legacy RPL`.
You'll be prompted to either unstake your full balance or to input a custom amount to unstake. Enter `y` to unstake the full amount or enter `n` to input a custom amount to unstake.
From here, the smart node will walk you through the rest of the steps required to make the unstake request.
```
You have 4383.275814 RPL staked on your megapool and can request to unstake up to 4383.275814 RPL.
Would you like to unstake the maximum amount of staked RPL? [y/n]
n
Please enter an amount of staked RPL to unstake:
1000
+================ Suggested Gas Prices ================+
| Avg Wait Time | Max Fee | Total Gas Cost |
| 15 Seconds | 2.97747 gwei | 0.00061 to 0.00091 ETH |
| 1 Minute | 2.47747 gwei | 0.00050 to 0.00076 ETH |
| 3 Minutes | 1.97747 gwei | 0.00040 to 0.00060 ETH |
| >10 Minutes | 1.97747 gwei | 0.00040 to 0.00060 ETH |
+======================================================+
These prices include a maximum priority fee of 0.010 gwei.
Please enter your max fee (including the priority fee) or leave blank for the default of 2.47747 gwei:
Using a max fee of 2.477 gwei and a priority fee of 0.010 gwei.
Are you sure you want to unstake 1000.000000 RPL? [y/n]
y
Unstaking RPL...
Transaction has been submitted with hash .
You may follow its progress by visiting:
https://hoodi.etherscan.io/tx/
Waiting for the transaction to be included in a block... you may wait here for it, or press CTRL+C to exit and return to the terminal.
Successfully unstaked 1000.000000 RPL.
```
### Checking the Status of Your Unstaking RPL
After you've successfully made a request to unstake RPL, the `rocketpool node withdraw-rpl` command will inform you when the unstaking RPL is eligible for a withdrawal:
```
Your node has 1017.688800 RPL on its legacy stake (previously associated to minipools) and 3383.275814 RPL staked on its megapool.
Your node currently has 0.000000 RPL locked on pDAO proposals.
Your node's RPL withdrawal address is .
You have 1000.000000 RPL currently unstaking until 2026-02-19, 04:05 +0000 UTC (47h57m19s from now).
```
### Step 2: Withdrawing Unstaked RPL
After the 28 day unstaking period has passed, the status will be reflected in the `rocketpool node withdraw-rpl` command and you'll finally be able to withdraw your unstaked RPL.
```
You have 1000.000000 RPL unstaked and ready to be withdrawn to your RPL withdrawal address.
```
If you don't have an RPL withdrawal address configured, the RPL will be withdrawn to your node wallet. Node operators with a custom RPL withdrawal address will need to withdraw from the withdrawal
address and not from the node address. You can use this site to withdraw using your RPL withdrawal address: [https://node.rocketpool.net/withdraw-rpl](https://node.rocketpool.net/withdraw-rpl)
```
Your node has 1017.688800 RPL on its legacy stake (previously associated to minipools) and 3383.275814 RPL staked on its megapool.
Your node currently has 0.000000 RPL locked on pDAO proposals.
Your node's RPL withdrawal address is .
You have 1000.000000 RPL unstaked and ready to be withdrawn to your RPL withdrawal address.
Please select one of the three options below.
1: withdraw unstaked RPL
2: request to unstake RPL
3: request to unstake legacy RPL
1
+================ Suggested Gas Prices ================+
| Avg Wait Time | Max Fee | Total Gas Cost |
| 15 Seconds | 2.97747 gwei | 0.00061 to 0.00091 ETH |
| 1 Minute | 2.47747 gwei | 0.00050 to 0.00076 ETH |
| 3 Minutes | 1.97747 gwei | 0.00040 to 0.00060 ETH |
| >10 Minutes | 1.97747 gwei | 0.00040 to 0.00060 ETH |
+======================================================+
These prices include a maximum priority fee of 0.010 gwei.
Please enter your max fee (including the priority fee) or leave blank for the default of 2.47747 gwei:
Using a max fee of 2.477 gwei and a priority fee of 0.010 gwei.
Are you sure you want to withdraw 1000.000000 RPL? [y/n]
y
Withdrawing RPL...
Transaction has been submitted with hash .
You may follow its progress by visiting:
https://hoodi.etherscan.io/tx/
Waiting for the transaction to be included in a block... you may wait here for it, or press CTRL+C to exit and return to the terminal.
Successfully withdrew 1000.000000 RPL.
```
## Staking
Staking RPL on your megapool can be done using the `rocketpool node stake-rpl` command.
```
staker@node:~$ rocketpool node stake-rpl
NOTE: By staking RPL, you become a member of the Rocket Pool pDAO. Stay informed on governance proposals by joining the Rocket Pool Discord.
The node has a balance of 0.000000 RPL.
Please choose an amount of RPL to stake:
1: 5% of borrowed ETH (2191.637908 RPL) for one validator?
2: 10% of borrowed ETH (4383.275815 RPL) for one validator?
3: 15% of borrowed ETH (6574.913722 RPL) for one validator?
4: Your entire RPL balance (0.000000 RPL)?
5: A custom amount
```
Using this command will stake RPL on your megapool, increasing your voter share rewards. It's not possible to stake RPL on a minipool anymore.
## Viewing your node's ETH and RPL rewards
The smart node has a handy new feature that allows you to check the status of all the different types of rewards that your node might have.
Here's a list of all the possible reward types:
1. Megapool Execution Layer Rewards
2. Fee Distributor Rewards
3. Minipool Balance Distribution
4. Periodic Rewards (RPL + ETH)
5. Unclaimed Rewards
6. Credit Balance Withdrawal
7. Staked ETH on Behalf Withdrawal
8. PDAO Bond Claims
You can access this menu using the `rocketpool claims status` command. It will let you know if you have rewards to claim and which type.
## Claiming your node's ETH and RPL rewards
If you're ready to claim rewards, you can use the `rocketpool claims claim-all` command. It will let you select either all, or some reward types.
Here's an example of the menu:
```
staker@node:~$ rocketpool claims claim-all
============================================================
Available Rewards Summary
============================================================
--- [1] Megapool Execution Layer Rewards ---
Cannot distribute: 2 validator(s) exiting
--- [2] Fee Distributor ---
Fee distributor not initialized. Run 'rocketpool node initialize-fee-distributor' first.
--- [3] Minipool Balance Distribution ---
No minipools eligible for balance distribution.
--- [4] Periodic Rewards (RPL + ETH) ---
Unclaimed intervals: 6
Interval 141: 0.000000 RPL, 0.000033 ETH
Interval 142: 0.000000 RPL, 0.000038 ETH
Interval 143: 0.000000 RPL, 0.000062 ETH
Interval 144: 0.000000 RPL, 0.000016 ETH
Interval 145: 0.000000 RPL, 0.000025 ETH
Interval 146: 0.000000 RPL, 0.000038 ETH
Total: 0.000000 RPL + 0.000215 ETH
--- [5] Unclaimed Rewards ---
No unclaimed rewards.
--- [6] Credit Balance Withdrawal ---
Credit balance: 4.000000 ETH (the equivalent amount in rETH will be transferred to 0x4d19DE4A5a1B1B36EBaB3D5c32C01061fbDE328d)
--- [7] Staked ETH on Behalf Withdrawal ---
No ETH staked on behalf of the node.
--- [8] PDAO Bond Claims ---
No claimable bonds or rewards.
============================================================
Totals
============================================================
ETH: 4.000215
RPL: 0.000000
The following 2 claim(s)/credits are available:
1. Periodic Rewards (RPL + ETH): 0.000215 ETH
2. Credit Balance Withdrawal: 4.000000 ETH
Enter the numbers of the claims you want to execute (comma-separated), 'all' to claim everything, or 'none' to cancel:
```
Once you've made your selection(s) and confirmed the gas options, there might be additional prompts to follow depending
on what type of reward you're claiming. We won't go into all of them here though. The smart node should be able to walk you through
all the steps.
Here's what it looks like to redeem two types of rewards - periodic rewards + ETH credit:
```
+================ Suggested Gas Prices ================+
| Avg Wait Time | Max Fee | Total Gas Cost |
| 15 Seconds | 2.93764 gwei | 0.00111 to 0.00167 ETH |
| 1 Minute | 2.56087 gwei | 0.00097 to 0.00146 ETH |
| 3 Minutes | 1.93764 gwei | 0.00073 to 0.00110 ETH |
| >10 Minutes | 1.93764 gwei | 0.00073 to 0.00110 ETH |
+======================================================+
These prices include a maximum priority fee of 0.010 gwei.
Please enter your max fee (including the priority fee) or leave blank for the default of 2.56087 gwei:
Using a max fee of 2.561 gwei and a priority fee of 0.010 gwei.
Executing 2 claim(s)...
[1/2] Periodic Rewards (RPL + ETH)
Submitting transaction...
Claiming periodic rewards...
Transaction has been submitted with hash 0x68585d6cef75a6b9507a10e634de2d01a77ae920ea05659ea79c5493a1bc9e30.
You may follow its progress by visiting:
https://hoodi.etherscan.io/tx/0x68585d6cef75a6b9507a10e634de2d01a77ae920ea05659ea79c5493a1bc9e30
Waiting for the transaction to be included in a block... you may wait here for it, or press CTRL+C to exit and return to the terminal.
Successfully claimed periodic rewards.
[2/2] Credit Balance Withdrawal
Submitting transaction...
Withdrawing credit balance...
Transaction has been submitted with hash 0xabf1922e362e25238fc24857aae1f42093097a90a9ef3a0f2ca9dc44c24f8f15.
You may follow its progress by visiting:
https://hoodi.etherscan.io/tx/0xabf1922e362e25238fc24857aae1f42093097a90a9ef3a0f2ca9dc44c24f8f15
Waiting for the transaction to be included in a block... you may wait here for it, or press CTRL+C to exit and return to the terminal.
Successfully withdrew 4.000000 credit as rETH.
============================================================
All 2 claim(s) completed successfully.
============================================================
```
## Next Steps
Now that you understand RPL staking and rewards in Saturn 1, feel free to check out the [pDAO governance](/pdao/overview.md) section to learn how your voting power can be
used to participate in making key decisions to improve Rocket Pool. And please take the time to review [Monitoring and Maintenance](/node-staking/maintenance/overview.md) to
learn how you can apply updates, monitor your node, and brush up on how to keep your node in tip top shape throughout its life.
For more technical details on UARS and the economics behind voter share, see [RPIP-46: Universal Adjustable Revenue Split](https://rpips.rocketpool.net/RPIPs/RPIP-46).
---
url: /node-staking/mev.md
---
> For AI agents: the complete documentation index is available at /llms.txt, the full documentation bundle is available at /llms-full.txt.
# MEV, MEV-Boost, and MEV Rewards
In the previous section, you learned about how node operators earn priority fees.
Priority fees are a great boost to a node operator's income, but they aren't the _only_ form of liquid reward available to you on the Execution layer.
There is a supplemental form of rewards available, known as **MEV rewards**.
:::tip NOTE
As a quick reminder here's a breakdown of the different types of rewards and which layer they're provided on:
- Consensus Layer (locked until withdrawals): attestations, block proposals, sync committees, slashing reports
- Execution Layer (liquid): priority fees and MEV from block proposals
:::
## What is MEV
When your validator creates a block, it usually does so with a very simple algorithm: keep track of a list of pending transactions, bundle as many as them into the block you're building as possible (prioritizing so the ones with the highest tips come first), and submit that block to the chain.
However, Ethereum network users have discovered an interesting side-effect of being able to see the publicly available pool of pending transactions (known as the **mempool**).
Having this knowledge allows them to employ clever and sophisticated algorithms to modify the ordering of those transactions, and in some cases, introduce _new_ transactions between them.
These two techniques combined can be used to extract additional ETH from a block proposal.
This extra ETH is known as **Maximal Extractable Value**, or MEV for short.
In general, there are two "flavors" of MEV:
- MEV that comes from "benign" sources, such as being the first to arbitrage between exchanges after a large buy or sell
- MEV that comes at the cost of the Ethereum users, by front-running their transactions and profiting from the user's resulting slippage (see [Sandwich Attacks](https://trustwallet.com/blog/how-to-protect-yourself-from-sandwich-attacks) for more information on this technique)
## Block Builders and Relays
Finding MEV opportunities is not an easy thing; state-of-the-art opportunity finders, known as **searchers**, require immensely powerful computers and employ complex AI algorithms to quickly identify and extract MEV.
Searchers then take these opportunities and provide them to **block builders** - entities that aggregate these bundles of opportunities together to form a complete Ethereum block (which can be the searchers themselves or other parties).
The hardware and software requirements for running a profitable searcher prevent most node operators from using them (or at least using them _competitively_), and thus prevent them from finding their own MEV opportunities to capitalize on.
Luckily, simply _finding_ MEV opportunities is only half of the equation.
Every Epoch (6.4 minutes, or 32 slots), the Beacon Chain randomly selects a validator from the entire list of active validators to propose a block that will fit in one of the slots for in that Epoch.
This list can be seen for the next upcoming Epoch, which means everyone can see which validators are assigned to each slot a few minutes in advance.
Some [clever entities](https://docs.flashbots.net/) have leveraged this advance knowledge to essentially construct a kind of "marketplace" of sorts.
In this marketplace, validators can register themselves when they have upcoming block proposals and block builders can submit bids for blocks they'd like the validators to propose.
These bids always give the priority fees from each transaction in the block to the proposer, and they _also_ offer a supplemental tip to the proposer that comes from the MEV the builder was able to extract for themselves.
The validators can then examine these bids, determine which one ultimately provides the most profit, and propose that block instead of building their own.
This "marketplace" where block builders interact with validators is known as a **relay**.
Different relays have different rules (such as which of the aforementioned "flavors" of MEV they permit from block builders, and whether or not they comply with certain government sanction regulations), but ultimately they all serve this same marketplace function.
Rocket Pool currently offers its node operators access to **multiple different relays**:
| Name | Regulation | MEV Types |
| ------------------------------------------------------------------------------------------------------------ | ------------------------------ | --------- |
| [Flashbots](https://boost.flashbots.net/) | Complies with OFAC Sanctions\* | All types |
| [bloXroute Regulated](https://docs.bloxroute.com/eth/block-builders-and-validators/mev-relay-for-validators) | Complies with OFAC Sanctions\* | All types |
| [Ultra Sound](https://relay.ultrasound.money/) | Unregulated | All types |
| [Ultra Sound Filtered](https://relay-filtered.ultrasound.money/) | Complies with OFAC Sanctions\* | All types |
| [AESTUS](https://aestus.live/) | Unregulated | All types |
| [Titan Global](https://docs.titanrelay.xyz/) | Unregulated | All types |
| [Titan Regional](https://docs.titanrelay.xyz/) | Complies with OFAC Sanctions\* | All types |
| BTCS OFAC+ | Complies with OFAC Sanctions\* | All types |
::: warning NOTE
\*Relays that comply with OFAC sanctions follow the blacklist of addresses that the United States Office of Foreign Assets Control (OFAC) maintains.
We **strongly encourage** you to read more about the OFAC sanctions, network censorship, and make a carefully-informed decision about whether or not you believe you should comply with those sanctions and which relays you are comfortable using.
More information can be found in articles such as these:
- [https://home.treasury.gov/news/press-releases/jy0916](https://home.treasury.gov/news/press-releases/jy0916)
- [https://www.coindesk.com/tech/2022/08/23/as-censorship-on-ethereum-begins-could-this-open-sourced-code-help-counter-it/](https://www.coindesk.com/tech/2022/08/23/as-censorship-on-ethereum-begins-could-this-open-sourced-code-help-counter-it/)
- [https://blog.bitmex.com/ofac-sanctions-ethereum-pos-some-technical-nuances/](https://blog.bitmex.com/ofac-sanctions-ethereum-pos-some-technical-nuances/)
- [https://www.paradigm.xyz/2022/09/base-layer-neutrality](https://www.paradigm.xyz/2022/09/base-layer-neutrality)
:::
If you're interested in exploring the relative market share and average tips per block from each of the relays, take a look at [https://www.mevboost.org/](https://www.mevboost.org/).
This site captures many metrics about the various MEV relays so you can better understand the popularity and returns of the relays.
## MEV-Boost
There are many relays out there, and having your node automatically register and maintain contact with each of them can be a burdensome task.
Luckily, the engineers at Flashbots produced and maintain a program explicitly designed to handle this relay management known as [MEV-Boost](https://boost.flashbots.net/).
MEV-Boost is a simple program: you tell it which relays you want to use and tell your Consensus client how to reach it, and it takes care of all of the registration, bidding, blind signing, and proposal management in conjunction with your Consensus client.
It lets you passively participate in this builder-proposer-marketplace, and thus earn extra rewards with zero effort on your part.
MEV-Boost is [open source](https://github.com/flashbots/mev-boost) and has been [audited](https://github.com/flashbots/mev-boost/blob/main/docs/audit-20220620).
The Smart Node also supports [Commit-Boost](/node-staking/commit-boost.md), an alternative to MEV-Boost. You can enable one or the other, but not both.
Below is a good visual depiction of how the entire MEV ecosystem functions, and where MEV-Boost fits in:
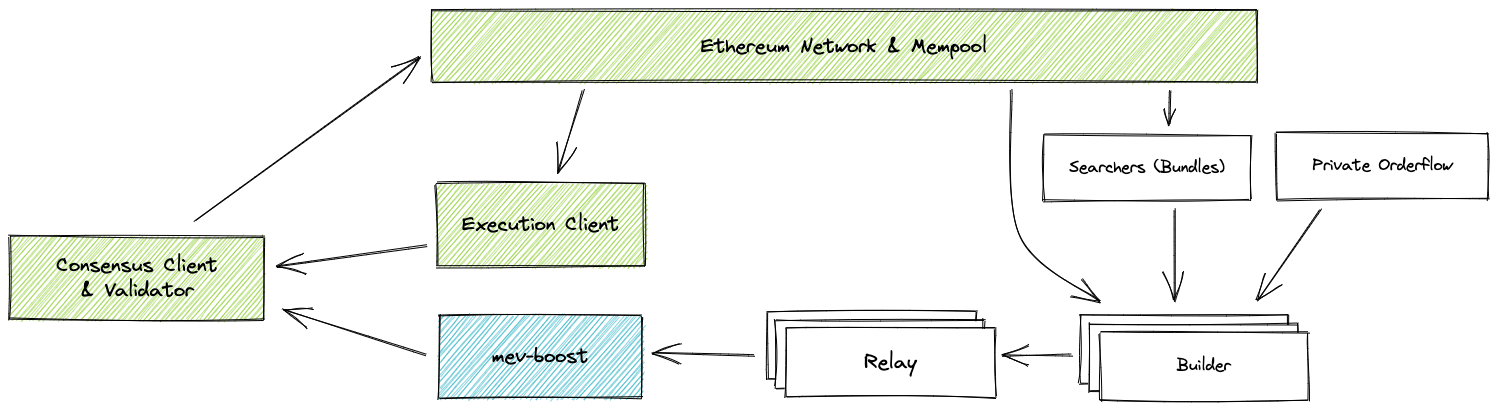
_Image courtesy of Flashbots_
The Rocket Pool Smart Node comes with MEV-Boost directly bundled in by default, enabling our **Docker Mode** and **Hybrid Mode** node operators to seamlessly take advantage of it.
**Native Mode** users will need to set it up manually.
## Rocket Pool and MEV
Because Rocket Pool validators are partially funded by the rETH stakers, the protocol requires that MEV rewards (as well as priority fees) be **shared with the rETH stakers** (minus the node operator's commission, of course).
Node operators are not permitted to pocket the entire MEV reward for themselves when proposing with a Rocket Pool validator.
To that end, MEV-Boost is a critical component of the Rocket Pool network for several reasons:
- It provides easy access to the network of MEV relays
- It ensures that the node operator isn't building their own blocks; this is important to ensure that a node operator isn't running their own searcher and stealing MEV without sharing it with the rETH stakers
- It increases the overall returns for the rETH stakers, which keeps the protocol competitive with other, more centralized staking providers
The second point here is important: Rocket Pool as a protocol will ultimately rely on a [Trusted Block Builder](https://github.com/rocket-pool/rocketpool-research/blob/master/Post%20Merge/Security#option-2-trusted-block-builders) (or more accurately, a Trusted Relay) design to ensure that rETH stakers always receive their fair share of MEV rewards and priority fees.
Each of the relays listed above currently act in this role.
We are taking a three-phase approach towards transitioning to the Trusted Block Builder design:
### Phase 1: Opt-In!
In phase 1, MEV-Boost is provided to all node operators as an **opt-in** configuration.
Node operators are encouraged to use it because it improves rETH's returns and thus keeps the protocol competitive, but are not required to use it.
Node operators can elect to use **one or more** of the trusted relays listed above but cannot use a custom (untrusted) relay.
This phase ended in November 2022.
### Phase 2: Opt-Out
In phase 2, MEV-Boost is enabled by default for all node operators.
Node operators can elect to use **one or more** of the trusted relays listed above but cannot use a custom (untrusted) relay.
Node operators that choose to opt-out of MEV-boost must do so explicitly before starting the Smart Node.
This is the **current phase**.
### Phase 3: Required
In phase 3, MEV-Boost is no longer optional; it will be required for all node operators.
Node operators **must** elect to use **one or more** of the trusted relays listed above but cannot use a custom (untrusted) relay.
There is currently **no scheduled date** for this phase.
## Configuring MEV-Boost in the Smart Node
To learn how to configure MEV-Boost, please select which mode you are using below.
**Docker Mode**
Configuring MEV-Boost is easy with the Smart Node's configuration TUI.
Start by running `rocketpool service config`, select the `ePBS` category, and then select `MEV-Boost`:
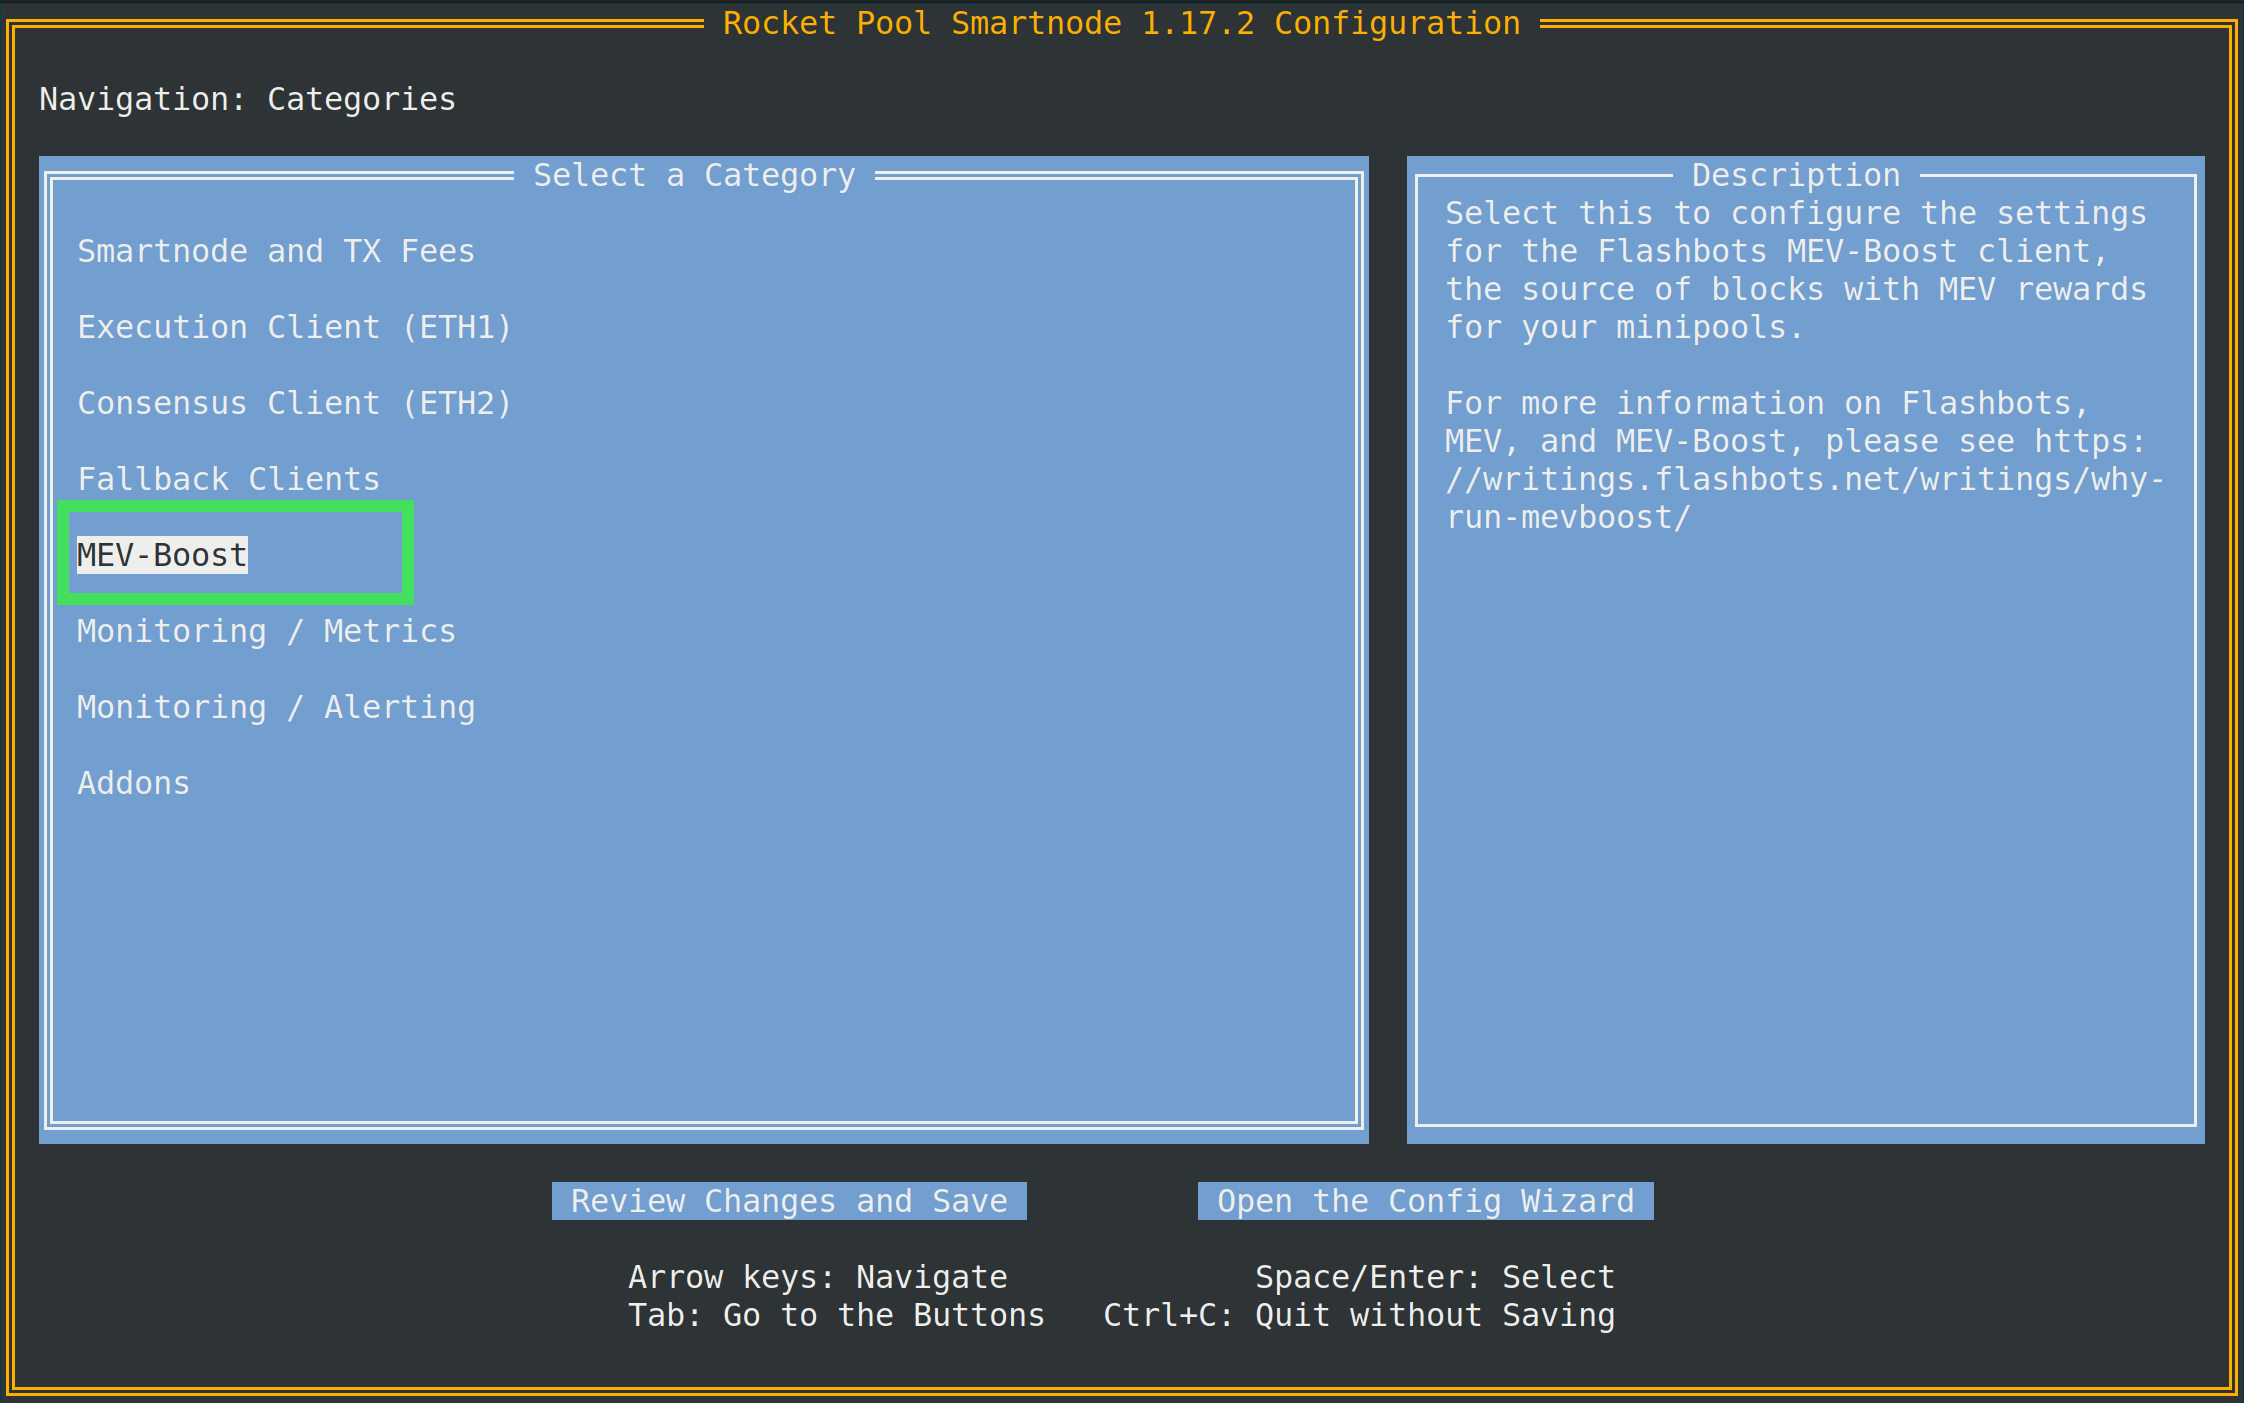Check the box labeled `Enable MEV-Boost` to enable it.
Once enabled, The screen will look like this (_as of Smart Node v1.17.2_):
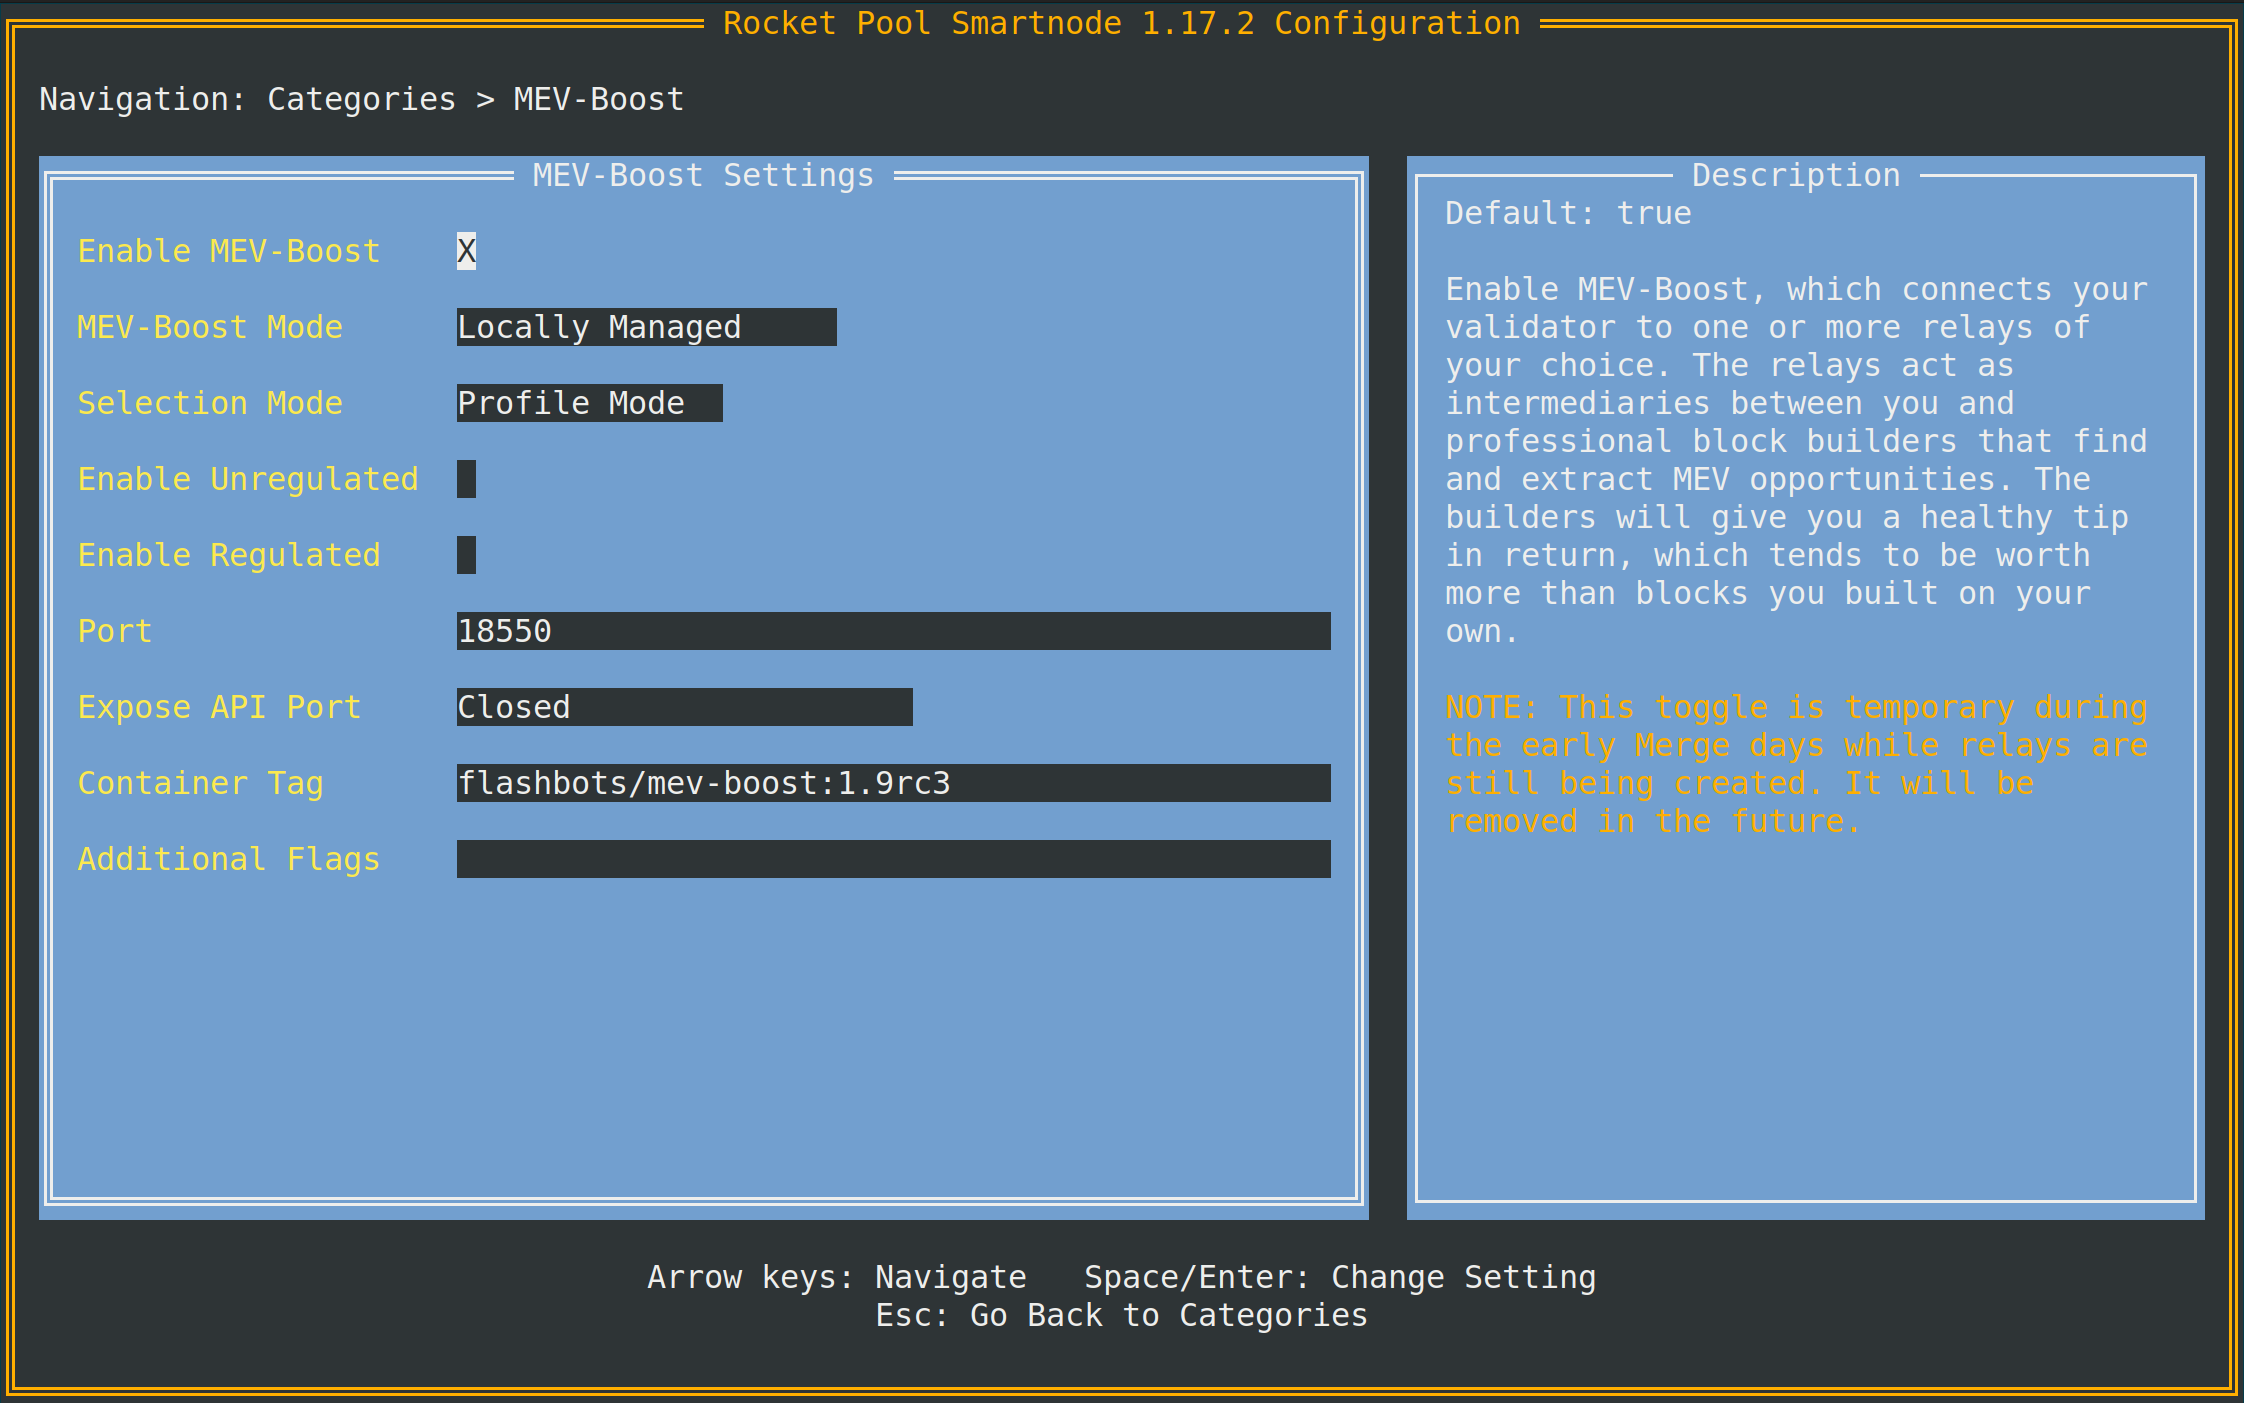Below is a description of each option and how to use them.
- The `MEV-Boost Mode` box lets you toggle between a MEV-Boost instance that Rocket Pool manages, and an external one that you manage on your own. This is meant for advanced users that already have MEV-Boost set up and simply want to use it instead of having Rocket Pool run a second copy. Regular Docker Mode users should just leave this set to `Locally Managed`.
- The `Selection Mode` box lets you switch between **Profile Mode** and **Relay Mode**.
- **Profile Mode** is the default. It lets you select which relays to enable based on their "profiles". A relay's profile is made of the following choices:
- Whether it's **regulated** (complies with government sanctions lists such as the OFAC list and blacklists certain addresses) or **unregulated** (_does not_ censor any transactions based on any blacklists)
- Whether it **allows all types of MEV** or explicitly prohibits bundles that involve sandwich attacks or front-running Ethereum users
- You can **select multiple profiles**.
- Each profile you select has a set of relays that adhere to it which are listed in the description box; enabling that profile will enable all of those relays.
- Advanced users can change this to **Relay Mode**, which lets them explicitly select which relays they would like to use.
- The `Port` box is not important for Docker mode users.
- The `Expose API Port` box is not important for Docker mode users.
- The `Container Tag` box is useful to manually upgrade the version of MEV-Boost that the Smart Node runs if Flashbots releases a new high-priority version you want to use before a Smart Node update with it is released.
- The `Additional Flags` box is used if you want to add supplemental config flags or parameters directly to the MEV-Boost container. Normally, it will not be useful.
Once you've enabled MEV-Boost and enabled the relays you'd like, simply save and exit.
The Smart Node will restart the relevant containers for you, and automatically set it all up for you.
See below for instructions on how to check that it's working as expected.
**Hybrid Mode**
Configuring MEV-Boost is easy with the Smart Node's configuration TUI.
Start by running `rocketpool service config`, select the `ePBS` category, and then select `MEV-Boost`:
Check the box labeled `Enable MEV-Boost` to enable it.
Once enabled, The screen will look like this (_as of Smart Node v1.17.2_):
Check the box labeled `Enable MEV-Boost` to enable it.
Below is a description of each option and how to use them.
- The `MEV-Boost Mode` box lets you toggle between a MEV-Boost instance that Rocket Pool manages, and an external one that you manage on your own. Some users prefer to let Rocket Pool manage its own instance of MEV-Boost and connect their externally-managed Beacon Nodes to it. In this case, `Locally Managed` is the best option. If you already run your own MEV-Boost instance and simply want to let Rocket Pool's VC use it (i.e. by enabling blinded block signing), simply leave this on `Externally Managed`. **You don't need to take any further action after this.**
NOTE
If you run your own MEV-Boost instance, you **must** only register with the trusted relays listed above. If your Rocket Pool validator proposes a block that was sent via an untrusted relay, the Oracle DAO will **flag you for cheating** and possibly stealing MEV from the rETH stakers. This will result in [a penalty](https://github.com/rocket-pool/rocketpool-research/blob/master/Penalties/penalty-system) on your minipools or megapool validators!
- If you decided to use a `Locally Managed` instance of MEV-Boost, the `Selection Mode` box lets you switch between **Profile Mode** and **Relay Mode**.
- **Profile Mode** is the default. It lets you select which relays to enable based on their "profiles". A relay's profile is made of the following choices:
- Whether it's **regulated** (complies with government sanctions lists such as the OFAC list and blacklists certain addresses) or **unregulated** (_does not_ censor any transactions based on any blacklists)
- Whether it **allows all types of MEV** or explicitly prohibits bundles that involve sandwich attacks or front-running Ethereum users
- You can **select multiple profiles**.
- Each profile you select has a set of relays that adhere to it which are listed in the description box; enabling that profile will enable all of those relays.
- Advanced users can change this to **Relay Mode**, which lets them explicitly select which relays they would like to use.
- The `Port` box determines which port MEV-Boost will listen for incoming connections from your Beacon Node on. If you need to change it because of a port conflict within your node, you can do it here.
- The `Expose API Port` box **should be checked** so that your externally-managed BN can communicate with the MEV-Boost instance Rocket Pool will manage. Select `Open to Localhost` if your externally-managed BN is running on the same machine. Only select `Open to External hosts` if your externally-managed BN is running on a different machine _and_ you've followed the proper steps to secure your node from unwanted traffic: [Securing Your Node](/node-staking/securing-your-node.md)
- The `Container Tag` box is useful to manually upgrade the version of MEV-Boost that the Smart Node runs if Flashbots releases a new high-priority version you want to use before a Smart Node update with it is released.
- The `Additional Flags` box is used if you want to add supplemental config flags or parameters directly to the MEV-Boost container. Normally, it will not be useful.
Once you've enabled MEV-Boost and enabled the relays you'd like, simply save and exit.
If you're using a `Locally Managed` instance and have the `Expose API Port` box checked, you can then configure your Beacon Node to connect to it at `http://localhost:18550`.
Please refer to [Flashbots' documentation](https://github.com/flashbots/mev-boost/wiki/Testing) to learn how to enable MEV-Boost on your externally-managed Beacon Node.
NOTE
Note that you **may need to permit this in your UFW configuration** if you have the firewall enabled.
See below for instructions on how to check that it's working as expected.
**Native Mode**
Please refer to [Flashbots' documentation](https://github.com/flashbots/mev-boost/wiki/Testing) to learn how to enable MEV-Boost on your Beacon Node and Validator Client services.
NOTE
In your MEV-Boost instance, you **must** only register with the trusted relays listed above. If your Rocket Pool validator proposes a block that was sent via an untrusted relay, the Oracle DAO will **flag you for cheating** and possibly stealing MEV from the rETH stakers. This will result in [a penalty](https://github.com/rocket-pool/rocketpool-research/blob/master/Penalties/penalty-system) on your minipool!
## Checking MEV-Boost's Logs
To check on MEV-Boost's logs, run the following command (for Docker Mode users and Hybrid users with a locally-managed container):
```shell
rocketpool service logs mev-boost
```
The output will show you which relays you've enabled, their connection status, and begin listening for traffic from your Beacon Node:
```
mev-boost_1 | time="2022-09-28T22:02:06Z" level=info msg="mev-boost v1.3.1" module=cli
mev-boost_1 | time="2022-09-28T22:02:06Z" level=info msg="Using genesis fork version: 0x00000000" module=cli
mev-boost_1 | time="2022-09-28T22:02:06Z" level=info msg="using 4 relays" module=cli relays="[{0xac6e77dfe25ecd6110b8e780608cce0dab71fdd5ebea22a16c0205200f2f8e2e3ad3b71d3499c54ad14d6c21b41a37ae https://0xac6e77dfe25ecd6110b8e780608cce0dab71fdd5ebea22a16c0205200f2f8e2e3ad3b71d3499c54ad14d6c21b41a37ae@boost-relay.flashbots.net?id=rocketpool} {0xb0b07cd0abef743db4260b0ed50619cf6ad4d82064cb4fbec9d3ec530f7c5e6793d9f286c4e082c0244ffb9f2658fe88 https://0xb0b07cd0abef743db4260b0ed50619cf6ad4d82064cb4fbec9d3ec530f7c5e6793d9f286c4e082c0244ffb9f2658fe88@bloxroute.regulated.blxrbdn.com?id=rocketpool} {0x9000009807ed12c1f08bf4e81c6da3ba8e3fc3d953898ce0102433094e5f22f21102ec057841fcb81978ed1ea0fa8246 https://0x9000009807ed12c1f08bf4e81c6da3ba8e3fc3d953898ce0102433094e5f22f21102ec057841fcb81978ed1ea0fa8246@builder-relay-mainnet.blocknative.com?id=rocketpool} {0xb3ee7afcf27f1f1259ac1787876318c6584ee353097a50ed84f51a1f21a323b3736f271a895c7ce918c038e4265918be https://0xb3ee7afcf27f1f1259ac1787876318c6584ee353097a50ed84f51a1f21a323b3736f271a895c7ce918c038e4265918be@relay.edennetwork.io?id=rocketpool}]"
mev-boost_1 | time="2022-09-28T22:02:06Z" level=info msg="Checking relay" module=service relay="https://0xac6e77dfe25ecd6110b8e780608cce0dab71fdd5ebea22a16c0205200f2f8e2e3ad3b71d3499c54ad14d6c21b41a37ae@boost-relay.flashbots.net?id=rocketpool"
mev-boost_1 | time="2022-09-28T22:02:06Z" level=info msg="Checking relay" module=service relay="https://0xb0b07cd0abef743db4260b0ed50619cf6ad4d82064cb4fbec9d3ec530f7c5e6793d9f286c4e082c0244ffb9f2658fe88@bloxroute.regulated.blxrbdn.com?id=rocketpool"
mev-boost_1 | time="2022-09-28T22:02:07Z" level=info msg="Checking relay" module=service relay="https://0x9000009807ed12c1f08bf4e81c6da3ba8e3fc3d953898ce0102433094e5f22f21102ec057841fcb81978ed1ea0fa8246@builder-relay-mainnet.blocknative.com?id=rocketpool"
mev-boost_1 | time="2022-09-28T22:02:07Z" level=info msg="Checking relay" module=service relay="https://0xb3ee7afcf27f1f1259ac1787876318c6584ee353097a50ed84f51a1f21a323b3736f271a895c7ce918c038e4265918be@relay.edennetwork.io?id=rocketpool"
mev-boost_1 | time="2022-09-28T22:02:07Z" level=info msg="listening on 0.0.0.0:18550" module=cli
```
This indicates that it's running properly.
If you have validators already up and running, you will see messages like this every few minutes in the logs:
```
mev-boost_1 | time="2022-09-28T21:40:48Z" level=info msg="http: GET /eth/v1/builder/status 200" duration=0.147305645 method=GET module=service path=/eth/v1/builder/status status=200
mev-boost_1 | time="2022-09-28T21:40:48Z" level=info msg="http: POST /eth/v1/builder/validators 200" duration=0.052895118 method=POST module=service path=/eth/v1/builder/validators status=200
```
This indicates that your Beacon node was able to properly connect to it and register its validators, indicating that your node is now actively engaging with the MEV relays and is ready to receive blocks from block builders!
## Next Steps
Now that MEV-Boost has been set up, you're ready to create a new megapool validator and start validating on the Ethereum network!
Read the next section to walk through this process.
---
url: /node-staking/minipools/delegates.md
---
> For AI agents: the complete documentation index is available at /llms.txt, the full documentation bundle is available at /llms-full.txt.
::: danger WARNING
Minipool deposits are currently disabled in preparation for Saturn 1.
:::
# The Minipool Delegate
Every validator you run has a **minipool** contract as its "owner" so-to-speak.
The minipool is a unique contract specifically assigned to that validator; it acts as its **withdrawal address**.
All reward and staking balance withdrawals from the Beacon Chain will be sent to the minipool contract.
Each minipool is unique to ensure that you (the node operator) have ultimate control over it.
Nobody else controls it, nobody else can change it; it's entirely at your command.
That being said, in order to minimize gas costs during node deposits, the minipool _itself_ contains very little actual functionality.
Almost everything it can do is deferred to a **delegate** contract.
The minipool delegate contract is a special contract that contains the bulk of the logic required by minipools - things like fairly distributing the balance between you and the pool stakers, for example.
Unlike minipools, where each minipool is a unique contract, the delegate is a single contract that many minipools can "forward" requests to.
Occasionally, the Rocket Pool development team will publish a new minipool delegate that adds new functionality.
For example, in the Atlas update, we introduced a new delegate that had support for distributing skimmed rewards without needing to close the minipool.
Minipool can have their delegates upgraded to take advantage of this new functionality.
Delegate upgrades are **opt-in**, so you can decide if and when you want to use them.
That being said, they are usually required in order to take advantage of new functionality that network upgrades introduce.
### Upgrading your Delegate
To upgrade a minipool to a new delegate contract, simply run the following command:
```shell
rocketpool minipool delegate-upgrade
```
This will present you with a list of your minipools that are not currently using the latest delegate and are eligible for upgrading:
```
Please select a minipool to upgrade:
1: All available minipools
2: 0x7e5702a2cE66B5B35E59B9Ac00eEAAa547881e40 (using delegate 0x5c2D33A015D132D4f590f00df807Bb1052531ab9)
3: 0x7E5703fdA638CD86c316B9EbAF76927fF695ADC5 (using delegate 0x5c2D33A015D132D4f590f00df807Bb1052531ab9)
4: 0x7E5704aD2a63eb90880426Dcd4a3811246dF3cB0 (using delegate 0x5c2D33A015D132D4f590f00df807Bb1052531ab9)
5: 0x7E5705c149D11efc951fFc20349D7A96bc6b819C (using delegate 0x5c2D33A015D132D4f590f00df807Bb1052531ab9)
6: 0x7E570625cE8F586c90ACa7fe8792EeAA79751778 (using delegate 0x5c2D33A015D132D4f590f00df807Bb1052531ab9)
7: 0x7E5700c82E38434C6c72890bb82f5B5305f4328a (using delegate 0x6aCEA7f89574Dd8BC6ffDfDca1965A3d756d5B20)
```
Select the one(s) you would like to upgrade from the list by entering the corresponding number on the left of the minipool address.
Once selected, you will be prompted to confirm your gas price settings, and after that a transaction to upgrade the minipool will be sent:
```
Using a max fee of 26.00 gwei and a priority fee of 2.00 gwei.
Are you sure you want to upgrade 1 minipools? [y/n]
y
Upgrading minipool 0x7e5702a2cE66B5B35E59B9Ac00eEAAa547881e40...
Transaction has been submitted with hash 0xcd91c9a38f3438c3d8a45bb5f439014e5935dcb50b0704f3c5077f54174e99bb.
Waiting for the transaction to be included in a block... you may wait here for it, or press CTRL+C to exit and return to the terminal.
Successfully upgraded minipool 0x7e5702a2cE66B5B35E59B9Ac00eEAAa547881e40.
```
You can verify that it's using the latest delegate with `rocketpool minipool status`.
Any minipools that are _not_ using the latest delegate will have a yellow notification under their status letting you know that they can be upgraded:
```
Address: 0x7E5703fdA638CD86c316B9EbAF76927fF695ADC5
Penalties: 0
...
Delegate address: 0x5c2D33A015D132D4f590f00df807Bb1052531ab9
Rollback delegate:
Effective delegate: 0x5c2D33A015D132D4f590f00df807Bb1052531ab9
*Minipool can be upgraded to delegate 0x149aE025fFC7E7bbcCc8d373d56797D637bF5D33!
```
---
url: /node-staking/minipools/overview.md
---
> For AI agents: the complete documentation index is available at /llms.txt, the full documentation bundle is available at /llms-full.txt.
::: danger WARNING
Minipool deposits are currently disabled in preparation for Saturn 1.
:::
# Overview
This section covers the processes of creating and migrating minipools (Rocket Pool validators).
This is where you'll learn how to start validating the Ethereum network and earn rewards for it.
## Prerequisites
Before running minipools, please make sure you:
- Have set up a node machine (or virtual machine) and secured it (via the [Securing your Node](/node-staking/securing-your-node.md) guide)
- Have the Smart Node [installed](/node-staking/installing/overview.md) and [configured](/node-staking/config/overview.md) on it
- Have a node wallet loaded on your Smart Node
- Synced your Execution and Consensus clients
- Provisioned your node with [a withdrawal address](/node-staking/prepare-node.md#setting-your-primary-withdrawal-address), set up your [fallback clients](/node-staking/fallback.md) (optional), opted into the [Smoothing Pool](/node-staking/fee-distrib-sp.md#the-smoothing-pool) (optional), and configured [MEV](/node-staking/mev.md)
## Guides
[Creating a New Minipool (Validator)](/node-staking/create-validator.md) explains the process of creating a new Rocket Pool minipool and corresponding validator on the Beacon Chain.
Whether you're making your very first minipool or already have some and would like to make another one, this guide will walk you through it step-by-step.
[The Minipool Delegate](/node-staking/minipools/delegates.md) explains a bit about what the minipool contract is, and introduces the **delegate** contract that contains most of its functionality.
It also demonstrates how to update the delegate for your minipools after a network upgrade to take advantage of new features.
[Converting a Solo Validator into a Minipool](/node-staking/solo-staker-migration.md) walks through the process of converting an existing validator outside of Rocket Pool (such as one you use for solo staking) directly into a Rocket Pool minipool without needing to exit the Beacon Chain and create a new minipool.
If you're a solo staker that wants to take advantage of this capability, this is the guide for you!
[Migrating a 16-ETH Minipool to 8-ETH](/node-staking/leb-migration.md) shows how to reduce the bonded amount of ETH for a minipool from 16 ETH down to 8 ETH, giving you 8 ETH in credit that can be used to create a new minipool for free (though it still costs ETH for gas, of course).
[The Deposit Credit System](/node-staking/credit.md) covers the "ETH Credit" system that lets you create new minipools without having to pay for their ETH bonds after you perform one of the above migrations.
---
url: /node-staking/native.md
---
> For AI agents: the complete documentation index is available at /llms.txt, the full documentation bundle is available at /llms-full.txt.
# Creating a Native Rocket Pool Node without Docker
::: tip NOTE
This guide is designed for **Smart Node v1.6.5 and higher**.
If you are using a previous version, you must upgrade to v1.6.5 or higher before configuring Native mode.
:::
In this section, we will walk through the process of installing the Rocket Pool Smart Node stack natively onto your system, without the use of Docker containers.
The general plan is as follows:
1. Create a standard solo-staking setup with `systemd` services for the Execution Client, the Consensus Client / Beacon Node, and the Validator Client
2. Create system services for the Rocket Pool components (the **node** and **watchtower** processes)
3. Configure Rocket Pool to communicate with your client services
4. Update your Validator Client service definition to use Rocket Pool's fee recipient and validator keys
This is a fairly involved setup so it will take some time to complete.
The diversity of Operating Systems and distros available make it impractical to make guides available for all of them.
The instructions in this guide are tailored to a Debian-based system (including Ubuntu).
For other distros or operating systems, you may follow the high-level steps described in the guide but will have to substitute certain commands for the ones that your system uses as appropriate.
::: danger
This guide is intended for users that are experienced with Linux system administration and usage.
This includes using the terminal, creating system accounts, managing permissions, and installing services.
We assume you are familiar with these activities - as you will be managing the bulk of the infrastructure yourself, we only provide limited support for Native installations.
**If you are not familiar with these activities, we do not recommend that you use Native Mode.**
:::
## Step 1: Set up the Execution and Consensus Clients
Native Mode effectively extends a standard solo-staking setup, and simply allows the Smart Node software to attach to the clients that it already runs (with a few small modifications).
To that end, we recommend you start by following some of the conventional solo staking guides provided by the community:
- Somer Esat's set of guides per-client: [https://github.com/SomerEsat/ethereum-staking-guides](https://github.com/SomerEsat/ethereum-staking-guides)
- CoinCashew guides: [https://www.coincashew.com/coins/overview-eth/guide-or-how-to-setup-a-validator-on-eth2-mainnet](https://www.coincashew.com/coins/overview-eth/guide-or-how-to-setup-a-validator-on-eth2-mainnet)
Note that **you won't actually create a validator as defined in those guides** - Rocket Pool will do that for you.
**You can ignore the portions involving the Staking Deposit CLI tool.**
You simply need to follow the guides to the point where you have an Execution Client service, a Consensus Client / Beacon Node service, and a Validator Client service all installed and syncing the chain.
**Skip the steps that involve funding a validator and recording its mnemonic.**
Also, there is a special case for the **fee recipient** - when you get to the portion of the guide where you specify the fee recipient in your Validator Client configuration, **leave it blank for now**.
We will describe how to set it up for Rocket Pool validators below.
Once your clients are installed and you can see in their logs that they are syncing the chains properly, you can follow the next steps to set up the Rocket Pool Smart Node and connect it to your clients.
## Step 2: Install Rocket Pool
### Creating the Service Account
The first step is to create a new system account for the Rocket Pool services and disable login and shell access for it:
```shell
sudo useradd -r -s /sbin/nologin rp
```
Now, add yourself to the `rp` group.
You'll need to do this in order to use the Rocket Pool CLI, because it and the Rocket Pool daemon both need to access the Execution layer wallet file.
```shell
sudo usermod -aG rp $USER
```
Finally, add the user account for your **Validator Client** to the `rp` group as well.
The name of that user account depends on which guide you followed to set up your VC service.
For example, if your VC runs as user `lighthousevalidator`, you would do the following:
```shell
sudo usermod -aG rp lighthousevalidator
```
After this, logout and back in for the changes to take effect.
### Setting up the Binaries
Start by making a folder for Rocket Pool and a data subfolder.
You can put this wherever you want; for this guide, I'll put it into `/srv`:
```shell
sudo mkdir -p /srv/rocketpool
sudo chown $USER:$USER /srv/rocketpool
```
Now, download the CLI and daemon binaries (or ignore this and build them from source if you prefer).
Choose the platform that your system uses from the tabs below.
**Linux x64**
```shell
sudo wget https://github.com/rocket-pool/smartnode/releases/latest/download/rocketpool-cli-linux-amd64 -O /usr/local/bin/rocketpool
sudo wget https://github.com/rocket-pool/smartnode/releases/latest/download/rocketpool-daemon-linux-amd64 -O /usr/local/bin/rocketpoold
sudo chmod +x /usr/local/bin/rocketpool
```
**Linux arm64**
```shell
sudo wget https://github.com/rocket-pool/smartnode/releases/latest/download/rocketpool-cli-linux-arm64 -O /usr/local/bin/rocketpool
sudo wget https://github.com/rocket-pool/smartnode/releases/latest/download/rocketpool-daemon-linux-arm64 -O /usr/local/bin/rocketpoold
sudo chmod +x /usr/local/bin/rocketpool
```
**macOS x64**
```shell
sudo wget https://github.com/rocket-pool/smartnode/releases/latest/download/rocketpool-cli-darwin-amd64 -O /usr/local/bin/rocketpool
sudo wget https://github.com/rocket-pool/smartnode/releases/latest/download/rocketpool-daemon-darwin-amd64 -O /usr/local/bin/rocketpoold
sudo chmod +x /usr/local/bin/rocketpool
```
**macOS arm64**
```shell
sudo wget https://github.com/rocket-pool/smartnode/releases/latest/download/rocketpool-cli-darwin-arm64 -O /usr/local/bin/rocketpool
sudo wget https://github.com/rocket-pool/smartnode/releases/latest/download/rocketpool-daemon-darwin-arm64 -O /usr/local/bin/rocketpoold
sudo chmod +x /usr/local/bin/rocketpool
```
Now, set the owner and group of the daemon to `rp`:
```shell
sudo chown rp:rp /usr/local/bin/rocketpoold
```
Finally, **set the `suid` bit** and other permissions bits on the daemon binary:
```shell
sudo chmod u+sx,g+sx,o-rwx /usr/local/bin/rocketpoold
```
This will ensure that the daemon always runs as the `rp` user, so it always has the proper permissions set.
::: danger NOTE
The Smart Node will most likely fail with permissions errors if you don't do this.
Please be sure to run this command!
:::
### Setting up the Installation Folder
With the CLI and Daemon installed, you'll need to next set up the folder structure and accompanying files that the Smart Node expects to exist.
Start by creating the following folders:
```
mkdir -p /srv/rocketpool/data/validators && sudo chmod 775 /srv/rocketpool/data/validators
mkdir /srv/rocketpool/data/rewards-trees
mkdir /srv/rocketpool/data/custom-keys
sudo chown -R rp:rp /srv/rocketpool/data
```
Next, download the following scripts - Rocket Pool will use them when it needs to stop or restart your Validator Client to change its fee recipient (discussed later) or load new keys after you create a new minipool:
```shell
wget https://github.com/rocket-pool/smartnode/raw/master/shared/services/rocketpool/assets/install/scripts/restart-vc.sh -O /srv/rocketpool/restart-vc.sh
wget https://github.com/rocket-pool/smartnode/raw/master/shared/services/rocketpool/assets/install/scripts/stop-validator.sh -O /srv/rocketpool/stop-validator.sh
chmod +x /srv/rocketpool/restart-vc.sh
chmod +x /srv/rocketpool/stop-validator.sh
```
Now open `~/.profile` with your editor of choice and add this line to the end:
```shell
alias rp="rocketpool -d /usr/local/bin/rocketpoold -c /srv/rocketpool"
```
Save it, then reload your profile:
```shell
source ~/.profile
```
This will let you interact with Rocket Pool's CLI with the `rp` command, which is a nice shortcut.
### Creating the Services
Next up, we'll create a `systemd` service for the Rocket Pool node daemon.
This is the service that will automatically check for and claim RPL rewards after each checkpoint, and stake minipools once you've created them via `node deposit`.
We'll also create a `watchtower` service as well.
This will be used if you're an Oracle DAO member, or if you ever want to generate your own rewards interval trees (discussed in the [Claiming Rewards](/node-staking/rewards.md) section later on).
**Node**
Create the `rp-node` service:
```shell
sudo nano /etc/systemd/system/rp-node.service
```
Contents:
```
[Unit]
Description=rp-node
After=network.target
[Service]
Type=simple
User=rp
Restart=always
RestartSec=5
ExecStart=/usr/local/bin/rocketpoold --settings /srv/rocketpool/user-settings.yml node
[Install]
WantedBy=multi-user.target
```
Create a log file for the service, so you can watch its output - this will replace the behavior of `rocketpool service logs node`:
```
nano /srv/rocketpool/node-log.sh
```
Contents:
```
#!/bin/bash
journalctl -u rp-node -b -f
```
Save it, then make it executable:
```
chmod +x /srv/rocketpool/node-log.sh
```
Now you can watch the node's logs by simply running:
```shell
sudo /srv/rocketpool/node-log.sh
```
**Watchtower**
Create a service for the watchtower:
```shell
sudo nano /etc/systemd/system/rp-watchtower.service
```
Contents:
```
[Unit]
Description=rp-node
After=network.target
[Service]
Type=simple
User=rp
Restart=always
RestartSec=5
ExecStart=/usr/local/bin/rocketpoold --settings /srv/rocketpool/user-settings.yml watchtower
[Install]
WantedBy=multi-user.target
```
Create a log file for the watchtower:
```
nano /srv/rocketpool/watchtower-log.sh
```
Contents:
```
#!/bin/bash
journalctl -u rp-watchtower -b -f
```
Save it, then make it executable:
```
chmod +x /srv/rocketpool/watchtower-log.sh
```
Now you can watch the watchtower's logs by simply running:
```shell
sudo /srv/rocketpool/watchtower-log.sh
```
The services are now installed.
### Setting up Passwordless Script Access
The next step is to give the `rp` user the ability to restart the Validator Client when new validator keys are created, and stop the Validator Client if an emergency condition is detected.
Create a new `sudoers` file using `visudo`:
```shell
sudo visudo -f /etc/sudoers.d/rocketpool
```
Add the following lines to it:
```
Cmnd_Alias RP_RESTART = /usr/bin/systemctl restart
Cmnd_Alias RP_STOP = /usr/bin/systemctl stop
rp ALL=(ALL) NOPASSWD: RP_RESTART, RP_STOP
```
Where `` is the name of your VC service (e.g. `lighthousevalidator`)
Now, modify `/srv/rocketpool/restart-vc.sh`:
- Uncomment the line at the end and change it to `sudo systemctl restart `
Also modify `/srv/rocketpool/stop-validator.sh`:
- Uncomment the line at the end and change it to `sudo systemctl stop `
All set!
The `node` process can now restart or stop your VC as required automatically.
## Step 3: Configure the Smart Node
Now that your services are all created, it's time to configure the Smart Node stack.
Please visit the [Configuring the Smart Node Stack (Native Mode)](/node-staking/config-native.md) guide, and return here when you are finished.
### Enabling and Running the Services
With all of the services installed, it's time to:
- Enable them so they'll automatically restart if they break, and automatically start on a reboot
- Start them all
```shell
sudo systemctl daemon-reload
sudo systemctl enable rp-node rp-watchtower
sudo systemctl start rp-node rp-watchtower
```
### Setting Up a Wallet
Next, create a new node wallet or recover an existing wallet.
Please carefully follow the instructions in the [Setting up a Wallet](/node-staking/wallet-init.md) portion of the guide, then return here when you're done.
Once that's done, use the service log file scripts to verify that they successfully loaded your new wallet.
You should also verify this using the following command:
```shell
rp wallet status
```
If working properly it should produce the following output:
```
Your Smartnode is currently using the Hoodi Test Network.
The node wallet is initialized.
Node account:
```
## Step 4: Update the VC Service Definition
Unlike a solo staking setup, Rocket Pool generates and manages its validator keys automatically.
There are a few adjustments you'll need to make to the VC service definition file you just created in order for it to work with Rocket Pool correctly, including:
- The **Fee Recipient**
- The VC's data or wallet directory
- The VC's keys and secrets directories
We'll cover these step-by-step for each client.
### Setting Up the Fee Recipient File
::: danger NOTE
It is **crucial** that you follow these steps - failing to do so and using the wrong fee recipient will result in [penalties](https://github.com/rocket-pool/rocketpool-research/blob/master/Penalties/penalty-system) being applied to your validators and deductions taken from your Beacon Chain balance!
:::
The **fee recipient** is the argument you provide to your Validator Client that specifies the address on the Execution layer that you want your priority fees and MEV rewards to be sent to.
Rocket Pool has two different addresses for the fee recipient:
- If you are opted into the Smoothing Pool, it must be the **Smoothing Pool's address**
- If you are opted out of the Smoothing Pool, it must be **your node's Fee Distributor address**
_To learn more about the Smoothing Pool and your Fee Distributor, please see the [Fee Distributors and the Smoothing Pool](/node-staking/fee-distrib-sp.md) section of the guide._
Rocket Pool's `node` service will set this for you automatically by detecting which one it needs to be and setting it in a configuration file and restarting your Validator Client service to pick up the change.
Your Validator Client service can use that configuration file automatically so you don't need to hard-code the fee recipient.
Open the `systemd` service definition file that you just created for your Validator Client.
Before the `ExecStart` line, add this line:
```
EnvironmentFile=/srv/rocketpool/data/validators/rp-fee-recipient-env.txt
```
Then modify your fee recipient argument as follows; select your client of choice from the tabs below:
**Lighthouse**
Change
`--suggested-fee-recipient address`
to
`--suggested-fee-recipient ${FEE_RECIPIENT}`
**Nimbus**
Change
`--suggested-fee-recipient=address`
to
`--suggested-fee-recipient=${FEE_RECIPIENT}`
**Prysm**
Change
`--suggested-fee-recipient address`
to
`--suggested-fee-recipient ${FEE_RECIPIENT}`
**Teku**
Change
`--validators-proposer-default-fee-recipient=address`
to
`--validators-proposer-default-fee-recipient=${FEE_RECIPIENT}`
::: tip NOTE
If you start your Validator Client before Rocket Pool's services, it may error out because this file does not exist yet.
Don't worry, this file will be created by Rocket Pool once you've initialized and started its services.
:::
### Setting the Data and Keys Directories
Next, you must tell the VC where to store its data and load the validator keys that Rocket Pool generates.
Click on the client you use in the tabs below:
**Lighthouse**
Create the following directories and set their owner to `rp`:
```shell
sudo mkdir -p /srv/rocketpool/data/validators/lighthouse/validators
sudo mkdir -p /srv/rocketpool/data/validators/lighthouse/secrets
sudo chown -R rp:rp /srv/rocketpool/data/validators/lighthouse
sudo chmod -R 775 /srv/rocketpool/data/validators/lighthouse
```
Now, add or change the following parameters in the Lighthouse VC's service definition file to these new values:
```
--datadir /srv/rocketpool/data/validators/lighthouse
```
**Nimbus**
Create the following directories and set their owner to `rp`:
```shell
sudo mkdir -p /srv/rocketpool/data/validators/nimbus/validators
sudo mkdir -p /srv/rocketpool/data/validators/nimbus/secrets
sudo chown -R rp:rp /srv/rocketpool/data/validators/nimbus
sudo chmod -R 775 /srv/rocketpool/data/validators/nimbus
```
Now, add or change the following parameters in Nimbus's service definition file to the following:
```
--validators-dir=/srv/rocketpool/data/validators/nimbus/validators --secrets-dir=/srv/rocketpool/data/validators/nimbus/secrets
```
**Prysm**
Create the following directories and set their owner to `rp`:
```shell
sudo mkdir -p /srv/rocketpool/data/validators/prysm-non-hd/direct/accounts
sudo chown -R rp:rp /srv/rocketpool/data/validators/prysm-non-hd
sudo chmod -R 775 /srv/rocketpool/data/validators/prysm-non-hd
```
Add or change the following parameters in the Prysm VC's service definition file to these new values:
```
--wallet-dir /srv/rocketpool/data/validators/prysm-non-hd --wallet-password-file /srv/rocketpool/data/validators/prysm-non-hd/direct/accounts/secret
```
The VC will fail to start until you make a new Rocket Pool minipool (described later in the guides) because these files won't be created until that time, but the Beacon Node will be able to sync properly.
**Teku**
Create the following directories and set their owner to `rp`:
```shell
sudo mkdir -p /srv/rocketpool/data/validators/teku/keys
sudo mkdir -p /srv/rocketpool/data/validators/teku/passwords
sudo chown -R rp:rp /srv/rocketpool/data/validators
sudo chmod -R 775 /srv/rocketpool/data/validators/teku
```
Now, add or change the following parameters in the Teku VC's service definition file to the following:
```
--data-path=/srv/rocketpool/data/validators/teku --validator-keys=/srv/rocketpool/data/validators/teku/keys:/srv/rocketpool/data/validators/teku/passwords
```
### Relaxing `umask`
By default, your system will typically come with a `umask` configuration that will strip the `+w` bit from the group permissions whenever the `node` daemon creates a new folder.
This is problematic for several consensus clients, because they will actually write things such as lock files or other metadata into the directories that the Smart Node creates when it generates new validator keys during a minipool deposit.
To combat this and ensure your VC works correctly, please **relax your `umask` settings**.
For example, instead of `0022`, you should consider setting it to `0002` for the `rp` user.
Every system is different, so please consult [a guide](https://www.howtogeek.com/812961/umask-linux/) that covers your Operating System to learn how to do this.
::: warning WARNING
This step is _crucial_ to ensure the automatic staking and validating duties are handled properly.
If you notice permissions problems in your VC's logs after your minipool passes the 12-hour scrub check and enters `staking` status, you will likely need to run `sudo chmod 775` on the folder containing your validator keys so your VC service can write to that folder.
:::
### Reloading the VC Service
With these changes made, you can now reload and restart the VC service using the following:
```shell
sudo systemctl daemon-reload
sudo systemctl restart
```
**If not using Prysm**, please watch the VC's logs carefully to ensure that it successfully started properly and the following are defined correctly:
- The fee recipient
- The data path
- The wallet / keys / secrets path
You can verify this with, for example, `ps aux | grep fee` to filter the running processes to look at the fee recipient that your VC has used.
**It should be the same one defined in `/srv/rocketpool/data/validators/rp-fee-recipient-env.txt`.**
If they are all using the correct values, then congratulations!
You've successfully set up your Rocket Pool node and can follow the next sections of the guide to learn how to use it.
## Next Steps
Now that your clients are installed, we recommend you take a look at the security suggestions in the [Securing your Node](/node-staking/securing-your-node.md) section next.
As you're running a Native setup, you have likely done some of these things already; nevertheless, it doesn't hurt to at least explore it and see how well the recommended security posture fits with your system.
---
url: /node-staking/performance.md
---
> For AI agents: the complete documentation index is available at /llms.txt, the full documentation bundle is available at /llms-full.txt.
# Monitoring your Node's Performance
Now that your node is up and running and you have one or more minipools attached, you'll need to keep an eye on everything to make sure it's running smoothly.
You can track your machine either:
1. Directly by tapping into your machine metrics
2. Indirectly through the use of third party tools
It is recommended to use a combination of both depending on your needs.
## Directly Tracking your Machine's Status
With respect to your machine's status, there are a few useful metrics you'll probably want to keep an eye on:
- CPU Usage
- Free RAM remaining
- Swap space usage (if you enabled it)
- Remaining free disk space
- Network I/O (if your ISP imposes a data cap)
::: tip NOTE
The sections below show you some ways to monitor things, but they require you to be logged into the terminal of your machine.
There is a better, much more convenient and much nicer-looking method that uses a [Grafana web dashboard](/node-staking/grafana.md) but it is still under development.
Stay tuned for the completion of that section!
:::
### CPU, RAM, and Swap
The first three can be easily viewed with the `htop` program.
This will give you a nice live view into your system resources, as shown by this screenshot from a Raspberry Pi:
```
htop
```
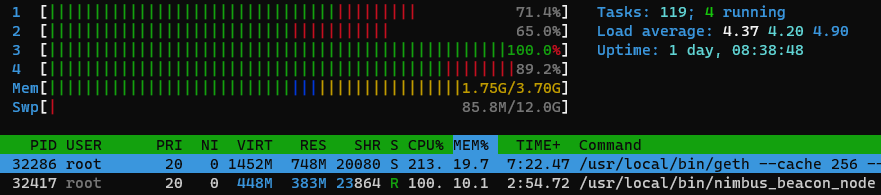
On the top display with the bars, the numbered bars each refer to a CPU core's current usage.
`Mem` shows you how much RAM you're currently using (in this screenshot, 1.75 GB) and how much you have total (3.70 GB).
`Swp` shows you how much swap space you're using (85.8 MB) and how much you have total (12.0 GB).
On the bottom table, each row represents a process.
Your Execution and Consensus clients will likely be on top (in this case, Geth and Nimbus) which you can see in the rightmost column labeled `Command`.
The `RES` column shows you how much RAM each process is taking - in this screenshot, Geth is taking 748 MB and Nimbus is taking 383 MB.
The `CPU%` column shows you how much CPU power each process is consuming.
100% represents a single core, so if it's over 100%, that means it's using a lot from multiple cores (like Geth is here, with 213%).
### Remaining Free Disk Space
Keeping an eye on how much disk space you have free is easy to do with the following command:
```
df -h
```
This will provide output similar to the following example:
```
Filesystem Size Used Avail Use% Mounted on
...
/dev/mmcblk0p2 30G 12G 16G 43% /
...
/dev/sda1 1.8T 852G 981G 47% /mnt/rpdata
...
```
For conventional setups where you have one drive that stores both your Operating System and your Execution and Consensus chain data, you just need to look at the entry that has `/` in the `Mounted on` column.
This represents your main disk.
If that ever looks like it's running out of space (say, 80% used or so), then you need to start thinking about doing some cleanup.
For example, if you're running Geth, you may want to look at [how to prune it](/node-staking/pruning.md) to clear up some space.
For setups that store the Execution and Consensus chain data on a separate drive, you'll want to look at the row that has your chain data folder in the `Mounted on` column as well.
In this example we mounted an external SSD to `/mnt/rpdata`, so we'll have to keep an eye on it to make sure it doesn't grow too large either.
### Network I/O and Data Usage
If you want to track how much network I/O your system uses over time, you can install a nice utility called `vnstat`.
Here's an example of installing it on a Ubuntu / Debian system:
```shell
sudo apt install vnstat
```
To run it, do this (assuming `eth0` is the name of the network interface you use for your Internet connection):
```
vnstat -i eth0
```
This won't work right away because it needs time to collect data about your system, but as the days and weeks pass, it will end up looking like this:
```
$ vnstat -i eth0
Database updated: 2021-06-28 22:00:00
eth0 since 2021-01-29
rx: 3.33 TiB tx: 4.25 TiB total: 7.58 TiB
monthly
rx | tx | total | avg. rate
------------------------+-------------+-------------+---------------
2021-05 550.19 GiB | 855.34 GiB | 1.37 TiB | 4.51 Mbit/s
2021-06 498.13 GiB | 784.43 GiB | 1.25 TiB | 4.57 Mbit/s
------------------------+-------------+-------------+---------------
estimated 535.31 GiB | 842.97 GiB | 1.35 TiB |
daily
rx | tx | total | avg. rate
------------------------+-------------+-------------+---------------
yesterday 18.35 GiB | 32.00 GiB | 50.36 GiB | 5.01 Mbit/s
today 18.26 GiB | 30.52 GiB | 48.78 GiB | 5.29 Mbit/s
------------------------+-------------+-------------+---------------
estimated 19.92 GiB | 33.30 GiB | 53.22 GiB |
```
This will let you keep tabs on your total network usage, which might be helpful if your ISP imposes a data cap.
Note that most modern systems more commonly use other network interfaces like eno0 and enp0s31f6 and not eth0.
If you need to check your network interface, run the following command:
```shell
ls /sys/class/net
```
Ethernet (hard-wire) devices usually start with `e`, such as the examples above.
Wireless devices usually start with `w`.
## Smart Node Alert Notifications
[Monitoring your Smart Node Stack with Alert Notifications](/node-staking/maintenance/alerting.md) walks through using the Smart Node alert notification functionality to receive notifications about the health and important events of your Rocket Pool Smart Node.
## Third-Party Performance Monitoring
The best monitoring uses a Swiss-cheese model: every tool has holes, but if you stack them on top of each-other there is less of a chance anything falls through and catches you by surprise.
Please note that these third-party tools are used by the Rocket Pool community, but are not officially endorsed or supported by the Rocket Pool team.
If you have a tool suggestion, or are a tool owner, you are very welcome to add a pull request with details on your tool.
### Beaconcha.in Website: Using the Beacon Chain as a Metric Source
The [Beaconcha.in](https://beaconcha.in) block explorer website and app provide a way to track your validator's performance by looking at it's on-chain activity.
They also have the option to receive [email notifications](https://beaconcha.in/user/notifications) for significant events like downtime.
Navigate to their site, and enter the public key for your validator in the search box on the top of the screen.
::: tip
If you forgot your validator's public key, you can easily retrieve it with the command `rocketpool minipool status`.
:::
If everything is set up right, you should see something like this:
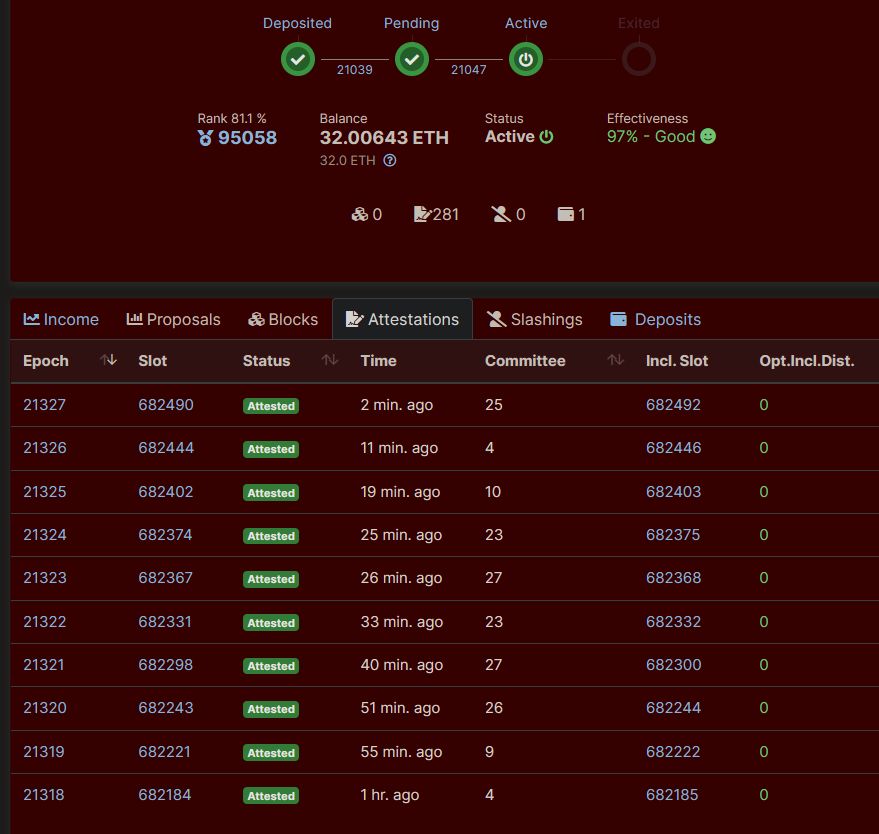
::: tip NOTE
The above link is for the **mainnet** version of Beaconcha.in.
If you're running on the Hoodi Testnet, use [this link instead](https://hoodi.beaconcha.in)!
:::
This is a record of all of the Beacon Chain activity for your validator.
You can use it to check your validator's balance on the Beacon Chain to watch it grow over time and calculate your APY.
You can also use it to quickly gauge if your validator is alive and running correctly.
If it is, all of the attestations should say `Attested` for their **Status**, and ideally all of the **Opt. Incl. Dist.** should be 0 (though an occasional 1 or 2 is fine).
If there are lots of blocks that say `Missed` on them, then your validator is not working properly.
You should check the logs of the `eth1`, `eth2`, and `validator` services with `rocketpool service logs ...` if you're using Docker or Hybrid mode (or the corresponding log scripts if you're using Native mode) to look for problems.
**You should pin this tab or create a bookmark with it so you can quickly jump to it and check the status of your validator.**
#### Using Beaconcha.in to Monitor Multiple Minipools
Beaconcha.in has a [dashboard view](https://beaconcha.in/dashboard) that allows you to monitor multiple validators or minipools at once.
Simply add your validator indices one at a time. If you have a lot of minipools, you can run:
```shell
rocketpool minipool status | grep Validator.index | awk -F " " '{print $3}' | paste -s -d, -
```
to get a comma-separated list, and place it in the URL bar like so: `https://beaconcha.in/dashboard?validators=123456,123457`
### Beaconcha.in App: Validator Overview and Push Notifications
The Beaconcha.in website is a great way to view metrics and set up email alerts.
Their mobile app has a more "at-a-glance" nature.
It also features a push notification service that includes some useful alerts like:
1. Notifications of issues like missed attestations
2. Notifications of Rocket Pool reward rounds
3. Over/under-collateralisation of the RPL on your node
Note that the app has a free version, and paid options with convenience features like homescreen widgets.
### Renaming your Validators on Beaconcha.in
The Beaconcha.in website has a feature that allows users to rename their validators, making them easier to identify/search.
To be able to use this feature you need to sign a message using your node wallet's private key, in order to prove you're the person who controls that validator.
The Smart Node v1.5.1 includes the ability to sign messages with your node wallets's private key by using the command `rocketpool node sign-message`, then providing the message that you want to sign.
It must contain the term 'beaconcha.in' to be used to rename your validators.
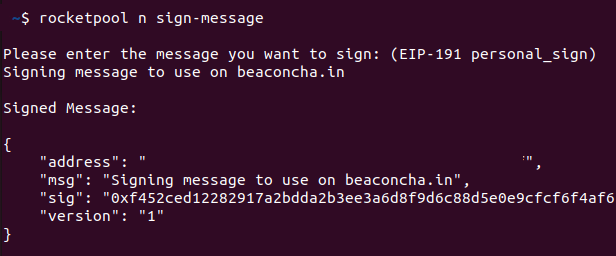
Open your validator page on Beaconcha.in and click on the `Edit validator name` button.
Copy the result from the sign-message command and paste it in the "Signature" field.
Fill your desired nickname and click the `Save changes`button.
### Uptimerobot: Port-scanning for Uptime
The [Uptimerobot](https://uptimerobot.com/) service is a simple service that scans an IP address for an open port.
If your machine becomes unavailable on the port you specified, Uptimerobot can send you a notification that there is an issue.
The service was a wide variety of notification options including email, push notification, SMS, phone call, and webhooks.
The setup screen looks something like this:
The IP to monitor is the external IP of your node, which you can find by logging into your node by `ssh` or physically, and opening [icanhazip.com](https://icanhazip.com/) in a browser or running the following command in your terminal:
```shell
curl icanhazip.com
```
The port to monitor depends on your node setup; users running the typical Smart Node installation will likely have forwarded ports 30303 and 9001 for the Execution and Consensus clients respectively, so these are good choices for uptime monitoring.
### Rocketpool Metrics Dashboards
There are multiple community-lead initiatives to provide an overview of your node performance, as well as the Rocket Pool network as a whole.
### Scripting with Pushover (advanced)
::: tip NOTE
[Monitoring your Smart Node Stack with Alert Notifications](/node-staking/maintenance/alerting.md) walks through using the Smart Node alert notification functionality which includes a notification when there are updates available for your node.
:::
The [Pushover](https://pushover.net/) service allows you to send yourself push notifications.
::: warning NOTE
This is an advanced activity to undertake.
It can be helpful if you are familiar with shell scripting, but is not recommended if you are not comfortable in a shell environment.
:::
To get started with Pushover:
1. Create an account at [pushover.net](https://pushover.net/)
2. [Create an API token](https://pushover.net/apps/build)
3. Install the Pushover mobile app and/or browser extension
4. Call the Pushover API for any action you care about
Calling the Pushover API to send you a push notification is done through a `curl` call structured as such:
```shell
PUSHOVER_USER=
PUSHOVER_TOKEN=
MESSAGE_TITLE=
MESSAGE_CONTENT=
curl -f -X POST -d "token=$PUSHOVER_TOKEN&user=$PUSHOVER_USER&title=$MESSAGE_TITLE&message=$MESSAGE_CONTENT&url=&priority=0" https://api.pushover.net/1/messages.json
```
#### Example: Push Notification on Updates Available
If you set up automatic updates using the `unattended-upgrades` and `update-nofifier` packages, you may want to receive a push notification when there are updates available for your node.
A potential way to do this is to create a script in `~/update-notifier.sh` and to trigger it daily at 9:00 using `crontab`.
To do this, first create the script by running:
```shell
nano ~/update-notifier.sh
```
Then paste the following script:
```shell
#!/bin/bash
PUSHOVER_USER=
PUSHOVER_TOKEN=
NODE_ADDRESS="$(rocketpool node status | grep -Po "(?<=The node )(0x[A-Za-z0-9]{40})")"
EXPLORER_URL=https://beaconcha.in/validators/deposits?q=
#EXPLORER_URL=https://www.rp-metrics-dashboard.com/dashboard/MAINNET/
NOTIFICATION_URL="$EXPLORER_URL$NODE_ADDRESS"
# Check if the update-notifier file is showing updates available
if cat /var/lib/update-notifier/updates-available | grep -Pq '^(?!0)[0-9]* updates can be applied'; then
MESSAGE_TITLE="⚠️ Rocket Pool node system updates available"
MESSAGE_CONTENT="$( cat /var/lib/update-notifier/updates-available | grep -P '^(?!0)[0-9]* updates can be applied' )"
else
MESSAGE_TITLE="✅ Rocket Pool node system up to date"
MESSAGE_CONTENT="No system updates available"
fi
curl -f -X POST -d "token=$PUSHOVER_TOKEN&user=$PUSHOVER_USER&title=$MESSAGE_TITLE&message=$MESSAGE_CONTENT&url=$NOTIFICATION_URL&priority=0" https://api.pushover.net/1/messages.json
```
Next, run the following command to mark the script as executable:
```shell
chmod u+x ~/update-notifier.sh
```
Now run the following command to open your crontab:
```shell
crontab -e
```
Then use the arrow keys to scroll down, and add the line `* 9 * * * ~/update-notifier.sh` so the file looks like this:
```shell
# Edit this file to introduce tasks to be run by cron.
#
# Each task to run has to be defined through a single line
# indicating with different fields when the task will be run
# and what command to run for the task
#
# To define the time you can provide concrete values for
# minute (m), hour (h), day of month (dom), month (mon),
# and day of week (dow) or use '*' in these fields (for 'any').
#
# Notice that tasks will be started based on the cron's system
# daemon's notion of time and timezones.
#
# Output of the crontab jobs (including errors) is sent through
# email to the user the crontab file belongs to (unless redirected).
#
# For example, you can run a backup of all your user accounts
# at 5 a.m every week with:
# 0 5 * * 1 tar -zcf /var/backups/home.tgz /home/
#
# For more information see the manual pages of crontab(5) and cron(8)
#
# m h dom mon dow command
# This like triggers at 9 AM local time
# to configure your own times, refer to https://crontab.guru/
0 9 * * * ~/update-notifier.sh
```
The press `control+x` to exit and press `Y` when asked whether you want to save your changes.
You should now receive a notification at 09:00 local time if you have updates.
You can manually run the script by typing this in your terminal:
```shell
~/update-notifier.sh
```
#### Example: Get Notified when your APC UPS Daemon Activates
Some home stakers are using an Uninterruptible power supply with the `apcupsd` utility to make sure their node shuts down gracefully if their power goes out.
The `apcupsd` utility uses the `apccontrol` script to manage its logic, thus it is possible to monitor the activity of this daemon by editing the `/etc/apcupsd/apccontrol` file.
To do this, run:
```shell
sudo nano /etc/apcupsd/apccontrol
```
Then at the top of the line add the following code so the file looks like this:
```shell
PUSHOVER_USER=
PUSHOVER_TOKEN=
MESSAGE_TITLE="UPS Daemon called"
MESSAGE_CONTENT="called with: $1"
curl -f -X POST -d "token=$PUSHOVER_TOKEN&user=$PUSHOVER_USER&title=$MESSAGE_TITLE&message=$MESSAGE_CONTENT&url=&priority=0" https://api.pushover.net/1/messages.json
#
# Copyright (C) 1999-2002 Riccardo Facchetti
#
# platforms/apccontrol. Generated from apccontrol.in by configure.
```
This will send you a push notification whenever your UPS daemon takes action, includion periodic "self test" functionality.
---
url: /node-staking/platform.md
---
> For AI agents: the complete documentation index is available at /llms.txt, the full documentation bundle is available at /llms-full.txt.
# Node Requirements and Choosing a Platform
Alright!
So you've decided to try your hand at running a Rocket Pool node.
The first step of the process is to decide what kind of platform you want to run your node on.
If you already have one in mind, great!
You can skip to the next section.
If you aren't sure yet, then read on for some information about your options.
## Full Node Requirements
A **full node** is one that runs both an Execution Client and Consensus Client along with the Rocket Pool stack.
Now that the Merge has occurred, Rocket Pool nodes are required to run this configuration (though the Execution and Consensus clients can be externally managed for users already running a solo-staking setup - we'll cover this in more detail later).
Here is a simple breakdown of what is required to run a full Rocket Pool node well:
- A **stable Internet connection**. The longer you stay online, the better your rewards. A spotty Internet connection will hurt your returns, and by extension, the rETH ratio growth.
- At least **10Mbps of bandwidth both up and down**. A full node usually takes around 8Mbps to 10Mbps up & down of network traffic, depending on your configuration and number of minipools.
- **No data cap** imposed by your ISP. Running a full node will take a lot of data - we have seen reports of over 2 TB per month on chain data alone. This can be mitigated somewhat with a few settings tweaks to the ETH clients, but as a rule of thumb, don't run a full node if your Internet plan comes with a monthly data cap.
- **Stable electricity**. For the same reason as needing a stable Internet connection, you also want to have reliable power. This can be mitigated with a large UPS (backup battery) to deal with short blackouts.
- A **computer** with sufficient specs. This is pretty flexible because it _really_ depends on what Execution and Consensus client you use, and what settings you configure them with. The computer can be a local machine, or it can be hosted in the cloud. Read below for some more information on those two options, and how to decide which is best for you.
The computer must meet the [hardware guidelines](/node-staking/local/hardware.md)
::: warning NOTE
At this time, only **Linux** and **macOS** platforms are supported.
**Windows is not currently supported** for Smart Node operation.
:::
## Running a Local Node
If you have reliable electricity and uncapped Internet access, and are willing to build (or buy pre-made) and maintain a computer, then running a local node might be a great choice for you. With this option, you will set up a dedicated computer as a Rocket Pool node and run it locally in your own home.
Advantages:
- No monthly fees, other than utilities
- Complete control over your own machine and its data (including your wallet's key)
- Access to perform maintenance and upgrades whenever you want
- Contributes to Execution and Consensus's, and Rocket Pool's decentralization (and thus, their security)
Disadvantages:
- Requires stable, uncapped Internet and electricity
- **Running a node uses at least 1.5 TB of data per month. If you have a data cap below this amount, you may run into problems while running a local node!**
- You're solely responsible for network & computer security
- Can be challenging if you're not experienced with computer maintenance
- Vulnerable to theft
If the advantages sound like they outweigh the disadvantages for you, then take a look at our [Local Node Operator's Guide](/node-staking/local/hardware.md).
## Running on a Server
If you don't have a reliable uncapped Internet plan, or you just don't want to deal with building and maintaining your own physical computer, you may want to look at running a private server you rent from a hosting provider. Essentially, these companies will happily create and run a server for you, for a monthly fee. If you don't mind that fee and want to run a Rocket Pool node, using a server can be a good strategy.
Advantages:
- No maintenance, support is usually available to fix issues
- Doesn't affect your Internet plan or data cap
- Usually run in a professional data center, very little down time
- May be more cost effective than buying / building your own computer
Disadvantages:
- Makes Execution and Consensus, and Rocket Pool somewhat more centralized, which weakens the security of the networks
- Monthly fees
- Servers may come with data caps, or have expensive network I/O rates
- Possible for hosts to examine your machine's contents and take your wallet's key if not secured
If those advantages sound like they outweigh the disadvantages for you, then take a look at our [Server Node Operator's Guide](/node-staking/vps/providers.md).
---
url: /node-staking/prepare-node.md
---
> For AI agents: the complete documentation index is available at /llms.txt, the full documentation bundle is available at /llms-full.txt.
# Preparing your Node for Operation
If you're here, then you've successfully started the Smart Node services, created a wallet, and finished syncing both the Execution and Consensus chains on your respective clients.
If so, then you are ready to register your node on the Rocket Pool network and create a megapool with a validator!
If not, please review the previous sections and return here once you've completed those steps.
Before creating a megapool and new validator, there are a few steps to take to finish preparing your node.
These only need to be done once though; once you've done them, you can skip to the [Creating a Megapool Validator](/node-staking/megapools/create-megapool-validator.md) section if you want to create multiple validators on your node.
## Loading your Node Wallet
Registering your node and standing up a validator both involve submitting transactions to the Ethereum network from your node wallet.
This means **you'll need to have some ETH on it** to pay for the gas costs of those transactions.
If you wish to stake RPL you can do this directly on the node, or (preferably) you can use the Rocket Pool website's **Stake on Behalf** function to stake for your node with RPL in your cold wallet.
We'll discuss the Stake on Behalf feature later in this guide when it's time to stake your RPL.
::: tip NOTE
The ETH required for gas fees to set up a node with one minipool is about 0.0025 ETH times the current gas price in gwei.
For example, with a gas price of 30 gwei, you would pay about 0.075 ETH in gas fees.
See [this worksheet](https://docs.google.com/spreadsheets/d/1loB9U8wCIJn73a1DsR-mJJ9PQaYWMlF9asNc7BgM_zc/edit#gid=1413609552https://docs.google.com/spreadsheets/d/1loB9U8wCIJn73a1DsR-mJJ9PQaYWMlF9asNc7BgM_zc/edit#gid=1413609552) to help estimate the gas fees for various network conditions.
:::
**Running on the Hoodi Test Network**
f you're running on the Hoodi test network, please see the [Practicing with the Test Network](/node-staking/testnet/overview.md) section to learn how to acquire test ETH.
For test RPL, we have added a similar faucet function directly to the CLI.
Please see the [Getting Test RPL on Hoodi](/node-staking/testnet/overview.md#getting-test-rpl-on-hoodi) guide to acquire some.
**Running on the Main Network**
We assume that you already have a separate Ethereum-compatible wallet that is holding your ETH.
If you need RPL, you can purchase it on a centralized exchange such as [Kraken](https://www.kraken.com/prices/rocket-pool?quote=usd) or a decentralized exchange such as [Balancer](https://app.balancer.fi/#/trade/ether/0xD33526068D116cE69F19A9ee46F0bd304F21A51f).
Start by transferring some ETH from your existing wallet to the node wallet.
If running on Mainnet, **leave your RPL on the wallet you used to purchase it.**
As a reminder, you can use `rocketpool wallet status` to get the address of the node wallet if you need it.
If you are not sure how to send cryptocurrency from your existing wallet, please consult your wallet's documentation.
WARNING
Sending cryptocurrency across wallets is a non-reversible operation!
If you enter the wrong recipient address, **there is no way to retrieve your tokens**.
We recommend you send a small amount of ETH first as a **test transaction** to verify that you correctly entered the node wallet's address, and then **whitelist** that address in your other wallet, if possible, to avoid mistyping it.
## Registering your Node with the Network
Once you have ETH in your wallet, you can register your node with the Rocket Pool network to access all of its features.
To do this, run the following command:
```shell
rocketpool node register
```
This will prompt you for the timezone you want to register with.
By default, this will detect the timezone from your system clock, but you can change it if you prefer.
Any of the `Country/City` format timezones [listed on this page](https://en.wikipedia.org/wiki/List_of_tz_database_time_zones) should be acceptable.
::: tip NOTE
The timezone is just used for the global map of node operators displayed on the main site.
You don't need to set it to your actual timezone if you have security concerns.
If you prefer to remain anonymous, use a generic option such as `Etc/UTC`.
:::
Once this is complete, you will officially be a member of the Rocket Pool network!
## Setting your Primary Withdrawal Address
Before anything else, we highly recommended you change the **primary withdrawal address** for your node.
This is the address that all of your RPL checkpoint rewards, your staked RPL, and your Beacon Chain ETH will be sent to when you claim your checkpoint rewards or exit your validator and withdraw from your megapool.
Optionally, you can set a withdrawal address for your ETH and [a new one for your RPL](https://rpips.rocketpool.net/RPIPs/RPIP-31). The RPL withdrawal address if set will be able to trigger and claim RPL from inflation rewards and will have no effect on ETH consensus rewards or anything related to ETH. If you haven't set an RPL withdrawal address, the Primary Withdrawal Address will receive RPL rewards as well. By default, **whoever controls the primary withdrawal address can access ALL your staked RPL, ETH, and rewards.**
The address used to supply a node with ETH should be the primary withdrawal address for the node. Click [here](/legacy/houston/stake-eth-on-behalf.md) to read about **staking ETH on behalf of a node**.
::: warning NOTE
Upon setting up your node for the first time, this is set to your node's wallet address.
However, for security reasons, **it is vitally important to set this to a different address controlled by a cold wallet.**
A cold wallet could be a hardware wallet (such as a [Ledger](https://www.ledger.com/), [Trezor](https://trezor.io/), or [Grid+](https://gridplus.io/)), or a Smart Contract wallet (such as [Argent](https://www.argent.xyz/)).
We **strongly recommend** that you DO NOT use a hot wallet such as MetaMask as your primary withdrawal address.
This way, if your node wallet is compromised, the attacker doesn't get access to your staked ETH and RPL by forcing you to exit because all of those funds will be sent to your separate cold wallet (which they hopefully do not have).
Primary withdrawal addresses are set at a node operator level.
If you create multiple megapool validators, they will all refer to the same primary withdrawal address so you only need to perform this setup once.
[See here](https://ethereum.org/en/security/#wallet-security) for some basics on wallet security from the Ethereum Foundation.
:::
There are two different ways to do this.
Please read both options below to determine which one applies to you.
**Method 1**
**Use this method if your new primary withdrawal address can be used to sign transactions via MetaMask or WalletConnect.**
NOTE
This method will require you to **submit a transaction** from your new primary withdrawal address, so **you must have a small amount of ETH in that address already.**
NOTE
For users of **Ledger** hardware wallets, note that Ledger Live does not yet support MetaMask or WalletConnect natively.
You will need to use MetaMask and connect it to your Ledger instead.
Follow [the official Ledger instructions](https://www.ledger.com/academy/security/the-safest-way-to-use-metamask) to do this.
To work with the Rocket Pool website, you will need to have your Ledger connected, unlocked, and the ETH app open.
You will also need to **enable "blind signing"** for the current session; you can find this within the Settings portion of the ETH app on the device.
Bind signing will automatically be disabled after you close the session.
If you are using Hoodi Testnet and want to use your Ledger as your primary withdrawal address, **you must create a new Ethereum wallet on your Ledger** first to ensure you don't connect your live address to the test network, which tends to cause confusion.
Make sure to select the **Hoodi Testnet** in the network selection dropdown when connecting your Ledger to MetaMask.
Note that Ledger Live will not show your balance on the test network, but other applications which support the test network (such as MetaMask and Etherscan) will be able to display it.
1. Run `rocketpool node set-primary-withdrawal-address 'your cold wallet address or ENS name'`. Your new primary withdrawal address will be marked as "pending". Until you confirm it, **your old primary withdrawal address will still be used**.
2. To confirm it, you must send a special transaction **from your new primary withdrawal address** to the megapool contract to verify that you own the primary withdrawal address.
3. The easiest way to do this is to navigate to the Rocket Pool primary withdrawal address site (for the [Hoodi Testnet](https://testnet.node.rocketpool.net/primary-withdrawal-address) or for [Mainnet](https://node.rocketpool.net/primary-withdrawal-address)).
4. If you haven't already connected Metamask or WalletConnect to the Rocket Pool website, do this now. Click the **select wallet** button in the center of the screen, and choose MetaMask or WalletConnect based on which wallet you would like to use. You will then be prompted asking you to confirm the connection. For example, using MetaMask:
Click **Next**, then click **Confirm** to enable the Rocket Pool website to use your wallet. 3. Select **primary Withdrawal Address** from the top menu (or the hamburger menu on the left side if you're on a mobile device). 4. You will see this prompt:
4. Type your **node wallet address** here and click on the **Check Mark button** to continue.
5. You will be prompted with a question asking if you want to set a new node primary withdrawal address or confirm a pending one. Select **Confirm**.
6. Now, there should be a new confirmation dialog in your wallet. Again, using MetaMask as an example, click the MetaMask icon to open it and you should see something like this:
Click **Confirm** to send the transaction to the network. This will take some time until it gets included in a block, but once it does, you will see a confirmation dialog:
5. Your new primary withdrawal address will now be confirmed and activated. You can view this with `rocketpool node status`.
**Method 2**
**Use this method only if your primary withdrawal address _cannot_ be used to sign transactions via MetaMask or WalletConnect.**
In this method, you will run:
```shell
rocketpool node set-primary-withdrawal-address --force 'your cold wallet address'
```
You will be offered the chance to send a test transaction before confirming this, to ensure that you have the right address.
If you confirm this command when it prompts you, your new primary withdrawal address will be set immediately.
::: danger
By doing this, you bypass the safety measure associated with Method 1, which requires you to prove that you own the new address.
If you make a typo here, there is no way to undo it and **your megapool's rewards will be lost forever**.
We **strongly** encourage you to use the test transaction mechanism before confirming this, and if possible, use Method 1 instead.
:::
Once this is done, you will **no longer be able to change your primary withdrawal address using the `set-primary-withdrawal-address` command**.
To change it, you will need to send a signed transaction from your **active** primary withdrawal address (the one you just switched to).
The Rocket Pool website has a function to help you do this.
## Setting your Signalling Address
Setting your signalling address will allow you to participate in off-chain governance votes on
[RocketDash](https://rocketdash.net/vote) from a browser or mobile device, without having to expose node keys to a hot wallet.
:::tip NOTE
RocketDash replaced Snapshot for Rocket Pool's off-chain governance votes. Your signalling address is stored on-chain,
so if you already set one for Snapshot, RocketDash uses it too and you do not need to set it again.
:::
There are a few things to prepare:
- Your node's address
- An address you want to use for off-chain voting (signalling address)
You'll be signing a message saying that your node's address can delegate to the new address. This message states your
intent to use your wallet address as a signalling address.
Select which network you're using from one of the tabs below.
**Hoodi Testnet**
If you're trying this out on Hoodi testnet, you can sign on this page:
[https://testnet.node.rocketpool.net/signalling-address](https://testnet.node.rocketpool.net/signalling-address)
**Mainnet**
If you're ready to configure this on mainnet, go here instead:
[https://node.rocketpool.net/signalling-address](https://node.rocketpool.net/signalling-address)
:::danger WARNING
Do not load your node's private key onto a hot wallet. Please choose another account to be your signalling address.
After setting the signalling address, you can use it to vote on RocketDash with your node's voting power.
:::
Start by **connecting the address you want to use as a signalling address** to the website using MetaMask,
WalletConnect, or any of the other methods the website supports. You will then be presented with this dialog to look up
your node address.
Next, you'll enter your node address then click the orange "Find" button. This will check if the address is a registered
node and then bring you to the next step.
:::tip TIP
**Make sure you have the correct node address before doing this!** if you need to confirm your node's address, you can
quickly retrieve it via the CLI using the `rocketpool node status` command.
:::
Once you've signed in and confirmed your node address, you'll see your **signalling address**. It should be the
same as the account you've signed into the site with. Double check that this is correct before proceeding. Once you're
confident that you're signed into the desired account, click the orange "Sign Message" button. You'll see a prompt in
your wallet extension app to sign the following message:
```
`node address` may delegate to me for Rocket Pool governance
```
Signing won't cost you any gas but setting will. After you sign, the frontend will give you a command to paste into the
smartnode. Go ahead and paste it into your smartnode's CLI and follow the prompted steps. The command should look
something like this:
```shell
rocketpool pdao set-signalling-address
`signalling address`
`signature`
```
If you see this message in your CLI, you're all set!
```
The node's signalling address was successfully set to `signalling address`
```
:::tip TIP
Don't worry if you accidentally close the site or lose track of the command. You can simply repeat the steps and **sign
again using the same node address and signalling address**. The frontend uses `signer.Signmessage()` from the ethers
library, which means your signature is deterministic given the same input.
Click [here](https://docs.ethers.org/v6/api/providers/#cid_865) to learn more.
:::
Clearing your signalling address is pretty easy, just use this command in the CLI:
```shell
rocketpool pdao clear-signalling-address
```
## Setting your RPL Withdrawal Address
It's important to understand the difference between your [primary withdrawal address](/node-staking/prepare-node.md#setting-your-primary-withdrawal-address) and your RPL withdrawal address. By default, your RPL withdrawal address is unset and your Primary withdrawal address is where all of your RPL checkpoint rewards, your staked RPL, and Beacon Chain ETH will be sent to.
You can set a [separate withdrawal address for your RPL](https://rpips.rocketpool.net/RPIPs/RPIP-31) if you wish. Your RPL withdrawal address if set will be able to trigger and claim RPL from inflation rewards and will have no effect on ETH consensus rewards or anything related to ETH. In this case, your Primary withdrawal address will no longer have any authority over RPL related actions.
This creates some interesting opportunities where RPL can be supplied by an entity to a node operator that does not wish to have exposure to RPL. That entity can then claim RPL rewards for putting up the required insurance collateral for the node. In other words, this allows different actors to supply each collateral type.
::: warning NOTE
Upon setting up your node for the first time, your RPL withdrawal address defaults to being unset.
If you choose to set an RPL withdrawal address, **it is vitally important to set this to a different address controlled by a cold wallet.**
A cold wallet could be a hardware wallet (such as a [Ledger](https://www.ledger.com/), [Trezor](https://trezor.io/), or [Grid+](https://gridplus.io/)), or a Smart Contract wallet (such as [Safe](https://app.safe.global/welcome)).
We **strongly recommend** that you DO NOT use a hot wallet such as MetaMask as your RPL withdrawal address.
This way, if your node wallet is compromised, the attacker doesn't get access to your staked RPL by forcing you to exit because all of those funds will be sent to your separate cold wallet (which they hopefully do not have).
RPL withdrawal addresses are set at a node operator level.
If you create multiple megapool validators, they will all refer to the same RPL withdrawal address so you only need to perform this setup once.
[See here](https://ethereum.org/en/security/#wallet-security) for some basics on wallet security from the Ethereum Foundation.
:::
There are two different ways to do this.
Please read both options below to determine which one applies to you.
**Method 1**
_Use this method if your new RPL withdrawal address can be used to sign transactions via MetaMask or WalletConnect._\*
NOTE
This method will require you to **submit a transaction** from your new RPL withdrawal address, so **you must have a small amount of ETH in that address already.**
NOTE
For users of **Ledger** hardware wallets, note that Ledger Live does not yet support MetaMask or WalletConnect natively.
You will need to use MetaMask and connect it to your Ledger instead.
Follow [the official Ledger instructions](https://www.ledger.com/academy/security/the-safest-way-to-use-metamask) to do this.
To work with the Rocket Pool website, you will need to have your Ledger connected, unlocked, and the ETH app open.
You will also need to **enable "blind signing"** for the current session; you can find this within the Settings portion of the ETH app on the device.
Bind signing will automatically be disabled after you close the session.
If you are using Hoodi Testnet and want to use your Ledger as your RPL withdrawal address, **you must create a new Ethereum wallet on your Ledger** first to ensure you don't connect your live address to the test network, which tends to cause confusion.
Make sure to select the **Hoodi Testnet** in the network selection dropdown when connecting your Ledger to MetaMask.
Note that Ledger Live will not show your balance on the test network, but other applications which support the test network (such as MetaMask and Etherscan) will be able to display it.
1. Run `rocketpool node set-rpl-withdrawal-address 'your cold wallet address or ENS name'`. Your new RPL withdrawal address will be marked as "pending". Until you confirm it, **your old RPL withdrawal address will still be used**.
2. To confirm it, you must send a special transaction **from your new RPL withdrawal address** to the megapool contract to verify that you own the RPL withdrawal address.
3. The easiest way to do this is to navigate to the Rocket Pool RPL withdrawal address site (for the [Hoodi Testnet](https://testnet.node.rocketpool.net/rpl-withdrawal-address) or for [Mainnet](https://node.rocketpool.net/rpl-withdrawal-address)).
4. If you haven't already connected Metamask or WalletConnect to the Rocket Pool website, do this now. Click the **select wallet** button in the center of the screen, and choose MetaMask or WalletConnect based on which wallet you would like to use. You will then be prompted asking you to confirm the connection. For example, using MetaMask:
Click **Next**, then click **Confirm** to enable the Rocket Pool website to use your wallet. 3. Select **RPL Withdrawal Address** from the top menu (or the hamburger menu on the left side if you're on a mobile device). 4. You will see this prompt:
4. Type your **node wallet address** here and click on the orange **Find** button to continue.
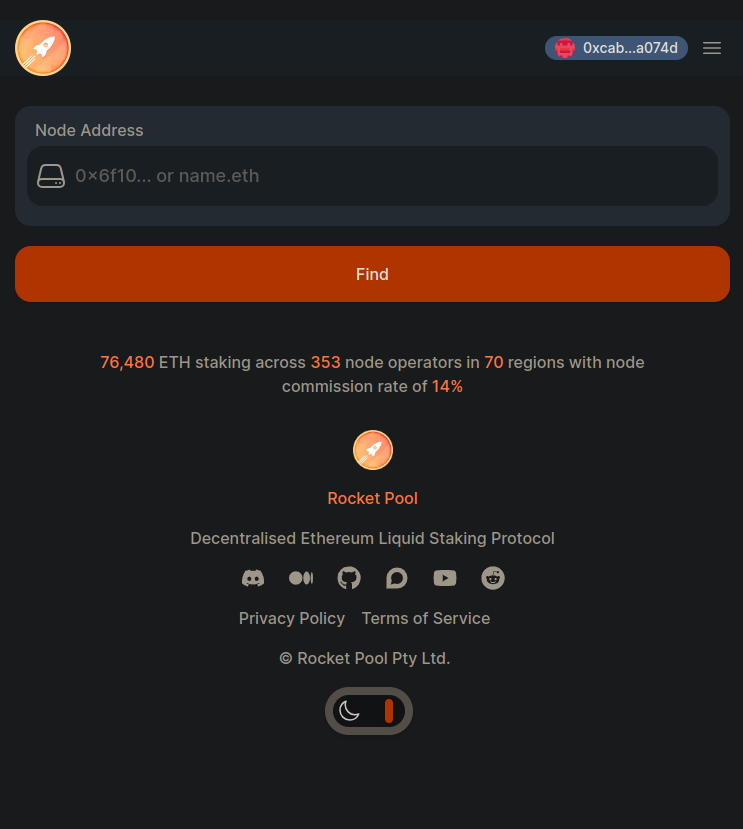1. You will be prompted to confirm a pending RPL withdrawal address. This should be the same address you used while running this command previously: `rocketpool node set-rpl-withdrawal-address` Select **Confirm Pending** when you're ready.
2. Now, there should be a new confirmation dialog in your wallet. Again, using MetaMask as an example, click the MetaMask icon to open it and you should see something like this:
Click **Confirm** to send the transaction to the network. This will take some time until it gets included in a block, but once it does, you will see a confirmation dialog:
5. Your new RPL withdrawal address will now be confirmed and activated. You can view this with `rocketpool node status`.
**Method 2**
**Use this method only if your RPL withdrawal address _cannot_ be used to sign transactions via MetaMask or WalletConnect.**
In this method, you will run:
```shell
rocketpool node set-rpl-withdrawal-address --force `your cold wallet address`
```
You will be offered the chance to send a test transaction before confirming this, to ensure that you have the right address.
If you confirm this command when it prompts you, your new RPL withdrawal address will be set immediately.
By doing this, you bypass the safety measure associated with Method 1, which requires you to prove that you own the new address.
If you make a typo here, there is no way to undo it and **your megapool's rewards will be lost forever**.
We **strongly** encourage you to use the test transaction mechanism before confirming this, and if possible, use Method 1 instead.
Once this is done, you will **no longer be able to change your RPL withdrawal address using the `set-rpl-withdrawal-address` command**.
To change it, you will need to send a signed transaction from your **active** RPL withdrawal address (the one you just switched to).
The Rocket Pool website has a function to help you do this.
If you'd like to unset your RPL withdrawal address, the process is pretty simple. First thing, you'll want to navigate back to the RPL Withdrawl Address page on the Rocket Pool website.
**Hoodi Testnet**
[https://testnet.node.rocketpool.net/rpl-withdrawal-address](https://testnet.node.rocketpool.net/rpl-withdrawal-address)
**Mainnet**
[https://node.rocketpool.net/rpl-withdrawal-address](https://node.rocketpool.net/rpl-withdrawal-address)
If you're signed in with the node's RPL withdrawal address, you should be able to click the **unset** button on the right here:

Clicking **unset** will take you to a page where you can confirm the details. If you're happy with what you see, click the orange **unset** button to send the transaction to the network.
That's all there is to setting your RPL withdrawal address! We hope you found the process quick and easy.
Feel free to swing by [our Discord server](https://discord.gg/G46XgK264a) to let us know what you thought of it and keep tabs on the project as it evolves.
## Map an ENS Name to your Node Wallet
If you want your node wallet address to be mapped to a human-readable name like `alice.eth`, follow these steps:
1. Purchase an ENS name at [the official ENS website](https://app.ens.domains).
2. Still at the ENS website, setup the **forward resolution** for the name, defining which address will be used when someone references your `.eth` name.
- Select "My account"
- Click on the ENS name you want to edit
- Click on "Add/edit record"
- Insert your desired ETH address, click "Confirm" and submit the transaction.
3. After the previous transaction is confirmed, you can use the Smart Node CLI to setup the **reverse resolution**. This will allow applications to map back from your node wallet address to your `.eth` name.
Execute the command:
```shell
rocketpool wallet set-ens-name
```
This action also requires sending a transaction. You'll need to confirm the desired parameters and submit the transaction.
::: warning NOTE
**Make sure you completed step 2 to setup the forward resolution before running the CLI command to setup the reverse resolution**. This is a safety measure to stop wallets from trying to impersonate an ENS name they don't control.
:::
4. After the transaction was successfully included in a block, run `rocketpool node status` to see that your your wallet is now associated to your ENS name.
## Next Steps
The next steps to prepare your node will teach you about setting up a fallback node, how priority fees work, your Fee Distributor and the Smoothing Pool, and MEV.
Each topic will require you to make a choice about how you want to run your node.
Please move on to the next sections in the guide when you're ready.
Once you're done with those topics, you'll be guided through the process of making a megapool validator and earning staking rewards.
---
url: /node-staking/preparing-the-os.md
---
> For AI agents: the complete documentation index is available at /llms.txt, the full documentation bundle is available at /llms-full.txt.
# Preparing the Operating System
\[TBD] This should be where we describe how to do things like setting up a 2nd hard drive if applicable, running an IOPS test with `fio`, setting up swap space... everything someone might need to do. The `fio` test is important I think, but the other stuff might be skippable.
---
url: /node-staking/provisioning/overview.md
---
> For AI agents: the complete documentation index is available at /llms.txt, the full documentation bundle is available at /llms-full.txt.
# Overview
This section covers the details of how to provision your node for staking with Rocket Pool once you've installed and configured the Smart Node.
It's a long one because there's a lot of information around staking to cover, so **please read through each guide before creating your first megapool validator!**
## Prerequisites
Before provisioning your node for staking, please make sure you've done the following:
- Set up a node machine (or virtual machine) and secured it (via the [Securing your Node](/node-staking/securing-your-node.md) guide)
- Have the Smart Node [installed](/node-staking/installing/overview.md) and [configured](/node-staking/config/overview.md) on it
## Guides
[Starting Rocket Pool](/node-staking/starting-rp.md) will show you how to start the Smart Node services for each mode and how to check on the sync progress of your Execution and Consensus clients.
[Creating a New Wallet](/node-staking/wallet-init.md) walks through the process of creating a brand new wallet with the Smart Node if this is your first time setting up a node.
[Importing / Recovering an Existing Wallet](/node-staking/recovering-rp.md) is an alternative to creating a new wallet.
Use this guide if you already have a node wallet that you want to recover onto your node (or if you're migrating from a service like Allnodes to your own hardware).
[Preparing your Node for Operation](/node-staking/prepare-node.md) covers some important first steps you'll want to take once you have a wallet loaded onto your node, well before you fund it with any ETH or RPL (other than a small amount of ETH for gas costs, of course).
[Specifying a Fallback Node](/node-staking/fallback.md) walks you through the optional process of pointing your node at a second (externally-managed) pair of Execution and Consensus clients that can act as a backup for your primary clients if they ever go down, so your node can keep validating while you perform maintenance on them.
[Fee Distributors and the Smoothing Pool](/node-staking/fee-distrib-sp.md) discuss the way Execution layer rewards are provided to your node every time one of your validators proposes a block, how to collect those rewards, and describes Rocket Pool's **Smoothing Pool** - a popular feature that combines Execution layer rewards from everyone and evenly distributes them during Rocket Pool's regular rewards intervals.
[MEV, MEV-Boost, and MEV Rewards](/node-staking/mev.md) explains **Maximum-Extractable Value** (MEV), its role in the staking ecosystem, and how you can configure it to your liking using the Smart Node.
[Commit-Boost](/node-staking/commit-boost.md) covers Commit-Boost, an alternative to MEV-Boost that you can enable in the Smart Node instead.
---
url: /node-staking/pruning.md
---
> For AI agents: the complete documentation index is available at /llms.txt, the full documentation bundle is available at /llms-full.txt.
# Pruning the Execution Client
::: tip NOTE
This page is the **offline / online prune** path for `geth` and `nethermind` (`rocketpool service prune-eth1`).
The usual way to keep disk use in check is **Rolling History Expiry** (the default Pruning Mode). Nethermind, Besu, Reth, and Erigon drop bodies and receipts older than about one year; Geth uses pre-Prague history expiry instead. See [Execution Client History Expiry](/node-staking/maintenance/history-expiry.md).
:::
If you use `geth` or `nethermind` as your primary Execution client, you will likely notice that your node's free disk space slowly decreases over time.
The Execution client is by far the biggest contributor to this; depending on how much RAM you allocated to its cache during `rocketpool service config`, it can grow at a rate of several gigabytes per day!
To handle this, Execution clients provide a special function called **pruning** that lets them scan and clean up their database safely to reclaim some free space.
Every node operator using Geth or Nethermind will have to prune it eventually.
If you have a 2 TB SSD, you can usually go for months between rounds of pruning.
For 1 TB SSD users, you will have to prune more frequently.
If you have [the Grafana dashboard](/node-staking/grafana.md) enabled, a good rule of thumb is to start thinking about pruning your Execution client when your node's used disk space exceeds 80%.
When you decide that it's time, the Smart Node comes with the ability to prune it for you upon request.
Read below to learn how it works, and what to expect.
::: warning NOTE
Pruning your Execution client is only possible in Docker Mode.
If you use your own Execution client, such as an external client in Hybrid mode or Native mode, you cannot use the Smart Node to prune the Execution client.
You will need to do it manually.
Please refer to the documentation for your Execution client to learn how to prune it.
:::
## Nethermind 2.0 and FlatDB
Starting with Smart Node v1.24.3, the Smart Node uses **Nethermind 2.0**. Nethermind 2.0 stores new databases in a format called **FlatDB**.
FlatDB does not need manual state pruning, and does not support it. If your Nethermind database uses FlatDB, you do not need `rocketpool service prune-eth1` at all.
Existing Nethermind databases are **not** converted. If your node was synced before Nethermind 2.0, it keeps using the legacy **Patricia** database and you can keep pruning it as described on this page.
The only way to move to FlatDB is to resync your Execution client with `rocketpool service resync-eth1`.
::: warning NOTE
Before you resync, consider [setting up a fallback node](/node-staking/fallback.md) and [testing that it works](/node-staking/fallback.md#testing-the-fallback-clients).
With a fallback configured, the Smart Node and your Consensus client will automatically switch to it while your primary Execution client resyncs, and switch back once it is synced.
:::
### Check which database you have
Run:
```shell
rocketpool service get-db-details
```
| Output | What it means |
| ------------------------------------------------------------------------------- | ----------------------------------------------------------------------------- |
| `Nethermind is using FlatDB. Manual state pruning is not needed or supported.` | You do not need to prune. The rest of this page does not apply to you. |
| `Nethermind is using the legacy Patricia database. State pruning is supported.` | Follow the pruning steps below when your disk starts to fill up. |
| `Nethermind has no persisted state database yet.` | Nethermind has not written any state yet (for example, right after a resync). |
::: tip NOTE
`get-db-details` requires your Execution client container to be running.
It only reports the database format. On an Archive node it may still say that state pruning is supported, but Archive nodes cannot be pruned.
:::
### FlatInTrie on systems with 16 GiB of RAM or less
When Nethermind syncs a new database on a machine with **16 GiB of RAM or less**, the Smart Node selects Nethermind's **FlatInTrie** FlatDB layout, which is better suited to systems with less memory.
This choice is saved alongside the database, so it will not change if you restart or later add more RAM.
It is only reset when you resync with `rocketpool service resync-eth1`.
### Settings that only apply to the legacy database
The following Nethermind settings in `rocketpool service config` only affect legacy Patricia databases, and are ignored with FlatDB:
- In-Memory Pruning Cache Size
- Full Prune Memory Budget Size
- Prune threshold (MB)
- Full pruning parallelism
::: tip NOTE
FlatDB removes the need to prune **state**. It does not change how much **history** (block bodies and receipts) your node keeps.
That is still controlled by your **Pruning Mode** setting. See [Execution Client History Expiry](/node-staking/maintenance/history-expiry.md).
:::
## Prerequisites
Select the client you're using from the tabs below.
**Geth**
Pruning Geth means taking the primary Execution client offline so it can clean itself up.
When this happens, the Smart Node (and your Consensus client) will need some other way to access the ETH1 chain in order to function properly.
The easiest way to provide this is with a **fallback node**.
If you [configured a fall back node](/node-staking/fallback.md) using `rocketpool service config` already, then the Smart Node will automatically switch over to it when your Geth container goes down for maintenance for you.
It will also inform your Consensus client to use the fallback as well.
WARNING
If you don't have a fallback node configured, your node will stop validating during the pruning process.
It will miss all attestations and block proposals until it's finished and has resynced with the network.
**You will leak ETH due to missed validations during this time!**
With that in mind, the following two conditions are required to successfully prune Geth:
- A working fallback node configured
- At least **50 GB** of free space remaining on your SSD
**Nethermind**
First, check which database you have with `rocketpool service get-db-details` (see [Nethermind 2.0 and FlatDB](#nethermind-20-and-flatdb)).
If it reports **FlatDB**, you do not need to prune.
If it reports the **legacy Patricia** database:
Nethermind is able to stay online while it prunes, meaning you do not require a fallback node to continue attesting.
Note, however, that pruning is **an extremely resource-intensive task** and you may see an increase in your attestations' inclusion distance and missed attestations during it.
On Mainnet, you need at least **250 GiB** of free space remaining on your SSD to prune Nethermind (50 GiB on the Hoodi testnet).
## Starting a Prune
Select the client you're using from the tabs below.
**Geth**
When you want to prune Geth, simply run this command:
```shell
rocketpool service prune-eth1
```
If you do not have a fallback client pair enabled, you will receive the following warning:
```
This will shut down your main execution client and prune its database, freeing up disk space.
Once pruning is complete, your execution client will restart automatically.
You do not have a fallback execution client configured.
Your node will no longer be able to perform any validation duties (attesting or proposing blocks) until Geth is done pruning and has synced again.
Please configure a fallback client with `rocketpool service config` before running this.
Are you sure you want to prune your main execution client? [y/n]
```
If you do have one enabled, you will see the following prompt instead:
```
This will shut down your main execution client and prune its database, freeing up disk space.
Once pruning is complete, your execution client will restart automatically.
You have fallback clients enabled. Rocket Pool (and your consensus client) will use that while the main client is pruning.
Are you sure you want to prune your main execution client? [y/n]
```
If you accept, you'll see a few details as the Smart Node prepares things; it should end with a success message:
```
Are you sure you want to prune your main ETH1 client? [y/n]
y
Your disk has 303 GiB free, which is enough to prune.
Stopping rocketpool_eth1...
Provisioning pruning on volume rocketpool_eth1clientdata...
Restarting rocketpool_eth1...
Done! Your main ETH1 client is now pruning. You can follow its progress with `rocketpool service logs eth1`.
Once it's done, it will restart automatically and resume normal operation.
NOTE: While pruning, you **cannot** interrupt the client (e.g. by restarting) or you risk corrupting the database!
You must let it run to completion!
```
With that, Geth is now pruning and you're all set!
You can follow its progress with:
```shell
rocketpool service logs eth1
```
Once it's done pruning, it will restart automatically and the Smart Node will resume using it again instead of your fallback.
**Nethermind**
When you want to prune Nethermind, simply run this command:
```shell
rocketpool service prune-eth1
```
If your database uses FlatDB, `prune-eth1` will stop without pruning and print:
```
Nethermind is using FlatDB, which does not need or support manual state pruning.
History expiry is managed separately by your configured pruning mode.
```
If your database uses the legacy Patricia format, you will see the following prompt:
```
This will shut down your main execution client and prune its database, freeing up disk space.
Once pruning is complete, your execution client will restart automatically.
Are you sure you want to prune your main execution client? [y/n]
```
If you accept, you'll see a few messages similar to the following:
```
Your disk has 790 GiB free, which is enough to prune.
Stopping rocketpool_eth1...
Provisioning pruning on volume rocketpool_eth1clientdata...
Restarting rocketpool_eth1...
Error requesting prune: AggregateException - One or more errors occurred. (Connection refused (127.0.0.1:7434))
Trying again in 3 seconds... (1/100)
...
Trying again in 3 seconds... (10/100)
Success: Pruning is now "Starting"
Done! Your main execution client is now pruning. You can follow its progress with `rocketpool service logs eth1`.
Once it's done, it will restart automatically and resume normal operation.
NOTE: While pruning, you **cannot** interrupt the client (e.g. by restarting) or you risk corrupting the database!
You must let it run to completion!
```
With that, Nethermind is now pruning and you're all set!
You can follow its progress with:
```shell
rocketpool service logs eth1
```
Once it's done pruning, it will restart automatically.
## Migrating Geth to Pebble v2
If you run **Geth** and the database is still on Pebble v1, migrate it in place with:
```shell
rocketpool service migrate-geth
```
This shuts Geth down, migrates Pebble v1 → v2, then restarts it. It is **not** the same as `prune-eth1`, and the command name is **`migrate-geth`** (not `migrate-eth1`).
::: warning NOTE
Geth is offline for the duration of the migration. Without a [fallback node](/node-staking/fallback.md), you will miss attestations and proposals until it is finished.
:::
Confirm the prompt, or pass `--yes` to skip it. Follow progress with:
```shell
rocketpool service logs eth1
```
Do not interrupt the container until the migration completes.
---
url: /node-staking/recovering-rp.md
---
> For AI agents: the complete documentation index is available at /llms.txt, the full documentation bundle is available at /llms-full.txt.
# Importing / Recovering an Existing Wallet
If you already have a wallet you'd like to use for your node, or if you're recovering a wallet you already created with the Smart Node earlier, this guide will help you through the import / recovery process.
Please select the appropriate option from the sections below.
## Recovering a Smart Node Wallet
If you generated your node wallet using the Smart Node and are simply recovering it on a new machine, the process is quite simple.
Make sure you've already installed the Smart Node software, and then simply run the following command once it's installed:
```shell
rocketpool wallet recover
```
::: warning NOTE
If, for some reason, you want to recover the wallet but _not_ any of the validator keys attached to your node's minipools or megapool validators, you can specify the `-k` flag to skip the rebuild process:
```shell
rocketpool wallet recover -k
```
If you do not specify this flag, the Smart Node will attempt to recover the validator keys for your minipools or megapool validators. That step needs synced Execution and Beacon clients.
With `-k`, recovering the **wallet only** does not need to wait for synced clients. You can do that while they are still syncing.
:::
By default, the Smart Node generates a random password to encrypt the recovered wallet.
To choose your own password instead, pass `-p` / `--password`.
::: tip NOTE
You do not need to know or remember this password. The **24-word node mnemonic** is enough to fully recover your wallet.
:::
After that, it will ask for your **24 word mnemonic recovery phrase**.
Enter it carefully - it will not be shown on-screen for safety, and it is very easy to make a mistake while typing it so take your time.
When you're done, you should see output similar to this:
```shell
$ rocketpool wallet recover
Please enter your recovery mnemonic phrase:
Recovering node wallet...
The node wallet was successfully recovered.
Node account:
No validator keys were found.
```
If you don't see any errors, then your wallet and validators will be recovered.
Once you're done, be sure to restart the Validator client with the following command for Docker and Hybrid mode users:
```shell
docker restart rocketpool_validator
```
**Native mode** users will simply have to restart their Validator container process.
This will ensure that the VC picks up all of the newly restored validator keys.
## Importing an Existing Address as a Node Wallet
If you have an address you'd like to use for a node, but _didn't_ create it with the Smart Node (e.g., you created it with MetaMask or a hardware wallet), then this is the section to follow.
::: danger WARNING
By doing this, your address will become a **hot wallet**.
The private key will be stored on your node machine.
If you're importing an address that is a cold wallet, such as a hardware wallet, be advised that **the protection provided by the hardware wallet will no longer exist!**
If you use this wallet for _any other cryptocurrency activity at all_, **you must migrate all of its funds to a separate address (e.g. a different hardware wallet) before importing it into your node! Only leave enough ETH on this address for your node's gas costs (typically 0.5 ETH is sufficient).**
Please ensure that you have secured your machine as much as possible by following the steps in the [Securing your Node](/node-staking/securing-your-node.md) guide before importing your address as a node wallet.
:::
This capability is only available with Smart Node **v1.4.3 or higher**.
If you have a lower version, you'll need to upgrade first.
This is a multi-step process, so follow the below sections carefully.
### Step 1: Add Externally-Generated Validator Keys
**If you don't have any existing minipools or megapool validators attached to the address you're importing, you can skip this step.**
If your address has already been registered as a Rocket Pool node wallet (such as via a service like **Allnodes**) and already has active minipools or megapool validators, and you'd like to import them into the Smart Node stack along with your address, you will need to provide the private keystore files for each of their corresponding validators.
These files will be encrypted with a password of your own choosing, so you will need that password for each file as well.
You need to get these files from the service that is currently running your node in order to import it.
Some service providers may be able to retrieve these files upon request.
If you use Allnodes, you can get these files during your initial setup process but **will not be able to retrieve them in the future unless you saved them during minipool creation.**
Select your installation mode and follow the steps below.
**Docker and Hybrid Mode**
First, ensure you've started the Smart Node with `rocketpool service start`.
This will create a special folder that can be used to hold the encrypted keystore files for your validators.
By default, the folder is located in `~/.rocketpool/data/custom-keys`.
If you've customized your installation or data directories, substitute appropriately to find the `custom-keys` folder.
Check with a file explorer or the `ls` command to make sure this folder exists.
If not, no worries - just make the folder with the following command:
```shell
mkdir ~/.rocketpool/data/custom-keys
```
**Native Mode**
Create a folder called `custom-keys` inside of your Smart Node's `data` folder (for example, `/srv/rocketpool/data/custom-keys`).
Next, place each of the validator keystore files into this folder.
The names of the files don't matter, but they must be JSON files that conform to the [EIP-2335](https://eips.ethereum.org/EIPS/eip-2335#scrypt-test-vector) format.
The Smart Node will look in this directory for any keystore files you have placed here in the next steps.
::: warning NOTE
The import process will _only_ look for validator keys that are attached to minipools or megapool validators registered to the address you're importing.
You **cannot** use this process to import other validator keys, such as for solo staking validators, into the Validator client managed by the Smart Node stack.
Please see the documentation for running in [Reverse Hybrid Mode](/node-staking/advanced-config.md#allowing-external-validator-clients-to-connect-to-the-smart-node) if you are interested in doing this.
:::
### Step 2 (Optional): Test Importing the Address
If you would like to test the recovery process to ensure you have the correct mnemonic and passwords **without actually regenerating your node wallet's private key or importing your validator keys**, you can do so with the following command:
```shell
rocketpool wallet test-recovery -a 0x1234abcd...
```
Where `0x1234abcd...` is the address you want to import, starting with the `0x` prefix.
**You will need your mnemonic phrase to import the private key for your address.**
::: tip TIP
If, for some reason, you want to recover the wallet but _not_ any of the validator keys for your minipools or megapool validators, you can specify the `-k` flag to skip the validator key recovery process.
For example:
```shell
rocketpool wallet test-recovery -a 0x1234abcd... -k
```
:::
The Smart Node will automatically search through the most popular derivation paths (e.g. the ones used by Ledger Live, MyEtherWallet, Trezor, and the Smart Node stack) and address indicies to find the settings that correspond to the address you provided.
::: tip TIP
If you have a custom derivation path, use the `-d` flag to specify it.
For example:
```shell
rocketpool wallet test-recovery -d "m/44'/60'/0'/%d"
```
Use `%d` for the portion of the path that can be iterated to use different indicies.
If you have a custom address index, use the `-i` flag to specify it.
For example, if your address was the 6th one on the standard derivation path, you could use:
```shell
rocketpool wallet test-recovery -i 5
```
You can use both the `-d` and `-i` flags at the same time if you require.
:::
First, you'll be prompted for your address's mnemonic phrase:
```
Please enter the number of words in your mnemonic phrase (24 by default):
24
Enter Word Number 1 of your mnemonic:
```
Enter it carefully, and the Smart Node will begin searching through all of the standard options to find it (unless you explicitly specified them using the `-d` and/or `-i` flags).
Next, if you have private keystore files to import from Step 1, you will be prompted for the passwords to each of those keystore files:
```
It looks like you have some custom keystores for your minipool's validators.
You will be prompted for the passwords each one was encrypted with, so they can be loaded into the Validator Client that Rocket Pool manages for you.
Please enter the password that the keystore for was encrypted with:
```
They will be organized by the **pubkey** list, **not the filenames**.
Ensure you know which file corresponds to which validator pubkey so you enter the correct passwords.
Once you've done this, the test recovery process will proceed and report back on whether it succeeded or failed:
```
Searching for the derivation path and index for wallet 0x1234abcd...
NOTE: this may take several minutes depending on how large your wallet's index is.
The node wallet was successfully recovered.
Derivation path: m/44'/60'/0'/0/%d
Wallet index: 0
Node account: 0x1234abcd...
Validator keys:
```
The above indicates a successful test recovery.
### Step 3: Import the Address
::: danger WARNING
If your address is a Rocket Pool node that is _not_ managed by your own self-hosted Smart Node (e.g. hosted by an external service like **Allnodes**), **IT IS CRITICAL** that you coordinate with the service running your node **before you begin this import process** and inform them that you would like to migrate to your own self-hosted system.
You **MUST CONFIRM** that they have shut down validation for your node and **will NEVER resume it**, and manually confirm that your validators are no longer attesting using a Blockchain explorer such as [https://beaconcha.in](https://beaconcha.in).
You must confirm that each validator has missed **AT LEAST 2 ATTESTATIONS** to ensure you can safely migrate.
Otherwise, you will both attest at the same time and **YOUR MINIPOOLS WILL BE SLASHED!**
The Smart Node will require you to confirm that you have done this before allowing you to proceed with the import process.
:::
If the test recovery succeeded, or if you skipped it, you will next import the wallet and regenerate all of its associated key files.
The process is exactly the same as the above, but use the `recover` command instead of the `test-recovery` command:
```shell
rocketpool wallet recover -a 0x1234abcd...
```
When you run this command, the Smart Node generates a random password to encrypt your imported node wallet unless you pass `-p` / `--password`.
::: tip NOTE
You do not need to know or remember this password. The **24-word node mnemonic** is enough to fully recover your wallet.
:::
After that, the mnemonic and custom validator keystore password prompts will proceed as they did before.
Once you've entered all of this information, the Smart Node will recover your address and (if not disabled) the custom validator keys for your minipools and megapool validators:
```
Searching for the derivation path and index for wallet 0x1234abcd...
NOTE: this may take several minutes depending on how large your wallet's index is.
The node wallet was successfully recovered.
Derivation path: m/44'/60'/0'/0/%d
Wallet index: 0
Node account: 0x1234abcd...
Validator keys:
```
Your address's private key will now be stored in the `data/wallet` file (e.g. `~/.rocketpool/data/wallet`), and the password for it will be stored in the `data/password` file (e.g. `~/.rocketpool/data/password`).
The private keys for each of your validators will be stored in the `data/validators` folders for each of the Consensus clients that the Smart Node supports.
::: danger NOTE
By importing an address in this fashion, the validator keys were **not** derived from your node wallet, and thus they **cannot** be recovered later by simply running `rocketpool wallet recover` as with a normal node wallet.
If you ever need to recover or import this wallet again, you will need to follow this same process which means **you will need to have these validator private keystores and their passwords backed up somewhere safe.**
If you ever lose them, **you will no longer be able to recover these validator keys!**
:::
### Step 4: Cleanup
At this point, you can now delete all of the private keystore files in the `data/custom-keys` directory.
The Smart Node will have imported them already and assigned randomized passwords to them, so those keystore files are no longer necessary.
Finally, ensure that there is **not** a file named `custom-key-passwords` in your `data` directory (e.g. `~/.rocketpool/data/custom-key-passwords`).
The Smart Node will build this temporary file only during the recover process, and will remove it automatically regardless of whether or not the recovery process succeeded; if for any reason it failed to remove it, it will alert you in the console output.
However, it never hurts to be too careful.
## Next Steps
Once you've imported or recovered your node wallet, follow the next steps in the [Intro to the Command Line Interface](/node-staking/cli-intro.md) guide.
---
url: /node-staking/rescue-dissolved.md
---
> For AI agents: the complete documentation index is available at /llms.txt, the full documentation bundle is available at /llms-full.txt.
# Rescuing a Dissolved Minipool
In the unlikely event your minipool does not stake within the dissolve window, it will be "dissolved" by the oDAO and
user funds provided will be returned to the deposit pool for use by another minipool. In this scenario, you will need
to perform the below process to retrieve your ETH and unlock your RPL to be unstaked.
## Update your Minipool Delegate
It is highly recommended that you use the latest minipool delegate when performing this process. Older delegates contain
a `selfdestruct` operation when they are closed which means, if the process is not completed correctly in the
specified order, funds may be locked forever. You can check that your minipool is on the latest delegate by attempting
to [Upgrade your Delegate](/node-staking/minipools/delegates.md#upgrading-your-delegate). If your minipool does not appear in the
list of minipools that can be upgraded then you can continue on below.
## Retrieve Your Unused Deposit Balance
::: tip NOTE
If your minipool was dissolved prior to Atlas, you may skip this step and head straight to [Increase Your Beaconchain Balance to 32 ETH](#increase-your-beaconchain-balance-to-32-eth).
You do not need to retrieve your unused deposit balance because the entire bond amount was deposited to the beaconchain
prior to Atlas.
:::
1 ETH from your initial bond deposit is used as an initial deposit to the beaconchain to secure your validator's
withdrawal credentials. The remaining amount is deposited to your minipool when it is assigned ETH from
the deposit pool.
When your minipool is dissolved, the user ETH is returned to the deposit pool and your ETH remains in the minipool ready
to be returned to you. Use the [Manual Distribution](/node-staking/skimming.md#manual-distribution) of rewards feature to retrieve this
ETH that can then be used in the next step to activate your validator.
## Increase Your Beaconchain Balance to 32 ETH
You must top up your validator's balance to the minimum required for activation on the beaconchain. This
amount is **32 ETH**. If you have a 16 ETH bonded minipool, you will require an additional 16 ETH and if you have an 8 ETH
bonded minipool you will need an additional 24 ETH during this step.
Deposit the required amount of ETH into your node address and then issue the following command to begin the process:
```shell
rocketpool minipool rescue-dissolved
```
You will be presented with a list of minipools that meet the criteria for a manual deposit:
```
Please select a minipool to rescue:
1: All available minipools
2: 0x7E5700bcd65B1770bA68abB288D3f53814d376aC (dissolved since 2023-02-08, 06:33 +0000 UTC)
3: 0x7E570195026dC29f4B2DfF08B56c3b5D0FF988Ef (dissolved since 2023-02-08, 06:33 +0000 UTC)
```
After selecting the minipool you want to rescue, you will be asked what amount you want to manually deposit:
```
1. All 16.000000 ETH required to rescue it
2. 1 ETH
3. A custom amount
```
Option 1 will be used in most circumstances. It is the amount required to bring your beaconchain balance up to the required
32 ETH amount. The other options are provided for advanced use cases.
::: tip NOTE
Bringing your beaconchain balance up to 32 ETH means your validator will be able to actively participate in Ethereum
validation duties. The smartnode may not have had a chance to restart your validator since the dissolution. Therefore,
it is a good idea to manually restart your validator to ensure it has loaded your validator keys and can perform
validation duties to avoid any penalties during the rescue process.
If you are running the standard Docker mode, this can be done with `docker restart rocketpool_validator`.
:::
Once this step is complete, your validator will enter the entry queue and you will need to wait for the following events
to occur:
1. 2048 execution layer blocks need to pass for your deposit to be accepted (\~8 hours)
2. Up to 32 epochs need to pass for validators to vote you in (0.5 - 3.5 hours)
3. A variable amount of time in the validator queue (6.4 minutes per 4 validators in the queue)
4. 256 epochs minimum validating before an exit is allowed (27 hours)
### Exiting your Validator
Once your validator has been active for a minimum of 256 epochs, you may exit your minipool via the same process as
any other minipool by following the [Exiting your Validator](/node-staking/withdraw.md#exiting-your-validator) guide.
The full 32 ETH balance will be returned to your minipool and dissolved minipools distribute 100% of their balance to the
node operator's withdrawal address.
---
url: /node-staking/rewards.md
---
> For AI agents: the complete documentation index is available at /llms.txt, the full documentation bundle is available at /llms-full.txt.
# Claiming Node Operator Rewards
As a Rocket Pool node operator, you are entitled to regular rewards that will be provided in the form of the RPL token and (if you are opted into the Smoothing Pool) some ETH as well.
This section will describe how these rewards work and how you can claim them.
## Rewards and Checkpoints
At regular intervals, Rocket Pool will flag a **checkpoint** on the network.
Currently, checkpoints occur **every 28 days**.
At a new checkpoint, the Oracle DAO will collectively create a **true snapshot** of the state of the node operators in the Rocket Pool network, which it will use to determine the RPL and Smoothing Pool ETH rewards for each node during that interval. Until June 2026, this snapshot was also used to pay "bonus commission" to Saturn 0 minipools (the ones created after 2024/10/28, which have a contract commission of 5%) out of Smoothing Pool rewards. That bonus has now ended.
This information is compiled into a [Merkle Tree](https://en.wikipedia.org/wiki/Merkle_tree) - an extremely efficient way to make all of the details available to smart contracts.
The Merkle Tree is built into a JSON file and hosted on [a GitHub repository that we maintain](https://github.com/rocket-pool/rewards-trees/). The Smart Node can also load rewards-interval **events** from that GitHub repo, so you can still claim after aggressive history expiry has dropped old Execution-layer logs.
Once the tree is submitted, the Rocket Pool smart contracts will mint new RPL tokens and move them, along with the Smoothing Pool's entire ETH balance, into the Rocket Pool vault for secure storage.
You can then view how many RPL and ETH rewards you earned during that interval and claim those rewards.
The rewards system has the following features:
- Each interval is independent. The amount of RPL and ETH you earned in one interval does not affect the earnings for subsequent intervals.
- You can **let rewards accumulate** for as long as you want. You do not need to claim rewards by a specific time; they will always be available for you to claim, and will always provide exactly the same amount of RPL and ETH **regardless of when you claim them**.
- You can claim one interval at a time, or **multiple intervals** all at once.
- Your first claim transaction uses about 85k gas. Each subsequent claim transaction costs about 55k gas.
- If you're claiming multiple intervals at once, each supplemental interval costs **6k gas** so it's most cost-effective to claim as many of them at once as possible.
- You can **restake some (or all) of your RPL rewards** as part of the claiming transaction so it's all done in a single transaction (which further reduces gas costs).
- Currently, **all of your claims must be on Mainnet** but we have the infrastructure in place to build the ability to claim on Layer 2 networks at a later date.
For more information on how the Merkle Tree is built and how rewards are calculated, [please visit our `research` repository and view the official specifications](https://github.com/rocket-pool/rocketpool-research/tree/master/Merkle%20Rewards%20System).
We've provided a brief explanation of them below.
### RPL Rewards
RPL's current rewards rate is **5% inflation per year** and rewards are paid out every 28 day period.
As of 2024/10/21, the last period's inflation was 77,533. Since 70% is distributed to Rocket Pool node operators, that was 54,273 RPL that period.
This amount will be divided among all of the node operators on the network, based on their [node weight](https://rpips.rocketpool.net/RPIPs/RPIP-30#specification).
Node operators earn the maximum APY for staked RPL positions worth 0-15% of borrowed ETH.
RPL stake beyond 15% borrowed ETH still earns further rewards, but at a reduced marginal APY.
If less than 28 days have passed between the time when you registered your node and the checkpoint, your rewards in that first rewards interval will be **pro-rated** to account for that. For example, if you registered on day 14 of the interval, you would receive 50% of normal rewards.
After that first interval, your node will have been registered long enough on subsequent intervals that you will receive full rewards for all of them.
The `rocketpool node status` command will show you your current collateralization ratio at any point of time. This collateralization ratio will be based on the prices at the time at which you run the command. However, if you want to know what your collateralization ratio will be at the next rewards round, follow the next steps:
- Run the `/when` command in the "random" channel of the [Rocketpool Discord](https://discord.com/channels/405159462932971535/405503016234385409), and see how many hours are left before the next rewards period starts.
- The oDAO takes a price snapshot every 19.2 hours (i.e. around 5760 blocks \* 12 seconds, excluding missed blocks). Therefore, checking the oDAO price submission contract in Etherscan will tell you whether a price snapshot was taken in the 19.2 previous hours before the time stated in the bullet point above. If that is the case, the price snapshot has been taken. If not, it is yet to be done and you can estimate when it will happen by looking at the last round of oDAO price submissionas, and adding 19.2 hours.
- To check which RPL/ETH price ratio was taken as a snapshot by the oDAO for the next rewards round, check the oDAO price submission contract in Etherscan (which you can obtain by running the `/get_address_of_contract contract:rocketNetworkPrices` command in the "random" channel of the Rocketpool Discord). Afterwards, open one or more of the transactions submitted by the oDAO members.
- Scroll down and in the "More Details" section, click on **"+ Click to show more"**, and then click on **"Decode Input Data"**.
- The RPL price (shown in wei units) displayed in the Input Data box, divided by 10^18 (to convert it to ETH units) multiplied by the number of RPL staked, should be >= 1.6 ETH (for 16 ETH minipools) and >= 2.4 ETH (for LEB8s), times the number of minipools of each type which you operate.
- If your collateral ratio is below the required amount as explained in the previous point, you can stake additional RPL in the time between the oDAO took the last price snapshot (see bullet point 3 above), and the time when the next rewards round begins (see bullet points 1 and 2 above), in order to bring your node back to a >=10% collateralization ratio.
- An alternative to checking the oDAO price submissions in etherscan is to keep an eye on the "events" channel of the Rocketpool discord, and look for the **RPL Price Update** message from the Rocket Watch bot (see example below) within the last 19.2 hours before the next rewards period starts.
### Smoothing Pool ETH Rewards
Along with RPL rewards, the Smoothing Pool's entire ETH balance is distributed during rewards checkpoints.
Out of the entire Smoothing Pool's rewards balance, the percentage which corresponds to pool stakers (50% for 16 ETH minipools, or 75% for LEB8s), minus the respective node commission, will be sent to the rETH contract. There it can either 1) be burned for ETH from pool stakers that want to exit, or 2) be used to create more minipools.
The remaining portion will be distributed amongst the eligible node operators.
Nodes that are opted into the smoothing pool for the interval, even if only part of the time, are eligible for a portion of the Smoothing Pool's total balance.
The balance is snapshotted at the rewards checkpoint, and the Oracle DAO determines each eligible node's portion.
The portion is determined by the following factors:
- Amount of time in the Smoothing Pool this interval
- Attestation performance on the Beacon Chain for each minipool
- The commission of each minipool
If you'd like to know more, please see the `research` repository linked above for a full breakdown of how the rewards are calculated.
### (Optional) Generating the Rewards Tree
When a new rewards checkpoint is reached, the Oracle DAO will begin to build the rewards tree for that interval.
Building this tree currently takes approximately 2 hours, and the rewards for the interval aren't available to claim until the tree has been built and submitted.
Once it's available, your node will automatically download this file and you'll be able to view and claim your rewards for that interval.
If you'd like to generate the tree yourself instead of downloading the pre-built one from the Oracle DAO, you can do so!
- Enter the `rocketpool service config` TUI.
- Navigate to the `Smartnode and TX Fees` section.
- Change the `Rewards Tree Mode` from `Download` to `Generate`.
- If your primary Execution client is not an archive node, you can add a URL for a separate archive node in the `Archive-Mode EC URL` box.
- This is needed to generate historical rewards trees.
- The Archive EC will only be used for tree generation; it will not be used for any other Smart Node duties.
- [Infura](https://infura.io/product/ethereum) and [Alchemy](https://www.alchemy.com/supernode) offer archive node access. **Note that the free tiers are usually not sufficient to handle tree generation, so you will need one of the paid tiers.**
Now your Smart Node will build the tree completely independently from the Oracle DAO, using only the data provided by your Execution and Consensus clients.
You can watch it during a rewards interval checkpoint with `rocketpool service logs watchtower`.
If you'd like to rebuild past trees from previous intervals, you can do so with the following command:
```shell
rocketpool network generate-rewards-tree
```
Follow the prompts, and then use `rocketpool service logs watchtower` to view its progress.
## Claiming Rewards
To view your pending unclaimed rewards, run the following command:
```shell
rocketpool node claim-rewards
```
As intervals go by and you accumulate rewards, the output will look like this:

Here you can quickly see how many rewards you've earned at each interval, and can decide which one(s) you want to claim.
You can also specify an amount you want to restake during this claim:

This will let you compound your RPL rewards in one transaction, which saves on gas costs.
Simply follow the prompts, ensure your node wallet has enough ETH to pay for the gas costs of claiming, and you're done!
**Your rewards will be sent to your withdrawal address.**
::: tip TIP
To view your node's total rewards, including those you've already claimed, use the following command:
```shell
rocketpool node rewards
```
This will provide a breakdown of how much RPL and ETH you've claimed so far, and how much is still unclaimed:
```
=== ETH ===
You have earned 8.1935 ETH from the Beacon Chain (including your commissions) so far.
You have claimed 0.0634 ETH from the Smoothing Pool.
You still have 3.4788 ETH in unclaimed Smoothing Pool rewards.
=== RPL ===
The current rewards cycle started on 27 Sep 22 21:26 EDT.
It will end on 30 Sep 22 21:26 EDT (20h35m17s from now).
You currently have 675.616380 unclaimed RPL from staking rewards.
Your estimated RPL staking rewards for this cycle: 36.851544 RPL (this may change based on network activity).
Based on your current total stake of 6615.797278 RPL, this is approximately 67.77% APR.
Your node has received 208.551820 RPL staking rewards in total.
You may claim these rewards at any time. You no longer need to claim them within this interval.
```
:::
## Execution-Layer Rewards in your Fee Distributor
If you're **not** opted into the Smoothing Pool, the Execution-layer portion of your rewards from block proposals (including transaction fees and MEV) will be sent to your node's [Fee Distributor](/node-staking/fee-distrib-sp.md#fee-distributors-and-the-smoothing-pool) contract instead.
To check the balance of your Fee Distributor, you can either use a chain explorer like [https://etherscan.io](https://etherscan.io) or simply run `rocketpool node status` - there will be a section called **Fee Distributor and Smoothing Pool** that shows it:
```
=== Fee Distributor and Smoothing Pool ===
The node is not opted into the Smoothing Pool.
To learn more about the Smoothing Pool, please visit /en/legacy/redstone/whats-new.html#smoothing-pool.
The node's fee distributor 0xA0bfbFC582f5814585f8455Ed6D7B620eA9a9EE4 has a balance of 1.143598 ETH.
```
### Distributing the Balance
To access the Fee Distributor's balance, you will **distribute** it (hence the name, _Fee Distributor_).
This will calculate your share of the rewards (based on your node's average minipool commission) and send it to your node's withdrawal address; the rest is sent to the staking pool.
Distribution can be done **at any time**.
You can sit on the balance and let it accumulate if you choose, or distribute it regularly.
To distribute the balance, run the following command:
```shell
rocketpool node distribute-fees
```
This will show how much goes to you and how much goes to the staking pool:
```
Your node's average commission is 15.00%.
Your fee distributor's balance of 1.143599 ETH will be distributed as follows:
Your withdrawal address will receive 0.657569 ETH.
rETH pool stakers will receive 0.486030 ETH.
```
Simply confirm the gas price you want and submit the transaction.
Once it's been completed, your portion of the rewards will be available in your node's withdrawal address.
If someone else distributes your fee distributor instead, your portion is held as unclaimed rewards. See [Claiming Unclaimed Rewards](/node-staking/fee-distrib-sp.md#claiming-unclaimed-rewards).
---
url: /node-staking/rewards/overview.md
---
> For AI agents: the complete documentation index is available at /llms.txt, the full documentation bundle is available at /llms-full.txt.
# Overview
This section covers how to access the rewards your node generates while validating.
## Prerequisites
Before configuring your Smart Node, please make sure you:
- Have set up a node machine (or virtual machine) and secured it (via the [Securing your Node](/node-staking/securing-your-node.md) guide)
- Have the Smart Node [installed](/node-staking/installing/overview.md) and [configured](/node-staking/config/overview.md) on it
- Have a node wallet loaded on your Smart Node
- Synced your Execution and Consensus clients
- Provisioned your node with [a withdrawal address](/node-staking/prepare-node.md#setting-your-primary-withdrawal-address), set up your [fallback clients](/node-staking/fallback.md) (optional), opted into the [Smoothing Pool](/node-staking/fee-distrib-sp.md#the-smoothing-pool) (optional), and configured [MEV](/node-staking/mev.md)
- Created at least one [minipool](/node-staking/create-validator.md)
## Guides
[Claiming Node Operator Rewards](/node-staking/rewards.md) explains how RPL rewards and Execution-layer rewards work, and how to access them.
[Distributing Skimmed Minipool Rewards](/node-staking/skimming.md) covers accessing rewards from the Beacon Chain that periodically get "skimmed" by the protocol and delivered to your minipools.
---
url: /node-staking/securing-your-node.md
---
> For AI agents: the complete documentation index is available at /llms.txt, the full documentation bundle is available at /llms-full.txt.
# Securing your Node
The goal of this guide is to walk you through steps you can take to secure your node against malicious actors.
Whether you're running a local server at home or a VPS server / virtual machine on the cloud, the tips here will help you harden your node against outside attack and help protect it during its lifespan.
This section will describe both **essential** actions, which you **must** take, and **nice-to-have** actions, which are helpful but not required.
::: tip NOTE
This guide is meant to be an **introduction** to some of the things you can do to harden your node machine.
If you are comfortable with the command-line terminal and want to go even further in protecting your node, take a look at the popular [imthenachoman/How-To-Secure-A-Linux-Server](https://github.com/imthenachoman/How-To-Secure-A-Linux-Server) guide.
:::
## Assumptions in This Guide
This guide assumes your node runs `Ubuntu 20.04 LTS`.
The concepts will carry over to other systems but the example commands may not.
As with all of the commands in this guide, we assume that you are connecting **remotely** to your node's command terminal using `ssh`.
If you need a refresher on how to use `ssh`, take a look at the [Intro to Secure Shell](/node-staking/ssh.md) guide first.
## ESSENTIAL: Keep your Client Machine Secure
::: warning NOTE
If you use your Smart Node locally (by physically logging into it with a keyboard and monitor directly attached to it), then **this section is not relevant to you - you can skip it**.
:::
Most Smart Node operators interact with their node remotely by connecting to its terminal from another computer using `ssh`:
- The machine you connect _to_ (in this case, your node machine) is called the **server**.
- The machine you connect _from_ (such as your laptop, desktop, or even your phone) is the **client**.
One of the most important things you can do to secure your Smart Node is to **keep your client machine secure**.
If your client machine is compromised and you use it to log into your node, then most of the security settings you apply to the node can be bypassed.
For example: if you use a laptop as an SSH client, and it has a [keylogger](https://en.wikipedia.org/wiki/Keystroke_logging) installed, then any secret things you type on the node (such as your password or recovery mnemonic) when connected via SSH will be stolen.
There is no definitive guide to keeping your client machine secure, but being aware that it is a factor in your security is a good first step.
Make sure that your client machine is as secure as it can be.
Here are a few tips:
- Don't use your client machine for **risky activities** (such as visiting untrustworthy websites or installing unnecessary programs)
- Keep your client machine updated with the **latest security patches**
- If possible, use a **malware and antivirus protection** program for your Operating System
For maximum security, you may want to use a **dedicated machine** as your SSH client, though this may not be practical for you.
## ESSENTIAL: Secure your SSH Access
::: warning NOTE
If you use your Smart Node locally (by physically logging into it with a keyboard and monitor directly attached to it), then **this section is not relevant to you - you can skip it**.
:::
Whether you run your Smart Node at home or you use a VPS in a remote datacenter, it is likely that either you access it through SSH, or that SSH is enabled **even if you do not use it**.
SSH connections are based on secure cryptography, but as with any secure system, the real security comes from using it correctly.
There are two main things to do for your SSH settings:
1. Use an SSH key to log in remotely instead of a username and password
2. Disable password-based authentication entirely, so SSH keys are the only remote login option
As you are probably familiar with now, the default way to log into your node via SSH is with a username and password.
The downside of this is that your password is typically something rather "short" and susceptible to [brute-force attacks](https://en.wikipedia.org/wiki/Brute-force_attack).
Luckily, there is an alternative way to log in via SSH: an **SSH key pair**.
SSH key pairs work similarly to blockchain wallets; they come with a public part (such as your wallet address) and a private part (the private key for your wallet address):
- You provide the **public part** to your node. This way, the node knows you're allowed to connect to it, and it knows that it's really you trying to connect.
- You keep the **private part** to yourself on your client machine. This way, you (and only you) can connect to your node.
- You can (and should!) protect the private part with a **password**, so someone who steals your key can't use it.
- From a computer's perspective, the private key is **exponentially harder** to crack than a password is. This mitigates the risk of a brute-force attack against your node.
::: tip TIP
If you'd like to learn more about SSH key pairs before creating your own, take a look at these links:
- [https://canvas.cse.taylor.edu/courses/27/pages/ssh-key-tutorial](https://canvas.cse.taylor.edu/courses/27/pages/ssh-key-tutorial)
- [https://www.ssh.com/academy/ssh/host-key](https://www.ssh.com/academy/ssh/host-key)
:::
### Creating an SSH Key Pair
Let's start by creating a new SSH key pair **on your client machine**.
There are many varieties of key out there, but we're going to use a key type called [ed25519](https://en.wikipedia.org/wiki/EdDSA#Ed25519) which provides excellent security.
Run the following command **on your client machine** (i.e., you should **not** run this while already SSH'd into your node machine - if you are, **exit out of SSH first**):
```shell
ssh-keygen -t ed25519 -C "your_email@example.com"
```
You will see the following:
```
Generating public/private ed25519 key pair.
Enter file in which to save the key (/home/username/.ssh/id_ed25519):
```
This asks you where you would like to save your private key file.
SSH is compatible with the provided default and will automatically use it for you if you select it.
However, you have the option of changing it to something else if you wish.
::: tip NOTE
The path `/home/username/.ssh/id_ed25519` is just an example, assuming your username is `username`.
You likely have a different username.
Whenever you see a path like the above in this guide, replace it with whatever path your system actually prints with your actual username.
:::
If you are comfortable with the default setting, simply press `Enter`.
Otherwise, type your desired location for the key.
It must be an absolute path (e.g. `/home/username/.ssh/rocketpool_key` on Linux, or `/Users/username/.ssh/rocketpool_key` on OSX).
Press `Enter` when you're done.
After pressing `Enter`, you will see:
```
Enter passphrase (empty for no passphrase):
```
**This will become the password for the private key itself**.
Whenever you use the key to connect to your node, you will need to enter this password first.
::: danger WARNING
**You should not leave this blank** - otherwise, anyone with the SSH key file will be able to use it!
Pick a good password that you (and only you) will know.
Also, **don't forget your password** - there is no way to recover this password if you lose it.
:::
Once you finish typing the password, press `Enter`.
It will ask you to retype it for confirmation.
After that, you will see something like the following output:
```
Your identification has been saved in /home/username/.ssh/id_ed25519
Your public key has been saved in /home/username/.ssh/id_ed25519.pub
The key fingerprint is:
SHA256:CASbPZETiQ83lLhpUO2aoT05TxMVLwqiWtdsRtoPt4s your_email@example.com
The key's randomart image is:
+--[ED25519 256]--+
| .o*==.. |
|. +=O... |
|..+B++o . |
|..=.+X o |
|.+.=+.O S |
|o.B.oo + . |
|. = . o |
| . . . |
| E . |
+----[SHA256]-----+
```
The first line states the location of the **private key**, which is called `id_ed25519` by default (notice that it does not have a file extension).
Ubuntu will load this key for you automatically when you use `ssh` if this private key file is in the default location.
The second line states the location of the **public key**, which is called `id_ed25519.pub` by default.
We'll need the public key for the next step.
::: tip NOTE
Ubuntu _should_ load this new key automatically.
However, some systems (such as macOS machines) will not load it automatically - you will have to tell it to do this with the following command **on your client machine**:
```shell
ssh-add $HOME/.ssh/id_ed25519
```
Note that this is the path of the **private key** that we generated in the previous step, **not the public key**.
Replace the path with whatever your system printed in that previous step.
If you get an error saying that the `ssh-agent` is not running, start it by running the following command **on your client machine**:
```shell
eval $(ssh-agent)
```
If you don't want to type these two commands every time you open the terminal, you can create a shortcut for adding your key by adding an `alias` to your `~/.bashrc` file.
Open the file using the text editor:
```shell
nano ~/.bashrc
```
Add this line to the end (assuming you used the default path for the private key - update as necessary):
```shell
alias loadkey='ssh-add $HOME/.ssh/id_ed25519'
```
Save and exit with `Ctrl+O` and `Enter`, then `Ctrl+X`.
Next, close and open your terminal for the changes to take effect.
You can now type `loadkey` **on your client machine** to load the key.
:::
### Adding the Public Key to your Node
Once you have your SSH key pair, you can now add the **public key** to your node.
This will let you connect to it over `ssh` using the private key you just generated, instead of your username and password.
There are two ways to do this - if one doesn't work, try the other way:
**Using ssh-copy-id**
**Note**: if your client machine is running Windows, `ssh-copy-id` is not yet available.
Please follow the instructions in the "Manually Adding the Key" tab.
Run the following command **on your client machine**:
```shell
ssh-copy-id -i $HOME/.ssh/id_ed25519.pub username@node.ip.address
```
For example, if my username on the node was `staker` and my node's IP address was `192.168.1.10`, I would run the following command:
```shell
ssh-copy-id -i $HOME/.ssh/id_ed25519.pub staker@192.168.1.10
```
You will see some messages like the following:
```
/usr/bin/ssh-copy-id: INFO: Source of key(s) to be installed: "/home/username/.ssh/id_ed25519.pub"
/usr/bin/ssh-copy-id: INFO: attempting to log in with the new key(s), to filter out any that are already installed
/usr/bin/ssh-copy-id: INFO: 1 key(s) remain to be installed -- if you are prompted now it is to install the new keys
```
This tells you that it's trying to log in with your key first to make sure it isn't already there.
Once it fails logging in, it knows that it's OK to add the new public key to the node machine.
It will then prompt you for the **password of the user on your node machine**.
(_Note that this is **not the password of the SSH key**!_)
Enter your user's password, and you will see the following output:
```
Number of key(s) added: 1
Now try logging into the machine with: "ssh 'username@node.ip.address'"
and check to make sure that only the key(s) you wanted were added.
```
That means it worked!
**Manually Adding the Key**
Start by getting the contents of the **public key** - run this command **on your client machine**:
- On macOS and Linux:
```shell
cat ~/.ssh/id_ed25519.pub
```
- On Windows (Command Prompt):
```shell
type %USERPROFILE%\.ssh\id_ed25519.pub
```
- On Windows (PowerShell):
```shell
type $ENV:UserProfile\.ssh\id_ed25519.pub
```
The output will look something like this:
```
ssh-ed25519 AAAAC3NzaC1lZDI1NTE5AAAAIGUgU3a6mNjy3N1TyWOwY+VA/nifAeABl2Ch2yIl1bGa your_email@example.com
```
This is your **public key**.
Copy this output and store it somewhere convenient - you're going to need it in a minute.
Next, use `ssh` to connect to your node like you normally would (using your node's username and password).
Once you're connected to your node, run the following commands:
```shell
mkdir -p ~/.ssh
nano ~/.ssh/authorized_keys
```
The second command will open a text editor for the file used to store all of the public keys that your node's user account trusts.
In this file, paste the **public key** that you retrieved a few steps ago using the `cat` command (the whole line starting with `ssh-ed25519`).
When it's in, save the file with `Ctrl+O` and `Enter`, then press `Ctrl+X` to exit.
Now, exit `ssh` by running the `exit` command so you return back to your local client machine's terminal.
You should now be able to `ssh` into the node like you normally would, but now you won't have to type the password of the user account.
Instead, you will have to type **the password of your SSH private key**.
Depending on your system settings, you may only have to do this once per restart, or you may have to do it every time you use the key to connect to your node.
### Disable Login-via-Password
Even though you have an SSH key pair set up, your node will still allow other machines to try to log in using the username and password method.
This defeats the entire purpose of using SSH keys in the first place, so the next step is to disable those.
::: danger NOTE
You are about to modify the SSH server's configuration.
All of your **existing** SSH sessions will be preserved.
However, if you make a mistake, then it's possible that you will not be able to create **new** SSH sessions anymore and effectively lock yourself out of the machine.
To prevent this, we strongly recommend that you create **2 SSH sessions** for the next steps - one for editing things and testing, and one as a backup so you can revert any breaking changes.
:::
Start by logging into your machine using `ssh` as usual:
```shell
ssh user@your.node.ip.address
```
As a reminder, **you should do this twice on two separate terminals so you have a backup session just in case**.
You can ignore the backup session for now - we'll tell you when you need it.
Run the following commands **only in the first session**.
Open the configuration file for the SSH server:
```shell
sudo nano /etc/ssh/sshd_config
```
As with all commands that start with `sudo`, this will prompt you for your **user account's password**.
This is a large file, so you'll have to navigate through it using the arrow keys on your keyboard or `Page Up` / `Page Down`.
Make the following changes:
1. Uncomment `#AuthorizedKeysFile` if it is commented (by removing the `#` in front of it)
2. Change `KbdInteractiveAuthentication yes` to `KbdInteractiveAuthentication no` and uncomment (by removing the `#` in front of it) - **note that older versions of SSH call this option `ChallengeResponseAuthentication` instead of `KbdInteractiveAuthentication`**
3. Change `PasswordAuthentication yes` to `PasswordAuthentication no` and uncomment (by removing the `#` in front of it)
4. Change `PermitRootLogin yes` to `PermitRootLogin prohibit-password` unless it's already set to that and has a `#` in front of it
Once you're done, save with `Ctrl+O` and `Enter`, then exit with `Ctrl+X`.
Finally, run `sudo sshd -T | grep -i passwordauthentication` and make sure that it prints `passwordauthentication no`.\
If it does not, you may need to run `sudo nano /etc/ssh/sshd_config.d/50-cloud-init.conf` and set `PasswordAuthentication yes` to `PasswordAuthentication no` in that file as well.
Save and exit as before, with `Ctrl+O` and `Enter`, then `Ctrl+X`
Next, restart the SSH server so it picks up the new settings:
```shell
sudo systemctl restart ssh.service
```
After this, logging into SSH via a username and password should be disabled.
::: warning NOTE
At this point, you should exit the SSH session and try to SSH back in.
If you are able to do so successfully, then your SSH configuration is still valid!
If you are **not** able to get back in, then something has gone wrong with your configuration.
Use the backup SSH session you created at the start of this section to modify the `/etc/ssh/sshd_config` file.
Try to find the mistake or undo your changes, then restart the SSH server using `sudo systemctl restart sshd`.
Once it's been restarted, try connecting with SSH again on your "other" terminal.
Keep doing this until you have it working again and are able to successfully connect.
:::
### (Optional) Enable Two-Factor Authentication
Two-factor authentication involves requiring a second security measure in addition to your password or SSH key, usually on a separate device from your primary one.
For example, you may be familiar with logging into a website such as a crypto exchange using both a password and a Google Authenticator code (or an SMS code).
This two-step process is an example of two-factor authentication.
SSH can also be configured to require a Google Authenticator code, which means that an attacker that somehow compromised your SSH key and its passphrase would **still need the device with the authenticator app on it** (presumably your phone).
This adds an extra layer of security to your system.
::: danger WARNING
We **strongly recommend** that you open a second terminal with an SSH connection to your node, just in case you misconfigure something.
This way, you will have a backup that is still connected in case you lock yourself out, so you can easily undo your mistakes.
If you **do** manage to lock yourself out, you will need to physically access your node via its local monitor and keyboard to log in and repair the misconfiguration.
:::
Start by installing [Google Authenticator](https://play.google.com/store/apps/details?id=com.google.android.apps.authenticator2\&hl=en_US\&gl=US) (or a compatible equivalent) on your phone if you don't already have it.
For Android users, consider [andOTP](https://play.google.com/store/apps/details?id=org.shadowice.flocke.andotp\&hl=en_US\&gl=US) which is an open-source alternative that supports password locking and convenient backups.
Next, install the Google Authenticator module on your node with this command:
```shell
sudo apt install -y libpam-google-authenticator
```
Now tell the `PAM` (pluggable authentication modules) to use this module.
First, open the config file:
```shell
sudo nano /etc/pam.d/sshd
```
Find `@include common-auth` (it should be at the top) and comment it out by adding a `#` in front of it, so it looks like this:
```
# Standard Un*x authentication.
#@include common-auth
```
Next, add these lines to the top of the file:
```shell
# Enable Google Authenticator
auth required pam_google_authenticator.so
```
Then save and exit the file with `Ctrl+O`, `Enter`, and `Ctrl+X`.
Now that `PAM` knows to use Google Authenticator, the next step is to tell `sshd` to use `PAM`.
Open the `sshd` config file:
```shell
sudo nano /etc/ssh/sshd_config
```
Now change the line `KbdInteractiveAuthentication no` to `KbdInteractiveAuthentication yes` so it looks like this:
```
# Change to yes to enable challenge-response passwords (beware issues with
# some PAM modules and threads)
KbdInteractiveAuthentication yes
```
(Older versions of SSH call this option `ChallengeResponseAuthentication` instead of `KbdInteractiveAuthentication`.)
Add the following line to the bottom of the file, which indicates to `sshd` that it needs both an SSH key and the Google Authenticator code:
```shell
AuthenticationMethods publickey,keyboard-interactive:pam
```
Then save and exit the file with `Ctrl+O`, `Enter`, and `Ctrl+X`.
Now that `sshd` is set up, we need to create our 2FA codes.
In your terminal, run:
```shell
google-authenticator
```
First, it will ask you about time-based tokens.
Say `y` to this question:
```
Do you want authentication tokens to be time-based: y
```
You will now see a big QR code on your screen; scan it with your Google Authenticator app to add it.
You will also see your secret and a few backup codes looking like this:
```
Your new secret key is: IRG2TALMR5U2LK5VQ5AQIG3HA4
Your verification code is 282436
Your emergency scratch codes are:
29778030
86888537
50553659
41403052
82649596
```
::: warning NOTE
Record the emergency scratch codes somewhere safe in case you need to log into the machine but don't have your 2FA app handy.
Without the app, you will no longer be able to SSH into the machine!
:::
Finally, it will ask you for some more parameters; the recommended defaults are as follows:
```
Do you want me to update your "//.google_authenticator" file: y
Do you want to disallow multiple uses of the same authentication token: y
By default... < long story about time skew > ... Do you want to do so: n
Do you want to enable rate-limiting: y
```
Once you're done, restart `sshd` so it grabs the new settings:
```shell
sudo systemctl restart sshd
```
When you try to SSH into your server with your SSH keys, you should now also be asked for a 2FA verification code, but not for a password.
## ESSENTIAL: Enable Automatic Security Updates
Operating System vendors routinely publish updates and security fixes, so it is important that you keep your system up to date with the latest patches.
The easiest way to do this is to enable automatic updates.
Run the following commands **on your node machine**:
```shell
sudo apt update
sudo apt install -y unattended-upgrades update-notifier-common
```
You can change the auto-update settings by editing `/etc/apt/apt.conf.d/20auto-upgrades`:
```shell
sudo nano /etc/apt/apt.conf.d/20auto-upgrades
```
This is an example of reasonable auto-update settings:
```shell
APT::Periodic::Update-Package-Lists "1";
APT::Periodic::Unattended-Upgrade "1";
APT::Periodic::AutocleanInterval "7";
Unattended-Upgrade::Remove-Unused-Dependencies "true";
Unattended-Upgrade::Remove-New-Unused-Dependencies "true";
# This is the most important choice: auto-reboot.
# This should be fine since Rocketpool auto-starts on reboot.
Unattended-Upgrade::Automatic-Reboot "true";
Unattended-Upgrade::Automatic-Reboot-Time "02:00";
```
When you are done adding your changes, save with `Ctrl+O` and `Enter`, then exit with `Ctrl+X`.
After, make sure to load the new settings:
```shell
sudo systemctl restart unattended-upgrades
```
## ESSENTIAL: Enable a Firewall
In general, your machine should only accept network traffic on ports that your Execution client, Consensus client, and Smart Node stack use.
To enforce that and prevent any unexpected or undesirable traffic, we can install a **firewall** on the node.
::: tip NOTE
If you selected a different execution/consensus client port during the Rocketpool setup, you need to edit the ports below to reflect your settings.
:::
Ubuntu comes with `ufw` installed by default (the **u**ncomplicated **f**ire **w**all), which is a convenient utility for managing your node's firewall settings.
The following commands will set `ufw` up with a good default configuration for your Smart Node.
**Run these on your node machine**.
Disable connections unless they're explicitly allowed by later rules:
```shell
sudo ufw default deny incoming comment 'Deny all incoming traffic'
```
Allow SSH:
```shell
sudo ufw allow "22/tcp" comment 'Allow SSH'
```
Allow execution client (formerly referred to as ETH1):
```shell
sudo ufw allow 30303/tcp comment 'Execution client port, standardised by Rocket Pool'
sudo ufw allow 30303/udp comment 'Execution client port, standardised by Rocket Pool'
```
Allow consensus client (formerly referred to as ETH2):
```shell
sudo ufw allow 9001/tcp comment 'Consensus client port, standardised by Rocket Pool'
sudo ufw allow 9001/udp comment 'Consensus client port, standardised by Rocket Pool'
```
Smart Node consensus clients also use P2P gossip over QUIC, which is always enabled and listens on UDP port **8001** by default. Allow it in your host firewall:
```shell
sudo ufw allow 8001/udp comment 'Consensus client port, standardised by Rocket Pool'
```
If you use Erigon, also allow its torrent port (default `42069`, TCP and UDP). If you use Teku with [IPv6 enabled](/node-staking/advanced-config.md#experimental-enabling-dual-stack-ipv4--ipv6-networking), also allow its IPv6 ports (default `9090` TCP and UDP, and `8002` UDP).
Finally, enable `ufw`:
```shell
sudo ufw enable
```
::: tip NOTE
`iptables` experts might note that Docker bypasses `ufw` settings.
Strictly speaking, that means unless you are running in Hybrid mode, you do not need the Execution and Consensus client rules.
Adding them, however, has no downside and will make sure that if you ever switch to Hybrid mode you will not run into firewall issues.
:::
## (Optional) Enable Brute-Force and DDoS Protection
To protect your server from DDoS attacks and brute-force connection attempts, you can install `fail2ban`.
This program will monitor incoming connections and block IP addresses that try to log in with faulty credentials repeatedly.
See [this guide](https://github.com/imthenachoman/How-To-Secure-A-Linux-Server#application-intrusion-detection-and-prevention-with-fail2ban) for more information on intrusion prevention.
Run the following commands **on your node machine**:
Install the service:
```shell
sudo apt install -y fail2ban
```
Next, open `/etc/fail2ban/jail.d/ssh.local`:
```shell
sudo nano /etc/fail2ban/jail.d/ssh.local
```
Add the following contents to it:
```
[sshd]
enabled = true
banaction = ufw
port = 22
filter = sshd
logpath = %(sshd_log)s
maxretry = 5
```
You can change the `maxretry` setting, which is the number of attempts it will allow before locking the offending address out.
Once you're done, save and exit with `Ctrl+O` and `Enter`, then `Ctrl+X`.
Finally, restart the service:
```shell
sudo systemctl restart fail2ban
```
And with that, you've just greatly improved the security posture of your node.
Congratulations!
---
url: /node-staking/skimming.md
---
> For AI agents: the complete documentation index is available at /llms.txt, the full documentation bundle is available at /llms-full.txt.
# Distributing Skimmed Minipool Rewards
The ETH rewards you receive for running a validator for Ethereum are routinely sent to your minipools in a process referred to as "skimming".
The frequency of skims depends on the number of activate validators on the Beacon Chain. At the time of writing the number of validators is around
500,000 which results in a skim occurring approximately every 2-3 days.
Skimmed rewards will accrue in each of your minipools until you "distribute" them. This process distributes the skimmed rewards between you, as the node operator, and rETH holders
based on your commission rate and ratio of supplied and provided ETH.
::: warning NOTE
In order to access your minipool's balance, you will need to upgrade to the [Atlas delegate](/node-staking/minipools/delegates.md) first.
The old Redstone delegate cannot be used to distribute the minipool's balance.
:::
## Automatic Distribution
By default, the Smart Node is configured to automatically distribute any of your minipools when their individual balances reach **1 ETH**. This
threshold can be configured in the TUI by following the steps below.
Run:
```shell
rocketpool service config
```
Navigate to the setting `Smartnode and TX Fee Settings > Auto Distribute Threshold` shown below.
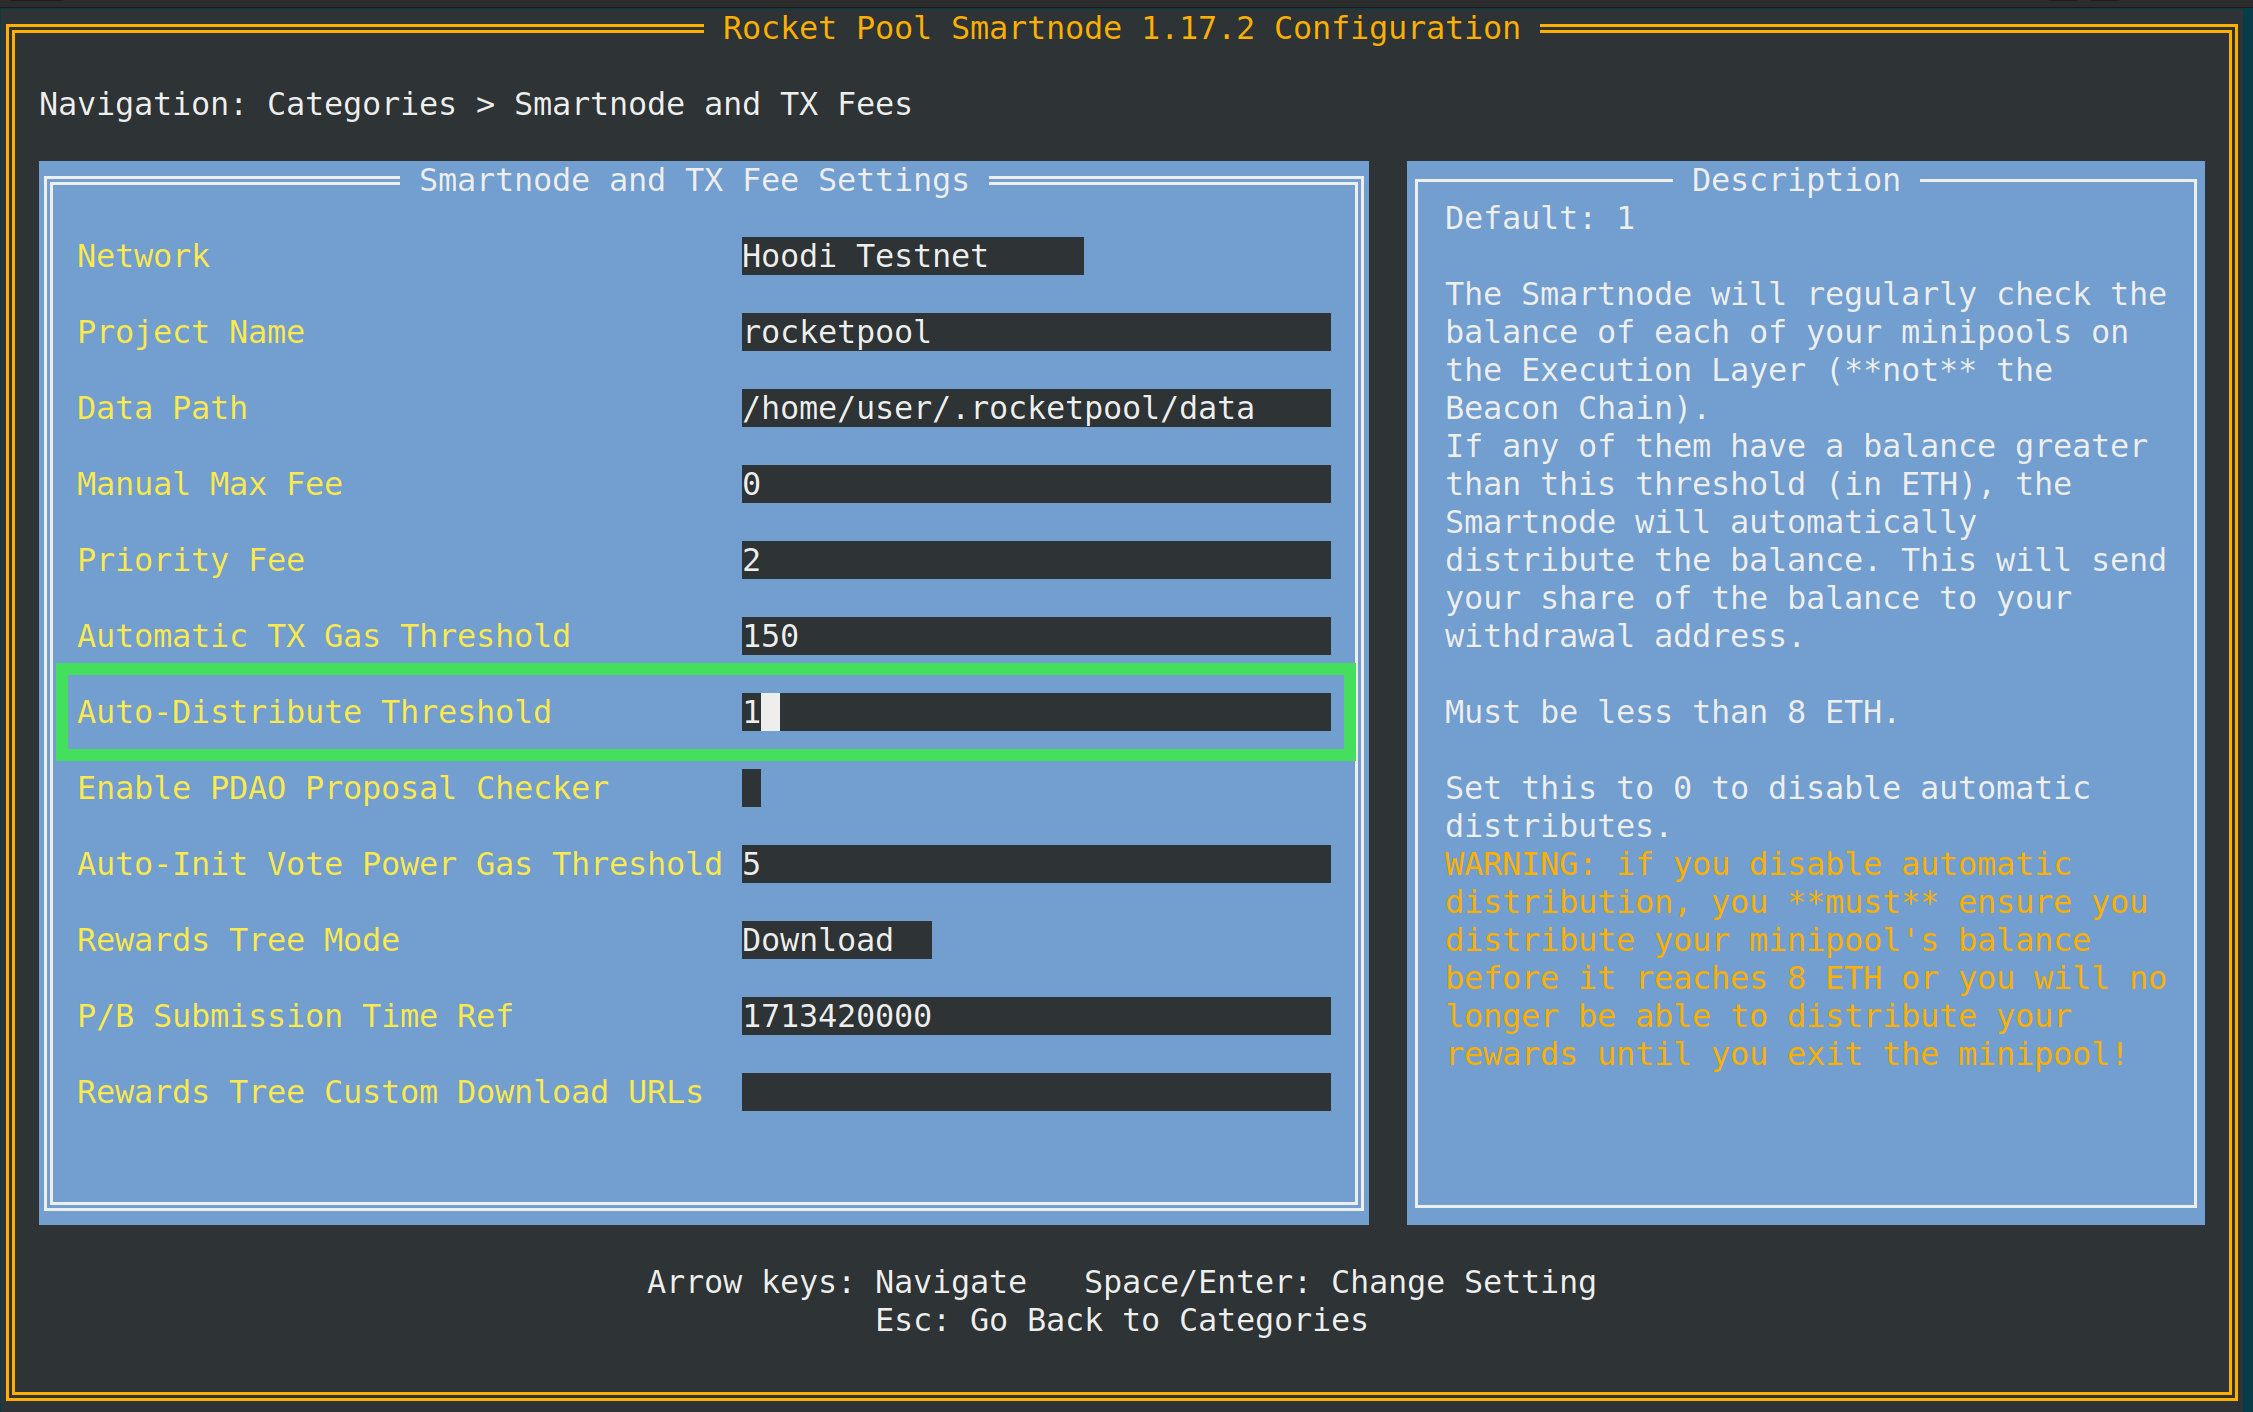
Changing this setting will adjust the threshold at which the Smart Node will automatically distribute your minipools.
Setting the parameter to 0 will disable automatic distributions.
::: warning WARNING
If you decide to disable automatic distribution, it is important that you still perform a manual distribution on a regular
basis. Read the [manual distribution section](#manual-distribution) that follows on how to do this.
After a long period of time your skimmed rewards may exceed 8 ETH. If this situation occurs you will no longer be able
to distribute them and will need to exit your validator to access your accrued rewards.
Rocket Pool features a failsafe design which allows anyone, after a long waiting period, to distribute your minipool when
its balance exceeds 8 ETH. To protect your capital, the Smart Node monitors this situation and will automatically exit
your minipool if it occurs.
:::
## Manual Distribution
If you have disabled the automatic distribution of skimmed rewards, you will need to routinely distribute them yourself
with the following process.
You can also manually distribute your rewards using this process at any time without waiting for the automatic process above.
If your minipool has less than 8 ETH in it, you can distribute your rewards using the following command:
```shell
rocketpool minipool distribute-balance
```
This will show you the minipools you have that are eligible for distribution, how much ETH they have, and how much ETH you (the node operator) will receive:
```
WARNING: The following minipools are using an old delegate and cannot have their rewards safely distributed:
0x7E5703fdA638CD86c316B9EbAF76927fF695ADC5
0x7E5704aD2a63eb90880426Dcd4a3811246dF3cB0
0x7E5705c149D11efc951fFc20349D7A96bc6b819C
0x7E570625cE8F586c90ACa7fe8792EeAA79751778
Please upgrade the delegate for these minipools using `rocketpool minipool delegate-upgrade` in order to distribute their ETH balances.
Please select a minipool to distribute the balance of:
1: All available minipools
2: 0x7E5700bcd65B1770bA68abB288D3f53814d376aC (0.112307 ETH available, 0.031200 ETH goes to you plus a refund of 0.024419 ETH)
3: 0x7E570195026dC29f4B2DfF08B56c3b5D0FF988Ef (0.070754 ETH available, 0.000481 ETH goes to you plus a refund of 0.069399 ETH)
4: 0x7e5702a2cE66B5B35E59B9Ac00eEAAa547881e40 (0.122064 ETH available, 0.070187 ETH goes to you plus a refund of 0.000000 ETH)
5: 0x7E5700c82E38434C6c72890bb82f5B5305f4328a (0.102739 ETH available, 0.000000 ETH goes to you plus a refund of 0.000000 ETH)
6: 0xffCAB546539b55756b1F85678f229dd707328A2F (0.070989 ETH available, 0.025201 ETH goes to you plus a refund of 0.000000 ETH)
```
Any minipools using the original launch delegate will be mentioned at the start, letting you know that you cannot call `distribute-balance` on them until you upgrade their delegates.
This delegate was written before skimmed withdrawals were specified and, as such, do not feature a way to distribute skimmed rewards.
Note that for eligible minipools, you are also shown the **refund amount**.
This is an amount owed directly to you (for example, because you had a balance in your minipool prior to [migrating from a 16-ETH bond down to an 8-ETH bond](/node-staking/leb-migration.md) or you [converted a solo validator into a minipool](/node-staking/solo-staker-migration.md) with existing rewards).
It will not be shared with the rETH holders.
Enter the number of the minipool that you want to distribute.
You will be prompted with the gas price chart as usual, and asked to confirm your decision.
Once you have, your minipool's balance will be distributed:
```
Using a max fee of 2.00 gwei and a priority fee of 2.00 gwei.
Are you sure you want to distribute the ETH balance of 1 minipools? [y/n]
y
Distributing balance of minipool 0x7E5700bcd65B1770bA68abB288D3f53814d376aC...
Transaction has been submitted with hash 0xb883eab903d9688b40d291c5c2030084f9bce19135837ebf96a5c1e8871cfbf9.
Waiting for the transaction to be included in a block... you may wait here for it, or press CTRL+C to exit and return to the terminal.
Successfully distributed the ETH balance of minipool 0x7E5700bcd65B1770bA68abB288D3f53814d376aC.
```
As you can see [from the transaction](https://zhejiang.beaconcha.in/tx/b883eab903d9688b40d291c5c2030084f9bce19135837ebf96a5c1e8871cfbf9), this provided the node's withdrawal address with the node's share of the rewards (plus the refund amount) and returned the rest to the staking pool.
---
url: /node-staking/solo-staker-migration.md
---
> For AI agents: the complete documentation index is available at /llms.txt, the full documentation bundle is available at /llms-full.txt.
# Migrating from Solo Staking to Rocket Pool
::: danger SOLO VALIDATOR CONVERSION IS NO LONGER POSSIBLE
The [Saturn 1 upgrade](/upgrades/saturn-1/whats-new.md) removed the ability to convert an existing solo validator directly into a Rocket Pool validator.
Minipools - including the "vacant" minipools that powered solo validator conversion - can no longer be created, and megapool validators can only be created through a fresh Beacon Chain deposit.
To move your stake from solo staking to Rocket Pool, you now **exit your solo validator** and **create new validators under a megapool**.
This page explains what changed and walks you through the new process.
:::
## What Changed in Saturn 1
Before Saturn 1, a solo staker could convert an active validator into a Rocket Pool minipool without exiting it from the Beacon Chain.
The process involved creating a special "vacant" minipool, changing the validator's withdrawal credentials from the original `0x00` BLS credentials to the minipool's address, passing an Oracle DAO scrub check, and finally promoting the minipool.
The Saturn 1 upgrade replaced minipools with [megapools](/node-staking/megapools/overview.md) as the way new validators are created, and solo validator conversion did not carry over:
- **Minipool creation is disabled at the protocol level**, and that includes vacant minipools. There is no longer a minipool contract you can point an existing validator's withdrawal credentials at.
- **Megapool validators are created through the Rocket Pool deposit queue** with a fresh Beacon Chain deposit: a 1 ETH prestake, followed by the remaining 31 ETH once the protocol has verified the validator's withdrawal credentials on-chain.
An already-active validator cannot go through this flow, so there is no mechanism for absorbing an existing solo validator into a megapool.
- The Smart Node commands used for conversion (such as `rocketpool node create-vacant-minipool` and `rocketpool minipool promote`) have been removed from the CLI.
In short: the only way to migrate from solo staking today is to **exit your validator from the Beacon Chain and use the withdrawn ETH to create new megapool validators**.
## Why Would I Migrate?
Migration is not for everyone, but Rocket Pool megapool validators enjoy several advantages over conventional solo staking validators:
- They **earn commission** on the portion of ETH they borrow from the pool stakers (28 ETH per validator).
- Your existing 32 ETH stake could be used to create up to **eight megapool validators** (at the current bond of 4 ETH each), earning commission on up to 224 ETH of borrowed ETH.
- They are eligible for participation in the [Smoothing Pool](/node-staking/fee-distrib-sp.md#the-smoothing-pool), which pools all Execution layer rewards (e.g., from block proposals and [MEV rewards](/node-staking/mev.md)) and fairly distributes them among participants during each rewards interval.
- If you stake RPL on your megapool, you will earn [voter share rewards](/node-staking/megapools/staking-and-claiming-rewards.md#how-voter-share-is-distributed-to-megapool-rpl-stakers) (a share of protocol ETH revenue) in addition to RPL inflation rewards, along with voting power in [pDAO governance](/pdao/overview.md). RPL staking is entirely optional.
That being said, there are some differences that are important to highlight:
- You will have to accept **smart contract risk**, as the protocol is implemented as a series of smart contracts.
- Conventional node operation leverages the **Smart Node stack**; you will have to accept any risks associated with installing and running that software on your node.
- Being a node operator does involve learning some new concepts, so there is a **learning curve** associated with becoming one.
- Megapool validators split their rewards with the pool stakers, so your validators' withdrawal address will be your megapool contract on the Execution layer, **not an EOA that you control**. This also applies to your **fee recipient** for Execution layer rewards.
- **Your capital earns nothing while it is in transit.** Between exiting your solo validator and your megapool validators activating, you will earn no rewards. New megapool validators must pass through the Rocket Pool deposit queue _and_ the Beacon Chain queue before they begin attesting, so read the [Timing Considerations](#timing-considerations) section below before you exit anything.
We encourage you to carefully go through these pros and cons before deciding to migrate.
If you would like to continue with the process, the steps are described below.
## Step 1: Exit Your Solo Validator
The first step is to exit your solo validator from the Beacon Chain and withdraw its balance:
1. If your validator still has `0x00` BLS withdrawal credentials, you must first [update them to Execution layer withdrawal credentials](https://launchpad.ethereum.org/en/withdrawals) that point to an address you control. Without this, your ETH cannot be withdrawn after the exit.
2. Submit a **voluntary exit** for the validator. You can do this with your Consensus / Validator client; consult the documentation for your client for specifics.
3. Wait for the validator to pass through the Beacon Chain exit queue and for its full balance to be swept to your withdrawal address.
::: warning WARNING
A voluntary exit is **irreversible**. Once your validator has exited, it can never validate again - the only way back is to create a new validator.
Make sure you have read this entire page (especially the [Timing Considerations](#timing-considerations) section) before exiting.
:::
[validatorqueue.com](https://www.validatorqueue.com/) is a helpful site for checking the current length of the Beacon Chain exit queue.
## Step 2: Set Up a Rocket Pool Node
While you wait for your exit to process, you can prepare your Rocket Pool node.
If you are new to Rocket Pool node operation, start with the [Node Operator's guide](/node-staking/responsibilities.md), which covers everything from hardware selection to [installing the Smart Node stack](/node-staking/installing/overview.md) and [registering your node](/node-staking/prepare-node.md).
Since you have been running your own validator, much of this will feel familiar - and if you already run your own Execution and Consensus clients, you may be interested in the [Hybrid configuration with external clients](/node-staking/install-modes.md#the-hybrid-configuration-with-external-clients).
## Step 3: Create Your Megapool Validators
Once your withdrawn ETH is in hand, you're ready to create megapool validators using `rocketpool megapool deposit`.
Each validator currently requires a **4 ETH bond** and borrows **28 ETH** from the staking pool, so your 32 ETH of withdrawn stake could fund up to **eight megapool validators**.
Your megapool contract is deployed automatically with your first validator deposit, and every validator you create afterwards is managed by that same megapool.
The [Creating a Megapool (Validator)](/node-staking/megapools/create-megapool-validator.md) guide walks you through the whole process step-by-step, including how the deposit queue works and how to confirm a successful stake.
::: tip NOTE
Unlike the old conversion process, your new validators will use **new validator keys** generated from your Smart Node wallet.
Your old solo validator keys are not reused, and the Smart Node's Validator Client will manage the new keys for you - there is no key import step.
:::
## Timing Considerations
The old conversion process had no downtime: your validator kept attesting throughout.
The new migration path does involve downtime, so it pays to understand the queues involved before you exit your solo validator:
1. **The Beacon Chain exit queue**, which determines how quickly your solo validator can exit and be withdrawn.
2. **The Rocket Pool deposit queue**, which determines when your new validators are matched with borrowed ETH from the deposit pool. Express queue tickets were distributed to existing node operators based on ETH bonded in legacy minipools; new nodes currently receive none, so a former solo staker's validators will join the **standard queue**.
3. **The Beacon Chain deposit queue**, which megapool validators pass through **twice**: once for the 1 ETH prestake, and again for the remaining 31 ETH stake after the protocol verifies the validator's withdrawal credentials.
You earn no rewards from the moment your solo validator exits until your megapool validators are activated, so check the queues before committing.
::: tip Useful Links
[validatorqueue.com](https://www.validatorqueue.com/) is a helpful site for checking the length of the Beacon Chain queue. This queue is contingent on the amount of ETH entering and leaving the Beacon Chain.
:::
If the deposit queue turns out to be longer than you'd like, you can [exit a validator from the Rocket Pool deposit queue](/node-staking/megapools/create-megapool-validator.md#exit-a-validator-from-the-rocket-pool-deposit-queue) at any time before it is assigned ETH and receive your bond back as [deposit credit](/node-staking/megapools/credit.md), which is redeemable for rETH.
## Alternative: Staking Without Running a Node
If, after weighing the trade-offs, you'd rather not run a node at all, you can simply stake your withdrawn ETH with [rETH](/liquid-staking/overview.md) - Rocket Pool's liquid staking token - and earn staking rewards without any hardware, maintenance, or queues on your end.
---
url: /node-staking/ssh.md
---
> For AI agents: the complete documentation index is available at /llms.txt, the full documentation bundle is available at /llms-full.txt.
# Intro to Secure Shell (SSH)
In general, there are two ways to access your node machine: **locally**, and **remotely**.
- **Locally** refers to sitting down at the physical node and using a monitor and keyboard connected directly to it.
- **Remotely** refers to connecting to the node using a different computer (say, a laptop or desktop) over a network and interacting with it from there.
Most of the time, node operators prefer the flexibility of working on their node **remotely**.
The Smart Node currently doesn't have a GUI (Graphical User Interface), only a CLI (Command Line Interface), which means interacting with it is done entirely by typing commands into a command-line terminal.
As such, interacting with it remotely requires some way to access your node's terminal from a different machine.
In this section, we'll provide a brief introduction to the most popular way of doing this: **SSH**.
**Using a Windows Machine**
There are a few different ways to use SSH from a Windows machine.
The simplest is to use **Powershell**, which is a powerful command terminal that comes built into modern versions of
Windows.
Powershell has SSH included, so you can use it right away without installing any supplemental programs.
You can find it by opening the Start menu and typing `Powershell` into the search bar; there will be several
options, but option you want is simply called `Windows Powershell`:
This will open up a terminal with a blue background.
You can use `ssh` from here - see below for instructions on how to do that.
Another popular tool is called [PuTTY](https://www.chiark.greenend.org.uk/~sgtatham/putty/latest.html).
PuTTY is a special program that includes a terminal dedicated for SSH usage, but it also comes with a convenient GUI
for doing things like changing configurations, saving settings to a "profile", and keeping a list of machines you
can easily connect to by selecting from a list.
Instead of using `ssh` as you would with the other tools, PuTTY will do this for you automatically - all you need to
provide are the username and password.
For information on how to use PuTTY, take a look at [this great
tutorial](https://tonyteaches.tech/putty-ssh-windows-tutorial/).
**NOTE**: PuTTY might display the wrong colors in the `rocketpool service
config` text-based user interface (TUI).
There's an easy solution for this. In the PuTTY
settings, navigate to **Connection** > **Data** > **Terminal Details**
in the dropdown menu. There should be a **Terminal-type string** text box. Type in `xterm-256color`, then save
the settings
to resolve this.
**Using a Linux or macOS Machine**
Using SSH from a Linux or macOS machine is trivial; if you're already using one of these, then you've likely already
interacted with the terminal at some point.
SSH is built directly into the terminal; use it by running the `ssh` command. By default, SSH will allow you to
connect to your node's primary user account.
Here's how you would connect to your node using SSH.
:::warning NOTE
Run the following command from your laptop or desktop, **not from your node itself**!
:::
```shell
ssh username@node-ip-address
```
Say, for example, that your node's username is `staker` and your node's IP address is `192.168.1.10`.
You would connect to it with the following command:
```shell
ssh staker@192.168.1.10
```
The first time you do this, you will see a message presenting the public key that your node is using - if you are
familiar with how to verify this key, you can do so now.
Otherwise, if you trust that you have the correct node IP address in your `ssh` command, you can just say `yes` to
accept it.
You only need to do this once.
The client will then prompt you for your user's password; once you enter that, you're in!
You will be greeted with a welcome message, some details about your machine, and a new prompt.
At this point, everything you type in the terminal **is executed remotely on your node machine** - it's as if you
were logged directly into the node machine and typing on it with a locally-attached keyboard!
You'll need to SSH into the terminal periodically for updates and maintenance.
It can be inconvenient to remember how to log in to your node, so it may be helpful to shorten this command by
creating a memorable alias - a custom "shortcut" command.
:::warning NOTE
If you do this, be sure to create the alias on the **client machine**, **not** on the node!
If your terminal is still connected to the node, first run `exit` at the command prompt (or simply open a new
terminal window).
:::
:::warning NOTE
This section only applies to Linux/OSX or WSL users - PowerShell is not supported.
:::
In this example, we'll create an alias called `ethnode` which will replace the SSH command.
Assuming, as before, that your node's username is `staker` and your node's IP address is `192.168.1.10`, create the
alias with the following command:
```shell
echo "alias ethnode='ssh staker@192.168.1.10'" >> ~/.bash_aliases
```
Reload the alias list to make your current terminal window aware of the new alias:
```shell
source ~/.bash_aliases
```
Now, you can connect to the node using the alias you just created instead of the longer command that involves
specifying the node's IP address:
```shell
ethnode
```
---
url: /node-staking/starting-rp.md
---
> For AI agents: the complete documentation index is available at /llms.txt, the full documentation bundle is available at /llms-full.txt.
# Starting Rocket Pool
At this point, you should have the complete Rocket Pool infrastructure running, including the Smart Node stack, an Execution and a Consensus client.
You should also have hardened your operating system from outside attackers.
If you've completed both of these steps, you're ready to create a Rocket Pool node and begin staking.
If not, please review the previous sections and return here once you've completed those steps.
## Starting and Stopping the Rocket Pool Services
**Docker (Default) Mode**
Now that you have the Smart Node installed, starting the stack is easy.
Simply enter the following command:
```shell
rocketpool service start
```
This command will create all of the necessary Docker images if they don't already exist, make sure the Rocket Pool docker network and storage volumes have been initialized, and update any containers if they no longer match the configuration settings from `rocketpool service config`'s UI.
The first time you do it, the output should look like this:
```
$ rocketpool service start
Creating network "rocketpool_net" with the default driver
Creating volume "rocketpool_eth1clientdata" with default driver
Creating volume "rocketpool_eth2clientdata" with default driver
Creating rocketpool_eth1 ...
Creating rocketpool_eth1 ... done
Creating rocketpool_eth2 ...
Creating rocketpool_eth2 ... done
Creating rocketpool_watchtower ...
Creating rocketpool_mev-boost ...
Creating rocketpool_mev-boost ... done
Creating rocketpool_node ...
Creating rocketpool_validator ...
Creating rocketpool_validator ... done
Creating rocketpool_node ... done
Creating rocketpool_watchtower ... done
```
If it does, then the Smart Node stack has been successfully initialized and is now running.
If you ever need to stop the services (for example, during an upgrade or because you need to do maintenance), you can use `rocketpool service stop` to shut everything down.
The output should look like this:
```
$ rocketpool service stop
Are you sure you want to pause the Rocket Pool service? Any staking minipools will be penalized! [y/n]
y
Stopping rocketpool_node ...
Stopping rocketpool_validator ...
Stopping rocketpool_watchtower ...
Stopping rocketpool_mev-boost ...
Stopping rocketpool_eth2 ...
Stopping rocketpool_eth1 ...
Stopping rocketpool_validator ... done
Stopping rocketpool_node ... done
Stopping rocketpool_watchtower ... done
Stopping rocketpool_mev-boost ... done
Stopping rocketpool_eth2 ... done
Stopping rocketpool_eth1 ... done
```
NOTE
Once you call this, Rocket Pool will **not** automatically start after a system reboot.
You will have to call `rocketpool service start` to start all of the Docker containers and enable auto-start on reboot again.
**Hybrid Mode**
Now that you have the Smart Node installed, starting the stack is easy.
Simply enter the following command:
```shell
rocketpool service start
```
This command will create all of the necessary Docker images if they don't already exist, make sure the Rocket Pool docker network and storage volumes have been initialized, and update any containers if they no longer match the configuration settings from `rocketpool service config`'s UI.
The first time you do it, the output should look like this:
```
$ rocketpool service start
Creating network "rocketpool_net" with the default driver
Creating rocketpool_watchtower ...
Creating rocketpool_node ...
Creating rocketpool_validator ...
Creating rocketpool_validator ... done
Creating rocketpool_node ... done
Creating rocketpool_watchtower ... done
```
If it does, then the Smart Node stack has been successfully initialized and is now running.
Note that your external Execution and/or Consensus clients will not be listed here, as Rocket Pool does not manage them and thus cannot start them.
You will have to ensure that you've started them separately, using whatever mechanism you originally created them with.
If you ever need to stop the services (for example, during an upgrade or because you need to do maintenance), you can use `rocketpool service stop` to shut everything down.
The output should look like this:
```
$ rocketpool service stop
Are you sure you want to pause the Rocket Pool service? Any staking minipools will be penalized! [y/n]
y
Stopping rocketpool_node ...
Stopping rocketpool_validator ...
Stopping rocketpool_watchtower ...
Stopping rocketpool_validator ... done
Stopping rocketpool_node ... done
Stopping rocketpool_watchtower ... done
```
Again, you will be responsible for manually ensuring that your Execution and Consensus clients are stopped appropriately as well, if you want them to be stopped.
NOTE
Once you call this, Rocket Pool will not automatically start after a system reboot.
You will have to call `rocketpool service start` to start all of the Docker containers and enable auto-start on reboot again.
**Native Mode**
In native mode, you already set up and started the Smart Node services as part of the [Configuring a Native Rocket Pool Node without Docker](/node-staking/native.md) section.
Assuming you set them up as `systemd` services, you can start them with `sudo systemctl start ...`.
For example, if you are using Geth for Execution and Teku for Consensus:
```shell
sudo systemctl start geth teku-bn teku-vc rp-node rp-watchtower
```
Stopping them is the same process, but using `sudo systemctl stop ...`.
Note that stopping the services **does not disable autostart**; the processes will automatically start upon a reboot.
## Confirming the Correct Version and Network
Once the containers or services are up, a good first step is to confirm that you have the correct versions of the clients and are on the network that you expect.
You can do this with the following command:
```shell
rocketpool service version
```
The output will look like this **(note that you may have a newer version than what is displayed here, this is just an example)**:
```
Your Smartnode is currently using the Ethereum Mainnet.
Rocket Pool client version: 1.20.2
Rocket Pool service version: 1.20.2
Selected Eth 1.0 client: Reth (Locally managed)
Image: ghcr.io/paradigmxyz/reth:v2.1.0
Selected Eth 2.0 client: Nimbus (Locally managed)
Image: statusim/nimbus-eth2:multiarch-v26.3.1
VC image: statusim/nimbus-validator-client:multiarch-v26.3.1
MEV-Boost client: Disabled
Commit-Boost client: Disabled
```
The first line will tell you if your Smart Node is configured for the Ethereum mainnet or for the Hoodi testnet.
::: warning NOTE
**For Docker / Hybrid users:**
If you are not on the network you expect to be on, go back to the Installing Rocket Pool section and review the installation instructions - you may have missed the portion that has different instructions depending on which network you want to use.
**For Native users:**
If you accepted the default settings when you first ran `rp service config`, then it's possible that the network reported here is incorrect.
Simply switch it in the `rp service config` TUI, in the `Smartnode` section, to the proper network and restart your `node` and `watchtower` services.
:::
The second set of lines will tell you which clients you're using, and which versions of them are defined in Rocket Pool's configuration.
## Checking the Service Status and Logs
Now that the Smart Node services have been started, it's a good idea to check that they're running correctly without errors.
**Docker (Default) Mode**
The first thing to check is whether the Docker containers are running well, or if they are constantly restarting due to an error.
Run the following command:
```shell
docker ps
```
The results should look like this:
```
CONTAINER ID IMAGE COMMAND CREATED STATUS PORTS NAMES
4c1de08a352b prom/prometheus:v2.37.0 "/bin/prometheus --w…" 9 days ago Up 9 days 9090/tcp rocketpool_prometheus
56940decdd1f sigp/lighthouse:v2.5.1 "sh /setup/start-bn.…" 9 days ago Up 9 days 0.0.0.0:9001->9001/tcp, 0.0.0.0:9001->9001/udp, :::9001->9001/tcp, :::9001->9001/udp rocketpool_eth2
bd061e632535 grafana/grafana:8.5.9 "/run.sh" 9 days ago Up 9 days 3000/tcp, 0.0.0.0:3100->3100/tcp, :::3100->3100/tcp rocketpool_grafana
5c4db92762fb ethereum/client-go:v1.10.21 "sh /setup/start-ec.…" 9 days ago Up 9 days 8545-8546/tcp, 0.0.0.0:30303->30303/tcp, 0.0.0.0:30303->30303/udp, :::30303->30303/tcp, :::30303->30303/udp rocketpool_eth1
4cf8d364fb90 rocketpool/smartnode:v1.5.0 "/go/bin/rocketpool …" 9 days ago Up 9 days rocketpool_watchtower
9eb944c29997 rocketpool/smartnode:v1.5.0 "/go/bin/rocketpool …" 9 days ago Up 9 days rocketpool_node
2ca5d3dcb471 sigp/lighthouse:v2.5.1 "sh /setup/start-vc.…" 9 days ago Up 9 days rocketpool_validator
dedc577fe361 prom/node-exporter:v1.3.1 "/bin/node_exporter …" 2 weeks ago Up 9 days rocketpool_exporter
```
The key thing to check is the `STATUS` column.
If none of the entries state `Restarting...`, then the containers should be running properly (see the below note for an exception about the `rocketpool_validator` container).
NOTE
If you are using Prysm or Lodestar as your Consensus client, you will likely notice the `rocketpool_validator` container is constantly restarting.
This is okay!
The validator container will fail until a new validator has been created using the `rocketpool megapool deposit` command, which we will cover in the [Creating a Megapool Validator](/node-staking/megapools/create-megapool-validator.md) section.
Once this is done, the container will function correctly - until then, just ignore it.
Still, it might be useful to check the logs of the various services.
To check on the logs, use the `rocketpool service logs container` command, where `container` is one of `eth1`, `eth2`, `validator`, `api`, `node`, or `watchtower`.
For example, to check the logs for your ETH1 client:
```
$ rocketpool service logs eth1
Attaching to rocketpool_eth1
eth1_1 | INFO [06-17|05:17:19.052] Imported new block receipts count=25 elapsed=26.651ms number=247,000 hash=6583ec..35eb1c age=2y3mo2w size=15.72KiB
eth1_1 | INFO [06-17|05:17:19.098] Imported new block headers count=192 elapsed=18.515ms number=247,551 hash=b7d5e4..d49faf age=2y3mo2w
eth1_1 | INFO [06-17|05:17:19.334] Imported new block receipts count=371 elapsed=46.450ms number=247,371 hash=dd3240..1ed173 age=2y3mo2w size=266.59KiB
eth1_1 | INFO [06-17|05:17:19.354] Imported new state entries count=1271 elapsed=2.866ms processed=374,695 pending=3134 trieretry=0 coderetry=0 duplicate=0 unexpected=0
eth1_1 | INFO [06-17|05:17:19.441] Imported new block headers count=384 elapsed=35.331ms number=247,935 hash=4c4dba..5bf8b6 age=2y3mo2w
eth1_1 | INFO [06-17|05:17:19.460] Imported new block receipts count=180 elapsed=33.648ms number=247,551 hash=b7d5e4..d49faf age=2y3mo2w size=128.73KiB
eth1_1 | INFO [06-17|05:17:19.480] Imported new block headers count=192 elapsed=19.122ms number=248,127 hash=aa70b9..40d139 age=2y3mo1w
eth1_1 | INFO [06-17|05:17:19.486] Imported new block receipts count=6 elapsed=26.042ms number=247,557 hash=fd6656..ca2439 age=2y3mo2w size=3.77KiB
```
You should do this for both `eth1` and `eth2` to make sure both clients are running without any errors.
**Hybrid Mode**
The first thing to check is whether the Docker containers are running well, or if they are constantly restarting due to an error.
Run the following command:
```shell
docker ps
```
The results should look like this:
```
CONTAINER ID IMAGE COMMAND CREATED STATUS NAMES
a3c22f54eff0 rocketpool/smartnode:v1.0.0-rc3 "/go/bin/rocketpool …" 2 hours ago Up 2 minutes rocketpool_node
0d5818868ef6 sigp/lighthouse:v1.4.0 "sh /setup/start-val…" 2 hours ago Up 2 minutes rocketpool_validator
88bea525fa89 rocketpool/smartnode:v1.0.0-rc3 "/go/bin/rocketpool …" 2 hours ago Up 2 minutes rocketpool_watchtower
```
The key thing to check is the `STATUS` column.
If none of the entries state `Restarting...`, then the containers should be running properly (see the below note for an exception about the `rocketpool_validator` container).
NOTE
If you are using **Lodestar** or **Prysm** as your Consensus client, you will likely notice the `rocketpool_validator` container is constantly restarting.
This is okay!
The validator container will fail until a new validator has been created using the `rocketpool megapool deposit` command, which we will cover in the [Creating a Megapool Validator](/node-staking/megapools/create-megapool-validator.md) section.
Once this is done, the container will function correctly - until then, just ignore it.
Still, it might be useful to check the logs of the various services.
To check on the logs, use the `rocketpool service logs container` command, where `container` is one of `eth1`, `eth2`, `validator`, `api`, `node`, or `watchtower`.
You can ignore `eth1` and/or `eth2` based on which ones you are maintaining externally, but if you are letting Rocket Pool manage one of them, you should check the status of it now using this command.
**Native Mode**
The easiest way to check the status and logs in native mode is to use the logging scripts that you created when you first set up the Smart Node services.
For example, to check Geth's log, you would just run:
```shell
/srv/geth/log.sh
```
You should see that it is slowly chugging along without any errors.
Do this for your Execution and Consensus clients now to verify that they are working properly.
::: tip TIP
When you're done looking at the logs, you can exit and return to the command prompt using `Ctrl + C`.
:::
## Waiting for Your ETH Clients to Sync
Now that your clients have started up, you're going to want to wait until your Execution and Consensus clients have finished syncing with the network before proceeding.
One easy way to check on their status is with the following command:
```shell
rocketpool node sync
```
This command will show how far along your Execution & Consensus clients are in the syncing process, similar to this:
```shell
$ rocketpool node sync
Your Smartnode is currently using the Hoodi Test Network.
Your eth2 client is on the correct network.
Your primary execution client is fully synced.
You do not have a fallback execution client enabled.
Your consensus client is still syncing (99.69%).
```
You can call this occasionally to keep tabs on your clients' progress.
To get an actual ETA of the sync time, it's easiest to look at the logs for your clients with `rocketpool service logs eth1` and `rocketpool service logs eth2` respectively (or the equivalent log script commands if you're using the hybrid / native modes.)
Each client typically provides an ETA on its sync status in its log output.
::: tip NOTE
It can take **days** to fully sync both ETH1 and ETH2 depending on your client selection and your machine's hardware profile.
**This is expected**.
Sit back, relax, and wait for both of them to finish.
:::
::: warning NOTE
If your node is not syncing at all or has no peers, it may be because your router is blocking ports 30303 and 9001. If they're closed, you'll need to setup port forwarding on your router (forward UDP port 8001 too, which your Consensus client uses for QUIC). Also, make sure your node has a static local IP address so the port forwarding does not break due to your node getting a new address.
:::
## Next Steps
Once your clients have synced, you're ready to either [create a new wallet](/node-staking/wallet-init.md) if this is your first node, or [recover an existing wallet](/node-staking/recovering-rp.md) if you're restoring from a backup or migrating from another provider such as Allnodes to your own hardware.
Select which one you'd like to learn more about and follow the steps in the corresponding guide.
---
url: /node-staking/tailscale.md
---
> For AI agents: the complete documentation index is available at /llms.txt, the full documentation bundle is available at /llms-full.txt.
# Configuring a Tailscale VPN Server
::: tip NOTE
This is **optional.**
You only need to consider this section if you run a node at home and would like to connect to it from outside of your home network.
:::
If you would like to log into your home network remotely, such as while on vacation or on a business trip, the most common route is to use a **Virtual Private Network** server.
This will allow you to connect to your node via SSH **and** monitor your Grafana dashboard from anywhere in the world, all without exposing your SSH port to the internet.
Many Rocket Pool node operators use [Tailscale](https://tailscale.com/blog/how-tailscale-works/) as their VPN server of choice for this.
Tailscale is an open source P2P VPN tunnel and hosted endpoint discovery service.
It takes care of authentication, publication, and the NAT traversal required to establish an end-to-end encrypted path between your machine and your node without sending any sensitive traffic to a centralized server.
It is a very powerful tool.
We will briefly cover a basic configuration of it, but feel free to [review their documentation](https://tailscale.com/kb/start/) for more details.
## Setting Tailscale Up
First, create a free [Tailscale account](https://tailscale.com/).
Tailscale requires the use of an SSO identity provider such as Google, GitHub, Okta, Microsoft, etc.
For details, visit [their SSO Page](https://tailscale.com/kb/1013/sso-providers/).
It is recommended that you enable 2FA (Two Factor Authentication) on whichever identity provider you choose for added security.
Next, follow [their onboarding guide](https://tailscale.com/kb/1017/install/) to install Tailscale on your **client** - the machine you want to connect to your network with.
For example, this could be a laptop or your phone.
**Note that it is _not_ your Rocket Pool node!**
Once completed you should see your computer as 'connected' on the [Tailscale dashboard](https://login.tailscale.com/admin/machines).
Now, install Tailscale on your **Rocket Pool node**.
You can find instructions for this on their website; for example, here are the [installation instructions for Ubuntu](https://tailscale.com/kb/1039/install-ubuntu-2004/).
::: warning NOTE
If you have UFW configured, you will also want to follow the [UFW Configuration Instructions](https://tailscale.com/kb/1077/secure-server-ubuntu-18-04/)).
:::
First, add Tailscale’s package signing key and repository **on your Rocket Pool node**:
```shell
curl -fsSL https://pkgs.tailscale.com/stable/ubuntu/focal.noarmor.gpg | sudo tee /usr/share/keyrings/tailscale-archive-keyring.gpg >/dev/null
curl -fsSL https://pkgs.tailscale.com/stable/ubuntu/focal.tailscale-keyring.list | sudo tee /etc/apt/sources.list.d/tailscale.list
```
Now, install Tailscale **on your Rocket Pool node**:
```shell
sudo apt-get update
sudo apt-get install tailscale
```
Finally, authenticate and connect your machine to your Tailscale network **on your Rocket Pool node**:
```shell
sudo tailscale up
```
You’re connected!
You can find your Tailscale IPv4 address by running:
```shell
tailscale ip -4
```
You should now see your node machine added to the on the [Tailscale dashboard](https://login.tailscale.com/admin/machines).
You may also change the name of the **node machine** through the dashboard, e.g. to `rocketnode`.
It is suggested to [disable key expiry](https://tailscale.com/kb/1028/key-expiry) for the node machine to prevent the need to periodically re-authenticate.
::: tip Note
If you would like to access your node using a memorable hostname such as rocketnode, you can do so by enabling MagicDNS in the Tailscale settings.
:::
You should now be able to `exit` the SSH session to your node on your client, and SSH into your node again through Tailscale using `ssh your.user@rocketnode`.
::: warning NOTE
If you modified the SSH port of the **node machine** in `/etc/ssh/sshd_config` when you first configured it, use `ssh your.user@rocketnode -p ` instead.
For example, if you assigned SSH to port 1234, you would do:
```shell
ssh your.user@rocketnode -p 1234
```
:::
You can now also visit `http://rocketnode:3100` in your web browser to access your Grafana dashboard from your **client**.
If you have UFW configured, you can now add a rule to accept any incoming SSH connections over Tailscale.
::: danger WARNING
The following steps will modify your firewall rules.
\*\*You must have at least 2 SSH sessions open to your node machine before proceeding - one for modifying the configuration and testing it afterwards, and one that will stay logged in as a backup in case your changes break SSH so you can revert them!
:::
**Run these commands on the node machine.**
Allow access to all incoming ssh connections over Talscale.
```shell
sudo ufw allow in on tailscale0
```
You may also remove access to the SSH port adding from the [enabling a firewall](/node-staking/securing-your-node.md#essential-enable-a-firewall) steps to completely lock down your node.
Note that you **will not** be able to login from the local network as tailscale will become the only way to login.
Only run the following command if you are okay with this.
```shell
sudo ufw delete "22/tcp"
```
Once you’ve set up firewall rules to restrict all non-Tailscale connections, restart UFW and SSH:
```shell
sudo ufw reload
sudo service ssh restart
```
Now, confirm that everything is working as expected.
`exit` from one of your current SSH sessions (**but remember to keep the second one open as a backup**).
Next, connect to the **node machine** via SSH using the Tailscale IP address:
```shell
ssh your.user@rocketnode
```
If it works, you did everything right and can now safely log into your home network while abroad!
::: tip TIP
If you've previously port forwarded your node's SSH port in your router, you can now remove it.
:::
---
url: /node-staking/testnet/mainnet.md
---
> For AI agents: the complete documentation index is available at /llms.txt, the full documentation bundle is available at /llms-full.txt.
# Migrating from the Test Network to Mainnet
If you've already used Rocket Pool on our Hoodi test network, are comfortable with its ins and out, and are ready to either stake ETH or run a node for real on the main Ethereum chain, then this guide is for you!
Here you will find instructions on how to migrate an existing Smart Node stack from the Hoodi test network to one connected to the Ethereum mainnet, ready for staking your own real ETH and RPL.
## Pool Staking on Mainnet
Pool staking is largely the same process on mainnet as it was on the testnet.
The URL will be different and the address of the rETH token may be different, but there are no significant changes to the workflow.
Follow the [Staking Guide](/liquid-staking/overview.md), which has been updated with instructions for mainnet.
### Differences Between the Testnet and Mainnet
- The testnet Smart Node has a faucet for test ETH. The mainnet Smart Node **does not have a faucet**. You will need to supply your own ETH in order to stake.
- Mainnet supports many Ethereum wallets via WalletConnect, so you can use other wallets that you could not use on the testnet. **You are no longer restricted to using Metamask in order to stake**.
## Smart Node Operation on Mainnet
::: danger NOTE
**Nothing** from the test network can be migrated to mainnet.
The chain data is different for both Execution and Consensus, so you must remove the old chain data and resync the mainnet chains from scratch.
Your validators on the testnet do not carry over to mainnet.
Also, for security, compatibility, and safety purposes, **you must make a new wallet on mainnet!**
**Do not use your testnet node wallet on mainnet!**
**The following steps will delete all of your testnet data.**
If you want to preserve your test network setup, you should back up your hard drive or move it to a second machine.
:::
### Differences Between the Testnet and Mainnet
- The testnet Smart Node has a faucet for ETH and RPL. The mainnet Smart Node **does not have a faucet**. You will need to supply your own ETH and your own RPL.
- If you are using Geth, your node's workload will be **considerabily higher**. Geth takes approximately 40x the storage space of Hoodi, and requires more CPU power and RAM to process. If you're using the Rocket Pool Grafana dashboard, be prepared to see much higher usage.
A full Geth node uses 1.4 TB as of 2025-09-19. [Expiring block data prior to the merge](/node-staking/maintenance/history-expiry.md) can reduce the storage usage by about 300-500 GB.
- Your Beacon Chain peers (and thus, your attestation effectiveness) will be **higher** than the testnet. Peers on mainnet are much more diverse and tend to be higher quality than on the testnet.
- The RPL rewards checkpoint occurs every **28 days** instead of every 2 days, to help offset high gas costs.
- The RPL price used by the Rocket Pool network (and thus, your collateral level) along with the total effective staked RPL across the network are reported **once every 24 hours** instead of once every hour.
### Automatic Migration (Docker Mode Only)
For Docker Mode users, the Smart Node can migrate to Mainnet for you automatically.
**While you still have the testnet configured**, exit your validators on Hoodi:
```
rocketpool minipool exit
```
Select `1: All available minipools` from the list of choices and wait for it to complete.
This will help clean up the network by removing your validators instead of leaving them to constantly fail attestations and weaken Hoodi's health (since they're no longer online).
Once that's done, open the Settings Manager:
```
rocketpool service config
```
Next, open the **Smart Node and TX Fees** category and change the **Network** drop down from `Hoodi Testnet` to `Ethereum Mainnet`:
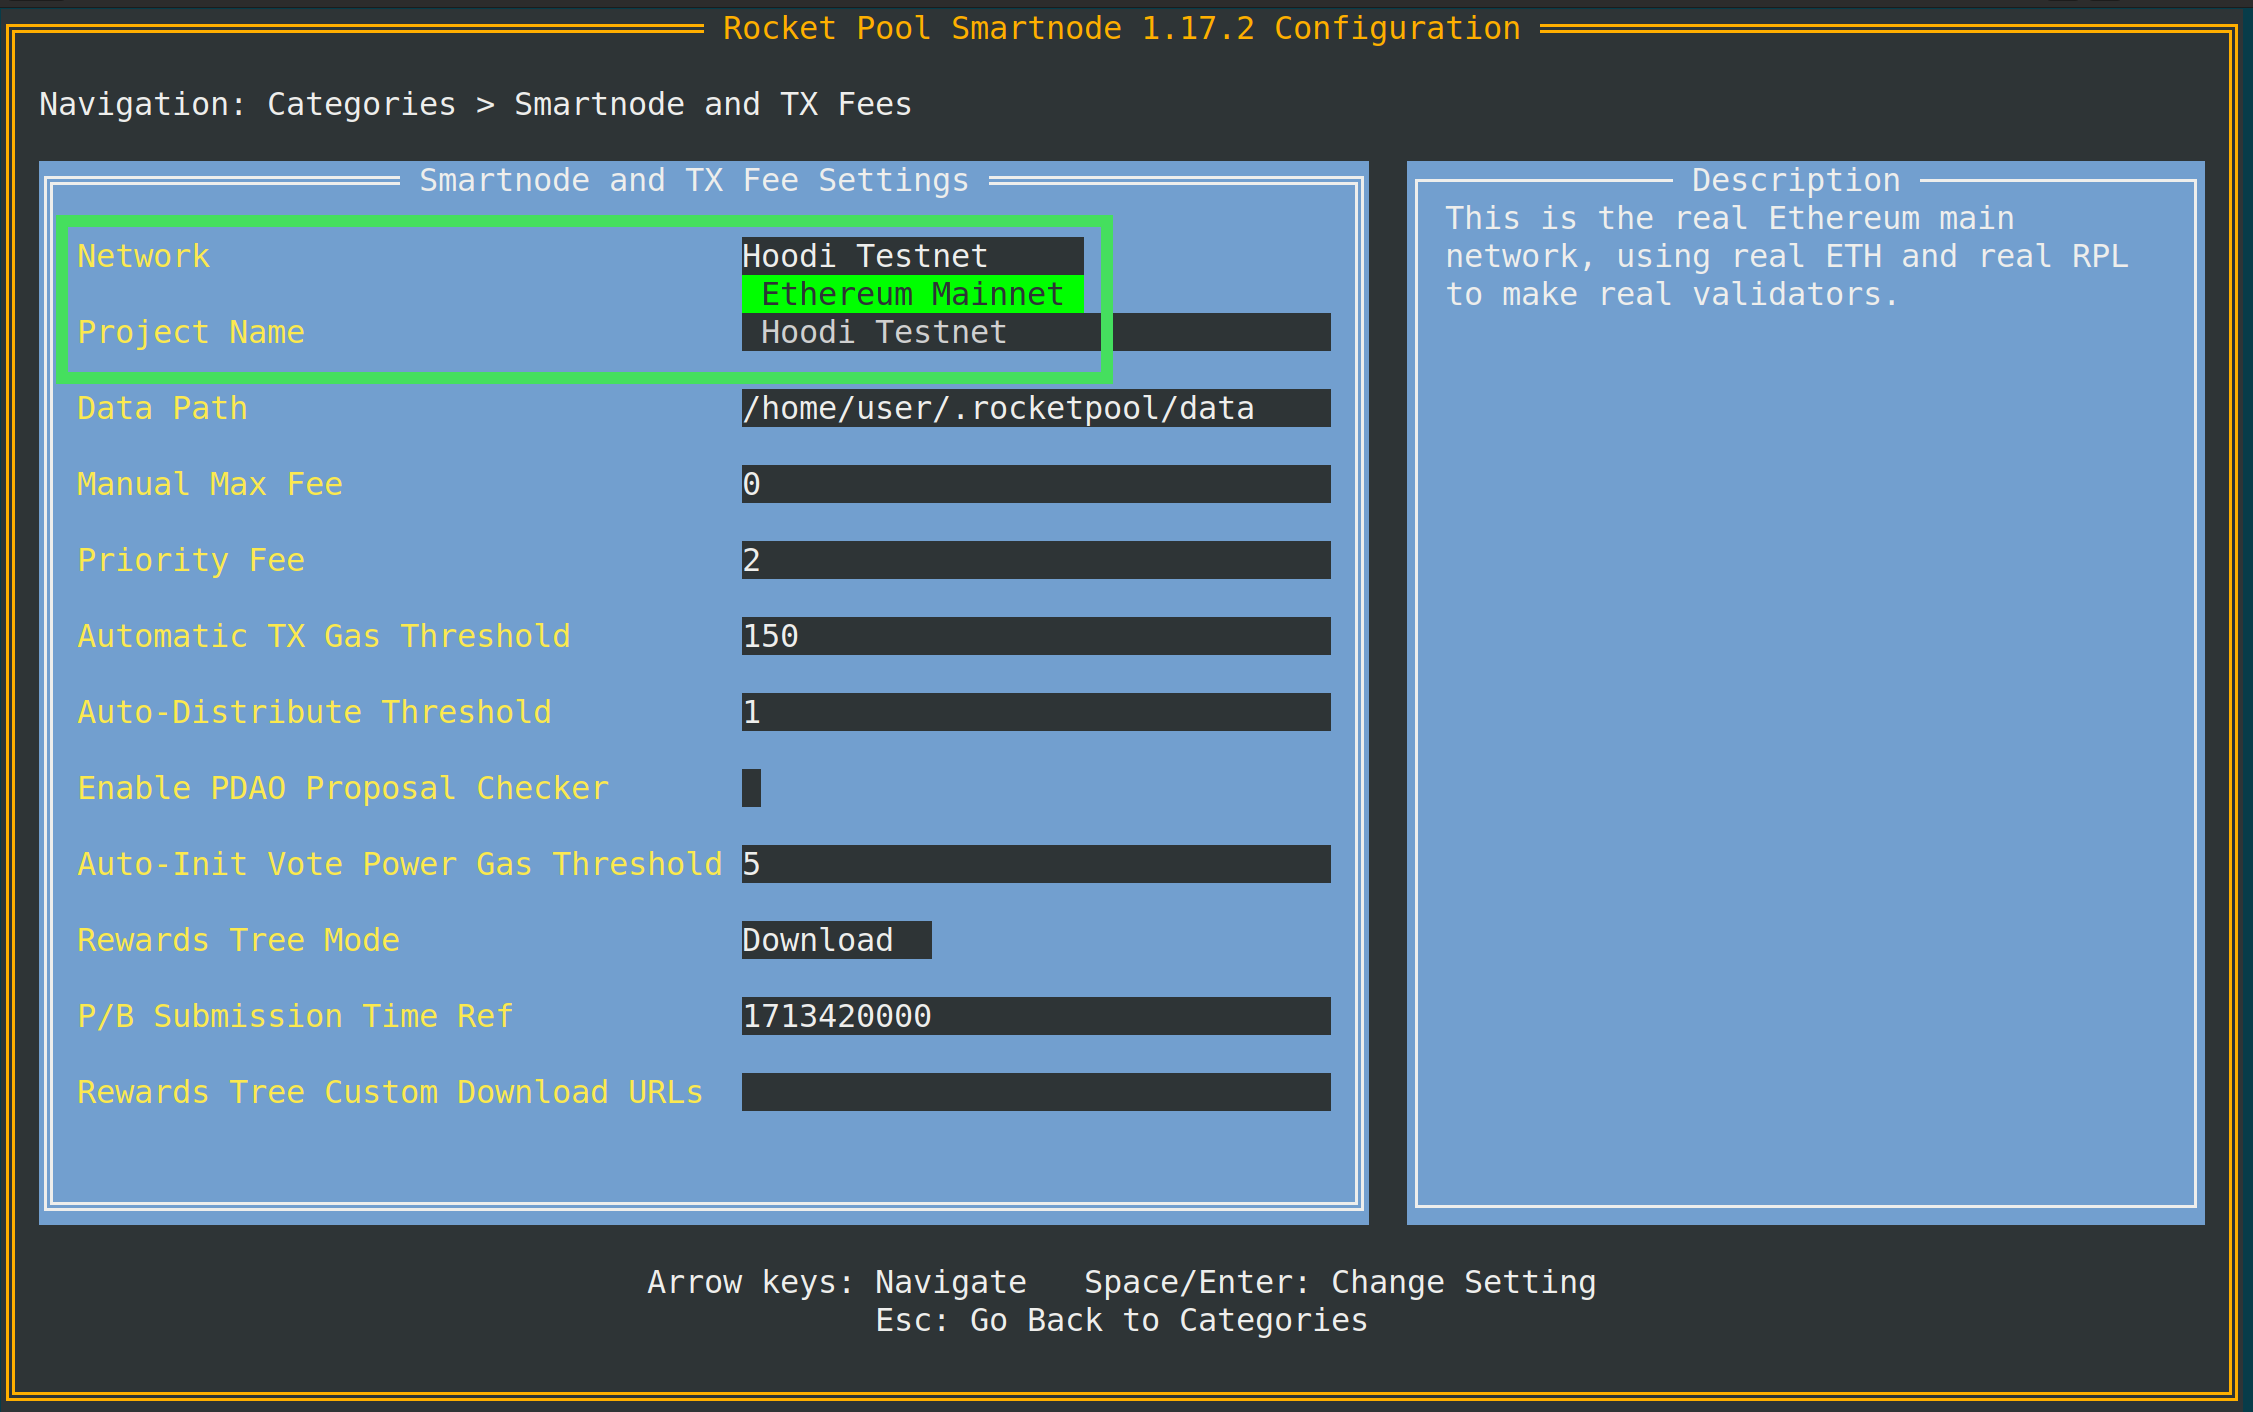
When you save and exit, you will be prompted with a notification that everything is about to be erased and a confirmation dialog:
```
WARNING: You have requested to change networks.
All of your existing chain data, your node wallet, and your validator keys will be removed.
Please confirm you have backed up everything you want to keep, because it will be deleted if you answer `y` to the prompt below.
Would you like the Smartnode to automatically switch networks for you? This will destroy and rebuild your `data` folder and all of Rocket Pool's Docker containers. [y/n]
```
Back up anything you want to keep (such as your `data` folder which contains your node wallet and validator keys), then press `y` and `Enter` when you're ready.
The Smart Node will handle switching over automatically.
When it's done, you will be left with a fresh install on Mainnet.
All of your settings (such as client choice) will be preserved, but you will need to create a new wallet. Also, you likely will not have a _Checkpoint Sync URL_ on mainnet and should set one up as explained [here](/node-staking/config-docker.md#beacon-chain-checkpoint-syncing); otherwise it will take a long time to sync the mainnet beacon chain.
### Migrating Manually
If for any reason you cannot leverage the Smart Node's automatic migration process, you can do it manually in a few simple steps:
**Docker**
1. **While you still have the testnet configured**, exit your validators on Hoodi:
```shell
rocketpool minipool exit
```
Select `1: All available minipools` from the list of choices and wait for it to complete.
This will help clean up the network by removing your validators instead of leaving them to constantly fail attestations and weaken Hoodi's health (since they're no longer online).
2. Shut down the testnet:
```shell
rocketpool service stop
```
3. Delete your testnet chain data and Docker containers:
```shell
rocketpool service terminate
```
4. Delete your Rocket Pool configuration folder:
```shell
sudo rm -rf ~/.rocketpool
```
5. (Optional) Delete your Rocket Pool CLI:
```shell
rm ~/bin/rocketpool
```
You will overwrite this with the latest version of the CLI anyway, but if you want to be thorough, you can remove the old one first.
At this point your testnet installation has been purged, and you can safely migrate to a new mainnet installation.
Follow the [Creating Node with Docker](/node-staking/docker.md) guide carefully to set it up.
**Native Mode**
1. **While you still have the testnet configured**, exit your validators on Hoodi:
```shell
rocketpool minipool exit
```
Select `1: All available minipools` from the list of choices and wait for it to complete.
This will help clean up the network by removing your validators instead of leaving them to constantly fail attestations and weaken Hoodi's health (since they're no longer online).
2. Stop all of the Rocket Pool and Ethereum services (using, for example, `geth` and `lighthouse`; replace with the services you created during installation):
```shell
sudo systemctl stop rp-node rp-watchtower geth lh-bn lh-vc
```
3. Delete all of the testnet chain data (for example, using `geth` and `lighthouse` on x64; replace with your own configuration):
```shell
sudo rm -rf /srv/geth/geth_data
sudo rm -rf /srv/lighthouse/lighthouse_data
```
4. Delete the Rocket Pool configuration folder:
```shell
sudo rm -rf /srv/rocketpool
```
5. (Optional) Remove the Rocket Pool CLI and Daemon binaries:
```shell
sudo rm /usr/local/bin/rocketpool /usr/local/bin/rocketpoold
```
You will overwrite these with the latest versions anyway, but if you want to be thorough, you can remove the old ones first.
NOTE
For the sake of simplicity, these instructions _do not include_ some steps such as removing the `eth1` and `eth2` users, or removing the services that you stopped earlier.
You can reuse them and ignore the steps involved in setting them up in the installation guide.
You will need to redo some of the installation steps including:
- Create the `/srv/rocketpool` folder and its skeleton framework, and set the permissions properly
- Get the latest release versions of the Execution and Consensus, and Validator client binaries
- Set the **`ExecStart` string** in the services (**use the mainnet configuration defined in the installation
guide!)**
- Get the latest CLI and Daemon binaries
- Get the latest configuration files from the installer archive, put them into `/srv/rocketpool`, and adjust them to match your node's setup
At this point you're ready to migrate following the [native installation guide](/node-staking/native.md).
---
url: /node-staking/testnet/overview.md
---
> For AI agents: the complete documentation index is available at /llms.txt, the full documentation bundle is available at /llms-full.txt.
# Practicing with the Test Network
An Ethereum **test network** (`testnet` for short) is an Ethereum blockchain, functionally identical to the standard Ethereum blockchain, but it's intended to be used for testing smart contracts before they go live onto the main "real" blockchain (called `mainnet`).
Testnets run in parallel with mainnet - there are actually several of them running right now!
You can read more about some of the Execution Layer testnets [here](https://support.mycrypto.com/how-to/getting-started/where-to-get-testnet-ether) if you like.
Rocket Pool uses **Hoodi** for its Execution Layer testnet.
You can use a block explorer for it here if you'd like to take a look at it: [https://hoodi.etherscan.io/](https://hoodi.etherscan.io/)
The same concept applies to the Consensus Layer as well.
Rocket Pool uses **Hoodi** for its Consensus Layer testnet.
You can find a block explorer for it here: [https://hoodi.beaconcha.in/](https://hoodi.beaconcha.in/)
Because the networks are intended for testing, **ETH on them is given out for free to help people test**.
This ETH **cannot be transferred** to mainnet; it must stay on Hoodi and has no real value, so you can think of it as **Monopoly money**.
::: danger
**DO NOT use your real ETH from mainnet at any point if you are trying out Rocket Pool's test network!**
You will **lose your funds** forever if you do this!
You should only use test ETH that you received on the Hoodi network from a faucet (described below)!
:::
## Configuring the Testnet
[The default configuration of Rocket Pool using Docker](/node-staking/install-modes.md) handles all of the settings involved in using a testnet for you automatically.
There's nothing special you need to do.
If you're using [a different setup](/node-staking/install-modes.md) with an external execution or consensus client, or are running your clients [natively without Docker](/node-staking/install-modes.md), then you will need to set this up manually:
- For **Geth**: add `--hoodi` to the launch command.
- For **Lighthouse**: add `--network hoodi` to the launch command.
- For **Nimbus**: add `--network=hoodi` to the launch command.
- For **Prysm**: add `--hoodi` to the launch command.
- For **Teku**: add `--network=hoodi` to the launch command.
- For **Lodestar**: prefix the launch command with `LODESTAR_NETWORK=hoodi`
Check the next section to learn how to get some test ETH on Hoodi, which you'll need to test Rocket Pool out.
## Getting Test ETH on Hoodi
To use the Rocket Pool test network, you'll need ETH on Hoodi.
Luckily, you can get this for free using a **faucet** - an automated service that will provide you with Hoodi ETH to test with.
::: warning NOTE
You will need to provide an Ethereum address in order to receive test ETH.
If you are just trying to stake your ETH normally and receive rETH, please review the [Staking Guide](/liquid-staking/overview.md) before getting Hoodi ETH.
You will be prompted to return here at the appropriate step.
If you are planning to run a node, please go through the [Node Operator Guide](/node-staking/responsibilities.md) to set up a node and create a new wallet first.
You will be prompted to return here at the appropriate step.
:::
Rocket Pool provides a faucet in its [Discord server](https://discord.gg/rocketpool).
Join the server and head to the `#support` channel.
Here, you can ask for testnet ETH.
You will need to provide your node address.
::: warning NOTE
Anyone can request testnet ETH with the command below.
The request includes Approve and Deny buttons.
Only the dev team and prominent members of the community can press those buttons.
Be patient and someone with access will approve or deny the request.
:::
If you aren't planning to register a node and just want some ETH to test staking to receive rETH, type the following command in the channel:
```
/faucet eth 1
```
Enter your Hoodi address in the `address` field.
If your wallet doesn't have any ETH already, the bot will send your wallet 1 ETH to test with.
If you _are_ planning to run a node, do the following:
1. Start by running the `/faucet eth 1` command above to acquire enough ETH to register your node
2. Register your node (see the [Preparing your Node](/node-staking/prepare-node.md) page for instructions)
3. Run the following command to get 8 Hoodi ETH so you can create a validator:
```
/faucet eth 9
```
In order to use `/faucet eth 9`, the address you provide it _must_ be a registered Rocket Pool node.
Therefore, you must follow these 3 steps in that order.
## Getting Test RPL on Hoodi
If you're testing out node operation, you'll need some test RPL in addition to test ETH.
Rocket Pool provides a faucet in its [Discord server](https://discord.gg/rocketpool).
Join the server and head to the `#support` channel.
Here, you can ask for testnet RPL.
You will need to provide your node address.
::: warning NOTE
Anyone can request testnet RPL with the command below.
The request includes Approve and Deny buttons.
Only the dev team and prominent members of the community can press those buttons.
Be patient and someone with access will approve or deny the request.
:::
```
/faucet rpl
```
Enter your Hoodi node address in the `address` field.
This will provide you with 600 of the **legacy (v1) RPL** token, which is analogous to the original RPL token on mainnet.
Rocket Pool uses a **new (v2) RPL** token which supports the inflation used to reward node operators.
To learn how to swap legacy RPL for new RPL, follow the steps in the [Creating a Minipool (Validator)](/node-staking/create-validator.md) guide.
---
url: /node-staking/updates.md
---
> For AI agents: the complete documentation index is available at /llms.txt, the full documentation bundle is available at /llms-full.txt.
# Checking for Updates
One of the responsibilities of a node operator is making sure your system is up to date with the latest security patches.
Automatic updates are convenient but can interfere with your node operation, so it may be preferable to run them manually.
In either case, **you must make sure that your machine is regularly patched!**
::: tip NOTE
Most of the time, updating will not require your system to be down for more than a few minutes.
You might be concerned that such downtime will negatively affect your Beacon Chain balance.
Rest assured, the penalty for being offline for such a short period of time is **completely negligible**.
Each attestation you miss will penalize you for slightly less than the amount you'd earn from a successful attestation.
As a rule of thumb, if you're offline for an hour, you will earn it all back after being online for an hour again.
Also note that there is **absolutely no chance** that you will be _slashed_ by going offline for a short time.
Slashing only occurs if you attack the network, and going offline for maintenance does not count as attacking the network.
**Please keep your systems up to date - don't worry about the downtime penalties!**
:::
## Updating your Operating System
You should frequently check your Operating System's package manager or update service to ensure that quickly apply any new important security patches.
The exact instructions vary for each Operating System and can be found with your system's documentation, but here are a few examples.
**Ubuntu**
In a terminal, type the following:
```shell
sudo apt update
```
This will access the package servers and check to see if any of your installed packages have new versions available.
If updates are available, the output will look like this:
```
Fetched 3974 kB in 2s (1641 kB/s)
Reading package lists... Done
Building dependency tree
Reading state information... Done
12 packages can be upgraded. Run 'apt list --upgradable' to see them.
```
You can install the updates with the following command:
```shell
sudo apt dist-upgrade
```
This will show you the list of packages that are about to be updated, and if the total installation size is large enough, it will show you the size and prompt you to confirm that you accept:
```
12 upgraded, 0 newly installed, 0 to remove and 0 not upgraded.
Need to get 51.3 MB of archives.
After this operation, 52.2 kB of additional disk space will be used.
Do you want to continue? [Y/n]
```
Ensure that you have enough space available to do this, then press `y` and `Enter` to begin the update process.
Once the progress bar is finished and you're dropped back into the terminal prompt, run the following command to clean up any old versions of packages that were just replaced:
```shell
sudo apt autoremove
```
Next, check if your system needs to be rebooted:
```shell
cat /var/run/reboot-required
```
If the above command prints `No such file or directory`, then reboot is not required and you can skip the step below.
However if the command prints `*** System restart required ***`, then you should restart your machine to finish applying the updates when you are able:
```shell
sudo reboot
```
Rocket Pool will gracefully shut down and automatically start back up with the system once it reboots.
**MacOS**
To update the OS packages, use the UI to select `Apple -> Software Update`.
To update packages themselves, the easiest way is via `homebrew` in the terminal:
```shell
brew update && brew upgrade
```
## Updating the Smart Node Stack
Occasionally, Rocket Pool will release a new version of the Smart Node stack.
Updates can contain new versions of the CLI or the Rocket Pool Docker containers, as well as new versions of the Execution and Consensus clients.
The most consistent way to find out about new releases is to subscribe to the Rocket Pool Discord server; they will always be posted in the Releases channel and you will receive a notification.
::: warning NOTE
Note that running `apt update` will not update the node software.
This must be done manually using the steps below.
:::
::: tip TIP
When you have completed the Smart Node upgrade, the Grafana dashboard will still indicate there is still an update available.
It will automatically clear within a day when the system next auto-checks for updates.
If you want to clear it immediately after the update, simply run:
`sudo apt update`
:::
::: tip TIP
If you do not know your CPU architecture, you can run the following command to find it:
```shell
uname -m
```
The output of this command will print your architecture.
**Note that `x86_64` is the same as `x64` and `amd64`.**
**Note that `aarch64` is the same as `arm64`.**
:::
The steps to upgrade depend on which mode your node uses. The best way to update the Smart Node is by using
the CLI's built-in update command. Select from the options below:
**CLI Update Command (Docker Mode - Linux/macOS)**
To update the Smart Node using the built-in update command, run:
```shell
rocketpool update
```
This command will:
1. Download and verify the latest CLI binary
2. Optionally stop, upgrade, and restart the service automatically
Follow the interactive prompts to complete the update.
```
Your detected os/architecture is linux/amd64.
The cli at ~/bin/rocketpool will be replaced. Continue? [y/n]
y
```
Afterwards, the Smart Node will download and verify the latest CLI binary:
```
Replacing the cli at ~/bin/rocketpool with the latest version...
Downloading the new binary from https://github.com/rocket-pool/smartnode/releases/latest/download/rocketpool-cli-linux-amd64
Verifying the binary signature
Downloading the signature from https://github.com/rocket-pool/smartnode/releases/latest/download/rocketpool-cli-linux-amd64.sig
Signed by 651023D62E70B5DD
Fornax
Updating from 1.24.0 to 1.24.2
The cli has been updated.
Would you like to automatically stop, upgrade, and restart the service to complete the update? [y/n]
y
```
At this point, you can select `y` on all the interactive prompts to let the Smart Node
guide you through the rest of the steps.
When finished, you'll see a message confirming the upgrade was successful:
```
The upgrade to Smart Node 1.24.2 has been completed.
Please monitor your validators for a few minutes for issues.
```
**Manual Update - Linux (Docker or Hybrid Mode)**
Stop the Rocket Pool services:
```shell
rocketpool service stop
```
Download the new Smart Node CLI:
For `x64` systems (most normal machines):
```shell
wget https://github.com/rocket-pool/smartnode/releases/latest/download/rocketpool-cli-linux-amd64 -O ~/bin/rocketpool
```
For `arm64` systems:
```shell
wget https://github.com/rocket-pool/smartnode/releases/latest/download/rocketpool-cli-linux-arm64 -O ~/bin/rocketpool
```
Now run the install command:
```shell
rocketpool service install -d
```
The `-d` flag tells it to ignore system dependencies like Docker, since you already have them.
If you'd like to see what's changed, open the Settings Manager - the Review Page will show you what's new:
```shell
rocketpool service config
```
When you're done, start Rocket Pool up again:
```shell
rocketpool service start
```
Finally, check the version to make sure the CLI and Smart Node stack are both up to date:
```shell
rocketpool service version
```
The output should look something like this:
```
Your Smartnode is currently using the Hoodi Test Network.
Rocket Pool client version: 1.24.2
Rocket Pool service version: 1.24.2
Selected Eth 1.0 client: Geth (Locally managed)
Image: ethereum/client-go:v1.10.21
Selected Eth 2.0 client: Lighthouse (Locally managed)
Image: rocketpool/lighthouse:mevboost-5ee3bc5
```
Both the client and service should match the new release version.
**Manual Update - Linux (Native Mode)**
NOTE
This will only update the Smart Node stack itself - it **will not** update your Execution or Consensus clients.
You will have to do this manually (see the next section below).
Stop the Rocket Pool services:
```shell
sudo systemctl stop rp-node rp-watchtower
```
Download the new Smart Node CLI and back up the old CLI and daemon binaries if you need to bring them back:
For `x64` systems (most normal machines):
```shell
sudo mv /usr/local/bin/rocketpool /usr/local/bin/rocketpool_bak
sudo mv /usr/local/bin/rocketpoold /usr/local/bin/rocketpoold_bak
sudo wget https://github.com/rocket-pool/smartnode/releases/latest/download/rocketpool-cli-linux-amd64 -O /usr/local/bin/rocketpool
sudo wget https://github.com/rocket-pool/smartnode/releases/latest/download/rocketpool-daemon-linux-amd64 -O /usr/local/bin/rocketpoold
sudo chmod +x /usr/local/bin/rocketpool /usr/local/bin/rocketpoold
```
For `arm64` systems:
```shell
sudo mv /usr/local/bin/rocketpool /usr/local/bin/rocketpool_bak
sudo mv /usr/local/bin/rocketpoold /usr/local/bin/rocketpoold_bak
sudo wget https://github.com/rocket-pool/smartnode/releases/latest/download/rocketpool-cli-linux-arm64 -O /usr/local/bin/rocketpool
sudo wget https://github.com/rocket-pool/smartnode/releases/latest/download/rocketpool-daemon-linux-arm64 -O /usr/local/bin/rocketpoold
sudo chmod +x /usr/local/bin/rocketpool /usr/local/bin/rocketpoold
```
If you'd like to see what's changed, open the Settings Manager - the Review Page will show you what's new:
```shell
rp service config
```
When you're done, start Rocket Pool up again:
```shell
sudo systemctl start rp-node rp-watchtower
```
Finally, check the version to make sure the CLI and Smart Node stack are both up to date:
```
rocketpool service version
Rocket Pool client version: 1.24.2
Rocket Pool service version: 1.24.2
Selected Eth 1.0 client: Geth (Locally managed)
Selected Eth 2.0 client: Nimbus (Locally managed)
```
Both the client and service should match the new release version.
**Manual Update - macOS (Docker or Hybrid Mode)**
Stop the Rocket Pool services:
```shell
rocketpool service stop
```
Download the new Smart Node CLI:
For `x64` systems (most Macs):
```shell
wget https://github.com/rocket-pool/smartnode/releases/latest/download/rocketpool-cli-darwin-amd64 -O /usr/local/bin/rocketpool
```
For `arm64` systems, such as the Mac mini with M1:
```shell
wget https://github.com/rocket-pool/smartnode/releases/latest/download/rocketpool-cli-darwin-arm64 -O /opt/homebrew/bin/rocketpool
```
Now run the install command:
```shell
rocketpool service install -d
```
The `-d` flag tells it to ignore system dependencies like Docker, since you already have them.
If you'd like to see what's changed, open the Settings Manager - the Review Page will show you what's new:
```shell
rocketpool service config
```
When you're done, start Rocket Pool up again:
```shell
rocketpool service start
```
Finally, check the version to make sure the CLI and Smart Node stack are both up to date:
```shell
rocketpool service version
Rocket Pool client version: 1.24.2
Rocket Pool service version: 1.24.2
Selected Eth 1.0 client: Geth (Locally managed)
Selected Eth 2.0 client: Nimbus (Locally managed)
```
Both the client and service should match the new release version.
## Manually Updating the Execution or Consensus Client
Each new Smart Node release ships pinned Docker image digests for the Execution, Consensus, and Smart Node containers (`repo:tag@sha256:…` in `~/.rocketpool/mainnet.env`). `rocketpool service install` overwrites those official pin files. In some cases you might want to run a different client image _before_ waiting for a new Smart Node release. This section shows you how.
**Docker Mode**
Updating to new client versions is easy in Docker mode.
Smart Node now pins client and Smart Node images by digest.
Changing **Container Tag** in the TUI still lets you run a different tag or digest before the next Smart Node release.
After `rocketpool service install` or `rocketpool update`, the official pins in `mainnet.env` are replaced; a TUI override still wins until you clear it.
Start by opening the Settings Manager:
```shell
rocketpool service config
```
To change the Execution client version, go to the **Execution Client** category.
Modify the **Container Tag** setting:
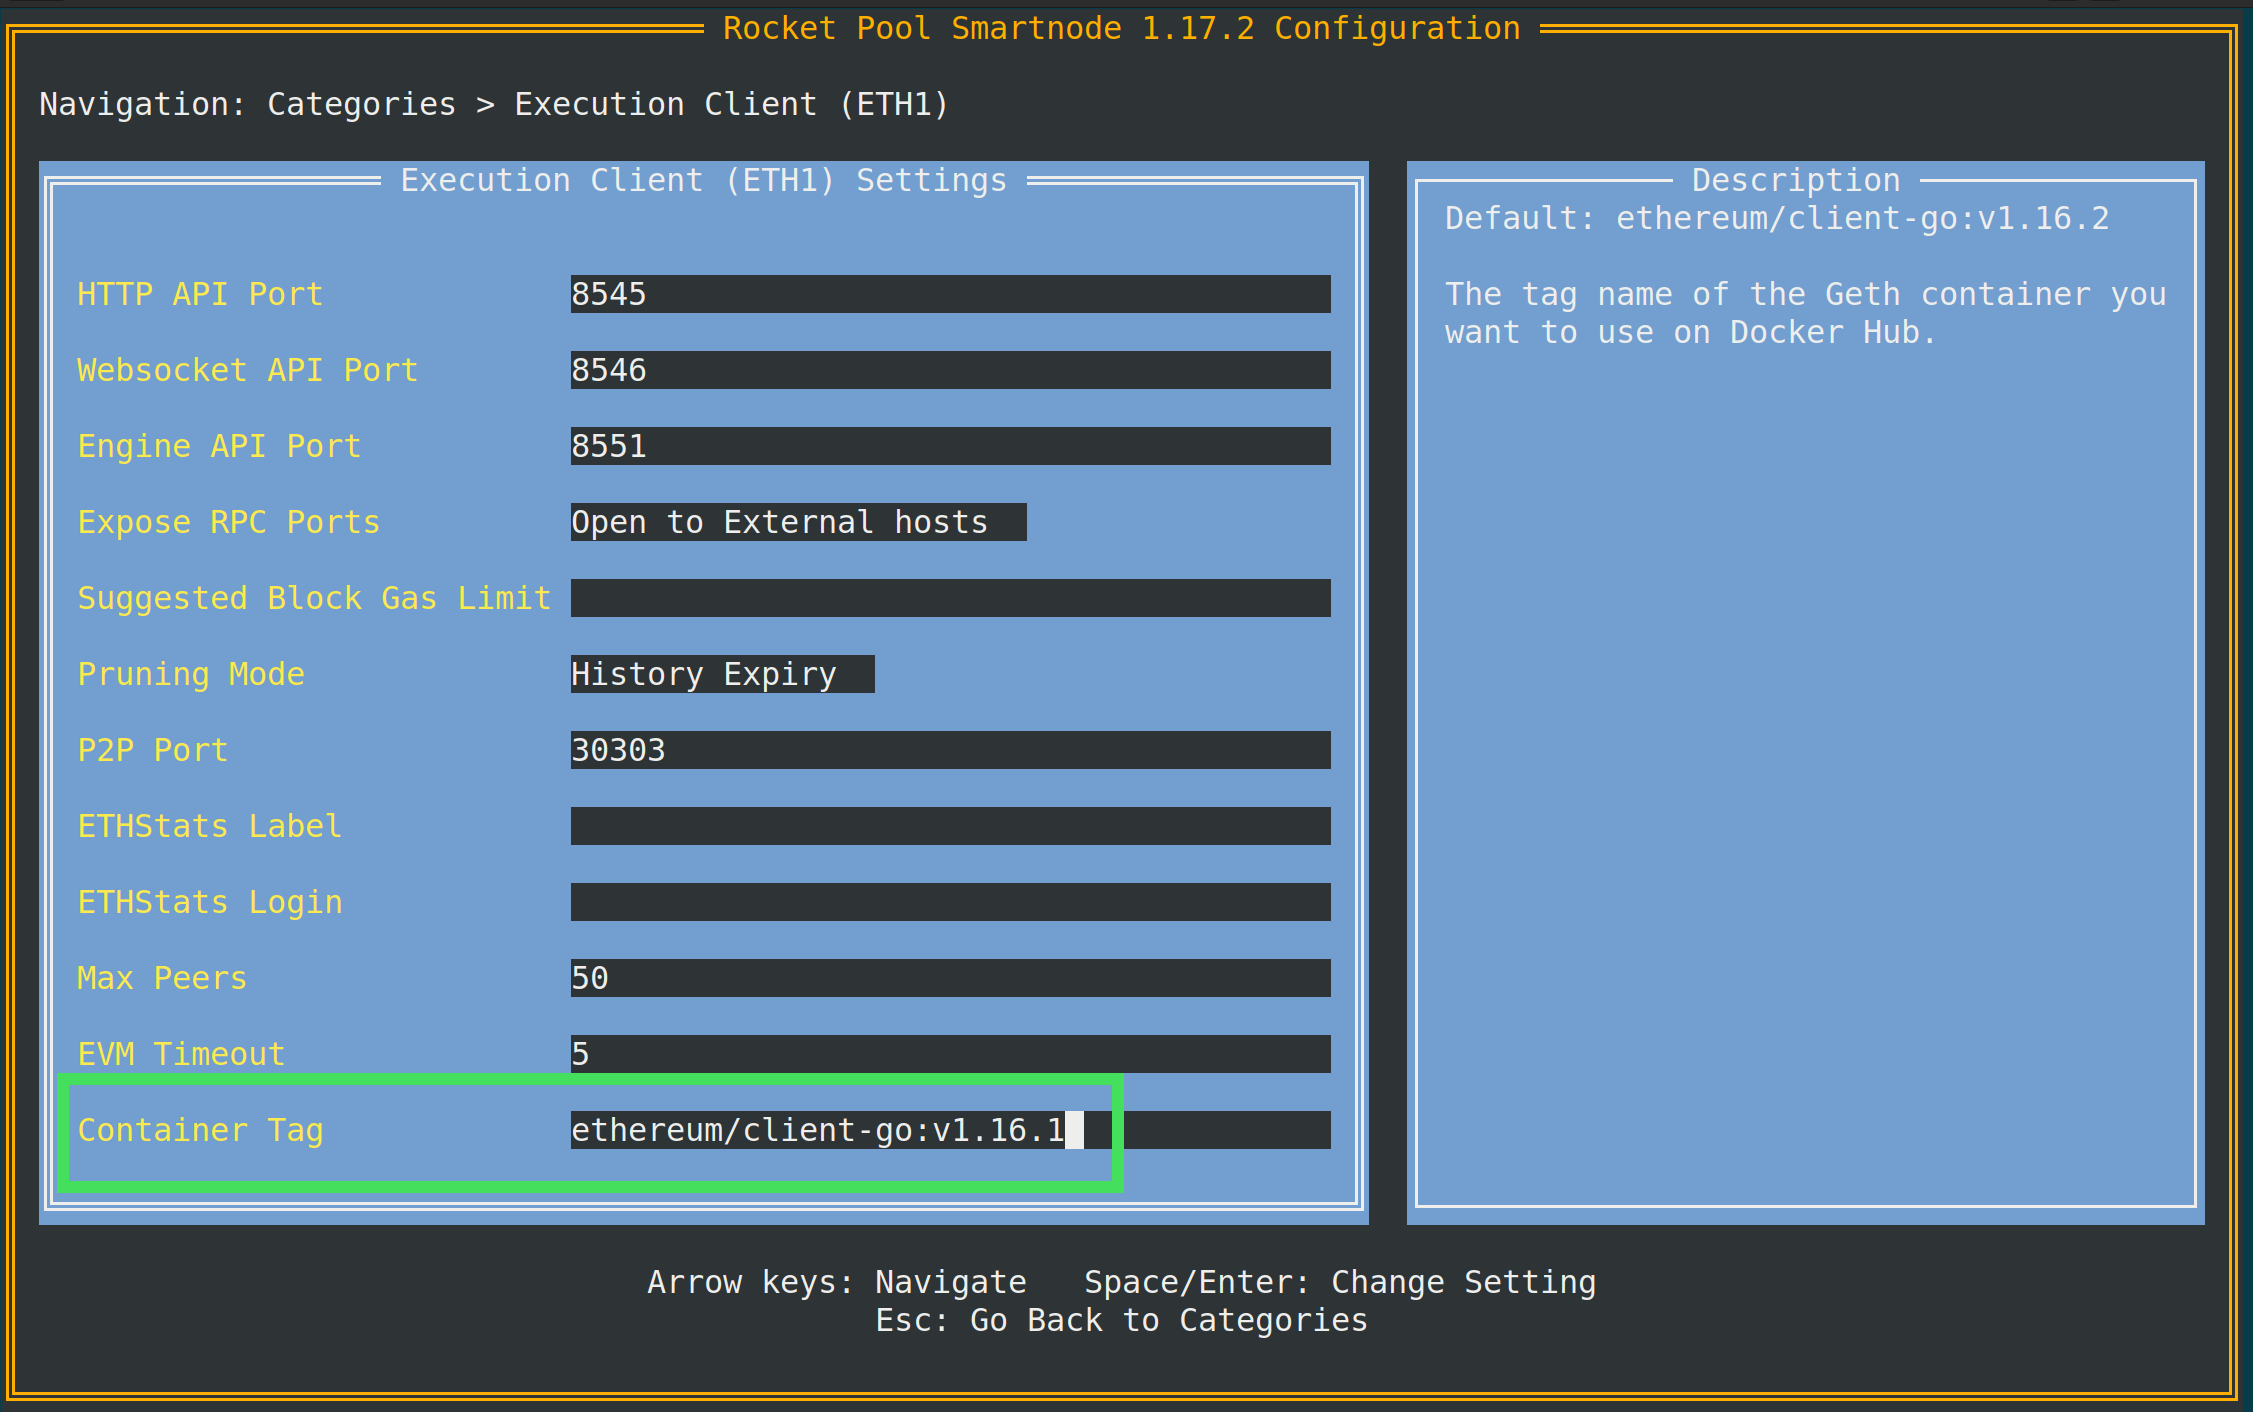To change the Consensus client version, go to the **Consensus Client** category.
Modify the **Beacon Node Container Tag** setting:
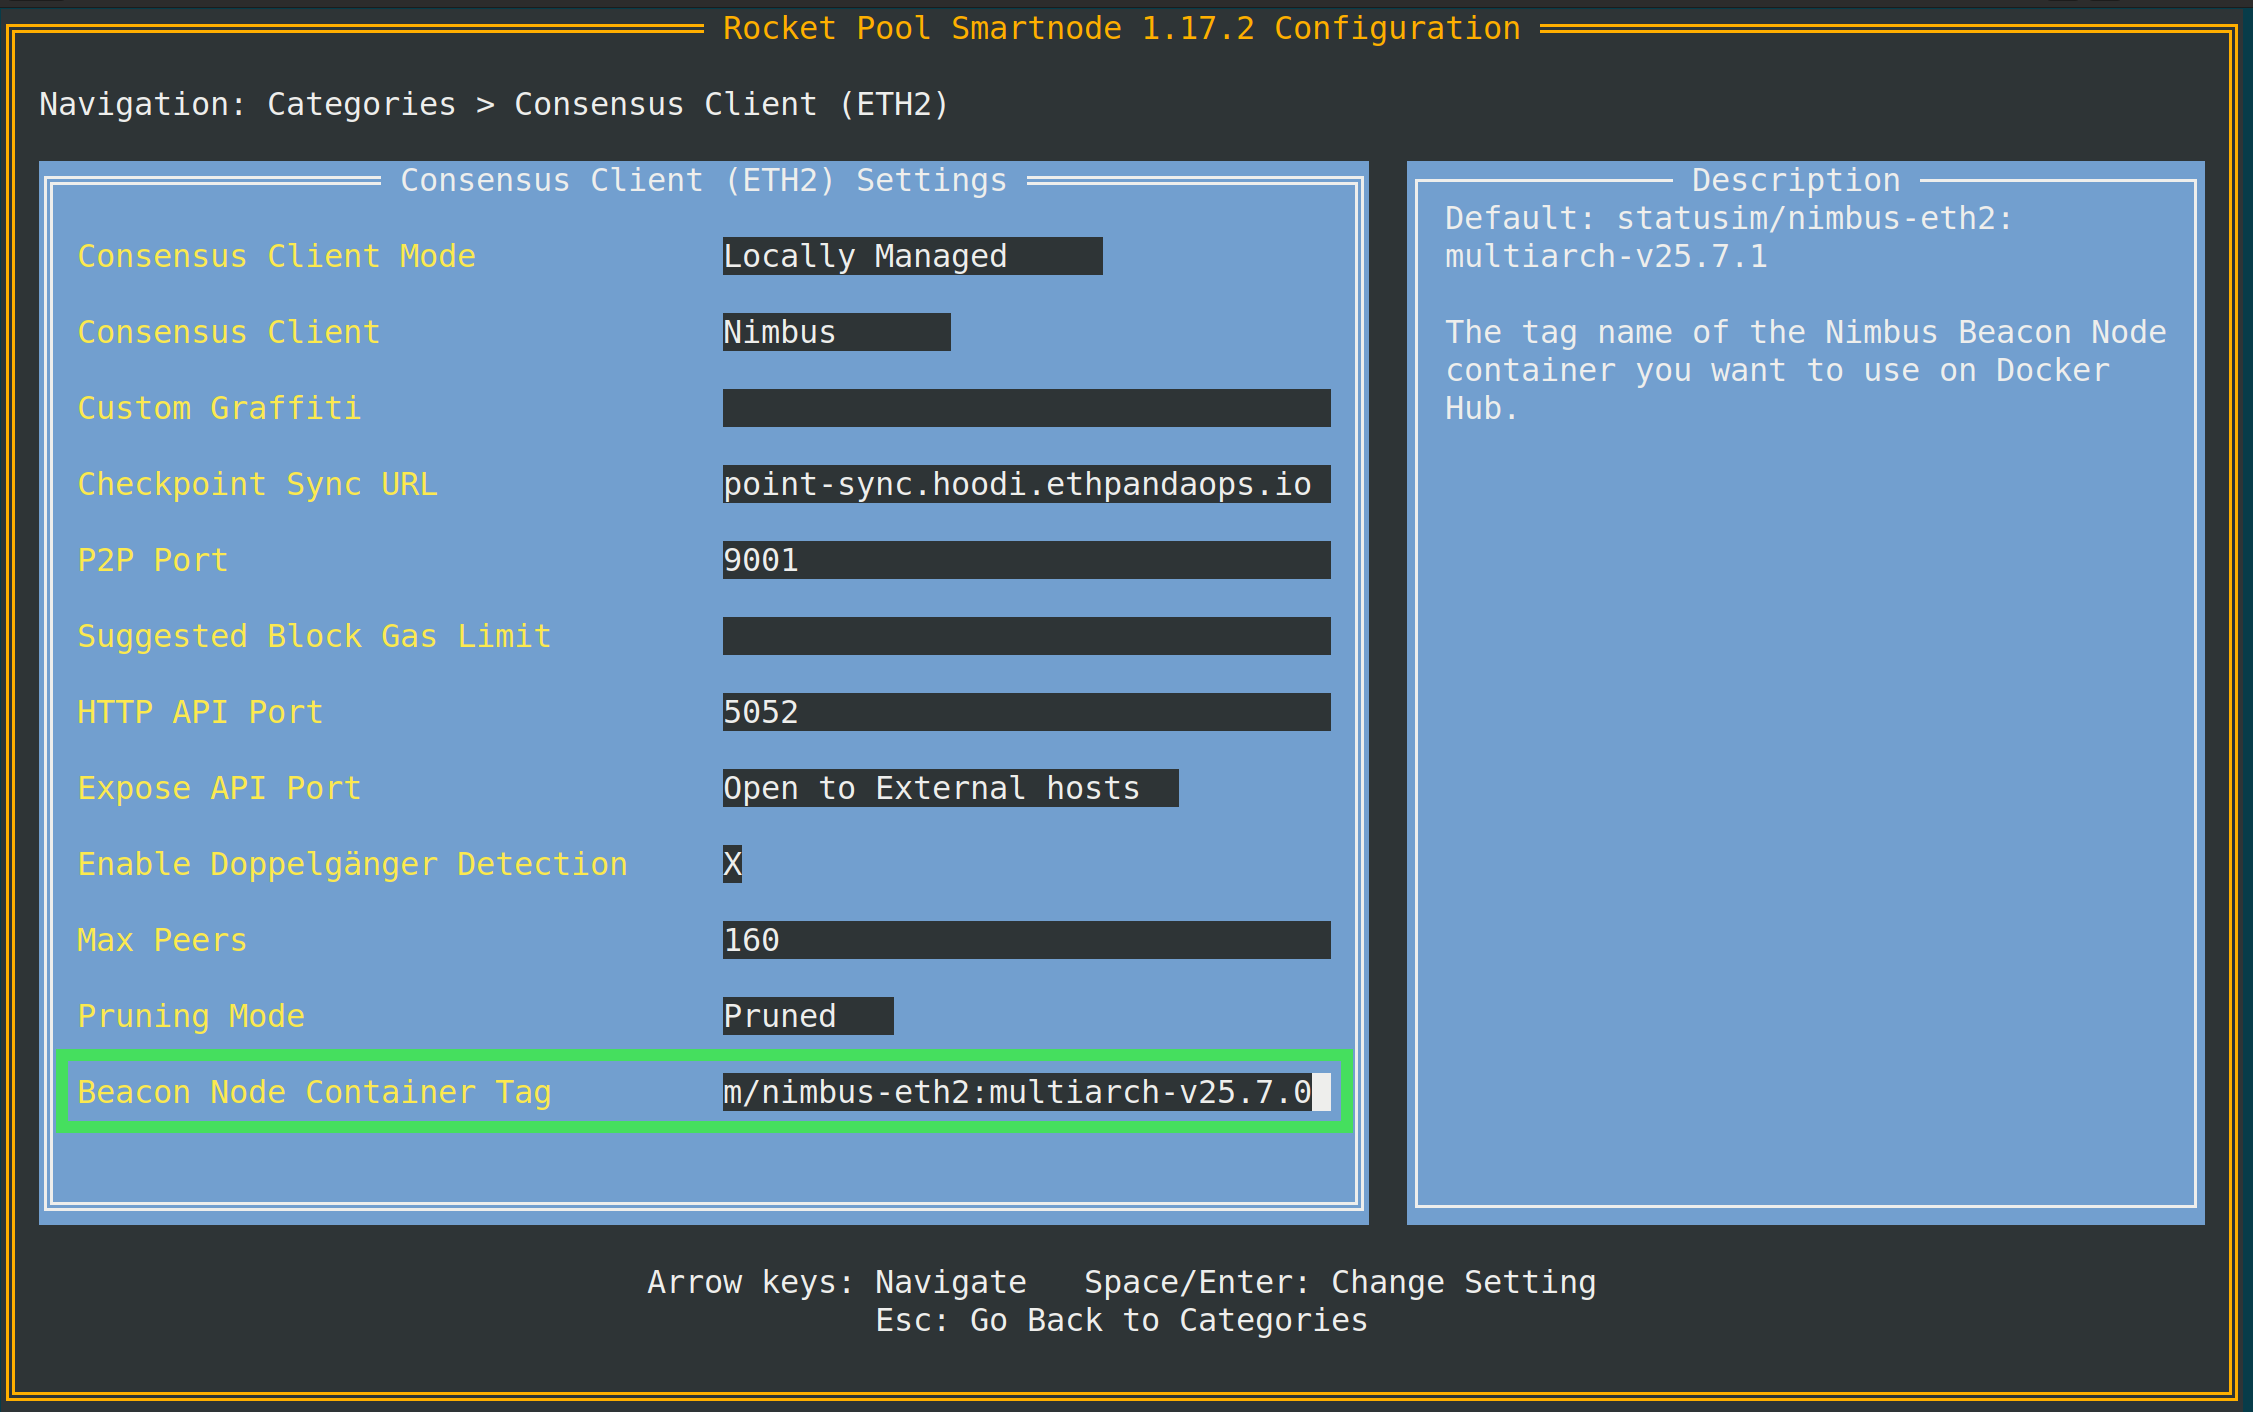When you're happy with your changes, save and exit as usual.
The Smart Node will offer to restart all of the affected containers automatically.
::: tip NOTE
Official pins live in `~/.rocketpool/mainnet.env`. Do not edit that file for lasting changes; install overwrites it. Optional per-network overrides go in `~/.rocketpool/testnet.env` or `~/.rocketpool/devnet.env` (only keys you set replace the mainnet pin). A **Container Tag** you set in the Settings Manager overrides the pin for that service. Leave it at the default to keep the official digest.
:::
**Native Mode**
First, shut down your Execution client, Beacon Node, and/or Validator client service depending on what you'd like to update.
For example, shutting down Geth:
```shell
sudo systemctl stop geth
```
Next, download the latest binary release from the vendor of your client (or build it from source) and replace the old binary with the new one.
We recommend you **move the old binary to a backup location** instead of overwriting it, just in case the new client has problems.
Finally, start the client service again - for example, starting Geth:
```shell
sudo systemctl start geth
```
You should follow the log scripts closely after the upgrade to ensure that the new client works as expected.
---
url: /node-staking/vps/os.md
---
> For AI agents: the complete documentation index is available at /llms.txt, the full documentation bundle is available at /llms-full.txt.
# Preparing the Operating System
As described in the previous section, there are many different VPS and cloud providers.
Writing guides for all of them would be somewhat impractical, but in this section we'll go over a typical workflow for preparing a virtual machine hosted on [Amazon Web Services](https://aws.amazon.com/).
Specifically, we'll cover how to select the appropriate virtual hardware configuration and how to prepare the Operating System for Rocket Pool.\
You should be able to extrapolate how to apply these steps to any provider once you've become familiar with their ecosystem.
## Creating an EC2 Virtual Machine
The first step is to [create an AWS account](https://portal.aws.amazon.com/billing/signup) if you don't already have one.
Follow the instructions provided in that link or log in with an existing account, and you will eventually make it to your management console dashboard:
Next, click on the drop-down at the top right of the screen to select the geographic region you want your server to physically reside in.
Servers cannot be moved between regions once they're created, so you want to ensure you're happy with the currently selected option before actually creating the server.
Now, click **Services** in the toolbar.
Go to the **Compute** section and select **EC2**.
Your dashboard should change to a view similar to this:
Click the orange **Launch Instance** button and select **Launch Instance** from the list of options to create a new machine.
You will be presented with a marketplace of Amazon Machine Images.
Each of these represents a specific snapshot of a machine with a pre-installed Operating System and some other useful software components.
For a Rocket Pool node, we recommend you use the **Ubuntu Server 24.04 LTS (HVM)** image.
Next, you will have to choose an **Instance Type**.
This determines what virtual hardware resources your machine will have available.
At the time of writing, these are what the different options offer:
| Instance | vCPU | CPU Credits / hour | Mem (GiB) | Storage | Network Performance |
| ---------- | ---- | ------------------ | --------- | -------- | ------------------- |
| t2.nano | 1 | 3 | 0.5 | EBS-Only | Low |
| t2.micro | 1 | 6 | 1 | EBS-Only | Low to Moderate |
| t2.small | 1 | 12 | 2 | EBS-Only | Low to Moderate |
| t2.medium | 2 | 24 | 4 | EBS-Only | Low to Moderate |
| t2.large | 2 | 36 | 8 | EBS-Only | Low to Moderate |
| t2.xlarge | 4 | 54 | 16 | EBS-Only | Moderate |
| t2.2xlarge | 8 | 81 | 32 | EBS-Only | Moderate |
The hardware requirements largely depend on which consensus client you plan to run - Nimbus, for example, requires less than 1GB of RAM by itself so it is perfectly reasonable to run it on a **t2.large** instance.
For more RAM-heavy clients, you may want to go with a **t2.xlarge** instance for extra headroom.
::: tip
You may want to consult the [Choosing your ETH Clients](/node-staking/eth-clients.md) section before deciding on an instance type so you can make sure that the client you want is supported by the instance type you choose.
:::
Once you've made your choice, click the **Next** button.
The default settings are all fine for the **Instance Details** section, so leave them alone and click **Next**.
When you arrive at the **Add Storage** section, you'll create a new virtual hard drive for your system.
This can be expanded later thanks to the power of the cloud, so getting the correct number now isn't absolutely critical.
However, for the sake of your own peace of mind, you should change the size to one of the following figures:
- Use at least **100 GiB** if you're just trying Rocket Pool out on the [Hoodi Test Network](/node-staking/testnet/overview.md).
- Use at least **1 TiB** (preferably **2 TiB**) if you're going to use this node on the main Ethereum network (**mainnet**).
Leave the default values for the other settings and click **Next**.
In the **Add Tags** step, you should click the **click to add a Name tag** button and give it an easy-to-remember name that you can use to identify the server later; something like **Rocket Pool Smart Node** will work if you need inspiration.
Click **Next** when you're done.
In the **Security Group** section, keep the **Create a new security group** option selected.
Enter a name and description such as **Smart Node** and **Smart Node Group**.
Remove all of the existing rules in the table and add the following rules:
| Type | Port Range | Source | Description |
| ---------- | ---------- | --------------------------------- | ----------- |
| SSH | 22 | \[Your public IP address at home] | SSH Access |
| Custom TCP | 30303 | Anywhere | ETH1 P2P |
| Custom UDP | 30303 | Anywhere | ETH1 P2P |
| Custom TCP | 9001 | Anywhere | ETH2 P2P |
| Custom UDP | 9001 | Anywhere | ETH2 P2P |
| Custom UDP | 8001 | Anywhere | ETH2 QUIC |
This will allow you to remotely connect to your server via SSH (the command line terminal) from your laptop or desktop.
It will also allow the Execution and Consensus clients to connect to other nodes on the Ethereum network.
::: warning NOTE
For SSH access, this will only work if you have a **static public IP address**.
You will likely need to request this from your ISP, as many of them use a dynamic IP system and change your public address occasionally.
If you cannot procure a static address, you will have to go to the AWS console and update this setting with your new IP address every time it changes.
:::
The security group table should now resemble this:
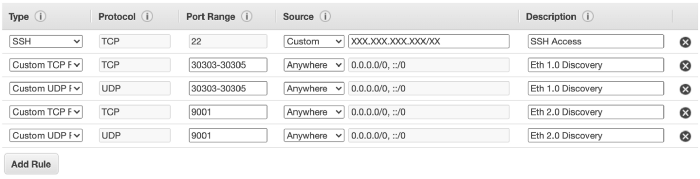
Now, review all of the instance details to make sure you're happy with them, and click **Launch** when you're satisfied.
When the **SSH key pair** prompt appears, select **Create a new key pair**.
Give it a memorable name such as **Smart Node Key**, then click **Download Key Pair**.
Store these files somewhere secure, such as `~/.ssh/` (or `C:\Users\[your username]\.ssh\` on Windows) where your other keys commonly reside.
::: danger
This key pair contains the private key that you will use to SSH into your machine.
If anyone gets a hold of this key, they will have complete access to your node - **including your Rocket Pool node wallet** and all of the coins within it.
You **must** keep this file secure at all times.
:::
Next, click **Launch Instance** to create your new virtual server.
When a notice pops up, click the **View Instances** to be taken to your list of servers.
You'll see your Rocket Pool node there with some accompanying details about its configuration and status.
Finally, assign an **Elastic IP Address** to your machine - you can think of this like a static IP address that is exclusive to AWS.
Your node will always be accessible at this address, so you can always use the same SSH command to connect to it.
Go to **Network and Security** in the navigation panel on the left and click **Elastic IPs**.
Now, click **Allocate Elastic IP Address**.
The default settings are all fine, so just click through the prompts and return to the list when you're done.
Next, select the new address in the list.
Click the **Actions** button above it, then click **Associate Elastic IP Address**.
Leave the resource type set to **Instance** and select the Rocket Pool Smart Node instance you just created from the list.
Click **Associate** to assign the address to your virtual server.
Now, if you look under the \*Associated Instance ID\*\* column of the address, you can verify that it has your machine assigned to it.
## Accessing the Machine
To access the machine, open a new terminal on Linux or macOS (use Powershell on Windows) and type the following command:
```shell
ssh [your elastic IP address]
```
If you stored your keys in the `.ssh` folder, this will use the private key pair you generated during setup to authenticate with the machine automatically - no usernames, no passwords.
Once here, you have complete terminal access to the system.
## Setting up Swap Space
In most cases, if you choose your Execution and Consensus clients and your instance type carefully, you should not run out of RAM.
Then again, it never hurts to add a little more.
What we're going to do now is add what's called **swap space**.
Essentially, it means we're going to use the SSD as "backup RAM" in case something goes horribly, horribly wrong and your server runs out of regular RAM.
The SSD isn't nearly as fast as the regular RAM, so if it hits the swap space it will slow things down, but it won't completely crash and break everything.
Think of this as extra insurance that you'll (most likely) never need.
### Creating a Swap File
The first step is to make a new file that will act as your swap space.
Decide how much you want to use - a reasonable start would be 8 GB, so you have 8 GB of normal RAM and 8 GB of "backup RAM" for a total of 16 GB.
To be super safe, you can make it 24 GB so your system has 8 GB of normal RAM and 24 GB of "backup RAM" for a total of 32 GB, but this is probably overkill.
Luckily, since your SSD has 1 or 2 TB of space, allocating 8 to 24 GB for a swapfile is negligible.
For the sake of this walkthrough, let's pick a nice middleground - say, 16 GB of swap space for a total RAM of 24 GB.
Just substitute whatever number you want in as we go.
Enter this, which will create a new file called `/swapfile` and fill it with 16 GB of zeros.
To change the amount, just change the number in `count=16` to whatever you want. **Note that this is going to take a long time, but that's ok.**
```shell
sudo dd if=/dev/zero of=/swapfile bs=1G count=16 status=progress
```
Next, set the permissions so only the root user can read or write to it (for security):
```shell
sudo chmod 600 /swapfile
```
Now, mark it as a swap file:
```shell
sudo mkswap /swapfile
```
Next, enable it:
```shell
sudo swapon /swapfile
```
Finally, add it to the mount table so it automatically loads when your server reboots:
```shell
sudo nano /etc/fstab
```
Add a new line at the end that looks like this:
```
/swapfile none swap sw 0 0
```
Press `Ctrl+O` and `Enter` to save, then `Ctrl+X` and `Enter` to exit.
To verify that it's active, run these commands:
```shell
sudo apt install htop
htop
```
Your output should look like this at the top:

If the second number in the last row labeled `Swp` (the one after the `/`) is non-zero, then you're all set.
For example, if it shows `0K / 16.0G` then your swap space was activated successfully.
If it shows `0K / 0K` then it did not work and you'll have to confirm that you entered the previous steps properly.
Press `q` or `F10` to quit out of `htop` and get back to the terminal.
### Configuring Swappiness and Cache Pressure
By default, Linux will eagerly use a lot of swap space to take some of the pressure off of the system's RAM.
We don't want that. We want it to use all of the RAM up to the very last second before relying on SWAP.
The next step is to change what's called the "swappiness" of the system, which is basically how eager it is to use the swap space.
There is a lot of debate about what value to set this to, but we've found a value of 6 works well enough.
We also want to turn down the "cache pressure", which dictates how quickly the server will delete a cache of its filesystem.
Since we're going to have a lot of spare RAM with our setup, we can make this "10" which will leave the cache in memory for a while, reducing disk I/O.
To set these, run these commands:
```shell
sudo sysctl vm.swappiness=6
sudo sysctl vm.vfs_cache_pressure=10
```
Now, put them into the `sysctl.conf` file so they are reapplied after a reboot:
```shell
sudo nano /etc/sysctl.conf
```
Add these two lines to the end:
```shell
vm.swappiness=6
vm.vfs_cache_pressure=10
```
Then save and exit like you've done before (`Ctrl+O`, `Ctrl+X`).
And with that, your server is up and running and ready to run Rocket Pool!
Move on to the [Choosing your ETH Clients](/node-staking/eth-clients.md) section.
---
url: /node-staking/vps/overview.md
---
> For AI agents: the complete documentation index is available at /llms.txt, the full documentation bundle is available at /llms-full.txt.
# Overview
This section is aimed at helping you understand the process of preparing a virtual private server or virtual machine hosted on the cloud as a Rocket Pool node.
## Guides
[Selecting a Hosting Provider](/node-staking/vps/providers.md) shows several examples of popular hosting providers that other Rocket Pool node operators use to run nodes in the cloud.
[Preparing the Operating System](/node-staking/vps/os.md) walks you through the basic steps of installing and configuring the base Operating System on your machine to prepare it for life as a node.
::: tip NOTE
Note that you will need to use a remote service like SSH to use your machine; consult the [**Intro to Secure Shell (SSH)**](/node-staking/ssh.md) guide if you need a tutorial on how to do this.
:::
---
url: /node-staking/vps/providers.md
---
> For AI agents: the complete documentation index is available at /llms.txt, the full documentation bundle is available at /llms-full.txt.
# Selecting a Hosting Provider
If you've arrived at this section, then you would like to run a Rocket Pool node but can't set one up locally at your home; you require a **virtual private server (VPS)** hosted on the cloud.
There are several different services available that can provide such a machine, and they come in two different flavors: VPS providers and public cloud providers.
Choosing the correct one can be difficult, and understanding the differences between them is key.
In this guide, we'll shine some light onto the distinction and list a few of the services that other Rocket Pool users have leveraged in the past to help you navigate through your options.
## Traditional VPS Hosting
A virtual private server is a single instance of a virtual machine that resides on a larger physical machine.
They are the cheapest option, and they are less-frequently employed than the ubiquitous cloud platforms so they tend to contribute more towards the Ethereum network's decentralization.
However, they rarely have high-availability support; if the physical server goes down, it's likely that your VPS hosted on it will go down as well.
Also, they have a fixed resource footprint; it's usually not possible to increase or decrease resources like CPU and RAM on demand.
As of 5/2026, one well-priced and performant option was the RS 12000 G12 from [Netcup](https://www.netcup.eu/vserver/vps.php).
One word of warning is that storage is shared with others, so storage IOPs are a potential bottleneck.
## Dedicated Server Hosting
Unlike a VPS, a dedicated server is an entire physical device that is rented by you. They are a relatively affordable option, and they are less-frequently employed than the ubiquitous cloud platforms so they tend to contribute more towards the Ethereum network's decentralization.
As of 5/2026 two well-priced and performant options were the Rise and Advance bare-metal servers from [OVH](https://us.ovhcloud.com/). There are a variety of these that change over time, as well as significant sales. You'll need to check that the [hardware guidelines](/node-staking/local/hardware.md) are met.
## Cloud Hosting
Cloud hosting refers to virtual machines that are split across on a distributed network of multiple servers, rather than being hosted on a single physical machine.
If one of the hosting machines fails, the others can seamlessly take over for it so availability and reliability tend to be extremely high on these platforms.
They also tend to offer flexible resource options; it's relatively simple to add more CPU, RAM, or disk space on demand.
Due to these extra benefits, cloud-based servers tend to be more expensive than VPS solutions.
They're also very popular platforms, so using them generally reduces the overall decentralization of the Ethereum network.
The 3 primary cloud providers are [Amazon Web Services (AWS)](https://aws.amazon.com/), [Microsoft Azure](https://azure.microsoft.com/en-us/), and [Google Cloud Platform (GCP)](https://cloud.google.com/).
We do not recommend using cloud hosting due to price and centralization concerns.
## Key Considerations
### Price
Cloud hosting solutions are usually a safer choice if cost is not a priority.
The section below has a more detailed breakdown of cost estimates but here is a general comparison between a VPS option and a dedicated server option:
- OVH Dedicated Server: $118-243/mo
- Netcup VPS: $81-117/mo
---
url: /node-staking/wallet-init.md
---
> For AI agents: the complete documentation index is available at /llms.txt, the full documentation bundle is available at /llms-full.txt.
# Creating a New Wallet
If the Smart Node services are up and running, the next step is to set up an Ethereum wallet for your node.
This is simply an Execution Layer address that will hold your node's funds - it will use this to send ETH to your megapool validator when you begin staking, pay for gas during various transactions, and other various operations.
You have the option of either creating a brand new wallet from scratch, or importing / recovering an existing wallet or address.
Please choose which option you'd like from the tabs below.
**Creating a New Wallet**
The most common way to run a node is to create a new Ethereum address that is dedicated to the node.
The Smart Node CLI provides a way to do this easily:
```shell
rocketpool wallet init
```
By default, the Smart Node generates a random password to encrypt your wallet's private key (stored in the password file below).
To choose your own password instead, pass `-p` / `--password`.
::: tip NOTE
You do not need to know or remember this password. The **24-word node mnemonic** is enough to fully recover your wallet.
:::
Next, you will be presented the **unique 24-word mnemonic** for your new wallet.
This is the **recovery phrase** for your wallet.
If you ever lose your machine, you can use this phrase to regenerate your wallet and resurrect all of the Consensus validators attached to it.
NOTE
It is **essential** that you write this mnemonic down because this is the only time it will be shown to you, but keep it somewhere safe.
Anyone with this phrase can gain control of your wallet.
Once you confirm your mnemonic phrase, you will be presented with the unique Ethereum address for your node wallet.
**Recovering or Importing an Existing Wallet**
Once you are finished entering the mnemonic phrase, you will see a success message like the following:
"The node wallet was successfully initialized.
Node account: LongStringOfLettersAndNumbers"
This is the public address you to which you will send ETH in "Preparing your Node for Operation". You may also verify it by typing "rocketpool wallet status".
If you already have a node wallet that you created in a previous installation of the Smart Node, or if you want to import an address that you created elsewhere (such as with **Allnodes**), please follow the instructions in the [Importing an Existing Wallet for your Node](/node-staking/recovering-rp.md) guide.
Return here when you're finished.
::: warning NOTE
As of the current build, Rocket Pool needs to have access to your wallet's private key in order to perform its automatic duties.
**This means that the private key will exist in a file on your machine.**
If an attacker manages to gain access to your machine, they could gain access to your node wallet and steal all of the tokens that it contains!
Please ensure that you have followed the security guide in the [Securing your Node](/node-staking/securing-your-node.md) section before you continue, and are comfortable with your security posture.
:::
**Docker & Hybrid Modes**
Your wallet's private key will be stored in a file located at `~/.rocketpool/data/wallet`.
The password used to encrypt your wallet's key will be stored in `~/.rocketpool/data/password`.
This is the file that must be protected at all times.
**Native Mode**
The wallet and password files will be stored in the `data` directory under the Rocket Pool directory that you set up earlier (e.g. `/srv/rocketpool`).
Your wallet's private key will be stored in a file located at `/srv/rocketpool/data/wallet`.
The password used to encrypt your wallet's key will be stored in `/srv/rocketpool/data/password`.
This is the file that must be protected at all times.
---
url: /node-staking/withdraw.md
---
> For AI agents: the complete documentation index is available at /llms.txt, the full documentation bundle is available at /llms-full.txt.
# Shut Down a Minipool
## Exiting your Validator
When you have decided that you no longer want to run a minipool and want to access the full balance locked on the Beacon Chain, you will have to take several steps:
1. Send a voluntary exit request for the minipool's validator from the Beacon Chain.
2. Wait for your validator to exit.
3. Wait for your validator's balance to be withdrawn to your minipool on the Execution layer.
4. Close the minipool to distribute the rewards and access the funds
We'll cover each step below.
### Sending the Exit Request
If you want to exit the validator attached to a minipool, run the following command:
```shell
rocketpool minipool exit
```
You will be presented with a list of minipools that can be exited:
```
Please select a minipool to exit:
1: All available minipools
2: 0x7E5700bcd65B1770bA68abB288D3f53814d376aC (staking since 2023-02-08, 06:33 +0000 UTC)
3: 0xd8E804cFA64ADb386F52DB20717810130c90f674 (staking since 2023-02-08, 06:33 +0000 UTC)
```
Once you confirm you want to exit, your node will send a voluntary exit request to the Beacon Chain.
This is **not** a normal Execution layer transaction, so you do not need to pay gas for it.
If you need the validator public key for the minipool you just exited, you can retrieve it using `rocketpool minipool status`.
You can view your validator's exit status on a Beacon Chain explorer such as [https://beaconcha.in](https://beaconcha.in) (or [https://hoodi.beaconcha.in](https://hoodi.beaconcha.in) for the Hoodi Testnet).
It will take some time for your status to be updated, but once it is you will see it in the "exiting" state:
Here you can see the Status is `Exiting`, the epoch it will exit on is highlighted (5224), and the "Exited" icon will be pulsing green to indicate the operation is in progress.
It may take some time for your validator to exit, _especially_ if there are a large number of validators exiting the Beacon Chain at the same time; the protocol is designed to only allow a small number of validators to exit per epoch so you may have to wait your turn.
Once your exit epoch has passed, your validator will officially exit the chain and will no longer attest or propose blocks.
You can confirm this in your Validator Client logs, or on the explorer:
The status has changed to `Exited` and there is some text underneath that indicates your **withdrawable epoch** (which should be 256 epochs after you exit, or about 27 hours).
Beaconcha.in also conveniently provides the local timestamps for when your validator will exit and when it will be withdrawable.
Once it has entered the **withdrawable** state, your validator will be enqueued by the Beacon Chain for rewards distribution.
This queue depends on how many validators are currently withdrawing.
Once it's your turn, the Beacon Chain will _automatically_ send your balance to your minipool's address on the Execution layer.
At this point, you can access it using the Smart Node CLI to do a distribution.
### Distributing Full Rewards
::: tip NOTE
This process requires your validator to be exited from the Beacon Chain and your validator's balance to have been transferred to the minipool contract.
If you need a refresher on how to do that process, please see the [**Exiting your Validator**](#exiting-your-validator) section above - return here once you're done.
:::
If you have exited your validator from the Beacon Chain and your balance has been deposited into the minipool contract, you can safely withdraw the entire thing in one command.
Unlike [manual distribution](/node-staking/skimming.md#manual-distribution), this process will actually **finalize** your minipool which closes it and renders it inactive.
Once your balance has been withdrawn from the Beacon Chain and you go through the following process to access the funds, the minipool's duty is over.
To retrieve the funds and close the minipool, run the following command:
```shell
rocketpool minipool close
```
This will present you with a list of minipools that are eligible for closure:
```
Please select a minipool to close:
1: All available minipools
2: 0xd8E804cFA64ADb386F52DB20717810130c90f674 (32.007209 ETH available, 8.002559 ETH is yours plus a refund of 0.000000 ETH)
```
Here you can see the total balance for each eligible minipool, how much of that balance will be distributed to you, and how much of that balance is reserved for you as a refund (which bypasses distribution).
Select which minipool you'd like to distribute and close from the list, confirm the action, and wait for your transaction to be validated.
Once it does, your share of the minipool balance (and your refund) will be sent to your withdrawal address, and the minipool will enter the `finalized` state.
You can verify it by looking up the transaction on a block explorer such as [Etherscan](https://etherscan.io).
### Unstaking RPL
At this point, your effective RPL will be updated to remove this minipool from the calculation.
You can now unstake any RPL you have that would put you over the 60% bonded ETH threshold.
To unstake RPL against the node, run the following command:
```shell
rocketpool node withdraw-rpl
```
::: tip NOTE
There are two limitations on RPL withdrawals:
RPL cannot be withdrawn within 28 days of staking (or restaking) RPL. Be careful if you claim these rewards before closing your minipool, if you restake any amount of RPL rewards you will not be able to withdraw any amount of RPL for 28 days since the last staking action.
RPL can be withdrawn down to 60% of your total bonded ETH. On a full exit, that means all of it can be withdrawn; for partial exits, plan with this limit in mind.
:::
## A Note on the Old Delegate
The **original minipool delegate** assigned to every minipool from Rocket Pool's launch until Atlas's deployment was built with two assumptions in mind:
1. The only time your minipool will ever have a balance is after the validator has exited the Beacon Chain.
2. The Oracle DAO will change your minipool's state from "staking" to "withdrawable" once the balance has been transferred from the Beacon Chain to the minipool contract.
The first point is clearly no longer relevant now that Ethereum is being upgraded to support skimming.
The second point is _also_ no longer true, because the Oracle DAO is **no longer** going to flag "withdrawable" minipools.
This was an intentional design decision to reduce the power that the Oracle DAO yields over Rocket Pool node operators and allow them to access rewards without any supplemental requirement on trusted parties.
Because of these deficiencies, the Smart Node CLI **no longer supports** withdrawals or fund distribution on the original minipool delegate.
If you'd like to access your rewards, you **must** upgrade to the Atlas delegate which supports the new withdrawal conditions listed above.
::: danger DANGER
If you are an advanced user and bypass the CLI to invoke the distribution functionality on the contract directly via a third-party tool, be advised of the following things:
1. The delegate's distribution function will revert if the minipool's balance is **below 16 ETH**. Balances below 16 ETH **cannot be accessed.**
2. If the minipool has **between 16 and 32 ETH** in its balance, distribution by the original delegate will assume your validator has been **slashed**. It will return 16 ETH to the staking pool and give you whatever is left over. It will _only_ function properly if the minipool balance is above 32 ETH.
3. The minipool will never enter the `finalized` state because the Oracle DAO will never mark it as `withdrawable`, so even though you may be able to access your ETH, **your RPL will be locked** until you upgrade to the Atlas delegate.
Because of these points, we **strongly recommend** you just upgrade to the Atlas delegate in the first place and avoid them entirely.
:::
---
url: /odao/monitoring.md
---
> For AI agents: the complete documentation index is available at /llms.txt, the full documentation bundle is available at /llms-full.txt.
# Monitoring your Oracle DAO Node
Once your node is up and running, it's important that you regularly monitor its health to ensure that it's correctly performing its automated duties.
Doing so involves the following:
- Monitoring the health of your physical (or virtual) system at the OS level
- Monitoring the health of your Execution and/or Consensus clients (if you run local clients)
- Ensuring your node is regularly submitting the required transactions to the chain for status updates
- Ensuring you have a sufficient ETH balance in your node wallet to execute those transactions
- Routinely applying updates to the Smart Node, your clients (if applicable), and your Operating System
- Monitoring the health of the other Oracle DAO members, and communicating with them if you believe their node(s) are not functioning properlyS
In this section, we'll describe a few examples of how to do these via the Smart Node's built-in [Grafana](https://grafana.com/) support.
## The Standard Rocket Pool Dashboard
The Smart Node provides a convenient dashboard that allows you to monitor many of the metrics listed above.
There is one dashboard for each Consensus Client.
Below is an example of the dashboard for Nimbus:

- Your machine's hardware health is captured in the upper-left quadrant.
- Your Execution client is functioning properly if the Network Stats in the lower-left quadrant are being populated.
- Your Consensus client is functioning properly if the peer count in the upper-right quadrant is updating with a non-zero number; the exact number depends on your choice of client and your network configuration.
- Your node's ETH balance is displayed in the table at the bottom right.
- Any Operating System updates or Smart Node updates are presented in the `Available Updates` box in the top-middle panel.
::: tip NOTE
Operating System and Smart Node updates require the update tracker, which you can install via `rocketpool service install-update-tracker`.
:::
For information on how to prepare the metrics system and the Smart Node dashboard, please visit the [Monitoring your Node's Performance](/node-staking/performance.md) and the [Setting up the Grafana Dashboard](/node-staking/grafana.md) pages of the Smart Node documentation.
## The Oracle DAO Dashboard
We have also constructed a simple dashboard specifically tailored towards Oracle DAO members:
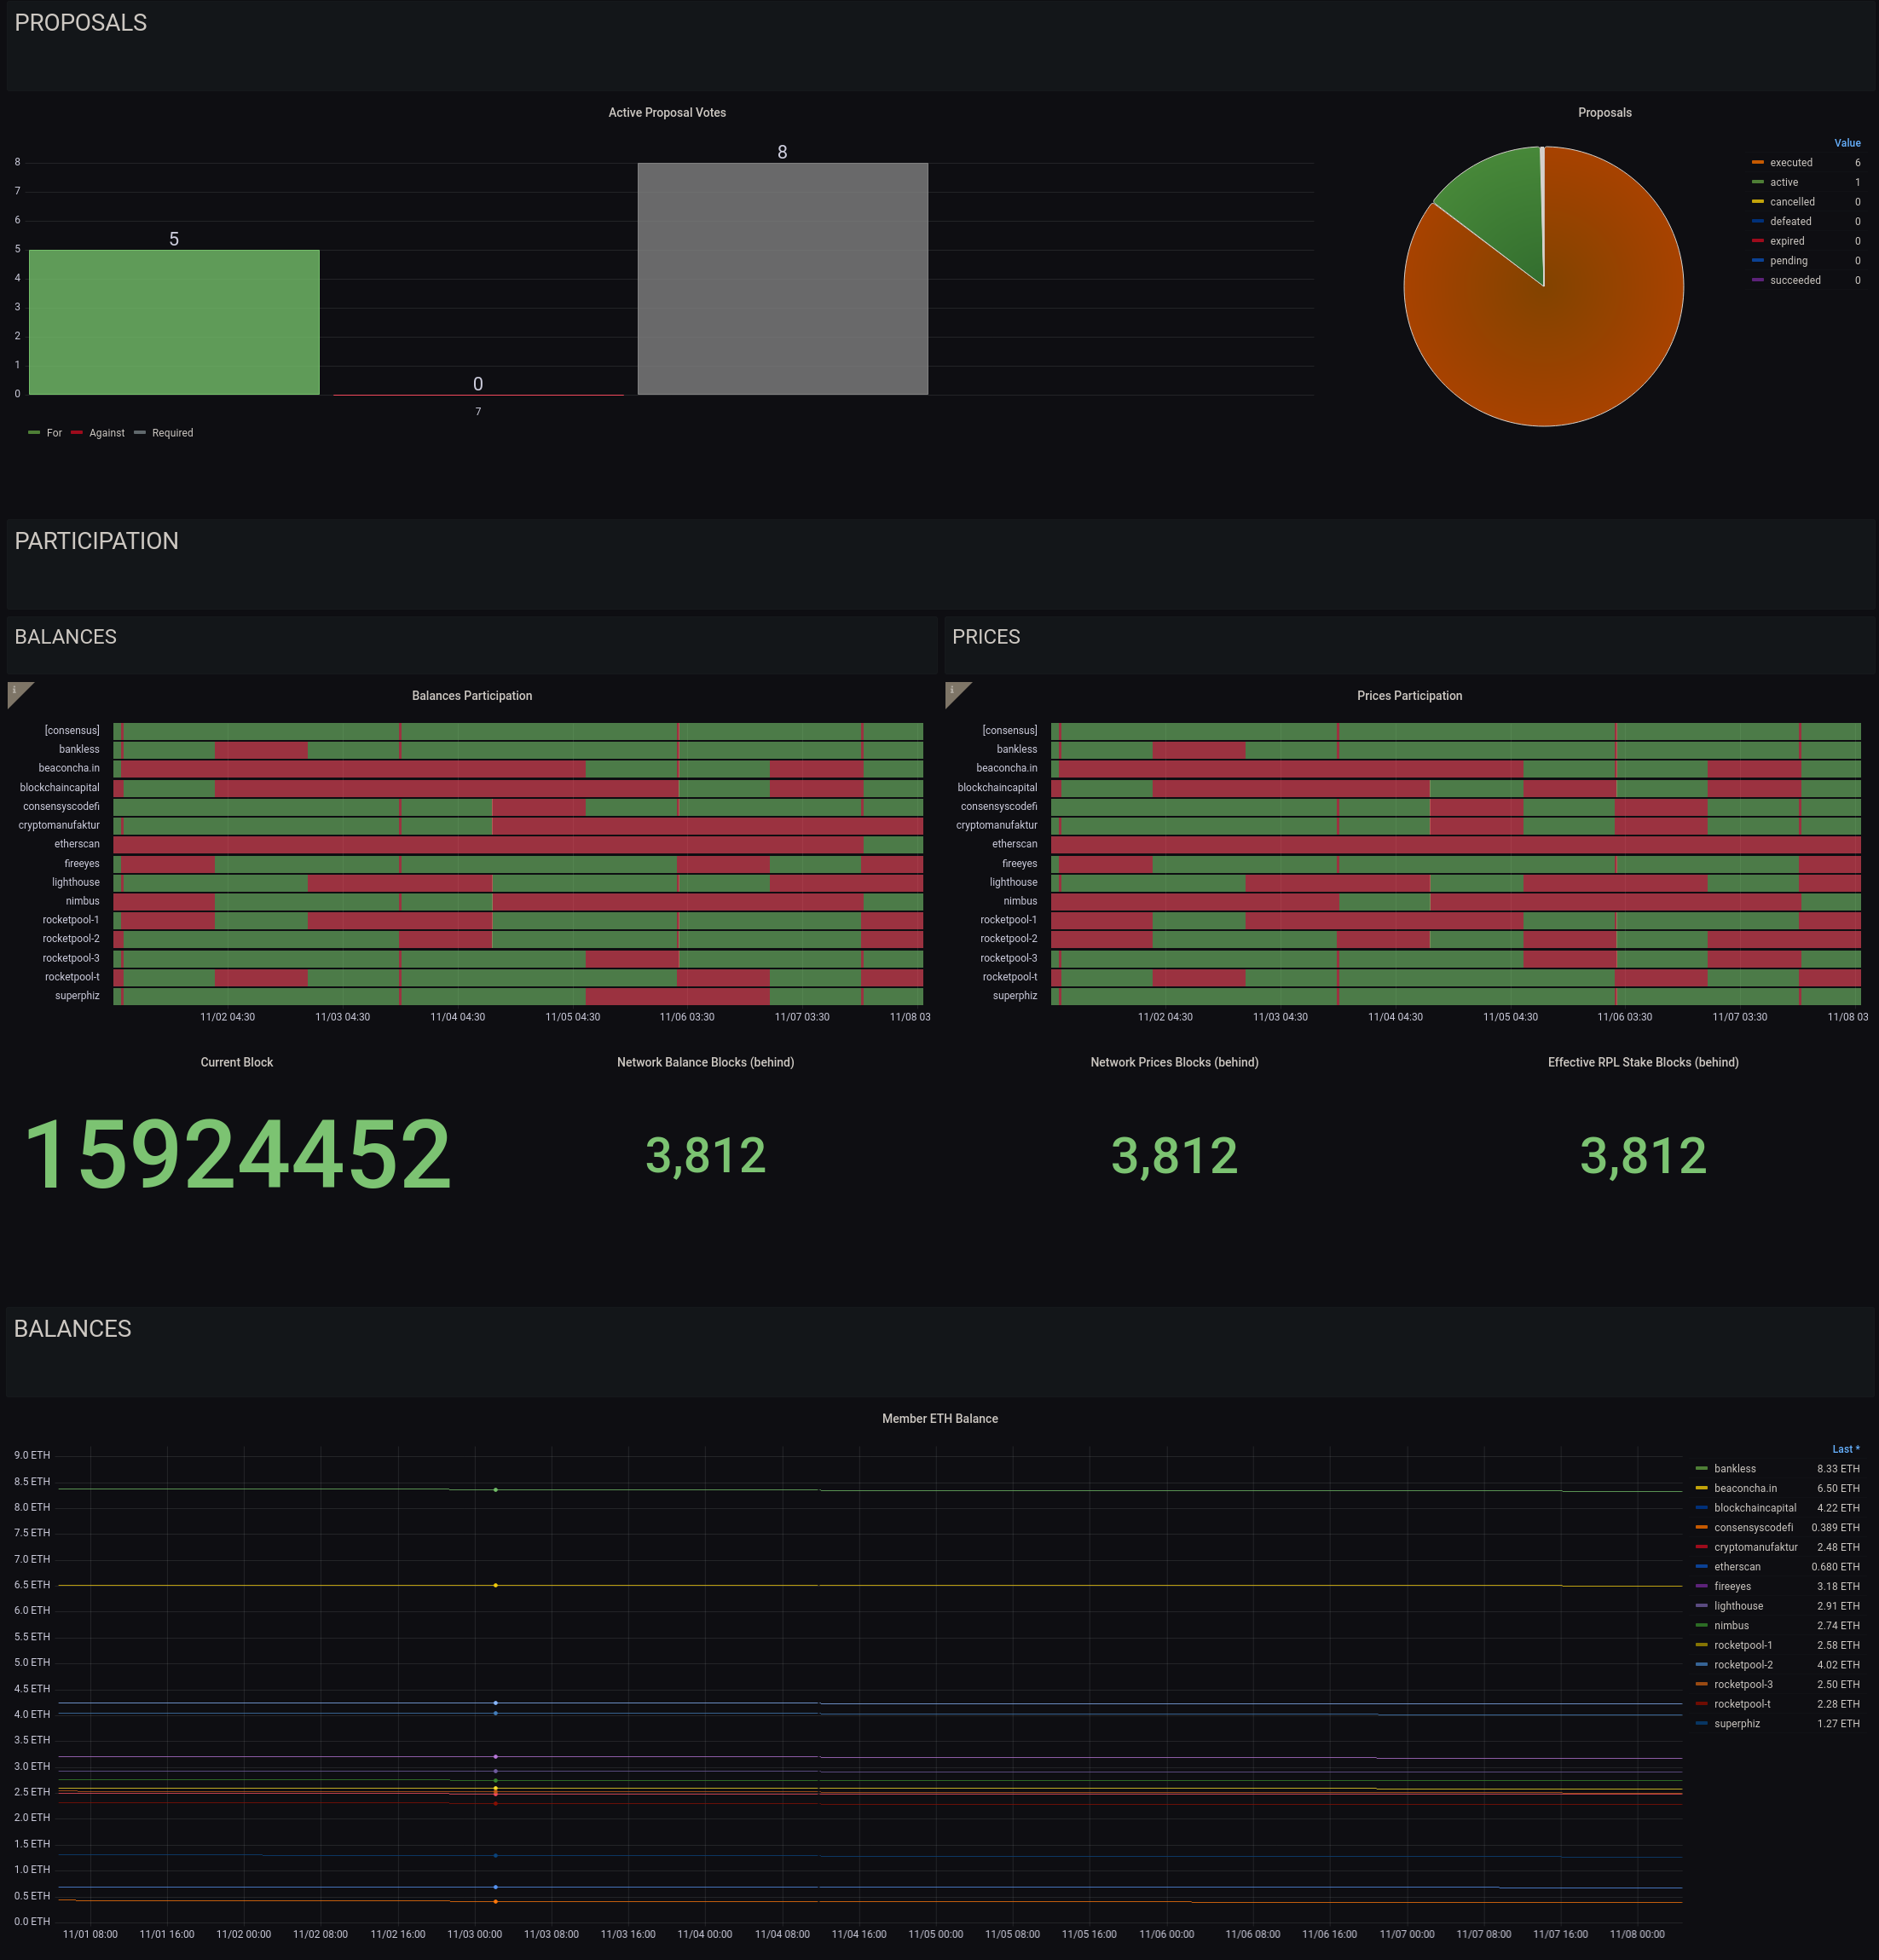
This dashboard that tracks the following:
- The status of the Oracle DAO proposals that need to be voted on or executed (more details on these in the next section)
- The history of submissions for price and balance updates\*
- The ETH balances of each Oracle DAO node
\*_Note that price and balance submission currently requires a quorum of 51% of nodes to agree on each one, at which point the submission is canonized. Submissions from other members will revert as they are no longer required, so if your node does not submit for a given interval, it doesn't mean that it's offline. You should be concerned if you miss more than 5 consecutive intervals in a row, and should check your `watchtower` daemon logs to verify there aren't any issues._
Enabling this dashboard is a two-step process.
First, enable Oracle DAO metrics in the `Metrics` section of the `rocketpool service config` editor:
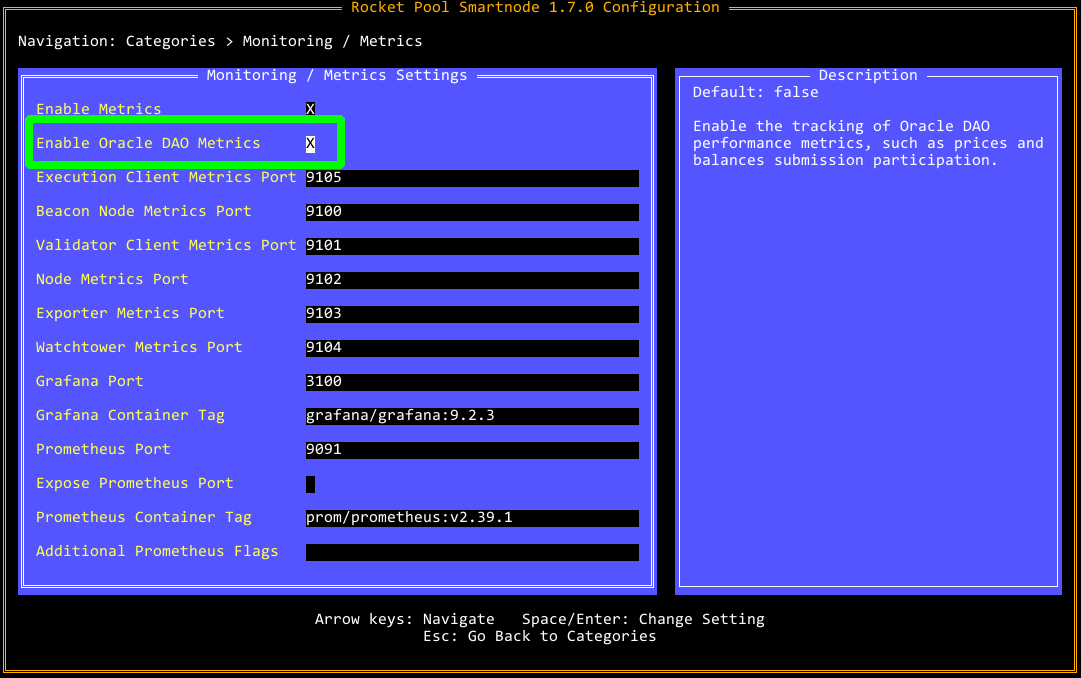
If you are running in Docker or Hybrid mode, this will restart your `node` daemon to apply the changes.
If you are running in Native mode, please restart the `node` service manually.
Second, import the [Oracle DAO dashboard](https://grafana.com/grafana/dashboards/15003-odao-member-dashboard/) from Grafana Labs (ID `15003`) into your node's local Grafana server.
## Checking the Logs
If you or one of the other Oracle DAO members has expressed concern with your node, the first line of defense is to look at the `watchtower` daemon logs using (for Docker and Hybrid mode) the following command:
```shell
rocketpool service logs watchtower
```
This will show the `docker` logs for the watchtower container, truncating to the last hundred lines or so.
To go further back, you can use the `-t` flag to indicate the number of lines.
For example:
```shell
rocketpool service logs watchtower -t 2000
```
will show the last 2000 lines.
As this will get cluttered very fast, you may want to pipe this into a utility like `less` so it is scrollable.
## Next Steps
In the next section, we'll cover the duties that you must perform manually as an Oracle DAO member.
---
url: /odao/overview.md
---
> For AI agents: the complete documentation index is available at /llms.txt, the full documentation bundle is available at /llms-full.txt.
# The Rocket Pool Oracle DAO
::: warning NOTE
This documentation only applies to members of Rocket Pool's Oracle DAO.
If you have not been explicitly invited to the Oracle DAO and just intend to run a regular Rocket Pool node, this section of the guide does not apply to you.
You can safely ignore it, but are welcome to read it if you are interested.
:::
The **Oracle DAO** is the group of special Rocket Pool nodes that are responsible for the administrative duties required by the protocol that cannot be achieved by Smart Contracts due to technical limitations.
They are essentially the same as normal Rocket Pool nodes; they use the same tools, can be configured with the same methods, and can even run regular minipools, but they come with supplemental tasks that they perform.
This includes things such as:
- Shuttling information from the Beacon Chain to the Execution Layer, including validator status and balances
- Ensuring minipools are created using validator public keys that aren't already in use, and [have the proper withdrawal credentials](https://github.com/rocket-pool/rocketpool-research/blob/master/Reports/withdrawal-creds-exploit) so the protocol can safely fund them
- Constructing the rewards Merkle tree at the end of each rewards period and uploading it to IPFS for other node operators to access
- Monitoring proposals for compliance with Rocket Pool's [fee recipient requirements](/node-staking/mev.md)
- Proposing and voting on modifications to the core protocol, including changing parameters and approving contract upgrades
- Proposing and voting on the Oracle DAO roster, including inviting and removing other Oracle DAO members
As a reward for fulfilling these duties, the Oracle DAO is collectively given a [small percentage](https://rpips.rocketpool.net/RPIPs/RPIP-25) of the total RPL inflation produced at each rewards period, divided evenly among its members.
Unlike normal Rocket Pool nodes, which can be created and run permissionlessly by anyone, membership in the Oracle DAO is **invite only** by existing members.
If you have recently been invited to join the Oracle DAO, this section of the guide will help you understand your role, get your node set up, and ensure that it stays healthy.
## Requirements
To run an Oracle DAO node, you will require the following:
- Access to an **Execution Client's RPC endpoint**. This can be a locally-run client, as is the case with most Rocket Pool nodes, or it can link to external clients that you or your organization maintain independently.
- Access to an **Archive-Mode Execution Client**, which can either act as your primary client or a supplementary (fallback) client. It will only be used in rare circumstances where duties require your node to recall an Execution Layer state that has been pruned from your Execution Client. Nevertheless, it is **critical** that you have access to an Archive Node during these periods to ensure your duties are able to be fulfilled successfully.
- We **strongly** recommend you use an on-premises archive node for this, as services such as [Infura](https://infura.io/pricing) or [Alchemy](https://www.alchemy.com/pricing) have shown some difficulty in keeping up with demand during critical periods such as constructing the rewards tree.
- Access to an **Archive-Mode Beacon Node's REST API endpoint** (via HTTP). This can be a locally-run client, as is the case with most Rocket Pool nodes, or it can link to external clients that you or your organization maintain independently.
- The standard Smart Node CLI.
- The Smart Node daemon is configured and running in `watchtower` mode (this is included with the standard Smart Node bundle for all users, but only actively performs duties for Oracle DAO nodes).
- This can be run in a Docker container (standard setup) or as a simple `systemd` service ("Native" mode).
- Enough ETH to pay for the gas costs of your duties (discussed later).
::: warning NOTE
If you simply cannot run an on-premises archive node and _must_ rely on a third-party service, consider the following:
If you plan to use **Infura** for your Archive Mode fallback, you must have at least the **Team** plan.
The free tier and the Developer tier are not sufficient.
If you plan to use **Alchemy**, you must have at least the **Growth** plan.
The free tier is not sufficient.
:::
## Activities
Oracle DAO duties are split into two parts.
1. **Automated duties**: these are duties related to routine Rocket Pool operation, such as shuttling information from the Consensus Layer to the Execution Layer, calculating various aspects of the protocol off-chain, and submitting them as updates to the Smart Contracts. Each of these is performed automatically by the `watchtower` daemon process and do not require manual intervention so long as your Execution and Consensus Clients, and your `watchtower` daemon, are all operating normally.
2. **Manual duties**: these are duties that require your own decision making and out-of-band communication with the rest of the Oracle DAO to perform. They include things such as voting on contract upgrades, changing parameters, and inviting or kicking members to/from the Oracle DAO. These can all be done via the standard Smart Node CLI.
Read the next section to learn how to set up your Oracle DAO node.
---
url: /odao/proposals.md
---
> For AI agents: the complete documentation index is available at /llms.txt, the full documentation bundle is available at /llms-full.txt.
# Oracle DAO Proposals
As a reminder, there are two types of Oracle DAO duties:
1. **Automated duties** - these are duties related to routine Rocket Pool operation, such as shuttling information from the Consensus Layer to the Execution Layer, calculating various aspects of the protocol off-chain, and submitting them as updates to the Smart Contracts. Each of these is performed automatically by the `watchtower` daemon process and do not require manual intervention so long as your Execution and Consensus Clients, and your `watchtower` daemon, are all operating normally. You set up the `watchtower` daemon in the previous steps already, so this section will not go over them again.
2. **Manual duties** - these are duties that require your own decision-making and out-of-band communication with the rest of the Oracle DAO to perform. They include things such as voting on contract upgrades, changing parameters, and inviting or kicking members to/from the Oracle DAO. These can all be done via the standard Smart Node CLI. This section describes each of these duties and how to perform them.
Proposals form the core of your responsibilities outside the automated `watchtower` duties.
Essentially, they work as follows:
- The collective Oracle DAO should discuss an upcoming proposal extensively ahead of time, so each member is aware of it and understands what that proposal will entail.
- An Oracle DAO member then creates the proposal via an on-chain transaction.
- The proposal will then enter a **wait period** before voting can begin to have further discussion and form their opinion on it. This is currently **7 days** on Mainnet.
- After the wait period is over, members can vote on the proposal via a simple yes-or-no vote.
- When a quorum of 51% of the Oracle DAO members has voted the same way, the vote is concluded. If 51% agreed to the proposal, it will be able to be **executed**. Any member can execute the proposal once it is approved.
- Execution refers to formally triggering the change on-chain, thus modifying the state of the core Rocket Pool contracts.
## Making a Proposal
Once you make a proposal, it will enter a **review period** where the other members can see it and discuss it, but will not be able to vote on it.
At the time of writing, this is currently **7 days**.
After the review period, there will be a **voting period** where members can vote either for the proposal, or against it.
At the time of writing, this is currently **14 days**.
If the proposal reaches quorum before it expires (that is, if enough members vote in favor of it to reach consensus), it will be **passed**.
Quorum is a configurable parameter by the Oracle DAO; it is currently set to at least **51%** of the total member pool.
Once a vote is passed, it can be **executed** which causes its changes to go into effect.
At the time of writing, the execution is **14 days** after the proposal was passed.
The process for making a new proposal depends on the type of proposal you want to make.
Select a type from the tabs below.
**Oracle DAO Member List**
To propose modifying the list of Oracle DAO members, use the `rocketpool odao propose member` command which
provides the following options:
```
NAME:
rocketpool odao propose member - Make an oracle DAO member proposal
USAGE:
rocketpool odao propose member command [command options] [arguments...]
COMMANDS:
invite, i Propose inviting a new member
leave, l Propose leaving the oracle DAO
kick, k Propose kicking a member
OPTIONS:
--help, -h show help
```
#### invite
Inviting a member is done via `rocketpool odao propose member invite` which will take 3 additional arguments:
- The node address to invite (must be a registered Rocket Pool node)
- The name / label for this node
- The URL or contact info for the user or organization running the node
For example: to invite a new member, run `rocketpool odao propose member invite
0xabcd1234abcd1234abcd1234abcd1234abcd1234 some-user user@example.com`.
#### kick
Kicking a member out of the Oracle DAO is done via the `rocketpool odao propose member kick` command.
It will ask you to select which member you want to kick, and issue an optional fine (from 0 RPL up to the bonded
RPL amount, currently 1750 RPL).
This fine, if provided, will burn part of (or all of) the member's RPL bond if the Oracle DAO votes to kick that
member.
#### leave
If you would like to voluntarily resign from the Oracle DAO, use the `rocketpool odao propose member leave`
command.
This will create a new proposal so the other members can vote on whether or not to approve your resignation.
**Oracle DAO Parameters**
To propose modifying the parameters that govern how Oracle DAO votes and membership modification work, use the
`rocketpool odao propose setting` command which provides the following options:
```
NAME:
rocketpool odao propose setting - Make an oracle DAO setting proposal
USAGE:
rocketpool odao propose setting command [command options] [arguments...]
COMMANDS:
members-quorum, q Propose updating the members.quorum setting - takes a percent, from 0 to 100
members-rplbond, b Propose updating the members.rplbond setting - takes an RPL amount (e.g. 5000)
proposal-cooldown, c Propose updating the proposal.cooldown.time setting - format is e.g. 1h30m45s
proposal-vote-timespan, v Propose updating the proposal.vote.time setting - format is e.g. 1h30m45s
proposal-vote-delay-timespan, d Propose updating the proposal.vote.delay.time setting - format is e.g. 1h30m45s
proposal-execute-timespan, x Propose updating the proposal.execute.time setting - format is e.g. 1h30m45s
proposal-action-timespan, a Propose updating the proposal.action.time setting - format is e.g. 1h30m45s
scrub-period, s Propose updating the minipool.scrub.period setting - format is e.g. 1h30m45s
OPTIONS:
--help, -h show help
```
#### members-quorum
Using `rocketpool odao propose setting members-quorum value` will change the quorum required for the Oracle DAO's
duties before they are considered canonized.
`value` here can be a floating point number between 0 and 100, indicating the percent of members needed to reach
quorum on Oracle DAO votes.
::: warning NOTE
Note that this does **not** affect the quorum required for automated duties such as RPL price and rETH balance
submission; those settings are controlled by the Protocol DAO (pDAO), _not_ the Oracle DAO.
:::
#### members-rplbond
Use `rocketpool odao propose setting members-rplbond value` to change the amount of RPL required as a bond for new
members invited to the Oracle DAO.
For example, entering `5000` for `value` will set the bond at 5000 RPL.
Note that this does not affect members that already exist; it only affects new members invited after the change.
#### proposal-cooldown
Use `rocketpool odao propose setting proposal-cooldown value` to change the cooldown time that a member must wait
between submitting proposals.
`value` is a string-formatted time duration, such as `1h30m45s` for one hour, thirty minutes, and forty-five
seconds.
It does not accept days; for multiple days, simply use the total number of hours.
#### proposal-vote-timespan
Use `rocketpool odao propose setting proposal-vote-timespan value` to change how long a vote can exist before
expiring.
`value` is a string-formatted time duration, such as `1h30m45s` for one hour, thirty minutes, and forty-five
seconds.
It does not accept days; for multiple days, simply use the total number of hours.
#### proposal-vote-delay-timespan
Use `rocketpool odao propose setting proposal-vote-delay-timespan value` to change how long the Oracle DAO must
wait before being able to vote on a new proposal.
`value` is a string-formatted time duration, such as `1h30m45s` for one hour, thirty minutes, and forty-five
seconds.
It does not accept days; for multiple days, simply use the total number of hours.
#### proposal-execute-timespan
Use `rocketpool odao propose setting proposal-execute-timespan value` to change how long the Oracle DAO has to
execute (enact) a proposal after it is approved.
If none of the members execute the proposal during this window, it will expire and the proposal will become
invalid.
`value` is a string-formatted time duration, such as `1h30m45s` for one hour, thirty minutes, and forty-five
seconds.
It does not accept days; for multiple days, simply use the total number of hours.
#### proposal-action-timespan
Certain proposals require secondary actions after being executed for them to finish taking effect (such as
inviting a member to join, then them actually joining).
Use `rocketpool odao propose setting proposal-action-timespan `value\`\` to change how long this secondary action is
able to be run after the proposal is executed.
The user will be unable to take this action _after_ this window; if the action isn't taken in time, the proposal
is essentially invalid.
`value` is a string-formatted time duration, such as `1h30m45s` for one hour, thirty minutes, and forty-five
seconds.
It does not accept days; for multiple days, simply use the total number of hours.
#### scrub-period
Use `rocketpool odao propose setting scrub-period value` to change how long the "scrub period" lasts (the time
between a new minipool entering `prelaunch` status and entering `staking` status).
The Oracle DAO has this long to check new minipools for the [withdrawal credentials
exploit](https://github.com/rocket-pool/rocketpool-research/blob/master/Reports/withdrawal-creds-exploit) and
scrub them if the exploit is detected, thus ensuring rETH funds are not stolen.
This duty is performed automatically by the `watchtower` daemon.
As the check is usually done in a matter of minutes, this value is simply designed to act as an insurance buffer
in the case that the Oracle DAO cannot come to consensus due to node failure; the members have this long to
resolve the problem and reach the quorum on scrubbing an exploited minipool.
`value` is a string-formatted time duration, such as `1h30m45s` for one hour, thirty minutes, and forty-five
seconds.
It does not accept days; for multiple days, simply use the total number of hours.
**Contract Upgrades**
Contract upgrades are currently outside the scope of the CLI.
The transactions must be submitted manually; please consult the Rocket Pool team if you would like to learn how to
propose a contract upgrade to the network.
## Viewing Proposals
To view a brief summary of all of the proposals in the protocol's history, use `rocketpool odao proposals list`.
This will sort the proposals by their status and show who proposed it and what it does.
To view the details of a specific proposal, use `rocketpool odao proposals details value` where `value` is the ID of the proposal you would like to view.
This will show a comprehensive breakdown of the proposal's information including who created it, when it was created, the payload body, how many members voted in favor of it, how many members voted against it, and whether or not your node has voted on it yet.
## Voting on Proposals
To vote on a proposal, use the following command:
```shell
rocketpool odao proposals vote
```
This will provide you with an interactive dialog asking which proposal you would like to vote on, and whether you would like to vote in favor of it or against it.
Follow the prompts carefully to complete the vote.
## Executing Proposals
When a proposal has received enough votes in favor of it to reach quorum, any member of the Oracle DAO can then _execute_ the proposal (apply its changes) using the following command:
```shell
rocketpool odao proposals execute
```
This will provide you with an interactive dialog asking which proposal you would like to execute.
Follow the prompts carefully to complete the execution.
---
url: /odao/setup.md
---
> For AI agents: the complete documentation index is available at /llms.txt, the full documentation bundle is available at /llms-full.txt.
# Setting up an Oracle DAO Node
At a bare minimum, a standard Rocket Pool node runs the following:
- The Smart Node CLI
- The Smart Node API daemon
- The Smart Node `node` daemon
- The Smart Node `watchtower` daemon
Optionally, the node can also run the following components:
- An Execution Client
- A Beacon Node
- A Validator Client
- MEV-Boost
- Prometheus
- The Prometheus Node Exporter
- Grafana
Each of these components can be run as Docker containers in the standard setup, as `systemd` services in the "Native Mode" setup, or run as externally-managed entities that the Smart Node can connect to via their respective API routes.
Conveniently, Oracle DAO nodes are the same as normal Rocket Pool nodes, but the `watchtower` daemon performs the supplemental Oracle DAO duties and there are more Prometheus metrics collected for performance monitoring purposes.
## Initial Node Setup
The best way to start is by following [the standard setup instructions](/node-staking/platform.md) for a normal Rocket Pool node.
That process will help you determine how you'd like to configure and run your node.
If you would like to run minipools (validators) on your node, please follow the normal node documentation from start to finish and return here when you're done.
If you do _not_ intend to run minipools and instead will use it purely for Oracle DAO duties, you can skip all of the steps relating to staking RPL and minipool creation.
The other steps such as node registration, establishing a good security posture, monitoring the node's health and performance, and updating the Smart Node after an update all still apply to you and you should review them carefully before proceeding.
Return here when you've finished.
## Additional Oracle DAO Configuration
There are two additional settings you need to provision in order to satisfy your Oracle DAO responsibilities.
Please select the mode you use to configure your node below from the tabs below.
**(service config) Interactive UI**
Open the `rocketpool service config` TUI and go to the `Smartnode and TX Fees` section.
Here, you will see two options at the bottom:
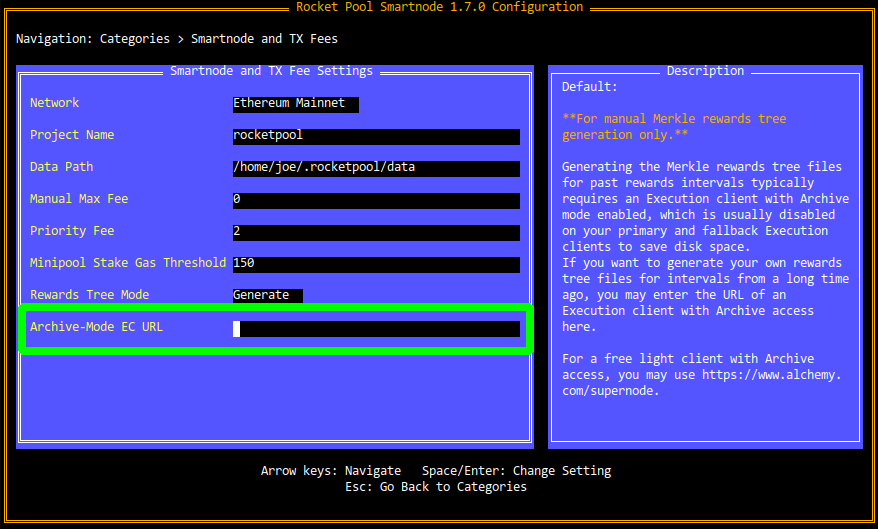The `Archive-Mode EC URL` must be the HTTP endpoint of the RPC API for your Archive Execution Client.
**Note that if you are already using your Archive EC as your primary client in Externally-Managed mode, you can ignore this setting.**
**(service config) Headlessly**
Run the following command to configure your node headlessly:
```shell
rocketpool service config --smartnode-archiveECUrl "http://your Archive EC URL"
```
Where:
`--smartnode-archiveECUrl` must be the HTTP endpoint of the RPC API for your Archive Execution Client.
**Note that if you are already using your Archive EC as your primary client in Externally-Managed mode, you can ignore this setting.**
Finally, restart your `watchtower` daemon (i.e., with `docker restart rocketpool_watchtower` in Docker or Hybrid mode, or `sudo systemctl restart rp_watchtower` in Native mode) for the settings to take effect.
**Direct Config File**
Open the `user-settings.yml` file in your Smart Node directory (`~/.rocketpool` by default) in a text editor.
Scroll down to the `smartnode` section:
```
smartnode:
archiveECUrl: http://your Archive EC URL
dataPath: /home/user/.rocketpool/data
manualMaxFee: "0"
minipoolStakeGasThreshold: "150"
network: mainnet
priorityFee: "2"
projectName: rocketpool
rewardsTreeMode: generate
```
Replace the values in the `archiveECUrl` field, where:
`archiveECUrl` must be the HTTP endpoint of the RPC API for your Archive Execution Client.
**Note that if you are already using your Archive EC as your primary client in Externally-Managed mode, you can ignore this setting.**
Finally, restart your `watchtower` daemon (i.e., with `docker restart rocketpool_watchtower` in Docker or Hybrid mode, or `sudo systemctl restart rp_watchtower` in Native mode) for the settings to take effect.
## Oracle DAO Smart Node Commands
The Smart Node CLI's `odao` command group is used to interact with the Oracle DAO contracts and duties on-chain:
```
NAME:
rocketpool odao - Manage the Rocket Pool oracle DAO
USAGE:
rocketpool odao command [command options] [arguments...]
COMMANDS:
status, s Get oracle DAO status
members, m Get the oracle DAO members
member-settings, b Get the oracle DAO settings related to oracle DAO members
proposal-settings, a Get the oracle DAO settings related to oracle DAO proposals
minipool-settings, i Get the oracle DAO settings related to minipools
propose, p Make an oracle DAO proposal
proposals, o Manage oracle DAO proposals
join, j Join the oracle DAO (requires an executed invite proposal)
leave, l Leave the oracle DAO (requires an executed leave proposal)
OPTIONS:
--help, -h show help
```
### status
The `status` command simply summarizes a few details about the Oracle DAO such as member count and proposal count:
```
The node is a member of the oracle DAO - it can create unbonded minipools, vote on DAO proposals and perform watchtower duties.
There are currently 8 member(s) in the oracle DAO.
There are 29 oracle DAO proposal(s) in total:
- 22 proposal(s) have passed and been executed
- 7 proposal(s) were cancelled, defeated, or have expired
```
### members
The `members` command prints detailed information about each member of the Oracle DAO, including their handle, their contact information, their node address, their RPL bond, and the last time they submitted a proposal for voting:
```
The oracle DAO has 8 members:
--------------------
Member ID: kermit-2
URL: https://www.rocketpool.net
Node address: 0x04ddB06D1429578691F630B67A53916445DA38bE
Joined at: 31 Jul 21 23:32 EDT
Last proposal: 27 Sep 22 21:18 EDT
RPL bond amount: 5000.000000
Unbonded minipools: 0
...
```
### member-settings
`member-settings` shows the current values for each of the configurable parameters related to Oracle DAO membership:
```
ODAO Voting Quorum Threshold: 51.000000%
Required Member RPL Bond: 1750.000000 RPL
Max Number of Unbonded Minipools: 250
Consecutive Challenge Cooldown: 300 Blocks
Challenge Meeting Window: 900 Blocks
Cost for Non-members to Challenge Members: 1.000000 ETH
```
This command is described in more detail in the [Oracle DAO Proposals](/odao/proposals.md) section.
### proposal-settings
`proposal-settings` shows the current values for each of the configurable parameters related to proposals that the Oracle DAO can vote on:
```
Cooldown Between Proposals: 1h0m0s
Proposal Voting Window: 168h0m0s
Delay Before Voting on a Proposal is Allowed: 15m0s
Window to Execute an Accepted Proposal: 168h0m0s
Window to Act on an Executed Proposal: 168h0m0s
```
This command is described in more detail in the [Oracle DAO Proposals](/odao/proposals.md) section.
### minipool-settings
`minipool-settings` shows the current values for each of the configurable parameters related to minipools on the Rocket Pool network:
```
Scrub Period: 1h0m0s
```
### propose
The `propose` command is used to submit governance proposals that the rest of the Oracle DAO can vote on.
These can involve changing a setting or modifying the Oracle DAO members (i.e., inviting or kicking other members).
This command is described in more detail in the [Oracle DAO Proposals](/odao/proposals.md) section.
### proposals
The `proposals` command is used to interact with existing Oracle DAO governance proposals.
It can view them, rescind proposals that you made, vote on them, and execute them (if applicable) causing them to take effect after they have been approved by the other members:
```
NAME:
rocketpool odao proposals - Manage oracle DAO proposals
USAGE:
rocketpool odao proposals command [command options] [arguments...]
COMMANDS:
list, l List the oracle DAO proposals
details, d View proposal details
cancel, c Cancel a proposal made by the node
vote, v Vote on a proposal
execute, x Execute a proposal
OPTIONS:
--help, -h show help
```
This command is described in more detail in the [Oracle DAO Proposals](/odao/proposals.md) section.
### join / leave
The `join` and `leave` commands are used to join the Oracle DAO once you've been invited, or leave the Oracle DAO once the other members have approved your resignation request.
## Joining the Oracle DAO
### The RPL Bond
In order to join the Oracle DAO, your node wallet will need enough RPL in it to cover the required membership bond.
This will be locked in Rocket Pool's vault as part of the joining process.
The exact amount of RPL required for the bond will be determined at the time of your invitation, and will be communicated to you by the other Oracle DAO members prior to onboarding you.
::: warning NOTE
Unlike all other ETH and RPL rewards, the RPL bond is _not_ sent to your node's withdrawal address upon exiting the Oracle DAO.
It is sent back to your node wallet itself.
Consider this as extra incentive to protect your node wallet from compromise.
:::
### Accepting an Invitation
Once your node is set up and you have been invited to join the Oracle DAO by the existing members, you can use the `rocketpool odao join` command to accept the invitation.
This will involve two transactions:
- One to lock the RPL required for your bond
- One to join the Oracle DAO when the bond has been received
Once you've joined, your `watchtower` daemon will automatically begin performing its required duties.
You can verify this by looking at its logs (e.g. `rocketpool service logs watchtower` for standard Docker-based installations); the watchtower performs its loop of duties every 4 to 6 minutes, and you will notice a distinct change in its output once you've joined the Oracle DAO.
### Next Steps
Now that you've joined the Oracle DAO, take a look at the next section to learn how to test your node in this role.
---
url: /odao/testing.md
---
> For AI agents: the complete documentation index is available at /llms.txt, the full documentation bundle is available at /llms-full.txt.
# Testing your Oracle DAO Node
Once your node is set up and you've joined the Oracle DAO, you should test it to ensure it's able to perform its duties properly.
The best way to do this is to have it build the Redstone rewards Merkle tree using Rocket Pool's `treegen` utility.
### treegen
`treegen` is a tool that can reproduce the entire rewards Merkle tree and accompanying artifacts for a previous rewards interval via your archive Execution and Consensus clients.
It can also "dry run" the current interval by pretending that it ended at the latest finalized epoch (at the time of running it) and producing a partial tree from the start of the interval up to that point.
::: tip TIP
For more information on the rewards tree itself and accompanying files, please visit [**the formal specification**](https://github.com/rocket-pool/rocketpool-research/blob/master/Merkle%20Rewards%20System/merkle-tree-spec).
:::
`treegen` can be used as a standalone binary (currently only built for Linux systems, x64 and arm64) or as a Docker container.
If you would like to download the standalone binary, you can find it in the releases here: [https://github.com/rocket-pool/treegen](https://github.com/rocket-pool/treegen).
Usage instructions are included in the README there, but we'll cover some examples below as well.
The Docker container tag for it is `rocketpool/treegen:latest`.
## Building a Dry-Run Tree
For a first test, run `treegen` to generate a dry-run tree that calculates the tree from the start of the rewards interval to the latest (finalized) slot.
We'll use [the script](https://github.com/rocket-pool/treegen/blob/main/treegen.sh) included in the repository that leverages the Docker container to run it on the node machine itself for simplicity:
```shell
./treegen.sh -e http://localhost:8545 -b http://localhost:5052
```
::: warning NOTE
Note that this particular configuration requires you to expose the Execution Client and Beacon Node APIs through the Docker configuration - ensure you have both options enabled in the `rocketpool service config` TUI.
:::
This will test your clients' abilities to respond to queries in a timely fashion (e.g., if you are using a third-party service, this will be helpful to assess whether or not its query rate-limit is insufficient), but **will not test their Archive Mode capabilities**.
It will produce output like the following:
```
2022/11/06 12:11:37 Beacon node is configured for Mainnet.
2022/11/06 12:11:37 Generating a dry-run tree for the current interval (3)
2022/11/06 12:11:37 Snapshot Beacon block = 5077503, EL block = 15912334, running from 2022-10-27 01:35:39 -0400 EDT to 2022-11-06 12:11:37.672755513 -0500 EST m=+0.049901525
2022/11/06 12:11:38 Creating tree for 1684 nodes
2022/11/06 12:11:38 Pending RPL rewards: 27807066876373932561121 (27807.067)
2022/11/06 12:11:38 Total collateral RPL rewards: 19464946813461752792784 (19464.947)
2022/11/06 12:11:47 Calculated rewards: 19464946813461752792026 (error = 758 wei)
2022/11/06 12:11:47 Total Oracle DAO RPL rewards: 4171060031456089884168 (4171.060)
2022/11/06 12:11:47 Calculated rewards: 4171060031456089884168 (error = 0 wei)
2022/11/06 12:11:47 Expected Protocol DAO rewards: 4171060031456089884168 (4171.060)
2022/11/06 12:11:47 Actual Protocol DAO rewards: 4171060031456089884927 to account for truncation
2022/11/06 12:11:47 Smoothing Pool Balance: 62781809204406327225 (62.782)
2022/11/06 12:11:55 1229 / 1684 nodes were eligible for Smoothing Pool rewards
2022/11/06 12:12:03 Checking participation of 4364 minipools for epochs 156315 to 158671
2022/11/06 12:12:03 NOTE: this will take a long time, progress is reported every 100 epochs
2022/11/06 12:13:48 On Epoch 156415 of 158671 (4.24%)... (1m44.577189073s so far)
...
2022/11/06 12:49:55 On Epoch 158615 of 158671 (97.62%)... (37m51.785456663s so far)
2022/11/06 12:50:51 Finished participation check (total time = 38m47.979633935s)
2022/11/06 12:50:51 Pool staker ETH: 26638263090669169632 (26.638)
2022/11/06 12:50:51 Node Op ETH: 36143546113737157593 (36.144)
2022/11/06 12:50:51 Calculated NO ETH: 36143546113737155125 (error = 2468 wei)
2022/11/06 12:50:51 Adjusting pool staker ETH to 26638263090669172100 to account for truncation
2022/11/06 12:50:52 Saved minipool performance file to rp-minipool-performance-mainnet-3.json
2022/11/06 12:50:52 Generation complete! Saving tree...
2022/11/06 12:50:52 Saved rewards snapshot file to rp-rewards-mainnet-3.json
2022/11/06 12:50:52 Successfully generated rewards snapshot for interval 3.
```
If this runs without error, it will generate the rewards tree artifacts and save them as JSON files in your working directory.
You are free to explore them and ensure their contents are sane, but as they are dry-run files, they aren't canonically stored anywhere for comparison.
## Building a Canonical Tree from a Past Interval
This next test is to replicate one of the complete trees from a past interval.
This will require archival access on both the Execution Layer and the Consensus Layer, so it will serve as a good test of both capabilities.
As of this writing, **Interval 2** is an ideal choice as it is far in the past () and involved the Smoothing Pool (which accounts for the largest computational load when calculating the rewards for the period).
Run `treegen` using the following command:
```shell
./treegen.sh -e http:// -b http://localhost:5052 -i 2
```
Note that the **Execution Client URL** is different here: it _must be_ an Archive EC as the snapshot block for Interval 2 was far in the past.
::: warning NOTE
Depending on your client configuration, building this tree can take _hours_.
The Smart Node will give you status indicators about its progress along the way, as you can see in the example below.
:::
The output will look like this (truncated for previty):
```
2022/11/07 23:44:34 Beacon node is configured for Mainnet.
2022/11/07 23:44:36 Found rewards submission event: Beacon block 5002079, execution block 15837359
2022/11/07 23:46:25 Creating tree for 1659 nodes
2022/11/07 23:46:26 Pending RPL rewards: 70597400644162994104151 (70597.401)
2022/11/07 23:46:26 Approx. total collateral RPL rewards: 49418180450914095872905 (49418.180)
2022/11/07 23:46:26 Calculating true total collateral rewards (progress is reported every 100 nodes)
2022/11/07 23:47:06 On Node 100 of 1659 (6.03%)... (40.134456319s so far)
...
2022/11/07 23:57:41 On Node 1600 of 1659 (96.44%)... (11m14.880994468s so far)
2022/11/07 23:58:03 Calculating individual collateral rewards (progress is reported every 100 nodes)
2022/11/07 23:58:14 On Node 100 of 1659 (6.03%)... (11.421791885s so far)
...
2022/11/08 00:01:20 On Node 1600 of 1659 (96.44%)... (3m16.598462676s so far)
2022/11/08 00:01:26 Calculated rewards: 49418180450914095872087 (error = 818 wei)
2022/11/08 00:01:26 Total Oracle DAO RPL rewards: 10589610096624449115622 (10589.610)
2022/11/08 00:01:30 Calculated rewards: 10589610096624449115610 (error = 12 wei)
2022/11/08 00:01:30 Expected Protocol DAO rewards: 10589610096624449115622 (10589.610)
2022/11/08 00:01:30 Actual Protocol DAO rewards: 10589610096624449116454 to account for truncation
2022/11/08 00:01:30 Smoothing Pool Balance: 209598268075128756591 (209.598)
2022/11/08 00:04:20 On Node 104 of 1659 (6.27%)... (2m49.443336528s so far)
...
2022/11/08 00:27:33 On Node 1664 of 1659 (99.70%)... (27m28.373343345s so far)
2022/11/07 16:40:36 1197 / 1659 nodes were eligible for Smoothing Pool rewards
2022/11/07 16:45:45 Checking participation of 4308 minipools for epochs 150015 to 156314
2022/11/07 16:45:45 NOTE: this will take a long time, progress is reported every 100 epochs
2022/11/07 16:47:24 On Epoch 150115 of 156314 (1.59%)... (1m38.552513232s so far)
...
2022/11/07 18:24:31 On Epoch 156215 of 156314 (98.43%)... (1h38m46.325518238s so far)
2022/11/07 18:26:10 Finished participation check (total time = 1h40m24.47206731s)
2022/11/07 18:26:10 Pool staker ETH: 88931841842952006598 (88.932)
2022/11/07 18:26:10 Node Op ETH: 120666426232176749993 (120.666)
2022/11/07 18:26:10 Calculated NO ETH: 120666426232176747457 (error = 2536 wei)
2022/11/07 18:26:10 Adjusting pool staker ETH to 88931841842952009134 to account for truncation
2022/11/07 18:26:10 Finished in 2h36m3.709234237s
2022/11/07 18:26:10 Your Merkle tree's root of 0x278fd75797e2a9eddc128c0199b448877e30d1196c12306bdc95fb731647c18f matches the canonical root! You will be able to use this file for claiming rewards.
2022/11/07 18:26:10 Saving JSON files...
2022/11/07 18:26:10 Saved minipool performance file to rp-minipool-performance-mainnet-2.json
2022/11/07 18:26:10 Saved rewards snapshot file to rp-rewards-mainnet-2.json
2022/11/07 18:26:10 Successfully generated rewards snapshot for interval 2.
```
The key thing to look for here is this message at the end:
```
Your Merkle tree's root of 0x278fd75797e2a9eddc128c0199b448877e30d1196c12306bdc95fb731647c18f matches the canonical root! You will be able to use this file for claiming rewards.
```
If you receive this, then your watchtower can build the tree correctly.
::: danger NOTE
While this proves you can build the tree, you _must_ ensure your Web3.Storage API token has been entered into the Smart Node's configuration so it can upload the resulting tree to IPFS.
:::
### Next Steps
Next up, we'll cover how to monitor your node's performance.
---
url: /pdao/overview.md
---
> For AI agents: the complete documentation index is available at /llms.txt, the full documentation bundle is available at /llms-full.txt.
# Overview
This section outlines the process of setting up your node to participate in on-chain and off-chain ([RocketDash](https://rocketdash.net/vote)) proposals. There's a lot to unpack, so we highly recommend reading through an overview of the [Houston Upgrade](/legacy/houston/whats-new.md). This will help you understand the latest features that enable on-chain governance and how you can participate in shaping the protocol.
## Prerequisites
Before configuring your Smart Node, please make sure you:
- Have set up a node machine (or virtual machine) and secured it (via the [Securing your Node](/node-staking/securing-your-node.md) guide)
- Have the Smart Node [installed](/node-staking/installing/overview.md) and [configured](/node-staking/config/overview.md) on it
- Have a node wallet loaded on your Smart Node
- Synced your Execution and Consensus clients
- Provisioned your node with [a withdrawal address](/node-staking/prepare-node.md#setting-your-primary-withdrawal-address), set up your [fallback clients](/node-staking/fallback.md) (optional), opted into the [Smoothing Pool](/node-staking/fee-distrib-sp.md#the-smoothing-pool) (optional), and configured [MEV](/node-staking/mev.md)
- Created at least one [minipool](/node-staking/create-validator.md)
## There are three addresses involved in voting
- pDAO Signalling Address — will be used as your RocketDash address, if you want to vote directly or if you want to override your delegate's off-chain vote. This address is only used for off-chain voting on RocketDash, not on-chain voting.
- pDAO Delegate Node — if you choose to delegate your vote. You will set this to your delegate's node address. If you choose a delegate they will vote for you on RocketDash and for on-chain proposals.
- Node Address — if you have not delegated your vote or if you wish to override your delegate's on-chain vote you can do this from your node.
## Guides
[The Protocol DAO](/pdao/pdao.md) discusses who and how the pDAO governs Rocket Pool. This page will fill you in on how pDAO duties such as treasury spends can be executed on-chain, along with the role of the all new Security Council. It'll also walk you through the lifecycle of a pDAO proposal and explain some of the measures taken to prevent spam and gun down malicious proposals.
[Voting setup for non-smartnode users](/legacy/houston/nonsmartnode-setup.md) shows non-smartnode users (such as Allnodes users) how to set up voting.
[Checking your Voting Power](/pdao/participate.md#checking-your-voting-power) shows you how to check your node's voting power and delegate. Voting power no longer needs to be initialized.
[Setting your Signalling Address](/pdao/participate.md#setting-your-signalling-address) will walk you through the steps for setting a Signalling Address. It'll allow you to vote on RocketDash using your node's voting power without needing to load your node's private key onto a hot wallet. Make sure you have your Smart Node CLI handy and prepare a address (that isn't your node wallet) for this guide.
[Delegating Voting Power](/pdao/participate.md#delegating-voting-power) is a quick command you can use to delegate voting power instead of voting directly on proposals.
[Viewing the State of a Proposal](/pdao/participate.md#viewing-the-state-of-a-proposal) is a guide on how you can view a list of past and ongoing on-chain proposals. You'll be able to check the state and read up on the details of any given on-chain proposal.
[Voting on a Proposal](/pdao/participate.md#voting-on-a-proposal) shows you how cast a vote on an on-chain proposal. This guide also goes over the four options: **Abstain**, **For**, **Against**, and **Veto**.
[Creating a Proposal](/pdao/participate.md#creating-a-proposal) walks you through the requirements and steps to raise an on-chain proposal.
[Executing a successful proposal](/pdao/participate.md#executing-a-successful-proposal) will show you how to apply the effects of a successful proposal to the Rocket Pool Protocol.
[Claiming Bonds and Rewards](/pdao/participate.md#claiming-bonds-and-rewards) discusses the conditions in which bonds or rewards can be claimed by a Proposer or Challenger.
[Creating and Claiming a recurring treasury spend](/pdao/participate.md#creating-a-recurring-treasury-spend) is a feature which gives the pDAO full control over adding, modifying, and removing recurring payments.
---
url: /pdao/participate.md
---
> For AI agents: the complete documentation index is available at /llms.txt, the full documentation bundle is available at /llms-full.txt.
# Participating in on-chain pDAO Proposals
Any registered node can raise a pDAO proposal at any time, as long as it has [allowed RPL locking](#allowing-rpl-locking) and has enough unlocked staked RPL to cover the proposal bond (see [Creating a Proposal](#creating-a-proposal)). Any node with voting power at the proposal's snapshot block can vote on it. Proposals can be one of
the following types:
- Changing pDAO settings
- One-time treasury spends
- Repeat treasury spends (management committees)
- Security council membership
For greater detail and rationale, refer to [proposal types](https://rpips.rocketpool.net/RPIPs/RPIP-33#proposal-types).
It's important to understand that a pDAO proposal is an on-chain entity that exists to execute changes at the protocol
level.
## Governance Process
A proposal should be forecasted by the governance process before it ends up on-chain.
Changes to the Rocket Pool protocol are proposed, voted, and executed using a strict, yet transparent governance
process. The process begins with an informal discussion of an idea within the Discord community. This idea then
progresses to formal discussions in
the [#governance](https://discordapp.com/channels/405159462932971535/774497904559783947) channel on Discord and
the [DAO Forum](https://dao.rocketpool.net/), where it undergoes thorough research, modeling, and scrutiny in
preparation for a [Rocket Pool Improvement Proposal (RPIP)](https://rpips.rocketpool.net/). Following this, a draft RPIP
is prepared and reviewed by designated RPIP reviewers to ensure its quality and readiness for presentation to the DAO.
The draft proposal is then presented to the DAO on the forum for further review, feedback, and incorporation of any
necessary changes. Once the proposal has been refined based on community input, a poll is raised on the DAO forum to
gauge readiness for finalizing the RPIP text. If the poll passes, indicating community approval, the RPIP is marked
final and ready for an off-chain Protocol DAO vote on [RocketDash](https://rocketdash.net/vote) to determine whether
the proposal should be implemented. RocketDash replaced Snapshot for these votes.
From here, a node operator raises the proposal on-chain (see [Creating a Proposal](#creating-a-proposal)). It then goes
through the on-chain [proposal lifecycle](/pdao/pdao.md#lifecycle-of-a-pdao-proposal): a challenge window and two voting phases.
If the vote passes, anyone can execute the proposal.
A handy dandy visual representation of this process can be found on
the [Rocket Pool website](https://rocketpool.net/governance/process).
## Prerequisite
Please read the [lifecycle of a proposal](/pdao/pdao.md#lifecycle-of-a-pdao-proposal) before proceeding. It'll explain
the differences between all the voting periods and the actions that can be taken during each period.
The rest of this page will walk you through the steps required for participating in on-chain pDAO proposals.
## Checking your Voting Power
Voting power no longer needs to be initialized. To see your node's voting power and delegate, run:
```shell
rocketpool pdao status
```
:::tip NOTE
Whenever a new proposal is created, a voting tree representing a snapshot of the network's voting power and delegate info
is created in conjunction with the new proposal. Your voting power on a proposal is fixed at the block the proposal was
created, so changes made afterwards do not count for that proposal. `rocketpool pdao status` displays your node's voting
power at the latest block, which may or may not match your voting power on a particular proposal.
:::
## Setting your Signalling Address
Setting your signalling address will allow you to participate in off-chain governance votes on
[RocketDash](https://rocketdash.net/vote) from a browser or mobile device, without having to expose node keys to a hot wallet.
:::tip NOTE
RocketDash replaced Snapshot for Rocket Pool's off-chain governance votes. Your signalling address is stored on-chain,
so if you already set one for Snapshot, RocketDash uses it too and you do not need to set it again.
:::
Your signalling address can vote and override your delegate on RocketDash, but it cannot change your delegate. To
delegate, see [Delegating Voting Power](#delegating-voting-power).
There are a few things to prepare:
- Your node's address
- An address you want to use for off-chain voting (signalling address)
You'll be signing a message saying that your node's address can delegate to the new address. This message states your
intent to use your wallet address as a signalling address.
Select which network you're using from one of the tabs below.
**Hoodi Testnet**
If you're trying this out on Hoodi testnet, you can sign on this page:
[https://testnet.node.rocketpool.net/signalling-address](https://testnet.node.rocketpool.net/signalling-address)
**Mainnet**
If you're ready to configure this on mainnet, go here instead:
[https://node.rocketpool.net/signalling-address](https://node.rocketpool.net/signalling-address)
:::danger WARNING
Do not load your node's private key onto a hot wallet. Please choose another account to be your signalling address.
After setting the signalling address, you can use it to vote on RocketDash with your node's voting power.
:::
Start by **connecting the address you want to use as a signalling address** to the website using MetaMask,
WalletConnect, or any of the other methods the website supports. You will then be presented with this dialog to look up
your node address.
Next, you'll enter your node address then click the orange "Find" button. This will check if the address is a registered
node and then bring you to the next step.
:::tip TIP
**Make sure you have the correct node address before doing this!** if you need to confirm your node's address, you can
quickly retrieve it via the CLI using the `rocketpool node status` command.
:::
Once you've signed in and confirmed your node address, you'll see your **signalling address**. It should be the
same as the account you've signed into the site with. Double check that this is correct before proceeding. Once you're
confident that you're signed into the desired account, click the orange "Sign Message" button. You'll see a prompt in
your wallet extension app to sign the following message:
```
`node address` may delegate to me for Rocket Pool governance
```
Signing won't cost you any gas but setting will. After you sign, the frontend will give you a command to paste into the
smartnode. Go ahead and paste it into your smartnode's CLI and follow the prompted steps. The command should look
something like this:
```shell
rocketpool pdao set-signalling-address
`signalling address`
`signature`
```
If you see this message in your CLI, you're all set!
```
The node's signalling address was successfully set to `signalling address`
```
:::tip TIP
Don't worry if you accidentally close the site or lose track of the command. You can simply repeat the steps and **sign
again using the same node address and signalling address**. The frontend uses `signer.Signmessage()` from the ethers
library, which means your signature is deterministic given the same input.
Click [here](https://docs.ethers.org/v6/api/providers/#cid_865) to learn more.
:::
Clearing your signalling address is pretty easy, just use this command in the CLI:
```shell
rocketpool pdao clear-signalling-address
```
## Allowing RPL Locking
You may ignore this step if you are only interested in voting on a proposal. Allowing RPL locking is only required for
those who wish to propose or challenge a proposal.
RPL locking is required for proposing and challenging. By default, locking RPL for any purpose, will be disabled. Node
operator's will opt-in to performing governance activities by enabling the locking of RPL from their node or primary
withdrawal address. You can do so using this command in the Smart Node:
```shell
rocketpool node allow-rpl-locking
```
This will prompt you to allow the locking of RPL when creating or challenging governance proposals. Conversely you can
use the following command to opt-out of RPL locking:
```shell
rocketpool node deny-rpl-locking
```
::: tip NOTE
Locked RPL acts the same way as regular staked RPL for the purposes of rewards, voting, and collateral requirements.
Locked RPL is not counted towards thresholds for withdrawing RPL.
:::
## Delegating Voting Power
A node operator can elect to delegate their voting power to another node operator. The only requirement is that your
delegate is a registered node.
To delegate your voting power to another node, run this command from your node:
```shell
rocketpool pdao set-voting-delegate `address`
```
Your delegate votes for you on both on-chain proposals and off-chain votes on [RocketDash](https://rocketdash.net/vote).
Delegation can only be set from your node. You cannot delegate from your signalling address or on RocketDash.
::: tip NOTE
If you've delegated your voting power to another node operator, you can reset this by setting the delegate address to
your own node's address.
:::
### When to Vote
On-chain proposals have two voting phases. Which phase you should vote in depends on whether you have delegated your
voting power. These phases apply to on-chain proposals only. Off-chain votes on RocketDash do not have them.
- **Pending:** no one can vote yet.
- **Phase 1:** if you have not delegated your vote, this is when you vote. If you are a delegate, your vote also counts
for every node that delegated to you, so vote in phase 1. Otherwise their voting power only counts if they vote
themselves in phase 2. If you have delegated your vote, your delegate votes for you in this phase.
- **Phase 2:** if you have delegated your vote and disagree with how your delegate voted, or your delegate did not vote,
you can vote yourself now. Your vote replaces your delegate's vote for your share only. Anyone who has not voted yet
can also vote in phase 2, but the vote only counts their own voting power, even for a delegate.
On Mainnet, a new proposal is pending for **one week**, then phase 1 lasts **one week** and phase 2 lasts **one week**.
These durations are pDAO settings and can be changed by a vote. Run `rocketpool pdao settings` to see the current values.
A node can vote only once on a proposal, in either phase.
| You are... | When to vote |
| ---------------------------------------------------------------- | --------------------------------------------------------------------------------------------------------------------------------------------- |
| Voting for yourself (the default) | Phase 1. If you miss it, you can still vote in phase 2. |
| A delegate | **Phase 1.** If you miss phase 1, the voting power delegated to you is not counted. Your delegators can still vote for themselves in phase 2. |
| Delegated to another node, and you agree with their vote | You do not need to vote. |
| Delegated to another node, and you disagree or they did not vote | Phase 2. |
To see which phase a proposal is in and whether you or your delegate have voted, run:
```shell
rocketpool pdao proposals details
```
Check the `State`, `Phase 1 end`, `Phase 2 end`, `Node has voted` and `Delegate has voted` lines. You can also see the
phase of every proposal on [RocketDash](https://rocketdash.net/pdao-proposals).
When you vote with `rocketpool pdao proposals vote`, the Smart Node casts the right kind of vote for the current phase
automatically.
## Voting on a Proposal
During a voting period, **Node Operators** and **Delegates** can cast a vote with one of four options:
```
1. Abstain: The voter's voting power is contributed to quorum but is neither for nor against the proposal.
2. For: The voter votes in favor of the proposal being executed.
3. Against: The voter votes against the proposal being executed.
4. Veto: The voter votes against the proposal as well as indicating they deem the proposal as spam or malicious.
```
Their voting power will be applied to the option of their choosing. Voting power is the square root of your node's staked RPL, counting staked RPL only up to a cap set by the
`node.voting.power.stake.maximum` pDAO setting (currently 150% of your bonded ETH, as of November 2026).
A more detailed reading can be found in
the [rocketpool-research repo](https://github.com/rocket-pool/rocketpool-research/blob/master/Protocol%20DAO/kane/pDAO%20Replacement/pDAO.md#overview-of-on-chain-voting).
::: tip NOTE
A node may vote once and only once on a proposal, so choose carefully. To learn which phase you should vote in, see
[When to Vote](#when-to-vote).
:::
Use this command to cast a vote:
```shell
rocketpool pdao proposals vote
```
You'll be prompted to select a proposal to vote on if there is at least one proposal in an active voting phase.
The menu should display all of the proposals your node is eligible to vote on:
```
1: proposal 71 (message: 'invite test-member', payload: proposalSecurityInvite(test-member,0xBdbcb42DD8E39323a395B2B72d2c8E7039f1F145), phase 1 end: 14 Mar 24 05:40 UTC, vp required: 0.00, for: 0.00, against: 0.00, abstained: 0.00, veto: 0.00, proposed by: 0x681B8BBf08708e64694005c7Dc307b381b4D1A7D)
2: proposal 72 (message: 'replace langers-not-his-eoa (0xaC1396c21Eaf6630113516C69d63b7CB59B98b3E) on the security council with tpan (0x6E9E4Cc0A8172349E049128574E1fb85B8D3CE9E)', payload: proposalSecurityReplace(0xaC1396c21Eaf6630113516C69d63b7CB59B98b3E,tpan,0x6E9E4Cc0A8172349E049128574E1fb85B8D3CE9E), phase 1 end: 14 Mar 24 05:40 UTC, vp required: 0.00, for: 0.00, against: 0.00, abstained: 0.00, veto: 0.00, proposed by: 0xe2fC31d61E28BB16c0857D4682AB3616FA7A793d)
3: proposal 73 (message: 'set proposal.vote.delay.time', payload: proposalSettingUint(rocketDAOProtocolSettingsProposals,proposal.vote.delay.time,60), phase 1 end: 14 Mar 24 05:41 UTC, vp required: 0.00, for: 0.00, against: 0.00, abstained: 0.00, veto: 0.00, proposed by: 0x681B8BBf08708e64694005c7Dc307b381b4D1A7D)
```
After selecting an option, you'll be asked how you want to cast your vote.
```
How would you like to vote on the proposal?
1: Abstain
2: In Favor
3: Against
4: Veto
```
Selecting an option will then display your voting power, and then prompt you to send the transaction:
```
Your current voting power: 20123617964
+============== Suggested Gas Prices ==============+
| Avg Wait Time | Max Fee | Total Gas Cost |
| 15 Seconds | 76 gwei | 0.0176 to 0.0265 ETH |
| 1 Minute | 56 gwei | 0.0127 to 0.0190 ETH |
| 3 Minutes | 56 gwei | 0.0127 to 0.0190 ETH |
| >10 Minutes | 56 gwei | 0.0127 to 0.0190 ETH |
+==================================================+
These prices include a maximum priority fee of 2.00 gwei.
Please enter your max fee (including the priority fee) or leave blank for the default of 56 gwei:
```
You've successfully voted on the proposal once the transaction is included in the block! At this point, you may use
`rocketpool pdao proposals details ` to view the state of the proposal. A proposal needs to reach
`proposal.quorum` **voting power required** and a majority **voting power for** for it to be successful.
```
Voting power required: 140970562215
Voting power for: 197980809837
Voting power against: 0
Voting power abstained: 0
Voting power against: 0
Node has voted: In Favor
```
For the example above to pass, the voting power needs to exceed a quorum of `140970562215` voting power. There is
`197980809837` voting power in favor and no votes against or abstained. The proposal is poised for success and ready
for
execution by the end of `proposal.vote.phase2.time`.
## Viewing the State of a Proposal
Every proposal is assigned a `proposalID`. In this case, our proposal to invite `0xBdbc...` to the security council is
represented with `ID 71`. There are a few ways to view the state of the proposal. One method will display a list of
every pdao proposal along with their state (pending, succeeded, executed, etc). The second method displays in-depth
details about a specific proposal.
**Viewing a List of Proposals**
To list all proposals, use the following command:
```shell
rocketpool pdao proposals list
```
This will display a list of all proposals and their state
```
1 Pending proposal(s):
71: invite test-member (0xBdbcb42DD8E39323a395B2B72d2c8E7039f1F145) to the security council - Proposed by:
0x681B8BBf08708e64694005c7Dc307b381b4D1A7D
Succeeded proposal(s):
Executed proposal(s):
Destroyed proposal(s):
Quorum not Met proposal(s):
Defeated proposal(s):
Expired proposal(s):
```
Here we can see that our proposal `invite test-member` has an ID of 71 and is in the pending state. In this state,
[challengers](/pdao/pdao.md#challenge-process) can dispute the validity of the
merkle pollard (used to calculate voting power) supplied by the proposer. When `proposal.vote.delay.time` ends,
the proposal will transition into active voting phases. Feel free to review [lifecycle of a
proposal](/pdao/pdao.md#lifecycle-of-a-pdao-proposal) for a refresher.
**Viewing Proposal Details**
Now that you have the proposal ID, you can view the status of your proposal using this command:
```shell
rocketpool pdao proposals details `proposal-id`
```
This is where you can view all the information in regards to a specific proposal. For example, the execution
payload, what phase the proposal is in, and vote direction.
```
Proposal ID: 71
Message: invite test-member (0xBdbcb42DD8E39323a395B2B72d2c8E7039f1F145) to the security council
Payload: proposalSecurityInvite(test-member,0xBdbcb42DD8E39323a395B2B72d2c8E7039f1F145)
Payload (bytes):
f944c19f0000000000000000000000000000000000000000000000000000000000000040000000000000000000000000bdbcb42dd8e39323a395b2b72d2c8e7039f1f145000000000000000000000000000000000000000000000000000000000000000b746573742d6d656d626572000000000000000000000000000000000000000000
Proposed by: 0x681B8BBf08708e64694005c7Dc307b381b4D1A7D
Created at: 12 Mar 24 06:15 UTC
State: Pending
Voting start: 12 Mar 24 06:20 UTC
Challenge window: 30m0s
Voting power required: 90943818825
Voting power for: 0
Voting power against: 0
Voting power abstained: 0
Voting power against: 0
Node has voted: no
```
NOTE
The state of this sample proposal is `Pending`. This indicates that the proposal can be challenged, before
moving onto `Active (Phase 1)`. No voting can take place during the `Pending` state.
## Creating a Proposal
In order to be eligible to propose, a node must meet a few requirements:
- Is a registered Rocket Pool node
- Has allowed [RPL locking](/pdao/participate.md#allowing-rpl-locking)
- Has an RPL stake (minus any already locked RPL) of at least the proposal bond
Proposals exist to change parameters and execute code at the protocol level! There should be discussion and consensus
through the [governance](/pdao/participate.md#governance-process) process before a proposal is created on chain.
Use the command `rocketpool pdao propose` to bring up a menu of options
```
COMMANDS:
rewards-percentages, rp Propose updating the RPL rewards allocation percentages for node operators, the Oracle DAO, and the Protocol DAO
one-time-spend, ots Propose a one-time spend of the Protocol DAO's treasury
recurring-spend, rs Propose a recurring spend of the Protocol DAO's treasury
recurring-spend-update, rsu Propose an update to an existing recurring spend plan
security-council, sc Modify the security council
setting, s Make a Protocol DAO setting proposal
submit-batch, sb Submit a single proposal that changes multiple Protocol DAO settings from a JSON file
```
Each of these commands will prompt you with a list of inputs to create your desired proposal. Setting propose commands accept `--to-json` to write or append a setting change to a JSON file instead of submitting a transaction. When the file is ready, submit it with `rocketpool pdao propose submit-batch`.
In this guide, we'll
invite a node to the security council to serve as an example. To raise a proposal to invite a node to the security
council, you would use the command:
```shell
rocketpool pdao propose security-council invite
```
Keep in mind that this step will have some slight variation depending on the type of proposal. This particular command:
`rocketpool pdao propose security-council invite` will prompt you to enter an ID followed by a member address.
```
Please enter an ID for the member you'd like to invite: (no spaces)
test-member
Please enter the member's address:
0xBdbcb42DD8E39323a395B2B72d2c8E7039f1F145
... gas estimations ...
Are you sure you want to propose inviting test-member (0xBdbcb42DD8E39323a395B2B72d2c8E7039f1F145) to the security council? [y/n]
```
After this is included in a block, a pDAO proposal will be created! The proposal will enter
the [vote delay period](/pdao/pdao.md#vote-delay-period) upon creation.
## Executing a Successful Proposal
Congrats! Your proposal has passed! Now all that's left to do is to execute the proposal. Keep in mind that anybody
can
be the executor to a proposal. To execute a successful proposal, type in the command:
```shell
rocketpool pdao proposals execute
```
Selecting an option will prompt you to send a transaction. Once this transaction is included in a block, the change
will
be applied to the Rocket Pool protocol!
```
Please select a proposal to execute:
1: All available proposals
2: proposal 71 (invite test-member (0xBdbcb42DD8E39323a395B2B72d2c8E7039f1F145) to the security council)',
proposalSecurityInvite(test-member,0xBdbcb42DD8E39323a395B2B72d2c8E7039f1F145)
```
## Claiming Bonds and Rewards
Proposers or Challengers may claim their bonds upon conclusion of a proposal. Depending on the outcome of a proposal,
a Proposer or Challenger may or may not be able to claim their `proposal.bond` and `proposal.challenge.bond`.
Here's what happens to bonds for each outcome:
| Outcome | Proposer | Challengers |
| ------------------------------------------------------------------------ | ----------------------------------------------------------------------------------------- | --------------------------------------------------------------------------------------------------------------------------------------- |
| **Defeated by a challenge** | Loses their bond | Challengers who helped defeat the proposal split the proposer's bond, minus a 20% burn. Every challenger also gets their own bond back. |
| **Vetoed** | Loses their bond. It's burned when anyone runs `rocketpool pdao proposals finalize`. | — |
| **Any other outcome** (executed, expired, voted down, or quorum not met) | Gets their bond back, plus the bond of each challenge they responded to, minus a 20% burn | Challenges the proposer responded to: bond lost. Challenges the proposer didn't respond to: bond back. |
A challenger "helped defeat the proposal" if they challenged an index the proposer couldn't respond to, along the path that led to the defeat.
Use this command to claim bonds:
```shell
rocketpool pdao claim-bonds
```
This will display every proposal you're eligible to claim bonds from. You can either claim bonds from a specified
proposal, or you can claim bonds and rewards from all eligible proposals.
```
Please select a proposal to unlock bonds / claim rewards from:
1: All available proposals
2: Proposal 42 (proposer: true, unlockable: 21.00 RPL, rewards: 0.00 RPL)
3: Proposal 43 (proposer: true, unlockable: 21.00 RPL, rewards: 0.00 RPL)
4: Proposal 44 (proposer: true, unlockable: 21.00 RPL, rewards: 0.00 RPL)
5: Proposal 46 (proposer: true, unlockable: 21.00 RPL, rewards: 0.00 RPL)
6: Proposal 47 (proposer: true, unlockable: 21.00 RPL, rewards: 0.00 RPL)
7: Proposal 48 (proposer: true, unlockable: 21.00 RPL, rewards: 0.00 RPL)
8: Proposal 49 (proposer: true, unlockable: 21.00 RPL, rewards: 0.00 RPL)
```
Once you've selected an option, you'll be prompted with the network's current gas costs recommendations; confirm your
gas price selection and follow the rest of the prompts.
```
+============== Suggested Gas Prices ==============+
| Avg Wait Time | Max Fee | Total Gas Cost |
| 15 Seconds | 26 gwei | 0.1591 to 0.2387 ETH |
| 1 Minute | 21 gwei | 0.1261 to 0.1891 ETH |
| 3 Minutes | 21 gwei | 0.1261 to 0.1891 ETH |
| >10 Minutes | 21 gwei | 0.1261 to 0.1891 ETH |
+==================================================+
These prices include a maximum priority fee of 2.00 gwei.
Please enter your max fee (including the priority fee) or leave blank for the default of 21 gwei:
Using a max fee of 21.00 gwei and a priority fee of 2.00 gwei.
Are you sure you want to claim bonds and rewards from 7 proposals? [y/n]
```
Note that if you select the first option to claim all available proposals, they will each execute individually and not
as one transaction.
## Creating a Recurring Treasury Spend
You'll need to prepare a few inputs to create a recurring treasury spend:
- A contract name
- The recipient's address
- Amount of RPL to send per period
- The start time for the recurring payment (as a UNIX timestamp)
- The length of each payment period in hours / minutes / seconds (e.g., 168h0m0s)
- Number of payment periods
::: tip INFO
The recipient will need to keep note of the contract name in order to claim payments. Don't worry though, as this
information is stored and can be retrieved using the command `rocketpool pdao proposals details `
:::
To raise a proposal to set up a recurring treasury spend, use the following smartnode command and follow the prompts:
```shell
rocketpool pdao propose recurring-spend
```
Here's what it looks like all together:
```
Please enter a contract name for this recurring payment:
test-recurring-spend
Please enter a recipient address for this recurring payment:
0x681B8BBf08708e64694005c7Dc307b381b4D1A7D
Please enter an amount of RPL to send to 0x681B8BBf08708e64694005c7Dc307b381b4D1A7D per period:
1
Your value will be multiplied by 10^18 to be used in the contracts, which results in:
[1000000000000000000]
Please make sure this is what you want and does not have any floating-point errors.
Is this result correct? [y/n]
y
Please enter the time that the recurring payment will start (as a UNIX timestamp):
1717935233
The provided timestamp corresponds to 2024-06-09 12:13:53 +0000 UTC - is this correct? [y/n]
y
Please enter the length of each payment period in hours / minutes / seconds (e.g., 168h0m0s):
720h
Please enter the total number of payment periods:
24
```
Once you've entered all the required inputs, a proposal to create a recurring payment will be raised. When the pDAO
passes and executes this proposal, the recipient is allocated `1 RPL` starting at `2024-06-09 12:13:53 +0000 UTC`
every
`720 hours` for a total of `24 payments`.
## Claiming a Recurring Treasury Spend
Claiming recurring payments should be pretty simple! Navigate to our frontend
tool [here](https://node.rocketpool.net/claim-recurring-payments) to do so. If you're trying this out on
Hoodi
testnet, use [this](https://testnet.node.rocketpool.net/stake-rpl-on-behalf-of-node) link instead.
Once you're on the site, click the **connect wallet** button. Please read through and accept the Terms of Service &
Privacy Policy, this will enable different ways to connect, then click connect **metamask**.
MetaMask will prompt you to select an account to connect to the website. After you've signed in, you'll need to enter
the **contract name**. Doing so will display all the relevant details. Make sure you double check the recipient's
address. Anybody can call the claim function, but each payment contract will have a designated recipient to disperse
RPL
towards.

You can claim your payments at any time, you'll just get the total unclaimed RPL up until the most recent period.
Alternatively you can wait until all periods have passed to collect all at once and save on gas.
Just hit the big orange claim button when you're ready and review the transaction in metamask (or your preferred
wallet). Once that's done, you're all set!
---
url: /pdao/pdao.md
---
> For AI agents: the complete documentation index is available at /llms.txt, the full documentation bundle is available at /llms-full.txt.
# The Protocol DAO (pDAO)
The Rocket Pool Protocol DAO (pDAO) is responsible for shaping the direction of the protocol and is run by RPL governance. Its members and their voting power are made up of node operators, big and small, all of which are directly participating in the protocol. It serves the Rocket Pool community at large, including rETH holders, Node Operators, and RPL holders. The pDAO prioritizes the safety of the Rocket Pool protocol and the health of the Ethereum Network. For an explicit definition of who and what the pDAO is, feel free to take a look at the [pDAO charter](https://rpips.rocketpool.net/RPIPs/RPIP-23).
## New pDAO features in Houston
### On-chain execution of pDAO responsibilities
The Houston Upgrade introduces an on-chain replacement for the pDAO governance system's execution process. It uses an optimistic fraud-proof system that allows any node operator to raise proposals and vote on proposals to adjust "pDAO protocol parameters" and spend treasury funds. To see a comprehensive list of pDAO controllable parameters, click [here](https://rpips.rocketpool.net/RPIPs/RPIP-33#parameter-table).
Pre-Houston, the core team was responsible for executing pDAO duties at the behest of the community governance process. For example, the team carries out the monthly IMC and GMC payments as per the governance voted payment schedules. The plan was for this power to reside with the team temporarily until a new power structure is set up to take over these responsibilities. Houston removes this dependency on the team, making the protocol more decentralized and trustless.
### Security Council
The Houston upgrade also includes a new security council to help react quickly in the event of any potential issues with the protocol. These members can be elected by the pDAO and have the ability to propose and execute changes without delay. The pDAO has the power to elect and remove members from the security council. It's a serious role and the pDAO should develop strong entry requirements and processes for flushing stale members. The pDAO guardian will be the security council's sole member at the start of Houston.
### Recurring Treasury Spends
RPL has a 5% inflation rate. 47.5% of this inflation is currently directed towards the pDAO, set by [RPIP-81](https://rpips.rocketpool.net/RPIPs/RPIP-81). The pDAO can use these funds for a variety of purposes. For example, incentives such as liquidity provider (LP) bonuses, grants and bounties for 3rd party improvements and projects, and funding the development of the Rocket Pool protocol. The Houston upgrade also introduces a new feature that enables recurring treasury payments made to a specified beneficiary each rewards period.
## Protocol DAO (pDAO) proposals
Any registered node can raise a pDAO proposal at any time, as long as it has [allowed RPL locking](/pdao/participate.md#allowing-rpl-locking) and has enough unlocked staked RPL to cover the proposal bond. Any node with voting power at the proposal's snapshot block can vote on it. Proposals can be one of the following types:
- Changing pDAO settings
- One-time treasury spends
- Repeat treasury spends (management committees)
- Security council membership
For greater detail and rationale, refer to [proposal types](https://rpips.rocketpool.net/RPIPs/RPIP-33#proposal-types). It's important to understand that a pDAO proposal is an on-chain entity that exists to execute changes at the protocol level.
## Lifecycle of a pDAO proposal
A proposal should be forecasted by the [governance process](/pdao/participate.md#governance-process) before it ends up on-chain. It consists of 4 Periods, all of which are pDAO [controllable parameters](https://rpips.rocketpool.net/RPIPs/RPIP-33#parameter-table):
- Vote Delay Period: `proposal.vote.delay.time`
- Vote Phase 1: `proposal.vote.phase1.time`
- Vote Phase 2: `proposal.vote.phase2.time`
- Execution: `proposal.execute.time `

### Vote Delay Period
In order to decide the outcome of a proposal, the protocol must know the quorum required. A proposer calculates this value off-chain and submits it alongside their proposal. The value is optimistically accepted, but in the case of fraud, verifiers can perform a challenge/response process to prove the value is incorrect. Invalid proposals are then discarded.
A few reasons why proposers and challengers are required to lock RPL.
- `proposal.bond` incentivizes valid proposals and disincentivizes spam.
- `proposal.challenge.bond` incentivizes the takedown of invalid/malicious proposals.
Challengers supply an index into the Merkle-sum tree that they are alleging is incorrect. Any node operator can participate in challenging fraudulent proposals (and earn a reward in doing so). Feel free to read about the [pDAO Challenge Process](/pdao/pdao.md#challenge-process) if you're interested in opting in. A proposal not defeated in a challenge by the end of the vote delay period will enter voting stages.
::: tip NOTE
When `proposal.vote.delay.time` expires, the proposal is no longer able to be challenged or defeated.
:::
### Vote Period 1
During a voting period, Node Operators and Delegates can cast a vote with one of four options:
```
1. Abstain: The voter's voting power is contributed to quorum but is neither for nor against the proposal.
2. For: The voter votes in favor of the proposal being executed.
3. Against: The voter votes against the proposal being executed.
4. Veto: The voter votes against the proposal as well as indicating they deem the proposal as spam or malicious.
```
Their voting power will be included in the option of their choosing.
This can be done using the command:
```shell
rocketpool pdao proposals vote
```
If veto votes reach the veto quorum (as defined by the `proposal.veto.quorum` parameter) by the end of vote period 2, the proposal is vetoed and the proposer loses their bond. Veto votes also count as votes against. This is to dissuade spam, low quality proposals, or proposals that have not gone through off-chain processes first. The smartnode command `rocketpool pdao proposals finalize` is used to finalize a vetoed proposal by burning the proposer's locked RPL bond.
The duration of period 1 is determined by the `proposal.vote.phase1.time` parameter. The proposal will transition to phase 2 regardless of whether `proposal.quorum` is reached or not.
### Vote Period 2
Delegates can vote during vote period 2, but their vote is only worth their **local voting power**. Voters who didn't vote in period 1 will still be able to cast a vote during period 2. Node operators who disagree with their delegate's choice will have the opportunity to overturn their delegate's vote.
The process of overturning a vote is pretty simple, just call `rocketpool pdao proposals vote` during vote period 2 and follow the prompts. Your own voting power is removed from your delegate's vote and counted toward your choice instead.
The result of a proposal is concluded when vote period 2 is over. In order for a result to be determined (and executed), `proposal.quorum` total voting power must be reached by the end of `proposal.vote.phase2.time`. If quorum is met and consensus is reached, the proposal will pass the voting periods and be marked as successful.
::: tip NOTE
No further actions can be taken in the event that `proposal.quorum` is not met. A proposal is considered concluded and final if quorum is not met.
:::
### Execution
Once both voting periods have passed and the proposal is successful, the proposal can be executed and the change (defined by the payload) is applied to the Rocket Pool protocol. To execute a proposal, use the command:
```shell
rocketpool pdao proposals execute
```
You will be prompted to select a proposal to execute, the proposal will be applied to the protocol after this step!
After the proposal has passed the voting periods, the proposer may [claim](/pdao/participate.md#claiming-bonds-and-rewards) their locked RPL bond, unless the proposal was defeated by a challenge or vetoed.
::: tip NOTE
There is a window `proposal.execute.time` where a proposal can be executed. A proposal will expire if this timer reaches its end.
:::
And that's it! Keep in mind that all of the variables mentioned above are pDAO controllable parameters. Click [here](https://rpips.rocketpool.net/RPIPs/RPIP-33#parameter-table) for a comprehensive list of every parameter the pDAO has authority to change using on-chain proposals.
## Challenge Process
The complete network voting power tree is stored off-chain due to gas limits. When a user submits a new proposal, they are responsible for constructing the network voting tree at target block number. This tree is generated off-chain but verifiable via Merkle roots that are submitted on-chain. The protocol relies on **verifiers** to check the details submitted by the proposer.
Any node can participate in tracking and verifying the correctness of proposals. To opt into this responsibility, use the command `rocketpool service config`, navigate to the **Smart Node and TX Fee Settings** menu, and check the box `Enable PDAO Proposal Checker`.

When this setting is enabled, the node will check for new proposals, verify their correctness, and submit challenges to invalid proposals. The prerequisites are that [RPL Locking](/pdao/participate.md#allowing-rpl-locking) is enabled and your node has enough unlocked staked RPL to cover `proposal.challenge.bond` for each challenge.
This check runs every 5 minutes in conjunction with a few other node related duties. We'll run through an example of what challenging a fraudulent proposal looks like. We can use the smartnode command `rocketpool service logs node` to monitor the progress:
```
rocketpool_node | 2024/04/05 02:19:16 Checking for Protocol DAO proposal challenges to defend...
rocketpool_node | 2024/04/05 02:19:26 Checking for Protocol DAO proposals to challenge...
rocketpool_node | 2024/04/05 02:19:26 [Network Tree] Couldn't load network tree for block 1283202 from disk, so it must be regenerated.
rocketpool_node | 2024/04/05 02:19:26 [PDAO Proposals] Network tree for block 1283202 didn't exist, creating one.
rocketpool_node | 2024/04/05 02:19:26 [Voting Info Snapshot] Couldn't load network tree for block 1283202 from disk, so it must be regenerated.
rocketpool_node | 2024/04/05 02:19:26 [PDAO Proposals] Voting info snapshot for block 1283202 didn't exist, creating one.
rocketpool_node | 2024/04/05 02:19:26 Proposal 177 does not match the local tree artifacts and must be challenged.
rocketpool_node | 2024/04/05 02:19:26 [Voting Info Snapshot] Loaded file [vi-1283202.json.zst].
rocketpool_node | 2024/04/05 02:19:26 [Network Tree] Loaded file [network-tree-1283202.json.zst].
rocketpool_node | 2024/04/05 02:19:26 Submitting challenge against proposal 177, index 5...
rocketpool_node | 2024/04/05 02:19:26 This transaction will use a max fee of 16.067134 Gwei, for a total of up to 0.003252 - 0.004878 ETH.
rocketpool_node | 2024/04/05 02:19:26 Transaction has been submitted with hash 0x327e59e398bf2141a0d9273947d1da5c255606c45afaca428ab092186300eac2.
rocketpool_node | 2024/04/05 02:19:26 You may follow its progress by visiting:
rocketpool_node | 2024/04/05 02:19:26 https://holesky.etherscan.io/tx/0x327e59e398bf2141a0d9273947d1da5c255606c45afaca428ab092186300eac2
```
We can see that our node has caught a fraudulent proposal and started the process of challenging it. Block `1283202` is the block in which proposal 177 was raised, which means voting power for this proposal will be calculated at block `1283202`. If you're interested in seeing what these **Voting Info Snapshots** look like, you can locate them in this directory: `~/.rocketpool/data/voting`
Because the proposer was caught submitting incorrect voting info, our node makes a contract call `Function: createChallenge` on proposal 177 at index 5 and waits for the proposer to respond to the challenge.
```
rocketpool3_node | 2024/04/05 02:56:51 Checking for Protocol DAO proposal challenges to defend...
rocketpool3_node | 2024/04/05 02:57:01 Checking for Protocol DAO proposals to challenge...
rocketpool3_node | 2024/04/05 02:57:01 [Network Tree] Loaded file [network-tree-1283202.json.zst].
rocketpool3_node | 2024/04/05 02:57:01 Proposal 177 does not match the local tree artifacts and must be challenged.
rocketpool3_node | 2024/04/05 02:57:01 [Voting Info Snapshot] Loaded file [vi-1283202.json.zst].
rocketpool3_node | 2024/04/05 02:57:01 [Network Tree] Loaded file [network-tree-1283202.json.zst].
rocketpool3_node | 2024/04/05 02:57:01 Proposal 177 has been defeated with node index 20, submitting defeat...
rocketpool3_node | 2024/04/05 02:57:01 This transaction will use a max fee of 19.078965 Gwei, for a total of up to 0.002061 - 0.003091 ETH.
rocketpool3_node | 2024/04/05 02:57:01 Transaction has been submitted with hash 0x8cc01dff37205dc98e53f4e9fae7f3c802ecc1c69a01f53e734115a73401287e.
rocketpool3_node | 2024/04/05 02:57:01 You may follow its progress by visiting:
rocketpool3_node | 2024/04/05 02:57:01 https://holesky.etherscan.io/tx/0x8cc01dff37205dc98e53f4e9fae7f3c802ecc1c69a01f53e734115a73401287e
rocketpool3_node |
rocketpool3_node | 2024/04/05 02:57:01 Waiting for the transaction to be validated...
rocketpool3_node | 2024/04/05 02:57:13 Successfully defeated proposal.
```
Since the proposer's voting info is incorrect, it won't be able to respond to the challenge in time (determined by `proposal.challenge.period`). The proposal is considered defeated at this point. When the proposal is defeated, our node automatically makes the contract call `defeatProposal` on proposal 177 at index 5 to end the proposal.
::: tip NOTE
Challengers who participate in defeating the proposal are paid a proportional amount of the proposer's bond if they submit an index proven to be incorrect, minus a 20% burn. All other challengers receive their bond back only.
:::
Now that the proposal is defeated, our node (the challenger) can [claim](/pdao/participate.md#claiming-bonds-and-rewards) their original RPL bond as well as its share of the proposer's RPL bond as a reward for defeating a fraudulent proposal. 20% of that reward is burned.
If you're curious to dig into the details of the pDAO proposal and challenge system, take a look at the [technical specifications](https://github.com/rocket-pool/rocketpool-research/blob/houston/Protocol%20DAO/pdao-prop-challenge-spec.md#draft-protocol-dao-proposal-challenge-system-specification). Feel free to skip to this section on the [challenge process](https://github.com/rocket-pool/rocketpool-research/blob/houston/Protocol%20DAO/pdao-prop-challenge-spec.md#challenge-process) if you're interested in studying an example that goes into low level details.
---
url: /protocol/contracts-integrations.md
---
> For AI agents: the complete documentation index is available at /llms.txt, the full documentation bundle is available at /llms-full.txt.
# 🤝 Contracts & Integrations
Do you love RPL and rETH? Us too! So we put together a list of integrations and services, as well as official contract deployments, to help you discover new places these assets can be used!
If you would like to contribute by helping integrate Rocket Pool into more services and protocols, reach out on [Discord](https://discord.gg/MYrazaZZC4)!
## Key Protocol Contracts
| Chain | Contract | Address |
| ------- | -------- | --------------------------------------------------------------------------------------------------------------------------- |
| Mainnet | Deposit | [0xCE15294273CFb9D9b628F4D61636623decDF4fdC](https://etherscan.io/address/0xCE15294273CFb9D9b628F4D61636623decDF4fdC) |
| | Storage | [0x1d8f8f00cfa6758d7bE78336684788Fb0ee0Fa46](https://etherscan.io/address/0x1d8f8f00cfa6758d7bE78336684788Fb0ee0Fa46) |
| Hoodi\* | Deposit | [0x425E6f83e27f1676AD78BC39dA79C2C7b33d3Fd8](https://hoodi.etherscan.io/address/0x425E6f83e27f1676AD78BC39dA79C2C7b33d3Fd8) |
| | Storage | [0x594Fb75D3dc2DFa0150Ad03F99F97817747dd4E1](https://hoodi.etherscan.io/address/0x594Fb75D3dc2DFa0150Ad03F99F97817747dd4E1) |
Within the protocol, the Storage contract is used to find all the other deployed contract addresses as needed (see this [example](/protocol/contracts-usage.md#interacting-with-rocket-pool)).
See [All Active Deployed Protocol Contracts](#all-active-deployed-protocol-contracts) below for a full list of addresses.
\* Testnet
## Token Contracts
| Chain | Asset | Address |
| ---------- | ----- | ------------------------------------------------------------------------------------------------------------------------------------------------------------------- |
| Mainnet | RPL | [0xD33526068D116cE69F19A9ee46F0bd304F21A51f](https://etherscan.io/token/0xd33526068d116ce69f19a9ee46f0bd304f21a51f) |
| | rETH | [0xae78736Cd615f374D3085123A210448E74Fc6393](https://etherscan.io/token/0xae78736cd615f374d3085123a210448e74fc6393) |
| Arbitrum | RPL | [0xb766039cc6db368759c1e56b79affe831d0cc507](https://arbiscan.io/token/0xb766039cc6db368759c1e56b79affe831d0cc507) |
| | rETH | [0xec70dcb4a1efa46b8f2d97c310c9c4790ba5ffa8](https://arbiscan.io/token/0xec70dcb4a1efa46b8f2d97c310c9c4790ba5ffa8) |
| Optimism | RPL | [0xc81d1f0eb955b0c020e5d5b264e1ff72c14d1401](https://optimistic.etherscan.io/token/0xc81d1f0eb955b0c020e5d5b264e1ff72c14d1401) |
| | rETH | [0x9bcef72be871e61ed4fbbc7630889bee758eb81d](https://optimistic.etherscan.io/token/0x9bcef72be871e61ed4fbbc7630889bee758eb81d) |
| zkSync Era | RPL | [0x1CF8553Da5a75C20cdC33532cb19Ef7E3bFFf5BC](https://explorer.zksync.io/address/0x1CF8553Da5a75C20cdC33532cb19Ef7E3bFFf5BC) |
| | rETH | [0x32Fd44bB869620C0EF993754c8a00Be67C464806](https://explorer.zksync.io/address/0x32Fd44bB869620C0EF993754c8a00Be67C464806) |
| Polygon | RPL | [0x7205705771547cf79201111b4bd8aaf29467b9ec](https://polygonscan.com/token/0x7205705771547cf79201111b4bd8aaf29467b9ec) |
| | rETH | [0x0266F4F08D82372CF0FcbCCc0Ff74309089c74d1](https://polygonscan.com/token/0x0266F4F08D82372CF0FcbCCc0Ff74309089c74d1) |
| Hoodi\* | RPL | [0x1Cc9cF5586522c6F483E84A19c3C2B0B6d027bF0](https://hoodi.etherscan.io/address/0x1Cc9cF5586522c6F483E84A19c3C2B0B6d027bF0) |
| | rETH | [0x7322c24752f79c05FFD1E2a6FCB97020C1C264F1](https://hoodi.etherscan.io/address/0x7322c24752f79c05FFD1E2a6FCB97020C1C264F1) |
| Base | RPL | [0x1f73EAf55d696BFFA9b0EA16fa987B93b0f4d302](https://basescan.org/address/0x1f73EAf55d696BFFA9b0EA16fa987B93b0f4d302) |
| | rETH | [0xB6fe221Fe9EeF5aBa221c348bA20A1Bf5e73624c](https://basescan.org/address/0xB6fe221Fe9EeF5aBa221c348bA20A1Bf5e73624c) |
| Scroll | rETH | [0x53878B874283351D26d206FA512aEcE1Bef6C0dD](https://scrollscan.com/address/0x53878b874283351d26d206fa512aece1bef6c0dd) |
| Starknet | rETH | [0x0319111a5037cbec2b3e638cc34a3474e2d2608299f3e62866e9cc683208c610](https://starkscan.co/token/0x0319111a5037cbec2b3e638cc34a3474e2d2608299f3e62866e9cc683208c610) |
| Unichain | rETH | [0x94Cac393f3444cEf63a651FfC18497E7e8bd036a](https://uniscan.xyz/address/0x94Cac393f3444cEf63a651FfC18497E7e8bd036a) |
\* Testnet
## Deposit Pool Contract Version History
| Chain | RP Version | Address |
| ------- | --------------- | --------------------------------------------------------------------------------------------------------------------- |
| Mainnet | v1.4 (Saturn 1) | [0xCE15294273CFb9D9b628F4D61636623decDF4fdC](https://etherscan.io/address/0xCE15294273CFb9D9b628F4D61636623decDF4fdC) |
| | v1.2 (Atlas) | [0xDD3f50F8A6CafbE9b31a427582963f465E745AF8](https://etherscan.io/address/0xDD3f50F8A6CafbE9b31a427582963f465E745AF8) |
| | v1.1 (Redstone) | [0x2cac916b2A963Bf162f076C0a8a4a8200BCFBfb4](https://etherscan.io/address/0x2cac916b2A963Bf162f076C0a8a4a8200BCFBfb4) |
| | v1.0 | [0x4D05E3d48a938db4b7a9A59A802D5b45011BDe58](https://etherscan.io/address/0x4D05E3d48a938db4b7a9A59A802D5b45011BDe58) |
## Integrations
| Category | Service | Link | Link |
| ---------------- | ----------------------------- | ---------------------------------------------------------------------------------------------------------------------------------------------------------------------------------------------------------------------------------- | ------------------------------------------------------------------------------------------------------------------------------------------------------------------------------ |
| Exchanges | 1inch (Mainnet) | - | [ETH/rETH](https://app.1inch.io/#/1/simple/swap/1:ETH/1:rETH) |
| | Balancer (Mainnet) | [RPL Pools](https://balancer.fi/pools?skip=0\&textSearch=rpl) | [rETH Pools](https://balancer.fi/pools?skip=0\&textSearch=reth) |
| | Curve (Mainnet) | - | [rETH](https://curve.fi/dex/#/ethereum/pools?search=rETH) |
| | CowSwap (Mainnet) | [ETH/RPL](https://swap.cow.fi/#/1/swap/ETH/RPL) | [ETH/rETH](https://swap.cow.fi/#/1/swap/ETH/rETH) |
| | Hop (Multichain) | [ETH/RPL](https://app.hop.exchange) | [ETH/rETH](https://app.hop.exchange) |
| | ShapeShift (Multichain) | [ETH/RPL](https://app.shapeshift.com/) | [ETH/rETH](https://app.shapeshift.com/) |
| | PancakeSwap (Multichain) | [Pools](https://pancakeswap.finance/liquidity/pools?chain=eth\&token=1%3A0xae78736Cd615f374D3085123A210448E74Fc6393\&token=324%3A0x32Fd44bB869620C0EF993754c8a00Be67C464806\&token=1%3A0xD33526068D116cE69F19A9ee46F0bd304F21A51f) | [wETH/rETH](https://pancakeswap.finance/liquidity/pool/eth/0x2201d2400d30BFD8172104B4ad046d019CA4E7bd) |
| | Uniswap (Mainnet) | [ETH/RPL](https://app.uniswap.org/#/swap?inputCurrency=ETH\&outputCurrency=0xd33526068d116ce69f19a9ee46f0bd304f21a51f\&chainId=1) | [ETH/rETH](https://app.uniswap.org/#/swap?inputCurrency=ETH\&outputCurrency=0xae78736Cd615f374D3085123A210448E74Fc6393\&chainId=1) |
| | Uniswap (Arbitrum) | [ETH/RPL](https://app.uniswap.org/#/swap?inputCurrency=ETH\&outputCurrency=0xb766039cc6db368759c1e56b79affe831d0cc507\&chain=arbitrum) | [ETH/rETH](https://app.uniswap.org/#/swap?inputCurrency=ETH\&outputCurrency=0xec70dcb4a1efa46b8f2d97c310c9c4790ba5ffa8\&chain=arbitrum) |
| | Uniswap (Optimism) | - | [ETH/rETH](https://app.uniswap.org/#/swap?inputCurrency=ETH\&outputCurrency=0x9bcef72be871e61ed4fbbc7630889bee758eb81d\&chain=optimism) |
| | Uniswap (Polygon) | - | [wETH/rETH](https://app.uniswap.org/#/swap?inputCurrency=0x7ceB23fD6bC0adD59E62ac25578270cFf1b9f619\&outputCurrency=0x0266F4F08D82372CF0FcbCCc0Ff74309089c74d1\&chain=polygon) |
| Lending | Aave | - | [Aave](https://app.aave.com) |
| | Compound | - | [Compound](https://app.compound.finance) |
| | Morpho | - | [Morpho](https://app.morpho.org) |
| | Euler Finance | - | [Euler Finance](https://app.euler.finance) |
| | Moonwell | - | [Moonwell](https://moonwell.fi/discover) |
| | Spark | - | [Spark](https://app.spark.fi) |
| | Silo | - | [Silo](https://app.silo.finance) |
| | Alchemix | - | [Alchemix](https://alchemix.fi/vaults) |
| | MYSO Finance | - | [MYSO Finance](https://app.myso.finance/) |
| Oracles (NAV) | RP oDAO Rate (Mainnet) | - | [rETH/ETH](https://etherscan.io/address/0xae78736cd615f374d3085123a210448e74fc6393#readContract#F6) |
| | RP Rate Provider (Optimism) | - | [rETH/ETH](https://github.com/rocket-pool/rocketpool-ovm-oracle) |
| | RP Rate Provider (Arbitrum) | - | [rETH/ETH](https://github.com/rocket-pool/rocketpool-arbitrum-oracle) |
| | RP Rate Provider (Polygon) | - | [rETH/ETH](https://github.com/rocket-pool/rocketpool-polygon-oracle) |
| | RP Rate Provider (zksync era) | - | [rETH/ETH](https://github.com/rocket-pool/rocketpool-zksync-oracle) |
| | Chainlink (Arbitrum) | - | [rETH/ETH](https://data.chain.link/arbitrum/mainnet/crypto-eth/reth-eth-exchange-rate) |
| Oracles (Market) | RP oDAO Rate (Mainnet) | [ETH/RPL](https://etherscan.io/address/0x751826b107672360b764327631cC5764515fFC37#readContract#F3) | - |
| | Chainlink (Mainnet) | - | [rETH/ETH](https://data.chain.link/ethereum/mainnet/crypto-eth/reth-eth) |
| | Maker (Mainnet) | - | [rETH/USD](https://etherscan.io/address/0xee7f0b350aa119b3d05dc733a4621a81972f7d47) |
| Trackers | DefiLlama | [RPL](https://defillama.com/protocol/rocket-pool) | - |
| | Delta | - | [rETH](https://delta.app/) |
| | iYield | [RPL](https://go.iyield.com/rp) | [rETH](https://go.iyield.com/rp) |
| Vaults | Aura Finance | - | [Aura](https://app.aura.finance/#/) |
| | Gamma | - | [Gamma](https://app.gamma.xyz/vault/uni/ethereum/details/reth-weth-500-pegged-price) |
| | Notional Finance | - | [Notional Finance](https://notional.finance) |
| | Contango | - | [Contango](https://app.contango.xyz) |
| | Flat Money | - | [Flat Money](https://flat.money) |
## Management Committee Wallets
| Chain | Committee | Address |
| -------- | --------- | ------------------------------------------------------------------------------------------------------------------------------- |
| Mainnet | GMC | [0x6efD08303F42EDb68F2D6464BCdCA0824e1C813a](https://app.safe.global/home?safe=eth:0x6efD08303F42EDb68F2D6464BCdCA0824e1C813a) |
| | IMC | [0xb867EA3bBC909954d737019FEf5AB25dFDb38CB9](https://app.safe.global/home?safe=eth:0xb867EA3bBC909954d737019FEf5AB25dFDb38CB9) |
| Arbitrum | IMC | [0xd7102A3744c302f167c53621453516345bC460d7](https://app.safe.global/home?safe=arb1:0xd7102A3744c302f167c53621453516345bC460d7) |
## All Active Deployed Protocol Contracts
| Chain | Contract Name | Address |
| ------- | ------------------------------------- | --------------------------------------------------------------------------------------------------------------------------- |
| Mainnet | addressQueueStorage | [0x44E31944E1A6F3b8F805E105B130F8bdb7E2EBd8](https://etherscan.io/address/0x44E31944E1A6F3b8F805E105B130F8bdb7E2EBd8) |
| | addressSetStorage | [0xD4ae2511dF21F367792bA4D67c6eb032171c6a16](https://etherscan.io/address/0xD4ae2511dF21F367792bA4D67c6eb032171c6a16) |
| | rocketAuctionManager | [0x1a2F00D187C9388fDa3Bf2dc46a6b4740849EcCE](https://etherscan.io/address/0x1a2F00D187C9388fDa3Bf2dc46a6b4740849EcCE) |
| | rocketClaimDAO | [0xfB2F2Ab63DCf412ced6cdE5f4f809215ed0c81aa](https://etherscan.io/address/0xfB2F2Ab63DCf412ced6cdE5f4f809215ed0c81aa) |
| | rocketDAONodeTrusted | [0xb8e783882b11Ff4f6Cef3C501EA0f4b960152cc9](https://etherscan.io/address/0xb8e783882b11Ff4f6Cef3C501EA0f4b960152cc9) |
| | rocketDAONodeTrustedActions | [0x029d946F28F93399a5b0D09c879FC8c94E596AEb](https://etherscan.io/address/0x029d946F28F93399a5b0D09c879FC8c94E596AEb) |
| | rocketDAONodeTrustedProposals | [0xb0ec3F657ef43A615aB480FA8D5A53BF2c2f05d5](https://etherscan.io/address/0xb0ec3F657ef43A615aB480FA8D5A53BF2c2f05d5) |
| | rocketDAONodeTrustedSettingsMembers | [0xdA1AB39e62E0A5297AF44C7064E501b0613f0D01](https://etherscan.io/address/0xdA1AB39e62E0A5297AF44C7064E501b0613f0D01) |
| | rocketDAONodeTrustedSettingsMinipool | [0xE535fA45e12d748393C117C6D8EEBe1a7D124d95](https://etherscan.io/address/0xE535fA45e12d748393C117C6D8EEBe1a7D124d95) |
| | rocketDAONodeTrustedSettingsProposals | [0xAD038f8994a6bd51C8A72D3721CEd83401D4d2b0](https://etherscan.io/address/0xAD038f8994a6bd51C8A72D3721CEd83401D4d2b0) |
| | rocketDAONodeTrustedSettingsRewards | [0x7322c24752f79c05FFD1E2a6FCB97020C1C264F1](https://etherscan.io/address/0x7322c24752f79c05FFD1E2a6FCB97020C1C264F1) |
| | rocketDAONodeTrustedUpgrade | [0x9290AA076a2F1418a4E414E3D83AE03cA8E1ad10](https://etherscan.io/address/0x9290AA076a2F1418a4E414E3D83AE03cA8E1ad10) |
| | rocketDAOProposal | [0x1e94e6131Ba5B4F193d2A1067517136C52ddF102](https://etherscan.io/address/0x1e94e6131Ba5B4F193d2A1067517136C52ddF102) |
| | rocketDAOProtocol | [0xCaC25e88276A333cF9d4196d112D93af67ef809A](https://etherscan.io/address/0xCaC25e88276A333cF9d4196d112D93af67ef809A) |
| | rocketDAOProtocolActions | [0xB50d513de40eE70A662c39207b4382a693f9e08D](https://etherscan.io/address/0xB50d513de40eE70A662c39207b4382a693f9e08D) |
| | rocketDAOProtocolProposals | [0xcf7F6E23cD8189B7F56b14F66e11241C8ac0F03b](https://etherscan.io/address/0xcf7F6E23cD8189B7F56b14F66e11241C8ac0F03b) |
| | rocketDAOProtocolProposal | [0x2D627A50Dc1C4EDa73E42858E8460b0eCF300b25](https://etherscan.io/address/0x2D627A50Dc1C4EDa73E42858E8460b0eCF300b25) |
| | rocketDAOProtocolSettingsAuction | [0x364F989A3C9a1F66cB51b9043680974eA08C0d18](https://etherscan.io/address/0x364F989A3C9a1F66cB51b9043680974eA08C0d18) |
| | rocketDAOProtocolSettingsDeposit | [0x227BE8dD01DF8ad9BED0178e4F8cEC2996C5c365](https://etherscan.io/address/0x227BE8dD01DF8ad9BED0178e4F8cEC2996C5c365) |
| | rocketDAOProtocolSettingsInflation | [0x1d4AAEaE7C8b75a8e5ab589a84516853DBDdd735](https://etherscan.io/address/0x1d4AAEaE7C8b75a8e5ab589a84516853DBDdd735) |
| | rocketDAOProtocolSettingsMinipool | [0xaeF94C3650AA13d7A2456477fc374a16b94B9152](https://etherscan.io/address/0xaeF94C3650AA13d7A2456477fc374a16b94B9152) |
| | rocketDAOProtocolSettingsNetwork | [0x67Fd03a5095197D1aD1F932BC55E022C420b1153](https://etherscan.io/address/0x67Fd03a5095197D1aD1F932BC55E022C420b1153) |
| | rocketDAOProtocolSettingsNode | [0xb02B883303e658Ddcd58D3871Dc4Ca0C91f0fc9D](https://etherscan.io/address/0xb02B883303e658Ddcd58D3871Dc4Ca0C91f0fc9D) |
| | rocketDAOProtocolSettingsRewards | [0x8857610Ba0A7caFD4dBE1120bfF03E9c74fc4124](https://etherscan.io/address/0x8857610Ba0A7caFD4dBE1120bfF03E9c74fc4124) |
| | rocketDepositPool | [0xCE15294273CFb9D9b628F4D61636623decDF4fdC](https://etherscan.io/address/0xCE15294273CFb9D9b628F4D61636623decDF4fdC) |
| | rocketMerkleDistributorMainnet | [0xE4E2612EE8d7fdc8518Faea85770A3b9c886E2f5](https://etherscan.io/address/0xE4E2612EE8d7fdc8518Faea85770A3b9c886E2f5) |
| | rocketMinipoolBase | [0x560656C8947564363497E9C78A8BDEff8d3EFF33](https://etherscan.io/address/0x560656C8947564363497E9C78A8BDEff8d3EFF33) |
| | rocketMinipoolBondReducer | [0xDe8Ab526b19FCA2D5a57c4A78b698041717BE591](https://etherscan.io/address/0xDe8Ab526b19FCA2D5a57c4A78b698041717BE591) |
| | rocketMinipoolDelegate | [0x03d30466d199Ef540823fe2a22CAE2E3b9343bb0](https://etherscan.io/address/0x03d30466d199Ef540823fe2a22CAE2E3b9343bb0) |
| | rocketMinipoolFactory | [0x7B8c48256CaF462670f84c7e849cab216922B8D3](https://etherscan.io/address/0x7B8c48256CaF462670f84c7e849cab216922B8D3) |
| | rocketMinipoolManager | [0xe54B8C641fd96dE5D6747f47C19964c6b824D62C](https://etherscan.io/address/0xe54B8C641fd96dE5D6747f47C19964c6b824D62C) |
| | rocketMinipoolPenalty | [0xE64AC47b6e2FEcfCDEA35147Fe61af9894A06ba6](https://etherscan.io/address/0xE64AC47b6e2FEcfCDEA35147Fe61af9894A06ba6) |
| | rocketMinipoolQueue | [0x9e966733e3E9BFA56aF95f762921859417cF6FaA](https://etherscan.io/address/0x9e966733e3E9BFA56aF95f762921859417cF6FaA) |
| | rocketMinipoolStatus | [0xa52451b9d25EEf02BE42B3A8161A18f947F8A6a5](https://etherscan.io/address/0xa52451b9d25EEf02BE42B3A8161A18f947F8A6a5) |
| | rocketNetworkBalances | [0x1D9F14C6Bfd8358b589964baD8665AdD248E9473](https://etherscan.io/address/0x1D9F14C6Bfd8358b589964baD8665AdD248E9473) |
| | rocketNetworkFees | [0xf824e2d69dc7e7c073162C2bdE87dA4746d27a0f](https://etherscan.io/address/0xf824e2d69dc7e7c073162C2bdE87dA4746d27a0f) |
| | rocketNetworkPenalties | [0xeD0493DE30e82bE7C16C8925C7204CE9D1136B3a](https://etherscan.io/address/0xeD0493DE30e82bE7C16C8925C7204CE9D1136B3a) |
| | rocketNetworkPrices | [0x25E54Bf48369b8FB25bB79d3a3Ff7F3BA448E382](https://etherscan.io/address/0x25E54Bf48369b8FB25bB79d3a3Ff7F3BA448E382) |
| | rocketNodeDeposit | [0x6B13698c306a297Fee1383cdC2c65d63781D2D47](https://etherscan.io/address/0x6B13698c306a297Fee1383cdC2c65d63781D2D47) |
| | rocketNodeDistributorDelegate | [0x35A85d4c115801395e6E3abAa784Fb05826f129D](https://etherscan.io/address/0x35A85d4c115801395e6E3abAa784Fb05826f129D) |
| | rocketNodeDistributorFactory | [0xe228017f77B3E0785e794e4c0a8A6b935bB4037C](https://etherscan.io/address/0xe228017f77B3E0785e794e4c0a8A6b935bB4037C) |
| | rocketNodeManager | [0xcf2d76A7499d3acB5A22ce83c027651e8d76e250](https://etherscan.io/address/0xcf2d76A7499d3acB5A22ce83c027651e8d76e250) |
| | rocketNodeStaking | [0xedFc7DCaE43fF954577a2875a9D805874490eE3E](https://etherscan.io/address/0xedFc7DCaE43fF954577a2875a9D805874490eE3E) |
| | rocketRewardsPool | [0xCba5951fc706Fc783b7C142DaE8576Ebe29c41FD](https://etherscan.io/address/0xCba5951fc706Fc783b7C142DaE8576Ebe29c41FD) |
| | rocketSmoothingPool | [0xd4E96eF8eee8678dBFf4d535E033Ed1a4F7605b7](https://etherscan.io/address/0xd4E96eF8eee8678dBFf4d535E033Ed1a4F7605b7) |
| | rocketStorage | [0x1d8f8f00cfa6758d7bE78336684788Fb0ee0Fa46](https://etherscan.io/address/0x1d8f8f00cfa6758d7bE78336684788Fb0ee0Fa46) |
| | rocketTokenRETH | [0xae78736Cd615f374D3085123A210448E74Fc6393](https://etherscan.io/address/0xae78736Cd615f374D3085123A210448E74Fc6393) |
| | rocketTokenRPL | [0xD33526068D116cE69F19A9ee46F0bd304F21A51f](https://etherscan.io/address/0xD33526068D116cE69F19A9ee46F0bd304F21A51f) |
| | rocketTokenRPLFixedSupply | [0xB4EFd85c19999D84251304bDA99E90B92300Bd93](https://etherscan.io/address/0xB4EFd85c19999D84251304bDA99E90B92300Bd93) |
| | rocketUpgradeOneDotOne | [0xC680a22b4F03977f69b51A09f3Dbe922eb77C8FE](https://etherscan.io/address/0xc680a22b4f03977f69b51a09f3dbe922eb77c8fe) |
| | rocketUpgradeOneDotTwo | [0x9a0b5d3101d111EA0edD573d45ef2208CC97984a](https://etherscan.io/address/0x9a0b5d3101d111EA0edD573d45ef2208CC97984a) |
| | rocketUpgradeOneDotThree | [0x5dC69083B68CDb5c9ca492A0A5eC581e529fb73C](https://etherscan.io/address/0x5dC69083B68CDb5c9ca492A0A5eC581e529fb73C) |
| | rocketUpgradeOneDotThreeDotOne | [0xc2C81454427b1E53Fdf5d3B45561e3c18F90f9eD](https://etherscan.io/address/0xc2C81454427b1E53Fdf5d3B45561e3c18F90f9eD) |
| | rocketVault | [0x3bDC69C4E5e13E52A65f5583c23EFB9636b469d6](https://etherscan.io/address/0x3bDC69C4E5e13E52A65f5583c23EFB9636b469d6) |
| | rocketNetworkSnapshots | [0xe37F2d9dFb7397caF671DF5190a5dFB601028f17](https://etherscan.io/address/0xe37F2d9dFb7397caF671DF5190a5dFB601028f17) |
| | rocketNetworkVoting | [0x994A9C49230FEC0c127B8F42D6c5288F02610AeD](https://etherscan.io/address/0x994A9C49230FEC0c127B8F42D6c5288F02610AeD) |
| | rocketDAOProtocolSettingsProposals | [0xf6ad771dfB1cd10c66F688E251b5E5c21cbfDF81](https://etherscan.io/address/0xf6ad771dfB1cd10c66F688E251b5E5c21cbfDF81) |
| | rocketDAOProtocolVerifier | [0xc4D85aA3e318c38005F6D73cC53E5A2b4223723a](https://etherscan.io/address/0xc4D85aA3e318c38005F6D73cC53E5A2b4223723a) |
| | rocketDAOSecurity | [0x84aE6D61Df5c6ba7196b5C76Bcb112B8a689aD37](https://etherscan.io/address/0x84aE6D61Df5c6ba7196b5C76Bcb112B8a689aD37) |
| | rocketDAOSecurityActions | [0xeaa442dF4Bb5394c66C8024eFb4979bEc89Eb59a](https://etherscan.io/address/0xeaa442dF4Bb5394c66C8024eFb4979bEc89Eb59a) |
| | rocketDAOSecurityProposals | [0x334B9B1a6F9d7531efb13746482ff40f1c2a0c4e](https://etherscan.io/address/0x334B9B1a6F9d7531efb13746482ff40f1c2a0c4e) |
| | rocketDAOProtocolSettingsSecurity | [0xC9D771AaF504F33bB3C8a7E67eA9f1881F837cFf](https://etherscan.io/address/0xC9D771AaF504F33bB3C8a7E67eA9f1881F837cFf) |
| | rocketSwapRouter† | [0x16D5A408e807db8eF7c578279BEeEe6b228f1c1C](https://etherscan.io/address/0x16D5A408e807db8eF7c578279BEeEe6b228f1c1C) |
| | rocketMegapoolDelegate | [0xca3DD4bee7C174903dBF66c3897c27E9ADaAEBdD](https://etherscan.io/address/0xca3DD4bee7C174903dBF66c3897c27E9ADaAEBdD) |
| | rocketMegapoolFactory | [0xD5bffeaa9f373B9C367132772FAA0b88e3F0E38b](https://etherscan.io/address/0xD5bffeaa9f373B9C367132772FAA0b88e3F0E38b) |
| | rocketMegapoolProxy | [0x1B389D76a04d01026c5f5B0a125D4CCF26F9cd51](https://etherscan.io/address/0x1B389D76a04d01026c5f5B0a125D4CCF26F9cd51) |
| | rocketMegapoolManager | [0xf2CCd522Ba5fFEda28fe0389963845D61F342034](https://etherscan.io/address/0xf2CCd522Ba5fFEda28fe0389963845D61F342034) |
| | linkedListStorage | [0x52590E8aaC140E2020f8F51695719922ebcCb6D6](https://etherscan.io/address/0x52590E8aaC140E2020f8F51695719922ebcCb6D6) |
| | rocketDAOProtocolSettingsMegapool | [0x40628FAAc22383327b9f7bBc86CD1857050A2dCe](https://etherscan.io/address/0x40628FAAc22383327b9f7bBc86CD1857050A2dCe) |
| | rocketDAOSecurityUpgrade | [0x950BaF0358164339114914169BF16754789B5Dc4](https://etherscan.io/address/0x950BaF0358164339114914169BF16754789B5Dc4) |
| | rocketNetworkRevenues | [0x9D9708dA8E0200Dd8Dd9ad09e0AAf184Ad260842](https://etherscan.io/address/0x9D9708dA8E0200Dd8Dd9ad09e0AAf184Ad260842) |
| | beaconStateVerifier | [0xE9a114c50f26001443B91079Ab5573a90D2D8469](https://etherscan.io/address/0xE9a114c50f26001443B91079Ab5573a90D2D8469) |
| | rocketMegapoolPenalties | [0xa2afC3C2d8ea4eBdbE925cADe17c29517630e6aB](https://etherscan.io/address/0xa2afC3C2d8ea4eBdbE925cADe17c29517630e6aB) |
| | rocketNetworkSnapshotsTime | [0x569F5b3024054AB4049A50df223a747AFE18a891](https://etherscan.io/address/0x569F5b3024054AB4049A50df223a747AFE18a891) |
| | rocketUpgradeOneDotFour | [0x5b3B5C76391662e56d0ff72F31B89C409316c8Ba](https://etherscan.io/address/0x5b3B5C76391662e56d0ff72F31B89C409316c8Ba) |
| Hoodi\* | addressQueueStorage | [0x07FCaBCbe4ff0d80c2b1eb42855C0131b6cba2F4](https://hoodi.etherscan.io/address/0x07FCaBCbe4ff0d80c2b1eb42855C0131b6cba2F4) |
| | addressSetStorage | [0xA805d68b61956BC92d556F2bE6d18747adAeEe82](https://hoodi.etherscan.io/address/0xA805d68b61956BC92d556F2bE6d18747adAeEe82) |
| | rocketAuctionManager | [0x84D11B65E026F7aA08F5497dd3593fb083410B71](https://hoodi.etherscan.io/address/0x84D11B65E026F7aA08F5497dd3593fb083410B71) |
| | rocketDAONodeTrusted | [0x56CD23Baaf2e7cb7056968d85E5EFe343b0E1DC2](https://hoodi.etherscan.io/address/0x56CD23Baaf2e7cb7056968d85E5EFe343b0E1DC2) |
| | rocketDAONodeTrustedActions | [0xa0f327589B08CEB824c21CDe8eaD5a3e6ca9edF7](https://hoodi.etherscan.io/address/0xa0f327589B08CEB824c21CDe8eaD5a3e6ca9edF7) |
| | rocketDAONodeTrustedProposals | [0x2d3142a05bDD16a3223B585a7A48132867dA6480](https://hoodi.etherscan.io/address/0x2d3142a05bDD16a3223B585a7A48132867dA6480) |
| | rocketDAONodeTrustedSettingsMembers | [0x5c2D33A015D132D4f590f00df807Bb1052531ab9](https://hoodi.etherscan.io/address/0x5c2D33A015D132D4f590f00df807Bb1052531ab9) |
| | rocketDAONodeTrustedSettingsMinipool | [0x5ffe8bD3165e80D51ce834B32a6B6C02233494bF](https://hoodi.etherscan.io/address/0x5ffe8bD3165e80D51ce834B32a6B6C02233494bF) |
| | rocketDAONodeTrustedSettingsProposals | [0xe4C3Ec6A20bE31296032F968cEadeE9e9Aa76535](https://hoodi.etherscan.io/address/0xe4C3Ec6A20bE31296032F968cEadeE9e9Aa76535) |
| | rocketDAONodeTrustedSettingsRewards | [0x2FB42FfE2d7dF8381853e96304300c6a5E846905](https://hoodi.etherscan.io/address/0x2FB42FfE2d7dF8381853e96304300c6a5E846905) |
| | rocketDAOProposal | [0xdFa888bbFF50eacd574a5336f1bcF83546aC430f](https://hoodi.etherscan.io/address/0xdFa888bbFF50eacd574a5336f1bcF83546aC430f) |
| | rocketDAOProtocolActions | [0x1AA4544cE0fd51596B6d51d0f55A40e409B8BAd4](https://hoodi.etherscan.io/address/0x1AA4544cE0fd51596B6d51d0f55A40e409B8BAd4) |
| | rocketDAOProtocolProposal | [0x85cAF0D85eFD17f4a3170fB82D054C2dbD14e53c](https://hoodi.etherscan.io/address/0x85cAF0D85eFD17f4a3170fB82D054C2dbD14e53c) |
| | rocketDAOProtocolSettingsAuction | [0x37C254647779b00FFFE0F9ca57B3ce997FB97D41](https://hoodi.etherscan.io/address/0x37C254647779b00FFFE0F9ca57B3ce997FB97D41) |
| | rocketDAOProtocolSettingsInflation | [0xb1029Ac2Be4e08516697093e2AFeC435057f3511](https://hoodi.etherscan.io/address/0xb1029Ac2Be4e08516697093e2AFeC435057f3511) |
| | rocketDAOProtocolSettingsRewards | [0x614A5be866A0EC908cA9aE0d7D3eB100492A9f4e](https://hoodi.etherscan.io/address/0x614A5be866A0EC908cA9aE0d7D3eB100492A9f4e) |
| | rocketMinipoolBase | [0xac2245BE4C2C1E9752499Bcd34861B761d62fC27](https://hoodi.etherscan.io/address/0xac2245BE4C2C1E9752499Bcd34861B761d62fC27) |
| | rocketMinipoolDelegate | [0x56903694d881282D33ed0643EAe14263880Dd47F](https://hoodi.etherscan.io/address/0x56903694d881282D33ed0643EAe14263880Dd47F) |
| | rocketMinipoolFactory | [0xDD3f50F8A6CafbE9b31a427582963f465E745AF8](https://hoodi.etherscan.io/address/0xDD3f50F8A6CafbE9b31a427582963f465E745AF8) |
| | rocketMinipoolPenalty | [0x54705f80D7C51Fcffd9C659ce3f3C9a7dCCf5788](https://hoodi.etherscan.io/address/0x54705f80D7C51Fcffd9C659ce3f3C9a7dCCf5788) |
| | rocketMinipoolQueue | [0x4220EECD69B2e1e70a7001637cc3D839EE2E97f5](https://hoodi.etherscan.io/address/0x4220EECD69B2e1e70a7001637cc3D839EE2E97f5) |
| | rocketNetworkFees | [0x2cac916b2A963Bf162f076C0a8a4a8200BCFBfb4](https://hoodi.etherscan.io/address/0x2cac916b2A963Bf162f076C0a8a4a8200BCFBfb4) |
| | rocketNetworkPrices | [0x029d946F28F93399a5b0D09c879FC8c94E596AEb](https://hoodi.etherscan.io/address/0x029d946F28F93399a5b0D09c879FC8c94E596AEb) |
| | rocketNodeDistributorFactory | [0x42d4e4B59220dA435A0bd6b5892B90fF50e1D8D4](https://hoodi.etherscan.io/address/0x42d4e4B59220dA435A0bd6b5892B90fF50e1D8D4) |
| | rocketSmoothingPool | [0xA347C391bc8f740CAbA37672157c8aAcD08Ac567](https://hoodi.etherscan.io/address/0xA347C391bc8f740CAbA37672157c8aAcD08Ac567) |
| | rocketStorage | [0x594Fb75D3dc2DFa0150Ad03F99F97817747dd4E1](https://hoodi.etherscan.io/address/0x594Fb75D3dc2DFa0150Ad03F99F97817747dd4E1) |
| | rocketTokenRETH | [0x7322c24752f79c05FFD1E2a6FCB97020C1C264F1](https://hoodi.etherscan.io/address/0x7322c24752f79c05FFD1E2a6FCB97020C1C264F1) |
| | rocketTokenRPL | [0x1Cc9cF5586522c6F483E84A19c3C2B0B6d027bF0](https://hoodi.etherscan.io/address/0x1Cc9cF5586522c6F483E84A19c3C2B0B6d027bF0) |
| | rocketTokenRPLFixedSupply | [0x7EcCBbd05830EdF593d30005B8F69E965AF4D59f](https://hoodi.etherscan.io/address/0x7EcCBbd05830EdF593d30005B8F69E965AF4D59f) |
| | rocketUpgradeOneDotThreeDotOne | [0x149aE025fFC7E7bbcCc8d373d56797D637bF5D33](https://hoodi.etherscan.io/address/0x149aE025fFC7E7bbcCc8d373d56797D637bF5D33) |
| | rocketVault | [0x67CdE7AF920682A29fcfea1A179ef0f30F48Df3e](https://hoodi.etherscan.io/address/0x67CdE7AF920682A29fcfea1A179ef0f30F48Df3e) |
| | rocketDAOProtocolVerifier | [0xC78059b79c3a57feC182154F72aEE5a100a57b4A](https://hoodi.etherscan.io/address/0xC78059b79c3a57feC182154F72aEE5a100a57b4A) |
| | rocketDAOSecurity | [0x751826b107672360b764327631cC5764515fFC37](https://hoodi.etherscan.io/address/0x751826b107672360b764327631cC5764515fFC37) |
| | rocketDAOSecurityActions | [0x560656C8947564363497E9C78A8BDEff8d3EFF33](https://hoodi.etherscan.io/address/0x560656C8947564363497E9C78A8BDEff8d3EFF33) |
| | rocketMegapoolDelegate | [0xbd96545b6066c9701A55D88B237A70Cd30457d07](https://hoodi.etherscan.io/address/0xbd96545b6066c9701A55D88B237A70Cd30457d07) |
| | rocketMegapoolFactory | [0x894d1E83BB08aa50D77D5C4E471A6F94bBE056c5](https://hoodi.etherscan.io/address/0x894d1E83BB08aa50D77D5C4E471A6F94bBE056c5) |
| | rocketMegapoolProxy | [0x7791D20668112Ed6b81D46647a661D9997d35922](https://hoodi.etherscan.io/address/0x7791D20668112Ed6b81D46647a661D9997d35922) |
| | rocketMegapoolManager | [0x8Fb4399DE1442f28F8DcDbDc1435969aEAF4170E](https://hoodi.etherscan.io/address/0x8Fb4399DE1442f28F8DcDbDc1435969aEAF4170E) |
| | rocketNodeManager | [0xa9115EfdA9c4DceEf1321153561dCb375d13B07A](https://hoodi.etherscan.io/address/0xa9115EfdA9c4DceEf1321153561dCb375d13B07A) |
| | rocketNodeDeposit | [0x3FB8d496EA722455fB56D3B30CC97c3930F1CbF0](https://hoodi.etherscan.io/address/0x3FB8d496EA722455fB56D3B30CC97c3930F1CbF0) |
| | rocketNodeStaking | [0x5520aBac3C9103216D3b23FfEf3AC1aa0CEB24CA](https://hoodi.etherscan.io/address/0x5520aBac3C9103216D3b23FfEf3AC1aa0CEB24CA) |
| | rocketDepositPool | [0x425E6f83e27f1676AD78BC39dA79C2C7b33d3Fd8](https://hoodi.etherscan.io/address/0x425E6f83e27f1676AD78BC39dA79C2C7b33d3Fd8) |
| | linkedListStorage | [0x50223850F1e0D27C24Cb5Ef1D8158E8b1aB61095](https://hoodi.etherscan.io/address/0x50223850F1e0D27C24Cb5Ef1D8158E8b1aB61095) |
| | rocketDAOProtocol | [0xf295b126eA4f42a92F263466609d3945af6EEBc0](https://hoodi.etherscan.io/address/0xf295b126eA4f42a92F263466609d3945af6EEBc0) |
| | rocketDAOProtocolProposals | [0xC5107991Da31E4113faAeCEbf55588D3c280225e](https://hoodi.etherscan.io/address/0xC5107991Da31E4113faAeCEbf55588D3c280225e) |
| | rocketDAOProtocolSettingsNode | [0x4C31C7f7aDf948eE5e8501B8E6C65aef5fF12129](https://hoodi.etherscan.io/address/0x4C31C7f7aDf948eE5e8501B8E6C65aef5fF12129) |
| | rocketDAOProtocolSettingsDeposit | [0x86B455e24A9B5541D7703d07A8CE634f0309d2D2](https://hoodi.etherscan.io/address/0x86B455e24A9B5541D7703d07A8CE634f0309d2D2) |
| | rocketDAOProtocolSettingsNetwork | [0xaEa4d6AEfF4078b98ef28cC2fc7DdD4cc5226ECA](https://hoodi.etherscan.io/address/0xaEa4d6AEfF4078b98ef28cC2fc7DdD4cc5226ECA) |
| | rocketDAOProtocolSettingsSecurity | [0x7a75036A7b7F858Ac9fa89547EA952920fB5715D](https://hoodi.etherscan.io/address/0x7a75036A7b7F858Ac9fa89547EA952920fB5715D) |
| | rocketDAOProtocolSettingsMegapool | [0x9D64a4802db355E6C085B7497C29dd3175668D68](https://hoodi.etherscan.io/address/0x9D64a4802db355E6C085B7497C29dd3175668D68) |
| | rocketDAOProtocolSettingsMinipool | [0xf9769dA9633Bdf64395bf5d91Edf8F3320db8369](https://hoodi.etherscan.io/address/0xf9769dA9633Bdf64395bf5d91Edf8F3320db8369) |
| | rocketDAOSecurityUpgrade | [0x9B744A231274F92A481DDC161206Ec1F88442ed9](https://hoodi.etherscan.io/address/0x9B744A231274F92A481DDC161206Ec1F88442ed9) |
| | rocketDAOSecurityProposals | [0x0e79A9ccB66D740Bb8465165762BF4d75CD466aF](https://hoodi.etherscan.io/address/0x0e79A9ccB66D740Bb8465165762BF4d75CD466aF) |
| | rocketDAONodeTrustedUpgrade | [0x92d1c21D158a8e451a74C01332d2a3790909cBAF](https://hoodi.etherscan.io/address/0x92d1c21D158a8e451a74C01332d2a3790909cBAF) |
| | rocketNetworkRevenues | [0x5Ff34Dde4ac5aF26cE063940065E4D3ebc4c857c](https://hoodi.etherscan.io/address/0x5Ff34Dde4ac5aF26cE063940065E4D3ebc4c857c) |
| | rocketNetworkBalances | [0x0737C090618190954F94b4A7C7241372252f803a](https://hoodi.etherscan.io/address/0x0737C090618190954F94b4A7C7241372252f803a) |
| | rocketNetworkSnapshots | [0x37DC1e910DD70D895Aa0199894Fc7184ed2d64B7](https://hoodi.etherscan.io/address/0x37DC1e910DD70D895Aa0199894Fc7184ed2d64B7) |
| | rocketNetworkPenalties | [0xc3a18D6Ce3598EA1B938a0411EF16521AF8C010f](https://hoodi.etherscan.io/address/0xc3a18D6Ce3598EA1B938a0411EF16521AF8C010f) |
| | rocketRewardsPool | [0x83037aaaF7437e34f4116B33271bF1273f529bd1](https://hoodi.etherscan.io/address/0x83037aaaF7437e34f4116B33271bF1273f529bd1) |
| | beaconStateVerifier | [0x1AE88D33a7D0fEC71034480F9d1f19e17Ccf1f33](https://hoodi.etherscan.io/address/0x1AE88D33a7D0fEC71034480F9d1f19e17Ccf1f33) |
| | rocketNodeDistributorDelegate | [0xBad0Dbd347ED2be40Ce3426c0C6B91bE4f243578](https://hoodi.etherscan.io/address/0xBad0Dbd347ED2be40Ce3426c0C6B91bE4f243578) |
| | rocketClaimDAO | [0x27696EA43B7AcDFf5519371F6A4108C9736CD3fd](https://hoodi.etherscan.io/address/0x27696EA43B7AcDFf5519371F6A4108C9736CD3fd) |
| | rocketMinipoolBondReducer | [0xE04621683Cdf2437a759400FC3dA995a08D38C1b](https://hoodi.etherscan.io/address/0xE04621683Cdf2437a759400FC3dA995a08D38C1b) |
| | rocketMinipoolManager | [0x426c08eC5ba0ECf97A6bfE29C1B3Da962051e7CB](https://hoodi.etherscan.io/address/0x426c08eC5ba0ECf97A6bfE29C1B3Da962051e7CB) |
| | rocketNetworkVoting | [0xd29b82cC5a06311921db10F156896E3588858169](https://hoodi.etherscan.io/address/0xd29b82cC5a06311921db10F156896E3588858169) |
| | rocketMerkleDistributorMainnet | [0xcAFb9B62579d1a12207d642d644808E7e97ed910](https://hoodi.etherscan.io/address/0xcAFb9B62579d1a12207d642d644808E7e97ed910) |
| | rocketMegapoolPenalties | [0xdF3D4bddDf39965F92A8CAD73B1e84dEa02A963C](https://hoodi.etherscan.io/address/0xdF3D4bddDf39965F92A8CAD73B1e84dEa02A963C) |
| | rocketNetworkSnapshotsTime | [0x95D712ebA0b76aFCF1359d032D242bcBdb842DA6](https://hoodi.etherscan.io/address/0x95D712ebA0b76aFCF1359d032D242bcBdb842DA6) |
| | rocketDAOProtocolSettingsProposals | [0xDE349540f1FC0259823815811e3D6AE32fAD3ab1](https://hoodi.etherscan.io/address/0xDE349540f1FC0259823815811e3D6AE32fAD3ab1) |
| | rocketUpgradeOneDotFour | [0xb9b3E78C42e835df2F28b46b8F6B458fD32C6029](https://hoodi.etherscan.io/address/0xb9b3E78C42e835df2F28b46b8F6B458fD32C6029) |
\* Testnet
† Not registered in the Storage contract, so it cannot be queried on chain like the other entries.
This list was updated 11/11/2026
The addresses can be queried on chain as shown in this [example](/protocol/contracts-usage.md#interacting-with-rocket-pool).
---
url: /protocol/contracts-usage.md
---
> For AI agents: the complete documentation index is available at /llms.txt, the full documentation bundle is available at /llms-full.txt.
# Smart Contracts
## Introduction
The Rocket Pool [Smart Contracts](https://www.ethereum.org/learn/#smart-contracts) form the foundation of the Rocket Pool protocol. They are the base layer of infrastructure which all other elements of the network are built on top of, the Smart Node software stack, and all web or application interfaces.
Direct interaction with the contracts is usually not necessary, and is facilitated through the use of other software. This section provides a detailed description of the contract design, and information on how to build on top of Rocket Pool for developers wishing to extend it. All code examples are given as Solidity `v0.7.6`.
### Contract Design
The Rocket Pool network contracts are built with upgradability in mind, using a hub-and-spoke architecture. The central hub of the network is the `RocketStorage` contract, which is responsible for storing the state of the entire protocol. This is implemented through the use of maps for key-value storage, and getter and setter methods for reading and writing values for a key.
The `RocketStorage` contract also stores the addresses of all other network contracts (keyed by name), and restricts data modification to those contracts only. Using this architecture, the protocol can be upgraded by deploying new versions of an existing contract, and updating its address in storage. This gives Rocket Pool the flexibility required to fix bugs or implement new features to improve the protocol.
### Interacting With Rocket Pool
To begin interacting with the Rocket Pool network, first create an instance of the `RocketStorage` contract using its [interface](https://github.com/rocket-pool/rocketpool/blob/master/contracts/interface/RocketStorageInterface.sol):
```solidity
import "RocketStorageInterface.sol";
contract Example {
RocketStorageInterface rocketStorage = RocketStorageInterface(0);
constructor(address _rocketStorageAddress) public {
rocketStorage = RocketStorageInterface(_rocketStorageAddress);
}
}
```
The above constructor should be called with the address of the `RocketStorage` contract on the appropriate network.
Because of Rocket Pool's architecture, the addresses of other contracts should not be used directly but retrieved from the blockchain before use. Network upgrades may have occurred since the previous interaction, resulting in outdated addresses. `RocketStorage` can never change address, so it is safe to store a reference to it.
Other contract instances can be created using the appropriate interface taken from the [Rocket Pool repository](https://github.com/rocket-pool/rocketpool/tree/master/contracts/interface), e.g.:
```solidity
import "RocketStorageInterface.sol";
import "RocketDepositPoolInterface.sol";
contract Example {
RocketStorageInterface rocketStorage = RocketStorageInterface(address(0));
constructor(address _rocketStorageAddress) public {
// It is safe to store reference to RocketStorage
rocketStorage = RocketStorageInterface(_rocketStorageAddress);
}
function exampleMethod() public {
// All other contracts should be queried each time they are used
address rocketDepositPoolAddress = rocketStorage.getAddress(keccak256(abi.encodePacked("contract.address", "rocketDepositPool")));
RocketDepositPoolInterface rocketDepositPool = RocketDepositPoolInterface(rocketDepositPoolAddress);
// ...
}
}
```
The Rocket Pool contracts, as defined in `RocketStorage`, are:
- `rocketVault` - Stores ETH held by network contracts (internal, not upgradeable)
- `rocketAuctionManager` - Handles the auctioning of RPL slashed from node operators' stake
- `rocketDepositPool` - Accepts user-deposited ETH and handles assignment to minipools
- `rocketSmoothingPool` - Receives priority fees and MEV
- `rocketMinipoolBase` - Contains the initialisation and delegate upgrade logic for minipools
- `rocketMinipoolBondReducer` - Handles bond reduction window and trusted node cancellation
- `rocketMinipoolFactory` - Handles creation of minipool contracts
- `rocketMinipoolDelegate` - Minipool utility contract (internal)
- `rocketMinipoolManager` - Creates & manages all minipools in the network
- `rocketMinipoolQueue` - Organises minipools into a queue for ETH assignment
- `rocketMinipoolStatus` - Handles minipool status updates from watchtower nodes
- `rocketMinipoolPenalty` - Stores penalties applied to node operators by the oDAO
- `rocketNetworkBalances` - Handles network balance updates from watchtower nodes
- `rocketNetworkFees` - Calculates node commission rates based on network node demand
- `rocketNetworkPrices` - Handles RPL price and effective stake updates from watchtower nodes
- `rocketNetworkWithdrawal` - Handles processing of beacon chain validator withdrawals
- `rocketNetworkPenalties` - Handles minipool penalties
- `rocketRewardsPool` - Handles the distribution of rewards to each rewards contract
- `rocketClaimDAO` - Handles the claiming of rewards for the pDAO
- `rocketNodeDeposit` - Handles node deposits for minipool creation
- `rocketMerkleDistributorMainnet` - Handles distribution of RPL and ETH rewards
- `rocketNodeDistributorDelegate` - Contains the logic for RocketNodeDistributors
- `rocketNodeDistributorFactory` - Handles creation of RocketNodeDistributor contracts
- `rocketNodeManager` - Registers & manages all nodes in the network
- `rocketNodeStaking` - Handles node staking and unstaking
- `rocketDAOProposal` - Contains common oDAO and pDAO functionality
- `rocketDAONodeTrusted` - Handles oDAO related proposals
- `rocketDAONodeTrustedProposals` - Contains oDAO proposal functionality (internal)
- `rocketDAONodeTrustedActions` - Contains oDAO action functionality (internal)
- `rocketDAONodeTrustedUpgrade` - Handles oDAO contract upgrade functionality (internal)
- `rocketDAONodeTrustedSettingsMembers` - Handles settings relating to trusted members
- `rocketDAONodeTrustedSettingsProposals` - Handles settings relating to proposals
- `rocketDAONodeTrustedSettingsMinipool` - Handles settings relating to minipools
- `rocketDAONodeTrustedSettingsRewards` - Handles settings relating to rewards
- `rocketDAOProtocol` - Handles pDAO related proposals
- `rocketDAOProtocolProposals` - Handles pDAO proposal functionality (internal)
- `rocketDAOProtocolActions` - Handles pDAO action functionality (internal)
- `rocketDAOProtocolSettingsInflation` - Handles settings related to inflation
- `rocketDAOProtocolSettingsRewards` - Handles settings related to rewards
- `rocketDAOProtocolSettingsAuction` - Handles settings related to auction system
- `rocketDAOProtocolSettingsNode` - Handles settings related to node operators
- `rocketDAOProtocolSettingsNetwork` - Handles settings related to the network
- `rocketDAOProtocolSettingsDeposit` - Handles settings related to deposits
- `rocketDAOProtocolSettingsMinipool` - Handles settings related to minipools
- `rocketTokenRETH` - The rETH token contract (not upgradeable)
- `rocketTokenRPL` - The RPL token contract (not upgradeable)
- `rocketUpgradeOneDotOne` - Handled the Rocket Pool protocol Redstone upgrade.
- `rocketUpgradeOneDotTwo` - Handled the Rocket Pool protocol Atlas upgrade
- `addressQueueStorage` - A utility contract (internal)
- `addressSetStorage` - A utility contract (internal)
Legacy Rocket Pool contracts, that have been removed from `RocketStorage` since the initial deployment, are:
- `rocketClaimNode` - Handled the claiming of rewards for node operators
- `rocketClaimTrustedNode` - Handled the claiming of rewards for the oDAO
Contracts marked as “internal” do not provide methods which are accessible to the general public, and so are generally not useful for extension. For information on specific contract methods, consult their interfaces in the [Rocket Pool repository](https://github.com/rocket-pool/rocketpool/tree/master/contracts/interface).
## Deposits
The main reason for extending the Rocket Pool network is to implement custom deposit logic which funnels user deposits into the deposit pool. For example, a fund manager may wish to stake their users’ ETH in Rocket Pool via their own smart contracts, and abstract the use of Rocket Pool itself away from their users.
Note: the `RocketDepositPool` contract address should not be hard-coded in your contracts, but retrieved from `RocketStorage` dynamically. See [Interacting With Rocket Pool](#interacting-with-rocket-pool) for more details.
### Implementation
The following describes a basic example contract which forwards deposited ETH into Rocket Pool and minted rETH back to the caller:
```solidity
import "RocketStorageInterface.sol";
import "RocketDepositPoolInterface.sol";
import "RocketTokenRETHInterface.sol";
contract Example {
RocketStorageInterface rocketStorage = RocketStorageInterface(address(0));
mapping(address => uint256) balances;
constructor(address _rocketStorageAddress) public {
rocketStorage = RocketStorageInterface(_rocketStorageAddress);
}
function deposit() external payable {
// Check deposit amount
require(msg.value > 0, "Invalid deposit amount");
// Load contracts
address rocketDepositPoolAddress = rocketStorage.getAddress(keccak256(abi.encodePacked("contract.address", "rocketDepositPool")));
RocketDepositPoolInterface rocketDepositPool = RocketDepositPoolInterface(rocketDepositPoolAddress);
address rocketTokenRETHAddress = rocketStorage.getAddress(keccak256(abi.encodePacked("contract.address", "rocketTokenRETH")));
RocketTokenRETHInterface rocketTokenRETH = RocketTokenRETHInterface(rocketTokenRETHAddress);
// Forward deposit to RP & get amount of rETH minted
uint256 rethBalance1 = rocketTokenRETH.balanceOf(address(this));
rocketDepositPool.deposit{value: msg.value}();
uint256 rethBalance2 = rocketTokenRETH.balanceOf(address(this));
require(rethBalance2 > rethBalance1, "No rETH was minted");
uint256 rethMinted = rethBalance2 - rethBalance1;
// Update user's balance
balances[msg.sender] += rethMinted;
}
function withdraw() external {
// Load contracts
address rocketTokenRETHAddress = rocketStorage.getAddress(keccak256(abi.encodePacked("contract.address", "rocketTokenRETH")));
RocketTokenRETHInterface rocketTokenRETH = RocketTokenRETHInterface(rocketTokenRETHAddress);
// Transfer rETH to caller
uint256 balance = balances[msg.sender];
balances[msg.sender] = 0;
require(rocketTokenRETH.transfer(msg.sender, balance), "rETH was not transferred to caller");
}
}
```
---
url: /protocol/explainer-series.md
---
> For AI agents: the complete documentation index is available at /llms.txt, the full documentation bundle is available at /llms-full.txt.
# Explainer Series
Everybody loves a good explainer series! For the best detailed understanding of how an Ethereum staking protocol works, checkout this article series that goes into great detail over four different articles!

1. [Overview and Users of the protocol](https://medium.com/rocket-pool/rocket-pool-staking-protocol-part-1-8be4859e5fbd)
2. [The Protocol DAO and Oracle Node DAO](https://medium.com/rocket-pool/rocket-pool-staking-protocol-part-2-e0d346911fe1)
3. [RPL & Tokenomics](https://medium.com/rocket-pool/rocket-pool-staking-protocol-part-3-3029afb57d4c)
4. [Launch Details and Audit Reports](https://medium.com/rocket-pool/rocket-pool-staking-protocol-part-4-2635c44e4f7e)
If you want even more info on Rocket Pool, be sure to checkout our [medium blog account](https://medium.com/rocket-pool) for a detailed history of our updates.
---
url: /protocol/faq.md
---
> For AI agents: the complete documentation index is available at /llms.txt, the full documentation bundle is available at /llms-full.txt.
# Frequently Asked Questions
This FAQ section aims to complement the [explainer series of articles](/protocol/explainer-series.md) with concise answers to common questions we receive.
## General
[**What is Proof of Stake?**](#what-is-proof-of-stake)\
_A brief overview of what Proof of Stake is and why it is awesome._
[**What does Rocket Pool do?**](#what-does-rocket-pool-do)\
_A quick introduction into what Rocket Pool actually does._
[**Why would I need to use it?**](#why-would-i-need-to-use-it)\
_Good question and hopefully even better answers._
[**How does it work?**](#how-does-it-work)\
_Smart contracts, smart nodes & decentralised infrastructure._
[**Independent node operator vs Staking as a Service (SaaS) provider?**](#independent-node-operator-vs-staking-as-a-service-saas-provider)\
_Protocols can be used by everyone, from regular users to professional SaaS providers._
[**What tokens does Rocket Pool use?**](#what-tokens-does-rocket-pool-use)\
_We use two tokens. RPL and rETH. Find out more here._
[**Who's making it?**](#who-is-making-it)\
_It's not aliens or lizard people. Well, fairly sure anyway._
## Staking
[**What is the minimum deposit?**](#what-is-the-minimum-deposit)\
_I’ll save you a scroll, it’s 0.01 ETH._
[**What is the maximum deposit?**](#what-is-the-maximum-deposit)\
_I’ll save you another scroll, there's no fixed limit, but deposits can only be accepted while the deposit pool has room._
[**What are the staking periods?**](#what-are-the-staking-periods)\
_None for both stakers and node operators. Come and go as you please._
[**How much does it cost to stake with Rocket Pool?**](#what-commissions-are-possible-when-staking-with-rocket-pool)\
_We don't take a cut at all, instead all node operators that power the protocol get variable based commissions_
[**How does the protocol protect the value of rETH?**](#how-does-the-protocol-protect-the-value-of-reth)\
_Our top priority! We have lots of features in place._
[**What is a decentralised staking protocol exactly?**](#what-is-a-decentralised-staking-protocol-exactly)\
_OK, expect your mind to be blown._
[**How can I access my deposit and rewards?**](#how-can-i-access-my-deposit-and-rewards)\
_I heard something about withdrawals not being allowed for a while..._
[**Are your smart contracts audited and open source?**](#are-your-smart-contracts-audited-and-open-source)\
_For sure! Betas, audits, audits and more audits._
## Node Operators
[**Why would I run a Rocket Pool smart node vs going solo?**](#why-would-i-run-a-rocket-pool-smart-node-vs-going-solo)\
_A fraction of the ETH required (4 ETH instead of 32) and earn ETH commissions + extra RPL rewards, boom!._
[**What is the minimum staking amount for a node operator?**](#what-is-the-minimum-staking-amount-for-a-node-operator)\
_It’s 4 ETH, would you like to know more?_
[**What is involved in running a Rocket Pool node?**](#what-is-involved-in-running-a-rocket-pool-node)\
_Some ETH and uptime, uptime, uptime._
[**How is the RPL token used?**](#how-is-the-rpl-token-used)\
_Stake RPL on your node to earn a share of protocol revenue and extra RPL rewards!_
## dApps, SaaS Business and more
[**Can I build on top of the protocol or use it in my SaaS business?**](#integrated-dapps-saas-business-and-more)\
_Get your dApp connected with decentralised staking or run a node in the network and generate higher returns!_
## Contact
[**Website**](https://www.rocketpool.net/)\
_Contact us here via email or just read up on Rocket Pool._
[**Discord**](https://discord.gg/rocketpool)\
_Drop by for a chat and ask some questions, we’re a friendly bunch._
[**Doc Hub**](https://docs.rocketpool.net/)\
_You’re reading it :) But there’s a few more articles to be found…_
***
### What is Proof of Stake?
Proof of Stake is a consensus protocol used in Ethereum. It is different from the Proof of Work (PoW) protocol, which you may have heard of before, because Bitcoin uses PoW. With a decentralised blockchain, these consensus protocols help keep everyone on the same page, so we all know what transactions have been processed and in what order. This is known as validation.
Ethereum has a Proof of Stake (PoS) chain called the Beacon Chain, which is faster, more energy efficient and more decentralised than PoW. It's powered by users depositing ETH and providing an Ethereum node online 24/7 to perform the required validation. As a reward for providing the node, the Beacon Chain gives node operators additional ETH on top of their deposits. It can be viewed similarly to earning interest in a bank account, with the exception that these rewards are generated in return for helping secure the network.
### What does Rocket Pool do?
Rocket Pool is the base layer protocol for decentralised and trustless Ethereum staking.
Designed to support stakers of all shapes and sizes, Rocket Pool was built with the intent to allow anyone to trustlessly stake as little as **0.01** ETH to a network of decentralised node operators with full autonomy underpinned by node operator ETH bonds (a type of collateral that ensures good behavior). You can stake **ETH** by trading it for **rETH**, a [token which gains staking rewards over time](https://medium.com/rocket-pool/rocket-pool-2-5-tokenised-staking-48601d52d924#92b0) based on the performance of an entire network of decentralised node operators. You can also stake **4 ETH** per validator as a node operator in the protocol, earn rewards on your own stake fee free, plus earn commissions and RPL rewards from the network, generating a higher ROI by staking in the protocol vs staking outside of it as a solo node operator.
### Why would I need to use it?
Rocket Pool removes several high barriers to entry that exist with Proof of Stake on Ethereum for both individuals, groups and businesses.
- The Beacon Chain requires a deposit of at least **32 ETH**. Rocket Pool will allow anyone to earn rewards on deposits as small as **0.01 ETH**.
- Depositing ETH with the Beacon Chain will also require the user to have knowledge on how to interact with smart contracts. Rocket Pool handles all interactions with the Beacon Chain for you.
- With Rocket Pool you instantly get our rETH token when depositing. This is a tokenised staking deposit which gains rewards over time and doesn't need to be locked with us. It can be traded/sold/held at any time providing our users with liquidity. It can also be traded back to Rocket Pool for ETH plus rewards at any time if there is liquidity available.
- The Beacon Chain will require a user who makes a deposit to be technically proficient at running an Ethereum node 24/7 and keeping that node online and secure. Rocket Pool has a decentralised network of independent Ethereum node operators that provide this service.
- The Beacon Chain will penalise users who make a deposit but fail to keep their node online. Rocket Pool socialises any penalties or losses that occur on nodes across the whole network which minimises the effect greatly for any single user.
- Some users may be confident in running their own node but do not have the 32 ETH required for the deposit. If they join Rocket Pool's decentralised network of Ethereum node operators, they only need 4 ETH minimum to solo stake. They also get the added benefit of receiving extra income from the network for providing this service which generates a higher ROI than staking solo.
### How does it work?
Hold tight, this is a meaty one! The protocol is primarily composed of 3 main elements, smart contracts, the Smart Node Network and Megapools.
- Our smart contracts take ETH deposits from stakers (minting rETH in return), match them with node operators' validators, and manage rewards, governance and the protocol's tokens.
- Our Smart Node Network is a decentralised network of special Ethereum nodes that run our Smart Node software. They feature custom background processes that allow them to communicate with the protocol's smart contracts, and just as importantly, provide the network consensus (validation) required by the Beacon Chain.
- Any user can run one of these Smart Nodes and stake their own ETH fee-free if they have the minimum 4 ETH required. For providing the protocol with a Smart Node, the user also receives extra rewards from the network on top of the rewards they earn staking their own ETH. If they also stake RPL on their node, they earn a share of protocol revenue (the [voter share](/node-staking/megapools/staking-and-claiming-rewards.md#how-voter-share-is-distributed-to-megapool-rpl-stakers)) and RPL rewards.
- Megapools are another smart contract, but they're worth defining on their own because they're such a key part of the protocol. Each node has a single megapool that can hold many validators. Each validator pairs a 4 ETH bond from the node operator with 28 ETH from rETH stakers (users who want to stake without running a node). Together that's 32 ETH, which creates a new validator on the node that performs consensus duties and earns staking rewards. Neat!
### Independent node operator vs Staking as a Service (SaaS) provider?
Rocket Pool protocols support a wide array of actors, including independent node operators and service providers.
Web3 is full of highly knowledgeable Staking as a Service providers, helping the world better access the proof of stake landscape with projects like Ethereum. They support everything from institutional capital, to hedge funds, family offices and everything in between.
Rocket Pool was designed to support those providers, meaning ETH staked through SaaS solutions can be put to use through Rocket Pool, rather than having to spin up bespoke staking solutions to deal with each client.
ETH holders can choose between paying a SaaS provider or being paid to be an operator themselves. With Rocket Pool, SaaS providers and independent operators maximize their return by being paid to run a node, both in ETH and RPL. The protocol allows teams to run their own infrastructure, and use Rocket Pool to trustlessly stake ETH in batches of 4 ETH per validator — putting their capital to work further and earn a larger share of returns.
This design means a large staking provider or exchange could use Rocket Pool the same as a DeFi power user. Simply show up with 4 ETH and you’re treated the same as any other node operator. Rocket Pool’s democratized staking system doesn’t favor any one party, as ETH staked through Rocket Pool always directly supports the network.
Rocket Pool’s staked ETH wrapper, rETH, is the purest in DeFi because of the Rocket Pool network being fully distributed and trust-minimised. This makes rETH a natural building block for Ethereum and providers of all kinds.
### What tokens does Rocket Pool use?
**RPL — Rocket Pool Protocol Token**
RPL is the primary protocol token that will be used in governance of the protocol and can also be staked on a Rocket Pool node.
From a Node Operator perspective:
- As of Saturn 1, vote-eligible staked RPL will get a share of total protocol revenue
- [Half](https://rpips.rocketpool.net/RPIPs/RPIP-25) of RPL inflation is given as rewards to Node Operators based on staked RPL; these rewards are planned to be phased out with Saturn 2
- For Saturn 0 minipools made after 10/28/2024: Staked RPL provided up to 4% additional bonus commission. The bonus ended in June 2026, four rewards intervals after Saturn 1's launch.
- Staked RPL provides voting power for governance
From a protocol perspective:
- A [minority](https://rpips.rocketpool.net/RPIPs/RPIP-25) of RPL inflation provides funding for the pDAO
- A [minority](https://rpips.rocketpool.net/RPIPs/RPIP-25) of RPL inflation provides funding for the oDAO
- For legacy minipools, staked RPL serves as secondary collateral
**rETH — Rocket Pool Staking Deposit Token**\
When a user deposits into the protocol, they will instantly receive the rETH token which represents a tokenised staking deposit and the rewards it gains over time in the Rocket Pool network.
This token does not need to be locked within the network and it can be traded, sold or held as the user desires.
This token can also be traded back to the protocol for ETH + rewards earned at any time, providing there is sufficient liquidity in the protocol to meet the trade.
### Who is making it?
Rocket Pool was originally started in [late 2016 by David Rugendyke](https://medium.com/rocket-pool/rocket-pool-your-new-casper-friendly-ethereum-pos-pool-in-alpha-75709bd19936), a senior developer with over 18 years commercial experience and a computer science background.
In May 2017, an alpha version of the product was released. A vibrant community started to form and the team began expanding. With the help of an enthusiastic community, Rocket Pool ran five public betas with over 100,000 ETH (testnet) staked and hundreds of users participating, before the official launch on Ethereum mainnet in October 2021.
Today there is a great team working on Rocket Pool passionately alongside a fantastic community of more than three thousand node operators.
***
### What is the minimum deposit?
Rocket Pool protocol allows anyone to earn rewards on deposits as low as 0.01 ETH. When you trade ETH, you will receive rETH, a token that gains staking rewards over time based on the performance of all decentralised node operators in the protocol.
### What is the maximum deposit?
There's no per-user limit. Deposits are accepted as long as the deposit pool has room; its maximum size is set by the pDAO, and a deposit that would exceed it is rejected.
### What are the staking periods?
If you just want to stake you will receive our rETH token when you deposit. You can then do as you want with this token, it will still gain staking rewards over time and can be sold/traded or traded back to Rocket Pool for ETH + rewards if there is liquidity available for the trade.
If you want to run a node in the network, you can stake as a node for as little or long as you wish. The longer you stake, the more rewards you gain of course.
### What commissions are possible when staking with Rocket Pool?
Under Saturn 1's Universal Adjustable Revenue Split (UARS, [RPIP-46](https://rpips.rocketpool.net/RPIPs/RPIP-46)), node operator commissions come from rewards generated by the 28 ETH borrowed from the rETH staking pool for each megapool validator. The total commission is 14%, split into a 5% base commission share paid to every megapool node operator and a 9% [voter share](/node-staking/megapools/staking-and-claiming-rewards.md#how-voter-share-is-distributed-to-megapool-rpl-stakers) distributed proportionally to node operators who stake RPL on their megapool. The commission and its split are adjustable by pDAO governance vote rather than fixed; the values above are the ones Saturn 1 launched with. Legacy minipools are not part of this split and keep the commission set in their own contract.
### How does the protocol protect the value of rETH?
Our smart contracts are responsible for holding and moving funds. In the interest of transparency, they are [open source](https://github.com/rocket-pool/rocketpool) for all to analyse. Additionally, before the smart contracts were deployed to mainnet they were fully audited by both Sigma Prime and ConsenSys Diligence, two of the best auditing teams around.
Rocket Pool is a decentralised network of node operators. If you are a non-operator staker, your deposit will be allocated to a node operator who will perform Proof of Stake duties. Each validator is backed by the node operator's own ETH bond. If there is ETH loss due to poor node performance, the bond covers the loss before rETH stakers are affected. If the bond doesn't cover all of it, the rest becomes a debt on the operator's megapool. Until the debt is repaid, the node can't add new validators or reduce its bond, and its rewards and any ETH returned to it go toward paying off the debt first. In the meantime, the shortfall is spread across the entire network through a reduction in the relative value of rETH, rather than one user taking large losses just due to bad luck that their deposit ended up on a bad node. Debt repayments go straight back to rETH.
For example, if a node operator bonded 4 ETH and their validator leaves the network with 30 ETH, the network retains its 28 ETH and the operator retains 2 ETH - all loss is on the operator. If the validator leaves with 26 ETH, the network retains all 26 ETH, and the missing 2 ETH becomes a debt on the operator's megapool that is paid back from their future rewards.
Legacy minipools still follow the old rules: losses are covered by the operator's 8 or 16 ETH bond first, then by slashing their legacy staked RPL (up to the amount they have staked).
Node operators thus have a large incentive to perform well.
### What is a decentralised staking protocol exactly?
Rocket Pool is a protocol that contains a decentralised network of node operators. Each node operator is a separate entity with their own server infrastructure. Having this heterogeneous network is important for:
- _Fault tolerance_ — failures only affect a small number of nodes
- _Scalability_ — by opening up the network it means a huge number of nodes can be brought online to meet demand
- _Quadratic Leaking_ — this is a fancy term for how the Beacon Chain punishes validators for being offline. As a node operator, if you go offline with a big group of other validators your punishment is greater — this deters centralised staking services.
### How can I access my deposit and rewards?
If you are a non-operator staker and just sending your deposit to Rocket Pools smart contracts, you will instantly receive rETH tokens which are a form of tokenised staking, they will still gain rewards over time, but you don’t need to hold them with us and can trade/sell or hold them as you wish. You can also trade them back to the protocol for ETH + rewards gained if there is liquidity available in the protocol to cover the exchange.
### Are your smart contracts audited and open source?
In the interest of transparency, they are [open source](https://github.com/rocket-pool/rocketpool) for all to analyse. Additionally, before the smart contracts were deployed to mainnet they were fully audited by both Sigma Prime and ConsenSys Diligence, two of the best auditing teams around.
***
### Why would I run a Rocket Pool smart node vs going solo?
As a node operator, you can take advantage of the following benefits:
- You get to use our awesome [Smart Node Stack](https://github.com/rocket-pool/smartnode), a super handy setup to make staking very easy. [Get started here with the installer](https://github.com/rocket-pool/smartnode).
- You need only 4 ETH per validator to stake (as opposed to 32 ETH solo), since Rocket Pool assigns 28 ETH of the protocol's deposits. You can also run many validators in the one megapool on your node.
- You earn extra rewards through a commission on the rewards earned on your node by Rocket Pool users' ETH: a 5% base share, plus a share of a further 9% if you stake RPL ([details](#what-commissions-are-possible-when-staking-with-rocket-pool)).
- You stake your own ETH, free from any commissions.
- You can stake RPL on your node to earn a share of protocol revenue (the [voter share](/node-staking/megapools/staking-and-claiming-rewards.md#how-voter-share-is-distributed-to-megapool-rpl-stakers)) plus RPL rewards (optional; RPL is no longer required as collateral).
- You are always in control of your own node.
- You can come and go anytime from the network.
### What is the minimum staking amount for a node operator?
Since the Saturn 1 upgrade, the minimum staking amount for a node operator is 4 ETH. Each validator pairs your 4 ETH bond with 28 ETH from the rETH staking pool to form a 32 ETH validator inside a megapool, which can hold many validators under one node. (Legacy 8 ETH and 16 ETH minipools can no longer be created - the minipool queue was closed ahead of Saturn 1 by [RPIP-74](https://rpips.rocketpool.net/RPIPs/RPIP-74).) RPL is no longer required as collateral to run a megapool validator, but staking RPL on your megapool earns you a proportional share of protocol ETH revenue (the [voter share](/node-staking/megapools/staking-and-claiming-rewards.md#how-voter-share-is-distributed-to-megapool-rpl-stakers)) plus RPL inflation rewards. See the [megapool guides](/node-staking/megapools/overview.md) for details.
### What is involved in running a Rocket Pool node?
As a node operator you will need to run a server 24/7 performing proof of stake validator duties. Use our [Smart Node Stack](https://github.com/rocket-pool/smartnode) to manage your node + validators in the protocol, a super handy package to make staking very easy. [Get started here with the installer](https://github.com/rocket-pool/smartnode).
Since the [Saturn 0 upgrade](/upgrades/saturn-0/whats-new.md), the Rocket Pool protocol no longer requires a minimum amount of RPL. Before [Saturn 0 upgrade](/upgrades/saturn-0/whats-new.md), a minimum of 10% of the value in RPL of the ETH provided by the protocol (10% of 24 or 16 ETH respectively, that is, 2.4 or 1.6 ETH) was required.
### How is the RPL token used?
Check out [the tokens section](#what-tokens-does-rocket-pool-use) for a great overview!
***
### Integrated dApps, SaaS Business and more
If you’re a dApp, you can integrate directly into Rocket Pools smart contracts to stake ETH that your dApp might hold. You’ll instantly receive rETH (a tokenised staking deposit) back when depositing which can be used as your dApp wishes. You now have staking in a decentralised dApp using a decentralised staking network, whoa!
If you’re a SaaS (Staking as a Service) provider, you might want to maximise returns for your users. Spin up a few smart nodes in the Rocket Pool network and put that ETH to work earning staking rewards + extra commissions + RPL rewards.
Are you a wallet or DEX and want to give your users the ability to stake their ETH but not leave your service? Just write a smart contract that can manage depositing ETH into Rocket Pool on your users' behalf and then receive rETH back instantly. Bam! Staking services delivered.
There are many more possibilities. Rocket Pool is a permissionless smart contract based staking protocol, anyone can plug into it. Your users don’t even have to know you’re using us, that’s entirely up to you!
---
url: /protocol/glossary.md
---
> For AI agents: the complete documentation index is available at /llms.txt, the full documentation bundle is available at /llms-full.txt.
# Glossary
You may stumble upon some unfamiliar concepts in the Rocket Pool documentation. This section lists the common terms in the documentation for easy access, learning and plugin/theme development.
## APY - Annual Percent Yield (APY)
The amount of profit (yield) calculated over a one-year period divided by the initial investment amount expressed as a percentage.
## Bonding
_See insurance._
## Contract, (Smart)
An Ethereum program (smart contract) that is used to perform a set of programmed functions. Rocket Pool smart contracts include the deposit pool, minipool validator formation, and issue and track various token interactions on the Ethereum chain.
## Client
A client is an implementation of Ethereum software that verifies all transactions in each block, keeping the network secure and the data accurate. _See also Execution and Consensus client._
## Custodial
Centralized service that manages the entire ETH staking process on behalf of the user and retains "custody" over private validator keys and withdrawal keys. _See also non-custodial._
## DAO (Decentralized Autonomous Organization)
An organization represented by rules encoded as a computer program that is transparent, controlled by the organization members, and not influenced by a central government.
## Deposit Pool
The amount of ETH ready to be staked. The deposit pool is funded by regular users when they swap ETH for rETH. This ETH is the amount that is waiting to be paired with node operators in the node operator queue.
## ETH
The fundamental cryptocurrency coin generated and used by the Ethereum protocol.
## Execution Client
Ethereum Software clients that run the execution layer.
## Consensus Client
Ethereum Software clients that run the consensus layer.
## eth2.0 (the Beaconchain)
The Ethereum 2.0 network and update to the Ethernet network that was launched in December 2020 and replaced the proof-of-work eth1.0 consensus mechanism in September 2022. Deprecated term - now known simply as the Beaconchain or the consensus layer.
## Insurance
The amount of RPL token, expressed as a percentage of the value of ETH provided by the protocol, that a node operator needs to deposit when they start a minipool validator. The RPL insurance staked by a node operator will act as insurance to reimburse regular users in the event that the node operator exits staking with less than the protocol-provided ETH in their validators (24 ETH in the case of an 8 ETH minipool, 16 ETH in the case of a 16 ETH minipool).
## Minipool (Validator)
A validator that was funded and initialized via the Rocket Pool software. It is composed of ETH contributed from regular users via the deposit pool and ETH contributed from node operators during their registration process.
## Node
In the Ethereum network, nodes are devices (computers) that run Ethereum client software.
## Node Commission
The amount of supplemental ETH awarded to a node operator. This is effectively the “fee” that is taken from normal stakers; in Rocket Pool, that fee is given to the node operators. When Rocketpool launched, it ranged from 5 - 20% with the ideal target of 10%, with each minipool’s commission locked for life upon the creation of the minipool. Minipools created after 2024-10-28 have a 5% contract commission, and no new minipools can be created since Saturn 1. Megapool validators earn a commission set by the pDAO; see [Staking RPL and Claiming Rewards](/node-staking/megapools/staking-and-claiming-rewards.md).
## Node Operator
An individual that wishes to secure the Ethereum network by operating a node (computer) that will run the Rocket Pool software, a validator client, and optionally an execution and beaconchain client as well. Node operators will earn ETH APY rewards at a greater rate than solo-stakers on the Ethereum network.
## Node Software
A set of programs that allow node operators to interact with the Rocket Pool protocol.
## Node Wallet
An Ethereum wallet that is generated by Rocket Pool upon creating a new node. This wallet will be used to fund new minipools during their creation and pay for the gas fees needed to interact with Rocket Pool’s smart contracts.
## Non-Custodial
A service that provides streamlining for validator set up in management but does not hold user private validator keys and withdrawal keys. Rocket Pool is a non-custodial staking service.
## Oracle DAO (oDAO)
A DAO composed of all the oracle node operators. _See also DAO._
## Oracle Node
A special node run by trusted members of the Rocket Pool community that relays information from the beacon chain (such as total staking rewards and validator exit status) back to the execution layer so the Rocket Pool smart contracts can function correctly.
## Proof-of-Stake (PoS)
The consensus mechanism used in Ethereum, where users vote on the correctness of new blocks by staking the ETH in their wallet.
## Protocol DAO (pDAO)
The DAO composed of all holders of RPL tokens. _See also DAO._
## Regular Node (Operator)
The term given to “normal” node operators that do not have the additional responsibilities of Oracle Nodes.
## Regular Stakers
A retail (regular) user that wants to earn interest on their ETH coin without decoupling it from the underlying value of ETH. A regular staker interacts with the Rocket pool platform by swapping ETH coins for rETH tokens. Their ETH is entered into the staking pool, where it is acquired by Node Operators when they create new minipools.
## rETH (Rocket Pool Staking Deposit Token)
A token that represents a regular user’s deposit into the staking pool. Users receive an equivalent value of rETH token for each ETH coin they deposit. As interest is earned by staking on the Ethereum network the value of the rETH token increases with respect to ETH. This token does not need to be locked within the network and it can be traded, sold or held as the user desires.
## RPL (Rocket Pool Token)
**RPL — Rocket Pool Protocol Token**
RPL is the primary protocol token that will be used in governance of the protocol and can also be staked on a Rocket Pool node.
From a Node Operator perspective:
- As of Saturn 1, vote-eligible staked RPL will get a share of total protocol revenue
- The [majority](https://rpips.rocketpool.net/RPIPs/RPIP-25) of RPL inflation is given as rewards to Node Operators based on staked RPL; these rewards are planned to be phase out with Saturn 2
- For Saturn 0 minipools (made after 10/28/2024): Staked RPL provided up to 4% additional bonus commission. The bonus ended in June 2026, four rewards intervals after Saturn 1's launch.
- Staked provides voting power for governance
From a protocol perspective:
- A [minority](https://rpips.rocketpool.net/RPIPs/RPIP-25) of RPL inflation provides funding for the pDAO
- A [minority](https://rpips.rocketpool.net/RPIPs/RPIP-25) of RPL inflation provides funding for the oDAO
- It can serve as secondary collateral (e.g., against slashing)
## Stake
An amount of coin or token that is deposited as an assurance collateral to perform some work. An individual can stake ETH either as a regular user by swapping ETH for rETH or as a node operator by depositing ETH for use as part of the Beaconchain PoS consensus process. A person who stakes their ETH (e.g. a staker) is rewarded with an APY or return on their deposited ETH.
## Staking Pool
A staking pool allows multiple ETH coin holders to combine their tokens to collectively form the required amount to run an Ethereum validator. Rocket Pool forms, tracks, assigns, and insures these collective pools using a non-custodial decentralized method.
## Validator
_See minipool._
---
url: /protocol/index.md
---
> For AI agents: the complete documentation index is available at /llms.txt, the full documentation bundle is available at /llms-full.txt.
# Introduction
Rocket Pool is a first of its kind ETH Proof of Stake Protocol, designed to be community owned, decentralised, trustless and compatible with staking in Ethereum. It was first conceived in late 2016 and has been live since October 2021.
Rocket Pool is designed to cater to two main user groups; those that wish to participate in [tokenised staking using rETH](https://medium.com/rocket-pool/rocket-pool-2-5-tokenised-staking-48601d52d924#92b0) using as little as **0.01 ETH** and those that wish to stake ETH and run a node in the network to help generate a higher ROI than staking outside of the protocol due to commissions earned.
For more information on these two groups that make up the protocol, we'd highly recommend [reading article one in our explainer series](https://medium.com/rocket-pool/rocket-pool-staking-protocol-part-1-8be4859e5fbd) that goes into great detail on how users can participate, be it via tokenised staking or running a node in the protocol.
The core premise behind a protocol is to ensure the network is not beholden to any one party. This is a principle directly linked to Ethereum and ETH itself, and a mindset used at every stage of the process as Rocket Pool has evolved.
A 10,000 foot view of the components which make up the Rocket Pool Staking Protocol:

Rocket Pool strives to embody the core ethos of Ethereum and DeFi, specifically the non-custodial, trustless nature that allows self-sovereignty to truly thrive.
This is why creating this base protocol layer for ETH staking is so important, especially with the vast majority of players either not having the technical skills to run a node, or the financial capacity to own 32 ETH.
---
url: /upgrades/atlas/lebs.md
---
> For AI agents: the complete documentation index is available at /llms.txt, the full documentation bundle is available at /llms-full.txt.
# 8-ETH Bonded Minipools
When Rocket Pool was first launched, it supported two types of minipools:
1. A **16-ETH bond**, where the node operator provided 16 ETH and the remaning 16 ETH would come from the staking pool to create a complete (32 ETH) validator.
2. A **32-ETH temporary bond**, where the node operator would provide all 32 ETH so they could skip the initialization process and start validating on the Beacon Chain right away, then be given a refund of 16 ETH once the deposit pool had enough ETH to cover it. At this point it would turn into a normal 16-ETH bonded minipool.
The latter was removed by a community vote several months into the protocol's life due to it no longer being necessary and resulting in long refund delays.
The former represented the protocol's lowest bond amount because it guaranteed that if a node operator used Rocket Pool to attack the Ethereum protocol and had their _entire bond_ slashed, they would stand to lose just as much as the rETH stakers and would not come out ahead.
Since Rocket Pool's launch, the community has done [significant research](https://dao.rocketpool.net/t/leb8-discussion-thread/899) on the security provided by this bond and found that it was very conservative.
For all intents and purposes, a slashing of 16 ETH was deemed unrealistic and a 16-ETH bond effectively provided the same security benefits as a bond of only 8 ETH (plus the supplemental RPL requirement).
Thus, backed by this research, the Atlas upgrade introduces a new type of minipool to the list: the **8-ETH bond**, colloquially referred to by the Rocket Pool community as a "LEB8" (Lower ETH Bond - 8 ETH).
To create an 8-ETH minipool, the node operator only needs to provide **8 of their own ETH** (plus enough RPL to cover the collateral requirement - more on this in [RPL Collateral](#rpl-collateral)).
It will then pull **24 ETH** from the deposit pool in order to complete the validator and get to work on the Beacon Chain.
This **opens the door to new prospective node operators** that want to run a node but don't quite have 16 ETH.
Further, it lets larger node operators **put more pool staker ETH to work** on the Beacon Chain earning rewards.
As this works without meaningfully compromising security, everybody wins!
In this guide, we'll cover three topics:
- How 8-ETH bonded minipools actually work, and the reward numbers behind them
- How to create a new 8-ETH minipool
- How to migrate an _existing_ 16-ETH minipool down to an 8-ETH minipool without exiting
Read on to learn more about each topic.
## How 8-ETH Bonded Minipools Work
Mechanically, 8-ETH bonded minipools behave **identically** to every other minipool in the protocol.
They still "own" a validator on the Beacon Chain (they represent that validator's withdrawal credentials), they still come with a commission (though the commission with Atlas **will be fixed at 14%** for all new minipools), and they provide all the same functionality that a 16-ETH bonded minipool does.
The difference lies entirely in the numbers.
### Rewards
From a profitability perspective (looking _purely_ at ETH rewards and ignoring RPL), 8-ETH bonded minipools with a 14% commission provide _more rewards_ to the node operator than even _16-ETH bonded minipools at 20% commission_ (which, as of Redstone, is the highest possible reward configuration).
At the same time, they also provide more rewards to the _rETH holders_ as well due to the fact that the node operators are more efficiently putting the capital of the rETH holders to work.
Let's walk through a simple example to illustrate.
Say we are a node operator with 16 ETH available to stake (plus the required RPL bond).
Say we've earned 1 ETH of rewards on the Beacon Chain per validator.
Here's how the math works out for a single 16-ETH minipool with a 20% commission, versus two 8-ETH minipools at 14% commission:
```
1x 16 ETH Minipool @ 20%:
Rewards: 1 ETH
Node Share = (16/32) + (16/32 * 0.2)
= 0.5 + (0.5 * 0.2)
= 0.5 + 0.1
= 0.6 ETH
rETH Share = 1 - 0.6
= 0.4 ETH
2x 8 ETH Minipools @ 14%:
Rewards: 2 ETH
Node Share = ((8/32) + (24/32 * 0.14)) * 2
= (0.25 + (0.75 * 0.14)) * 2
= (0.25 + 0.105) * 2
= 0.71 ETH
rETH Share = 2 - 0.71
= 1.29 ETH
```
In other words, a node operator will earn **18% more ETH** via two 8-ETH minipools than they would with a single 16-ETH minipool at 20% commission.
### RPL Collateral
In order to create an 8-ETH minipool, node operators still need to stake enough RPL to cover the minimum collateral requirements for their node (accounting for all of its minipools of all bond sizes).
These rules have been clarified with Atlas:
- The **minimum RPL** per minipool is **10% of the _borrowed_ amount**
- The **maximum RPL** per minipool is **150% of the _bonded_ amount**
For a 16-ETH minipool, this remains unchanged; the minimum is 1.6 ETH worth of RPL, and the maximum is 24 ETH worth of RPL.
For an 8-ETH minipool, this becomes a **minimum of 2.4 ETH worth of RPL** (10% of the borrowed amount, which is 24 ETH) and a **maximum of 12 ETH worth of RPL** (150% of the bonded amount).
These numbers were selected by the Rocket Pool community [as part of a governance vote](https://vote.rocketpool.net/#/proposal/0x7426469ae1f7c6de482ab4c2929c3e29054991601c95f24f4f4056d424f9f671).
## Creating a New 8-ETH Minipool
The process to create a new minipool with an 8-ETH bond is identical to the process for creating a 16-ETH minipool.
Simply run the following command:
```shell
rocketpool node deposit
```
When prompted for your bond amount, select `8 ETH`:
```
Your eth2 client is on the correct network.
NOTE: by creating a new minipool, your node will automatically claim and distribute any balance you have in your fee distributor contract. If you don't want to claim your balance at this time, you should not create a new minipool.
Would you like to continue? [y/n]
y
Please choose an amount of ETH to deposit:
1: 8 ETH
2: 16 ETH
1
Your minipool will use the current fixed commission rate of 14.00%.
You currently have 8.00 ETH in your credit balance.
This deposit will use 8.000000 ETH from your credit balance and will not require any ETH from your node.
...
```
::: tip NOTE
This example also shows usage of the [**new Deposit Credit System**](/node-staking/credit.md).
Since the node operator has 8 ETH in credit, creating this 8-ETH minipool is free!
:::
That's all there is to it!
The rest of the process is the same as [the usual minipool creation instructions](/node-staking/create-validator.md).
---
url: /upgrades/atlas/whats-new.md
---
> For AI agents: the complete documentation index is available at /llms.txt, the full documentation bundle is available at /llms-full.txt.
# The Atlas Update
::: tip NOTE
Atlas was deployed on `18 April 2023, 00:00 UTC`. Please visit [here](/upgrades/houston/whats-new.md) to read about Houston, the latest protocol upgrade.
:::
This page describes the major changes that Rocket Pool's next major update, titled **Atlas**, brings to the protocol including updates to both the Smart Node stack and to the Rocket Pool protocol in general.
Please read through this page thoroughly to understand all of the differences between the previous version of Rocket Pool (Redstone) and Atlas.
## New Protocol Features
Atlas brings about some exciting new features that are based on both community feedback and changes to the Ethereum protocol itself.
Below is a brief list of these changes - click on any of them to learn more about it.
### Shapella and Withdrawals
The Ethereum protocol is preparing to undergo its next major upgrade: **Shanghai** on the Execution layer, and **Capella** on the Consensus layer - since these are now interconnected, both will occur at the same time.
Ethereum users have affectionately come to call the combined upgrade [**"Shapella"**](https://blog.ethereum.org/2023/02/21/sepolia-shapella-announcement) accordingly.
Shapella introduces **withdrawals** to the Beacon Chain, meaning node operators are now able to access the ETH that is currently locked on the Beacon Chain.
This comes in two flavors:
- Partial withdrawals (**skimming**), where your rewards (your excess Beacon Chain balance over 32 ETH) are sent to your minipool on the Execution Layer. This is done _automatically by the protocol itself_ every so often (about once every four or five days on Mainnet).
- **Full withdrawals**, where you exit your validator from the Beacon Chain and its entire balance is sent to your minipool on the Execution Layer. This is done _automatically by the protocol itself_ once your validator has been exited from the chain long enough.
Atlas introduces a new delegate contract for minipools that allows node operators to **distribute** the minipool's ETH balance, splitting it evenly between the node operator and the rETH holders (plus commission, of course) at any time.
This gives node operators **immediate access** to their Beacon Chain rewards!
It also puts the rETH holders's share back into the deposit pool, so it can be used to unstake rETH for ETH at the protocol's exchange rate (or to create new minipools).
### 8-ETH Bonded Minipools
One of the most anticipated changes made in Atlas is the introduction of the ability to only provide 8 ETH to make a minipool instead of 16 ETH.
Minipools with only 8 ETH bonded by their owning node operator are matched with **24 ETH** from the staking pool (provided by rETH holders) in order to make a validator.
This significantly reduces the capital requirement for running your own validator _and_ results in greater returns for both the node operator and the rETH stakers!
In fact, running two 8-ETH minipool instead of one 16-ETH minipool will provide **over 18% more rewards** - even if the 16-ETH minipool has a commission rate of 20%.
Creating an 8 ETH minipool requires that you stake a **minimum of 2.4 ETH worth of RPL** and a **maximum of 12 ETH worth of RPL**.
These represent 10% of the amount you're _borrowing_ from the protocol, and 150% of the amount you're _bonding_ (staking) yourself.
New minipools can be created with either 8 ETH or 16 ETH.
16 ETH minipools are unchanged from how they work today, and are available for users that want to minimize their exposure to the RPL token.
To learn how to make new minipools using an 8 ETH bond, please visit the [minipool creation guide](/node-staking/create-validator.md).
Also, once Atlas has been applied, node operators can **migrate existing 16-ETH minipools directly into 8-ETH minipool without needing to exit**.
This will give them 8 ETH back in [deposit credit](/node-staking/credit.md), which can be used to create a **new 8-ETH minipool for free**!
To learn more about 8-ETH bond minipools, please visit the [bond reduction guide](/node-staking/leb-migration.md).
### Solo Validator Conversion
Part of the Shapella upgrade involves the ability for solo validators to [change their validators' withdrawal credentials](https://notes.ethereum.org/@launchpad/withdrawals-faq) from the original (now unused) BLS-based withdrawal key to an address on the Execution layer.
This address will be the recipient for all of that validator's rewards and its full ETH balance once it exits the Beacon Chain.
Regular Rocket Pool node operators don't need to worry about any of this, as the protocol automatically set this up for your minipools when you created them.
_However_, as part of this new requirement for solo validators, Atlas brings an exciting opportunity: the ability to **create a special minipool** that will become the withdrawal address for your **existing solo validator**.
In other words, this will allow you to **directly convert a solo validator into a Rocket Pool minipool without needing to exit it!**
This means you will get all the benefits of Rocket Pool minipools, including:
- The ability to convert your one validator (with a 32 ETH bond) into **four minipools** (each with an 8 ETH bond), effectively **quadrupling** your presence on the Beacon Chain
- Commission on the portion of those minipools provided by rETH stakers
- Access to Rocket Pool's [Smoothing Pool](/node-staking/fee-distrib-sp.md#the-smoothing-pool) to pool and evenly distribute rewards from block proposals and MEV
To learn more about converting a solo validator into a minipool, please visit the [Converting a Solo Validator into a Minipool](/node-staking/solo-staker-migration.md) guide.
## New Smart Node Features
In addition to core changes to the Rocket Pool protocol, Atlas also brings some exciting upgrades to the Smart Node stack itself which are present in v1.9.0.
### Automatic Rewards Distributions
If you're already an active Rocket Pool node operator, you may be familiar with the `rocketpool_node` process that handles certain automated processes.
For example, it ensures you have the correct fee recipient and automatically runs the second `stake` transaction for you after `prelaunch` minipools pass the 12-hour scrub check.
Starting with Atlas, the `node` has a new duty: **automatic distribution of minipool rewards!**
This is due to the way [the Shapella upgrade works](/node-staking/skimming.md), by skimming your rewards from the Beacon Chain into your minipool every few days.
Whenever one of your minipools reaches a balance larger than a user-specified threshold (default of 1 ETH), the node will automatically run `distribute-balance` on it.
This will send your portion of the rewards to your withdrawal address, and the pool staker's portion back to the deposit pool.
Changing the threshold can be done in the `Smartnode and TX Fees` section of the `service config` TUI, under the `Auto-Distribute Threshold` setting.
### Unified Grafana Dashboard
By popular demand, we have created a new [**Grafana dashboard**](https://grafana.com/grafana/dashboards/24900-rocket-pool-dashboard-v1-4-0/) to help node operators track and assess the status, progress, and overall health of their nodes:

It comes with the following highly requested features:
- Support for all Execution and Consensus clients in a single dashboard - no more changing dashboards based on which clients you're using!
- Execution client stats, including CPU and RAM usage, and peer count
- Attestation accuracy tracking which follows how "correct" your attestations were for the previous epoch, so you know how far off from optimal rewards you're getting
- Tracking of the Smoothing Pool's balance
- Tracking of claimed and unclaimed rewards, now including ETH from the Smoothing Pool
- Stats about Rocket Pool's Snapshot-based governance votes
- Room for tracking a second SSD's used space and temperature if you have one for your OS and a different one for your chain data
- And more!
You can import the new dashboard from the official Grafana service using ID `21863` by following our [Grafana guide](/node-staking/grafana.md).
This new dashboard was a labor of love that involved extensive help from community member **0xFornax** - thank you for all of your hard work!
### Nimbus Changes
Smart Node v1.9.0 introduces **split mode support** for Nimbus!
Instead of running the Beacon Node and Validator Client inside a single process / container, the Smart Node will now run them in separate containers like the other clients. This has the following benefits:
- Nimbus now supports **fallback clients** (a secondary Execution client and Beacon Node that Nimbus's Validator Client can connect to when your primary clients are down for maintenance, such as resyncing).
- Nimbus is now supported in **Externally-Managed (Hybrid) Mode**, so you can couple the Validator Client that the Smart Node manages to an external Beacon Node that you maintain on your own.
- The Beacon Node no longer needs to be restarted after the addition of new minipools, meaning you don't lose attestations while it reconnects to its peers.
### Lodestar Support
[Lodestar](https://chainsafe.github.io/lodestar/) is now supported as an option for your Consensus Client of choice!
This is the newest addition to be officially accepted onto [Ethereum's Launchpad](https://launchpad.ethereum.org/en/lodestar), and it's ready for validation.
Lodestar supports many of the great features you've come to love from the other clients, including Doppelganger Detection, MEV-Boost, externally-managed clients (Hybrid Mode), and more!
### New Network Snapshot System
On a slightly more technical note, v1.9.0 introduces a brand new system for quickly capturing a snapshot of the state of **everything about your node** on both the Execution and the Consensus layers.
Under the hood, this system leverages [MakerDAO's multicall contract](https://github.com/makerdao/multicall) and Will O'Beirne's [Ethereum Balance Checker contract](https://github.com/wbobeirne/eth-balance-checker) to batch thousands of individual Execution client queries up into a single request.
This makes the `node` process much less taxing on the Execution client for node operators with a large number of validators, and should significantly reduce its CPU load which will improve attestations and overall rewards.
This new system hasn't made its way into the CLI itself yet, so any commands you run there (such as `rocketpool minipool status`) will still use the old single-query setup.
Over time we'll introduce it into the CLI too, which will make all of its commands lightning fast (_except for waiting for transactions to be validated, that still takes a while_).
---
url: /upgrades/houston/getting-started.md
---
> For AI agents: the complete documentation index is available at /llms.txt, the full documentation bundle is available at /llms-full.txt.
# Houston Quick-Start
Whether you're a seasoned Node Operator, rETH holder or curious onlooker, this page will help you get started with exploring the new features included in Houston.
##
### Initializing Voting Power
First and foremost, the most important step if you are **Node Operator** is to [initialize voting](/upgrades/houston/participate.md#initializing-voting) to unlock your voting power. Nodes who've initialized voting are included when the network's total voting power is calculated.
At the genesis of Houston, pDAO voting is disabled until a sufficient number of nodes have initialized voting. This is to prevent rogue proposals from passing while total voting power and quorum is low. After enough nodes have initialized voting, a switch will be flipped and pDAO will have the helm.
To initialize voting power, use this command in the smartnode:
```shell
rocketpool pdao initialize-voting
```
You only need to do this once. Initializing voting will ensure that your node's voting power is included in future on-chain proposals and allow you to vote on them.
### Setting your Snapshot Signalling Address
Secondly, you'll want to set your snapshot signalling address. This allows node operators to participate in Snapshot votes in their browser or mobile device without having to expose their node keys to a hot wallet.
Setting this up involves a handful of steps, so you'll want to follow this guide:
[Setting your Snapshot Signalling Address](/upgrades/houston/participate.md#setting-your-snapshot-signalling-address).
### Delegating on-chain Voting Power
If you want to delegate on-chain voting power to a community member of your choosing, click [here](/upgrades/houston/participate.md#delegating-voting-power) to learn how.
##
# Guides
[Full Houston Overview](/upgrades/houston/whats-new.md) presents the fully on-chain Protocol DAO and introduces new features such as staking ETH on behalf of a node, setting an RPL withdrawal address, and time based balance and RPL submissions. Houston smart contract audits can be found here as well.
[The Protocol DAO](/upgrades/houston/pdao.md) discusses who and how the pDAO governs Rocket Pool. This page will fill you in on how pDAO duties such as treasury spends can be executed on-chain, along with the role of the all new Security Council. It'll also walk you through the lifecycle of a pDAO proposal and explain some of the measures taken to prevent spam and gun down malicious proposals.
[Participating in Proposals](/upgrades/houston/participate.md) includes a detailed step-by-step guide on how Node Operators can participate in pDAO proposals. If you're keen on raising an on-chain proposal, voting or delegating voting power, this is the guide for you.
[Stake Eth on Behalf of a Node](/upgrades/houston/stake-eth-on-behalf.md) goes over the steps for staking ETH on behalf of a node. It's a new feature introduced in Houston to facilitate single depositor scenarios. We'll walk through how to do this on a testnet if you want to try it out before staking real ETH on mainnet.
[RPL Withdrawal Address](/upgrades/houston/rpl-withdrawal-address.md) shows you how to set an RPL withdrawal address for your node. This is useful if you want to enable a separate entity to supply the RPL insurance collateral for a node.
---
url: /upgrades/houston/nonsmartnode-setup.md
---
> For AI agents: the complete documentation index is available at /llms.txt, the full documentation bundle is available at /llms-full.txt.
# Voting setup for non-smartnode users
Some users (eg, Allnodes users) don't use the smartnode and may need to set up voting using direct contract interaction.
This guide contains both a minimal and a complete setup guide for such users.
::: tip
Your node address should be loaded onto a hardware wallet for this.
:::
## Minimal setup guide
This allows your delegate to vote for you on-chain and offchain. You'll be able to override your delegate on-chain, but not off-chain.
- Use etherscan to initialize vote power ("Connect to Web3" with node address) with a delegate [https://etherscan.io/address/0xA9d27E1952f742d659143a544d3e535fFf3Eebe1#writeContract#F2](https://etherscan.io/address/0xA9d27E1952f742d659143a544d3e535fFf3Eebe1#writeContract#F2)
- You can find delegates at [https://delegates.rocketpool.net/](https://delegates.rocketpool.net/)
## Full setup guide
Use etherscan to initialize vote power ("Connect to Web3" with node address)
- \[recommended for most] Initialize voting with a different node as the delegate [https://etherscan.io/address/0xA9d27E1952f742d659143a544d3e535fFf3Eebe1#writeContract#F2](https://etherscan.io/address/0xA9d27E1952f742d659143a544d3e535fFf3Eebe1#writeContract#F2)
- You can find delegates at [https://delegates.rocketpool.net/](https://delegates.rocketpool.net/)
- Remember you will always be able to override your delegates
- Initialize voting with your own node as the delegate [https://etherscan.io/address/0xA9d27E1952f742d659143a544d3e535fFf3Eebe1#writeContract#F1](https://etherscan.io/address/0xA9d27E1952f742d659143a544d3e535fFf3Eebe1#writeContract#F1)
- Here you'll be responsible for voting every time
- I would mostly suggest this option for folks that wish to be delegates since they _do_ need to vote every time.
- If your node was registered after Houston:
- You will already have your vote power initialized with your own node as the delegate
- You can set a new delegate with [https://etherscan.io/address/0xA9d27E1952f742d659143a544d3e535fFf3Eebe1#writeContract#F3](https://etherscan.io/address/0xA9d27E1952f742d659143a544d3e535fFf3Eebe1#writeContract#F3)
Set snapshot signalling address:
- Go to [https://node.rocketpool.net/signalling-address](https://node.rocketpool.net/signalling-address) and connect your node address
- Put in your desired snapshot signalling address and sign the message to get the r, s, and v arguments you'll need
- Note: your snapshot signalling address MUST NOT be your node address
- In a new tab, go to [https://etherscan.io/address/0xc1062617d10Ae99E09D941b60746182A87eAB38F#writeContract#F2](https://etherscan.io/address/0xc1062617d10Ae99E09D941b60746182A87eAB38F#writeContract#F2)
- "Connect to Web3" with node address
- Fill in the arguments with your signalling address and the r, s, v parameters given in the previous step
---
url: /upgrades/houston/participate.md
---
> For AI agents: the complete documentation index is available at /llms.txt, the full documentation bundle is available at /llms-full.txt.
# Participating in on-chain pDAO Proposals
Any node with a non-zero voting power may raise or participate in a pDAO proposal at any time. Proposals can be one of
the following types:
- Changing pDAO settings
- One-time treasury spends
- Repeat treasury spends (management committees)
- Security council membership
For greater detail and rationale, refer to [proposal types](https://rpips.rocketpool.net/RPIPs/RPIP-33#proposal-types).
It's important to understand that a pDAO proposal is an on-chain entity that exists to execute changes at the protocol
level.
## Governance Process
A proposal should be forecasted by the governance process before it ends up on-chain.
Changes to the Rocket Pool protocol and proposed, voted, and executed using a strict, yet transparent governance
process. The process begins with an informal discussion of an idea within the Discord community. This idea then
progresses to formal discussions in
the [#governance](https://discordapp.com/channels/405159462932971535/774497904559783947) channel on Discord and
the [DAO Forum](https://dao.rocketpool.net/), where it undergoes thorough research, modeling, and scrutiny in
preparation for a [Rocket Pool Improvement Proposal (RPIP)](https://rpips.rocketpool.net/). Following this, a draft RPIP
is prepared and reviewed by designated RPIP reviewers to ensure its quality and readiness for presentation to the DAO.
The draft proposal is then presented to the DAO on the forum for further review, feedback, and incorporation of any
necessary changes. Once the proposal has been refined based on community input, a poll is raised on the DAO forum to
gauge readiness for finalizing the RPIP text. If the poll passes, indicating community approval, the RPIP is marked
final and ready for a Protocol DAO vote, which is conducted via Snapshot to determine whether the proposal should be
implemented.
From here, the Oracle DAO will raise an on-chain proposal. There is a window in which the Protocol DAO, Oracle DAO and
community can review the proposal. If consensus is reached, the proposal is executed and changes are applied to the
protocol.
A handy dandy visual representation of this process can be found on
the [Rocket Pool website](https://rocketpool.net/governance/process).
## Prerequisite
Please read the [lifecycle of a proposal](/upgrades/houston/pdao.md#lifecycle-of-a-pdao-proposal) before proceeding. It'll explain
the differences between all the voting periods and the actions that can be taken during each period.
The rest of this page will walk you through the steps required for participating in on-chain pDAO proposals.
## Initializing Voting
If you are a node operator who registered before the Houston upgrade, you need to initialize voting to unlock voting
power. Keep in mind that having at least one minipool is a requirement for having voting power.
```shell
rocketpool pdao initialize-voting
```
This command will raise the prompt below. Please read it carefully:
```
Thanks for initializing your voting power!
You have two options:
1. Vote directly (delegate vote power to yourself)
This will allow you to vote on proposals directly,
allowing you to personally shape the direction of the protocol.
2. Delegate your vote
This will delegate your vote power to someone you trust,
giving them the power to vote on your behalf. You will have the option to override.
You can see a list of existing public delegates at https://delegates.rocketpool.net,
however, you can delegate to any node address.
Learn more about how this all works via: /en/legacy/houston/participate#participating-in-on-chain-pdao-proposals
Please type `direct` or `delegate` to continue:
```
- If you respond with `direct`, voting power will be initialized to your node and you'll be able to vote directly on
Protocol DAO proposals.
- If you respond with `delegate`, you'll have the opportunity to save a bit of gas by initializing voting
and [setting a delegate](/upgrades/houston/participate.md#delegating-voting-power) within the same transaction.
You only need to do this once. It configures the initial snapshot information for a node. After you initialize voting,
every action taken will update your node's snapshot information. Once your voting power is initialized, you can check
how much you have using the following smartnode command:
```shell
rocketpool pdao status
```
:::tip NOTE
Whenever a new proposal is created, a voting tree representing a snapshot of the network's voting power and delegate info
is created in conjunction with the new proposal. This means your node's voting power won't be included in a proposal if
it was raised before you initialized voting. `rocketpool pdao status` will display your node's voting power at the
latest block, which may or may not be representative of your voting power on a particular proposal.
:::
## Auto Initialize Vote Power
Smart Node version `1.13.8` introduces a new feature **Auto Initialize Vote Power**, which is designed to automatically
initialize voting power on nodes who have not yet done so. Automatically initialized voting power is self-delegated.
This feature can be configured in the Smart Node settings by running `rocketpool service config` and navigating to the \*
\*Smart Node and TX Fees\*\* section.

The **Auto-Init Vote Power Gas Threshold** is a limit (in gwei) on this automatic transaction. You can opt out of this
task by setting the threshold to 0. Feel free to opt out if your node was registered after the Houston upgrade or if
voting power is already enabled.
## Setting your Snapshot Signalling Address
Setting your Snapshot signalling address will allow you to participate in Snapshot votes on a browser or mobile device
without having to expose node keys to a hot wallet.
There are a few things to prepare:
- Your node's address
- An address you want to use for snapshot voting (signalling address)
You'll be signing a message saying that your node's address can delegate to the new address. This message states your
intent to use your wallet address as a Snapshot signalling address.
Select which network you're using from one of the tabs below.
**Hoodi Testnet**
If you're trying this out on Hoodi testnet, you can sign on this page:
[https://testnet.node.rocketpool.net/signalling-address](https://testnet.node.rocketpool.net/signalling-address)
**Mainnet**
If you're ready to configure this on mainnet, go here instead:
[https://node.rocketpool.net/signalling-address](https://node.rocketpool.net/signalling-address)
:::danger WARNING
Do not load your node's private key onto a hot wallet. Please choose another account to be your signalling address.
After setting the signalling address, you can use it to vote on Snapshot with your node's voting power.
:::
Start by **connecting the address you want to use as a signalling address** to the website using MetaMask,
WalletConnect, or any of the other methods the website supports. You will then be presented with this dialog to look up
your node address.
Next, you'll enter your node address then click the orange "Find" button. This will check if the address is a registered
node and then bring you to the next step.
:::tip TIP
**Make sure you have the correct node address before doing this!** if you need to confirm your node's address, you can
quickly retrieve it via the CLI using the `rocketpool node status` command.
:::
Once you've signed in and confirmed your node address, you'll see your **Snapshot signalling address**. It should be the
same as the account you've signed into the site with. Double check that this is correct before proceeding. Once you're
confident that you're signed into the desired account, click the orange "Sign Message" button. You'll see a prompt in
your wallet extension app to sign the following message:
```
`snapshot signalling address` may delegate to me for Rocket Pool governance
```
Signing won't cost you any gas but setting will. After you sign, the frontend will give you a command to paste into the
smartnode. Go ahead and paste it into your smartnode's CLI and follow the prompted steps. The command should look
something like this:
```shell
rocketpool pdao set-signalling-address
`snapshot signalling address`
`EIP712 signature`
```
If you see this message in your CLI, you're all set!
```
The node's signalling address was successfully set to `snapshot signalling address`
```
:::tip TIP
Don't worry if you accidentally close the site or lose track of the command. You can simply repeat the steps and **sign
again using the same node address and signalling address**. The frontend uses `signer.Signmessage()` from the ethers
library, which means your signature is deterministic given the same input.
Click [here](https://docs.ethers.org/v6/api/providers/#cid_865) to learn more.
:::
Clearing your signalling address is pretty easy, just use this command in the CLI:
```shell
rocketpool pdao clear-signalling-address
```
## Allowing RPL Locking
You may ignore this step if you are only interested in voting on a proposal. Allowing RPL locking is only required for
those who wish to propose or challenge a proposal.
RPL locking is required for proposing and challenging. By default, locking RPL for any purpose, will be disabled. Node
operator's will opt-in to performing governance activities by enabling the locking of RPL from their node or primary
withdrawal address. You can do so using this command in the Smart Node:
```shell
rocketpool node allow-rpl-locking
```
This will prompt you to allow the locking of RPL when creating or challenging governance proposals. Conversely you can
use the following command to opt-out of RPL locking:
```shell
rocketpool node deny-rpl-locking
```
::: tip NOTE
Locked RPL acts the same way as regular staked RPL for the purposes of rewards, voting, and collateral requirements.
Locked RPL is not counted towards thresholds for withdrawing RPL.
:::
## Delegating Voting Power
A node operator can elect to delegate their voting power to another node operator. The only requirement is that your
delegate is a registered node.
To delegate on-chain voting power to another node, use the following command:
```shell
rocketpool pdao set-voting-delegate `address`
```
::: tip NOTE
If you've delegated your voting power to another node operator, you can reset this by setting the delegate address to
your own node's address.
:::
- During phase 1 of a proposal: **Voters** and **Delegates** may cast their vote on a proposal.
- During phase 2 of a proposal: **Node Operators** who have delegated their vote get the opportunity to overturn their
Delegate's vote, if they disagree.
If you are a node operator with delegated voting power, you must vote during voting phase 1 for the delegated voting
power to count towards the proposal. Your vote in phase 1 will be worth your **local voting power + delegated voting
power**. Your vote in phase 2 is worth your **local voting power** only.
## Creating a Proposal
In order to be eligible to propose, a node must meet a few requirements:
- Included in snapshotting (either by [initializing voting](/upgrades/houston/participate.md#initializing-voting) or by
registering post Houston)
- Must have at least one minipool
- Has non-zero voting power
- Has allowed [RPL locking](/upgrades/houston/participate.md#allowing-rpl-locking)
- Has an RPL stake (minus any already locked RPL) greater than the proposal bond
Proposals exist to change parameters and execute code at the protocol level! There should be discussion and consensus
through the [governance](/upgrades/houston/participate.md#governance-process) process before a proposal is created on chain.
Use the command `rocketpool pdao propose` to bring up a menu of options
```
COMMANDS:
rewards-percentages, rp Propose updating the RPL rewards allocation percentages for node operators, the Oracle DAO, and the Protocol DAO
one-time-spend, ots Propose a one-time spend of the Protocol DAO's treasury
recurring-spend, rs Propose a recurring spend of the Protocol DAO's treasury
recurring-spend-update, rsu Propose an update to an existing recurring spend plan
security-council, sc Modify the security council
setting, s Make a Protocol DAO setting proposal
```
Each of these commands will prompt you with a list of inputs to create your desired proposal. In this guide, we'll
invite a node to the security council to serve as an example. To raise a proposal to invite a node to the security
council, you would use the command:
```shell
rocketpool pdao propose security-council invite
```
Keep in mind that this step will have some slight variation depending on the type of proposal. This particular command:
`rocketpool pdao propose security-council invite` will prompt you to enter an ID followed by a member address.
```
Please enter an ID for the member you'd like to invite: (no spaces)
test-member
Please enter the member's address:
0xBdbcb42DD8E39323a395B2B72d2c8E7039f1F145
... gas estimations ...
Are you sure you want to propose inviting test-member (0xBdbcb42DD8E39323a395B2B72d2c8E7039f1F145) to the security council? [y/n]
```
After this is included in a block, a pDAO proposal will be created! The proposal will enter
the [vote delay period](/upgrades/houston/pdao.md#vote-delay-period) upon creation.
## Viewing the State of a Proposal
Every proposal is assigned a `proposalID`. In this case, our proposal to invite `0xBdbc...` to the security council is
represented with `ID 71`. There are a few ways to view the state of the proposal. One method will display a list of
every pdao proposal along with their state (pending, succeeded, executed, etc). The second method displays in-depth
details about a specific proposal.
**Viewing a List of Proposals**
To list all proposals, use the following command:
```shell
rocketpool pdao proposals list
```
This will display a list of all proposals and their state
```
1 Pending proposal(s):
71: invite test-member (0xBdbcb42DD8E39323a395B2B72d2c8E7039f1F145) to the security council - Proposed by:
0x681B8BBf08708e64694005c7Dc307b381b4D1A7D
Succeeded proposal(s):
Executed proposal(s):
Destroyed proposal(s):
Quorum not Met proposal(s):
Defeated proposal(s):
Expired proposal(s):
```
Here we can see that our proposal `invite test-member` has an ID of 71 and is in the pending state. In this state,
[challengers](/legacy/houston/pdao.md#challenge-process) can dispute the validity of the
merkle pollard (used to calculate voting power) supplied by the proposer. When `proposal.vote.delay.time` ends,
the proposal will transition into active voting phases. Feel free to review [lifecycle of a
proposal](/upgrades/houston/pdao.md#lifecycle-of-a-pdao-proposal) for a refresher.
**Viewing Proposal Details**
Now that you have the proposal ID, you can view the status of your proposal using this command:
```shell
rocketpool pdao proposals details `proposal-id`
```
This is where you can view all the information in regards to a specific proposal. For example, the execution
payload, what phase the proposal is in, and vote direction.
```
Proposal ID: 71
Message: invite test-member (0xBdbcb42DD8E39323a395B2B72d2c8E7039f1F145) to the security council
Payload: proposalSecurityInvite(test-member,0xBdbcb42DD8E39323a395B2B72d2c8E7039f1F145)
Payload (bytes):
f944c19f0000000000000000000000000000000000000000000000000000000000000040000000000000000000000000bdbcb42dd8e39323a395b2b72d2c8e7039f1f145000000000000000000000000000000000000000000000000000000000000000b746573742d6d656d626572000000000000000000000000000000000000000000
Proposed by: 0x681B8BBf08708e64694005c7Dc307b381b4D1A7D
Created at: 12 Mar 24 06:15 UTC
State: Pending
Voting start: 12 Mar 24 06:20 UTC
Challenge window: 30m0s
Voting power required: 90943818825
Voting power for: 0
Voting power against: 0
Voting power abstained: 0
Voting power against: 0
Node has voted: no
```
NOTE
The state of this sample proposal is `Pending`. This indicates that the proposal can be challenged, before
moving onto `Active (Phase 1)`. No voting can take place during the `Pending` state.
## Voting on a Proposal
During a voting period, **Node Operators** and **Delegates** can cast a vote with one of four options:
```
1. Abstain: The voter's voting power is contributed to quorum but is neither for nor against the proposal.
2. For: The voter votes in favor of the proposal being executed.
3. Against: The voter votes against the proposal being executed.
4. Veto: The voter votes against the proposal as well as indicating they deem the proposal as spam or malicious.
```
Their voting power will be applied to the option of their choosing. Voting power is a function of "effective RPL stake."
A more detailed reading can be found in
the [rocketpool-research repo](https://github.com/rocket-pool/rocketpool-research/blob/master/Protocol%20DAO/kane/pDAO%20Replacement/pDAO.md#overview-of-on-chain-voting).
::: tip NOTE
If you are a node operator with delegated voting power, you must vote during voting phase 1 for the delegated voting
power to count towards the proposal. Your vote in phase 1 will be worth your local voting power + delegated voting
power. Your vote in phase 2 is worth your local voting power only. Please keep in mind that a node may vote once and
only once on a proposal, so choose carefully.
:::
Use this command to cast a vote:
```shell
rocketpool pdao proposals vote
```
You'll be prompted to select a proposal to vote on if there is at least one proposal in an active voting phase.
The menu should display all of the proposals your node is eligible to vote on:
```
1: proposal 71 (message: 'invite test-member', payload: proposalSecurityInvite(test-member,0xBdbcb42DD8E39323a395B2B72d2c8E7039f1F145), phase 1 end: 14 Mar 24 05:40 UTC, vp required: 0.00, for: 0.00, against: 0.00, abstained: 0.00, veto: 0.00, proposed by: 0x681B8BBf08708e64694005c7Dc307b381b4D1A7D)
2: proposal 72 (message: 'replace langers-not-his-eoa (0xaC1396c21Eaf6630113516C69d63b7CB59B98b3E) on the security council with tpan (0x6E9E4Cc0A8172349E049128574E1fb85B8D3CE9E)', payload: proposalSecurityReplace(0xaC1396c21Eaf6630113516C69d63b7CB59B98b3E,tpan,0x6E9E4Cc0A8172349E049128574E1fb85B8D3CE9E), phase 1 end: 14 Mar 24 05:40 UTC, vp required: 0.00, for: 0.00, against: 0.00, abstained: 0.00, veto: 0.00, proposed by: 0xe2fC31d61E28BB16c0857D4682AB3616FA7A793d)
3: proposal 73 (message: 'set proposal.vote.delay.time', payload: proposalSettingUint(rocketDAOProtocolSettingsProposals,proposal.vote.delay.time,60), phase 1 end: 14 Mar 24 05:41 UTC, vp required: 0.00, for: 0.00, against: 0.00, abstained: 0.00, veto: 0.00, proposed by: 0x681B8BBf08708e64694005c7Dc307b381b4D1A7D)
```
After selecting an option, you'll be asked how you want to cast your vote.
```
How would you like to vote on the proposal?
1: Abstain
2: In Favor
3: Against
4: Veto
```
Selecting an option will then display your voting power, and then prompt you to send the transaction:
```
Your current voting power: 20123617964
+============== Suggested Gas Prices ==============+
| Avg Wait Time | Max Fee | Total Gas Cost |
| 15 Seconds | 76 gwei | 0.0176 to 0.0265 ETH |
| 1 Minute | 56 gwei | 0.0127 to 0.0190 ETH |
| 3 Minutes | 56 gwei | 0.0127 to 0.0190 ETH |
| >10 Minutes | 56 gwei | 0.0127 to 0.0190 ETH |
+==================================================+
These prices include a maximum priority fee of 2.00 gwei.
Please enter your max fee (including the priority fee) or leave blank for the default of 56 gwei:
```
You've successfully voted on the proposal once the transaction is included in the block! At this point, you may use
`rocketpool pdao proposal details ` to view the state of the proposal. A proposal needs to reach
`proposal.quorum` **voting power required** and a majority **voting power for** for it to be successful.
```
Voting power required: 140970562215
Voting power for: 197980809837
Voting power against: 0
Voting power abstained: 0
Voting power against: 0
Node has voted: In Favor
```
For the example above to pass, the voting power needs to exceed a quorum of `140970562215` voting power. There is
`197980809837` voting power in favor and no votes against or abstained. The proposal is poised for success and ready
for
execution by the end of `proposal.vote.phase2.time`.
## Executing a Successful Proposal
Congrats! Your proposal has passed! Now all that's left to do is to execute the proposal. Keep in mind that anybody
can
be the executor to a proposal. To execute a successful proposal, type in the command:
```shell
rocketpool pdao execute
```
Selecting an option will prompt you to send a transaction. Once this transaction is included in a block, the change
will
be applied to the Rocket Pool protocol!
```
Please select a proposal to execute:
1: All available proposals
2: proposal 71 (invite test-member (0xBdbcb42DD8E39323a395B2B72d2c8E7039f1F145) to the security council)',
proposalSecurityInvite(test-member,0xBdbcb42DD8E39323a395B2B72d2c8E7039f1F145)
```
## Claiming Bonds and Rewards
Proposers or Challengers may claim their bonds upon conclusion of a proposal. Depending on the outcome of a proposal,
a
Proposer or Challenger may or may not be able to claim their `proposal.bond` and `proposal.challenge.bond`.
Here are some rules that dictate the conditions in which bonds can be claimed:
- If a proposal is defeated, the proposer forfeits their bond which is divided proportionally amongst the challengers
who contributed to the proposal's defeat. All other challengers receive their bond back only.
- Contributing to the defeat of a proposal means a challenger submitted an index which was later proven to be
incorrect
by the proposers inability to reply to a challenge. It is possible that there are multiple incorrect indices but only
those that resulted in the defeat of the proposal share the reward. All other challengers receive their bond back
only.
- If a challenger challenges a node, the proposer responds, and the proposal does not get defeated. The proposer can
claim the challenge bonds from the invalid challenges.
- If a proposal is defeated, the proposer forfeits their bond which is divided proportionally amongst the challengers
who contributed to the proposal's defeat.
Use this command to claim bonds:
```shell
rocketpool pdao claim-bonds
```
This will display every proposal you're eligible to claim bonds from. You can either claim bonds from a specified
proposal, or you can claim bonds and rewards from all eligible proposals.
```
Please select a proposal to unlock bonds / claim rewards from:
1: All available proposals
2: Proposal 42 (proposer: true, unlockable: 21.00 RPL, rewards: 0.00 RPL)
3: Proposal 43 (proposer: true, unlockable: 21.00 RPL, rewards: 0.00 RPL)
4: Proposal 44 (proposer: true, unlockable: 21.00 RPL, rewards: 0.00 RPL)
5: Proposal 46 (proposer: true, unlockable: 21.00 RPL, rewards: 0.00 RPL)
6: Proposal 47 (proposer: true, unlockable: 21.00 RPL, rewards: 0.00 RPL)
7: Proposal 48 (proposer: true, unlockable: 21.00 RPL, rewards: 0.00 RPL)
8: Proposal 49 (proposer: true, unlockable: 21.00 RPL, rewards: 0.00 RPL)
```
Once you've selected an option, you'll be prompted with the network's current gas costs recommendations; confirm your
gas price selection and follow the rest of the prompts.
```
+============== Suggested Gas Prices ==============+
| Avg Wait Time | Max Fee | Total Gas Cost |
| 15 Seconds | 26 gwei | 0.1591 to 0.2387 ETH |
| 1 Minute | 21 gwei | 0.1261 to 0.1891 ETH |
| 3 Minutes | 21 gwei | 0.1261 to 0.1891 ETH |
| >10 Minutes | 21 gwei | 0.1261 to 0.1891 ETH |
+==================================================+
These prices include a maximum priority fee of 2.00 gwei.
Please enter your max fee (including the priority fee) or leave blank for the default of 21 gwei:
Using a max fee of 21.00 gwei and a priority fee of 2.00 gwei.
Are you sure you want to claim bonds and rewards from 7 proposals? [y/n]
```
Note that if you select the first option to claim all available proposals, they will each execute individually and not
as one transaction.
## Creating a Recurring Treasury Spend
You'll need to prepare a few inputs to create a recurring treasury spend:
- A contract name
- The recipient's address
- Amount of RPL to send per period
- The start time for the recurring payment (as a UNIX timestamp)
- The length of each payment period in hours / minutes / seconds (e.g., 168h0m0s)
- Number of payment periods
::: tip INFO
The recipient will need to keep note of the contract name in order to claim payments. Don't worry though, as this
information is stored and can be retrieved using the command `rocketpool pdao proposals details `
:::
To raise a proposal to set up a recurring treasury spend, use the following smartnode command and follow the prompts:
```shell
rocketpool pdao propose recurring-spend
```
Here's what it looks like all together:
```
Please enter a contract name for this recurring payment:
test-recurring-spend
Please enter a recipient address for this recurring payment:
0x681B8BBf08708e64694005c7Dc307b381b4D1A7D
Please enter an amount of RPL to send to 0x681B8BBf08708e64694005c7Dc307b381b4D1A7D per period:
1
Your value will be multiplied by 10^18 to be used in the contracts, which results in:
[1000000000000000000]
Please make sure this is what you want and does not have any floating-point errors.
Is this result correct? [y/n]
y
Please enter the time that the recurring payment will start (as a UNIX timestamp):
1717935233
The provided timestamp corresponds to 2024-06-09 12:13:53 +0000 UTC - is this correct? [y/n]
y
Please enter the length of each payment period in hours / minutes / seconds (e.g., 168h0m0s):
720h
Please enter the total number of payment periods:
24
```
Once you've entered all the required inputs, a proposal to create a recurring payment will be raised. When the pDAO
passes and executes this proposal, the recipient is allocated `1 RPL` starting at `2024-06-09 12:13:53 +0000 UTC`
every
`720 hours` for a total of `24 payments`.
## Claiming a Recurring Treasury Spend
Claiming recurring payments should be pretty simple! Navigate to our frontend
tool [here](https://node.rocketpool.net/claim-recurring-payments) to do so. If you're trying this out on
Hoodi
testnet, use [this](https://testnet.node.rocketpool.net/stake-rpl-on-behalf-of-node) link instead.
Once you're on the site, click the **connect wallet** button. Please read through and accept the Terms of Service &
Privacy Policy, this will enable different ways to connect, then click connect **metamask**.
MetaMask will prompt you to select an account to connect to the website. After you've signed in, you'll need to enter
the **contract name**. Doing so will display all the relevant details. Make sure you double check the recipient's
address. Anybody can call the claim function, but each payment contract will have a designated recipient to disperse
RPL
towards.

You can claim your payments at any time, you'll just get the total unclaimed RPL up until the most recent period.
Alternatively you can wait until all periods have passed to collect all at once and save on gas.
Just hit the big orange claim button when you're ready and review the transaction in metamask (or your preferred
wallet). Once that's done, you're all set!
---
url: /upgrades/houston/pdao.md
---
> For AI agents: the complete documentation index is available at /llms.txt, the full documentation bundle is available at /llms-full.txt.
# The Protocol DAO (pDAO)
The Rocket Pool Protocol DAO (pDAO) is responsible for shaping the direction of the protocol and is run by RPL governance. Its members and their voting power are made up of node operators, big and small, all of which are directly participating in the protocol. It serves the Rocket Pool community at large, including rETH holders, Node Operators, and RPL holders. The pDAO prioritizes the safety of the Rocket Pool protocol and the health of the Ethereum Network. For an explicit definition of who and what the pDAO is, feel free to take a look at the [pDAO charter](https://rpips.rocketpool.net/RPIPs/RPIP-23).
## New pDAO features in Houston
### On-chain execution of pDAO responsibilities
The Houston Upgrade introduces an on-chain replacement for the pDAO governance system's execution process. It uses an optimistic fraud-proof system that allows any node operator to raise proposals and vote on proposals to adjust "pDAO protocol parameters" and spend treasury funds. To see a comprehensive list of pDAO controllable parameters, click [here](https://rpips.rocketpool.net/RPIPs/RPIP-33#parameter-table).
Pre-Houston, the core team was responsible for executing pDAO duties at the behest of the community governance process. For example, the team carries out the monthly IMC and GMC payments as per the governance voted payment schedules. The plan was for this power to reside with the team temporarily until a new power structure is set up to take over these responsibilities. Houston removes this dependency on the team, making the protocol more decentralized and trustless.
### Security Council
The Houston upgrade also includes a new security council to help react quickly in the event of any potential issues with the protocol. These members can be elected by the pDAO and have the ability to propose and execute changes without delay. The pDAO has the power to elect and remove members from the security council. It's a serious role and the pDAO should develop strong entry requirements and processes for flushing stale members. The pDAO guardian will be the security council's sole member at the start of Houston.
### Recurring Treasury Spends
RPL has a 5% inflation rate. 22% of this inflation is directed towards the pDAO as defined in [RPIP-25](https://rpips.rocketpool.net/RPIPs/RPIP-25). The pDAO can use these funds for a variety of purposes. For example, incentives such as liquidity provider (LP) bonuses, grants and bounties for 3rd party improvements and projects, and funding the development of the Rocket Pool protocol. The Houston upgrade also introduces a new feature that enables recurring treasury payments made to a specified beneficiary each rewards period.
## Protocol DAO (pDAO) proposals
Any node with a non-zero voting power may raise or participate in a pDAO proposal at any time. Proposals can be one of the following types:
- Changing pDAO settings
- One-time treasury spends
- Repeat treasury spends (management committees)
- Security council membership
For greater detail and rationale, refer to [proposal types](https://rpips.rocketpool.net/RPIPs/RPIP-33#proposal-types). It's important to understand that a pDAO proposal is an on-chain entity that exists to execute changes at the protocol level.
## Lifecycle of a pDAO proposal
A proposal should be forecasted by the [governance process](/upgrades/houston/participate.md#governance-process) before it ends up on-chain. It consists of 4 Periods, all of which are pDAO [controllable parameters](https://rpips.rocketpool.net/RPIPs/RPIP-33#parameter-table):
- Vote Delay Period: `proposal.vote.delay.time`
- Vote Phase 1: `proposal.vote.phase1.time`
- Vote Phase 2: `proposal.vote.phase2.time`
- Execution: `proposal.execute.time `

### Vote Delay Period
In order to decide the outcome of a proposal, the protocol must know the quorum required. A proposer calculates this value off-chain and submits it alongside their proposal. The value is optimistically accepted, but in the case of fraud, verifiers can perform a challenge/response process to prove the value is incorrect. Invalid proposals are then discarded.
A few reasons why proposers and challengers are required to lock RPL.
- `proposal.bond` incentivizes valid proposals and disincentivizes spam.
- `proposal.challenge.bond` incentivizes the takedown of invalid/malicious proposals.
Challengers supply an index into the Merkle-sum tree that they are alleging is incorrect. Any node operator can participate in challenging fraudulent proposals (and earn a reward in doing so). Feel free to read about the [pDAO Challenge Process](/upgrades/houston/pdao.md#challenge-process) if you're interested in opting in. A proposal not defeated in a challenge by the end of the vote delay period will enter voting stages.
::: tip NOTE
When `proposal.vote.delay.time` expires, the proposal is no longer able to be challenged or defeated.
:::
### Vote Period 1
During a voting period, Node Operators and Delegates can cast a vote with one of four options:
```
1. Abstain: The voter's voting power is contributed to quorum but is neither for nor against the proposal.
2. For: The voter votes in favor of the proposal being executed.
3. Against: The voter votes against the proposal being executed.
4. Veto: The voter votes against the proposal as well as indicating they deem the proposal as spam or malicious.
```
Their voting power will be included in the option of their choosing.
This can be done using the command:
```shell
rocketpool pdao proposals vote
```
If the veto quorum (as defined by the `proposal.veto.quorum` parameter) is met, the proposal is immediately defeated and the proposer loses their bond. This is to dissuade spam, low quality proposals, or proposals that have not gone through off-chain processes first. The smartnode command `rocketpool pdao proposals finalize` is used to finalize a vetoed proposal by burning the proposer's locked RPL bond.
The duration of period 1 is determined by the `proposal.vote.phase1.time` parameter. The proposal will transition to phase 2 regardless of whether `proposal.quorum` is reached or not.
### Vote Period 2
Delegates can vote during vote period 2, but only their vote is only worth their **local voting power**. Voters who didn't vote in period 1 will still be able to cast a vote during period 2. Node operators who disagree with their delegate's choice will have the opportunity to overturn their delegate's vote.
The process of overturning a vote is pretty simple, just call `rocketpool pdao proposals vote` during vote period 2 and follow the prompts. The delegate's voting power will be overturned by the delegatee's voting power.
The result of a proposal is concluded when vote period 2 is over. In order for a result to be determined (and executed), `proposal.quorum` total voting power must be reached by the end of `proposal.vote.phase2.time`. If quorum is met and consensus is reached, the proposal will pass the voting periods and be marked as successful.
::: tip NOTE
No further actions can be taken in the event that `proposal.quorum` is not met. A proposal is considered concluded and final if quorum is not met.
:::
### Execution
Once both voting periods have passed and the proposal is successful, the proposal can be executed and the change (defined by the payload) is applied to the Rocket Pool protocol. To execute a proposal, use the command:
```shell
rocketpool pdao proposals execute
```
You will be prompted to select a proposal to execute, the proposal will be applied to the protocol after this step!
After the proposal has passed the voting periods, the proposer may [claim](/upgrades/houston/participate.md#claiming-bonds-and-rewards) their locked RPL bond, unless the proposal was defeated by a challenge or vetoed.
::: tip NOTE
There is a window `proposal.execute.time` where a proposal can be executed. A proposal will expire if this timer reaches its end.
:::
And that's it! Keep in mind that all of the variables mentioned above are pDAO controllable parameters. Click [here](https://rpips.rocketpool.net/RPIPs/RPIP-33#parameter-table) for a comprehensive list of every parameter the pDAO has authority to change using on-chain proposals.
## Challenge Process
The complete network voting power tree is stored off-chain due to gas limits. When a user submits a new proposal, they are responsible for constructing the network voting tree at target block number. This tree is generated off-chain but verifiable via Merkle roots that are submitted on-chain. The protocol relies on **verifiers** to check the details submitted by the proposer.
Any node can participate in tracking and verifying the correctness of proposals. To opt into this responsibility, use the command `rocketpool service config`, navigate to the **Smart Node and TX Fee Settings** menu, and check the box `Enable PDAO Proposal Checker`.

When this setting is enabled, the node will check for new proposals, verify their correctness, and submit challenges to invalid proposals. The only prerequisite is that [RPL Locking](/upgrades/houston/participate.md#allowing-rpl-locking) is enabled.
This check runs every 5 minutes in conjunction with a few other node related duties. We'll run through an example of what challenging a fraudulent proposal looks like. We can use the smartnode command `rocketpool service logs node` to monitor the progress:
```
rocketpool_node | 2024/04/05 02:19:16 Checking for Protocol DAO proposal challenges to defend...
rocketpool_node | 2024/04/05 02:19:26 Checking for Protocol DAO proposals to challenge...
rocketpool_node | 2024/04/05 02:19:26 [Network Tree] Couldn't load network tree for block 1283202 from disk, so it must be regenerated.
rocketpool_node | 2024/04/05 02:19:26 [PDAO Proposals] Network tree for block 1283202 didn't exist, creating one.
rocketpool_node | 2024/04/05 02:19:26 [Voting Info Snapshot] Couldn't load network tree for block 1283202 from disk, so it must be regenerated.
rocketpool_node | 2024/04/05 02:19:26 [PDAO Proposals] Voting info snapshot for block 1283202 didn't exist, creating one.
rocketpool_node | 2024/04/05 02:19:26 Proposal 177 does not match the local tree artifacts and must be challenged.
rocketpool_node | 2024/04/05 02:19:26 [Voting Info Snapshot] Loaded file [vi-1283202.json.zst].
rocketpool_node | 2024/04/05 02:19:26 [Network Tree] Loaded file [network-tree-1283202.json.zst].
rocketpool_node | 2024/04/05 02:19:26 Submitting challenge against proposal 177, index 5...
rocketpool_node | 2024/04/05 02:19:26 This transaction will use a max fee of 16.067134 Gwei, for a total of up to 0.003252 - 0.004878 ETH.
rocketpool_node | 2024/04/05 02:19:26 Transaction has been submitted with hash 0x327e59e398bf2141a0d9273947d1da5c255606c45afaca428ab092186300eac2.
rocketpool_node | 2024/04/05 02:19:26 You may follow its progress by visiting:
rocketpool_node | 2024/04/05 02:19:26 https://holesky.etherscan.io/tx/0x327e59e398bf2141a0d9273947d1da5c255606c45afaca428ab092186300eac2
```
We can see that our node has caught a fraudulent proposal and started the process of challenging it. Block `1283202` is the block in which proposal 177 was raised, which means voting power for this proposal will be calculated at block `1283202`. If you're interested in seeing what these **Voting Info Snapshots** look like, you can locate them in this directory: `~/.rocketpool/data/voting`
Because the proposer was caught submitting incorrect voting info, our node makes a contract call `Function: createChallenge` on proposal 177 at index 5 and waits for the proposer to respond to the challenge.
```
rocketpool3_node | 2024/04/05 02:56:51 Checking for Protocol DAO proposal challenges to defend...
rocketpool3_node | 2024/04/05 02:57:01 Checking for Protocol DAO proposals to challenge...
rocketpool3_node | 2024/04/05 02:57:01 [Network Tree] Loaded file [network-tree-1283202.json.zst].
rocketpool3_node | 2024/04/05 02:57:01 Proposal 177 does not match the local tree artifacts and must be challenged.
rocketpool3_node | 2024/04/05 02:57:01 [Voting Info Snapshot] Loaded file [vi-1283202.json.zst].
rocketpool3_node | 2024/04/05 02:57:01 [Network Tree] Loaded file [network-tree-1283202.json.zst].
rocketpool3_node | 2024/04/05 02:57:01 Proposal 177 has been defeated with node index 20, submitting defeat...
rocketpool3_node | 2024/04/05 02:57:01 This transaction will use a max fee of 19.078965 Gwei, for a total of up to 0.002061 - 0.003091 ETH.
rocketpool3_node | 2024/04/05 02:57:01 Transaction has been submitted with hash 0x8cc01dff37205dc98e53f4e9fae7f3c802ecc1c69a01f53e734115a73401287e.
rocketpool3_node | 2024/04/05 02:57:01 You may follow its progress by visiting:
rocketpool3_node | 2024/04/05 02:57:01 https://holesky.etherscan.io/tx/0x8cc01dff37205dc98e53f4e9fae7f3c802ecc1c69a01f53e734115a73401287e
rocketpool3_node |
rocketpool3_node | 2024/04/05 02:57:01 Waiting for the transaction to be validated...
rocketpool3_node | 2024/04/05 02:57:13 Successfully defeated proposal.
```
Since the proposer's voting info is incorrect, it won't be able to respond to the challenge in time (determined by `proposal.challenge.period`). The proposal is considered defeated at this point. When the proposal is defeated, our node automatically makes the contract call `defeatProposal` on proposal 177 at index 5 to end the proposal.
::: tip NOTE
Challengers who participate in defeating the proposal are paid a proportional amount of the proposer's bond if they submit an index proven to be incorrect. All other challengers receive their bond back only.
:::
Now that the proposal is defeated, our node (the challenger) can [claim](/upgrades/houston/participate.md#claiming-bonds-and-rewards) their original RPL bond as well as the proposer's RPL bond as a reward for defeating a fraudulent proposal.
If you're curious to dig into the details of the pDAO proposal and challenge system, take a look at the [technical specifications](https://github.com/rocket-pool/rocketpool-research/blob/houston/Protocol%20DAO/pdao-prop-challenge-spec.md#draft-protocol-dao-proposal-challenge-system-specification). Feel free to skip to this section on the [challenge process](https://github.com/rocket-pool/rocketpool-research/blob/houston/Protocol%20DAO/pdao-prop-challenge-spec.md#challenge-process) if you're interested in studying an example that goes into low level details.
---
url: /upgrades/houston/rpl-withdrawal-address.md
---
> For AI agents: the complete documentation index is available at /llms.txt, the full documentation bundle is available at /llms-full.txt.
# Setting your RPL Withdrawal Address
It's important to understand the difference between your [primary withdrawal address](/node-staking/prepare-node.md#setting-your-primary-withdrawal-address) and your RPL withdrawal address. By default, your RPL withdrawal address is unset and your Primary withdrawal address is where all of your RPL checkpoint rewards, your staked RPL, and Beacon Chain ETH will be sent to.
You can set a [separate withdrawal address for your RPL](https://rpips.rocketpool.net/RPIPs/RPIP-31) if you wish. Your RPL withdrawal address if set will be able to trigger and claim RPL from inflation rewards and will have no effect on ETH consensus rewards or anything related to ETH. In this case, your Primary withdrawal address will no longer have any authority over RPL related actions.
This creates some interesting opportunities where RPL can be supplied by an entity to a node operator that does not wish to have exposure to RPL. That entity can then claim RPL rewards for putting up the required insurance collateral for the node. In other words, this allows different actors to supply each collateral type.
::: warning NOTE
Upon setting up your node for the first time, your RPL withdrawal address defaults to being unset.
If you choose to set an RPL withdrawal address, **it is vitally important to set this to a different address controlled by a cold wallet.**
A cold wallet could be a hardware wallet (such as a [Ledger](https://www.ledger.com/), [Trezor](https://trezor.io/), or [Grid+](https://gridplus.io/)), or a Smart Contract wallet (such as [Safe](https://app.safe.global/welcome)).
We **strongly recommend** that you DO NOT use a hot wallet such as MetaMask as your RPL withdrawal address.
This way, if your node wallet is compromised, the attacker doesn't get access to your staked RPL by forcing you to exit because all of those funds will be sent to your separate cold wallet (which they hopefully do not have).
RPL withdrawal addresses are set at a node operator level.
If you create multiple minipools, they will all refer to the same RPL withdrawal address so you only need to perform this setup once.
[See here](https://ethereum.org/en/security/#wallet-security) for some basics on wallet security from the Ethereum Foundation.
:::
There are two different ways to do this.
Please read both options below to determine which one applies to you.
**Method 1**
_Use this method if your new RPL withdrawal address can be used to sign transactions via MetaMask or WalletConnect._\*
NOTE
This method will require you to **submit a transaction** from your new RPL withdrawal address, so **you must have a small amount of ETH in that address already.**
NOTE
For users of **Ledger** hardware wallets, note that Ledger Live does not yet support MetaMask or WalletConnect natively.
You will need to use MetaMask and connect it to your Ledger instead.
Follow [the official Ledger instructions](https://www.ledger.com/academy/security/the-safest-way-to-use-metamask) to do this.
To work with the Rocket Pool website, you will need to have your Ledger connected, unlocked, and the ETH app open.
You will also need to **enable "blind signing"** for the current session; you can find this within the Settings portion of the ETH app on the device.
Bind signing will automatically be disabled after you close the session.
If you are using Hoodi Testnet and want to use your Ledger as your RPL withdrawal address, **you must create a new Ethereum wallet on your Ledger** first to ensure you don't connect your live address to the test network, which tends to cause confusion.
Make sure to select the **Hoodi Testnet** in the network selection dropdown when connecting your Ledger to MetaMask.
Note that Ledger Live will not show your balance on the test network, but other applications which support the test network (such as MetaMask and Etherscan) will be able to display it.
1. Run `rocketpool node set-rpl-withdrawal-address 'your cold wallet address or ENS name'`. Your new RPL withdrawal address will be marked as "pending". Until you confirm it, **your old RPL withdrawal address will still be used**.
2. To confirm it, you must send a special transaction **from your new RPL withdrawal address** to the minipool contract to verify that you own the RPL withdrawal address.
3. The easiest way to do this is to navigate to the Rocket Pool RPL withdrawal address site (for the [Hoodi Testnet](https://testnet.node.rocketpool.net/rpl-withdrawal-address) or for [Mainnet](https://node.rocketpool.net/rpl-withdrawal-address)).
4. If you haven't already connected Metamask or WalletConnect to the Rocket Pool website, do this now. Click the **select wallet** button in the center of the screen, and choose MetaMask or WalletConnect based on which wallet you would like to use. You will then be prompted asking you to confirm the connection. For example, using MetaMask:
Click **Next**, then click **Confirm** to enable the Rocket Pool website to use your wallet. 3. Select **RPL Withdrawal Address** from the top menu (or the hamburger menu on the left side if you're on a mobile device). 4. You will see this prompt:
4. Type your **node wallet address** here and click on the orange **Find** button to continue.
1. You will be prompted to confirm a pending RPL withdrawal address. This should be the same address you used while running this command previously: `rocketpool node set-rpl-withdrawal-address` Select **Confirm Pending** when you're ready.
2. Now, there should be a new confirmation dialog in your wallet. Again, using MetaMask as an example, click the MetaMask icon to open it and you should see something like this:
Click **Confirm** to send the transaction to the network. This will take some time until it gets included in a block, but once it does, you will see a confirmation dialog:
5. Your new RPL withdrawal address will now be confirmed and activated. You can view this with `rocketpool node status`.
**Method 2**
**Use this method only if your RPL withdrawal address _cannot_ be used to sign transactions via MetaMask or WalletConnect.**
In this method, you will run:
```shell
rocketpool node set-rpl-withdrawal-address --force `your cold wallet address`
```
You will be offered the chance to send a test transaction before confirming this, to ensure that you have the right address.
If you confirm this command when it prompts you, your new RPL withdrawal address will be set immediately.
By doing this, you bypass the safety measure associated with Method 1, which requires you to prove that you own the new address.
If you make a typo here, there is no way to undo it and **your minipool's rewards will be lost forever**.
We **strongly** encourage you to use the test transaction mechanism before confirming this, and if possible, use Method 1 instead.
Once this is done, you will **no longer be able to change your RPL withdrawal address using the `set-rpl-withdrawal-address` command**.
To change it, you will need to send a signed transaction from your **active** RPL withdrawal address (the one you just switched to).
The Rocket Pool website has a function to help you do this.
If you'd like to unset your RPL withdrawal address, the process is pretty simple. First thing, you'll want to navigate back to the RPL Withdrawl Address page on the Rocket Pool website.
**Hoodi Testnet**
[https://testnet.node.rocketpool.net/rpl-withdrawal-address](https://testnet.node.rocketpool.net/rpl-withdrawal-address)
**Mainnet**
[https://node.rocketpool.net/rpl-withdrawal-address](https://node.rocketpool.net/rpl-withdrawal-address)
If you're signed in with the node's RPL withdrawal address, you should be able to click the **unset** button on the right here:

Clicking **unset** will take you to a page where you can confirm the details. If you're happy with what you see, click the orange **unset** button to send the transaction to the network.
That's all there is to setting your RPL withdrawal address! We hope you found the process quick and easy.
Feel free to swing by [our Discord server](https://discord.gg/G46XgK264a) to let us know what you thought of it and keep tabs on the project as it evolves.
---
url: /upgrades/houston/stake-eth-on-behalf.md
---
> For AI agents: the complete documentation index is available at /llms.txt, the full documentation bundle is available at /llms-full.txt.
# Stake ETH on behalf of node
RPIP-32 allows an account to [stake ETH on behalf](https://rpips.rocketpool.net/RPIPs/RPIP-32) of a Rocket Pool node that is registered in the protocol. This supports a variety of situations where the node operator is not directly providing the ETH:
- Enhanced security for node operators, as they can stake directly from their hardware wallet, eliminating the need to transfer funds to the node beforehand.
- Staking as a Service providers where custody of funds are managed by a trusted custodian.
- Protocol integrations where custody of funds are managed by smart contracts.
- DAOs or organizations where custody of funds are managed by a treasury.
While the primary aim of this feature is to facilitate single depositor scenarios, it’s worth noting that multiple independent depositors can also leverage this capability by creating smart contracts layered on top. Rocket Pool also introduced the ability to [stake RPL on behalf](/node-staking/create-validator.md#whitelisting-an-address-to-stake-on-behalf) of a node back in our previous Atlas release.
### Prerequisite
Make sure that you've properly configured the [primary withdrawal address](/node-staking/prepare-node.md#setting-your-primary-withdrawal-address) of the node you intend on funding. Follow the link above for a guide on how withdrawal addresses act post houston.
::: tip NOTE
Don't skip this step! All ETH bond/rewards will be withdrawn to the primary withdrawal address. In other words, the address that supplies ETH for a node should be used as the primary withdrawal address! Please make sure that the node's primary withdrawal address is set to a wallet you have custody over.
:::
The process is slightly different for the Hoodi Testnet and Mainnet, so choose the network you are interested in from the tabs below.
**Preparing on the Hoodi Testnet**
WARNING
When practicing staking on the test network, you **do not need to provide any of your real ETH** during this process.
You will be given **fake test ETH** to use instead.
**Do not attempt to move your real ETH on mainnet to the testnet or you will lose it permanently!**
Start by installing [MetaMask](https://metamask.io/) if you haven't already.
Follow the instructions on their site to install the extension, create an account, and sign in.
Next, open the MetaMask panel using its icon in your browser toolbar.
You will need to add the Hoodi Testnet to MetaMask.
Click on the top left dropdown & click the "Add Network" button.
You will see a list of networks, Hoodi is not in this list so click the "Add a network manually" button.
Fill in the following details:
```
Network Name: Hoodi
New RPC Url: https://rpc.hoodi.ethpandaops.io
Chain ID: 560048
Currency Symbol: ETH
Block Explorer Url: https://hoodi.etherscan.io
```
Then click Save. You should now see the Hoodi network in the top left dropdown.
Click on the **network dropdown** in the top left of the Metamask extension & select **Hoodi Test Network**:
Now that you have a wallet address in MetaMask, you need to fill it with some test ETH.
Head over to the [Practicing with the Test Network](/node-staking/testnet/overview.md#getting-test-eth-on-hoodi) page for a quick guide on how to use a testnet faucet to get some test ETH on Hoodi.
Once you have some Hoodi ETH to test with, head to [https://testnet.node.rocketpool.net/deposit-eth-on-behalf-of-node](https://testnet.node.rocketpool.net/deposit-eth-on-behalf-of-node).
If you see a notice about a web3 browser being required, or the current network ID being unsupported, make sure you’ve completed the previous steps correctly before continuing.
**Preparing on the Ethereum Mainnet**
Start by installing [MetaMask](https://metamask.io/) if you haven't already.
Follow the instructions on their site to install the extension, create an account, and sign in.
Next, open the MetaMask panel using its icon in your browser toolbar.
Click on the **network dropdown** in the toolbar at the top and ensure that **Ethereum Mainnet** is selected:
Now that you have a wallet address in MetaMask, you need to transfer some ETH into it.
You will need to supply this from an existing wallet or buy ETH on an exchange.
Once you have some ETH to stake, head to [https://node.rocketpool.net/deposit-eth-on-behalf-of-node](https://node.rocketpool.net/deposit-eth-on-behalf-of-node).
If you see a notice about a web3 browser being required, or the current network ID being unsupported, make sure you’ve completed the previous steps correctly before continuing.
Once you're at the site, click on the **connect wallet** button. Please read through and accept the Terms of Service & Privacy Policy, this will enable different ways to connect, then click **connect metamask**.
MetaMask will prompt you to select an account to connect to the website.
Choose one, confirm a few permissions. You'll see an overview of your balances by clicking the wallet icon located at the top right of the window.
From here, you'll want to enter the address of the node you'd like to deposit ETH on behalf of. The page should look like this:

Go ahead and paste your desired address into this box and click find. In this example, we'll use `0xd3e317806456102d19db283b4c2201f0ef41a296`

In the first box, enter the amount of ETH you would like to deposit on behalf of the node. The second box indicates which address you'll be depositing ETH on behalf of. Please ensure that you've entered the correct address and deposit. Once you're satisfied, click Deposit and MetaMask will pop up with a window asking you to confirm your transaction.
Once you confirm it, the transaction will begin.
When it's been included in a block and added to the chain, your delegate will be able to use the command `rocketpool node status` in smartnode to see the new balance. This balance can also be viewed through the Rocket Pool staking site.
```
The node has 0.000000 ETH in its credit balance and 8.000000 ETH staked on its behalf. 8.000000 can be used to make new minipools.
```
::: warning NOTE
If a node operator deposits your ETH into a minipool, you won't be able to exit their minipool without access to their withdrawal credentials, so keep this in mind! You can use the Rocket Pool staking site to withdraw ETH staked on behalf of a node if it isn't being used in a minipool.
:::
That's it!
You're now staking with Rocket Pool.
# Unstake ETH on behalf of node
**Preparing on the Hoodi Testnet**
When you're ready to withdraw ETH you've staked on behalf of a node, head over to [https://testnet.node.rocketpool.net/withdraw-eth](https://testnet.node.rocketpool.net/withdraw-eth). After
signing in as the node's [primary withdrawal address](/node-staking/prepare-node.md#setting-your-primary-withdrawal-address), you should be greeted with a familiar menu. You'll be prompted to
enter the node address you want to withdraw from:
**Preparing on the Ethereum Mainnet**
When you're ready to withdraw ETH you've staked on behalf of a node, head over to [https://node.rocketpool.net/withdraw-eth](https://node.rocketpool.net/withdraw-eth). After signing in as the
node's [primary withdrawal address](/node-staking/prepare-node.md#setting-your-primary-withdrawal-address), you should be greeted with a familiar menu. You'll be prompted to enter the node
address you want to withdraw from:

After entering an address, clicking "Find" will take you to the next menu where you can withdraw ETH you've staked on behalf of that node.

You'll be able to see how much ETH is available for withdrawal in the top right. After you input your desired quantity and confirm the node address, click the orange **Withdraw ETH** button to send the transaction to the network.
Once the transaction is confirmed, you'll see the proper balances in your account!
That's all there is to staking ETH on behalf of a node! We hope you found the process quick and easy.
Feel free to swing by [our Discord server](https://discord.gg/G46XgK264a) to let us know what you thought of it and keep tabs on the project as it evolves.
---
url: /upgrades/houston/whats-new.md
---
> For AI agents: the complete documentation index is available at /llms.txt, the full documentation bundle is available at /llms-full.txt.
# The Houston Upgrade
The Houston upgrade is largely aimed at introducing a fully on-chain DAO to govern the protocol, known as the Protocol DAO or pDAO. It is a DAO like no other and it does not require snapshot voting or any other 3rd party tools to function, it is truly on-chain and one of a kind, more on that below.
This upgrade will also be introducing some other very exciting features that will allow new integrations and platforms to be built on the protocol. Some of these include the ability to stake ETH on behalf of node (not just from the node itself) and a new RPL withdrawal address feature, that allows one party to supply the ETH for staking and another party to provide the RPL without giving custody to the node operator"
## Protocol DAO
The Rocket Pool Protocol DAO (pDAO) is responsible for shaping the direction of the protocol and is run by RPL governance. Its members and their voting power are made up of node operators, big and small, all of which are directly participating in the protocol.
Typically DAO governance in the wider crypto space is done by token weight voting. Basically, the more tokens you hold for a protocol/project, the bigger your voting power. You also don’t need to be actively participating in the protocol, simply holding the tokens is enough.
This style of governance we wanted to avoid. If you want to help direct and guide the future of Rocket Pool, you need to be actively involved, not just storing tokens in a cold wallet. From the biggest Venture Capitalist funds to your ordinary guy running a single minipool, you will need to be actively participating in the protocol to help govern it.
Currently the protocol DAO has control over a variety of on-chain settings that are used in the protocol. New Rocket Pool Improvement Proposals (RPIP) can be made and voted on by these Node Operators within Rocket Pool. You can see the [**current RPIP registry here**](https://rpips.rocketpool.net/). If you’re a devil for the details, the current RPIP for the on-chain protocol DAO talked about now can be found here.
### What can the pDAO do?
The pDAO has control over many settings of the protocol, it can spend treasury funds and in our Houston upgrade, it comes with a new security council to help react quickly in the event of any potential issues with the protocol. Lets talk about each of those a little more below.
**Protocol Parameters:** These control certain facets of the protocol such as the setting that controls the minimum ETH amount that can be deposited for rETH (currently 0.01 ETH) or even controlling the maximum size of the deposit pool, this is how much max ETH that can be deposited into the protocol while waiting to be assigned to node operators for staking. You can find a full table of [these settings here](https://rpips.rocketpool.net/RPIPs/RPIP-33#parameter-table).
**Treasury Funds:** RPL has a 5% inflation rate and a portion of that is allocated to the pDAO treasury. The pDAO have the ability to spend this treasury on a variety of protocol oriented endeavors, from funding development of the protocol directly, grants management for funding 3rd party improvements and projects that make use of Rocket Pool and more. Our Houston upgrade adds a new ability where these payments from the treasury can be done not just in a lump sum manner, but in a progressive manner to help track goals in relation to ongoing funding.
**Security Council:** As the Houston upgrade moves the pDAO to a fully on-chain system, a new safety measure was introduced in the form of the [security council](https://rpips.rocketpool.net/RPIPs/RPIP-33#security-council). These members can be elected by the pDAO and they have the ability to pause the protocol quickly in the event any potential issues occur. Quorum must be met among members for any security response to be executed. The pDAO also has the power to remove members or disband the security council entirely if they need to.
### Proposals and Voting
For any governance system to function, there needs to be proposals and voting. At the moment, snapshot voting is used for these settings and proposal changes, then some manual intervention is needed to execute the changes. With the introduction of the [Houston upgrade and RPIP-33](https://rpips.rocketpool.net/RPIPs/RPIP-33), this is moved to a new optimistic fraud-proof system that allows any node operator to raise, vote on or challenge proposals, directly on-chain without the need for any 3rd party tools.
**Proposing:** Any node with a non-zero voting power may raise a proposal at any time. When doing so they must lock a proposal bond in the form of RPL for the entire proposal process.
**Challenging:** If a node that created a proposal has been found to have done so with incorrect data required, they can be challenged and the challenger must provide a bond for the challenge. The node that makes the challenge can be rewarded with the proposers bond made when creating the proposal if successful, however if they have made an invalid challenge, the proposer can collect their challenge bond.
**Voting**: If a proposal passes the period where it can be challenged, it enters the voting periods. Node operators can then choose to vote in one of the following flavors:
1. Abstain: The voter’s voting power is contributed to quorum but is neither for nor against the proposal.
2. For: The voter votes in favor of the proposal being executed.
3. Against: The voter votes against the proposal being executed.
4. Veto: The voter votes against the proposal as well as indicating they deem the proposal as spam or malicious. If the veto quorum is met, the proposal is immediately defeated and the proposer loses their bond. This is to dissuade spam, low quality proposals, or proposals that have not gone through off-chain processes first such as signaling by snapshot voting.
There are **two voting periods**
- Vote Period 1: For voters or delegates voting on behalf of others.
- Vote Period 2: For voters who delegated their power and want to overturn their delegate's decision.
Once both voting periods have passed and the proposal is successful, the proposal can be executed and the change is applied to the Rocket Pool protocol.
After the proposal has passed the voting periods, the proposer may unlock their RPL bond, unless the proposal was defeated by a challenge or vetoed.
## Stake ETH on Behalf of a node
[RPIP-32](https://rpips.rocketpool.net/RPIPs/RPIP-32) allows an account to [stake ETH on behalf](/upgrades/houston/stake-eth-on-behalf.md) of a Rocket Pool node that is registered in the protocol. This supports a variety of situations where the node operator is not directly providing the ETH:
- Enhanced security for node operators, as they can stake directly from their hardware wallet, eliminating the need to transfer funds to the node beforehand.
- Staking as a Service providers where custody of funds are managed by a trusted custodian.
- Protocol integrations where custody of funds are managed by smart contracts.
- DAOs or organizations where custody of funds are managed by a treasury.
While the primary aim of this feature is to facilitate single depositor scenarios, it’s worth noting that multiple independent depositors can also leverage this capability by creating smart contracts layered on top. Rocket Pool also introduced the ability to stake RPL on behalf of back in our previous Atlas release.
## RPL Withdrawal Address
Rocket Pool currently allows node operators to specify a withdrawal address for their ETH and RPL. This could be an external hardware wallet or something similarly secure.
With [RPIP-31](https://rpips.rocketpool.net/RPIPs/RPIP-31), you can set a withdrawal address for your ETH and [a new one for your RPL](/upgrades/houston/rpl-withdrawal-address.md) if you wish. The RPL withdrawal address if set will be able to trigger and claim RPL from inflation rewards and will have no effect on ETH consensus rewards or anything related to ETH.
This creates some interesting opportunities where RPL can be supplied by an entity to a node operator that does not wish to have exposure to RPL. That entity can then claim RPL rewards for putting up the required insurance collateral for the node.
## Time-based Balance and RPL Price Submissions
Rocket Pool nodes need to have at least 10% collateral in RPL staked to be eligible for rewards, with their "effective stake" calculated based on the ETH:RPL ratio, which is reported by the Oracle DAO at the end of each rewards interval. Previously, this "top up window" (the time between the final RPL report and the end of the interval) had some uncertainty and fluctuated from interval to interval because it was being specified by number of blocks. This was valid pre-merge but didn't factor variability and randomness in the way blocks are added.
To address this, the intervals for price and balance reporting will now be based on seconds rather than blocks. This change ensures predictability and has parity with the way rewards intervals are calculated today. If the interval is set to `86400` seconds (number of seconds in 24 hours), prices and balances are reported at the same time every day.
The protocol now has a fixed and controllable "top up window," removing guesswork and providing users with a consistent 24-hour window for topping up after the final price update. Feel free to read more about this change in [RPIP-35](https://rpips.rocketpool.net/RPIPs/RPIP-35).
## Audits
In preparation for the Houston Upgrade, Rocket Pool engaged with three of the most esteemed auditing teams in the Ethereum ecosystem.
- [Consensys Diligence](https://consensys.io/diligence/audits/2023/12/rocket-pool-houston/) (Late November to Mid December 2023)
- [Sigma Prime](https://rocketpool.net/files/audits/sigma-prime-audit-houston.pdf) x2 (Late November 2023, then a second round March 2024)
- [Chainsafe](https://rocketpool.net/files/audits/chainsafe-audit-houston.pdf) (Mid January to April 2024)
For a full history of audits plus details on the Immunefi bug bounty program, visit here:
[https://rocketpool.net/protocol/security](https://rocketpool.net/protocol/security)
---
url: /upgrades/redstone/docker-migration.md
---
> For AI agents: the complete documentation index is available at /llms.txt, the full documentation bundle is available at /llms-full.txt.
# \[Docker Mode] Guide to the Redstone Update and the Merge
This guide will cover everything you need to know in order to prepare your node for the Redstone Update and The Merge if you are using **Docker Mode**.
## Things to Do Before Upgrading to v1.5.0
Before upgrading to v1.5.0 and higher of the Smart Node, please go through the following checklist to make sure you're prepared:
### Switch to a Full Execution Client
The Merge requires you to run your own Execution client, so you won't be able to use remote providers like Infura or Pocket anymore.
v1.5.0 won't have them anymore, and won't let you start the stack until you select a full Execution client.
Because of this change, you should switch to a full client while you're still on v1.4, let it sync to completion, and then upgrade to v1.5.
Docker Mode makes switching clients very easy.
[This guide](/node-staking/change-clients.md#changing-execution-clients) provides a walkthrough of the process.
## Upgrading to v1.5.0
Upgrading the Smart Node stack to v1.5.0 is no different than any other upgrade.
Simply follow [the normal directions here](/node-staking/updates.md#updating-the-smart-node-stack).
## Things the Smart Node Handles Automatically
In Docker mode, the Smart Node will take care of most of the changes needed to support Redstone and The Merge automatically once you update to v1.5.0.
Here's a brief list of what it will do for you without any manual intervention:
### The Engine API
The Merge changes the way your Execution client talks to your Consensus client.
Instead of using the old HTTP or Websocket based RPC system, The Merge requires a new system exposed by your Execution client called the Engine API.
This is a special connection that lets the Consensus client replace the old Proof-of-Work mining system with Proof-of-Stake; it's the heart of The Merge.
It's also **authenticated** with a secret token, so only your Consensus client can connect to your Execution client - nothing else can.
The Smart Node will handle the set up of the authentication token and the Engine API on both your Execution and Consensus clients automatically.
### Your Fee Recipient
The **fee recipient** is the address on the Execution layer chain that will receive all of the priority fees for blocks you propose.
It is a setting provided to your Validator client when it first starts.
The Smart Node will handle setting it up to the correct address when you upgrade to v1.5, and will constantly check to make sure you're using the correct one so you don't get [penalized accidentally](https://github.com/rocket-pool/rocketpool-research/blob/master/Penalties/penalty-system).
If you opted into the [Smoothing Pool](/upgrades/redstone/whats-new.md#smoothing-pool), it will make that your fee recipient.
If you didn't, it will make your [fee distributor contract](/upgrades/redstone/whats-new.md#fee-recipients-and-your-distributor) the fee recipient.
### MEV-Boost
[MEV-boost](https://boost.flashbots.net/) is the system Flashbots provides to give MEV rewards to Proof-of-Stake validators after The Merge.
Rocket Pool has MEV-Boost built into the Smart Node and automatically configures your node to use it, so your proposals get the maximum amount of rewards.
## Things You Should Do After Upgrading
While the Smart Node handles most of the changes for you, there are a few additional things you should do manually:
### Ensure a Successful Upgrade
The first thing to do is ensure that your node is working correctly.
Consider taking the following steps:
- Check the logs for errors with `rocketpool service logs eth1`, `rocketpool service logs eth2`, `rocketpool service logs validator`, and `rocketpool service logs node`.
- Confirm with a Block Explorer (such as your Grafana dashboard and [https://beaconcha.in](https://beaconcha.in)) that you are still attesting properly
- Remember that if you have Doppelganger protection enabled, you will miss a few attestations after the restart. This is normal!
### Set Up a Fallback Node
Because The Merge is not compatible with remote providers like Infura and Pocket, you'll lose the ability to use them as fallback Execution clients when your primary goes offline.
The Smart Node still has the ability to provide a fallback Execution client (and now a fallback Consensus client as well), but you will now need to use Execution and Consensus clients that you control.
For more information on setting up a fallback node, see the [Fallback node guide](/node-staking/fallback.md).
### Initialize your Fee Distributor
If you aren't planning to opt into the [Smoothing Pool](/upgrades/redstone/whats-new.md#smoothing-pool) and claim all of your priority fees and MEV rewards to your [fee distributor contract](/upgrades/redstone/whats-new.md#fee-recipients-and-your-distributor), you will eventually have to initialize it (create the contract instance on the chain) in order to claim rewards from it to your withdrawal address.
This is a fairly cheap operation and only needs to be done once.
::: tip TIP
Initializing your fee distributor can be done at **any time**.
You can let rewards accumulate in its address long before you initialize it, and your balance will remain after initialization.
We recommend you do so when gas prices are low to minimize the overhead cost.
Note that it **must be initialized in order to claim your rewards.**
:::
### Opt Into the Smoothing Pool
If you plan on taking advantage of the [Smoothing Pool](/upgrades/redstone/whats-new.md#smoothing-pool) right away, you should opt in before the end of the first Redstone rewards period to maximize your "eligibility" amount.
Opting in can be done via running the following command:
```
rocketpool node join-smoothing-pool
```
### Claim Rewards
The Redstone upgrade replaces the expensive, problematic old rewards system with a [brand new one](/upgrades/redstone/whats-new.md#new-rewards-system) that's much cheaper, supports automatic restaking of RPL (both partial and full amounts), and - most importantly - **lets you claim your rewards whenever you want**.
Because there is no longer a time limit on claiming rewards, and because it's cheaper to claim many rewards intervals at once, the automatic rewards claiming feature of the Smart Node **has been removed**.
You will now be able to claim rewards via the following command:
```
rocketpool node claim-rewards
```
This will show you all of the rewards you've accumulated across all of the rewards intervals starting with the Redstone upgrade.
## Reverting to v1.4.3
If, for any reason, something isn't to your liking and you want to revert to the previous Smart Node release, you can do so easily.
The Smart Node automatically backs up your settings from the previous version when you upgrade it, so simply get the previous version (here we're demonstrating **v1.4.3**) and replace the settings with the backup:
1. Stop the service:
```shell
rocketpool service stop
```
1. Download the v1.4.3 CLI:
**Linux x64**
`shell wget https://github.com/rocket-pool/smartnode/releases/download/v1.4.3/rocketpool-cli-linux-amd64 -O ~/bin/rocketpool `
**Linux arm64**
`shell wget https://github.com/rocket-pool/smartnode/releases/download/v1.4.3/rocketpool-cli-linux-arm64 -O ~/bin/rocketpool `
**Mac x64**
`shell curl -L https://github.com/rocket-pool/smartnode/releases/download/v1.4.3/rocketpool-cli-darwin-amd64 > /usr/local/bin/rocketpool `
**Mac arm64**
`shell curl -L https://github.com/rocket-pool/smartnode/releases/download/v1.4.3/rocketpool-cli-darwin-arm64 > /usr/local/bin/rocketpool `
1. Install the v1.4.3 package:
```shell
rocketpool service install -d
```
1. Replace your old configuration with the v1.4.3 backup configuration:
```shell
cp ~/.rocketpool/user-settings-backup.yml ~/.rocketpool/user-settings.yml
```
1. Verify all of your old settings are now being used:
```shell
rocketpool service config
```
1. If it looks good, start the Smart Node stack:
```shell
rocketpool service start
```
All set! You're now back on the old version and should begin attesting shortly after starting the service.
::: danger WARNING
v1.4.3 is **deprecated** and will no longer be usable after the Redstone update is deployed.
If you do need to revert to it, please make plans to upgrade back to v1.5.0 before the contracts are updated!
:::
---
url: /upgrades/redstone/hybrid-migration.md
---
> For AI agents: the complete documentation index is available at /llms.txt, the full documentation bundle is available at /llms-full.txt.
# \[Hybrid Mode] Guide to the Redstone Update and the Merge
This guide will cover everything you need to know in order to prepare your node for the Redstone Update and The Merge if you are using **Hybrid Mode**.
## Things to Do Before Upgrading to v1.5.0
Before upgrading to v1.5.0 and higher of the Smart Node, please go through the following checklist to make sure you're prepared:
### Switch to a Full Execution Client
The Merge requires you to run your own Execution client, so you won't be able to use remote providers like Infura or Pocket anymore.
Because of this change, if you're currently using a light Execution client, you should switch to a full client while you're still on v1.4, let it sync to completion, and then upgrade to v1.5.
### Ensure the EC and CC are Both Externally Managed
Previous versions of the Smart Node stack allowed you to have one client locally managed, and the other externally managed.
For example, you could have an Execution client that the Smart Node manages and connect it to a Consensus client that you manage externally.
Starting with v1.5, this configuration is no longer supported.
You'll have to switch to either a locally managed Execution and Consensus client (also known as [Docker Mode](/upgrades/redstone/docker-migration.md)), or set up both an Execution and a Consensus client that you manage on your own.
::: tip TIP
If you are interested in letting the Smart Node maintain its own Execution and Consensus client but want to keep control over your own Validator client (e.g., if you have your own solo staking validator keys attached to it), you may want to consider [Reverse Hybrid Mode](/node-staking/advanced-config.md#allowing-external-validator-clients-to-connect-to-the-smart-node) which does exactly this!
:::
### Set Up the Engine API
The Merge changes the way your Execution client talks to your Consensus client.
Instead of using the old HTTP or Websocket based RPC system, The Merge requires a new system exposed by your Execution client called the Engine API.
This is a special connection that lets the Consensus client replace the old Proof-of-Work mining system with Proof-of-Stake; it's the heart of The Merge.
It's also **authenticated** with a secret token, so only your Consensus client can connect to your Execution client - nothing else can.
As you manage your own Execution and Consensus clients, you'll need to set up the Engine API manually.
How to do it depends entirely on which clients you're running.
CoinCashew has [a great and concise guide](https://www.coincashew.com/coins/overview-eth/ethereum-merge-upgrade-checklist-for-home-stakers-and-validators) on how to set up the Engine API on your Execution and Consensus clients.
Give that a look, and test the new configuration out by making sure it still attests properly before upgrading.
As always, Rocket Pool will manage its own Validator client so you don't need to worry about manually modifying it.
## Upgrading to v1.5.0
Upgrading the Smart Node stack to v1.5.0 is no different than any other upgrade.
Simply follow [the normal directions here](/node-staking/updates.md#updating-the-smart-node-stack).
## Things the Smart Node Handles Automatically
In Hybrid mode, the Smart Node will take care of some of the changes needed to support Redstone automatically once you update to v1.5.0, but you will need to handle others manually in Hybrid Mode.
Here's a brief list of what it will do for you without any manual intervention:
### Your Fee Recipient
The **fee recipient** is the address on the Execution layer (eth1) chain that will receive all of the priority fees for blocks you propose.
It is a setting provided to your Validator client when it first starts.
The Smart Node will handle setting it up to the correct address on the Validator client it manages when you upgrade to v1.5, and will constantly check to make sure you're using the correct one so you don't get [penalized accidentally](https://github.com/rocket-pool/rocketpool-research/blob/master/Penalties/penalty-system).
If you opted into the [Smoothing Pool](/upgrades/redstone/whats-new.md#smoothing-pool), it will make that your fee recipient.
If you didn't, it will make your [fee distributor contract](/upgrades/redstone/whats-new.md#fee-recipients-and-your-distributor) the fee recipient.
## Things You Should Do After Upgrading
While the Smart Node handles most of the changes for you, there are a few additional things you should do manually:
### Ensure a Successful Upgrade
The first thing to do is ensure that your node is working correctly.
Consider taking the following steps:
- Check the logs for errors with `rocketpool service logs validator` and `rocketpool service logs node`.
- Confirm with a Block Explorer (such as your Grafana dashboard and [https://beaconcha.in](https://beaconcha.in)) that you are still attesting properly
- Remember that if you have Doppelganger protection enabled, you will miss a few attestations after the restart. This is normal!
### Set Up MEV-Boost
[MEV-boost](https://boost.flashbots.net/) is the system Flashbots provides to give MEV rewards to Proof-of-Stake validators after The Merge.
**Rocket Pool requires all nodes to use it to maximize their returns and thus keep the protocol competitive with other staking services.**
You will need to make some adjustments to your Beacon Node / Consensus client to connect it to MEV-boost.
MEV-boost is currently not available on Hoodi or Mainnet, so you do not need to set it up at this time.
Of course, you will not be penalized for not using it during this transition period.
Once it becomes available, we will announce a date at which it must be installed and connected to your node.
Flashbots will provide instructions you can follow at that time, and we will link to them here.
::: danger NOTE
Once we make the announcement that MEV-boost must be enabled by all node operators, you must ensure you have it properly installed and configured with your Beacon Node!
Not doing so will result in your minipool being [penalized](https://github.com/rocket-pool/rocketpool-research/blob/master/Penalties/penalty-system).
:::
### Set Up a Fallback Node
Because The Merge is not compatible with remote providers like Infura and Pocket, you'll lose the ability to use them as fallback Execution clients when your primary goes offline.
The Smart Node still has the ability to provide a fallback Execution client (and now a fallback Consensus client as well), but you will now need to use Execution and Consensus clients that you control.
For more information on setting up a fallback node, see the [Fallback node guide](/node-staking/fallback.md).
### Initialize your Fee Distributor
If you aren't planning to opt into the [Smoothing Pool](/upgrades/redstone/whats-new.md#smoothing-pool) and claim all of your priority fees and MEV rewards to your [fee distributor contract](/upgrades/redstone/whats-new.md#fee-recipients-and-your-distributor), you will eventually have to initialize it (create the contract instance on the chain) in order to claim rewards from it to your withdrawal address.
This is a fairly cheap operation and only needs to be done once.
::: tip TIP
Initializing your fee distributor can be done at **any time**.
You can let rewards accumulate in its address long before you initialize it, and your balance will remain after initialization.
We recommend you do so when gas prices are low to minimize the overhead cost.
Note that it **must be initialized in order to claim your rewards.**
:::
### Opt Into the Smoothing Pool
If you plan on taking advantage of the [Smoothing Pool](/upgrades/redstone/whats-new.md#smoothing-pool) right away, you should opt in before the end of the first Redstone rewards period to maximize your "eligibility" amount.
Opting in can be done via running the following command:
```shell
rocketpool node join-smoothing-pool
```
### Claim Rewards
The Redstone upgrade replaces the expensive, problematic old rewards system with a [brand new one](/upgrades/redstone/whats-new.md#new-rewards-system) that's much cheaper, supports automatic restaking of RPL (both partial and full amounts), and - most importantly - **lets you claim your rewards whenever you want**.
Because there is no longer a time limit on claiming rewards, and because it's cheaper to claim many rewards intervals at once, the automatic rewards claiming feature of the Smart Node **has been removed**.
You will now be able to claim rewards via the following command:
```shell
rocketpool node claim-rewards
```
This will show you all of the rewards you've accumulated across all of the rewards intervals starting with the Redstone upgrade.
## Reverting to v1.4.3
If, for any reason, something isn't to your liking and you want to revert to the previous Smart Node release, you can do so easily.
The Smart Node automatically backs up your settings from the previous version when you upgrade it, so simply get the previous version (here we're demonstrating **v1.4.3**) and replace the settings with the backup:
1. Stop the service:
```shell
rocketpool service stop
```
1. Download the v1.4.3 CLI:
**Linux x64**
`shell wget https://github.com/rocket-pool/smartnode/releases/download/v1.4.3/rocketpool-cli-linux-amd64 -O ~/bin/rocketpool `
**Linux arm64**
`shell wget https://github.com/rocket-pool/smartnode/releases/download/v1.4.3/rocketpool-cli-linux-arm64 -O ~/bin/rocketpool `
**Mac x64**
`shell curl -L https://github.com/rocket-pool/smartnode/releases/download/v1.4.3/rocketpool-cli-darwin-amd64 > /usr/local/bin/rocketpool `
**Mac arm64**
`shell curl -L https://github.com/rocket-pool/smartnode/releases/download/v1.4.3/rocketpool-cli-darwin-arm64 > /usr/local/bin/rocketpool `
1. Install the v1.4.3 package:
```shell
rocketpool service install -d
```
1. Replace your old configuration with the v1.4.3 backup configuration:
```shell
cp ~/.rocketpool/user-settings-backup.yml ~/.rocketpool/user-settings.yml
```
1. Verify all of your old settings are now being used:
```shell
rocketpool service config
```
1. If it looks good, start the Smart Node stack:
```shell
rocketpool service start
```
All set! You're now back on the old version and should begin attesting shortly after starting the service.
::: danger WARNING
v1.4.3 is **deprecated** and will no longer be usable after the Redstone update is deployed.
If you do need to revert to it, please make plans to upgrade back to v1.5.0 before the contracts are updated!
:::
---
url: /upgrades/redstone/native-migration.md
---
> For AI agents: the complete documentation index is available at /llms.txt, the full documentation bundle is available at /llms-full.txt.
# \[Native Mode] Guide to the Redstone Update and the Merge
This guide will cover everything you need to know in order to prepare your node for the Redstone Update and The Merge if you are using **Native Mode**.
## Things to Do Before Upgrading to v1.5.0
Before upgrading to v1.5.0 and higher of the Smart Node, please go through the following checklist to make sure you're prepared:
### Switch to a Full Execution Client
The Merge requires you to run your own Execution client, so you won't be able to use remote providers like Infura or Pocket anymore.
Because of this change, if you're currently using a light Execution client, you should switch to a full client while you're still on v1.4, let it sync to completion, and then upgrade to v1.5.
### Set Up the Engine API
The Merge changes the way your Execution client talks to your Consensus client.
Instead of using the old HTTP or Websocket based RPC system, The Merge requires a new system exposed by your Execution client called the Engine API.
This is a special connection that lets the Consensus client replace the old Proof-of-Work mining system with Proof-of-Stake; it's the heart of The Merge.
It's also **authenticated** with a secret token, so only your Consensus client can connect to your Execution client - nothing else can.
As you manage your own Execution and Consensus clients, you'll need to set up the Engine API manually.
How to do it depends entirely on which clients you're running.
CoinCashew has [a great and concise guide](https://www.coincashew.com/coins/overview-eth/ethereum-merge-upgrade-checklist-for-home-stakers-and-validators) on how to set up the Engine API on your Execution and Consensus clients.
Give that a look, and test the new configuration out by making sure it still attests properly before upgrading.
We'll show you how to set up your Validator client so that it uses the correct fee recipient required by the Smart Node software automatically below.
## Upgrading to v1.5.0
Upgrading the Smart Node stack to v1.5.0 is no different than any other upgrade.
Simply follow [the normal directions here](/node-staking/updates.md#updating-the-smart-node-stack).
## Things You Should Do After Upgrading
In Native mode, there are several things you will need to do manually after upgrading:
### Ensure a Successful Upgrade
The first thing to do is ensure that your node is working correctly.
Consider taking the following steps:
- Check your log scripts for the Execution client, the Consensus client, the Validator client, and the Smart Node daemon (the `rp-node` service) to ensure they're all functioning normally without errors.
- Confirm with a Block Explorer (such as your Grafana dashboard and [https://beaconcha.in](https://beaconcha.in)) that you are still attesting properly
- Remember that if you have Doppelganger protection enabled, you will miss a few attestations after the restart. This is normal!
### Set up the Fee Recipient in your Validator Client
One of the **critical** details to set up prior to the Merge is the **fee recipient** specified by your validator client.
As described in the [overview article](/upgrades/redstone/whats-new.md#fee-recipients-and-your-distributor), this can be one of two values:
- If you **are opted into** the Smoothing Pool, this must be the address of the **Smoothing Pool contract**. You can get the address from [the official contracts page](/protocol/contracts-integrations.md).
- If you are **not** in the Smoothing Pool, this must be the address of your node's **fee distributor contract**. You can get the address by running `rocketpool node status`, under the `Fee Distributor and Smoothing Pool` section.
In Native mode, you have the choice of letting the Smart Node manage this for you if you use the Smart Node daemon service, `rp-node`, or managing it yourself if you do not use the daemon.
#### Automatic Management via the Daemon
The Smart Node daemon will automatically determine the appropriate fee recipient for your node and manage it in case it changes (such as opting into and out of the Smoothing Pool).
This is the **safest** option, because the Smart Node will always ensure it's set to a value that **prevents [penalization](https://github.com/rocket-pool/rocketpool-research/blob/master/Penalties/penalty-system)**.
The way it does this is by maintaining a file with the correct fee recipient in it, and regularly refreshing it to ensure its correctness.
When it needs to be updated, it modifies the file and restarts your Validator client automatically so it loads the new recipient - similarly to how it restarts your Validator client after staking a new minipool.
Select your client below to learn how to set it up:
**Lighthouse**
Modify your Validator Client service by adding the following line _before_ the `ExecStart` line:
```
EnvironmentFile=`data dir`/validators/rp-fee-recipient-env.txt
```
For example:
```
EnvironmentFile=/srv/rocketpool/data/validators/rp-fee-recipient-env.txt
```
Next, add the following command line argument _to the end_ of your `ExecStart` line:
```
--suggested-fee-recipient ${FEE_RECIPIENT}
```
Your VC will now use the file managed by the Smart Node daemon, and will automatically be restarted whenever the fee recipient changes.
**Nimbus**
Modify your Validator Client service by adding the following line _before_ the `ExecStart` line:
```
EnvironmentFile=`data dir`/validators/rp-fee-recipient-env.txt
```
For example:
```
EnvironmentFile=/srv/rocketpool/data/validators/rp-fee-recipient-env.txt
```
Next, add the following command line argument _to the end_ of your `ExecStart` line:
```
--suggested-fee-recipient=${FEE_RECIPIENT}
```
Your VC will now use the file managed by the Smart Node daemon, and will automatically be restarted whenever the fee recipient changes.
**Prysm**
Modify your Validator Client service by adding the following line _before_ the `ExecStart` line:
```
EnvironmentFile=`data dir`/validators/rp-fee-recipient-env.txt
```
For example:
```
EnvironmentFile=/srv/rocketpool/data/validators/rp-fee-recipient-env.txt
```
Next, add the following command line argument _to the end_ of your `ExecStart` line:
```
--suggested-fee-recipient ${FEE_RECIPIENT}
```
Your VC will now use the file managed by the Smart Node daemon, and will automatically be restarted whenever the fee recipient changes.
**Teku**
Modify your Validator Client service by adding the following line _before_ the `ExecStart` line:
```
EnvironmentFile=`data dir`/validators/rp-fee-recipient-env.txt
```
For example:
```
EnvironmentFile=/srv/rocketpool/data/validators/rp-fee-recipient-env.txt
```
Next, add the following command line argument _to the end_ of your `ExecStart` line:
```
--validators-proposer-default-fee-recipient=${FEE_RECIPIENT}
```
Your VC will now use the file managed by the Smart Node daemon, and will automatically be restarted whenever the fee recipient changes.
#### Manual Fee Recipient Management
::: danger WARNING
By doing this, you assume full responsibility for ensuring your fee recipient is always set to the correct address.
Please read the [penalty specification](https://github.com/rocket-pool/rocketpool-research/blob/master/Penalties/penalty-system) to understand what it must be set to given your configuration, and when you can safely change it from one value to another.
Failure to do so could result in your minipools being penalized!
:::
**Prior to Redstone being deployed**, you can simply use the rETH address for the network you're on (which can be found in [the official contracts page](/protocol/contracts-integrations.md)).
The rETH address is always safe no matter what.
**Once Redstone has been deployed**, you can see the exact address that you should set your fee recipient to via `rocketpool node status`. For example, if you are opted into the Smoothing Pool, it will show the Smoothing Pool's address and note that you must use it as your fee recipient:

If you are _not_ opted into the Smoothing Pool, it will show your fee distributor address and note that you must use it as your fee recipient:

Select your Consensus client below to learn how to configure it.
**Lighthouse**
Add the following command line argument to your Validator Client's service definition file:
```
--suggested-fee-recipient `address`
```
Where `address` is:
- The [rETH address](/protocol/contracts-integrations/index.md#token-contracts) **before** the Redstone update is deployed (e.g., `0xae78736Cd615f374D3085123A210448E74Fc6393` on Mainnet)
- Your node's **fee distributor** after Redstone is deployed, which you can retrieve with `rocketpool node status` once the contract upgrade occurs
- The [Smoothing Pool address](/protocol/contracts-integrations/index.md#key-protocol-contracts) if you opt into the Smoothing Pool
As a reminder, `rocketpool node status` will show you the correct fee recipient to use at any time.
**Please read the [penalty specification](https://github.com/rocket-pool/rocketpool-research/blob/master/Penalties/penalty-system) carefully to understand the conditions and expectations around the fee recipient.**
**Nimbus**
Add the following command line argument to Nimbus's service definition file:
```
--suggested-fee-recipient=`address`
```
Where `address` is:
- The [rETH address](/protocol/contracts-integrations/index.md#token-contracts) **before** the Redstone update is deployed (e.g., `0xae78736Cd615f374D3085123A210448E74Fc6393` on Mainnet)
- Your node's **fee distributor** after Redstone is deployed, which you can retrieve with `rocketpool node status` once the contract upgrade occurs
- The [Smoothing Pool address](/protocol/contracts-integrations/index.md#key-protocol-contracts) if you opt into the Smoothing Pool
As a reminder, `rocketpool node status` will show you the correct fee recipient to use at any time.
**Please read the [penalty specification](https://github.com/rocket-pool/rocketpool-research/blob/master/Penalties/penalty-system) carefully to understand the conditions and expectations around the fee recipient.**
**Prysm**
Add the following command line argument to your Validator Client's service definition file:
```
--suggested-fee-recipient `address`
```
Where `address` is:
- The [rETH address](/protocol/contracts-integrations/index.md#token-contracts) **before** the Redstone update is deployed (e.g., `0xae78736Cd615f374D3085123A210448E74Fc6393` on Mainnet)
- Your node's **fee distributor** after Redstone is deployed, which you can retrieve with `rocketpool node status` once the contract upgrade occurs
- The [Smoothing Pool address](/protocol/contracts-integrations/index.md#key-protocol-contracts) if you opt into the Smoothing Pool
As a reminder, `rocketpool node status` will show you the correct fee recipient to use at any time.
**Please read the [penalty specification](https://github.com/rocket-pool/rocketpool-research/blob/master/Penalties/penalty-system) carefully to understand the conditions and expectations around the fee recipient.**
**Teku**
Add the following command line argument to your Validator Client's service definition file:
```
--validators-proposer-default-fee-recipient=`address`
```
Where `address` is:
- The [rETH address](/protocol/contracts-integrations/index.md#token-contracts) **before** the Redstone update is deployed (e.g., `0xae78736Cd615f374D3085123A210448E74Fc6393` on Mainnet)
- Your node's **fee distributor** after Redstone is deployed, which you can retrieve with `rocketpool node status` once the contract upgrade occurs
- The [Smoothing Pool address](/protocol/contracts-integrations/index.md#key-protocol-contracts) if you opt into the Smoothing Pool
As a reminder, `rocketpool node status` will show you the correct fee recipient to use at any time.
**Please read the [penalty specification](https://github.com/rocket-pool/rocketpool-research/blob/master/Penalties/penalty-system) carefully to understand the conditions and expectations around the fee recipient.**
### Set Up MEV-Boost
[MEV-boost](https://boost.flashbots.net/) is the system Flashbots provides to give MEV rewards to Proof-of-Stake validators after The Merge.
**Rocket Pool requires all nodes to use it to maximize their returns and thus keep the protocol competitive with other staking services.**
You will need to make some adjustments to your Beacon Node / Consensus client to connect it to MEV-boost.
MEV-boost is currently not available on Hoodi or Mainnet, so you do not need to set it up at this time.
Of course, you will not be penalized for not using it during this transition period.
Once it becomes available, we will announce a date at which it must be installed and connected to your node.
Flashbots will provide instructions you can follow at that time, and we will link to them here.
::: danger NOTE
Once we make the announcement that MEV-boost must be enabled by all node operators, you must ensure you have it properly installed and configured with your Beacon Node!
Not doing so will result in your minipool being [penalized](https://github.com/rocket-pool/rocketpool-research/blob/master/Penalties/penalty-system).
:::
### Set Up a Fallback Node
Because The Merge is not compatible with remote providers like Infura and Pocket, you'll lose the ability to use them as fallback Execution clients when your primary goes offline.
The Smart Node still has the ability to provide a fallback Execution client (and now a fallback Consensus client as well), but you will now need to use Execution and Consensus clients that you control.
For more information on setting up a fallback node, see the [Fallback node guide](/node-staking/fallback.md).
### Initialize your Fee Distributor
If you aren't planning to opt into the [Smoothing Pool](/upgrades/redstone/whats-new.md#smoothing-pool) and claim all of your priority fees and MEV rewards to your [fee distributor contract](/upgrades/redstone/whats-new.md#fee-recipients-and-your-distributor), you will eventually have to initialize it (create the contract instance on the chain) in order to claim rewards from it to your withdrawal address.
This is a fairly cheap operation and only needs to be done once.
::: tip TIP
Initializing your fee distributor can be done at **any time**.
You can let rewards accumulate in its address long before you initialize it, and your balance will remain after initialization.
We recommend you do so when gas prices are low to minimize the overhead cost.
Note that it **must be initialized in order to claim your rewards.**
:::
### Opt Into the Smoothing Pool
If you plan on taking advantage of the [Smoothing Pool](/upgrades/redstone/whats-new.md#smoothing-pool) right away, you should opt in before the end of the first Redstone rewards period to maximize your "eligibility" amount.
Opting in can be done via running the following command:
```shell
rocketpool node join-smoothing-pool
```
### Claim Rewards
The Redstone upgrade replaces the expensive, problematic old rewards system with a [brand new one](/upgrades/redstone/whats-new.md#new-rewards-system) that's much cheaper, supports automatic restaking of RPL (both partial and full amounts), and - most importantly - **lets you claim your rewards whenever you want**.
Because there is no longer a time limit on claiming rewards, and because it's cheaper to claim many rewards intervals at once, the automatic rewards claiming feature of the Smart Node **has been removed**.
You will now be able to claim rewards via the following command:
```shell
rocketpool node claim-rewards
```
This will show you all of the rewards you've accumulated across all of the rewards intervals starting with the Redstone upgrade.
---
url: /upgrades/redstone/whats-new.md
---
> For AI agents: the complete documentation index is available at /llms.txt, the full documentation bundle is available at /llms-full.txt.
# The Rocket Pool Redstone Update
Rocket Pool's next major update, titled **Redstone**, has been released for beta testing on the Ropsten and Holesky test networks.
This page describes the major changes that Redstone brings, including updates to both the Smart Node stack and to the Rocket Pool protocol in general.
Please read through this page thoroughly to understand all of the differences between the previous version of Rocket Pool and Redstone.
::: tip ATTENTION
For detailed information on how to prepare your node for the upgrade and what to do after the upgrade, please look at the following guides:
- [Guide for Docker Mode](/upgrades/redstone/docker-migration.md)
- [Guide for Hybrid Mode](/upgrades/redstone/hybrid-migration.md)
- [Guide for Native Mode](/upgrades/redstone/native-migration.md)
:::
## Client Changes and The Merge
Ropsten (and shortly, Holesky) have successfully undergone **The Merge of the Execution and Consensus Layers**.
It no longer uses Proof-of-Work; instead, validators on Ropsten are now responsible for creating and proposing blocks on both chains.
While this comes with some exciting financial benefits (which will be discussed later), it also comes with some important changes to the way validators operate.
Below is a brief summary of the changes to client behavior as part of The Merge:
- Your Execution client now uses three API ports:
- One for HTTP access to its API (**default 8545**)
- One for Websocket access to its API (**default 8546**)
- One for the new **Engine API** used by Consensus clients after The Merge (**default 8551**)
- Execution clients now require a Consensus client to function, and Consensus clients now require an Execution client to function.
- **Neither one can operate in isolation any longer.**
- One Execution client must be linked to one, and only one, Consensus client (and vice versa).
- You will not be able to link multiple Execution clients to a single Consensus client, or multiple Consensus clients to a single Execution client.
- Because of this, **fallback execution clients are no longer available** for Rocket Pool node operators.
- **Full execution clients** are required.
- Remote providers (like Infura and Pocket) can no longer be used by any validators, Rocket Pool or otherwise.
## Fee Recipients and Your Distributor
As validators are now responsible for creating blocks, that means they receive the **priority fees** (also known as **tips**) attached to each transaction.
These fees are paid in ETH, and they are provided directly to you every time one of your minipool validators proposes a block.
Unlike the ETH locked on the Beacon Chain, **you don't have to wait for withdrawals to access your priority fees**!
They are simply awarded to you as part of the block proposal process.
In order to know where to send the fees to, your Validator Client requires an extra parameter known as the `fee recipient`.
This is the address on the Execution Layer (ETH1) that all of the priority fees earned by your node during block proposals will be sent to.
Rocket Pool is designed to fairly distribute these rewards, the same way it fairly distributes your Beacon chain rewards: half of any priority fees your minipool validators earn will go to you (plus the average commission of all of your minipools), and the other half will go to the pool stakers (minus your average commission).
To that end, the Smart Node will automatically set your Validator Client's `fee recipient` to a special address known as your node's **fee distributor**.
Your fee distributor is a unique contract on the Execution Layer that's **specific to your node**.
It will hold all of the priority fees you've earned over time, and it contains the logic required to fairly split and distribute them.
This distribution process is controlled by you (the node operator), and can be done whenever you please.
It does not have a time limit.
The address for your node's fee distributor is **deterministically based on your node address**.
That means it is known ahead of time, before the fee distributor is even created.
**The Smart Node will use this address as your fee recipient.**
::: tip NOTE
By default, your fee recipient will be set to the **rETH address** when you install Smart Node v1.5.0 (if the Redstone contract updates haven't been deployed yet).
The Smart Node will automatically update this to your node's fee distributor address once the Redstone update has been deployed.
One exception to this rule is if you are opted into the **Smoothing Pool** - see the section at the end of this page for more information on it.
:::
New Rocket Pool nodes will automatically initialize their node's distributor contract upon registration.
Existing nodes will need to do this process manually.
This only needs to be run once.
One interesting ramification of this is that your distributor's address may start accruing a balance **before** you've initialized your node distributor contract.
This is okay, because your distributor will gain access to all of this existing balance as soon as you initialize it.
You can view your fee distributor's balance as part of:
```shell
rocketpool node status
```
The output will look like this:

To initialize your node's distributor, simply run this new command:
```shell
rocketpool node initialize-fee-distributor
```
::: warning NOTE
After the Redstone update, you must call this function before you can create any new minipools with `rocketpool node deposit`.
:::
When your distributor has been initialized, you can claim and distribute its entire balance using the following command:
```shell
rocketpool node distribute-fees
```
This will send your share of the rewards to your **withdrawal address**.
## Rocket Pool Protocol Changes
In addition to the Execution and Consensus client changes and the new priority fees, the Rocket Pool protocol itself has undergone some important changes you should be aware of.
### New Rewards System
One of the most significant changes introduced with the Redstone update is the **new rewards system**.
This is a complete overhaul of the way node operators receive their RPL rewards (and ETH from the Smoothing Pool - discussed later).
The _old_ rewards system had the following drawbacks:
- Claiming cost approximately 400k gas, which is quite expensive.
- Node operators had to claim the rewards at each interval (every 28 days), or would forfeit them. This meant the gas costs could become prohibitively expensive for node operators with small amounts of RPL.
- Rewards were determined at the time of the _claim_, not at the time of the checkpoint. If a user staked a significant amount of RPL between the checkpoint and your claim, your rewards could be diluted and you'd receive less RPL than you were expecting.
The _new_ claims system solves all of these problems.
At every interval, the Oracle DAO will collectively create a **true snapshot** of the state of the node operators in the Rocket Pool network, including all of their effective stake amounts.
This information is compiled into a [Merkle Tree](https://en.wikipedia.org/wiki/Merkle_tree) - an extremely efficient way to make all of the details available to smart contracts.
The Merkle Tree is built into a JSON file and hosted on the [InterPlanetary File System (IPFS)](https://en.wikipedia.org/wiki/InterPlanetary_File_System), and the root of the Merkle Tree is submitted to the contracts.
This new system has the following features:
- You can now **let rewards accumulate** for as long as you want. No more time limit on when you need to claim.
- You can claim **multiple intervals** all at once.
- Your first claim transaction uses about 85k gas. Each subsequent claim transaction costs about 55k gas.
- If you're claiming multiple intervals at once, each supplemental interval costs **6k gas** so it's most cost-effective to claim as many of them at once as possible.
- Your RPL rewards **no longer get diluted** - your RPL rewards are fixed at the time of the snapshot, and you are always eligible for that amount.
- You can **restake some (or all) of your RPL rewards** as part of the claiming transaction, which further trims down gas requirements compared to today.
- Currently, **all of your claims must be on Mainnet** but we have the infrastructure in place to build the ability to claim on Layer 2 networks at a later date.
When your node detects a new rewards checkpoint, it will automatically download the JSON file for that interval.
You can then review your rewards using the following command:
```shell
rocketpool node claim-rewards
```
As intervals go by and you accumulate rewards, the output will look like this:

Here you can quickly see how many rewards you've earned at each interval, and can decide which ones you want to claim.
Note that **Ropsten's interval time is set to 1 day to facilitate testing.**
You can also specify an amount you want to restake during this claim:

This will let you compound your RPL rewards in one transaction, using substantially less gas than you currently need to use today.
::: tip NOTE
If you prefer to build the rewards checkpoint manually instead of downloading the one created by the Oracle DAO, you can change this setting from `Download` to `Generate` in the TUI:

As the tip implies, you will need access to an archive node to do this.
If your local Execution client is not an archive node, you can specify a separate one (such as Infura or Alchemy) in the `Archive-Mode EC URL` box below it.
This URL will only be used when generating Merkle trees; it will not be used for validation duties.
:::
::: danger WARNING
If you are below 10% RPL collateral _at the time of the snapshot_, you will not be eligible for rewards for that snapshot.
Unlike the current system, where you can simply "top off" before you claim in order to become eligible again, this will be locked in that snapshot forever and **you will never receive rewards for that period**.
You **must** be above 10% collateral at the time of a snapshot in order to receive rewards for that period.
:::
### Smoothing Pool
One final exciting new feature of the Redstone update is the **Smoothing Pool**.
The Smoothing Pool is **an opt-in feature** that will collectively pool the priority fees of every member opted into it.
During a rewards checkpoint, the total ETH balance of the pool is divided into a pool staker portion and a node operator portion.
All of the rewards in the node operator portion are **distributed fairly to every member of the pool**.
In essence, the Smoothing Pool is a way to effectively eliminate the randomness associated with block proposals on the Beacon Chain.
If you've ever had a streak of bad luck and gone months without a proposal, you may find the Smoothing Pool quite exciting.
::: tip NOTE
The Smoothing Pool rewards are built into the Merkle Tree used for RPL rewards, so you claim them at the same time you claim RPL using `rocketpool node claim-rewards`.
:::
To help clarify the details, the Smoothing Pool uses the following rules:
- Opting into the Smoothing Pool is done on a **node level**. If you opt in, all of your minipools are opted in.
- The node operator's total share is determined by the average commission of every minipool in every node opted into the Smoothing Pool.
- Anyone can opt in at any time. They must wait a full rewards interval (1 day on Ropsten, 28 days on Mainnet) before opting out to prevent gaming the system.
- Once opted out, you must wait another full interval to opt back in.
- The Smoothing Pool calculates the "share" of each minipool (portion of the pool's ETH for the interval) owned by each node opted in.
- The share is a function of your minipool's performance during the interval (calculated by looking at how many attestations you sent on the Beacon Chain, and how many you missed), and your minipool's commission rate.
- Your node's total share is the sum of your minipool shares.
- Your node's total share is scaled by the amount of time you were opted in.
- If you were opted in for the full interval, you receive your full share.
- If you were opted in for 30% of an interval, you receive 30% of your full share.
To opt into the Smoothing Pool, run the following command:
```shell
rocketpool node join-smoothing-pool
```
This will record you as opted-in in the Rocket Pool contracts and automatically change your Validator Client's `fee recipient` from your node's distributor contract to the Smoothing Pool contract.
To leave the pool, run this command:
```shell
rocketpool node leave-smoothing-pool
```
### The Penalty System
To ensure that node operators don't "cheat" by manually modifying the fee recipient used in their Validator Client, Rocket Pool employs a penalty system.
The Oracle DAO constantly monitors each block produced by Rocket Pool node operators.
Any block that has a fee recipient other than one of the following addresses is considered to be **invalid**:
- The rETH address
- The Smoothing Pool address
- The node's fee distributor contract (if opted out of the Smoothing Pool)
A minipool that proposed a block with an **invalid** fee recipient will be issued **a strike**.
On the third strike, the minipool will begin receiving **infractions** - each infraction will dock **10% of its total Beacon Chain balance, including ETH earnings** and send them to the rETH pool stakers upon withdrawing funds from the minipool.
Infractions are at a **minipool** level, not a **node** level.
The Smart Node software is designed to ensure honest users will never get penalized, even if it must take the Validator Client offline to do so.
If this happens, you will stop attesting and will see error messages in your log files about why the Smart Node can't correctly set your fee recipient.
## Guides for Pre- and Post-Upgrade
For detailed information on how to prepare your node for the upgrade and what to do after the upgrade, please look at the following guides:
- [Guide for Docker Mode](/upgrades/redstone/docker-migration.md)
- [Guide for Hybrid Mode](/upgrades/redstone/hybrid-migration.md)
- [Guide for Native Mode](/upgrades/redstone/native-migration.md)
---
url: /upgrades/saturn-0/whats-new.md
---
> For AI agents: the complete documentation index is available at /llms.txt, the full documentation bundle is available at /llms-full.txt.
# The Saturn 0 Upgrade
Welcome to Saturn 0! This upgrade aims to improve RPL tokenomics in the short term to unlock protocol growth. If you're a returning or prospective node operator, this page will
serve as an introduction to some new and exciting changes to the Rocket Pool protocol.
## ETH only minipools in Saturn 0
- The RPL requirement for new minipools is a thing of the past! Minipools in Saturn 0 do not require RPL stake to be deployed.
- The RPL requirement for new minipools is a thing of the past! Minipools in Saturn 0 do not require RPL stake to be deployed.
Node operators can now create minipools with an upfront cost of 8 ETH, which will feature a commission of 10%. In addition, a node
operator may optionally stake RPL to qualify for additional rewards and access voting power within the [Protocol DAO](/legacy/houston/pdao.md#the-protocol-dao-pdao).
- Nodes with an RPL stake of any size qualify for RPL issuance rewards. This unlocks RPL rewards for Node Operators under the 10% collateral cliff
who were previously unqualified for RPL issuance rewards.
- This means nodes with an RPL stake of 0-15% of borrowed ETH receive the maximum APY on RPL. Nodes still earn RPL yield beyond 15% collateral, at a decreasing rate.
Feel free to take a look how RPL issuance beyond 15% borrowed ETH is defined in [RPIP-30](https://rpips.rocketpool.net/RPIPs/RPIP-30#specification).
## New Commission Structure
We're excited to announce that newly launched Saturn 0 minipools will feature a commission structure ranging from 10% to 14%.
- Nodes without any staked RPL will earn 10% commission (5% from the minipool contract, and 5% from the dynamic commission boost).
- Nodes with staked RPL receive up to an additional 4% dynamic commission boost for staked RPL valued at >= 10% of borrowed ETH.
Note that the dynamic commission boost will be reduced to 0% on the 5th reward snapshot after Saturn 1 is released (leaving only the 5% minipool contract commission). This serves to increase the yield advantage of migrating to megapools.
::: warning WARNING
Your node must be opted into the [Smoothing Pool](/node-staking/fee-distrib-sp.md#the-smoothing-pool) to benefit from the dynamic commission boost. The Smart Node will inform you
to opt into the Smoothing Pool when depositing a minipool if you are not already opted in. _Your new minipools will miss out on additional yield if your node
isn't in the Smoothing Pool!!_
:::
## Node Operator Guide
If you're interested in running a Rocket Pool node to create your own Ethereum validators, take a look at our [Node Operator's guide](/node-staking/responsibilities.md).
This is a very comprehensive guide that goes over all of the considerations involved in node operation, including:
- Deciding to run a node locally at home, or remotely on the cloud
- Selecting the hardware for a local machine, or selecting a remote hosting provider
- Preparing and securing the operating system of your node
- Selecting your Execution and Consensus clients
- Installing Rocket Pool's Smart Node stack
- Creating a new Beacon Chain validator using the Rocket Pool network
- Maintaining and updating your node
- Participating in on-chain governance
Both guides will show you how to practice for free on the Rocket Pool testnet so you can get a feel for everything without risking any of your real-life ETH, and how to stake your real ETH on the Ethereum mainnet once you're comfortable with the process.
When you're ready, select a guide from the options above based on your interests.
You are also free to explore the various pages using the sidebar to the left.
---
url: /upgrades/saturn-1/whats-new.md
---
> For AI agents: the complete documentation index is available at /llms.txt, the full documentation bundle is available at /llms-full.txt.
# The Saturn 1 Upgrade
Welcome! This page serves as an introduction to key features included in the latest Rocket Pool Upgrade. Saturn 1 represents the most significant protocol
upgrade in Rocket Pool's history, fundamentally transforming the protocol's capacity, economics, and competitive positioning in the liquid staking ecosystem.
1. **Scaling**: Removes capacity constraints, enabling node operators to run more validators and the protocol to meet greater rETH demand,
2. **Flexibility & Competitiveness**: Adjustable commission structures allow optimization of node operator earnings as market conditions evolve,
3. **Sustainability**: Enhanced RPL tokenomics create stronger alignment between protocol success and node operator rewards
## Saturn 0
[The Saturn 0 upgrade](/upgrades/saturn-0/whats-new.md) was the precursor to Saturn 1. It was deployed on 28 October 2024, marking the first leap towards the overall Saturn development goals. This upgrade enabled ETH
only minipools by adjusting protocol parameters via Rocket Pool's [on-chain DAO](/pdao/overview.md). Additionally, all staked RPL became eligible for RPL rewards as the 10% collateral requirement was removed.
The rest of this page will go over the features included in Saturn 1.
## Saturn 1: Introducing Megapools
[Megapools](https://rpips.rocketpool.net/RPIPs/RPIP-43) are featured in the Saturn 1 upgrade. If you're a veteran Rocket Pool Node Operator, you'll know that each
minipool validator is managed by an individual minipool smart contract.
A megapool is a single smart contract per node operator that serves as an Ethereum withdrawal address for multiple validators.
The ongoing and upfront gas cost of managing multiple validators and distributing rewards is significantly lower when using
a single megapool contract in comparison to using multiple minipool contracts.
Legacy minipool deposits are disabled and node operators can migrate their minipool validators to a megapool.
Overall, megapools should improve the node operator experience and long term sustainability of Rocket Pool.
The delegate contract serves as an Ethereum withdrawal address and manages validator activities. Node operators can currently choose
to either upgrade or stay on the same minipool delegates, making it challenging to design future upgrades. The Saturn 1 Upgrade introduces [Forced Delegate Upgrades](https://rpips.rocketpool.net/RPIPs/RPIP-47), allowing the protocol to
iterate more efficiently. Forced delegate upgrades on megapool contracts means the Rocket Pool
Protocol won't be hindered by backwards compatibility when designing future upgrades, and gives the pDAO more flexibility to improve Rocket Pool over time.
If you're a new or returning node operator and want to look into creating a megapool, feel free to take a look at the [Creating a Megapool Validator](/node-staking/megapools/create-megapool-validator.md#creating-a-megapool-validator) guide.
## Lower Bond Requirements
Megapools reduce operational cost, allowing Rocket Pool to lower the bond requirement per validator from 8 ETH to 4 ETH.
Lower ETH bonds allow for the same amount of bonded ETH to support a larger volume of rETH and improves the capital
efficiency of Rocket Pool. In other words, lower bonds allow more commission per ETH bonded.
| Validator Type | Bond Required | Protocol ETH Matched | Commission Rate | Commission per ETH Bonded |
| -------------- | ------------- | -------------------- | --------------- | -------------------------- |
| 8 ETH Minipool | 8 ETH | 24 ETH | 5% | 15% |
| 4 ETH Megapool | 4 ETH | 28 ETH | 5% | **35%** (2.3x improvement) |
The bond requirement is a pDAO adjustable parameter in Saturn 1.
This sets the stage for Rocket Pool's future upgrade Saturn 2, which plans for 4 ETH bonds on
the first two validators then 1.5 ETH bonds on each subsequent validator.
Check out [RPIP-42: Bond curves](https://rpips.rocketpool.net/RPIPs/RPIP-42) to dive into the details.
## RPL Revenue Share
In Saturn 1, RPL becomes an ETH-accrual revenue share token. Node operators with RPL staked on their megapool
earn an ETH share (9% of protocol revenue) proportional to their staked RPL. The next section explains how this revenue distribution works.
## Universal Adjustable Revenue Split (UARS)
Saturn 1 introduces [Universal Adjustable Revenue Split (UARS)](https://rpips.rocketpool.net/RPIPs/RPIP-46), a new
and adjustable system for distributing protocol
ETH revenue from node operator commissions. This adaptability allows Rocket Pool to be competitive
as market conditions shift.
UARS splits ETH revenue among four groups. Each share is adjustable via pDAO governance:
- base commission share to node operators (5%)
- voter share rewards for RPL stakers (9%)
- pDAO share to the protocol treasury (0%, can be adjusted via governance)
- rETH holders receive the remainder
The voter share (9% of protocol revenue) is distributed proportionally among all node operators based on their share of total megapool RPL staked.
In Saturn 1, RPL inflation rewards continue alongside this new voter share mechanism, providing additional incentives for node operators who stake RPL.
You can learn more about RPL Revenue Share and UARS [here](/node-staking/megapools/staking-and-claiming-rewards.md#whats-changed-in-saturn-1).
## Reworked Deposit Mechanics
The Saturn 1 Upgrade includes a few notable changes to how the deposit queue for validator creation is
handled. In the event of a long deposit queue, node operators who wish to dequeue their deposit may so do in exchange for rETH.
The improved deposit queue features two types of queues - standard and express queue. The express queue processes
deposits at a quicker rate, but requires an express queue ticket for each validator deposit. This structure rewards existing
node operators and assists in the migration from minipools to megapools.
Existing node operators receive express queue tickets based on their bonded ETH in legacy minipools: one ticket for every 4 ETH bonded.
For example, a node operator with an 8 ETH legacy minipool gets 2 express queue tickets. This is enough tickets to fully migrate to two 4 ETH megapool validators using
the express queue.
[RPIP-59: Deposit Mechanics](https://rpips.rocketpool.net/RPIPs/RPIP-59#deposit-queue) goes into the nitty gritty of how deposits are handled.
## oDAO and pDAO Guardrail Parameters
In addition to revenue sharing parameters, a few guardrail parameters (controllable by pDAO) are being included in Saturn 1 to reduce the oracle DAO and protocol DAO trust assumptions.
These guardrails serve to improve safety without interfering with legitimate use.
- [RPIP-58: MEV Penalty Guardrail](https://rpips.rocketpool.net/RPIPs/RPIP-58): places a limit on the number of MEV penalties that the oDAO can apply to minipools per week.
- [RPIP-61: Balance Submission Guardrail](https://rpips.rocketpool.net/RPIPs/RPIP-61): during normal operation, the rETH exchange rate doesn't need to change frequently.
RPIP-61 places a limit on how often the oDAO can change the rETH exchange rate.
- [RPIP-60: Protocol Upgrade Guardrails](https://rpips.rocketpool.net/RPIPs/RPIP-60): introduces a delay between when a protocol upgrade is passed and when the upgrade is executed.
RPIP-60 allows users ample time to exit the protocol if it changes in a way they do not agree. It also gives the security council power to veto a protocol upgrade.
## rETH Liquidity
Currently, the ETH from rETH mints flow into the deposit pool to be available for node operating matching. In Saturn 1, a proportion of
ETH from new rETH mints will flow into the rETH contract rather than the deposit pool. Excess ETH above a buffer threshold of 1%
of rETH TVL will flow into the deposit pool. This change serves to prioritize rETH withdrawal liquidity by minimizing the creation
of additional supply and allowing rETH burns to better reflect demand. A closer look into rationale and how the buffer size is determined can be found
here: [RPIP-65: Prioritize rETH Withdrawal Buffer](https://rpips.rocketpool.net/RPIPs/RPIP-65)
## Audits
Rocket Pool is committed to ensuring the security of the protocol. Saturn 1 has undergone multiple rounds of comprehensive audits with leading teams
in the Ethereum ecosystem.
The final audit reports for Saturn 1 can be found below:
- [Cantina](https://rocketpool.net/files/audits/cantina-audit-saturn-1.pdf)
- [Bailsec](https://rocketpool.net/files/audits/bailsec-audit-saturn-1.pdf)
- [Sigma Prime](https://rocketpool.net/files/audits/sigma-prime-audit-saturn-1.pdf)
For a full history of audits, visit the [Protocol Security](https://rocketpool.net/protocol/security) page.
Rocket Pool also maintains an active [Immunefi bug bounty program](https://immunefi.com/bug-bounty/rocketpool/information/) with rewards up to $150,000 for critical vulnerabilities.
## Node Operator Guide
If you're interested in running a Rocket Pool node to create your own Ethereum validators, take a look at our [Node Operator's guide](/node-staking/responsibilities.md).
This is a very comprehensive guide that goes over all of the considerations involved in node operation, including:
- Deciding to run a node locally at home, or remotely on the cloud
- Selecting the hardware for a local machine, or selecting a remote hosting provider
- Preparing and securing the operating system of your node
- Selecting your Execution and Consensus clients
- Installing Rocket Pool's Smart Node stack
- Creating a new Beacon Chain validator using the Rocket Pool network
- Maintaining and updating your node
- Participating in on-chain governance
Both guides will show you how to practice for free on the Rocket Pool testnet so you can get a feel for everything without risking any of your real-life ETH, and how to stake your real ETH on the Ethereum mainnet once you're comfortable with the process.
When you're ready, select a guide from the options above based on your interests.
You are also free to explore the various pages using the sidebar to the left.
 - Scroll down and in the "More Details" section, click on **"+ Click to show more"**, and then click on **"Decode Input Data"**.
 - The RPL price (shown in wei units) displayed in the Input Data box, divided by 10^18 (to convert it to ETH units) multiplied by the number of RPL staked, should be >= 1.6 ETH (for 16 ETH minipools) and >= 2.4 ETH (for LEB8s), times the number of minipools of each type which you operate.
 - If your collateral ratio is below the required amount as explained in the previous point, you can stake additional RPL in the time between the oDAO took the last price snapshot (see bullet point 3 above), and the time when the next rewards round begins (see bullet points 1 and 2 above), in order to bring your node back to a >=10% collateralization ratio.
- An alternative to checking the oDAO price submissions in etherscan is to keep an eye on the "events" channel of the Rocketpool discord, and look for the **RPL Price Update** message from the Rocket Watch bot (see example below) within the last 19.2 hours before the next rewards period starts.
 ### Smoothing Pool ETH Rewards
Along with RPL rewards, the Smoothing Pool's entire ETH balance is distributed during rewards checkpoints.
Out of the entire Smoothing Pool's rewards balance, the percentage which corresponds to pool stakers (50% for 16 ETH minipools, or 75% for LEB8s), minus the respective node commission, will be sent to the rETH contract. There it can either 1) be burned for ETH from pool stakers that want to exit, or 2) be used to create more minipools.
The remaining portion will be distributed amongst the eligible node operators.
Nodes that are opted into the smoothing pool for the interval, even if only part of the time, are eligible for a portion of the Smoothing Pool's total balance.
The balance is snapshotted at the rewards checkpoint, and the Oracle DAO determines each eligible node's portion.
The portion is determined by the following factors:
- Amount of time in the Smoothing Pool this interval
- Attestation performance on the Beacon Chain for each minipool
- The commission of each minipool
If you'd like to know more, please see the `research` repository linked above for a full breakdown of how the rewards are calculated.
### (Optional) Generating the Rewards Tree
When a new rewards checkpoint is reached, the Oracle DAO will begin to build the rewards tree for that interval.
Building this tree currently takes approximately 2 hours, and the rewards for the interval aren't available to claim until the tree has been built and submitted.
Once it's available, your node will automatically download this file and you'll be able to view and claim your rewards for that interval.
If you'd like to generate the tree yourself instead of downloading the pre-built one from the Oracle DAO, you can do so!
- Enter the `rocketpool service config` TUI.
- Navigate to the `Smartnode and TX Fees` section.
- Change the `Rewards Tree Mode` from `Download` to `Generate`.
- If your primary Execution client is not an archive node, you can add a URL for a separate archive node in the `Archive-Mode EC URL` box.
- This is needed to generate historical rewards trees.
- The Archive EC will only be used for tree generation; it will not be used for any other Smart Node duties.
- [Infura](https://infura.io/product/ethereum) and [Alchemy](https://www.alchemy.com/supernode) offer archive node access. **Note that the free tiers are usually not sufficient to handle tree generation, so you will need one of the paid tiers.**
Now your Smart Node will build the tree completely independently from the Oracle DAO, using only the data provided by your Execution and Consensus clients.
You can watch it during a rewards interval checkpoint with `rocketpool service logs watchtower`.
If you'd like to rebuild past trees from previous intervals, you can do so with the following command:
```shell
rocketpool network generate-rewards-tree
```
Follow the prompts, and then use `rocketpool service logs watchtower` to view its progress.
## Claiming Rewards
To view your pending unclaimed rewards, run the following command:
```shell
rocketpool node claim-rewards
```
As intervals go by and you accumulate rewards, the output will look like this:

Here you can quickly see how many rewards you've earned at each interval, and can decide which one(s) you want to claim.
You can also specify an amount you want to restake during this claim:

This will let you compound your RPL rewards in one transaction, which saves on gas costs.
Simply follow the prompts, ensure your node wallet has enough ETH to pay for the gas costs of claiming, and you're done!
**Your rewards will be sent to your withdrawal address.**
::: tip TIP
To view your node's total rewards, including those you've already claimed, use the following command:
```shell
rocketpool node rewards
```
This will provide a breakdown of how much RPL and ETH you've claimed so far, and how much is still unclaimed:
```
=== ETH ===
You have earned 8.1935 ETH from the Beacon Chain (including your commissions) so far.
You have claimed 0.0634 ETH from the Smoothing Pool.
You still have 3.4788 ETH in unclaimed Smoothing Pool rewards.
=== RPL ===
The current rewards cycle started on 27 Sep 22 21:26 EDT.
It will end on 30 Sep 22 21:26 EDT (20h35m17s from now).
You currently have 675.616380 unclaimed RPL from staking rewards.
Your estimated RPL staking rewards for this cycle: 36.851544 RPL (this may change based on network activity).
Based on your current total stake of 6615.797278 RPL, this is approximately 67.77% APR.
Your node has received 208.551820 RPL staking rewards in total.
You may claim these rewards at any time. You no longer need to claim them within this interval.
```
:::
## Execution-Layer Rewards in your Fee Distributor
If you're **not** opted into the Smoothing Pool, the Execution-layer portion of your rewards from block proposals (including transaction fees and MEV) will be sent to your node's [Fee Distributor](/node-staking/fee-distrib-sp.md#fee-distributors-and-the-smoothing-pool) contract instead.
To check the balance of your Fee Distributor, you can either use a chain explorer like [https://etherscan.io](https://etherscan.io) or simply run `rocketpool node status` - there will be a section called **Fee Distributor and Smoothing Pool** that shows it:
```
=== Fee Distributor and Smoothing Pool ===
The node is not opted into the Smoothing Pool.
To learn more about the Smoothing Pool, please visit /en/legacy/redstone/whats-new.html#smoothing-pool.
The node's fee distributor 0xA0bfbFC582f5814585f8455Ed6D7B620eA9a9EE4 has a balance of 1.143598 ETH.
```
### Distributing the Balance
To access the Fee Distributor's balance, you will **distribute** it (hence the name, _Fee Distributor_).
This will calculate your share of the rewards (based on your node's average minipool commission) and send it to your node's withdrawal address; the rest is sent to the staking pool.
Distribution can be done **at any time**.
You can sit on the balance and let it accumulate if you choose, or distribute it regularly.
To distribute the balance, run the following command:
```shell
rocketpool node distribute-fees
```
This will show how much goes to you and how much goes to the staking pool:
```
Your node's average commission is 15.00%.
Your fee distributor's balance of 1.143599 ETH will be distributed as follows:
Your withdrawal address will receive 0.657569 ETH.
rETH pool stakers will receive 0.486030 ETH.
```
Simply confirm the gas price you want and submit the transaction.
Once it's been completed, your portion of the rewards will be available in your node's withdrawal address.
If someone else distributes your fee distributor instead, your portion is held as unclaimed rewards. See [Claiming Unclaimed Rewards](/node-staking/fee-distrib-sp.md#claiming-unclaimed-rewards).
---
url: /node-staking/rewards/overview.md
---
> For AI agents: the complete documentation index is available at /llms.txt, the full documentation bundle is available at /llms-full.txt.
# Overview
This section covers how to access the rewards your node generates while validating.
## Prerequisites
Before configuring your Smart Node, please make sure you:
- Have set up a node machine (or virtual machine) and secured it (via the [Securing your Node](/node-staking/securing-your-node.md) guide)
- Have the Smart Node [installed](/node-staking/installing/overview.md) and [configured](/node-staking/config/overview.md) on it
- Have a node wallet loaded on your Smart Node
- Synced your Execution and Consensus clients
- Provisioned your node with [a withdrawal address](/node-staking/prepare-node.md#setting-your-primary-withdrawal-address), set up your [fallback clients](/node-staking/fallback.md) (optional), opted into the [Smoothing Pool](/node-staking/fee-distrib-sp.md#the-smoothing-pool) (optional), and configured [MEV](/node-staking/mev.md)
- Created at least one [minipool](/node-staking/create-validator.md)
## Guides
[Claiming Node Operator Rewards](/node-staking/rewards.md) explains how RPL rewards and Execution-layer rewards work, and how to access them.
[Distributing Skimmed Minipool Rewards](/node-staking/skimming.md) covers accessing rewards from the Beacon Chain that periodically get "skimmed" by the protocol and delivered to your minipools.
---
url: /node-staking/securing-your-node.md
---
> For AI agents: the complete documentation index is available at /llms.txt, the full documentation bundle is available at /llms-full.txt.
# Securing your Node
The goal of this guide is to walk you through steps you can take to secure your node against malicious actors.
Whether you're running a local server at home or a VPS server / virtual machine on the cloud, the tips here will help you harden your node against outside attack and help protect it during its lifespan.
This section will describe both **essential** actions, which you **must** take, and **nice-to-have** actions, which are helpful but not required.
::: tip NOTE
This guide is meant to be an **introduction** to some of the things you can do to harden your node machine.
If you are comfortable with the command-line terminal and want to go even further in protecting your node, take a look at the popular [imthenachoman/How-To-Secure-A-Linux-Server](https://github.com/imthenachoman/How-To-Secure-A-Linux-Server) guide.
:::
## Assumptions in This Guide
This guide assumes your node runs `Ubuntu 20.04 LTS`.
The concepts will carry over to other systems but the example commands may not.
As with all of the commands in this guide, we assume that you are connecting **remotely** to your node's command terminal using `ssh`.
If you need a refresher on how to use `ssh`, take a look at the [Intro to Secure Shell](/node-staking/ssh.md) guide first.
## ESSENTIAL: Keep your Client Machine Secure
::: warning NOTE
If you use your Smart Node locally (by physically logging into it with a keyboard and monitor directly attached to it), then **this section is not relevant to you - you can skip it**.
:::
Most Smart Node operators interact with their node remotely by connecting to its terminal from another computer using `ssh`:
- The machine you connect _to_ (in this case, your node machine) is called the **server**.
- The machine you connect _from_ (such as your laptop, desktop, or even your phone) is the **client**.
One of the most important things you can do to secure your Smart Node is to **keep your client machine secure**.
If your client machine is compromised and you use it to log into your node, then most of the security settings you apply to the node can be bypassed.
For example: if you use a laptop as an SSH client, and it has a [keylogger](https://en.wikipedia.org/wiki/Keystroke_logging) installed, then any secret things you type on the node (such as your password or recovery mnemonic) when connected via SSH will be stolen.
There is no definitive guide to keeping your client machine secure, but being aware that it is a factor in your security is a good first step.
Make sure that your client machine is as secure as it can be.
Here are a few tips:
- Don't use your client machine for **risky activities** (such as visiting untrustworthy websites or installing unnecessary programs)
- Keep your client machine updated with the **latest security patches**
- If possible, use a **malware and antivirus protection** program for your Operating System
For maximum security, you may want to use a **dedicated machine** as your SSH client, though this may not be practical for you.
## ESSENTIAL: Secure your SSH Access
::: warning NOTE
If you use your Smart Node locally (by physically logging into it with a keyboard and monitor directly attached to it), then **this section is not relevant to you - you can skip it**.
:::
Whether you run your Smart Node at home or you use a VPS in a remote datacenter, it is likely that either you access it through SSH, or that SSH is enabled **even if you do not use it**.
SSH connections are based on secure cryptography, but as with any secure system, the real security comes from using it correctly.
There are two main things to do for your SSH settings:
1. Use an SSH key to log in remotely instead of a username and password
2. Disable password-based authentication entirely, so SSH keys are the only remote login option
As you are probably familiar with now, the default way to log into your node via SSH is with a username and password.
The downside of this is that your password is typically something rather "short" and susceptible to [brute-force attacks](https://en.wikipedia.org/wiki/Brute-force_attack).
Luckily, there is an alternative way to log in via SSH: an **SSH key pair**.
SSH key pairs work similarly to blockchain wallets; they come with a public part (such as your wallet address) and a private part (the private key for your wallet address):
- You provide the **public part** to your node. This way, the node knows you're allowed to connect to it, and it knows that it's really you trying to connect.
- You keep the **private part** to yourself on your client machine. This way, you (and only you) can connect to your node.
- You can (and should!) protect the private part with a **password**, so someone who steals your key can't use it.
- From a computer's perspective, the private key is **exponentially harder** to crack than a password is. This mitigates the risk of a brute-force attack against your node.
::: tip TIP
If you'd like to learn more about SSH key pairs before creating your own, take a look at these links:
- [https://canvas.cse.taylor.edu/courses/27/pages/ssh-key-tutorial](https://canvas.cse.taylor.edu/courses/27/pages/ssh-key-tutorial)
- [https://www.ssh.com/academy/ssh/host-key](https://www.ssh.com/academy/ssh/host-key)
:::
### Creating an SSH Key Pair
Let's start by creating a new SSH key pair **on your client machine**.
There are many varieties of key out there, but we're going to use a key type called [ed25519](https://en.wikipedia.org/wiki/EdDSA#Ed25519) which provides excellent security.
Run the following command **on your client machine** (i.e., you should **not** run this while already SSH'd into your node machine - if you are, **exit out of SSH first**):
```shell
ssh-keygen -t ed25519 -C "your_email@example.com"
```
You will see the following:
```
Generating public/private ed25519 key pair.
Enter file in which to save the key (/home/username/.ssh/id_ed25519):
```
This asks you where you would like to save your private key file.
SSH is compatible with the provided default and will automatically use it for you if you select it.
However, you have the option of changing it to something else if you wish.
::: tip NOTE
The path `/home/username/.ssh/id_ed25519` is just an example, assuming your username is `username`.
You likely have a different username.
Whenever you see a path like the above in this guide, replace it with whatever path your system actually prints with your actual username.
:::
If you are comfortable with the default setting, simply press `Enter`.
Otherwise, type your desired location for the key.
It must be an absolute path (e.g. `/home/username/.ssh/rocketpool_key` on Linux, or `/Users/username/.ssh/rocketpool_key` on OSX).
Press `Enter` when you're done.
After pressing `Enter`, you will see:
```
Enter passphrase (empty for no passphrase):
```
**This will become the password for the private key itself**.
Whenever you use the key to connect to your node, you will need to enter this password first.
::: danger WARNING
**You should not leave this blank** - otherwise, anyone with the SSH key file will be able to use it!
Pick a good password that you (and only you) will know.
Also, **don't forget your password** - there is no way to recover this password if you lose it.
:::
Once you finish typing the password, press `Enter`.
It will ask you to retype it for confirmation.
After that, you will see something like the following output:
```
Your identification has been saved in /home/username/.ssh/id_ed25519
Your public key has been saved in /home/username/.ssh/id_ed25519.pub
The key fingerprint is:
SHA256:CASbPZETiQ83lLhpUO2aoT05TxMVLwqiWtdsRtoPt4s your_email@example.com
The key's randomart image is:
+--[ED25519 256]--+
| .o*==.. |
|. +=O... |
|..+B++o . |
|..=.+X o |
|.+.=+.O S |
|o.B.oo + . |
|. = . o |
| . . . |
| E . |
+----[SHA256]-----+
```
The first line states the location of the **private key**, which is called `id_ed25519` by default (notice that it does not have a file extension).
Ubuntu will load this key for you automatically when you use `ssh` if this private key file is in the default location.
The second line states the location of the **public key**, which is called `id_ed25519.pub` by default.
We'll need the public key for the next step.
::: tip NOTE
Ubuntu _should_ load this new key automatically.
However, some systems (such as macOS machines) will not load it automatically - you will have to tell it to do this with the following command **on your client machine**:
```shell
ssh-add $HOME/.ssh/id_ed25519
```
Note that this is the path of the **private key** that we generated in the previous step, **not the public key**.
Replace the path with whatever your system printed in that previous step.
If you get an error saying that the `ssh-agent` is not running, start it by running the following command **on your client machine**:
```shell
eval $(ssh-agent)
```
If you don't want to type these two commands every time you open the terminal, you can create a shortcut for adding your key by adding an `alias` to your `~/.bashrc` file.
Open the file using the text editor:
```shell
nano ~/.bashrc
```
Add this line to the end (assuming you used the default path for the private key - update as necessary):
```shell
alias loadkey='ssh-add $HOME/.ssh/id_ed25519'
```
Save and exit with `Ctrl+O` and `Enter`, then `Ctrl+X`.
Next, close and open your terminal for the changes to take effect.
You can now type `loadkey` **on your client machine** to load the key.
:::
### Adding the Public Key to your Node
Once you have your SSH key pair, you can now add the **public key** to your node.
This will let you connect to it over `ssh` using the private key you just generated, instead of your username and password.
There are two ways to do this - if one doesn't work, try the other way:
**Using ssh-copy-id**
**Note**: if your client machine is running Windows, `ssh-copy-id` is not yet available.
Please follow the instructions in the "Manually Adding the Key" tab.
Run the following command **on your client machine**:
```shell
ssh-copy-id -i $HOME/.ssh/id_ed25519.pub username@node.ip.address
```
For example, if my username on the node was `staker` and my node's IP address was `192.168.1.10`, I would run the following command:
```shell
ssh-copy-id -i $HOME/.ssh/id_ed25519.pub staker@192.168.1.10
```
You will see some messages like the following:
```
/usr/bin/ssh-copy-id: INFO: Source of key(s) to be installed: "/home/username/.ssh/id_ed25519.pub"
/usr/bin/ssh-copy-id: INFO: attempting to log in with the new key(s), to filter out any that are already installed
/usr/bin/ssh-copy-id: INFO: 1 key(s) remain to be installed -- if you are prompted now it is to install the new keys
```
This tells you that it's trying to log in with your key first to make sure it isn't already there.
Once it fails logging in, it knows that it's OK to add the new public key to the node machine.
It will then prompt you for the **password of the user on your node machine**.
(_Note that this is **not the password of the SSH key**!_)
Enter your user's password, and you will see the following output:
```
Number of key(s) added: 1
Now try logging into the machine with: "ssh 'username@node.ip.address'"
and check to make sure that only the key(s) you wanted were added.
```
That means it worked!
**Manually Adding the Key**
Start by getting the contents of the **public key** - run this command **on your client machine**:
- On macOS and Linux:
```shell
cat ~/.ssh/id_ed25519.pub
```
- On Windows (Command Prompt):
```shell
type %USERPROFILE%\.ssh\id_ed25519.pub
```
- On Windows (PowerShell):
```shell
type $ENV:UserProfile\.ssh\id_ed25519.pub
```
The output will look something like this:
```
ssh-ed25519 AAAAC3NzaC1lZDI1NTE5AAAAIGUgU3a6mNjy3N1TyWOwY+VA/nifAeABl2Ch2yIl1bGa your_email@example.com
```
This is your **public key**.
Copy this output and store it somewhere convenient - you're going to need it in a minute.
Next, use `ssh` to connect to your node like you normally would (using your node's username and password).
Once you're connected to your node, run the following commands:
```shell
mkdir -p ~/.ssh
nano ~/.ssh/authorized_keys
```
The second command will open a text editor for the file used to store all of the public keys that your node's user account trusts.
In this file, paste the **public key** that you retrieved a few steps ago using the `cat` command (the whole line starting with `ssh-ed25519`).
When it's in, save the file with `Ctrl+O` and `Enter`, then press `Ctrl+X` to exit.
Now, exit `ssh` by running the `exit` command so you return back to your local client machine's terminal.
You should now be able to `ssh` into the node like you normally would, but now you won't have to type the password of the user account.
Instead, you will have to type **the password of your SSH private key**.
Depending on your system settings, you may only have to do this once per restart, or you may have to do it every time you use the key to connect to your node.
### Disable Login-via-Password
Even though you have an SSH key pair set up, your node will still allow other machines to try to log in using the username and password method.
This defeats the entire purpose of using SSH keys in the first place, so the next step is to disable those.
::: danger NOTE
You are about to modify the SSH server's configuration.
All of your **existing** SSH sessions will be preserved.
However, if you make a mistake, then it's possible that you will not be able to create **new** SSH sessions anymore and effectively lock yourself out of the machine.
To prevent this, we strongly recommend that you create **2 SSH sessions** for the next steps - one for editing things and testing, and one as a backup so you can revert any breaking changes.
:::
Start by logging into your machine using `ssh` as usual:
```shell
ssh user@your.node.ip.address
```
As a reminder, **you should do this twice on two separate terminals so you have a backup session just in case**.
You can ignore the backup session for now - we'll tell you when you need it.
Run the following commands **only in the first session**.
Open the configuration file for the SSH server:
```shell
sudo nano /etc/ssh/sshd_config
```
As with all commands that start with `sudo`, this will prompt you for your **user account's password**.
This is a large file, so you'll have to navigate through it using the arrow keys on your keyboard or `Page Up` / `Page Down`.
Make the following changes:
1. Uncomment `#AuthorizedKeysFile` if it is commented (by removing the `#` in front of it)
2. Change `KbdInteractiveAuthentication yes` to `KbdInteractiveAuthentication no` and uncomment (by removing the `#` in front of it) - **note that older versions of SSH call this option `ChallengeResponseAuthentication` instead of `KbdInteractiveAuthentication`**
3. Change `PasswordAuthentication yes` to `PasswordAuthentication no` and uncomment (by removing the `#` in front of it)
4. Change `PermitRootLogin yes` to `PermitRootLogin prohibit-password` unless it's already set to that and has a `#` in front of it
Once you're done, save with `Ctrl+O` and `Enter`, then exit with `Ctrl+X`.
Finally, run `sudo sshd -T | grep -i passwordauthentication` and make sure that it prints `passwordauthentication no`.\
If it does not, you may need to run `sudo nano /etc/ssh/sshd_config.d/50-cloud-init.conf` and set `PasswordAuthentication yes` to `PasswordAuthentication no` in that file as well.
Save and exit as before, with `Ctrl+O` and `Enter`, then `Ctrl+X`
Next, restart the SSH server so it picks up the new settings:
```shell
sudo systemctl restart ssh.service
```
After this, logging into SSH via a username and password should be disabled.
::: warning NOTE
At this point, you should exit the SSH session and try to SSH back in.
If you are able to do so successfully, then your SSH configuration is still valid!
If you are **not** able to get back in, then something has gone wrong with your configuration.
Use the backup SSH session you created at the start of this section to modify the `/etc/ssh/sshd_config` file.
Try to find the mistake or undo your changes, then restart the SSH server using `sudo systemctl restart sshd`.
Once it's been restarted, try connecting with SSH again on your "other" terminal.
Keep doing this until you have it working again and are able to successfully connect.
:::
### (Optional) Enable Two-Factor Authentication
Two-factor authentication involves requiring a second security measure in addition to your password or SSH key, usually on a separate device from your primary one.
For example, you may be familiar with logging into a website such as a crypto exchange using both a password and a Google Authenticator code (or an SMS code).
This two-step process is an example of two-factor authentication.
SSH can also be configured to require a Google Authenticator code, which means that an attacker that somehow compromised your SSH key and its passphrase would **still need the device with the authenticator app on it** (presumably your phone).
This adds an extra layer of security to your system.
::: danger WARNING
We **strongly recommend** that you open a second terminal with an SSH connection to your node, just in case you misconfigure something.
This way, you will have a backup that is still connected in case you lock yourself out, so you can easily undo your mistakes.
If you **do** manage to lock yourself out, you will need to physically access your node via its local monitor and keyboard to log in and repair the misconfiguration.
:::
Start by installing [Google Authenticator](https://play.google.com/store/apps/details?id=com.google.android.apps.authenticator2\&hl=en_US\&gl=US) (or a compatible equivalent) on your phone if you don't already have it.
For Android users, consider [andOTP](https://play.google.com/store/apps/details?id=org.shadowice.flocke.andotp\&hl=en_US\&gl=US) which is an open-source alternative that supports password locking and convenient backups.
Next, install the Google Authenticator module on your node with this command:
```shell
sudo apt install -y libpam-google-authenticator
```
Now tell the `PAM` (pluggable authentication modules) to use this module.
First, open the config file:
```shell
sudo nano /etc/pam.d/sshd
```
Find `@include common-auth` (it should be at the top) and comment it out by adding a `#` in front of it, so it looks like this:
```
# Standard Un*x authentication.
#@include common-auth
```
Next, add these lines to the top of the file:
```shell
# Enable Google Authenticator
auth required pam_google_authenticator.so
```
Then save and exit the file with `Ctrl+O`, `Enter`, and `Ctrl+X`.
Now that `PAM` knows to use Google Authenticator, the next step is to tell `sshd` to use `PAM`.
Open the `sshd` config file:
```shell
sudo nano /etc/ssh/sshd_config
```
Now change the line `KbdInteractiveAuthentication no` to `KbdInteractiveAuthentication yes` so it looks like this:
```
# Change to yes to enable challenge-response passwords (beware issues with
# some PAM modules and threads)
KbdInteractiveAuthentication yes
```
(Older versions of SSH call this option `ChallengeResponseAuthentication` instead of `KbdInteractiveAuthentication`.)
Add the following line to the bottom of the file, which indicates to `sshd` that it needs both an SSH key and the Google Authenticator code:
```shell
AuthenticationMethods publickey,keyboard-interactive:pam
```
Then save and exit the file with `Ctrl+O`, `Enter`, and `Ctrl+X`.
Now that `sshd` is set up, we need to create our 2FA codes.
In your terminal, run:
```shell
google-authenticator
```
First, it will ask you about time-based tokens.
Say `y` to this question:
```
Do you want authentication tokens to be time-based: y
```
You will now see a big QR code on your screen; scan it with your Google Authenticator app to add it.
You will also see your secret and a few backup codes looking like this:
```
Your new secret key is: IRG2TALMR5U2LK5VQ5AQIG3HA4
Your verification code is 282436
Your emergency scratch codes are:
29778030
86888537
50553659
41403052
82649596
```
::: warning NOTE
Record the emergency scratch codes somewhere safe in case you need to log into the machine but don't have your 2FA app handy.
Without the app, you will no longer be able to SSH into the machine!
:::
Finally, it will ask you for some more parameters; the recommended defaults are as follows:
```
Do you want me to update your "/