Configuring the Smartnode Stack (Docker / Hybrid Mode)
Running complete Execution layer and Consensus layer clients can be daunting; there are several options to choose from and each of them has a plethora of different settings. Luckily, the Smartnode is designed to hide all of that complexity so it's quick and easy to configure, while still giving you the freedom to customize everything if you so desire.
In this section, we'll go over the various methods for configuring the Smartnode if you're using the Docker-based setup or a Hybrid setup where you connect to externally managed Execution or Consensus clients (e.g., clients you manage outside of the Smartnode for solo staking).
NOTE
If you're using Native mode without Docker, please visit the Native configuration guide instead.
There are three ways to configure it:
- Via the Wizard UI - this is the easiest way. It only asks you a few basic question and uses well-tested defaults for the test. This will be what you are presented with when you run
rocketpool service configfor the first time. - Via the Settings Manager UI - this gives you access to all of the Smartnode's settings so you can customize everything as much as you want.
- Headlessly via the Command Line - this is an option for people who run the Smartnode in a headless (non-interactive) environment and need to configure it automatically.
Choose which mode you'd like to learn more about from the list above, or simply scroll through each option below.
Configuring via the Wizard
To start the configuration process, run the following command:
rocketpool service configThis will launch a terminal-based UI that will allow you to quickly and easily configure your node, as well as provide optional fine-grained control over every setting for advanced customization.
NOTE
If you've already configured the Smartnode, you will instead be greeted with the Settings Manager. You can choose to re-open the Wizard from there if you prefer it, and all of your existing settings will be pre-selected for you.
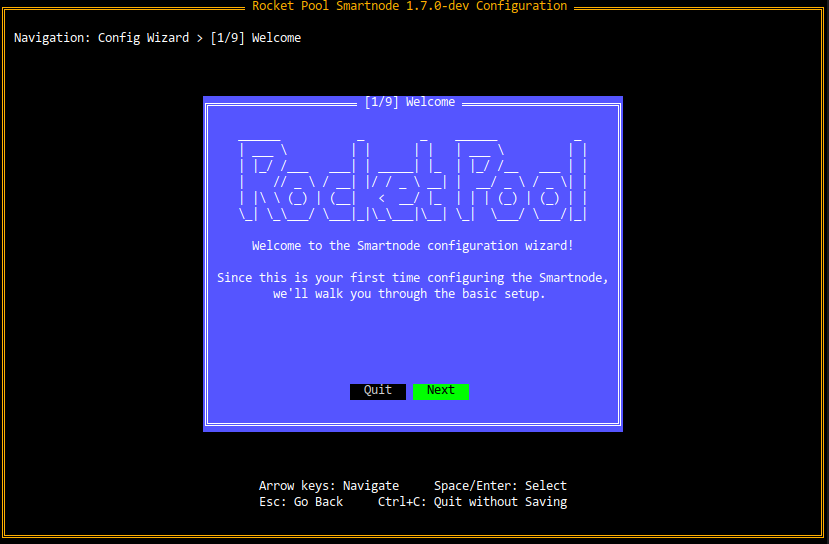
When you run the config UI for the first time (or if you choose to run the Wizard again later), you will be presented with a screen that looks like this:
TIP
To use the Wizard, press the Arrow Keys (up/down/left/right) to navigate between things such as buttons (choices) or text boxes. You can also use Tab and Shift+Tab if you prefer - it will do the same thing.
For buttons, the one that's currently selected will be highlighted in green. The ones in black are not selected. In the screenshot above, Next is currently selected and Quit is not.
Press Enter or Space to select a button, analogous to clicking on it with the mouse.
Press Escape to go back to the previous dialog if you changed your mind about something. This will come in handy as you progress through the various Wizard pages.
Hold Ctrl and press C at any time to exit the Wizard without saving anything.
For example, on the screen above, you could press the left and right arrow keys to move between the Next and Quit buttons.
Pressing Enter while Next is selected will proceeed to the next screen. Pressing Enter while Quit is selected will quit the Wizard without saving.
When you're ready to begin, press Next.
Choosing a Network
In the next screen, you will be asked to choose which network you want to use:
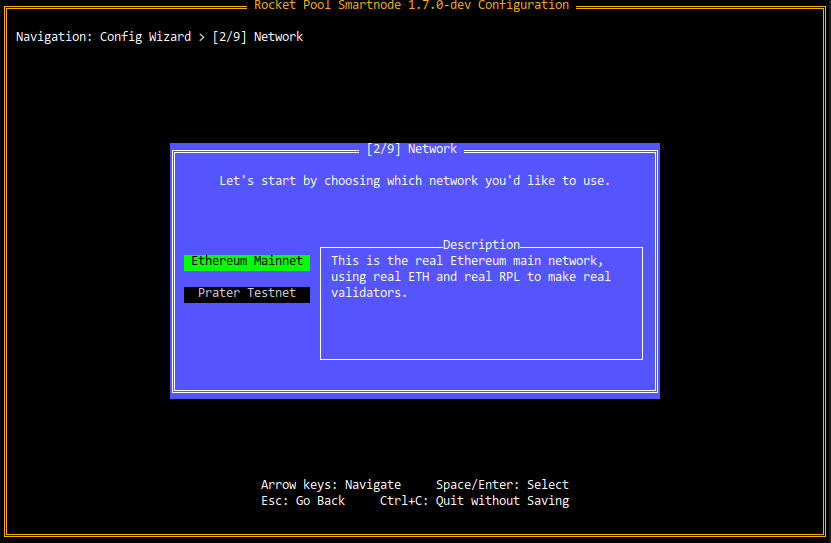
You can highlight the different choices with the Up and Down arrow keys (or Tab and Shift+Tab). When you change choices, the Description box on the right will show you a brief description of each option. This is true for all choice-based pages in the Wizard, not just the network selection, so you will see this style of page frequently.
If you want to practice running a Rocket Pool node on the Holesky test network with fake ETH and RPL you can get for free, select Holesky Testnet.
If you're ready to create a real Rocket Pool node on Mainnet to earn real rewards, select Mainnet.
Client Mode
You will be presented with two options for client mode:
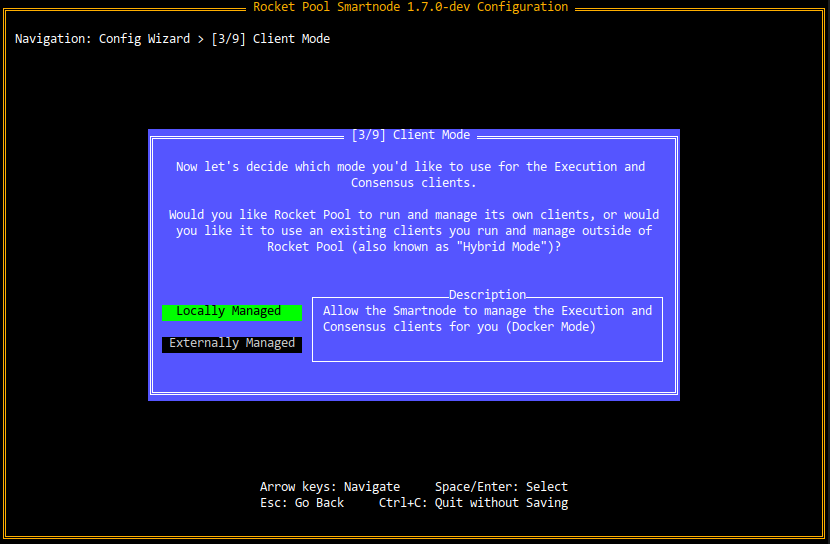
Locally Managed (also known as "Docker Mode") is the default choice. Use it if you don't already have a client pair and you want the Smartnode to manage one for you. By choosing this, the Smartnode will create, configure and manage an Execution & Consensus Client pair as Docker containers. Don't worry, you'll get to choose which client you want to run next.
Externally Managed (also known as "Hybrid Mode") is a convenient choice for users that already have an Execution & Consensus client pair running elsewhere that they manage manually. By choosing this, the Smartnode will simply connect to your existing clients and will not run one of its own. For example, users can use this to plug into the clients that they currently use for solo staking; that way, they don't need to have two separate copies of the clients.
NOTE
Since the Execution-Consensus Layer Merge, you cannot mix and match these modes (e.g., you cannot have a local Execution client but an externally-managed Consensus client). You must either choose all locally-managed or all externally-managed.
Execution Client Setup
Choose which mode you'd like to use for managing your Execution client and follow the steps in the corresponding tab below:
If you want the Smartnode to manage an Execution client for you, the next screen will ask you to pick a client:
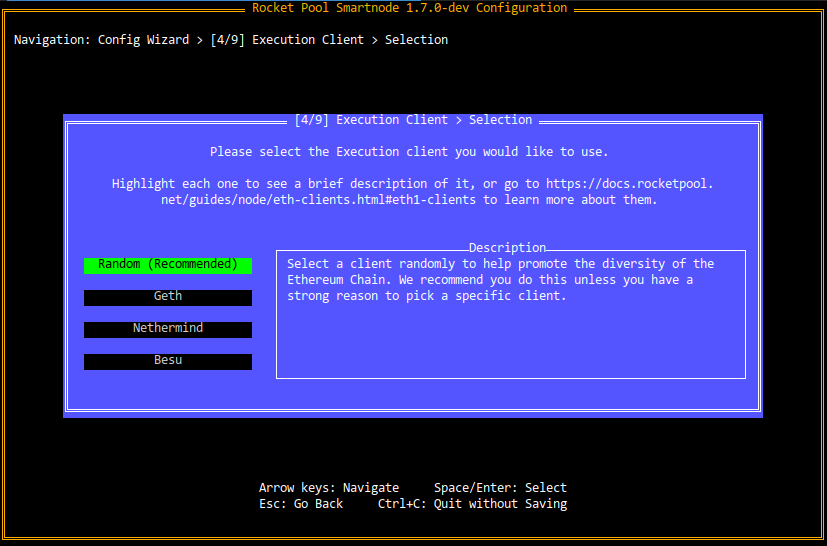
Please refer to the Choosing your ETH clients section for a description of each option. Once you've made your choice, click on the appropriate tab below to learn how to configure it:
If you choose Geth, Besu, or Nethermind, the Wizard will handle all of the configuration for you. You can manually adjust some of its parameters at the end of this process, but the defaults that it uses are completely appropriate for node operation. You can proceed to the next section.
NOTE
Open up the P2P port in your router's port forwarding setup. Configure it to forward port 30303 on both TCP and UDP to your machine's local IP address. This way, other Consensus clients can discover it and communicate with it from the outside. This will help your Consensus client sync quickly and improve performance (and thus rewards).
Each router has a different way of doing this, so you'll need to check out your router's manual on how to set up port forwarding.
NOTE
Because the Smartnode will run in its own Docker container, it will use Docker's internal network. You won't be able to use hostnames like localhost or 127.0.0.1 here; if your Execution client is running on the same machine as the Smartnode, you will need to provide the machine's LAN IP address instead.
And with that, your Execution client is all set!
Consensus Client Setup
Now that you have an Execution client ready, the next task is to set up the Consensus client. The "mode" (local or external) will be inherited from the choice you used for your Execution client earlier.
Choose which mode you selected earlier from the tabs below:
If you want the Smartnode to manage a Consensus client for you, the next screen will ask you to pick a client:
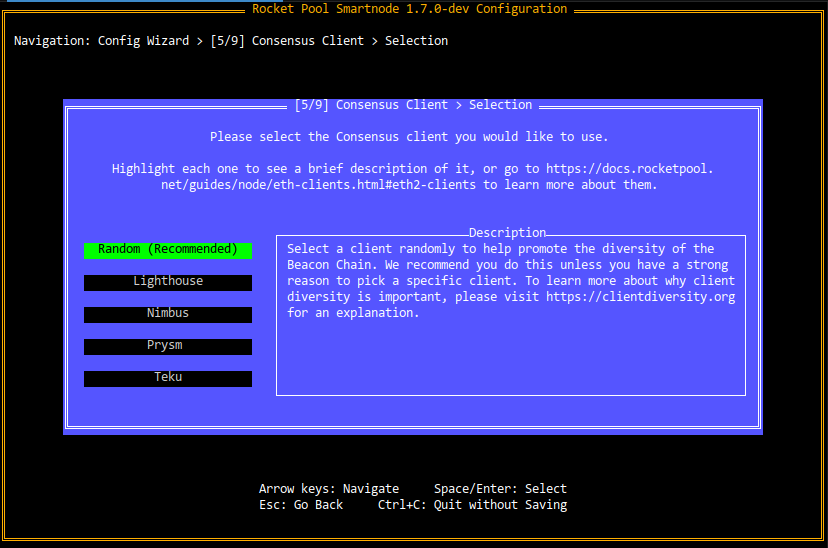
The preferred choice for the overall health and diversity of the network is the Random (Recommended) choice, which will randomly choose among one of the four supported Consensus clients for you.
If you would prefer to choose an explicit client, please refer to the Choosing your ETH clients section for a description of each option so you can make an educated decision.
NOTE
There are two conditions that will prompt you with warnings based on client selection:
The selected client is currently a supermajority client, meaning that an unhealthy majority of validators on the Beacon Chain use it which threatens the stability of the network
The selected client is too resource-heavy for the hardware you're currently using
If either of those cases are true for your chosen client, you will be warned and asked to choose a different client. You have the option of continuing to use the one you selected, but you must be aware of the risks in doing so.
Once you've made your choice or have been assigned a random client, click on the appropriate tab below to learn how to configure it:
The first option in Lighthouse's configuration will ask about your validator's graffiti message:
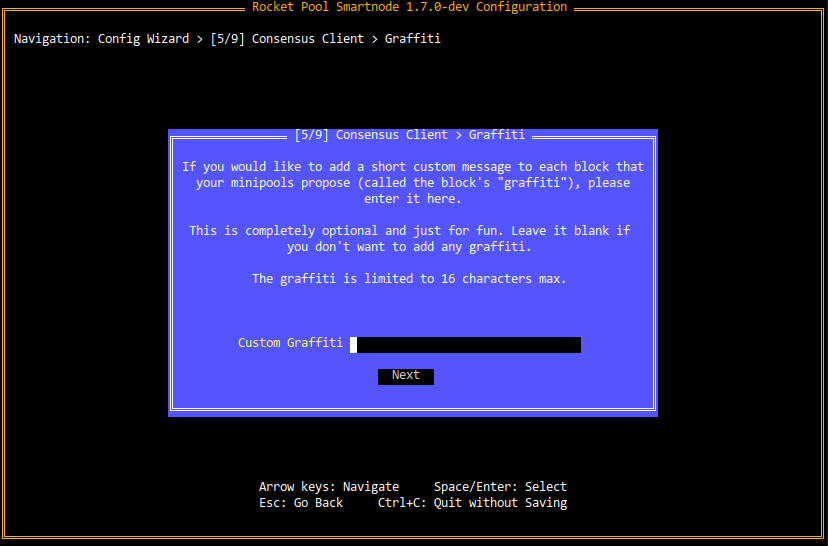
This is an optional custom message you can attach to any blocks you propose on the Beacon Chain. The message will be preserved forever, so think of it like a fun little way to leave your mark!
Note the maximum length of the graffiti is 16 characters.
If you'd like to see some examples of what validators are using for Graffiti today, take a look here.
Next up is an option to enable or disable Checkpoint Sync:

Lighthouse has the ability to instantly sync to the latest block on the Beacon Chain network by connecting to an existing Beacon Node that you trust. This is preferred over conventional syncing because it doesn't require any time (whereas conventional syncing can take days) and comes with some security benefits. Take a look at their documentation on checkpoint syncing for more information if you are curious.
You can enter the URL of any Beacon Node that provides access to its REST API here.
See the section below on Checkpoint Syncing if you'd like to use it.
The final question will ask if you want to enable Doppelgänger Protection:
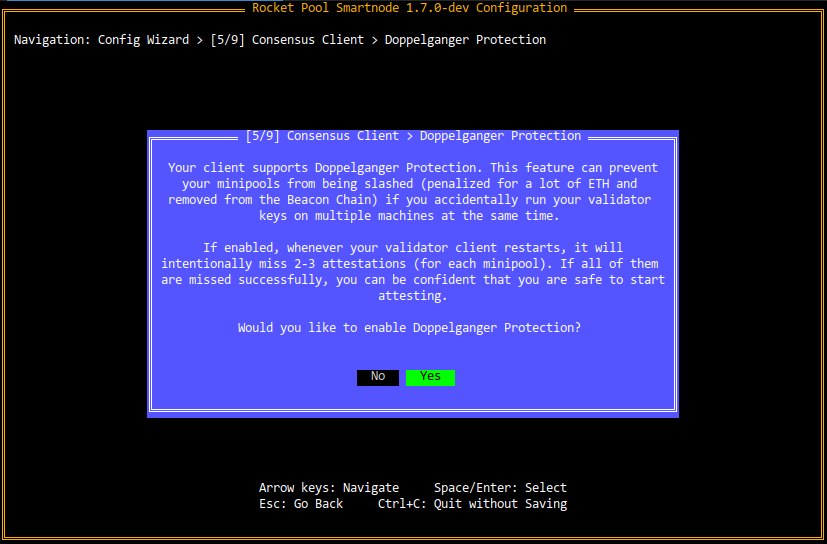
Lighthouse supports a feature called Doppelgänger Detection. In a nutshell, this feature will intentionally miss a few attestations after Lighthouse's Validator Client restarts; while doing this, it will listen to see if attestations are still being sent to the network using your validator keys.
Ideally, there would not be any attestations (which means no other machine is running with your validator keys attached). After its short waiting period, Lighthouse would start validating normally.
However, if there is another machine running with your validator keys attached, then Lighthouse will immediately shut down and issue an error message in its log files. The reason for this is that if it were to start attesting as well, then you would start double attesting which is a slashable offense. When slashed, your validator would be forcibly exited from the Beacon chain and you would be penalized a significant amount of ETH.
Most of the time, doppelgänger detection will result in nothing but a few missed attestations after a client restart. In situations where you are moving your validator to a new machine or you are changing to a new Beacon client, however, doppelgänger detection can prevent you from being slashed by double attesting accidentally.
Think of it as cheap insurance for your minipools; you'll miss a trivial bit of profit every time you restart, but you can be fairly confident that you won't accidentally run your keys in two places and get slashed for it.
Starting on version 4.5.0 Lighthouse has an option to establish P2P connections in a more efficient way using the QUIC protocol. If you are willing to use this feature you'll need to define an extra port "P2P QUIC port" field on the ETH2 settings, and forward it to your node in your router's port forwarding setup. The default P2P QUIC port is 9002 (UDP). Make sure to avoid collisions with ports already in use by your node (or fallback/testnet nodes). Also make sure the same port is open if you're using a firewall on your node (check ufw status). To check if the QUIC configuration is working you should see a 2-digit number after libp2p_quic_peers when running docker run --network rocketpool_net curlimages/curl http://eth2:9100/metrics | grep libp2p_quic_peers.
NOTE
Open up the P2P port in your router's port forwarding setup. Configure it to forward port 9001 on both TCP and UDP to your machine's local IP address. This way, other Consensus clients can discover it and communicate with it from the outside. This will help your Consensus client sync quickly and improve performance (and thus rewards).
Each router has a different way of doing this, so you'll need to check out your router's manual on how to set up port forwarding.
Beacon Chain Checkpoint Syncing
Checkpoint syncing is a very useful technique that some Beacon Chain clients support. It allows your Beacon client to instantly sync the entire Beacon chain without having to start from the beginning and catch up on every block. This means instead of taking days, your Beacon client can be ready in a matter of minutes. All it needs is access to an existing Beacon client that you trust.
You can use any Beacon node that provides access to its HTTP API. Currently, many node operators are using the checkpoint-sync-endpoints - a service that allows Rocket Pool node operators to checkpoint sync easily. Both the Holesky Testnet and Mainnet are supported. A list of checkpoint sync urls can be found via the following link:
Choose a relevant checkpoint sync url and paste in the terminal during rocketpool service config when it prompts you for a Checkpoint Sync Provider.
After that, your Beacon node will automatically connect to the checkpoint sync node when it first starts up and instantly pull down the latest state of the chain!
NOTE
Checkpoint Sync will only occur if you don't have any Beacon Chain data yet. In other words, if you start syncing normally and decide to checkpoint sync later, you will have to remove your chain data first in order for checkpoint sync to work. This can easily be done with the following command:
rocketpool service resync-eth2Fallback Node
Starting with 1.5.0 of the Smartnode stack, you can provide a "fallback" Execution client and Consensus client pair that can take over for your primary clients if they ever go offline (such as because you use Geth and need to prune it). In this situation, your primary node machine will still be responsible for attesting and proposing blocks with your minipools' validator keys, but it will connect to an external machine to interact with the Execution layer and Beacon chains.
To learn more about fall back nodes, see this section and return here when you're done.
Metrics Configuration
Rocket Pool comes with the ability to display a detailed dashboard showing metrics about your node's hardware health, system updates, your validator performance, your rewards, information about the overall Rocket Pool network, and more:
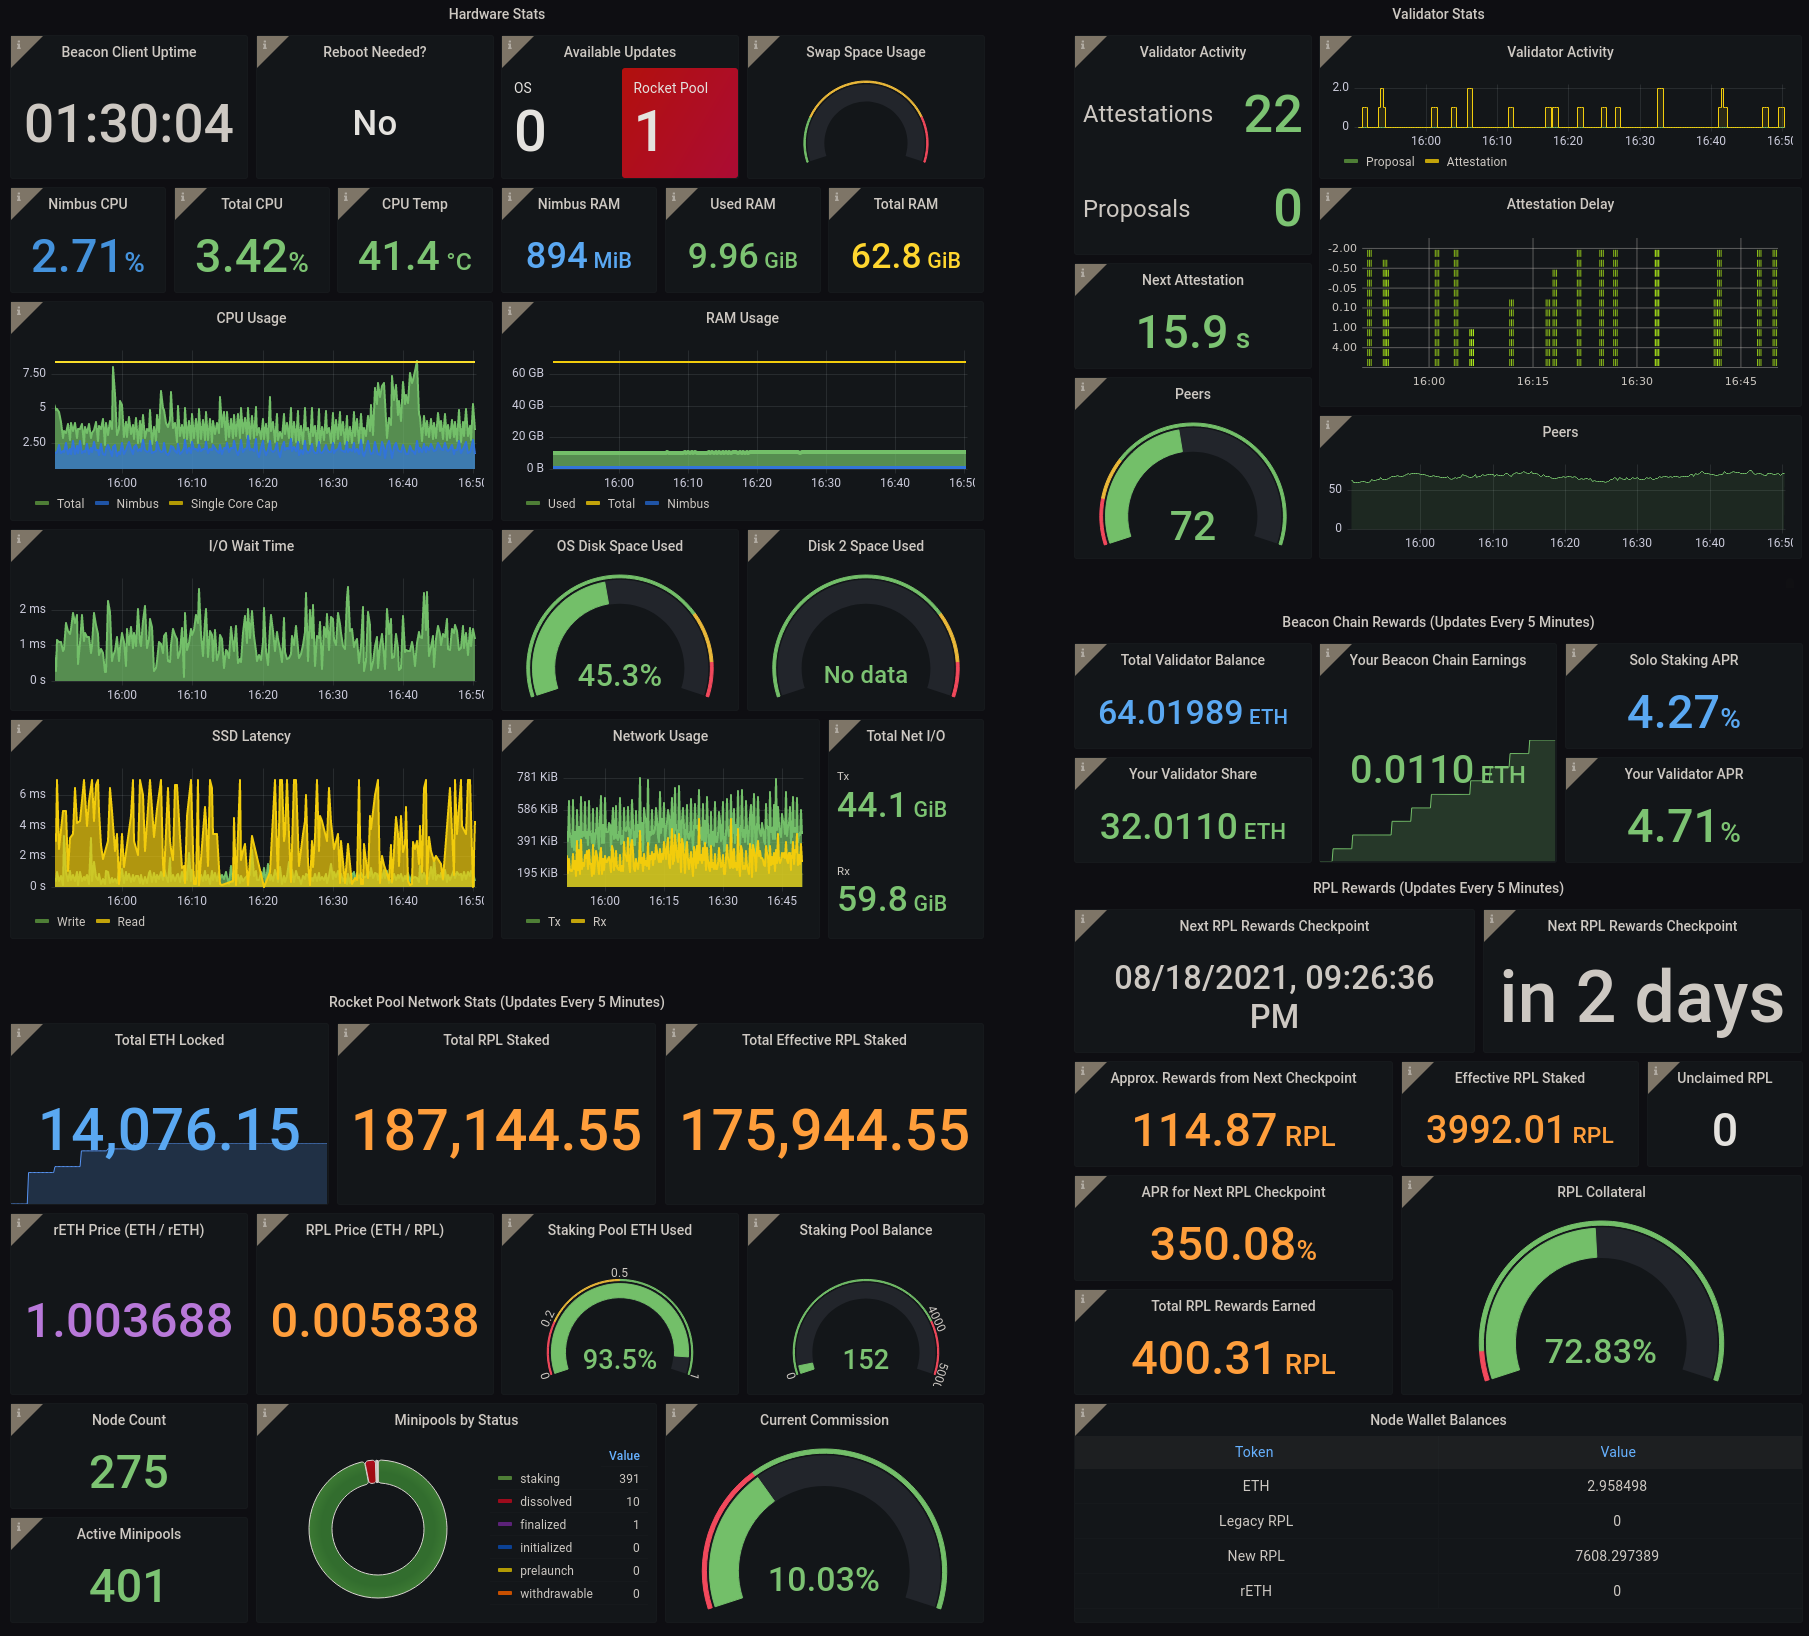
The next question in the Wizard will ask you if you want to enable this:
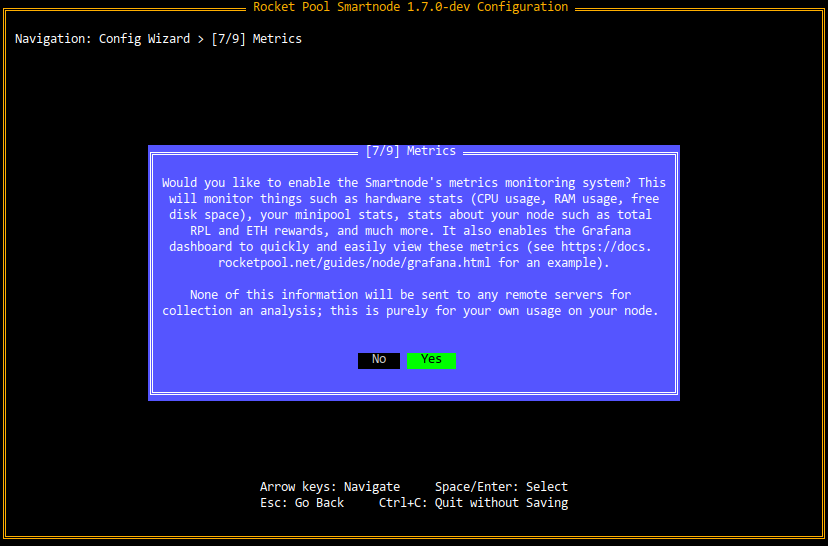
If you choose to enable it, you will learn more about setting it up and how to use it in the Setting up the Grafana Dashboard section later in the process.
NOTE
All of the data collected by this system stays on your machine. Rocket Pool does not collect any of the telemetry or send it to a separate service. It's purely there for you to use so you can monitor your own node!
MEV Configuration
Since the Merge of the Execution and Consensus layers in September 2022, Ethereum validators now have the ability to earn priority fees and participate in Maximal Extractable Value (or MEV for short).
Starting with Smartnode v1.7.0, MEV is now opt-out so its configuration is presented as part of the initial setup, as you see in the next screen:

Please read our MEV guide to learn more about MEV, its configuration, and what to do in this section of the wizard. Return here when you're finished.
Completion
After this question, you've finished setting up the Smartnode! You will see the following dialog:
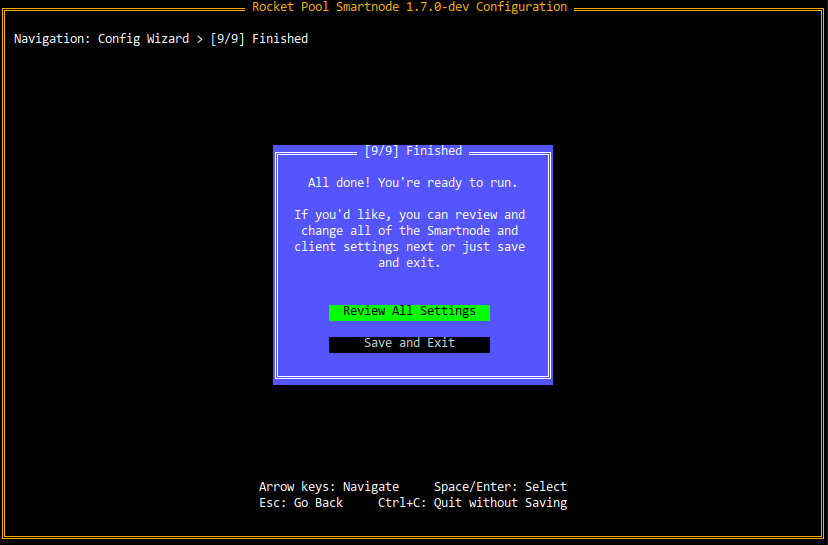
If you're happy with your setup and are ready to start the Smartnode, click Save and Exit here and go to the Securing your Node section next.
If you would like to review all of the settings and customize many additional settings that weren't included in the Wizard, click Review All Settings and go to the next section.
Configuring via the Settings Manager
If you've already run rocketpool service config, instead of being greeted by the Wizard, you will see the Settings Manager screen:
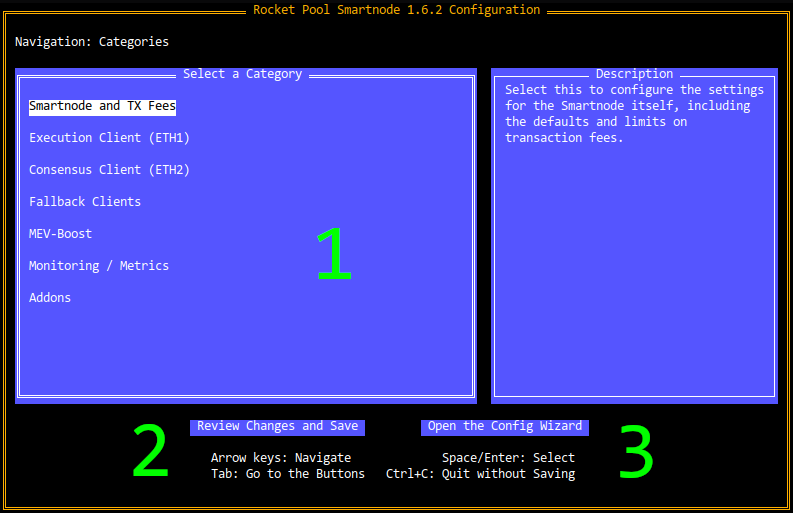
There are three main features of this screen:
- The Category List, which lets you drill down into the settings for each category of the Smartnode stack
- The Review Changes and Save button, which you can use when you're ready to see what settings you've changed and save the updated configuration
- The Open the Config Wizard button, which will bring you to the Setup Wizard if you prefer that interface instead
TIP
To use the Settings Manager, press the Arrow Keys (up/down/left/right) to navigate between options in the home page.
Press Tab to go between the category list (1) and the buttons (2 and 3) at the bottom of the screen. The button that's currently selected will be highlighted in green.
Press Enter or Space to select a button, analogous to clicking on it with the mouse.
Hold Ctrl and press C at any time to exit the Settings Manager without saving anything.
As you scroll through the categories list, each option will have a helpful description appear in the Description Box to the right of the screen. Feel free to explore them; nothing you do will be saved until you go through the Review dialog via the Review Changes and Save button, and you can press Ctrl+C at any time to exit without saving, so you won't accidentally mess something up by playing with the settings here.
Configuring the Settings
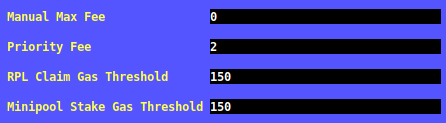
From the home screen, select any one of the categories with the Enter key to view the settings for that category. For example, here is the screen for the Smartnode and TX Fees category:
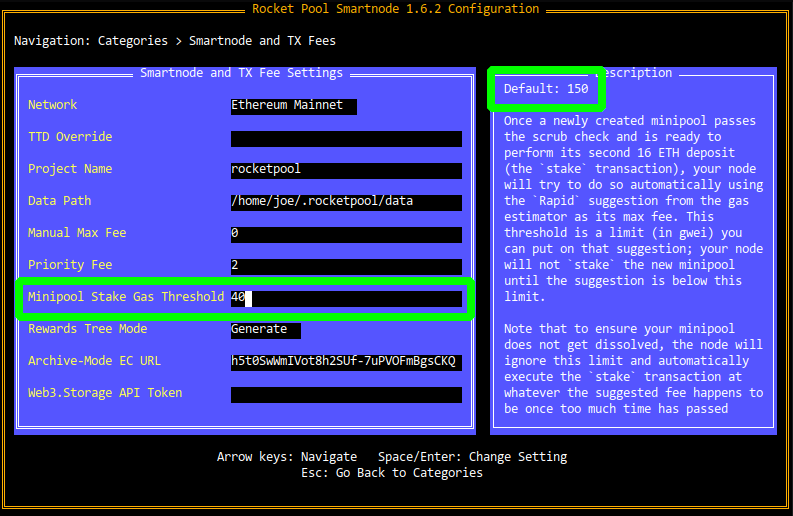
Use the Arrow Keys to move up and down between the settings. The currently selected one will have a white square at the end of it (if it's a text box or a check box), or will be highlighted in white (if it's a drop down).
Press Escape to go back to the home screen of the Settings Manager when you're done.
As you scroll through the settings, each one will show a brief description of what it does in the Description Box on the right. It will also show the default value there in case you want to revert it to its stock setting.
In this example, the RPL Claim Gas Threshold setting is currently selected (highlighted with a green box on the left-hand side of the screen). It has been changed to 40, but you can see that it has a default of 150 in the top-right corner (the top of the Description Box).
TIP
As a reminder, nothing will be saved to disk until you go through the Review dialog via the Review Changes and Save button. You are encouraged to explore all of the settings to learn about them and see what your Smartnode can do!
The Setting Types and How to Use Them
The settings manager uses the following setting types and UI elements:
Text Boxes
Text boxes are used to enter arbitrary strings of text or numbers. They look like this:
Enter your desired values into them, then press Enter or use the Arrow Keys to navigate to a different setting in order to preserve your changes. If you don't, the Settings Manager will assume you're still updating that setting and won't mark it as changed yet.
Drop Downs
Drop downs are used to select an option from a list of choices. They look like this (when they're open):
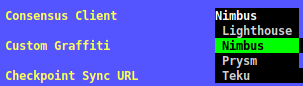
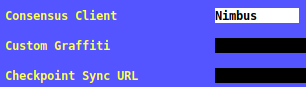
The green item is the one that is currently selected. Use the Arrow Keys to change options - as you do, the Description Box on the right will update to tell you more about the currently selected option. When you're happy with your choice, press Enter to choose the selected option and the drop down will close, revealing the option that is currently selected:
Check Boxes
Check boxes are used for simple Yes/No questions. They look like this:

When they are checked, they will have an X in the middle as you see above. When they are unchecked, they will simply be blank like this:

To change the setting, simply select it and press Enter.
Saving Changes
When you're happy with your changes and you'd like to review them before saving, press the Review Changes and Save button on the home screen. As a reminder, to get to it, press the Tab key.
You will be presented with a view that looks like this:
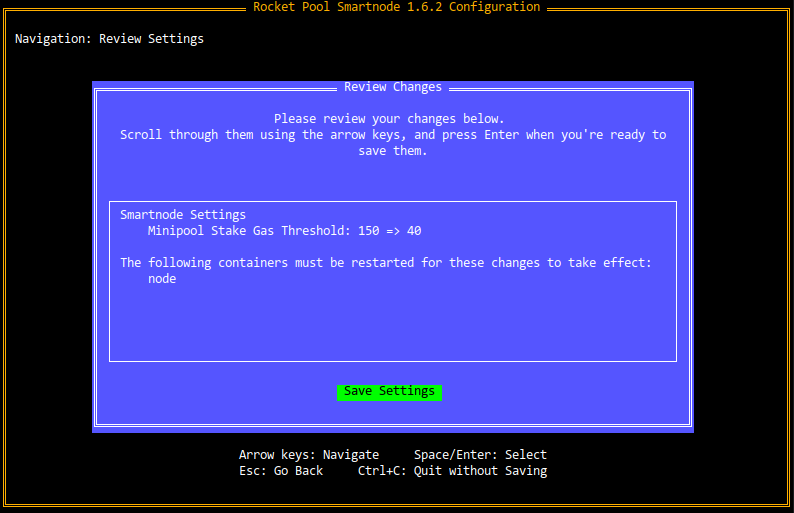
The Review Box here will present all of the settings you've changed, showing the old values and the new ones. For example, the first line here shows that the RPL Claim Gas Threshold used to be 150, and it's been changed to 40.
It will also show you which containers are affected by the settings you've modified and will offer to restart them for you after you've saved your changes.
NOTE
At this point, your changes still haven't been saved yet. If you want to go back and modify something, press Escape to return to the home screen.
When you are satisfied with the changes, press Enter to save the new configuration to disk. You will then exit the Terminal UI and be presented with something like this message:
Your changes have been saved!
The following containers must be restarted for the changes to take effect:
	rocketpool_watchtower
	rocketpool_validator
	rocketpool_eth2
	rocketpool_node
Would you like to restart them automatically now? [y/n]
Press y and Enter if you want to automatically apply your new configuration changes and restart the affected containers.
Press n and Enter if you have other things you want to do before restarting them, and will do it manually later.
In either case, your configuration is done!
NOTE
You may see an error message like the one below:
2022/08/13 13:49:41 Error piping stdout: read |0: file already closedThis is not actually an error, it's simply a cosmetic glitch. You can safely ignore it.
NOTE
If you are running Mac OS, you may see an issue complaining about node_exporter. You will need to run these commands to fix.
rocketpool service stop
nano ~/.rocketpool/override/exporter.yml
Replace the entire contents of the file with:
# Enter your own customizations for the node exporter container here. These changes will persist after upgrades, so you only need to do them once.
#
# See https://docs.docker.com/compose/extends/#adding-and-overriding-configuration
# for more information on overriding specific parameters of docker-compose files.

version: "3.7"
services:
  node-exporter:
    x-rp-comment: Add your customizations below this line
    volumes:   ["/proc:/host/proc:ro","/sys:/host/sys:ro"]
then finally rocketpool service start.
Configuring via the Command Line
If you use the Smartnode in a headless environment where you can't interact with the Terminal UI, you can configure your node via the command line instead.
The rocketpool service config command accepts, as arguments, every setting that can normally be configured via the Terminal UI. Run the following command to see a list of them (note that it's quite long):
rocketpool service config --helpThe output will look like this:
NAME:
   rocketpool service config - Configure the Rocket Pool service

USAGE:
   rocketpool service config

OPTIONS:
   --executionClientMode value  Choose which mode to use for your Execution client - locally managed (Docker Mode), or externally managed (Hybrid Mode).
                                Type: choice
                                Options: local, external
 (default: "local")
   --executionClient value  Select which Execution client you would like to run.
                            Type: choice
                            Options: geth, infura, pocket
 (default: "geth")
   --useFallbackExecutionClient         Enable this if you would like to specify a fallback Execution client, which will temporarily be used by the Smartnode and your Consensus client if your primary Execution client ever goes offline.
                                        Type: bool

...
Each option will have its name, its type, its default value, and (if it's a choice parameter) its options. Using this text, you can find the option(s) you want to set and specify them via the appropriate arguments.
NOTE
This command builds on top of your existing configuration, so if you have some settings already saved and just want to modify others, you don't need to repeat them. It will only update settings that you include as arguments to this command.
Next Steps
Once you've configured your node just the way you want it, you're ready to secure your operating system to protect your node. Move on to the Securing your Node section next.